Odoo 18 Studio is an intuitive and powerful tool that allows you to customize your Odoo environment without writing a single line of code. One of its most useful features is the ability to add a status bar to form views. A status bar visually tracks the lifecycle or progression of a record through various stages, making workflows easier to manage.
In this blog, we’ll guide you step-by-step on how to incorporate a status bar into a form view using Odoo 18 Studio. We’ll also explore how to customize its stages, configure properties, and use it for better organization. Let's dive in!
Why Add a Status Bar in Odoo?
A status bar in a form view offers several benefits:
1. Streamlined Progress Tracking: It provides a clear visual representation of a record's stage.
2. Better Workflow Management: Easily identify where each record stands within a process.
3. Customizability: Tailor the stages to match your specific business workflows.
4. Ease of Organization: Group and filter records based on their status for efficient management.
Step-by-Step Guide to Adding a Status Bar
Follow these steps to add and configure a status bar in your Odoo 18 form view using Studio
Step 1: Activate Studio Mode
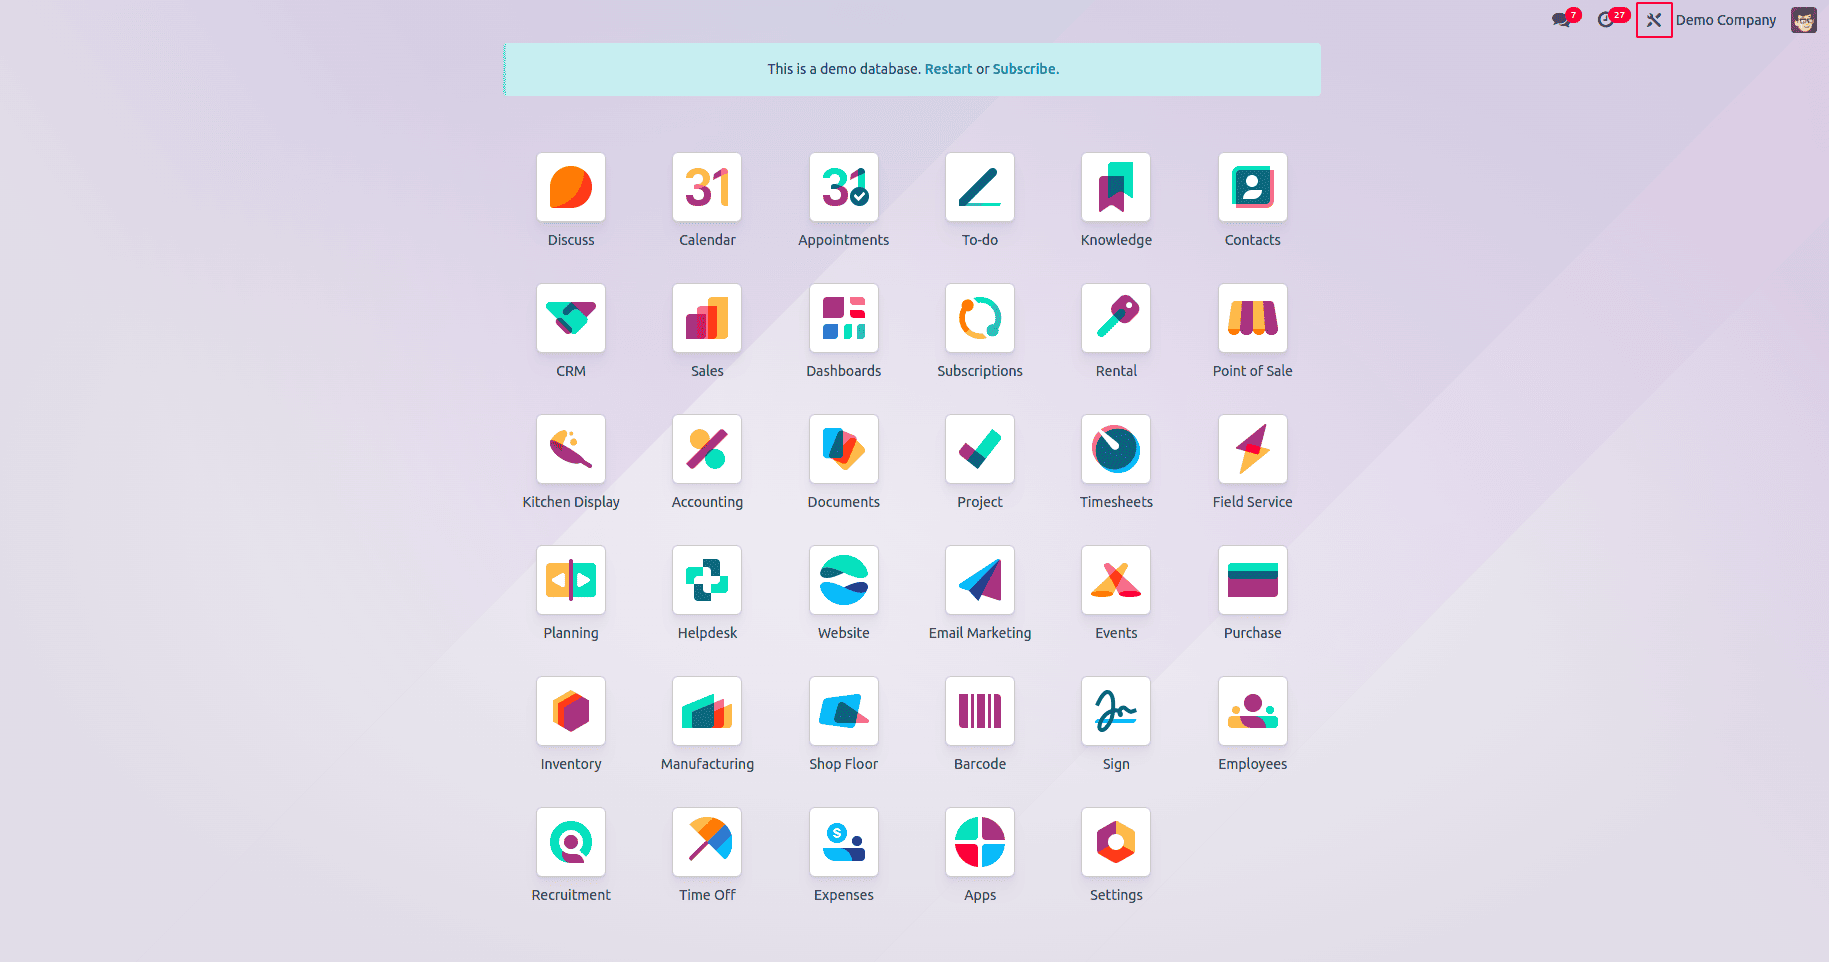
1. Go to the module and form view where you want to add the status bar. For this example, navigate to:
Sales > Products.
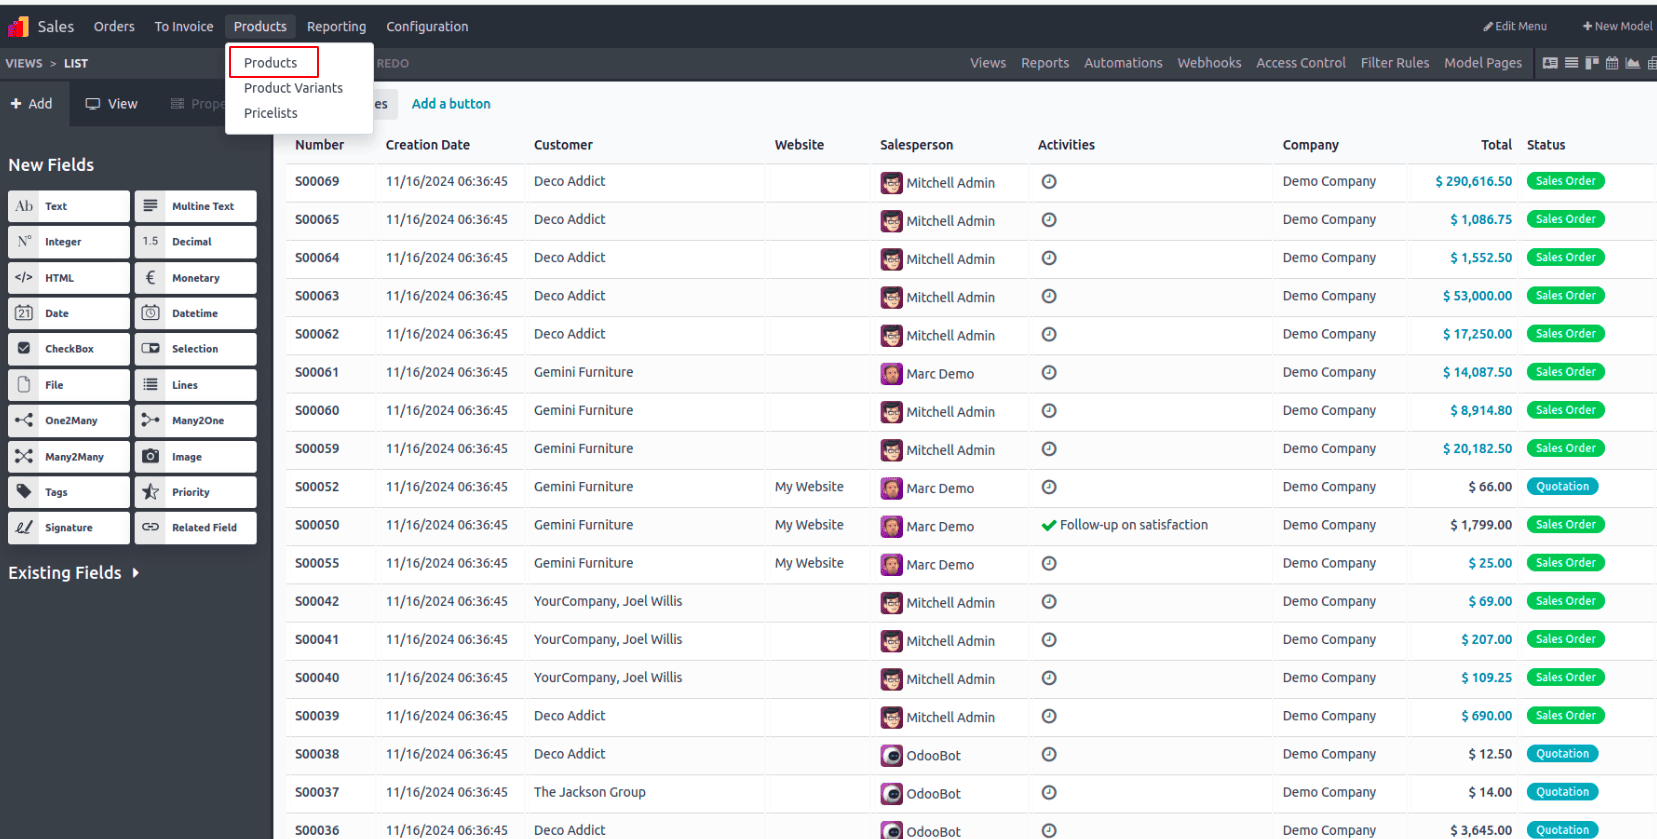
2. Open a product record to access its form view.
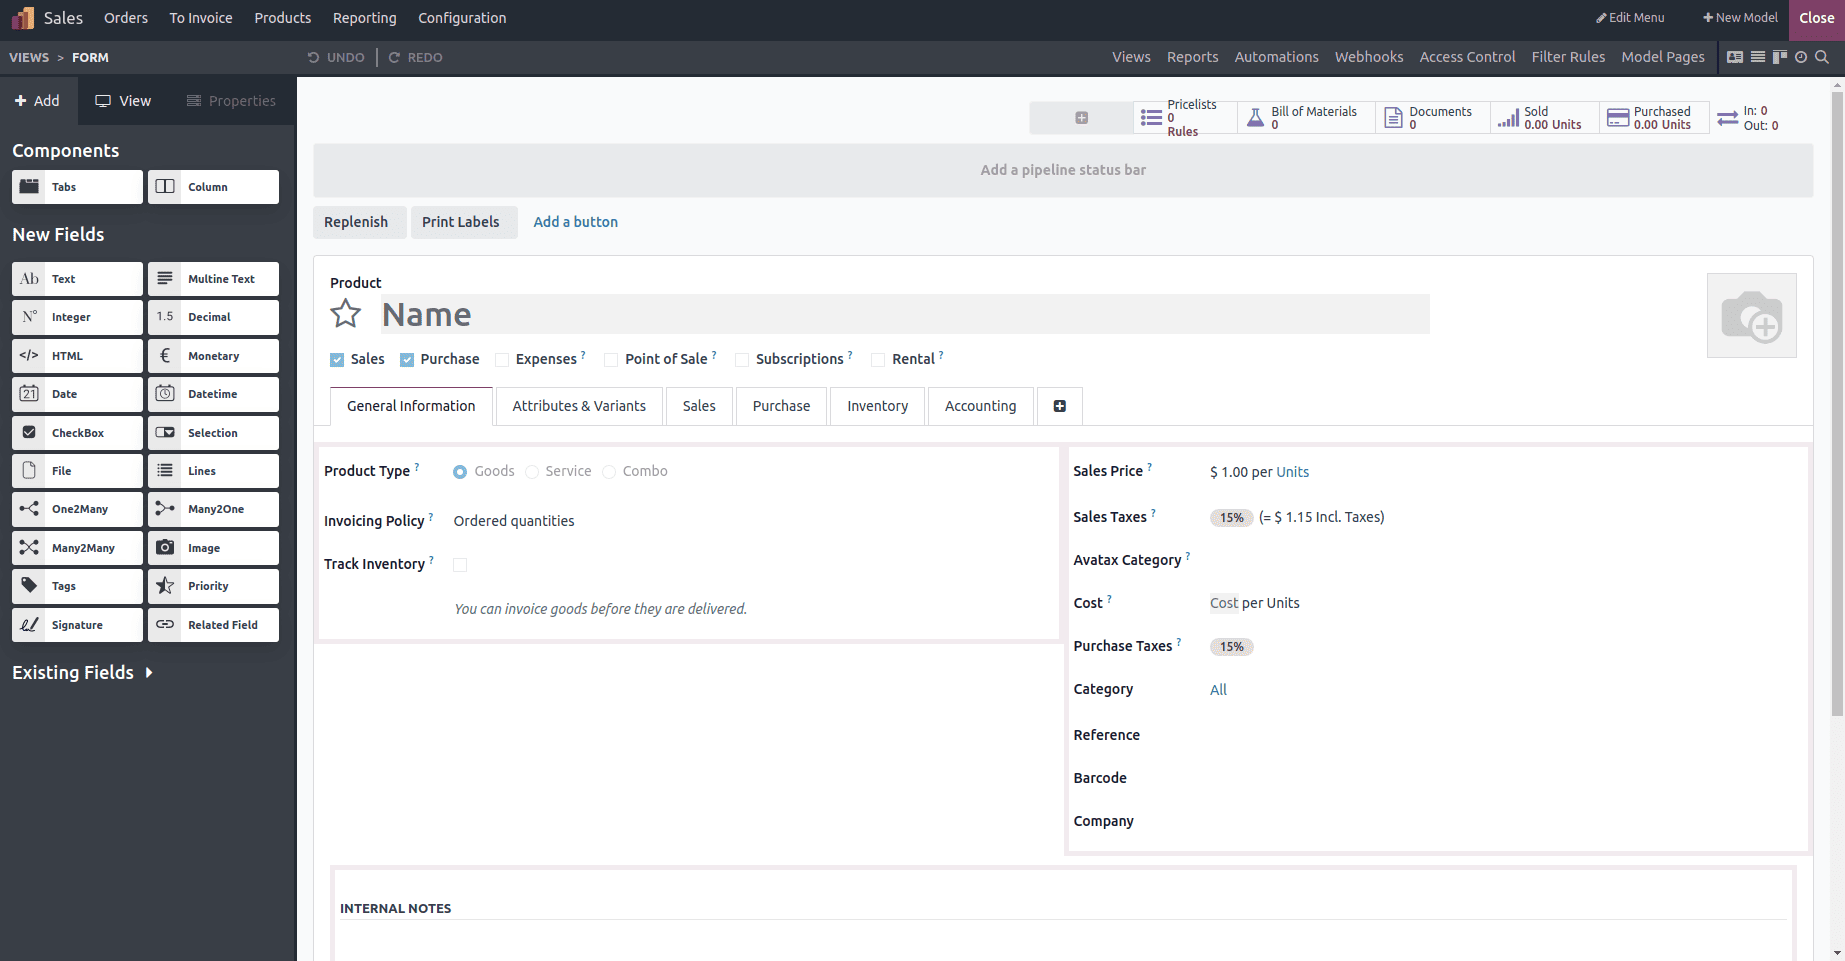
Step 2: Add the Status Bar
1. In Studio mode, locate the Add a pipeline status bar button at the top of the interface.
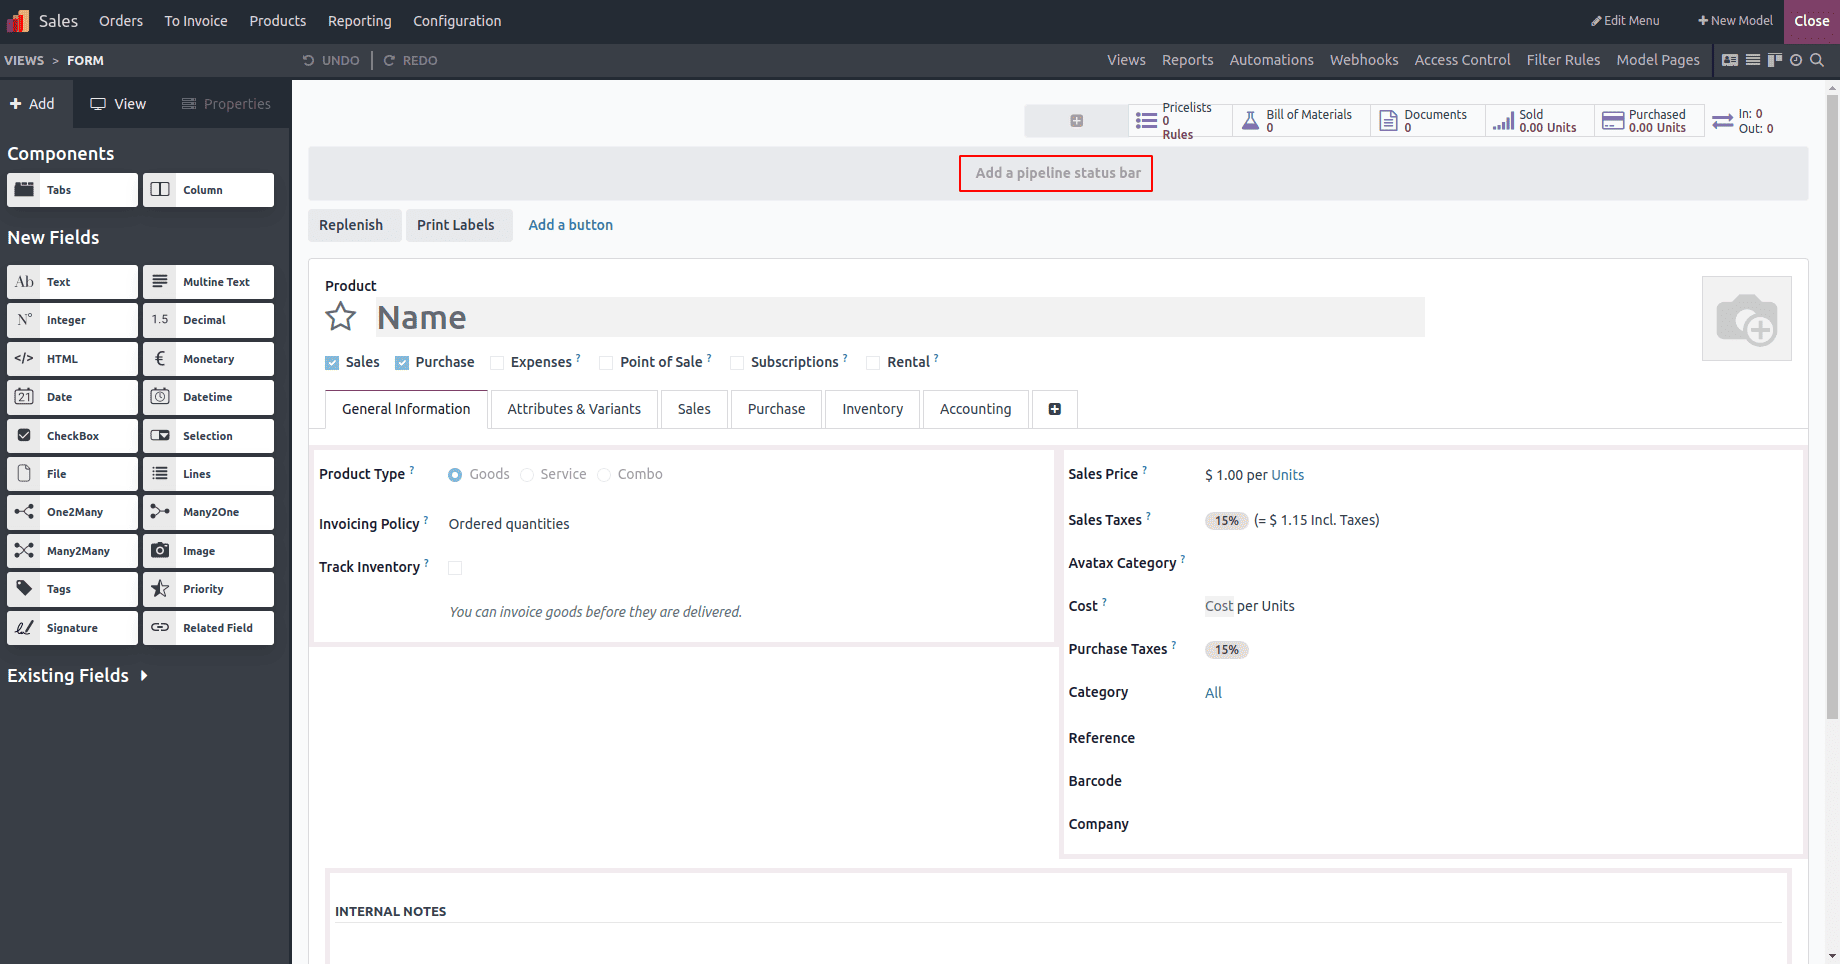
2. Click the button to add a dynamic status bar to your form view.
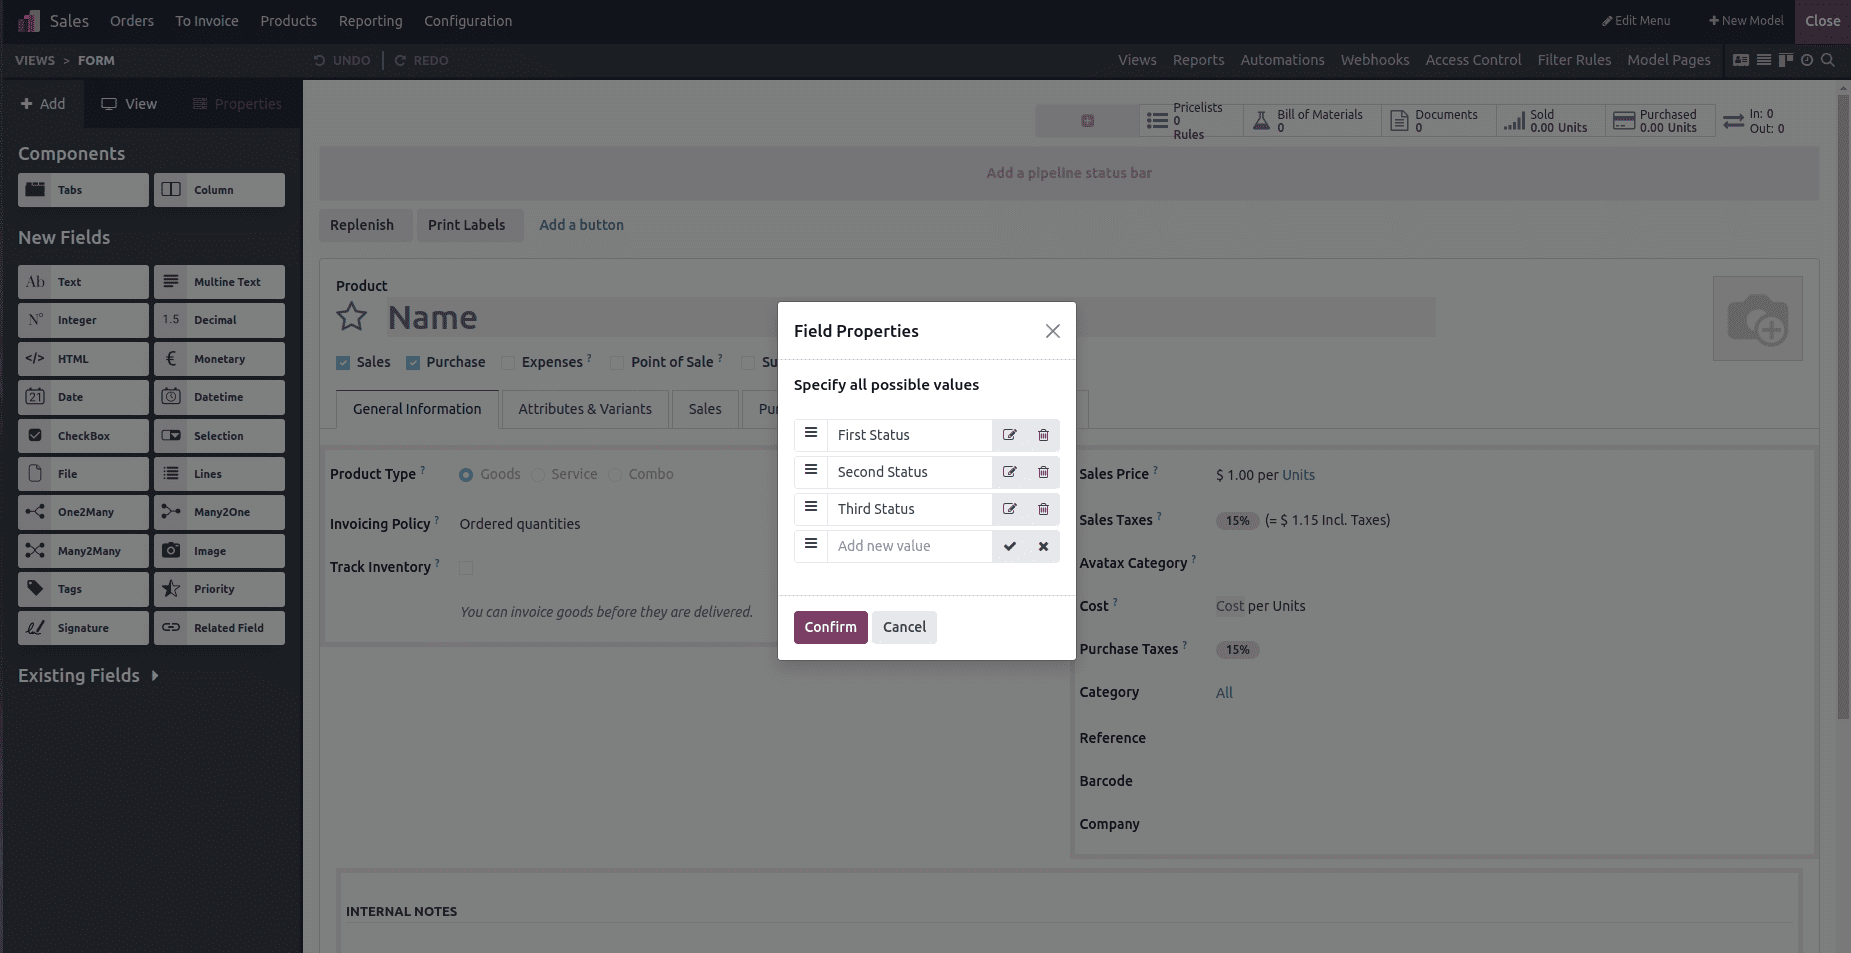
The status bar is now integrated into your form view. It comes with default stages such as First Status, Second Status, and Third Status, which you can customize as needed.
Step 3: Customize the Status Bar
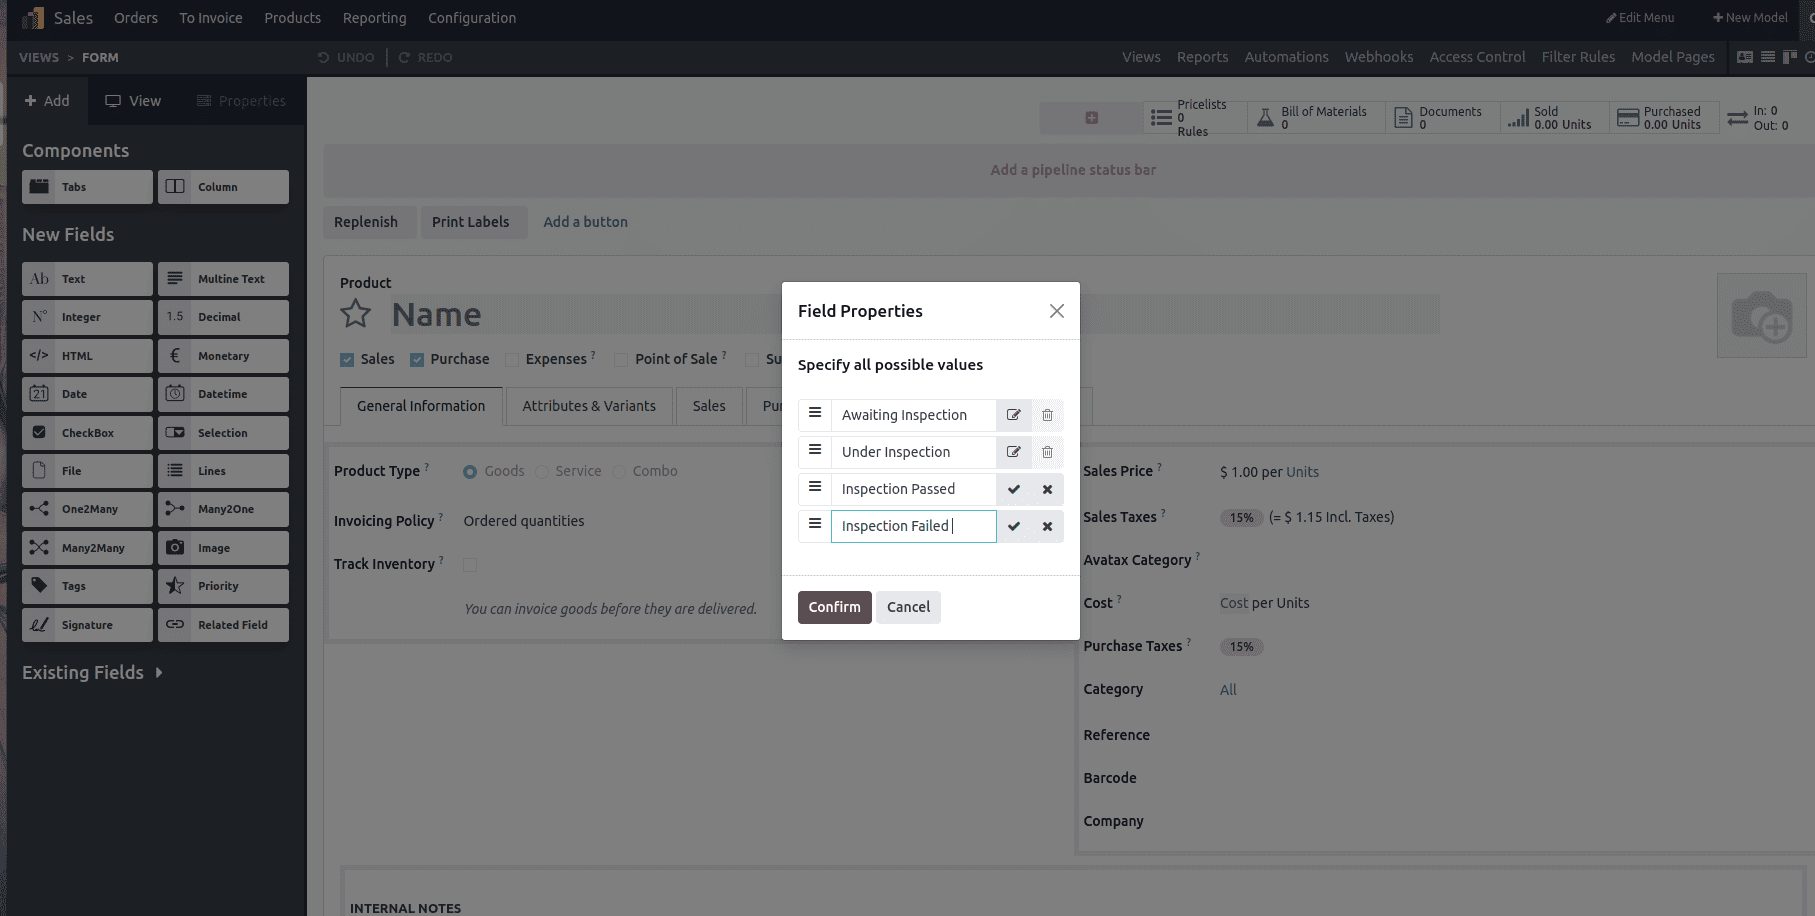
1. Edit Stage Values:
* Modify existing stages, or click the Add Stage button to create new ones.
* Assign names and colors to each stage for better visualization.
Example:
* Stage 1: Awaiting Inspection
* Stage 2: Under Inspection
* Stage 3: Inspection Passed
* Stage 4: Inspection Failed
2. Set Workflow Behavior:
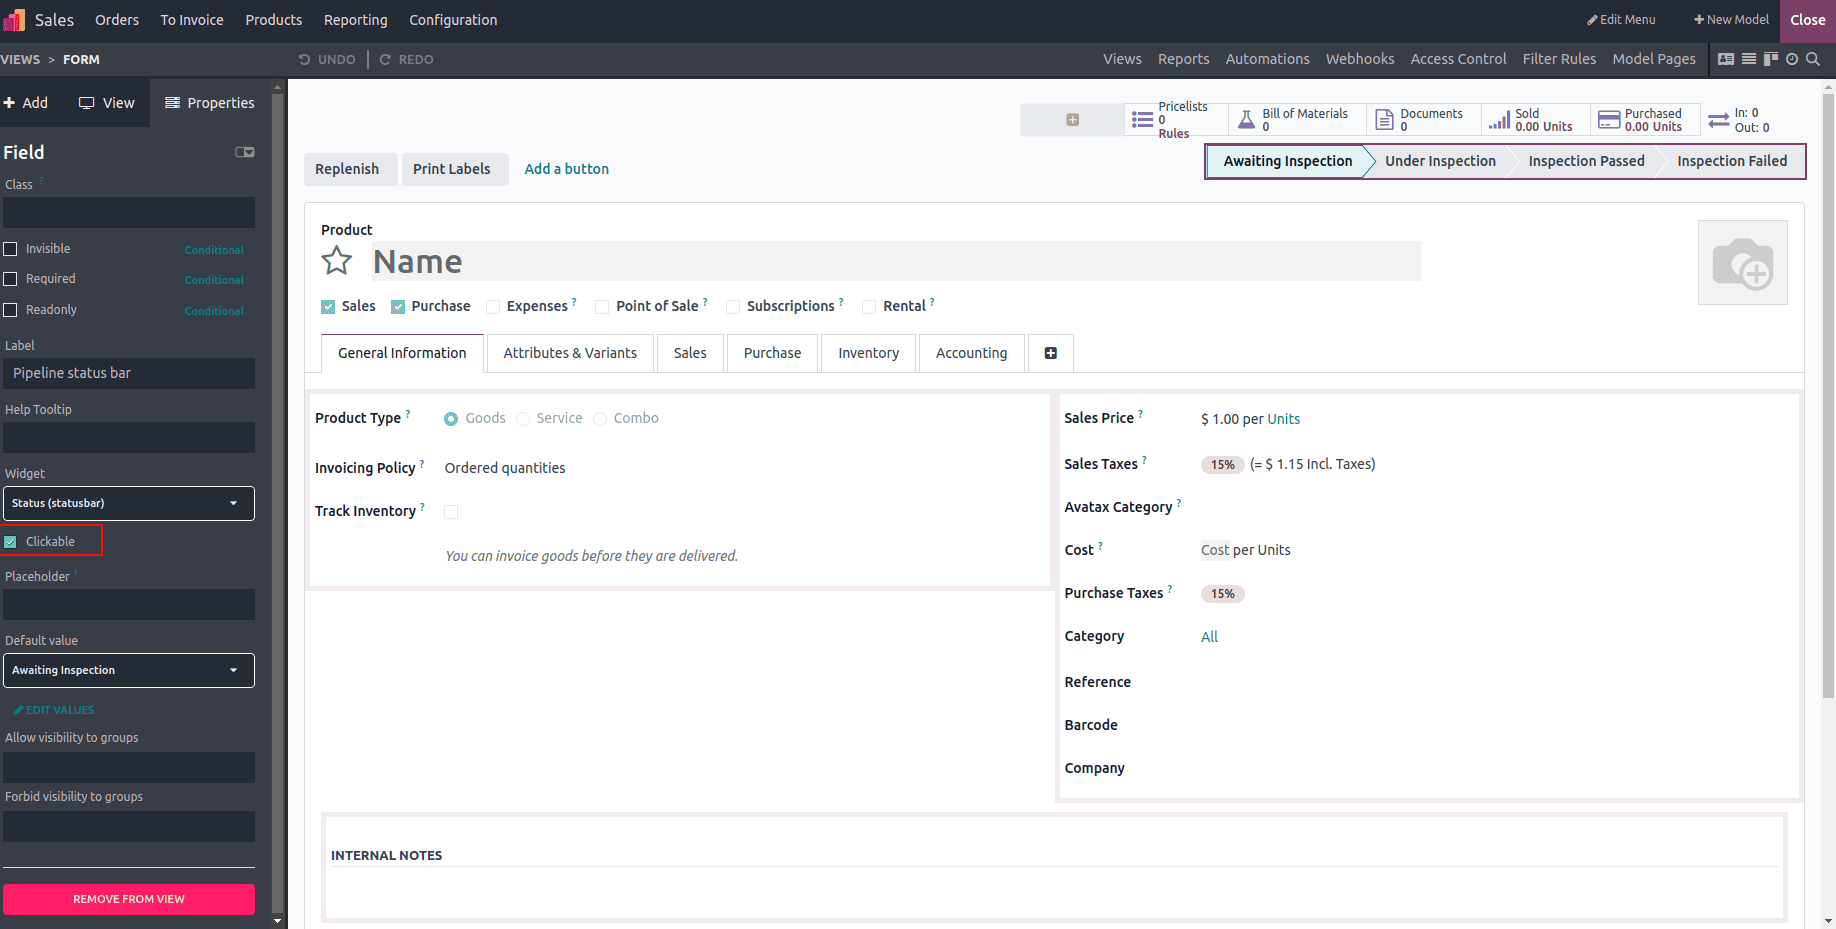
Define whether users can click stages to manually update the status, which means that you can configure the status bar so users can manually click on the stages to update the record's status. For example, if a record is currently in the "Awaiting Inspection" stage, users can click on the "Under Inspection" stage to move the record forward without requiring additional actions or scripts. This makes it easier for users to update progress directly through the interface.
3. Adjust Properties:
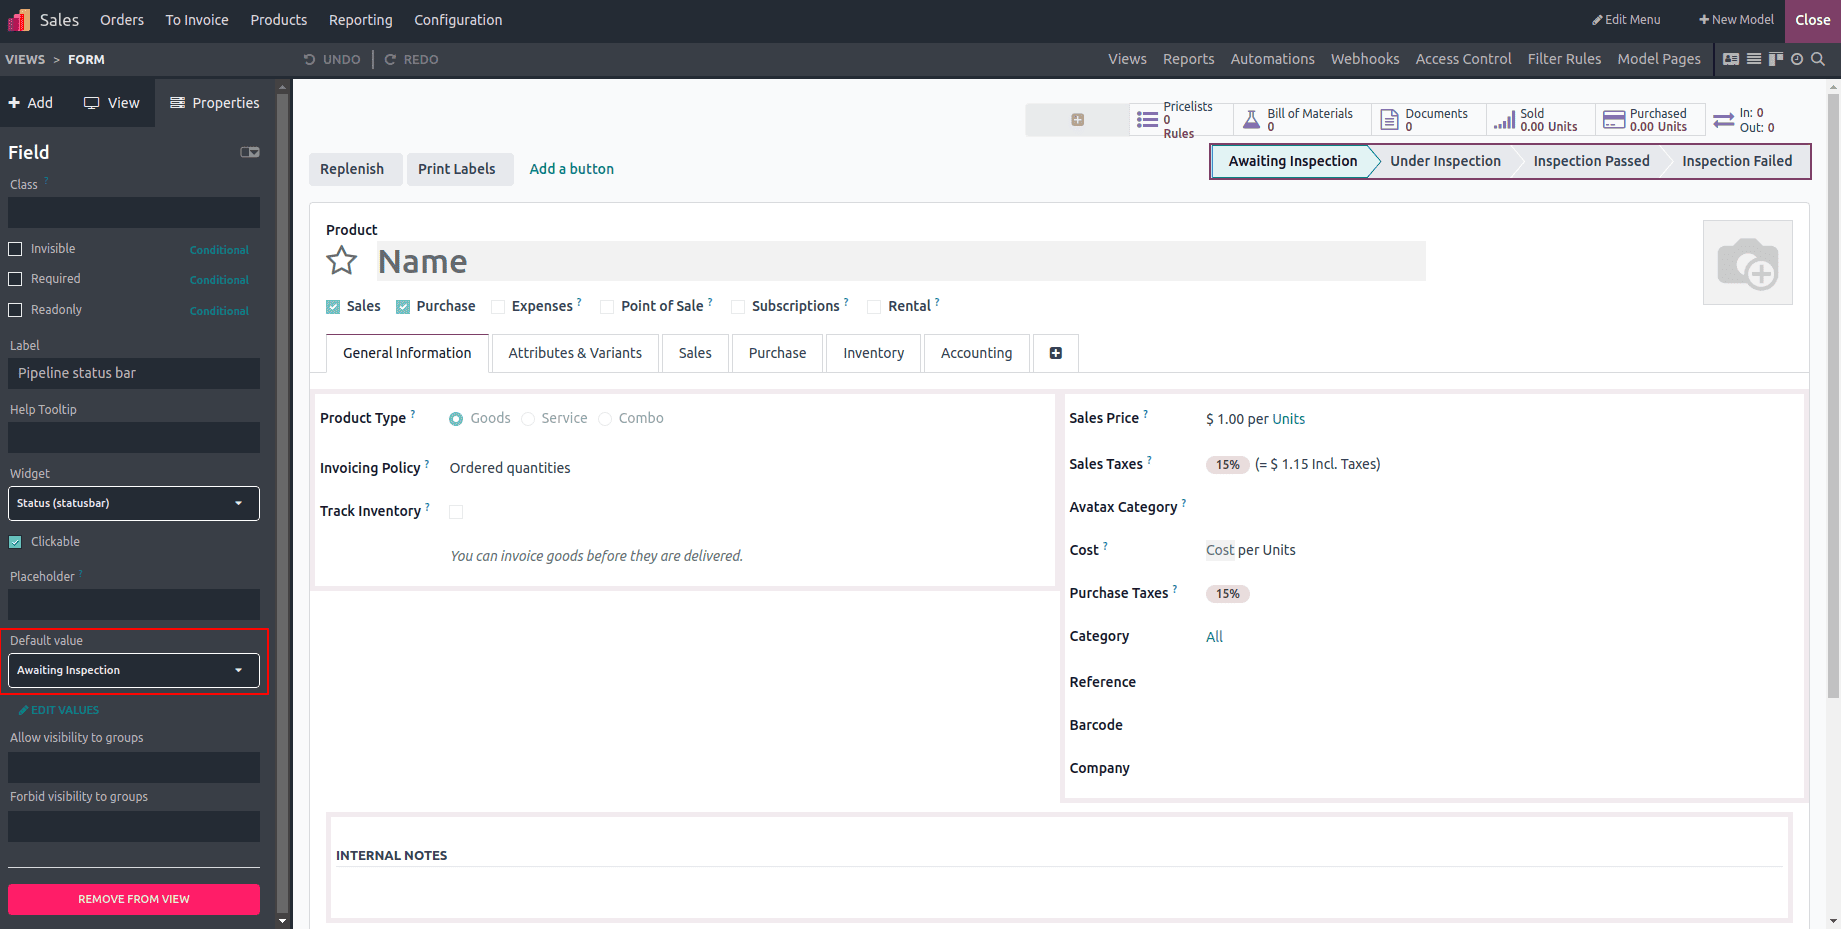
Set default values for new records, which helps to predefine a specific value for the status bar when creating a new record. For example:
* If the first stage of your workflow is "Awaiting Inspection", you can set "Awaiting Inspection" as the default value.
* This ensures that every new record automatically starts at the "Awaiting Inspection" stage without requiring manual selection by the user.
Step 3: Save and Test
1. After customizing the status bar, click Close Studio mode.
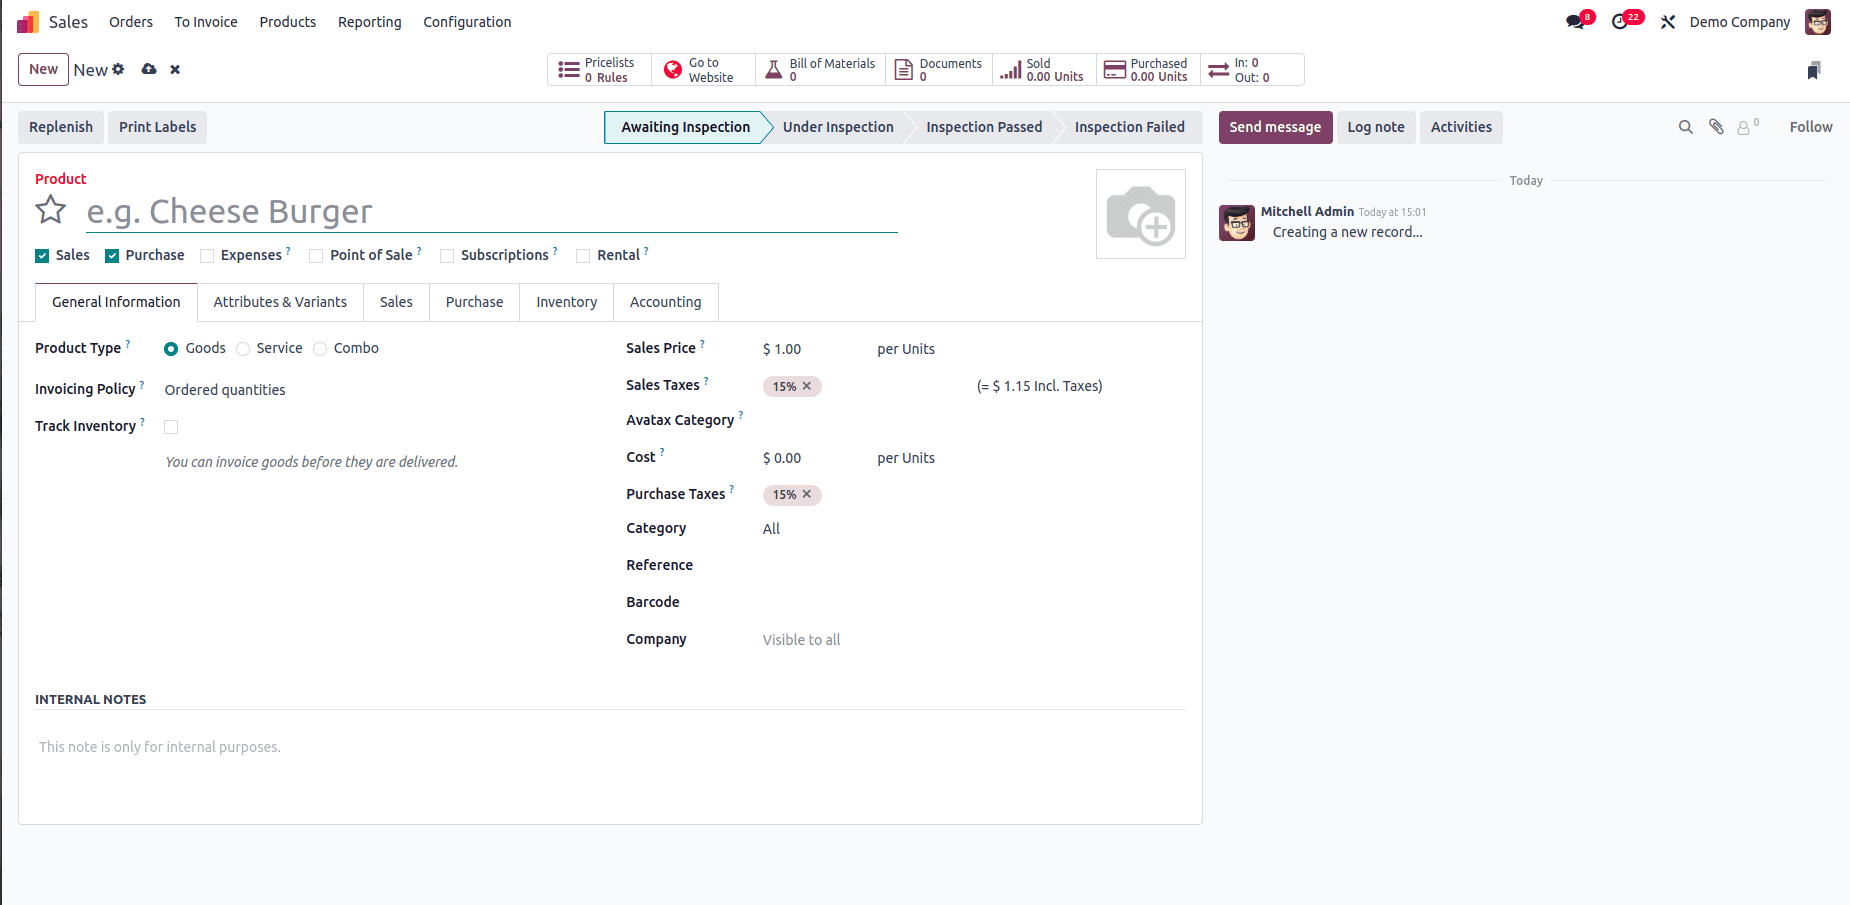
2. Open the form view again and confirm that the status bar is visible and functional.
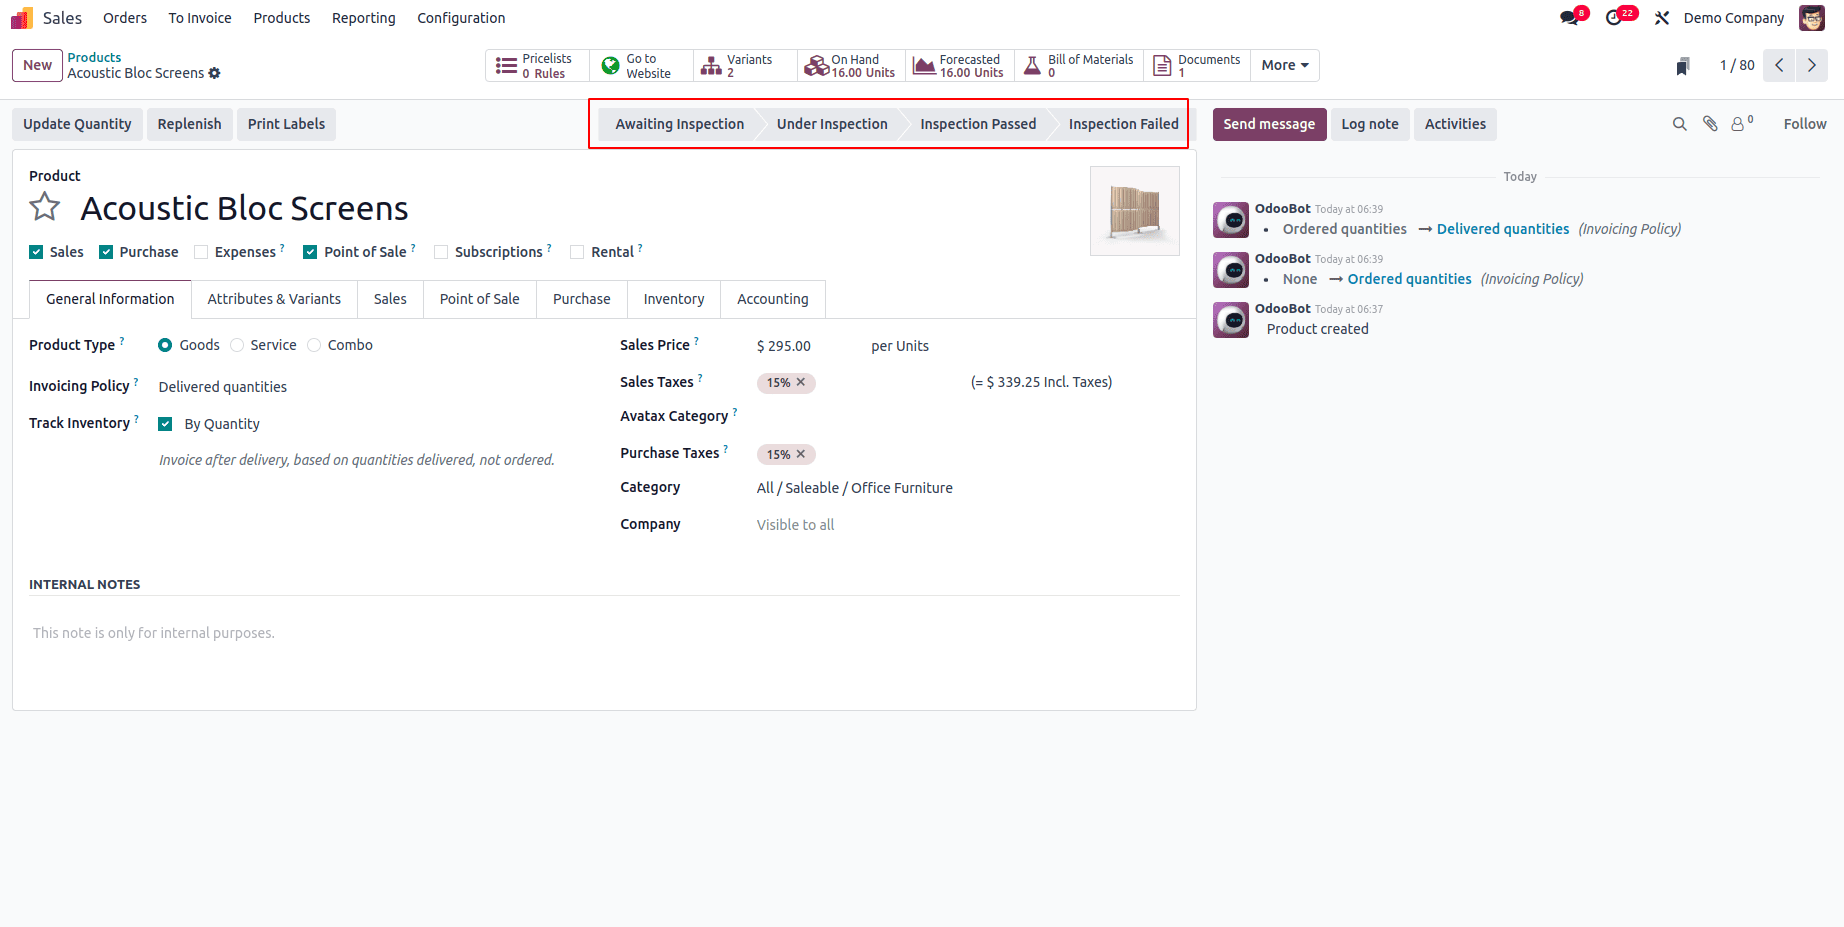
Organizing Records Using the Status Bar
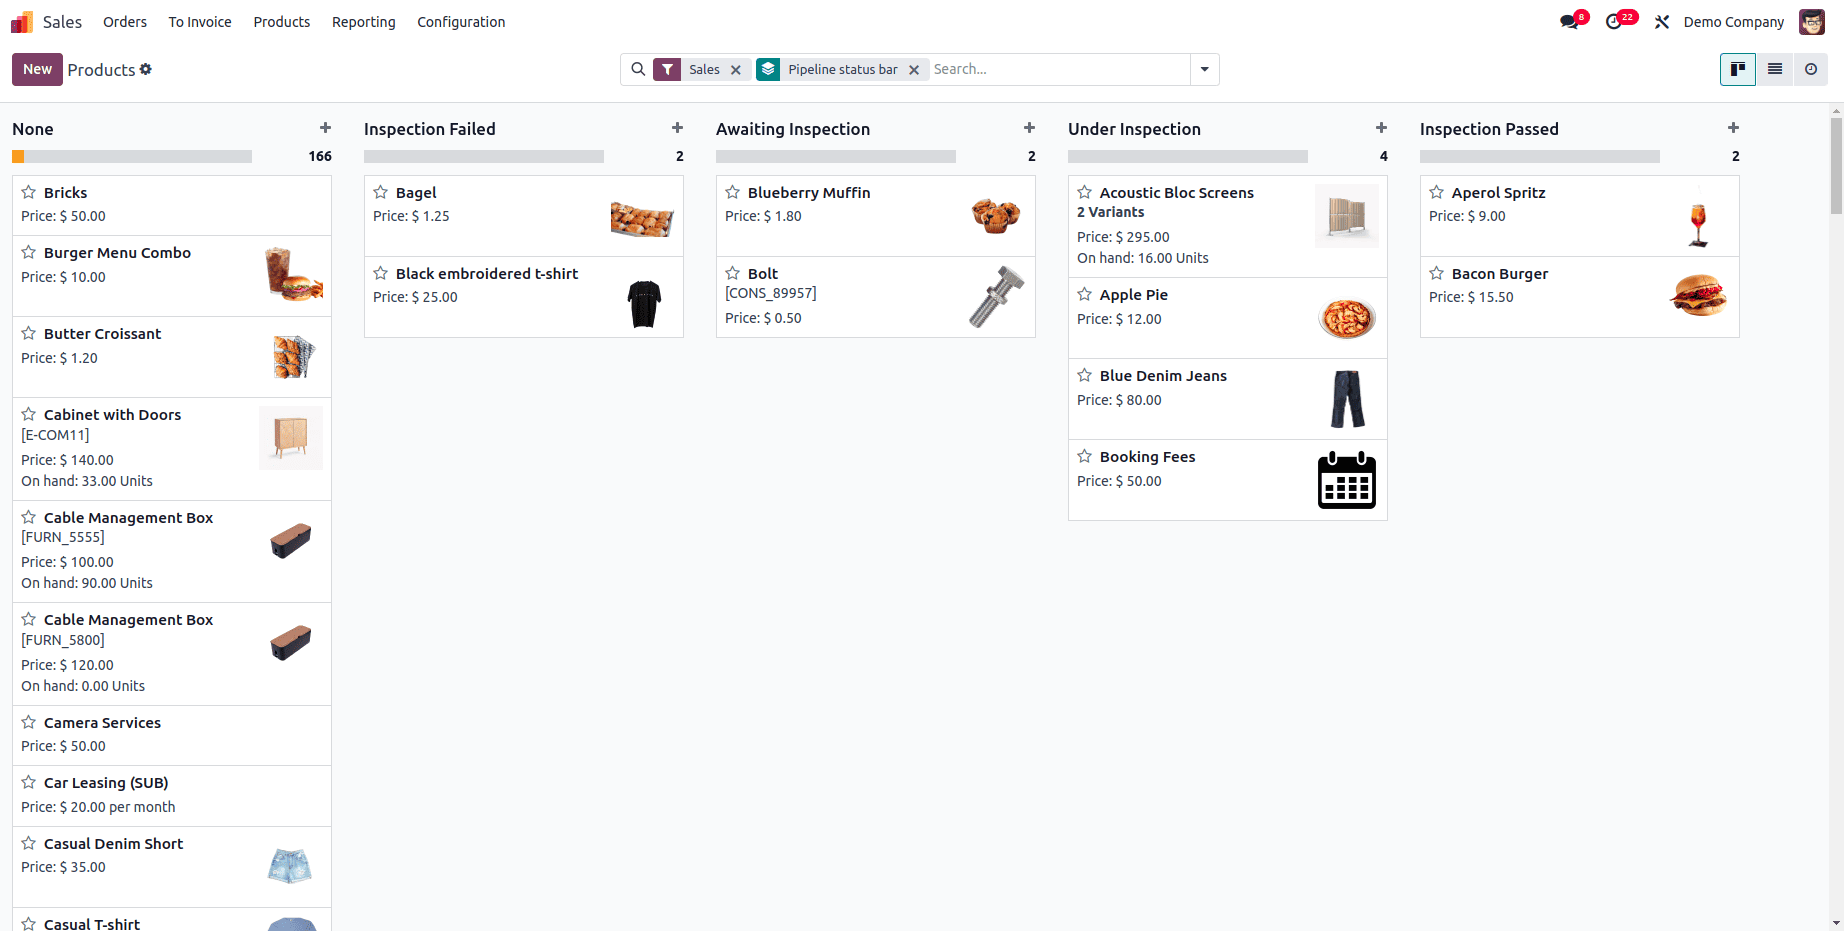
To maximize the utility of the status bar, you can use it to group and filter records in list and Kanban views, making it easier to manage workflows and monitor progress at a glance. For example, if you have inspection stages such as Stage 1: Awaiting Inspection, Stage 2: Under Inspection, Stage 3: Inspection Passed, and Stage 4: Inspection Failed, you can group records by these stages to quickly see which products are pending inspection, actively being inspected, have passed inspection, or failed. This feature helps organize records based on their stages, enabling quick identification of bottlenecks or pending tasks.
Grouping by Status
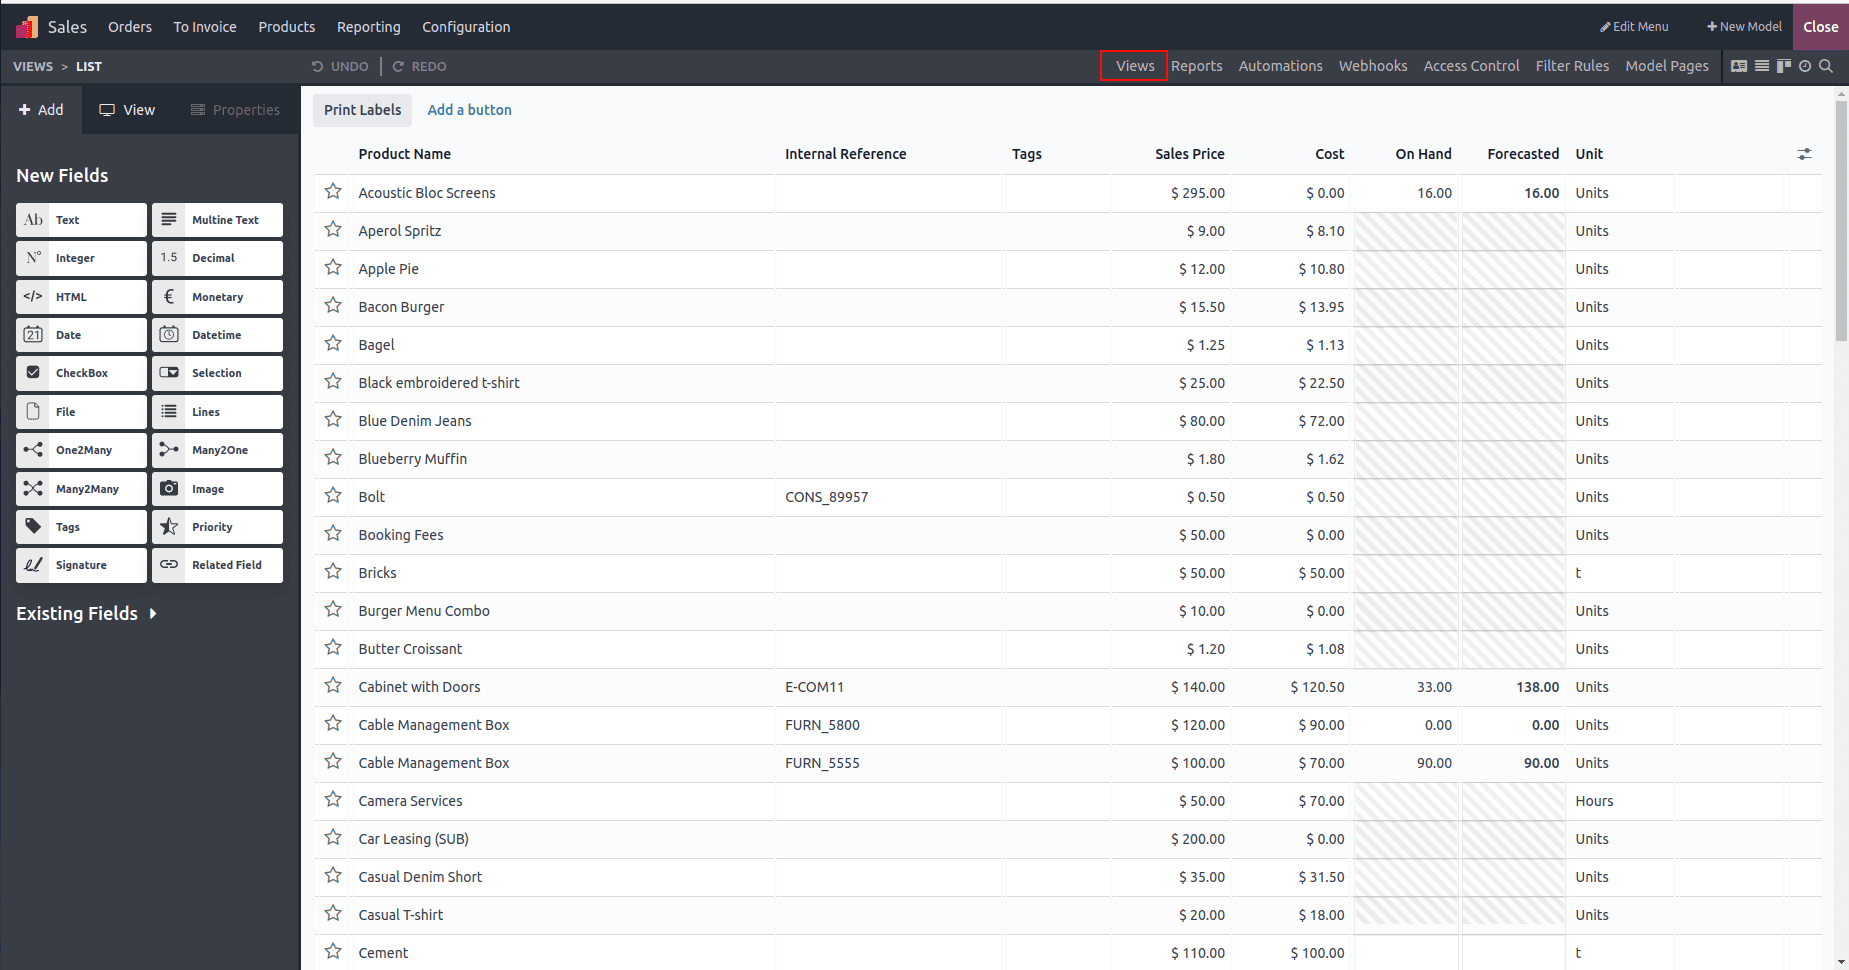
1. In the module's list view, click on the Views menu in Studio mode.
2. Select the Search View option.
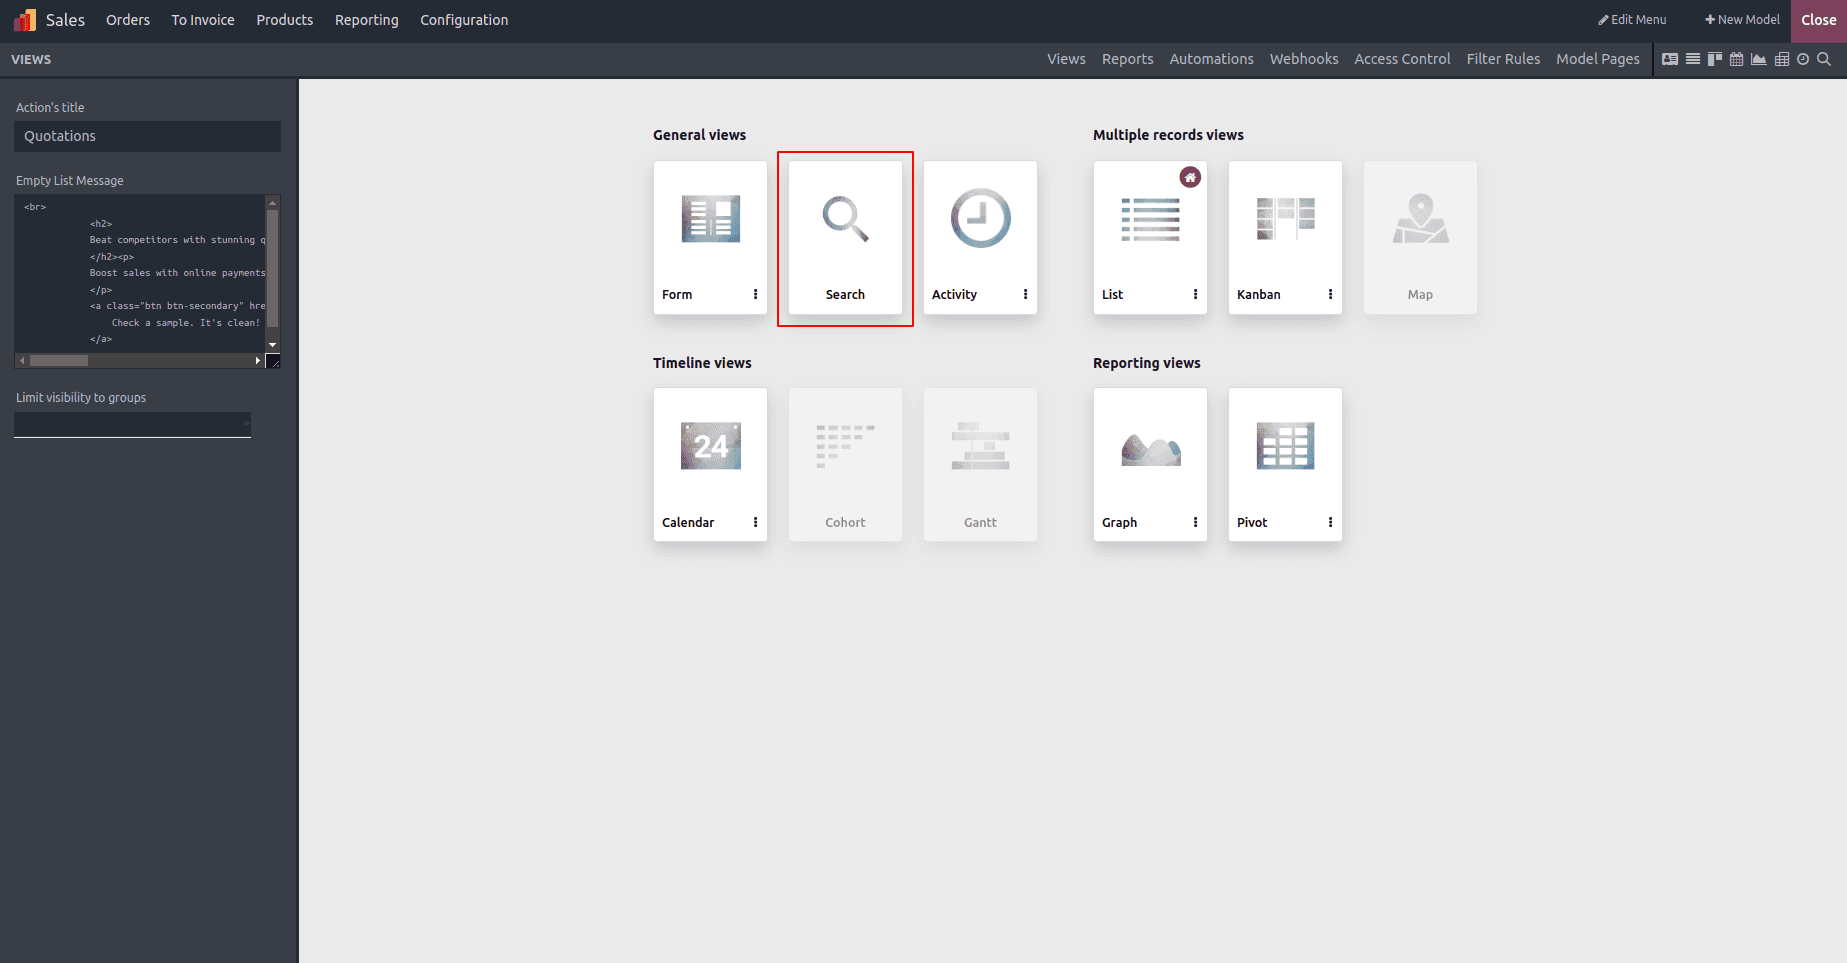
3. Drag and drop the Pipeline Status Bar field into the Group By section.
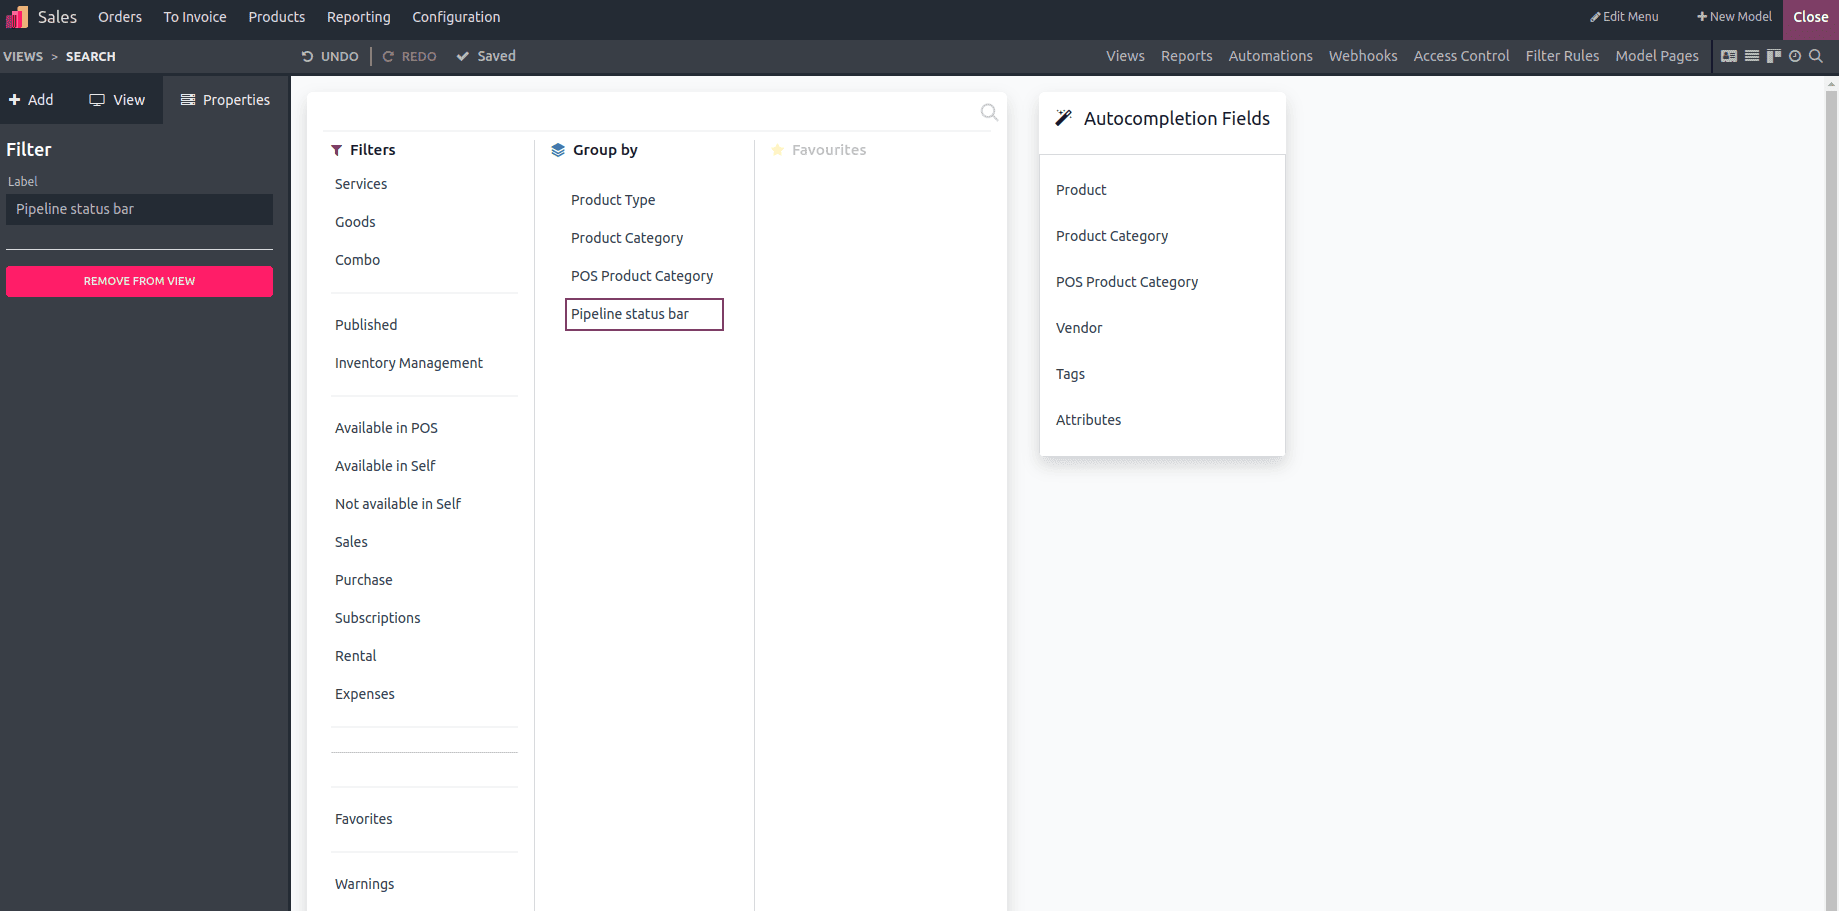
Now, you can group records by their status. For example, products in the Awaiting Inspection stage will appear together, allowing you to quickly identify items that are pending review. Similarly, records in the Under Inspection stage can be grouped to track items actively being inspected. Products marked as Inspection Passed can be grouped to highlight successfully inspected items, while those in the Inspection Failed stage can be isolated to prioritize rework or further investigation. This grouping feature provides better visibility into the status of each record and simplifies monitoring workflows.
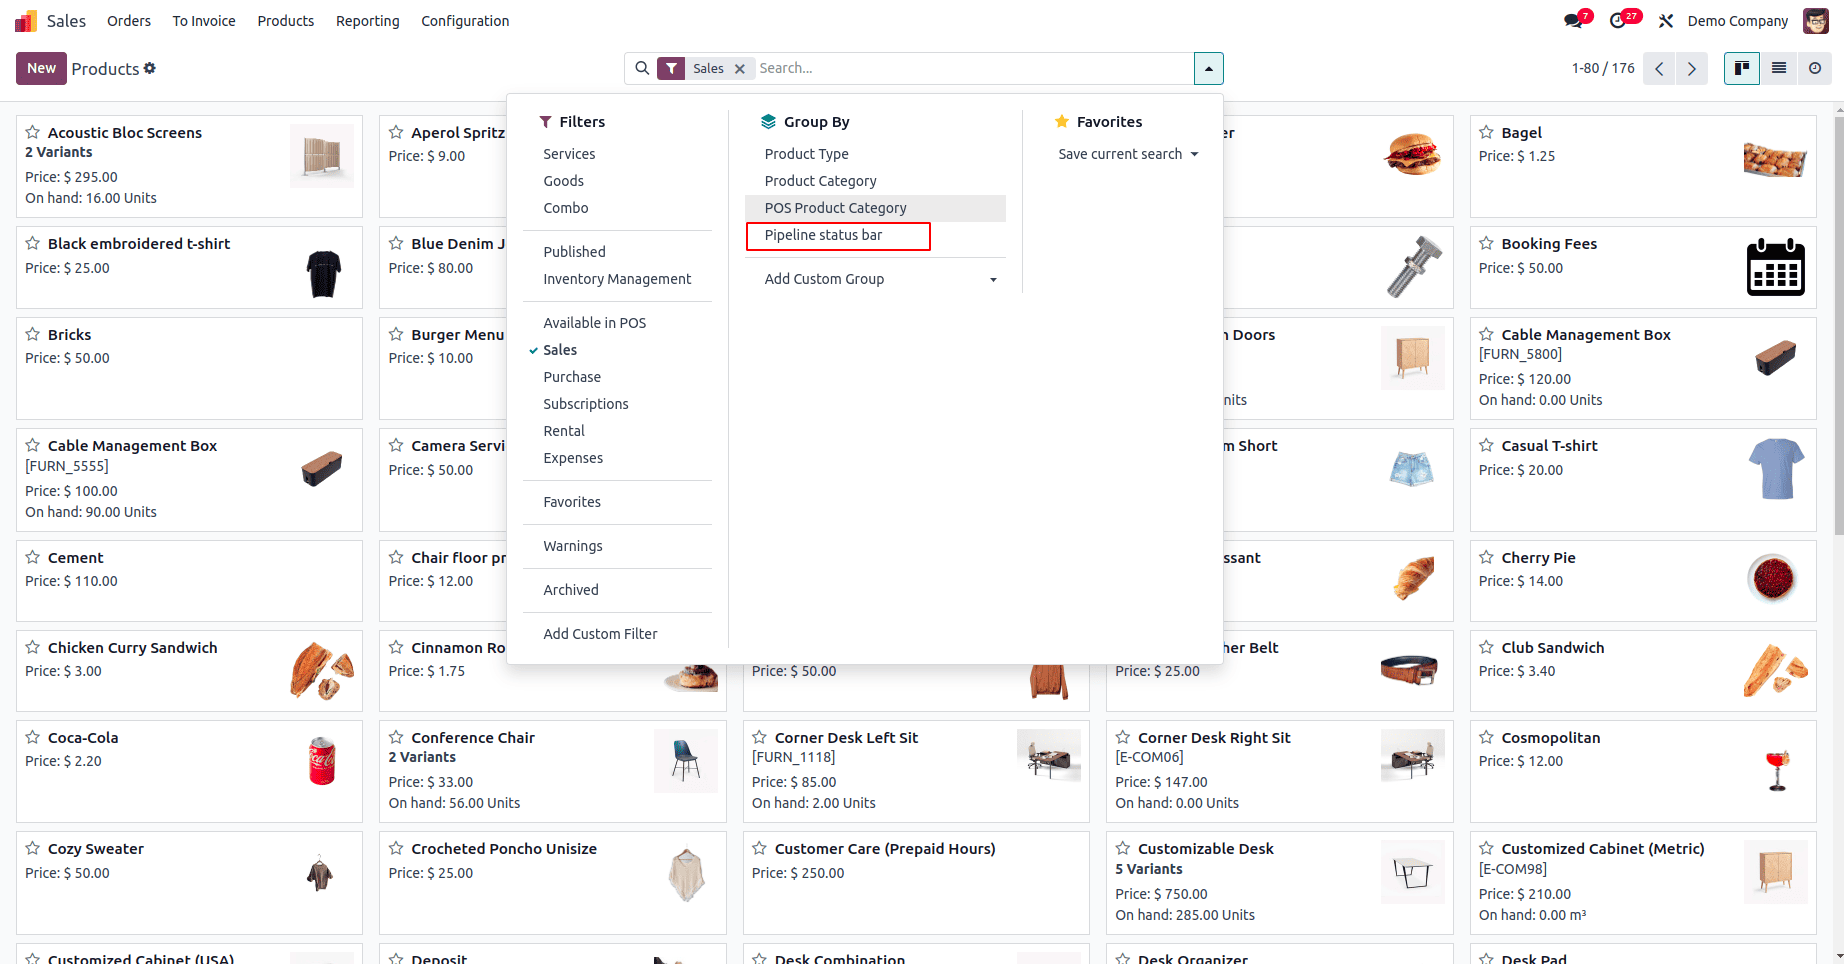
After grouping,
Adding and customizing a status bar in Odoo 18 Studio can greatly enhance your workflow management by providing a clear, visual representation of the current state or progress of your processes. Whether you're managing sales orders, project tasks, customer support tickets, or any other business operations, a status bar allows you to track progress at a glance, improving efficiency and reducing the chances of missing key updates or milestones. The visual nature of the status bar offers a simplified way of monitoring processes, making it easier to identify bottlenecks or delays and take timely action.
With Odoo Studio, you can implement this functionality quickly and without the need for any coding knowledge, making it an excellent tool for both beginners and experienced users alike. The drag-and-drop interface allows you to customize the status bar according to your specific requirements, adjusting things like colors, statuses, and progress indicators to match your organization's needs. This feature is highly versatile and can be applied across different modules, making it a valuable asset for various business processes.
Start experimenting with status bars in Odoo 18 Studio today, and elevate your process tracking by adding greater clarity, transparency, and control to your workflow management. It’s an easy-to-use tool that can significantly streamline your operations and improve productivity within your organization.
To read more about How to Add Status Bar in Form View Using Odoo 17 Studio, refer to our blog How to Add Status Bar in Form View Using Odoo 17 Studio.