In Odoo, enhancing user experience often involves customizing the chatter—a centralized hub for communication and updates on specific records. Adding custom buttons in the chatter can significantly streamline operations, enabling users to perform specific actions, such as triggering workflows or generating reports, directly within the interface. This blog will guide you through the process of adding a button to the chatter in Odoo 18, covering the necessary steps and code snippets to help you tailor this functionality to better meet your business needs and improve overall efficiency.
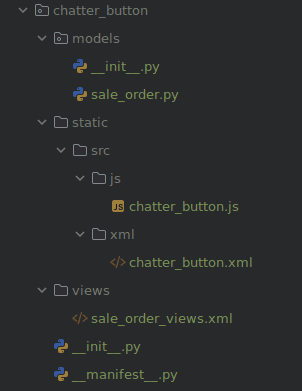
When customizing Odoo, it's essential to maintain a clear and organized module structure. This ensures that all the components—models, views, JavaScript, and templates—are correctly placed and function cohesively. In this section, we’ll outline the basic structure of the module that will allow us to add a button to the chatter. Understanding this layout is crucial before diving into the code.
Step 1: Create the Button in the Chatter
To add a button in the chatter, you will need to create a new template that extends the existing mail chatter template. Here’s how you can do that:
XML Code
Add the following XML code in your custom module:
<?xml version="1.0" encoding="UTF-8"?>
<templates>
   <t t-name="important.Chatter" t-inherit="mail.Chatter"
      t-inherit-mode="extension">
       <xpath expr="//*[contains(@class, 'o-mail-Chatter-activity')]"
              position="before">
           <button class="btn btn-warning text-nowrap me-2"
                   t-att-class="{'my-2': !props.compactHeight }"
                   data-hotkey="shift+i"
                   t-on-click="markAsImportant">
               <span>Mark as Important</span>
           </button>
      </xpath>
  </t>
</templates>
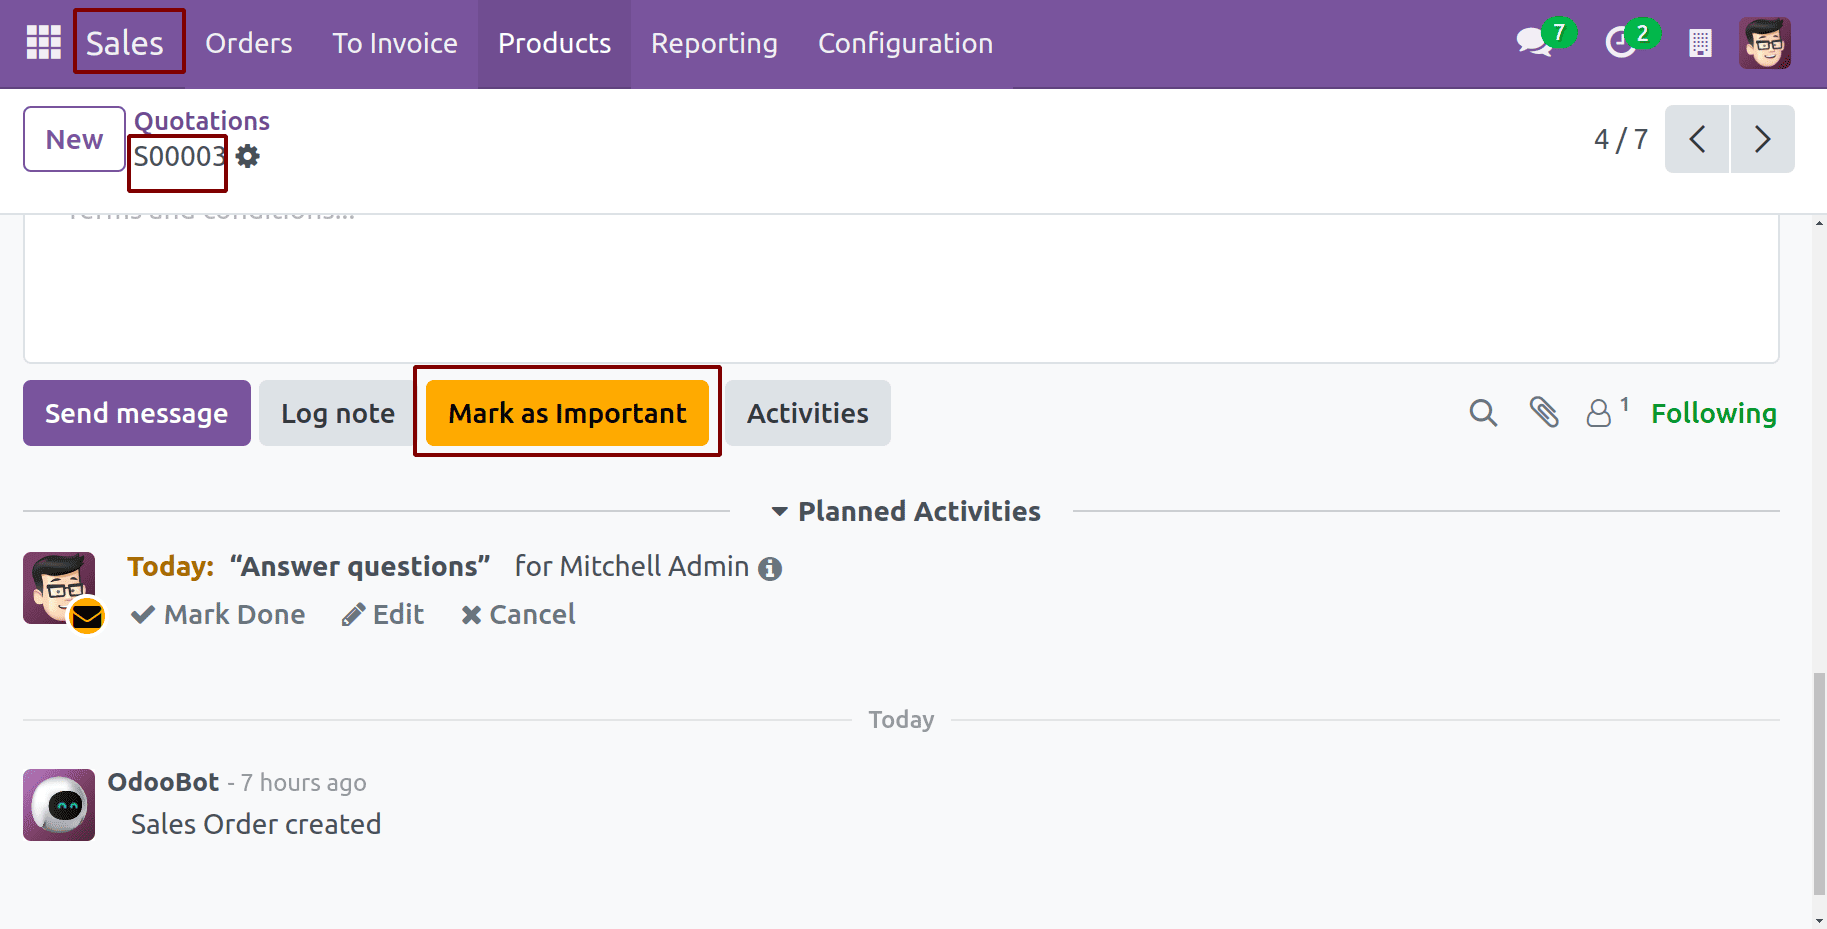
This code will add a "Mark as Important" button in the chatter. This XML template modifies the Chatter component in Odoo by inheriting from mail.Chatter and adding a custom button labeled "Mark as Important." The xpath expression targets the chatter's activity area and inserts the button before it. The button is styled with a warning color and includes a dynamic class based on the layout height. Additionally, a keyboard shortcut (Shift+i) is defined, and when clicked, the button triggers the markAsImportant JavaScript method.
Step 2: Define the Button's Functionality
Next, you need to define the functionality that occurs when the button is clicked. You will be patching the Chatter component to add the new method.
JavaScript Code
Add the following JavaScript code in your module:
/** @odoo-module **/
import { Chatter } from "@mail/chatter/web_portal/chatter";
import { patch } from "@web/core/utils/patch";
patch(Chatter.prototype, {
   async markAsImportant() {
        await this.env.services.action.doActionButton({
           type: "object",
           resModel: this.props.threadModel,
           resId: this.props.threadId,
           name: "action_mark_as_important",
       });
   },
});
This code defines the markAsImportant function that will be triggered when the button is clicked. The code extends the Odoo Chatter component, allowing it to trigger a specific server-side action when a custom button is clicked. It uses the patch function from Odoo’s core utilities to enhance the existing Chatter functionality by adding a new method called markAsImportant. When this method is invoked, it sends a request to the server via doActionButton, targeting the current record's model and ID. The resModel and resId parameters dynamically refer to the model (e.g., sale.order) and the specific record in model, while the action name (action_mark_as_important) points to a server-side method that will be executed.
Step 3: Implement the Logic in Your Model
Now, you will need to define the logic that updates the record when the button is clicked. In this example, we'll modify the sale.order model.
Python Code
Add the following code to your sale_order.py file:
from odoo import fields, models
class SaleOrder(models.Model):
   _inherit = 'sale.order'
   important = fields.Boolean("Important", default=False)
   def action_mark_as_important(self):
       """Mark the record as important and post a message
       in chatter"""
       for record in self:
           record.important = True
           record.message_post(
               body="This record has been marked as important.")
       return {
           'type': 'ir.actions.client',
           'tag': 'reload',
       }
In this code, we create an important field and define the action_mark_as_important function that marks the record as important and posts a message in the chatter.
Step 4: Add the Field to the View
To ensure that the new field is part of the form view, you need to add it to the appropriate view definition.
XML Code
Add the following XML code to include the field in the sale.order form view:
<?xml version="1.0" encoding="UTF-8" ?>
<odoo>
   <record id="sale_order_view_form" model="ir.ui.view">
       <field name="name">
           sale.order.view.form.inherit.chatter.button
       </field>
       <field name="model">sale.order</field>
       <field name="inherit_id" ref="sale.view_order_form"/>
       <field name="arch" type="xml">
           <field name="date_order" position="after">
           <field name="important" invisible="1"/>
           </field>
       </field>
   </record>
</odoo>
This XML code adds the important field to the sale.order form but keeps it invisible.
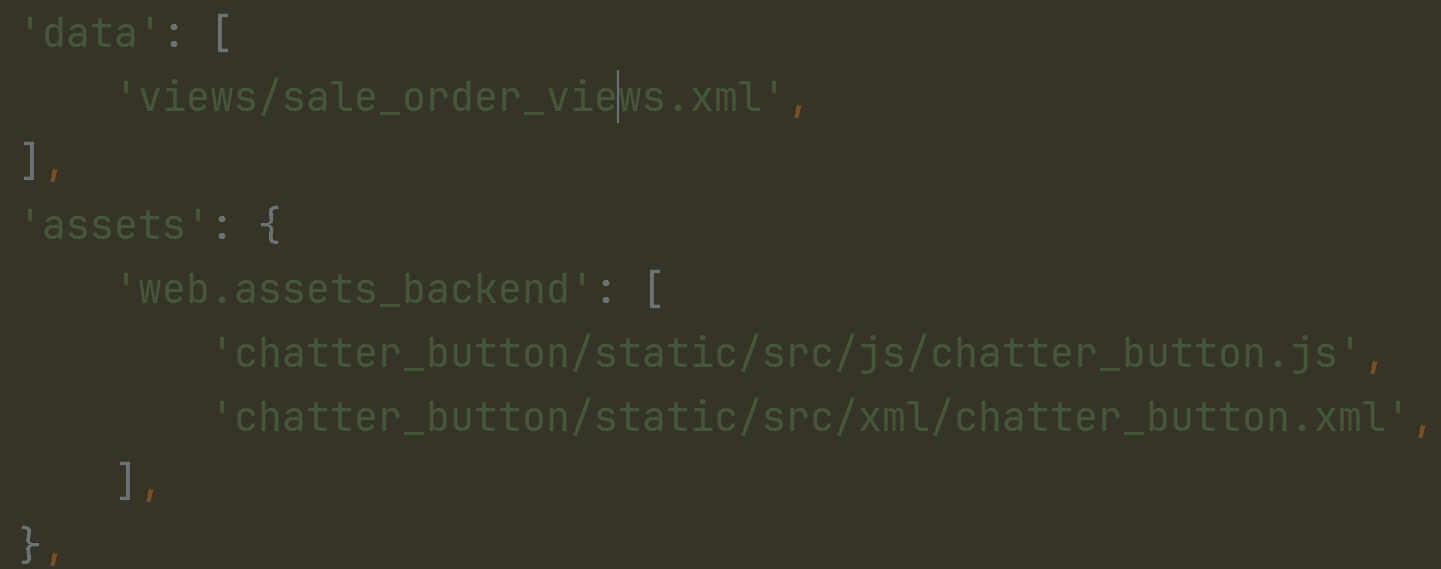
Step 5: Update the Manifest File
Don’t forget to update the __manifest__.py file of your custom module to include the new XML and JavaScript files:
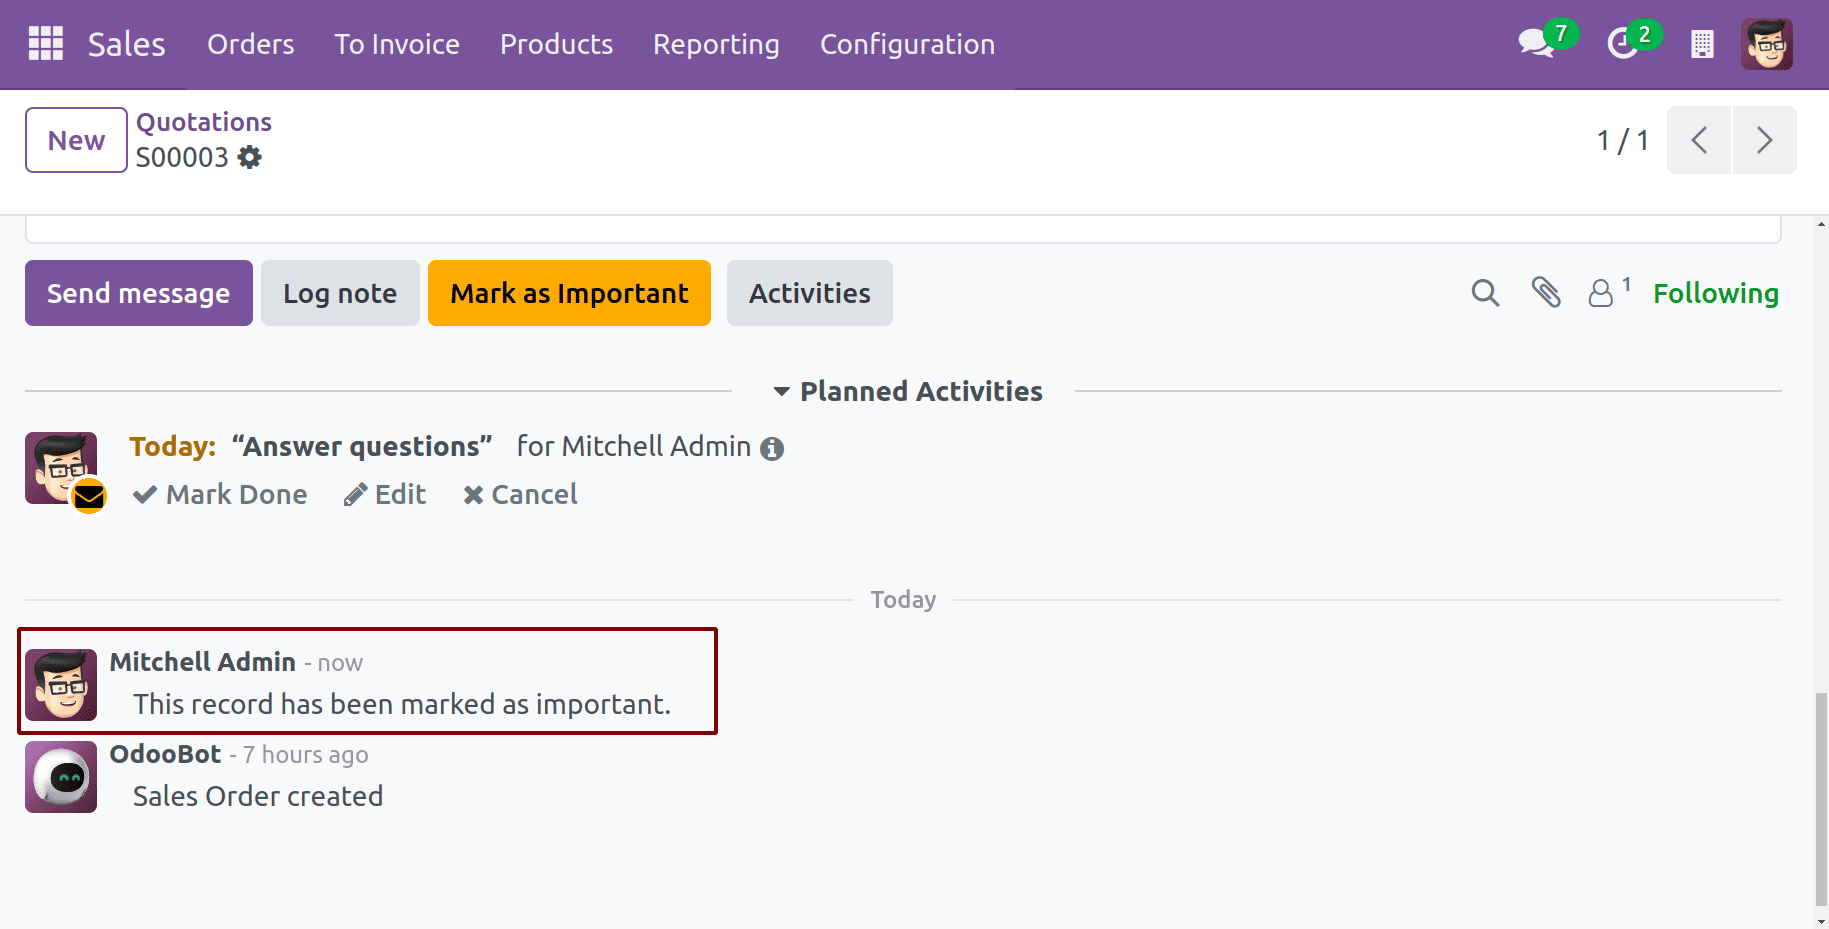
After following these steps, you will have successfully added a button to the chatter in Odoo 18. Upon clicking the "Mark as Important" button, the important field will be updated, and a message will be posted in the chatter.
By following these steps, you can successfully add a custom button to the chatter in Odoo 18, allowing users to trigger specific actions directly from the record’s communication hub. The ability to extend the functionality of chatter, from adding buttons to defining custom logic, opens the door to countless possibilities for enhancing user interactions within the platform.
To read more about How to Add a Button in Chatter in Odoo 17?, refer to our blog How to Add a Button in Chatter in Odoo 17?