There are several kinds of views available in Odoo, including calendar, kanban, graph, tree, and form. Every perspective offers information in a distinctive manner, facilitating comprehension. Almost all of Odoo's menus include these view options.
Introducing the Odoo advanced view option, the Gantt view.
The Gantt view is currently only available with the Odoo Enterprise edition. This is due to the fact that it needs the Enterprise edition-only "web_gantt" module to be installed. This module can be found and installed in Odoo Enterprise via the Apps menu.
Let us now examine Odoo's Gantt view. You are aware of bar charts, correct? They could be vertical or horizontal. Well, we use the horizontal type in Odoo's Gantt view.
To give you an example, consider this: The Planning module's Gantt view is seen in the picture below.
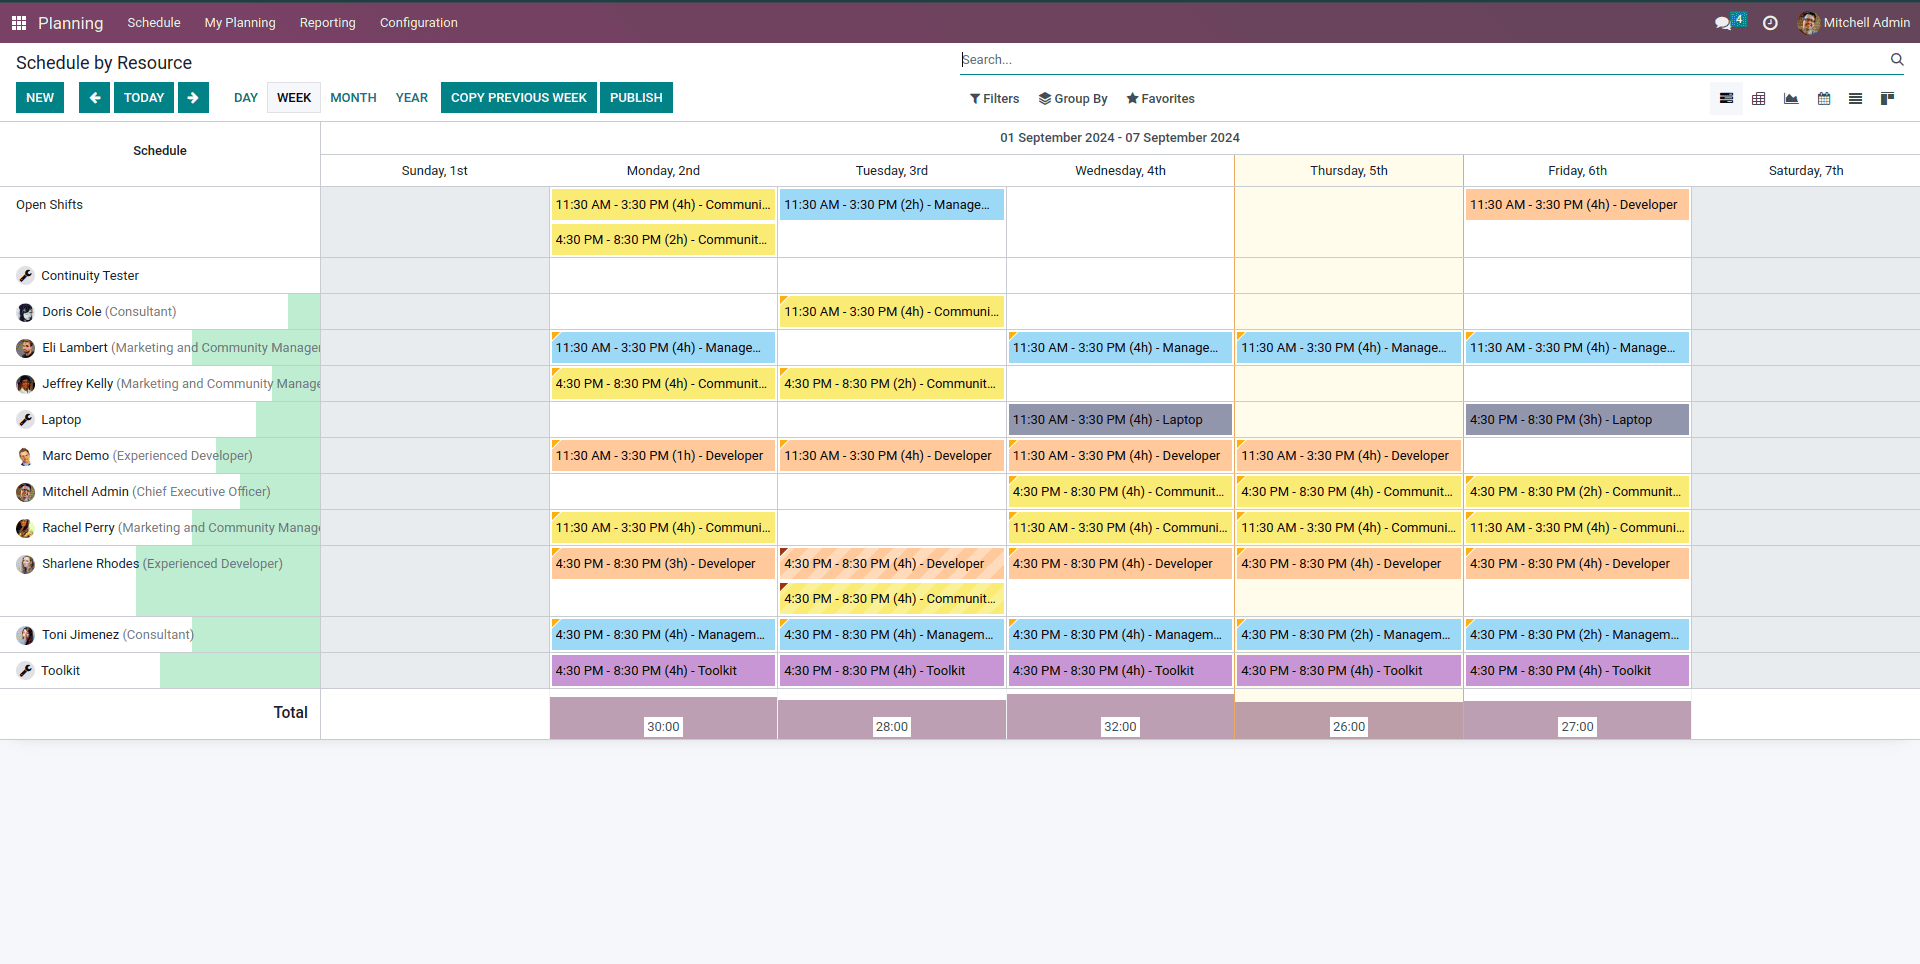
Planning is the fundamental concept of the Gantt perspective. Planning projects, production schedules, or anything else you need to organize is made possible by it. It also functions as an analytical report. And what is finest about it all? It provides an interface that is more aesthetically pleasing and easy to use.
Before we get started, let us make sure we have all the required properties and are aware of the key components that go into building a Gantt chart.
Main Element:
* Gantt tag
Attributes:
* string
* date_start
* date_stop
* default_group_by
* progress
* default_scale
* scales
* precision
* color
* display_unavailability
These are just a few example properties; keep in mind that, just as in any other view, you may always add more complex attributes as needed.
Let us make a simple Gantt chart with the necessary fields like group by, start date, and stop date.
To illustrate our Gantt view, we will first need a model. The model example with date_from, date_to, and employee_id parameters is shown below. Please do not hesitate to add extra fields as needed.
# -*- coding: utf-8 -*-
from odoo import fields, models

class SimpleGantt(models.Model):
   _name = 'simple.gantt'
   _rec_name = 'partner_id'
   partner_id = fields.Many2one('res.partner')
   start_date = fields.Date(string='Start Date')
   end_date = fields.Date(string='End Date')
Three fields make up the model "simple.gantt" used in this example: "partner_id," which refers to a partner, "start_date," which indicates the start date, and "end_date," which indicates the stop date. If additional fields are required for your particular use case, you can add them to this model.
Next, we need an XML file, just like the ones that are needed to create form views. We will, however, utilize the gantt tag and its attributes in place of the form tag.
<?xml version="1.0" encoding="UTF-8"?>
<odoo>
   <record id="simple_gantt_view_gantt" model="ir.ui.view">
       <field name="name">simple.gantt.view.gantt</field>
       <field name="model">simple.gantt</field>
       <field name="arch" type="xml">
           <gantt date_start="start_date" date_stop="end_date"
                  default_group_by="partner_id" string="Customers">
               <field name="partner_id"/>
               <field name="start_date"/>
               <field name="end_date"/>
           </gantt>
       </field>
   </record>
   <record id="action_view_simple_gantt" model="ir.actions.act_window">
       <field name="name">Gantt Partners</field>
       <field name="type">ir.actions.act_window</field>
       <field name="res_model">simple.gantt</field>
       <field name="view_mode">tree,form,gantt</field>
   </record>
   <menuitem id="menu_view_simple_gantt"
             name="Simple Gantt"
             action="action_view_simple_gantt"/>
</odoo>
Let us go on to the next phase now that the perspective has been established. Basic functionalities are provided by the Gantt tag, which has multiple properties. The ability to see each bar's details when we hover over it is made possible by the template attribute. Next, we must modify our action to include the Gantt view mode.
We now have the Gantt view mode in addition to our current form and tree view modes.
Let us examine the effects of this code on our application in more detail. The view I made is shown below.
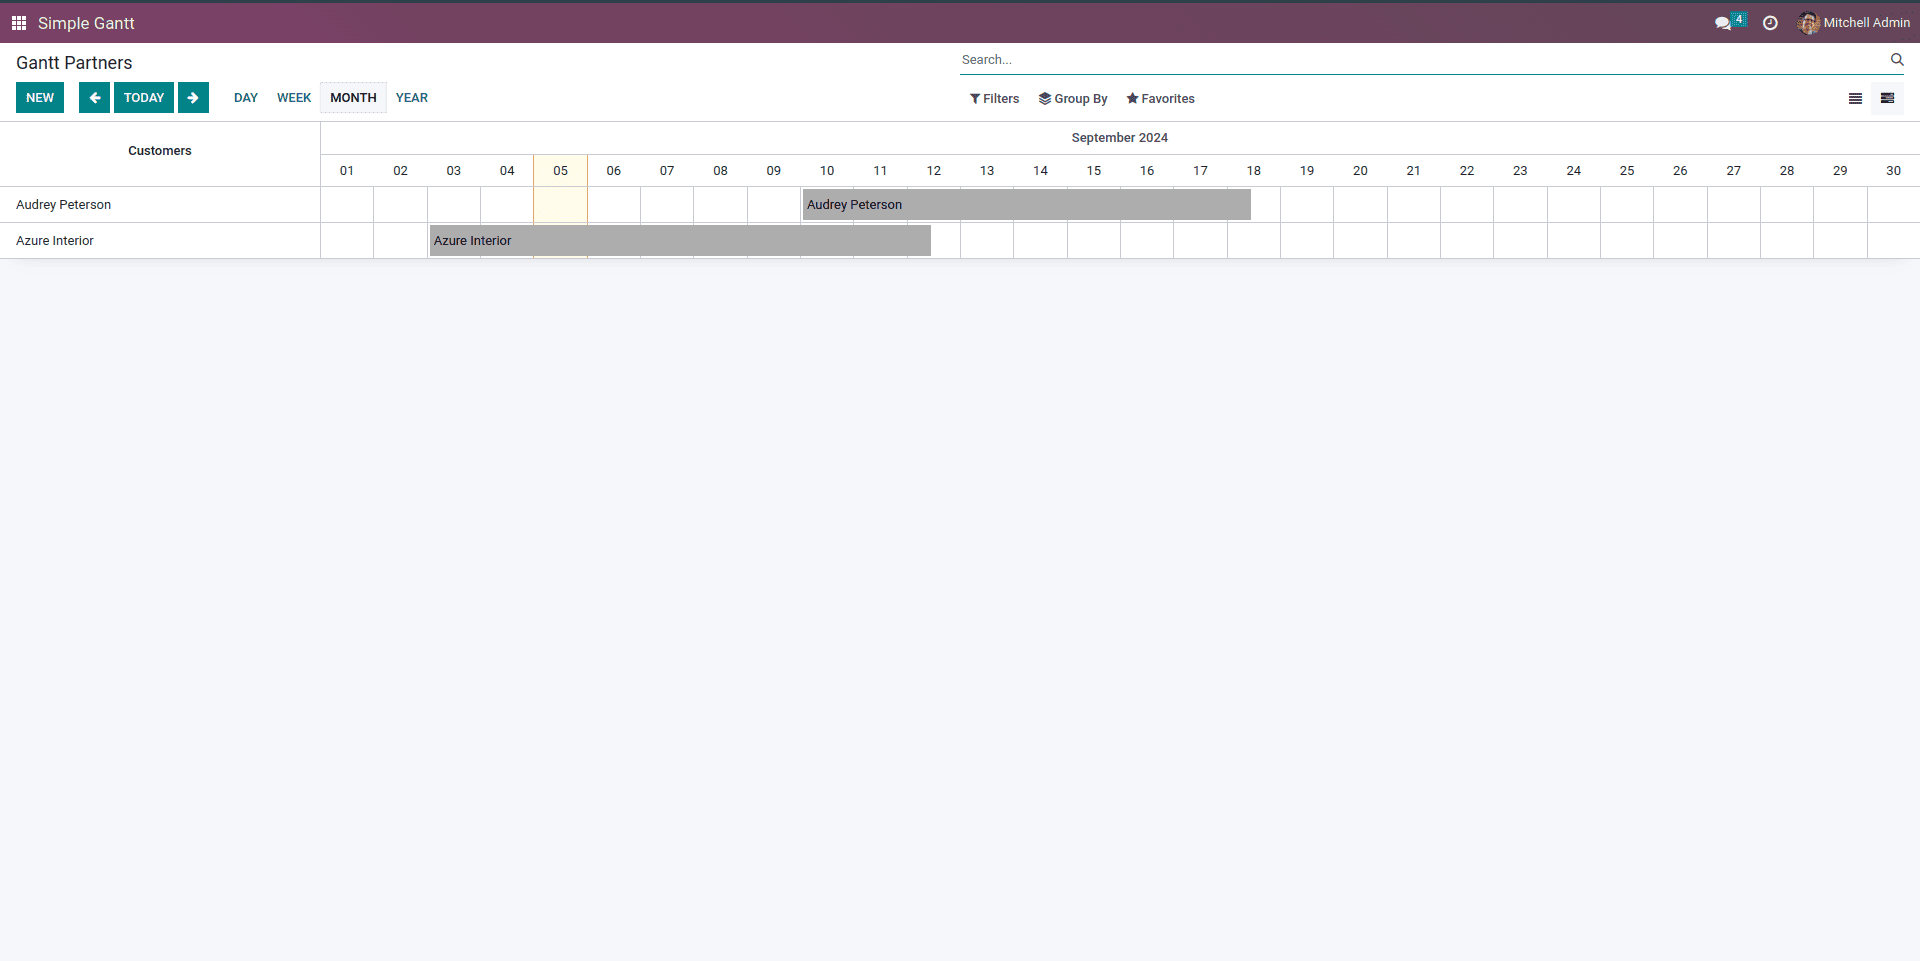
One way to add a new record is to click the 'New' button on the display. It is possible to filter data by day, week, or year. The various colors stand for diverse allocations. To gain more complex features, you can also try changing the properties inside the Gantt tag.
The Gantt views in Odoo 16 do more than just make schedules visually appealing; they also improve your company's operations. Seize this chance to uncover the complete potential of your data and steer your company toward a seamless future.
To read more about How to Create Gantt View in Odoo 17, refer to our blog How to Create Gantt View in Odoo 17.