A helpdesk team is a group of employees who keenly work to answer the queries of customers. Any company that remains connected with the customer will have to manage a Help Desk team to clarify the doubts and queries raised by the customers. This becomes essential for companies that engage in manufacturing, sale or service sectors where the companies directly deal with a number of customers. The customers will have different levels of knowledge and expertise and they would want to clear all their apprehensions before going ahead with the deal.
Odoo, a very popular ERP tool being used in many countries across the globe, has introduced the Odoo Helpdesk module aiming to synchronize all helpdesk-related activities. Odoo helpdesk can be integrated easily with the Odoo CRM as well. Besides, it can work in coordination with the Odoo Live Chat modules. This can also be integrated with Odoo website, to manage the customers and customer queries in a more systematic way. If this integration process is done the customers can present their queries to the helpdesk team using the website and they can get the answers. eCommerce businesses depend on full-fledged websites for the management of customers. As any negative experience of the customer can affect the customer relationship of the company,
Odoo Helpdesk with a user-friendly interface also helps the company to manage the helpdesk and policies related to the operations of the helpdesk team from the dashboard itself.
This blog will guide the formation of a helpdesk team using the Odoo 14 Helpdesk module.
Helpdesk creation
Go get your Odoo Helpdesk App first.
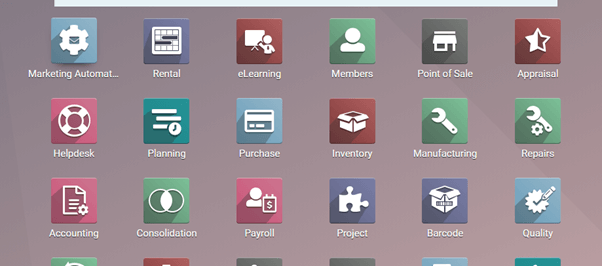
Helps is not far for the customers if you are using Odoo Helpdesk.
Now we can move directly to configuration.
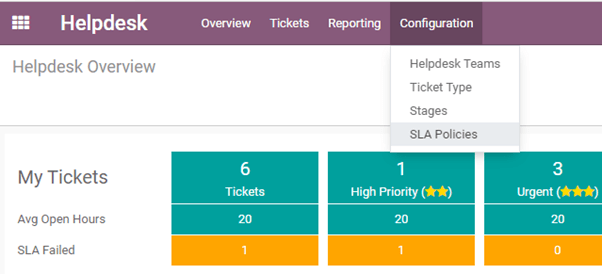
Below configuration, we can find the Helpdesk Teams option.
We can configure a new helpdesk team from here. Check how.
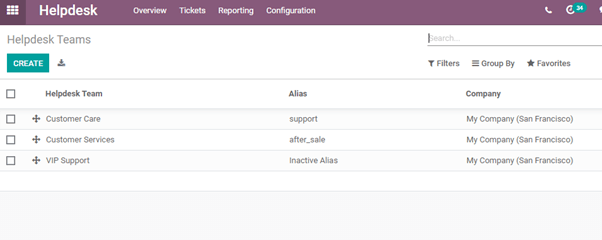
This page gives us the details of all existing helpdesk teams and a tab to create more teams.
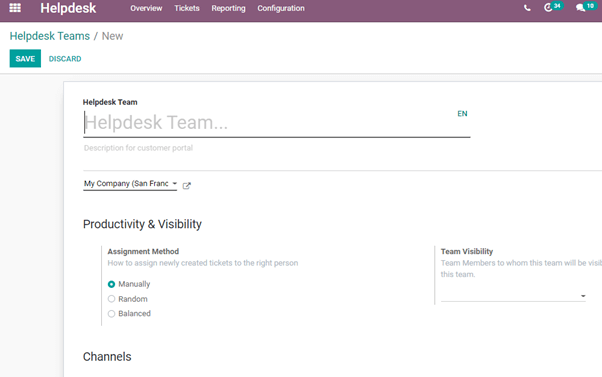
This is the help desk creation form where we can name the team and set all features of the team.
How can we create a new team using these fields? We can check in a step-by-step manner.
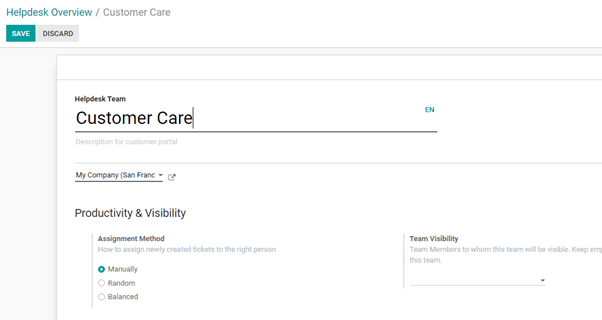
Helpdesk Team: We can add the name of the helpdesk team here. We can also provide a description if we are planning to add this in a partner portal.
Company: As you would have already provided your company details you can choose it from the dropdown menu or add a new name.
Productivity and Visibility:
This helps us to decide the method of assignment. That means we can decide how to assign a new ticket to a helpdesk team member.
Ticket assignments can be managed in different ways. They are
Manually
Random
Balanced
If we choose manually, the person who creates the ticket will be responsible for manually assigning the ticket to a helpdesk team member. If it is done randomly, the tickets will be randomly distributed among the helpdesk team members. Then we have a balanced option using which we can assign tickets automatically to a person based on the number of open tickets with each team member.
Team Visibility: This field decides who can view this team. If none is selected the team will be visible to all. If we want to restrict the use we can provide the name of the person in the field.
Channels
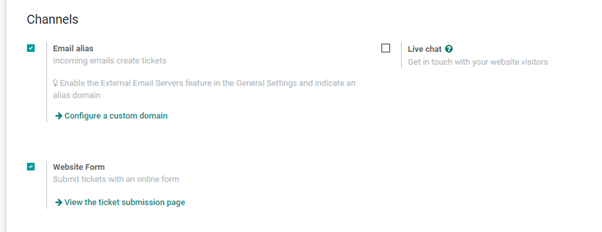
The next segment that we can see here is Channels. Below the channels option, we have three different forms which can be integrated with the helpdesk.
Email Alias- Enabling Email Alias we can automatically convert the emails received by the company in the helpdesk id as tickets.
Once we enable the Email Alias, it automatically enables external email server features that are available in the General Settings. This can also be indicated in the form of an alias domain.
Configure a custom domain- This option will take us to Settings to create a domain

Website Form: Once we enable this option for the team, the customers will be able to submit tickets using an online platform. We can provide a form on the website where the customer can fill in the details and submit them.
View Ticket Submission Page:
This link will take us to the website form
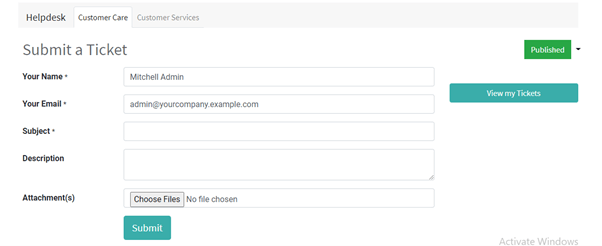
The above-given image is the form that can be used by the customer.
Live Chat:
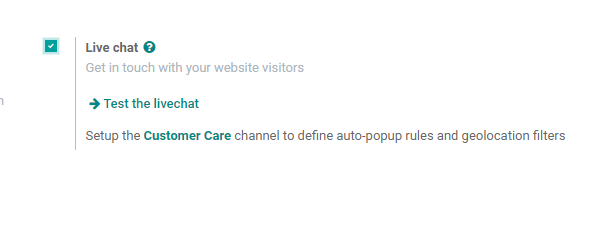
On enabling Live Chat the customers visiting the website will be able to present their queries through the live chat feature. These queries will be created as tickets. The helpdesk team that manages the live chat can either resolve the tickets and mark them as closed or leave them open.
Sell and Track Hours

This field helps us to enable timesheets on Ticket. Once we enable this we get an expanded form

Timesheet Timer: This can support us to track our time
Time Reinvoicing: This indicates the re-invoicing time to the customer with the help of tasks.
Performances
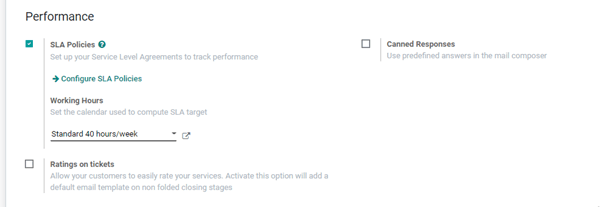
SLA policies: The Performances segment gives us an option to add SLA policies. We can configure SLA (Sale Level Agreement) policies here itself. We will discuss it in another blog.
Working Hours: We can set the working hours of a team and manage a calendar that can be used to compute SLA targets.
Ratings on Tickets: As we have seen on the overview page we can allow our customers to rate the tickets by enabling this option.
Canned Responses: This feature enables us to create predefined answers to a set of frequently asked questions. This answer can be managed in the mail composer and sent to the customer.
Self Service

We have three options here
Help Centre: We can enable a question and answer section on the website where the customer can access answers
Ticket closing: Once the ticket is solved or the issues is settled, the customer will be able to close the ticket
E-learning: Helps the customer by adding videos or courses regarding the product or service.
After-Sales

Refunds: We can enable this option if we want to generate credit notes using tickets
Coupons: Enable this to issue coupons based on tickets
Returns: Enable it if the helpdesk team wants to allow the buyer or client to return the purchased item
Repair: This option can ease repair management
Field Service

On enabling this option our helpdesk team will be responsible to carry out onsite intervention and offer field service based on the ticket.
Edit Helpdesk team
We can edit the helpdesk team in two ways. One is from Configuration. The second method is to edit the team directly from the overview page.
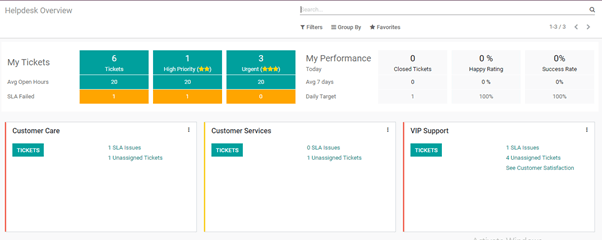
On this opening page, you can find many details like My Tickets, My performances, etc. Below these, we can find three columns named customer care, customer service, and VIP support. If you check the above-given helpdesk team page you can find that these are the three helpdesk teams created by us.
So if we want to make changes in any of these teams click on the three dots and find the settings option to edit the helpdesk.
Having doubts regarding helpdesk team configuration? We are just a mail or call away. Find our support at odoo@cybrosys.com and at +918606827707.