Employee expense as the name indicates is an expense or the amount spent by the employee. In some cases, the employee may have to spend money on behalf of the company to complete some of the projects or tasks or the employee may have to spend some money on behalf of the company to purchase some products from the vendors. The company will be responsible to give the amount back to the employee in such cases. We need a proper system to manage this process and this is called employee expenses management.
An ERP tool can be used to manage this operation in a way that ensures quick management of expenses and efficient handling of the documents. ERP will help the user to manage the expenses and register the expenses in the journals. This will ease the linking of expenses with the accounts. The accounting team will henceforth be able to reimburse the employee expenses in a proper way. This will enable you to manage all employee expenses the most efficiently way.
The ERP tool will help the management to entrust all reimbursement tasks to the accounting wing. The employees will be able to claim the expenses easily and send expense reimbursement requests for approval. There may be different types of employee expenses and the difference depends on the type of the company.
Major types of employee expenses are travel expenses, medical expenses, and business or vendor-related expenses.
Odoo Accounting Module for Employee Expense Management
Odoo accounting module, as we have discussed allows you to manage all types of payment-related operations. This requires the integration of the Odoo Accounting module with the Expenses module. The expenses module is a module that allows the employees to generate expense requests and manage all expense-related tasks.
Employee Expenses is a new feature that has been added to Odoo version 14. This feature helps you to complete the expense related tasks with the help of the accounting module itself. Earlier, the employees had to depend on the expense module for carrying out expense reimbursement-related operations. With the new feature, all vendor-related expenses can be managed from the accounting module itself.
How to use Employee Expenses in Odoo 14 Accounting
In Odoo 14 Accounting, Employee Expenses fall under the Vendor menu.
First, we have to install Odoo Accounting and Odoo Expense modules. The go to Accounting -> Vendor -> Employee Expense
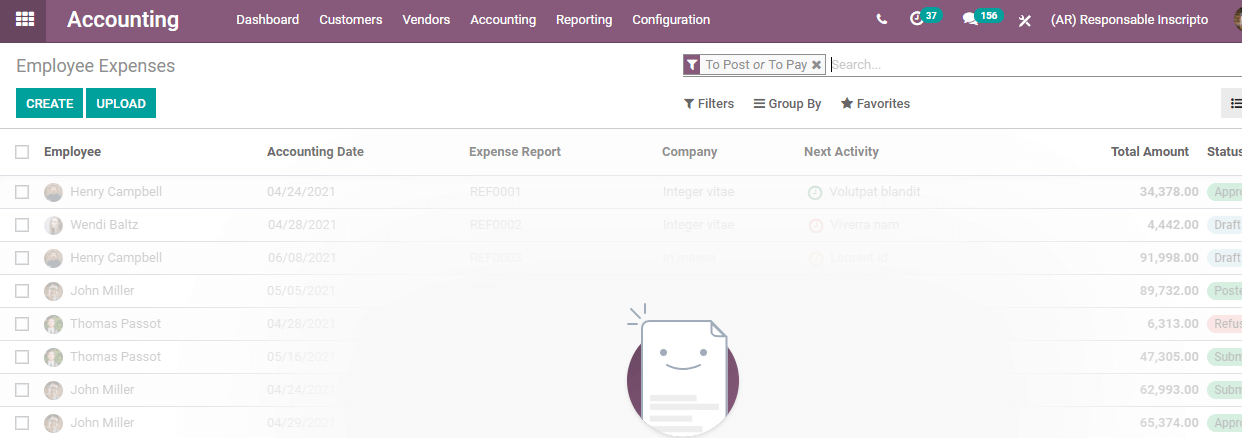
Here we can Create or Upload Expenses with ease.
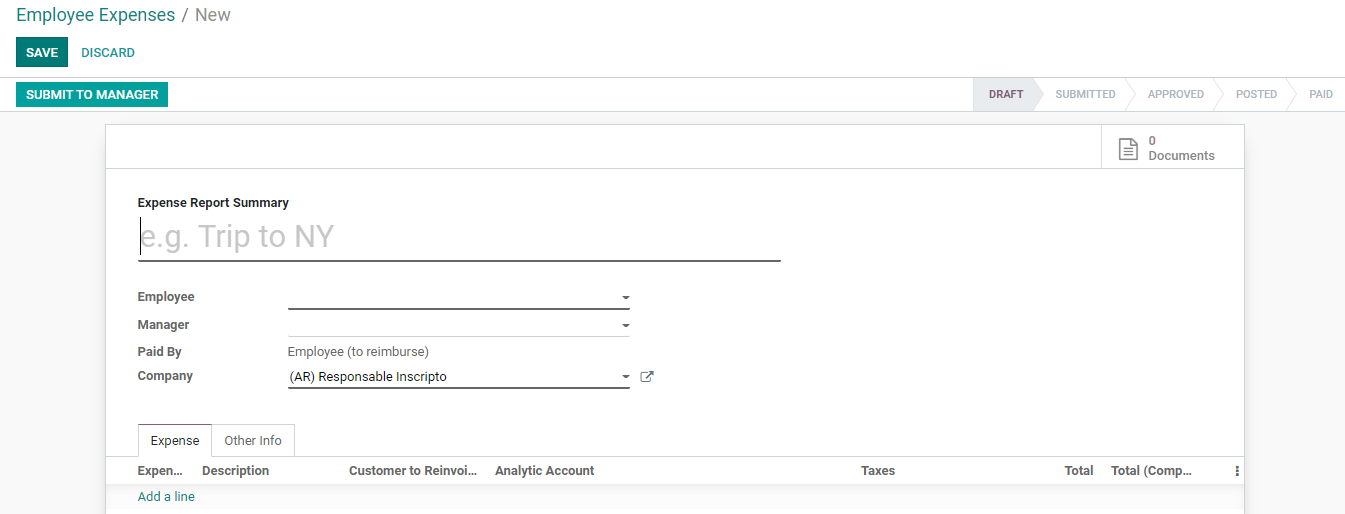
Employee expense gives us an opportunity to fill in many fields to make clear the reason for the expense.
The fields are as follows
Expense Report Summary: The title of the expense report
Employee: Employee who incurred the expense
Manager: The person who is responsible to approve the expense
Paid by: Here we have to name the employee who made the payment
Company: Name of the company
Here, we also have different tabs including Expense Tab and Other Info
Below the expenses tab, we have to create the expense lines.
When we click on Add a line option we get the following
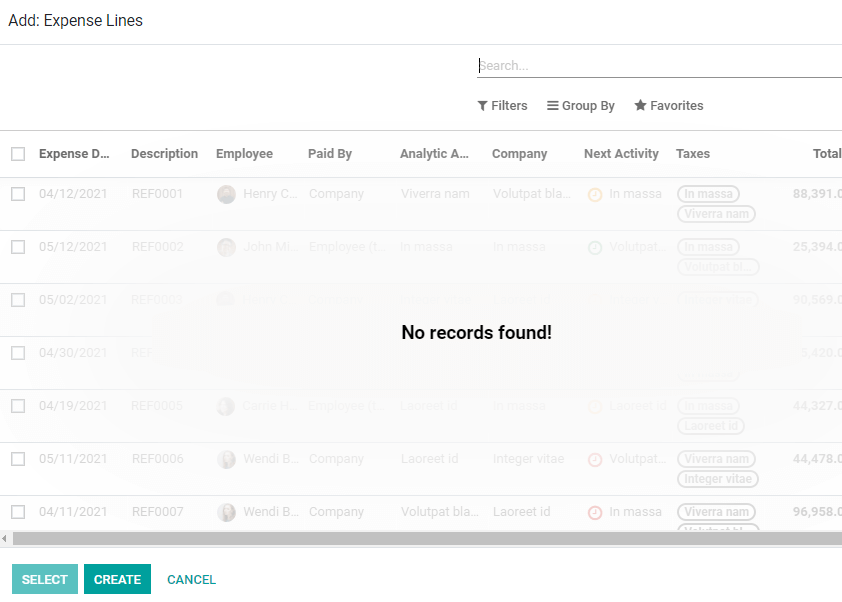
Here we can either select already created expense lines or create new lines using Create
When we click on Create we get a fresh page where we can add a description
If it is the purchase of a product we can add the product name, unit price, quantity, taxes, bill reference, expense data, account details, employee name, currency, analytic account company name, etc. We also have a field Paid By. Here we can mention if it was by employee (to reimburse) or company.
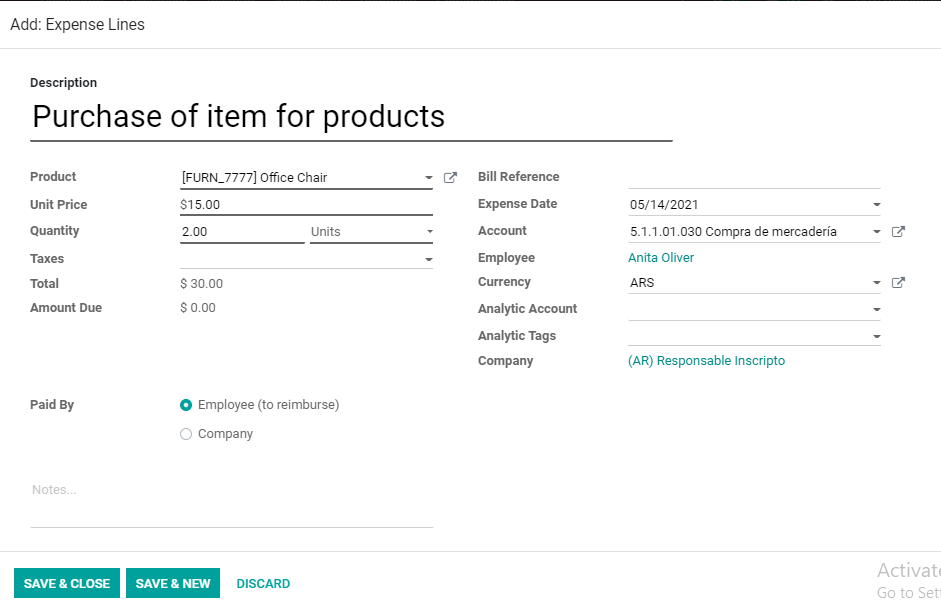
If the employee purchased only one item we can save and close and if there is more than one product we can choose Save and New option.
Now we have our Expense Tab

We can find the View Attachments option here. This will help us to attach the bills or supporting documents to prove the expense. Clicking on it we will get this
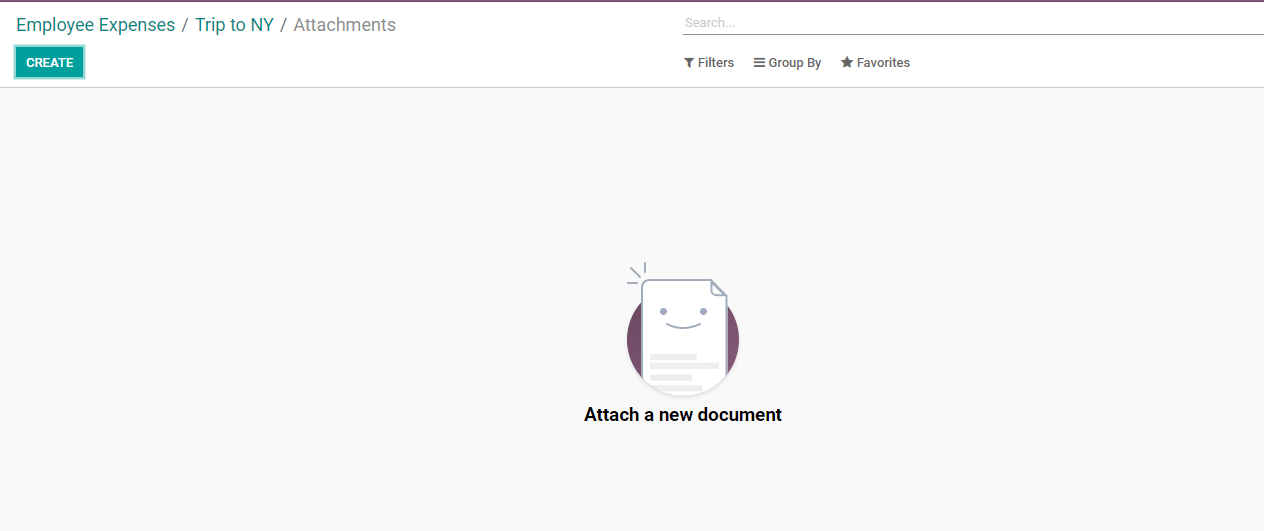
The Create tab will help us here.
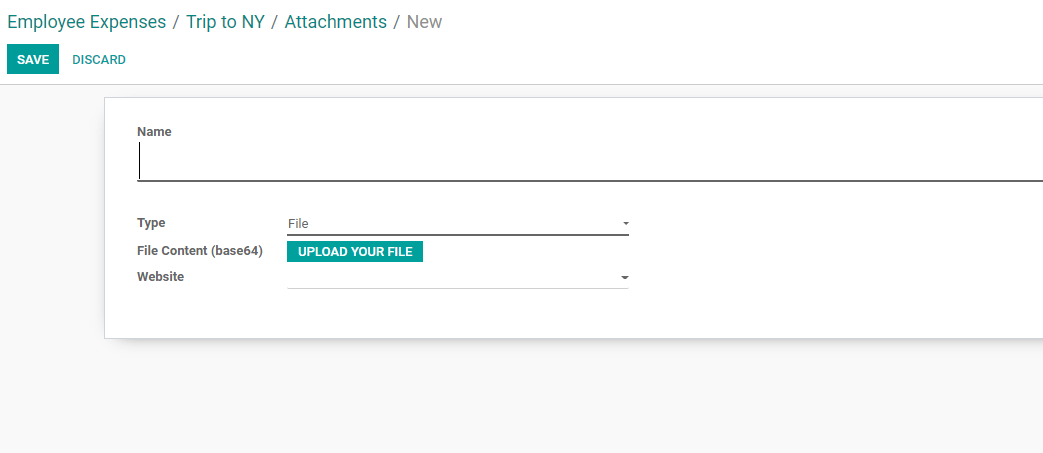
We can name the attachment, mention the attachment type and upload the file. The file can be uploaded using the Upload Your File tab. The website can also be mentioned here.
Once we complete the attachment we can use the option Submit to Manager

Once the employee submits it, the request will reach the manager

The manager will have three options: Approve, Refuse or Reset to draft.
If the employee had attached any file, the file could be viewed in the documents.
The reset to Draft option helps the manager to resend it to the employee for clarification. Send message option on the bottom can also be used to alert the employee about the reason.
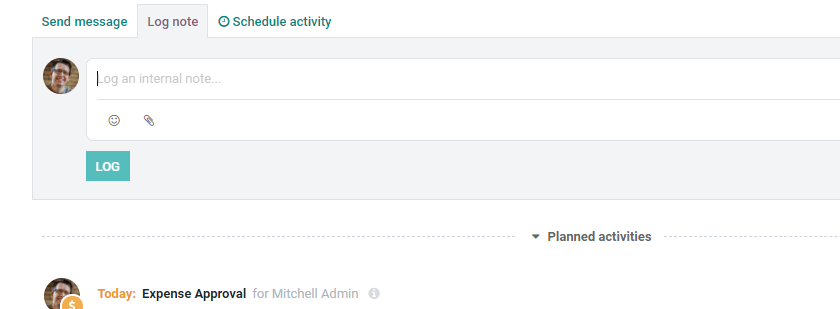
If the manager does not have any objection then the expense request can be approved. If the manager has any objection in approving, he can refuse it.

Once the Approved option is clicked by the manager, the status also changes. First, the employee expenses were in draft state. Then when we clicked submit to manager the status changed to submitted and now the status is approved.
When the expense is posted the status will change to post. In the same way, once the accounts wing makes the payment and the amount is reimbursed to the employee account the status will be mentioned as Paid.
Then the accounting team gets a window to post the journal entries and to report the expense in the next payslip. The accounts wing also has the option to refuse the claim.
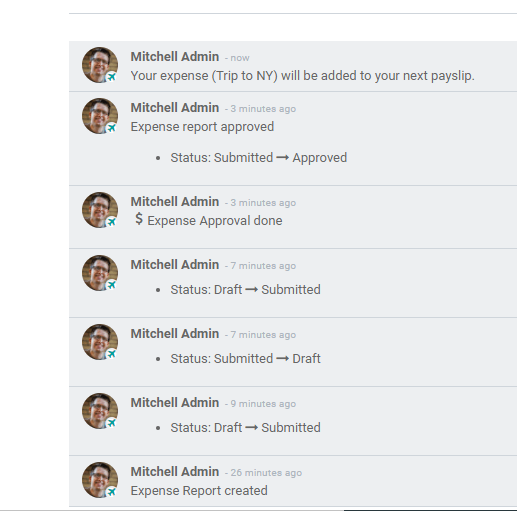
All these activities will get recorded in the log note.
This way we can easily create and manage employee expenses using Odoo 14 Accounting module.
Team Odoo has introduced a set of new features to Odoo accounting to ensure comprehensive support to the users. One of such features Employee Expense can be used to claim the expenses paid by the employees. The efficiency of this system will ease the project and task management plans of the company. If the amounts are paid on time and without any technical glitches the employees will be able to continue the process.
Any doubts regarding Employee Expense? We can help you. Contact us: by sending mails to odoo@cybrosys.com or dial +918606827707
Watch Video: