The events management module in Odoo made it easier to create new events and organize its processes. It helps a company to manage all the events created using Odoo. Management of each event is very essential as far as a business organization is concerned because each event is conducted for a specific purpose which helps them in the growth of their business. The events play a crucial role in the marketing and advertising of company products and services. To ensure new business opportunities by conducting new events, the Events management module in Odoo gives more attention to the successful creation of new events and their implementation.
The events module helps the company’s marketing team by organizing events for promotion and grabbing people’s attention to their products and services. There are also many entertainment and cultural events conducted by many organizations to build a collaborative business relationship between the business partners, employees as well as customers. Whatever the type of the event, conducting a successful event is a huge responsibility, and even a small error in the smooth going of the function may badly affect the reputation of the company.
The Odoo ERP system ensures a great platform for managing all your events in one place. On creating new events, Odoo also provides many configurations in the events management module.
This blog will discuss the configurations available in the Odoo events module and how it helps create new events.
Creating a new event is a simple process using the Events module. Odoo simplifies each step and facilitates the successful creation of events. Select the events module from the home dashboard of your Odoo.
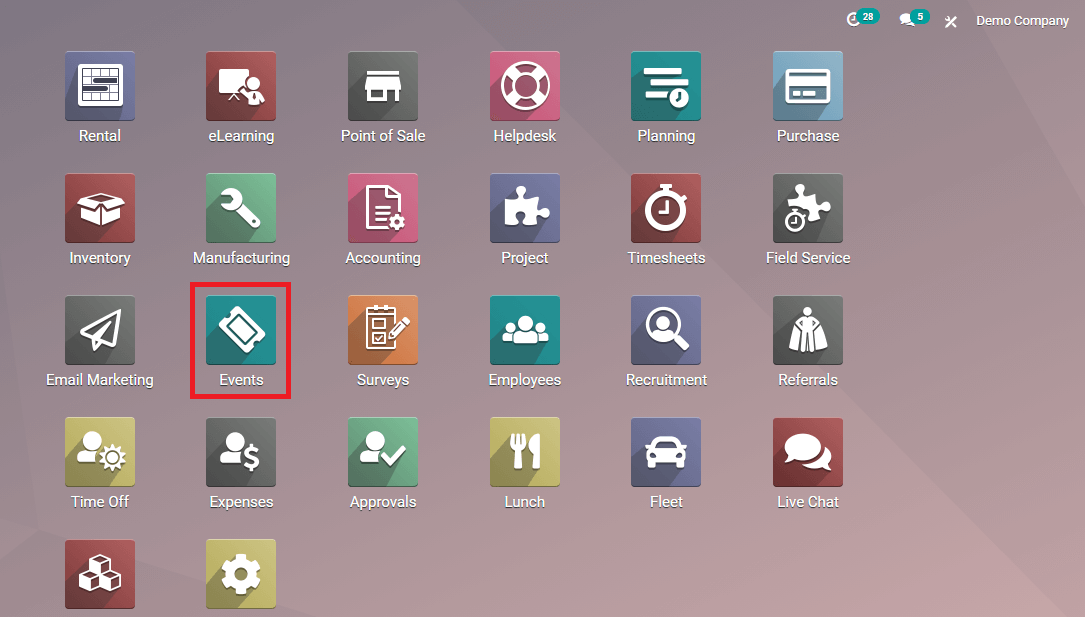
As shown in the image, this will be the icon of the Events module and you can get started with your work by entering into the module.
Configurations
You can see the configuration option in the main menu bar of the module. Clicking on this option will give you a dropdown menu where you can see available configurations in the Events module.
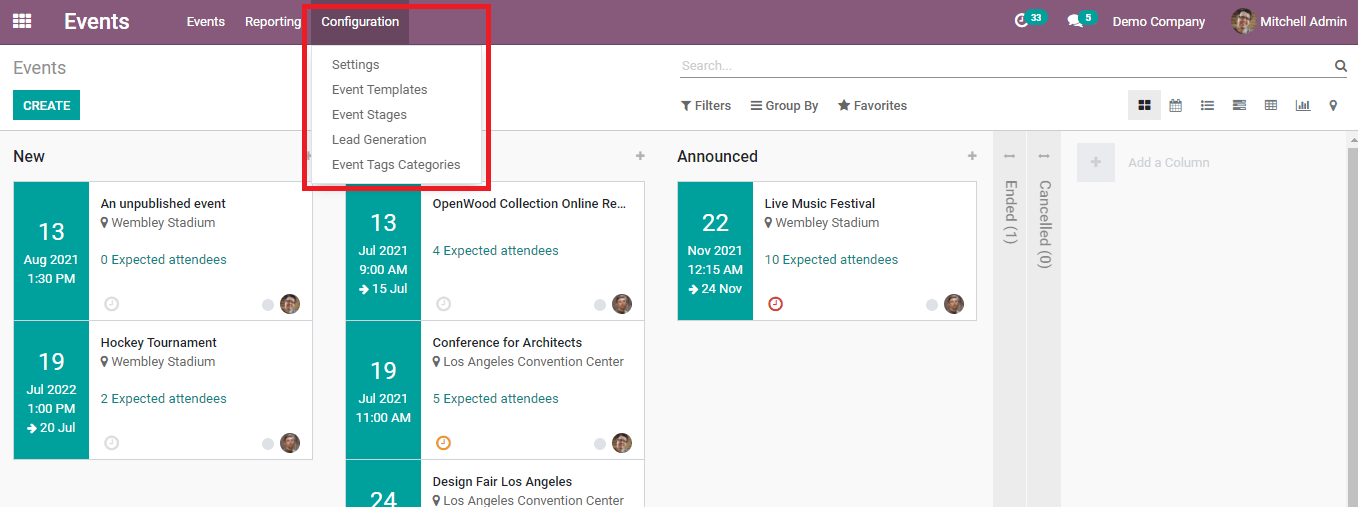
Let's take a look at each of these configuration options.
Settings
Under the settings option, these are the additional facilities available in the Events module.
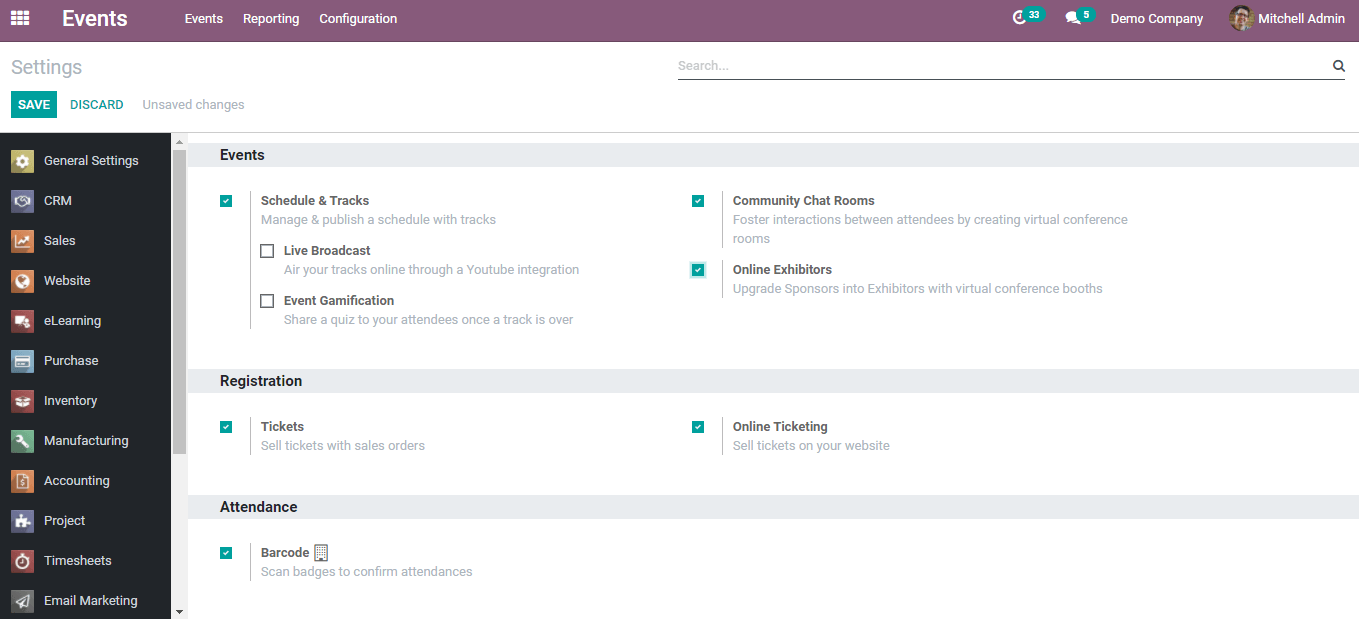
Schedule & Track: by enabling this option you can manage and publish a schedule with a track. This will allow you to track all the events by integrating them with the Enterprise event track, Event exhibitors, Mass mailing of track speakers, and Advanced events.
Community Chat Rooms: this will allow you to provide an opportunity to the attendees to interact by creating virtual conference rooms
Registration: there are two options available under the registration tab, Tickets, and Online Ticketing. You can use these options to sell the tickets with sales orders and sell them on your Odoo website respectively.
Attendance: using this option you can enable the facility to scan badges to record the participant’s attendance in an event.
Event Templates
We use event templates when we create a new event. The template will vary according to the type of event we are planning to conduct.
These templates can be created by using the ‘Event Template’ in the ‘Configuration’ menu. This template can manage the communication types, visibility of events, attendees, and ticketing.
In the picture below, you can see there are different types of templates available for each type of event. You can use these templates by editing the details according to your purpose or you can create a new template using the ‘Create’ button in the window.

A new template will be created from here.
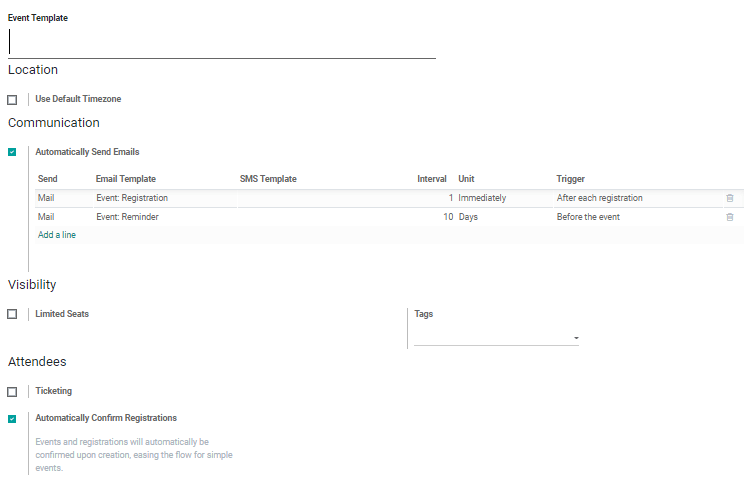
Add a title to the template and select the time zone from the given list.
Communication: In the ‘Communication’ field, you can select the method to communicate with your customers. You can choose either mail or SMS. Email and SMS templates can also be configured here. Set the interval, unit, and trigger to send an Email or SMS.
Visibility: In this field, you can limit the number of seats for an event and add tags to your template.

Attendees: Odoo allows you to organize the tickets in this field. You can add the name of the ticket, its price, and seat limits in the specific fields.

Automatically Confirm Registration: Use this option to automatically confirm the events created in the Events module.

After adding the necessary details to the event template you can save it. The newly created event template can be seen with other templates as shown below.

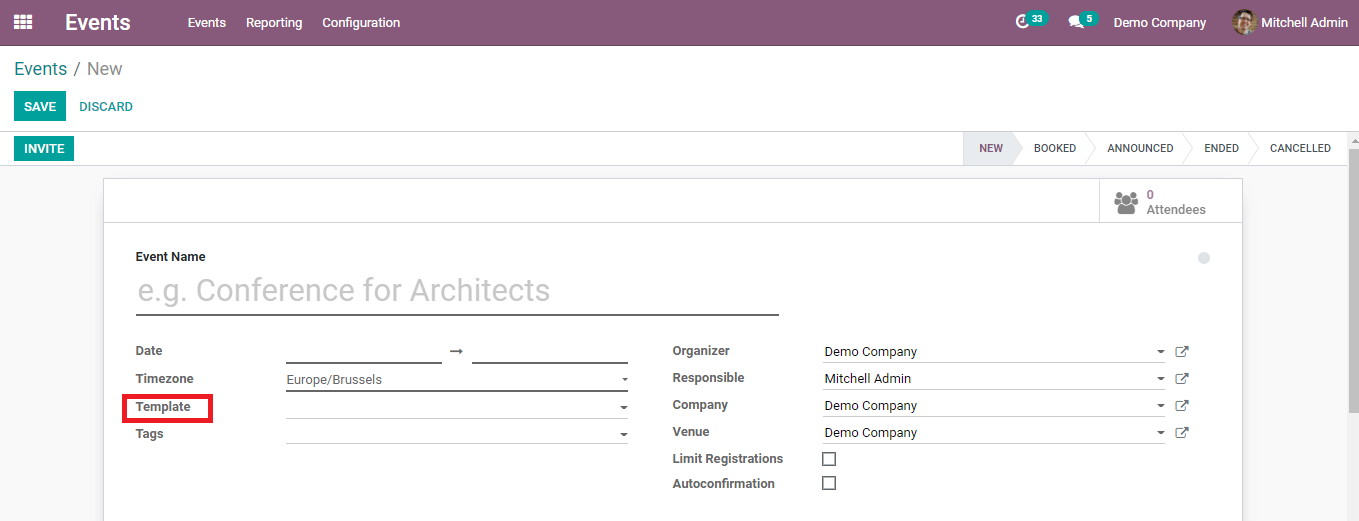
You can use this template in the ‘Template’ field while creating a new event.
Event Stages
When we open the events module we will get a view of different types of events categorized according to the stages they are going through.
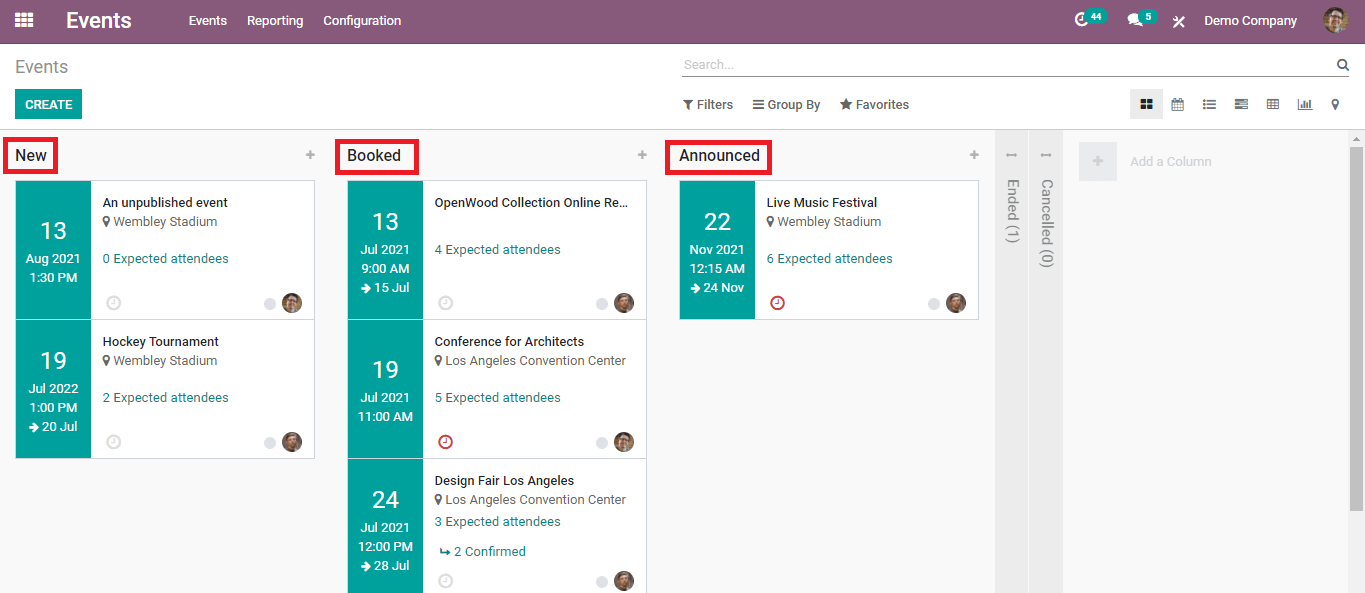
If you want to add new stages to your events, go to the configuration menu of this module and select ‘Event Stages’.

Creating a new event stage can be done in simple steps. Click the ‘Create’ button and add a name to your stage then save the stage.
Lead Generation
Lead generation is an important step in creating a new customer. You can generate leads from the list of candidates who registered for the event.

In the ‘Lead Generation' option in the configuration menu, you can see a list of leads and create a new one.
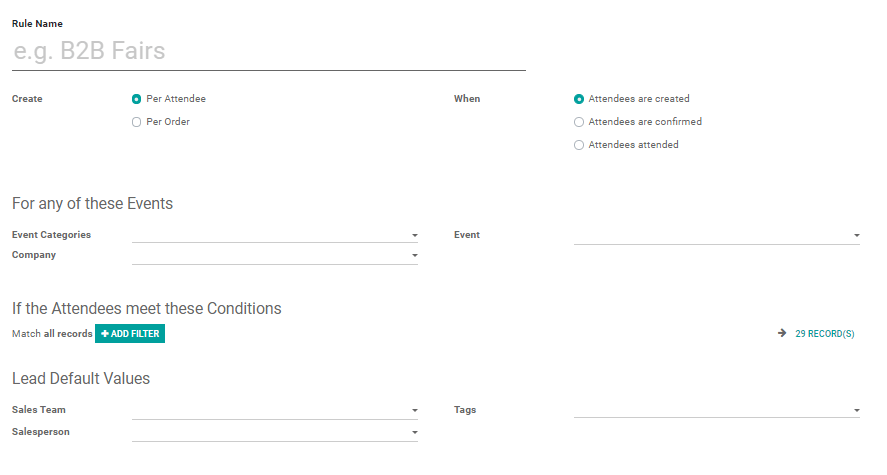
You can set a rule name, create the type per attendee or order, time, and the event details. You can also set filters to find the attendees who meet the requirement. Add the sales team, salesperson name, and tags to this form and save the lead.
Event Tags Category
Tags are a commonly used feature while creating any task in Odoo. On creating a new event, there is a field to add tags.
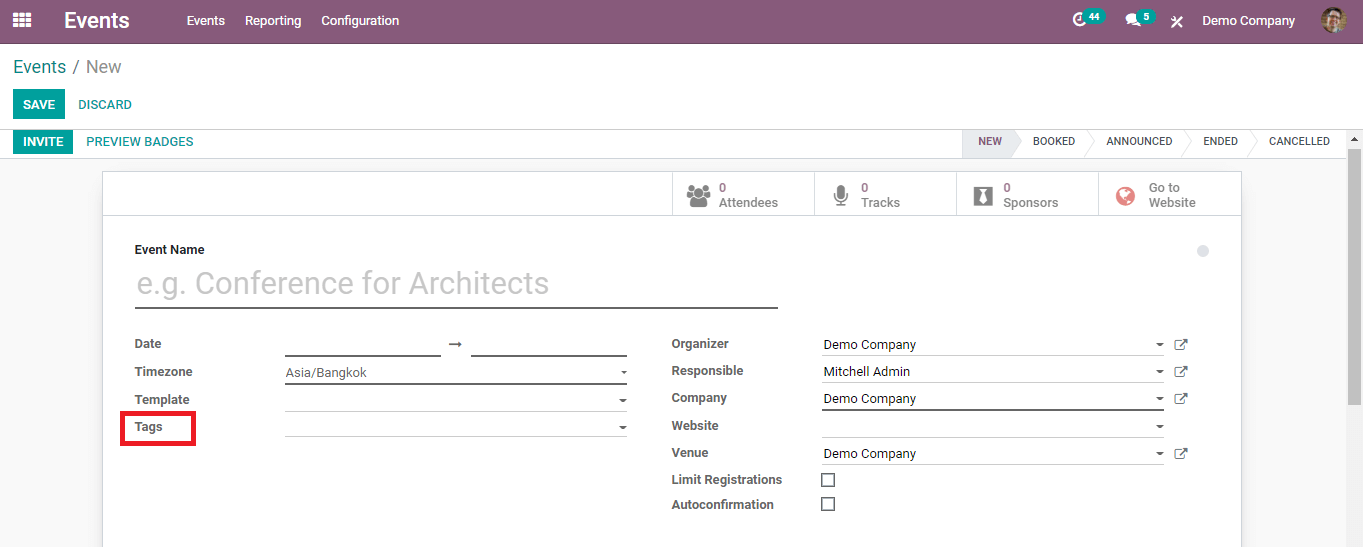
You can create new types of tags according to the nature of your event. Under the Configuration menu, we have an option to create new event tags.

The already available tags can be seen here. Click the ‘Create’ button.
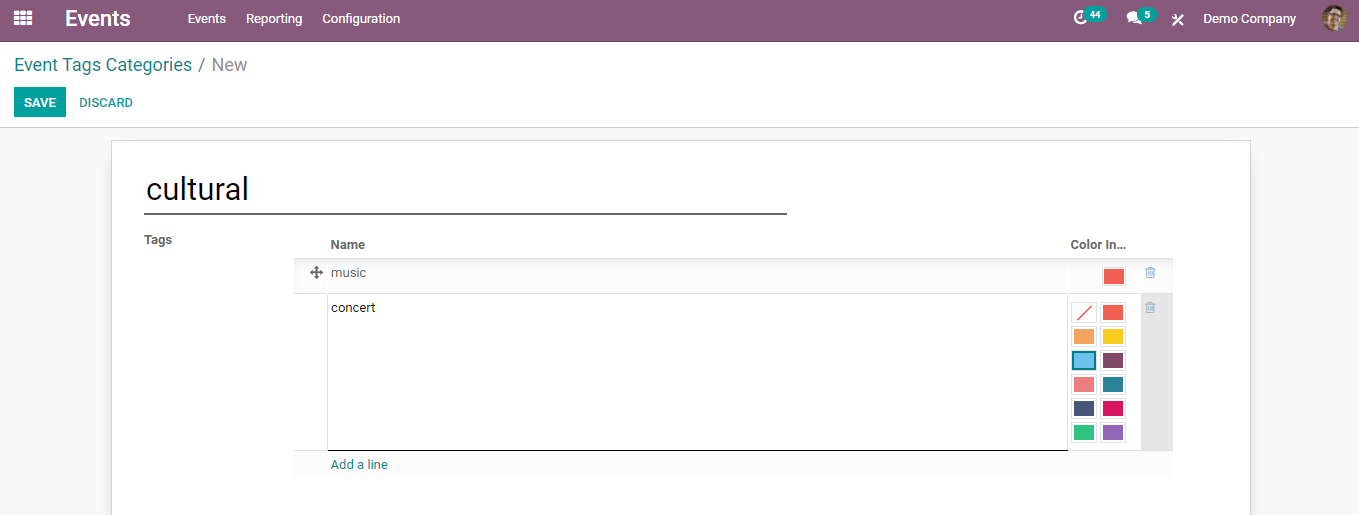
Give a name to the type of your tag and add new tags to this type using the ‘Add a Line’ option. You can also pick various colors for the tags. Save the tag category once you have done these steps.
These are the configurations available in the Events module in the Odoo and you can make use of each of them to create a new event efficiently.