In order to sustain a beneficial relationship with customers, a company must ensure the best customer service options for their customers. Providing an adequate platform to collect queries from customers both online and offline will help a company to easily analyze the responses about their products and services and take necessary actions to solve the reported issues. The companies in the field of service sector have to face a high level of customer enquiries on a daily basis. It is a tough challenge to manage all these queries and give responses to them within a specific time frame. In such cases, Odoo can provide you with great assistance in managing all queries from customers in an effective and efficient manner.
In the Odoo ERP system, you can find the Helpdesk module which is basically a customer service method based on the ticket system. You can set up a platform to collect customer queries on your company website. A customer can ask questions and seek help from experts on the specified platform on your company website. The queries will be recorded as tickets in the Odoo Helpdesk module and the assigned helpdesk team can provide support to the customer using this module. This dedicated module ensures to keep the relationship with customers fruitful. They can submit their questions, issues, and complaints to get a clear response from the company.
Odoo Team developed the Help Desk module for the smooth dealing of customer queries without any complications and delay in action. By considering the requirement of an effective system for customer service, Odoo has included many advanced tools in this module to guarantee the best customer-company interaction.
This blog will give you an insight into the overview of the Helpdesk module in Odoo 15.
The Help Desk module basically works based on a ticket system. Customer's queries will be registered as tickets and the company can take required action on each ticket within a specified time. In Odoo, tickets can be registered in the Helpdesk module automatically with the help of various platforms. A customer can submit queries through Email, Live Chat, phone calls, and website forms. The Helpdesk module ensures direct conversion of recorded queries into tickets and assigns them to different helpdesk teams. It is also possible to register tickets directly in the Helpdesk module. With the help of SLA policies, Odoo helps the customer to get a response from the company on time. If the queries demand any kind of maintenance or repair request, you can directly create quotations from the ticket itself in this module.
In your database, you will get the icon for the Helpdesk module from the main dashboard of Odoo as marked in the screenshot below.
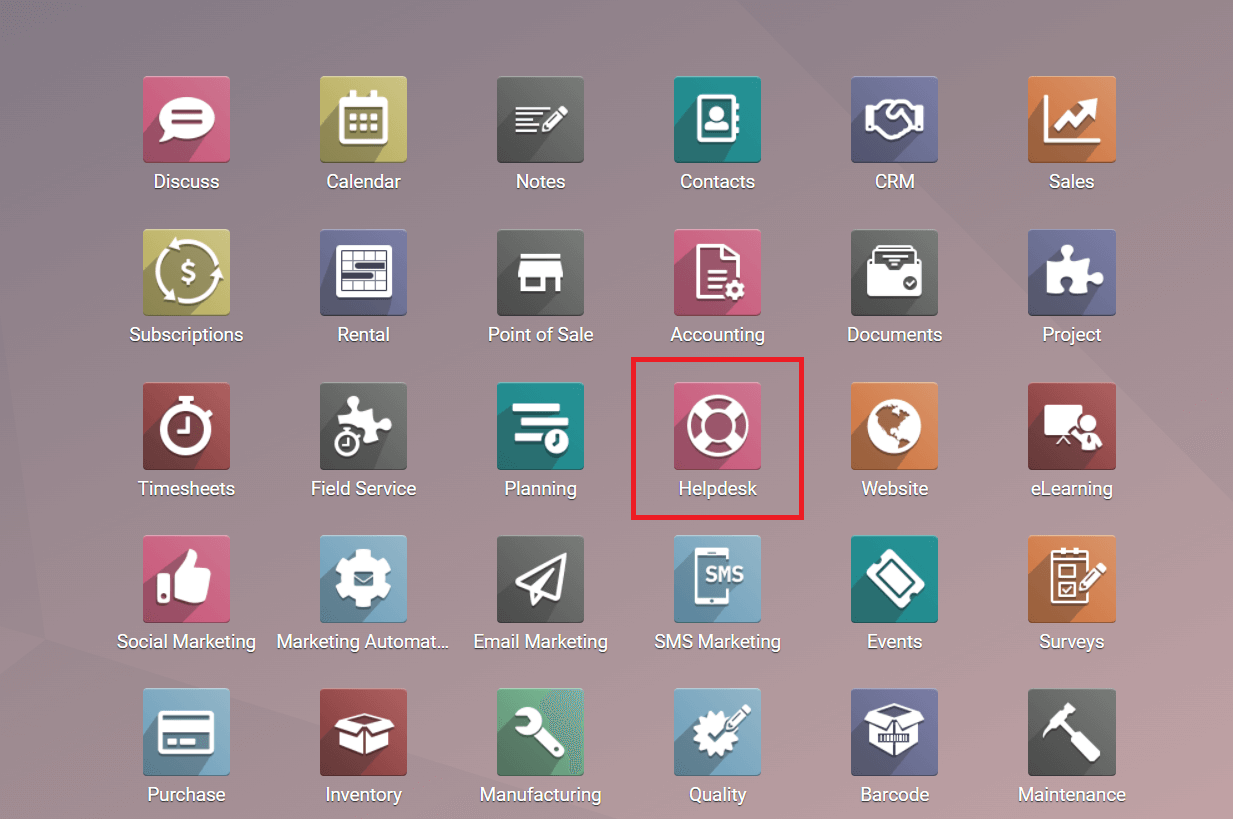
If it is not installed in your database, you can check for the module in the Odoo Appstore.

The moment you open the module, the display will show the Helpdesk Overview dashboard. In this module, you will get Overview, Tickets, Reporting, and Configuration menus in the main menu bar. As you can see in the screenshot above the Overview platform shows different tabs for different helpdesk teams and your performance details.
The Filters and Group By options will help the user to sort the data available on the dashboard.
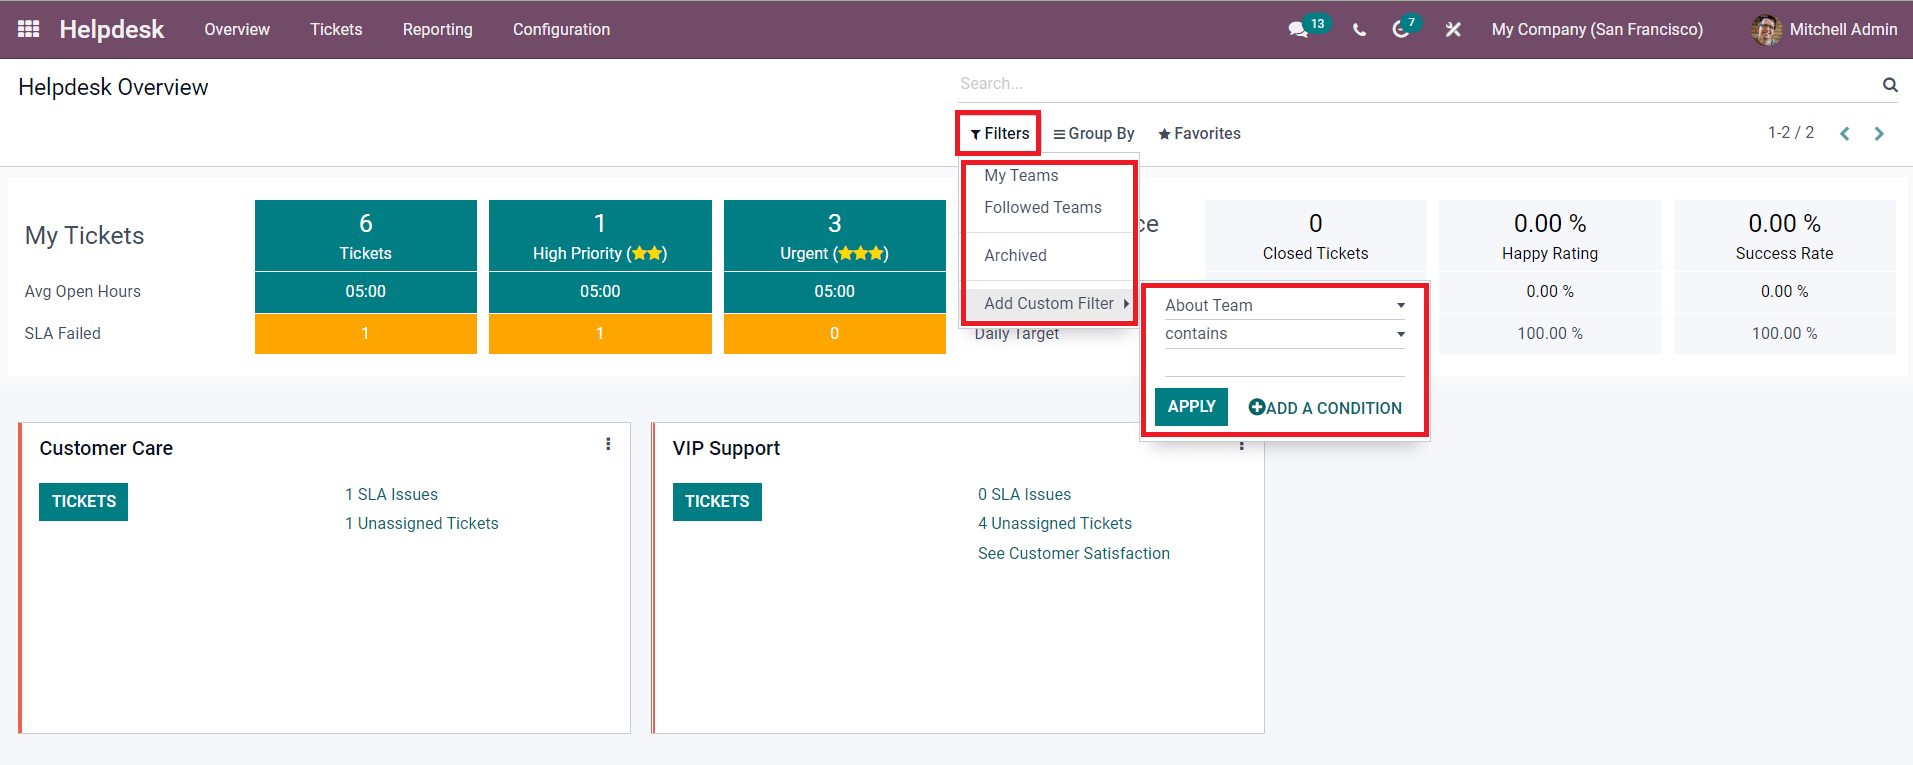
You can filter the data based on your team, followed team, and archived using the default filtering option. You can customize new filters using the Add Custom Filter option. Similarly, the Group By option will help you to group the data based on the configured company using the default option.
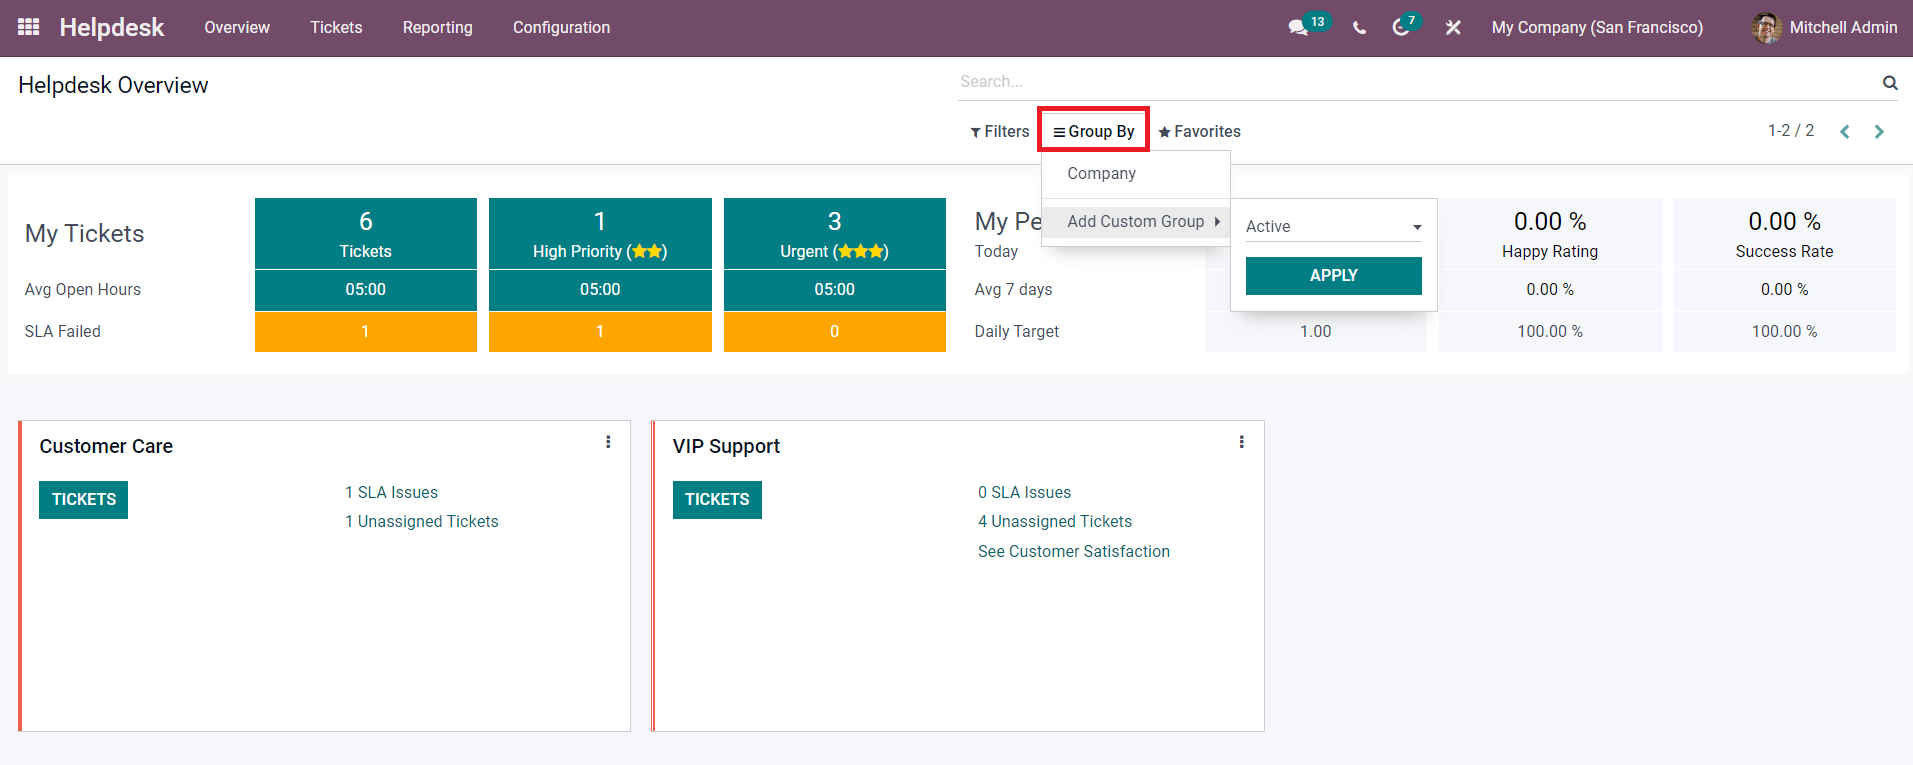
The Add Custom Group option will help you to add new criteria for grouping the data available on the Helpdesk Overview window.
The user will get the number of tickets assigned for him/her from this overview. The number of tickets according to their priority such as low priority, high priority, and urgent can be also seen in the window as marked in the screenshot below. You can prioritize tickets by giving stars to them while managing the tickets.
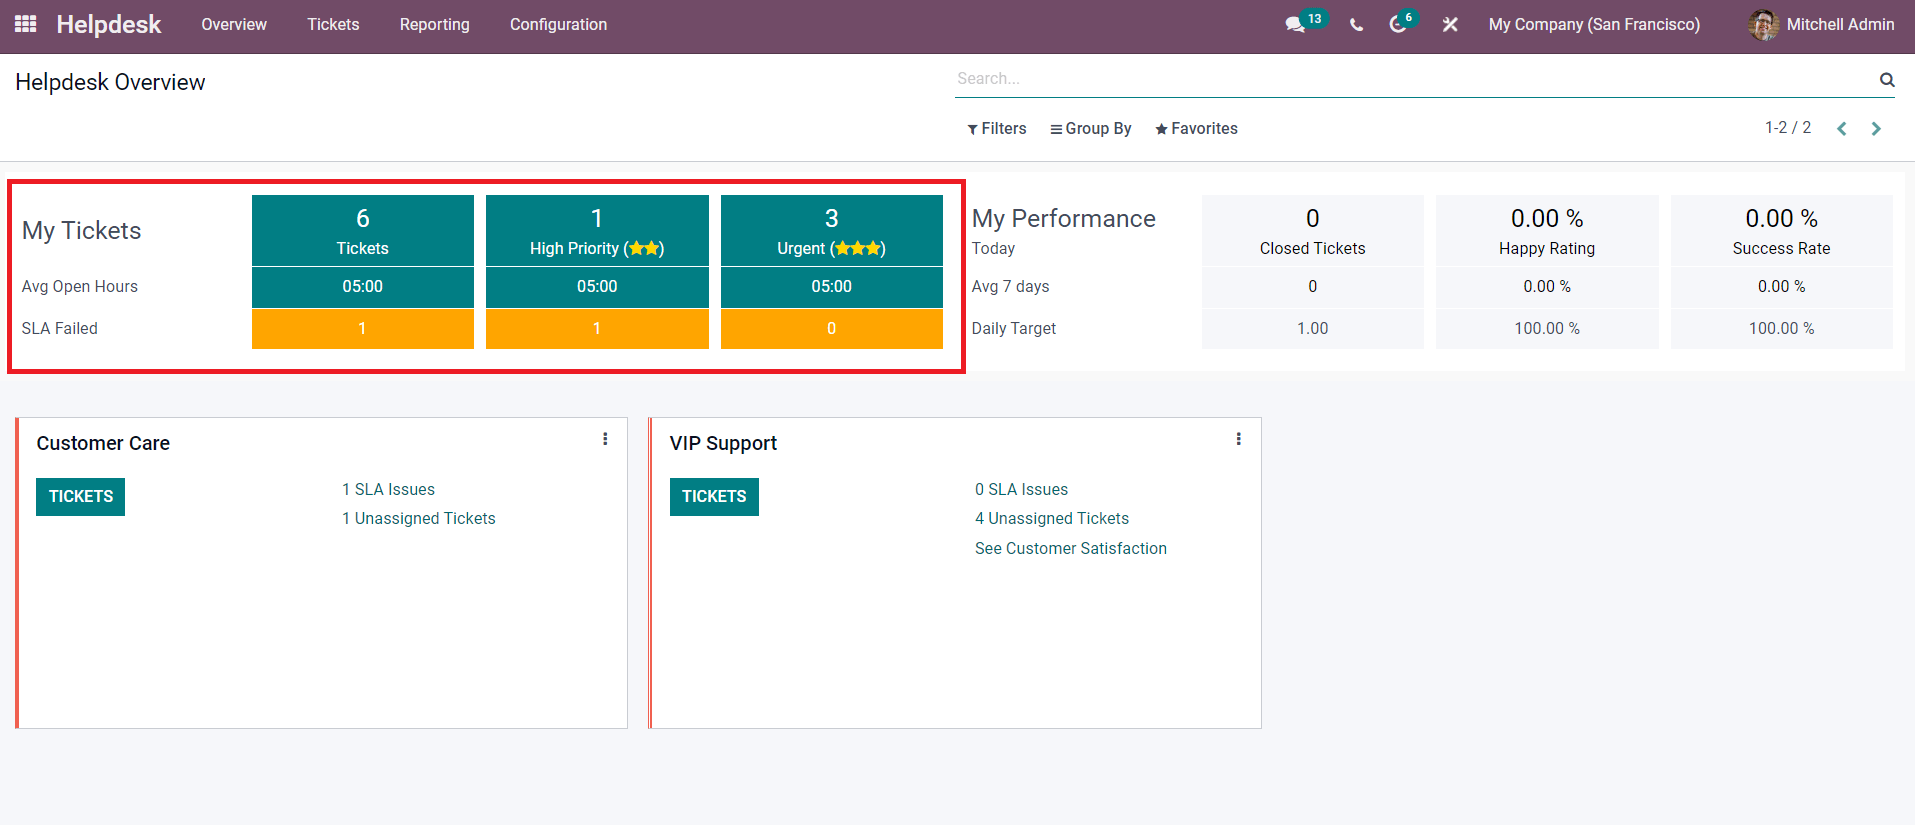
The average processing hours required for closing the open tickets can be seen under each type of ticket. The window also displays the number of failed SLAs in each type of ticket. To get more details about the tickets assigned for you, you can click on the number of tickets shown in the My Tickets field. A new window will appear with a list of all your open tickets.

The list includes the Name, Helpdesk Team, Assigned To, Customer, Company, Next Activity, Priority, SLA Deadline, and Stage of each ticket. You can select one ticket from this list and take the necessary action required to close that ticket.
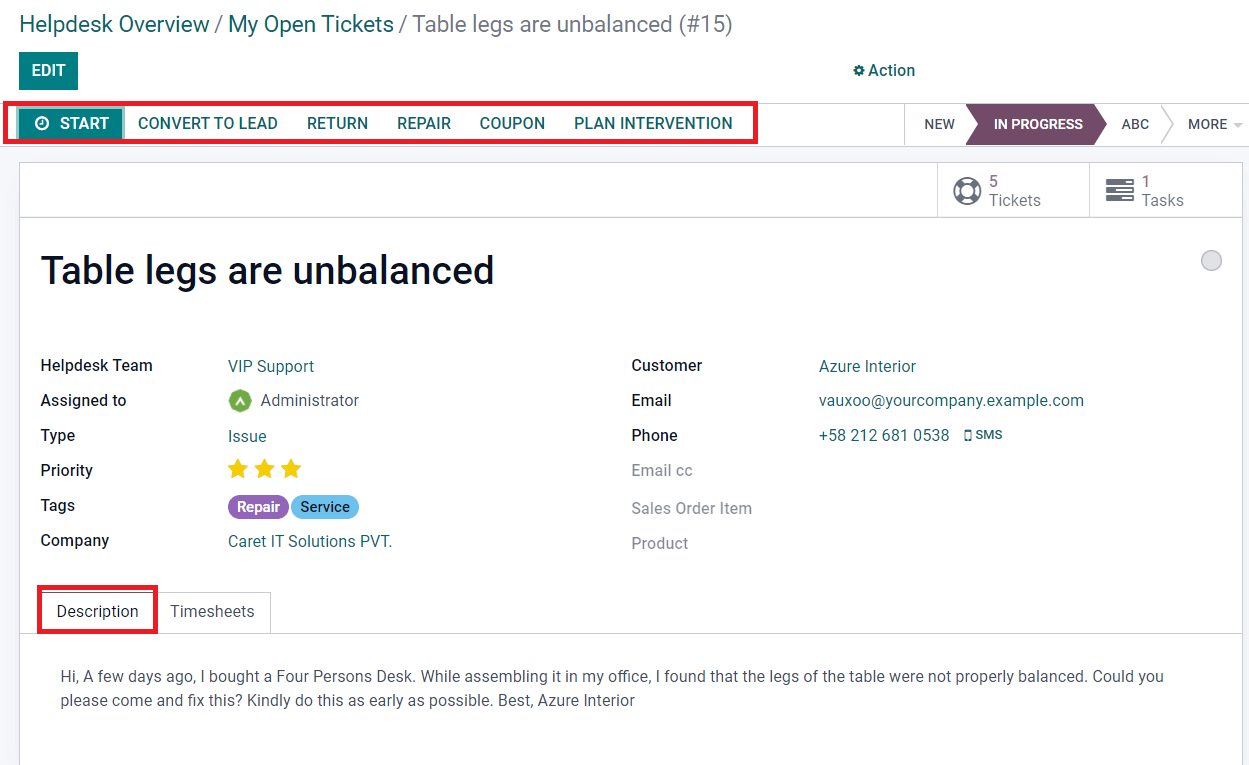
The ticket management window will give options to create a new lead from this opportunity, return the product, generate repair orders, coupons, and new quotations for field service. The Description tab shows the issue reported by the customer.
To get the details about the failed tickets, you can click on the number of tickets shown in the SLA Failed field as marked in the screenshot below.
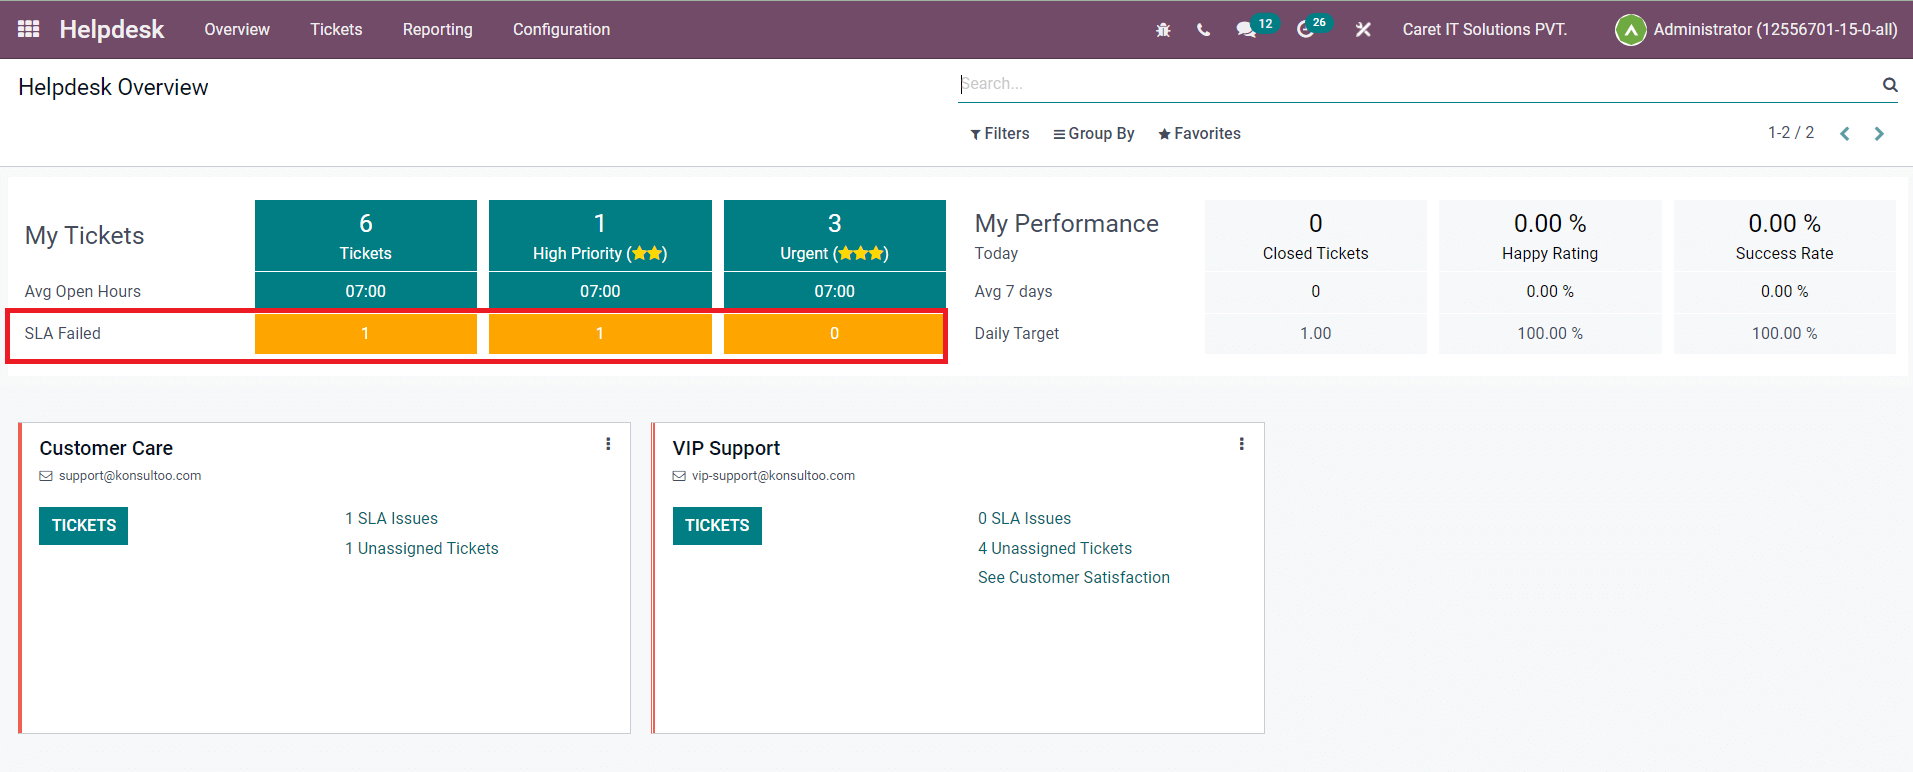
You will get the list of all failed tickets as shown below and you can manage them from this window.

It is easy to analyze your performance from the Overview dashboard itself. The My Performance field will show the total number of Closed Tickets, Happy Rating from customers, and the percentage of tickets that were closed without failing any SLAs.
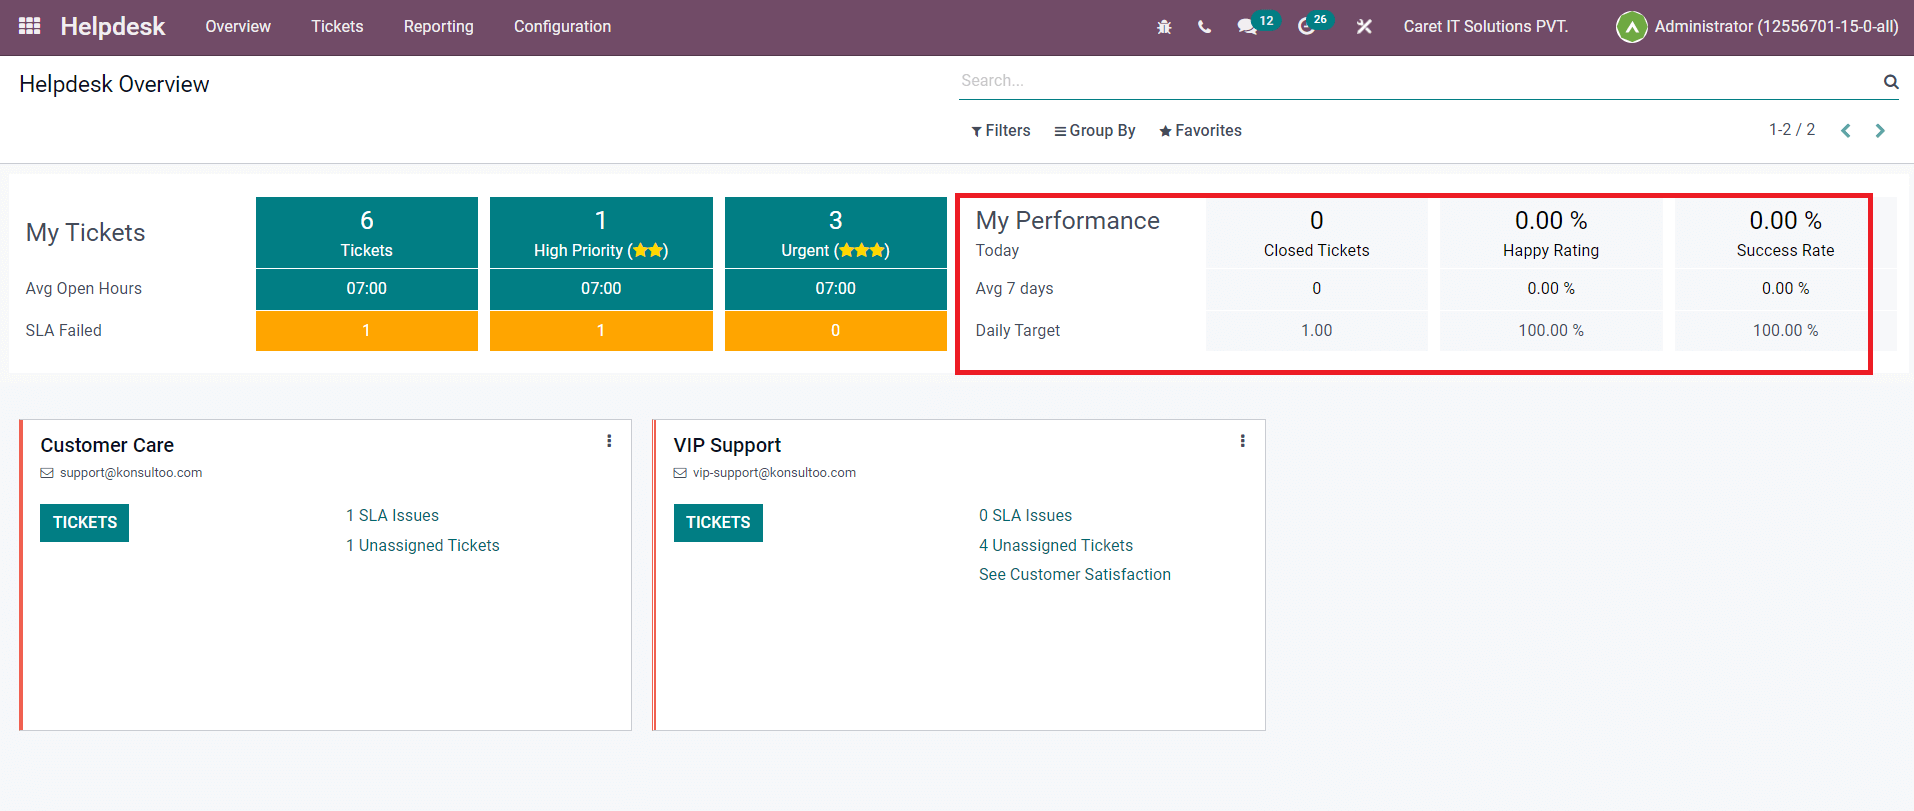
You can also observe the number of closed tickets in average 7 days and the daily target in the Helpdesk Overview.
Now, let’s take a look at the overview of the Helpdesk Team on this platform. As you can see in the image below, Odoo will display the helpdesk teams configured in the Helpdesk module in separate tabs. The Tickets option will give a detailed view of the assigned tickets for the concerned team. The option to view SLA Issues, Unassigned Tickets, and Customer Satisfaction can be seen in each tab.
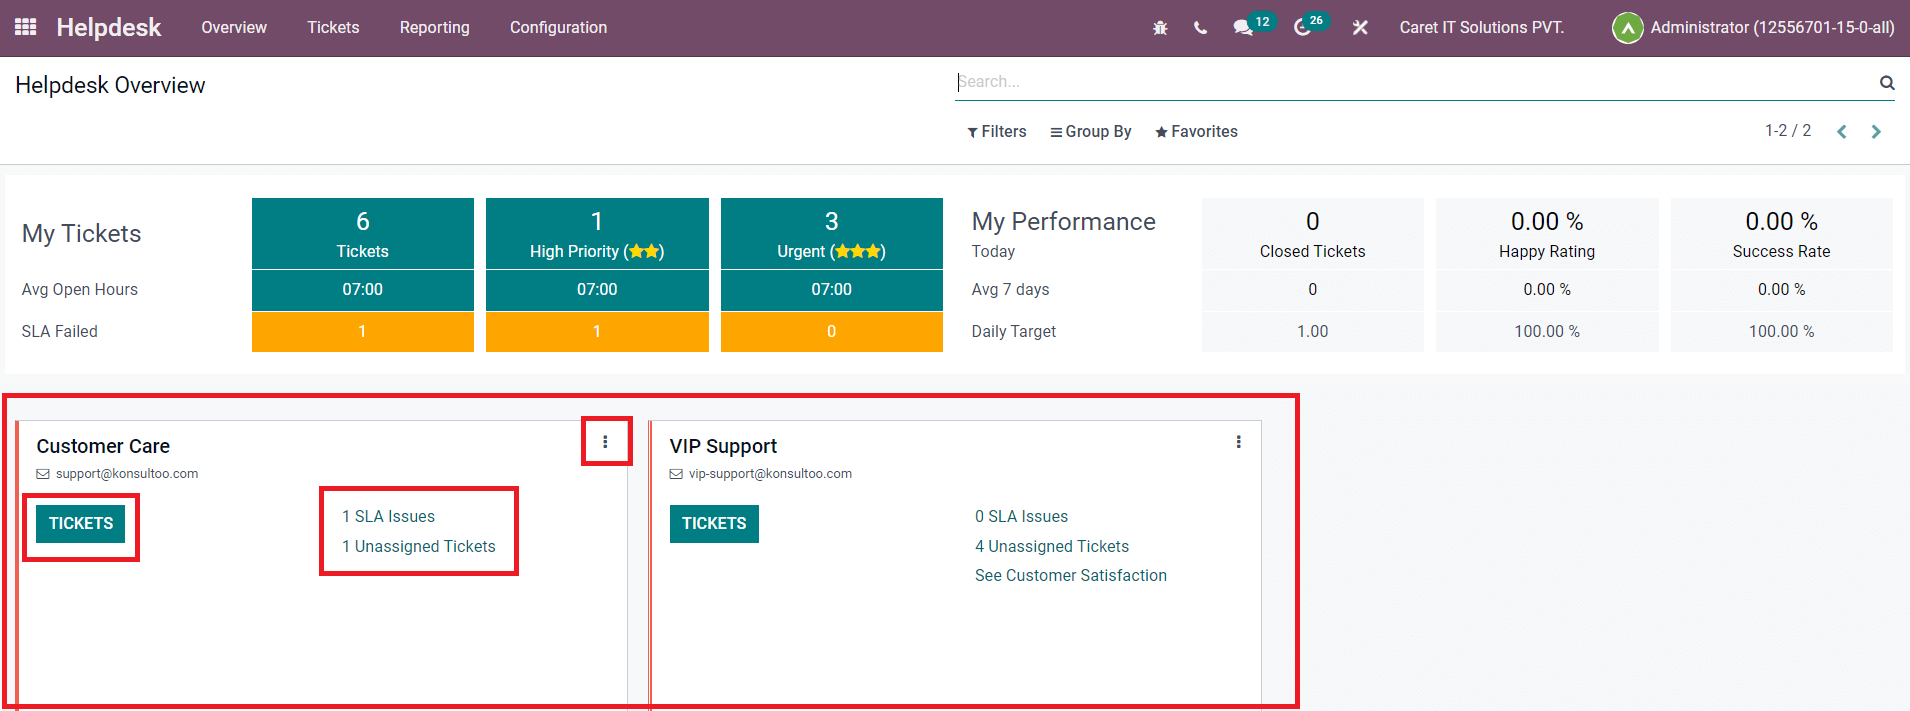
Click on the Tickets button from any of the helpdesk teams to manage tickets assigned for that particular team.

The Kanban view of the tickets platform shows all tickets of the selected team. The tickets are arranged in different stages according to their progression. In order to create a new stage, you are allowed to use the Add a Column button. You can select a ticket from this platform and take action accordingly. The Create button marked in the screenshot will help you to register a new ticket manually for this particular helpdesk team.
Now, the Settings option for the helpdesk team displayed on the Helpdesk Overview window can be found using the three vertical dots shown on the top right corner of each tab.
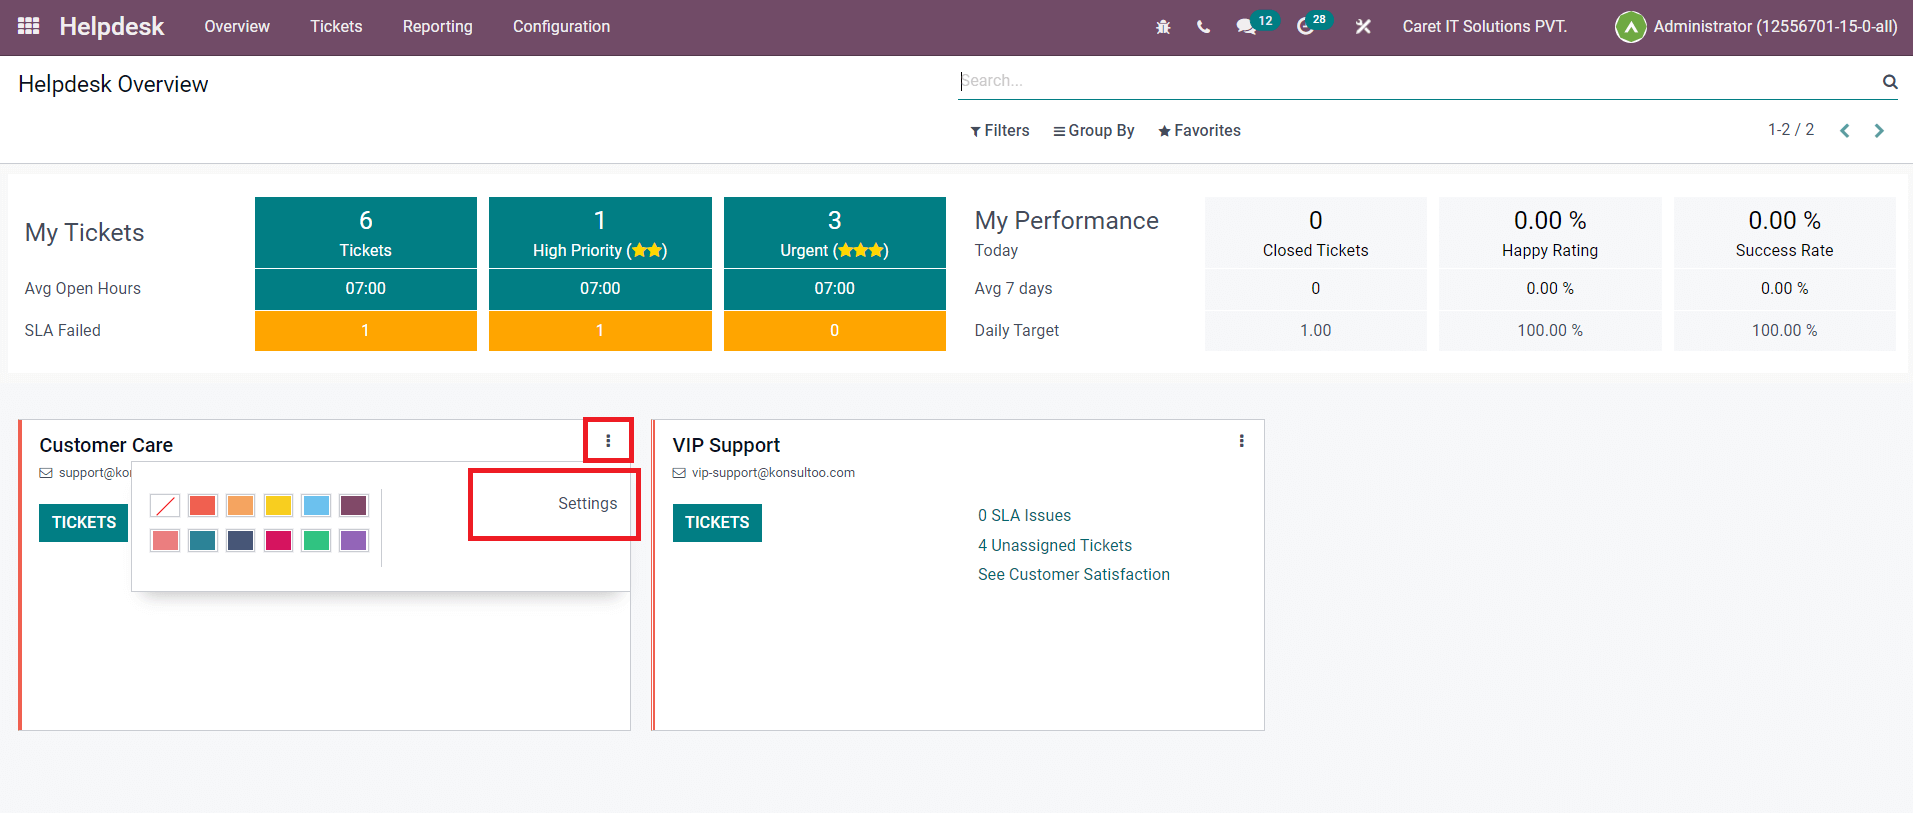
This option will help you to make changes in the details of the selected helpdesk team. Using the Overview platform in the Odoo Helpdesk module, you can easily monitor almost all operations in the module effortlessly.