To ensure the quality of products, the users need to check the quality during every operation. So Odoo 16 provides a perfect tool to do such quality checks, known as a Quality Module. The quality module is an essential part of company operations, which is mainly focused on maintaining the quality of products in every operation. It offers comprehensive tools to ensure proper monitoring of quality control, conduct different types of quality checks, and manage perfect actions to solve problems.
Users can easily install the Odoo quality module from the Apps.
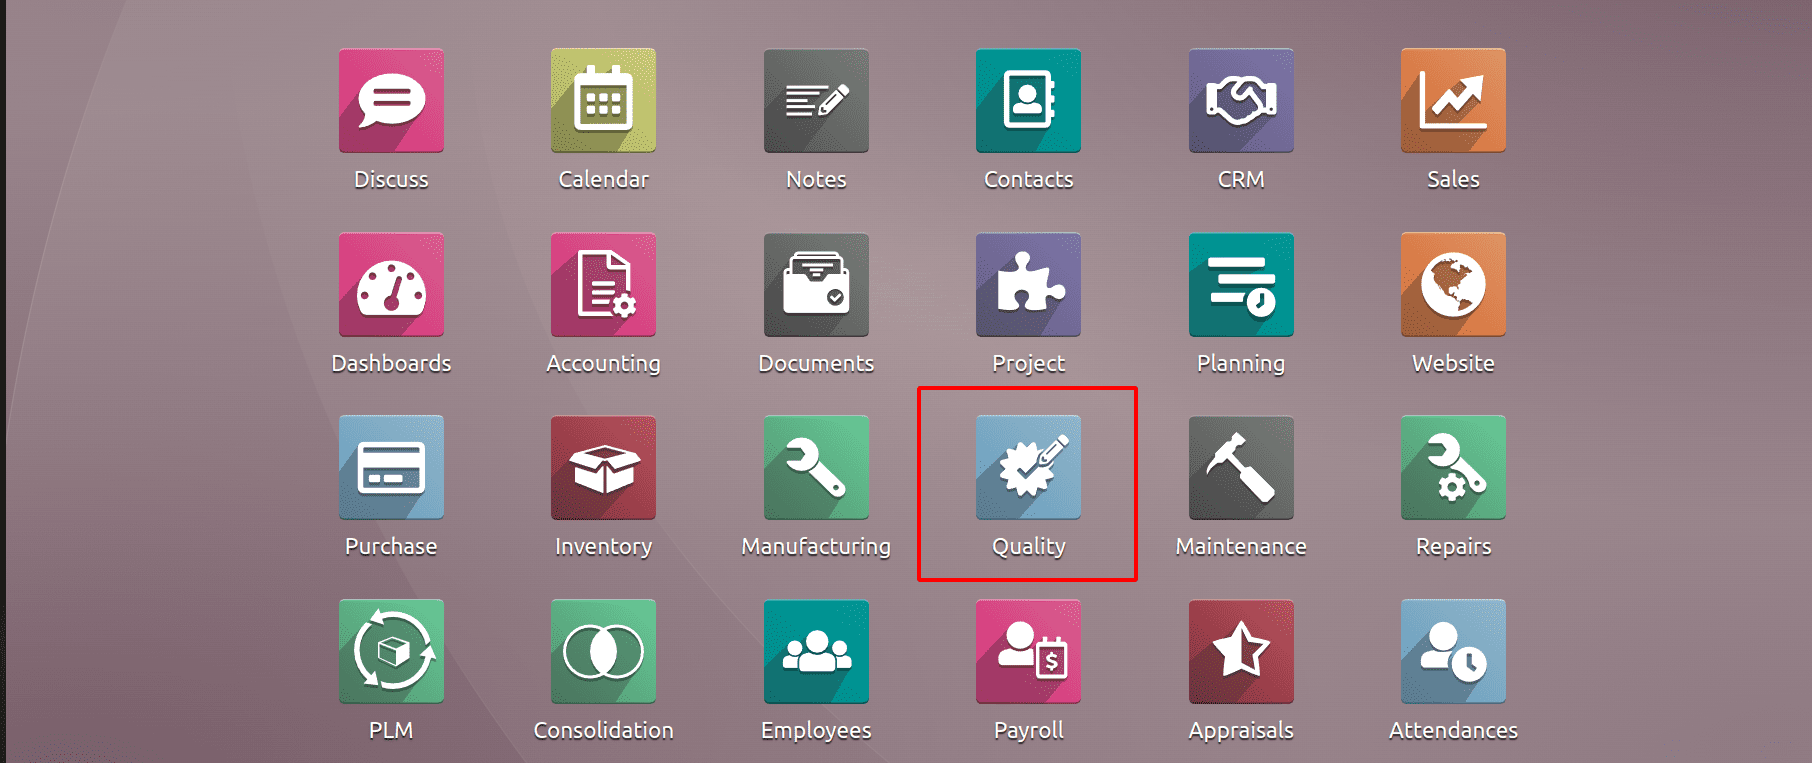
Quality Control Points
Quality control points help to achieve the stages where an item needs to be checked. Finding methods for evaluating a product's quality is simple. Choose the Control Points menu from the Quality Control tab to get these requirements.
: Quality control > Control Points > New

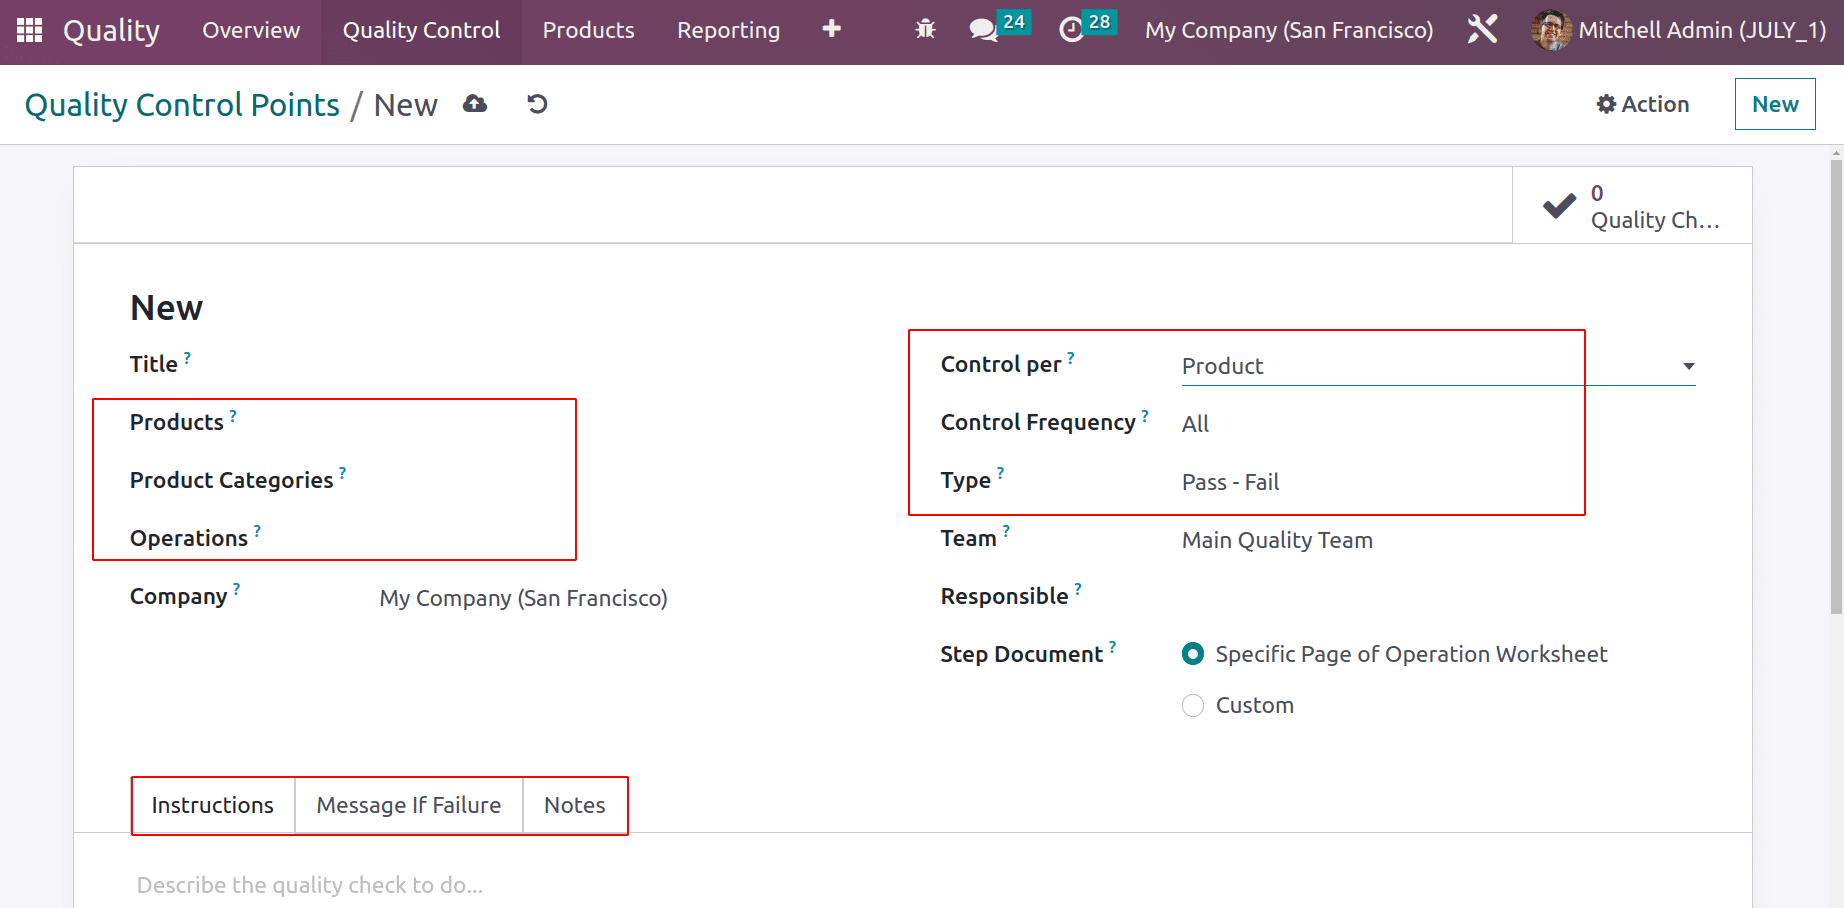
Quality control points can be created from there. Add a title for the quality control point. Adding quality checks for products, product categories, and operations is possible. Add the company name, quality team, responsible person, etc.
The instructions about the quality check can be added inside the Instructions tab. If the quality check fails, a message can be shown. This message can be added inside the Message Failure tab. Additional notes are also added in the Notes tab.
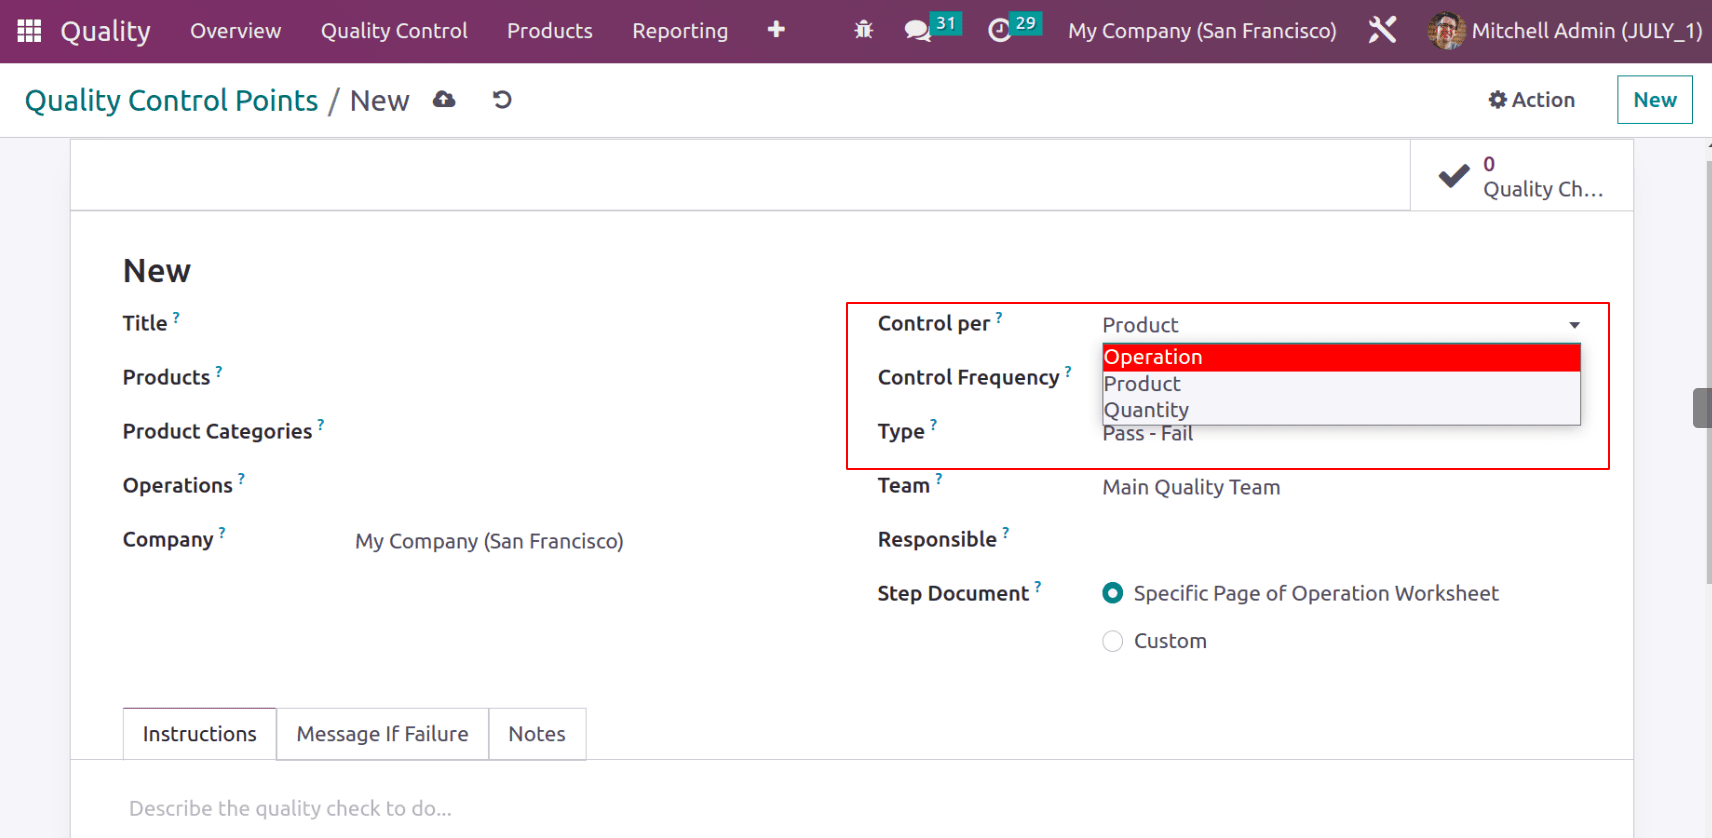
Control per product, Operation, and quantity are available. If we choose an operation, then the quality check is requested at the operation level. Quality check is done at the product level by choosing the product. If the quantity is selected, then the quality check is requested for each new quantity registered, with partial quality checks also possible. Let's check each one separately later.
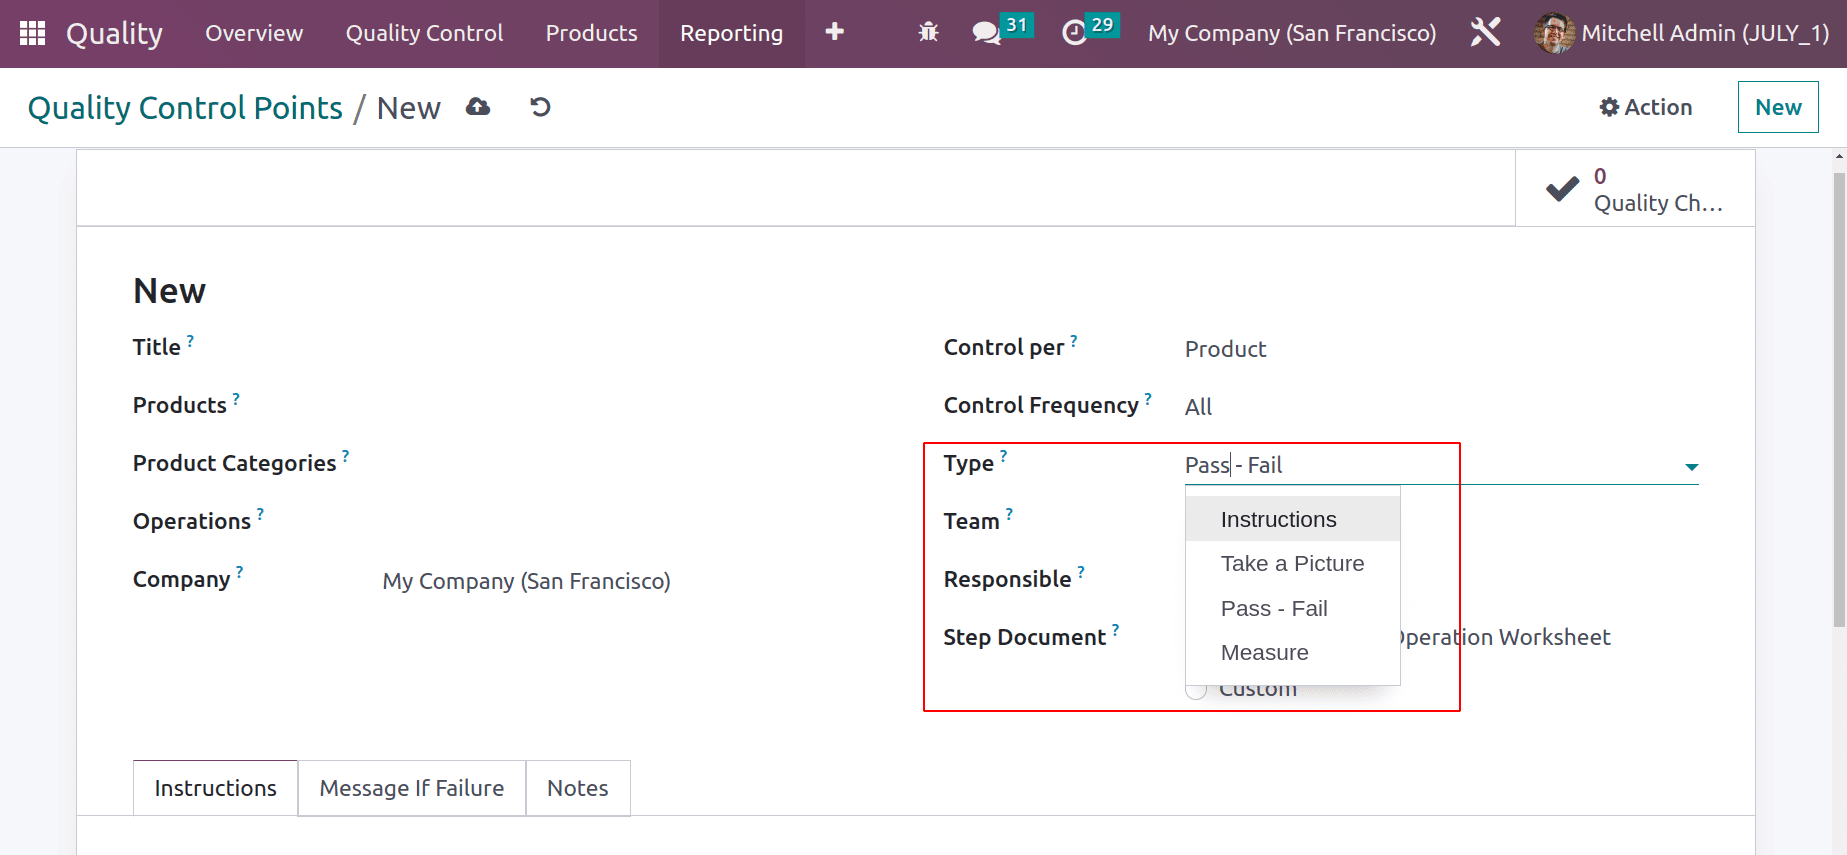
Different types of quality checks can be performed, based on the type of product.
Control Per Operation: The quality check happens on the operation. So Every time the chosen operation is performed, the quality checks will be done, which does not depend on the product.
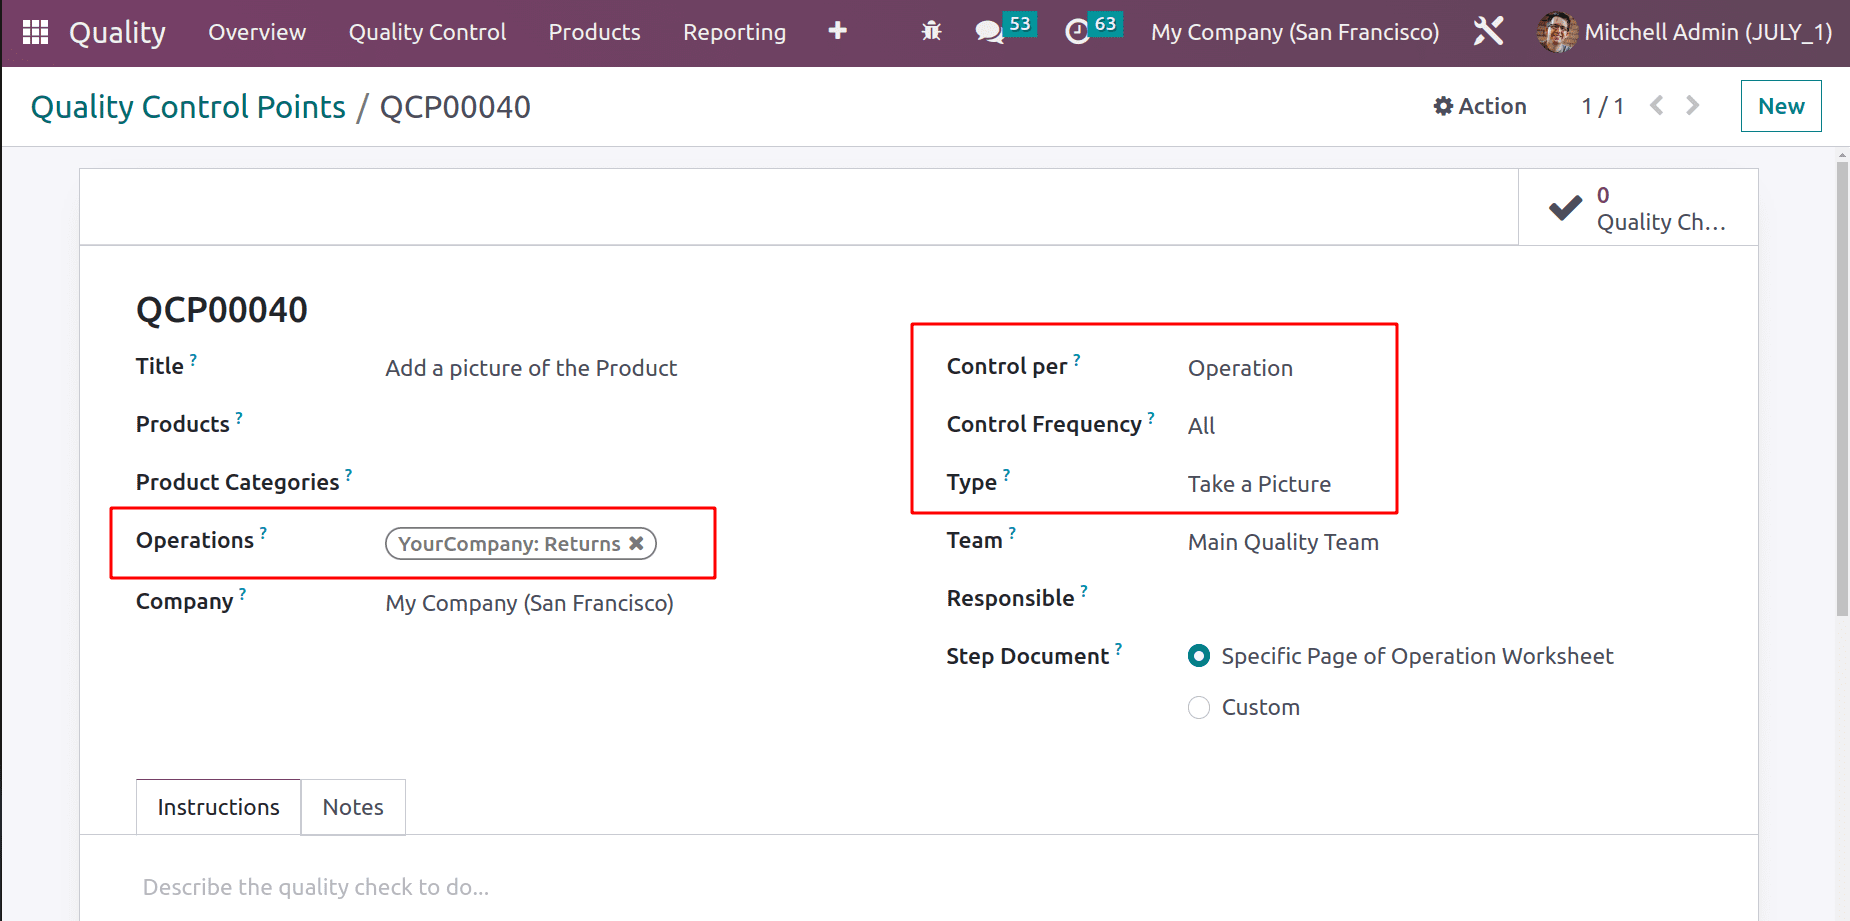
Here created a Control point. Control per is Operation. So the operation Return is mentioned on the Operation field. The quality check type is ‘Take a Picture’.
The quality checking type is Take a picture, which means if any customer returns the product, the user must add a picture to check the quality of the returned product. No product is mentioned here, which means it is for every product inside the company for the operation ‘Returns.’
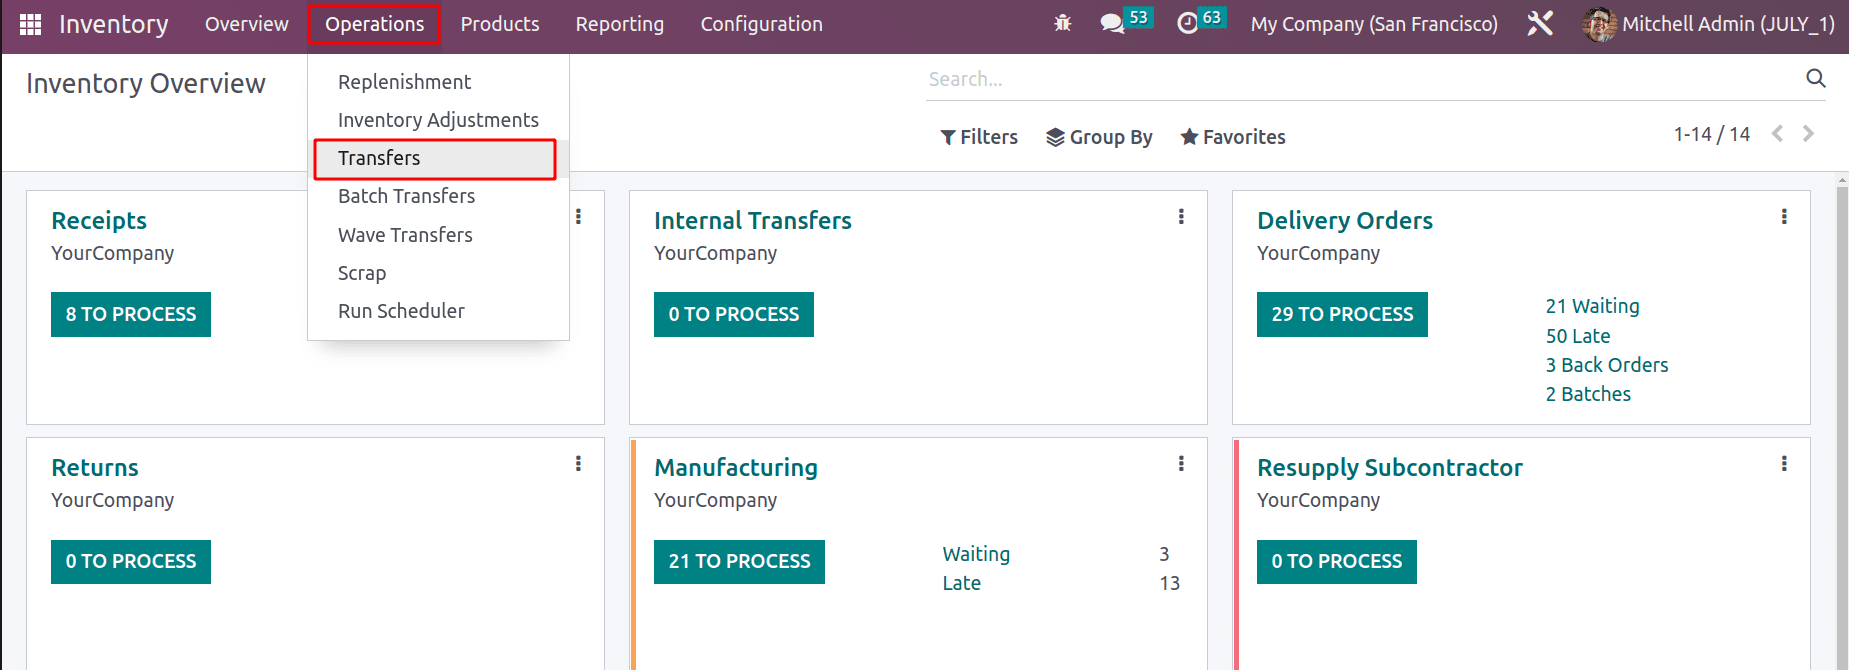
So let's create a Return operation. It is very easy by using the Inventory module. Go to the inventory module from the Operations tab and click the Transfer option.
: Inventory > Operations > Transfer
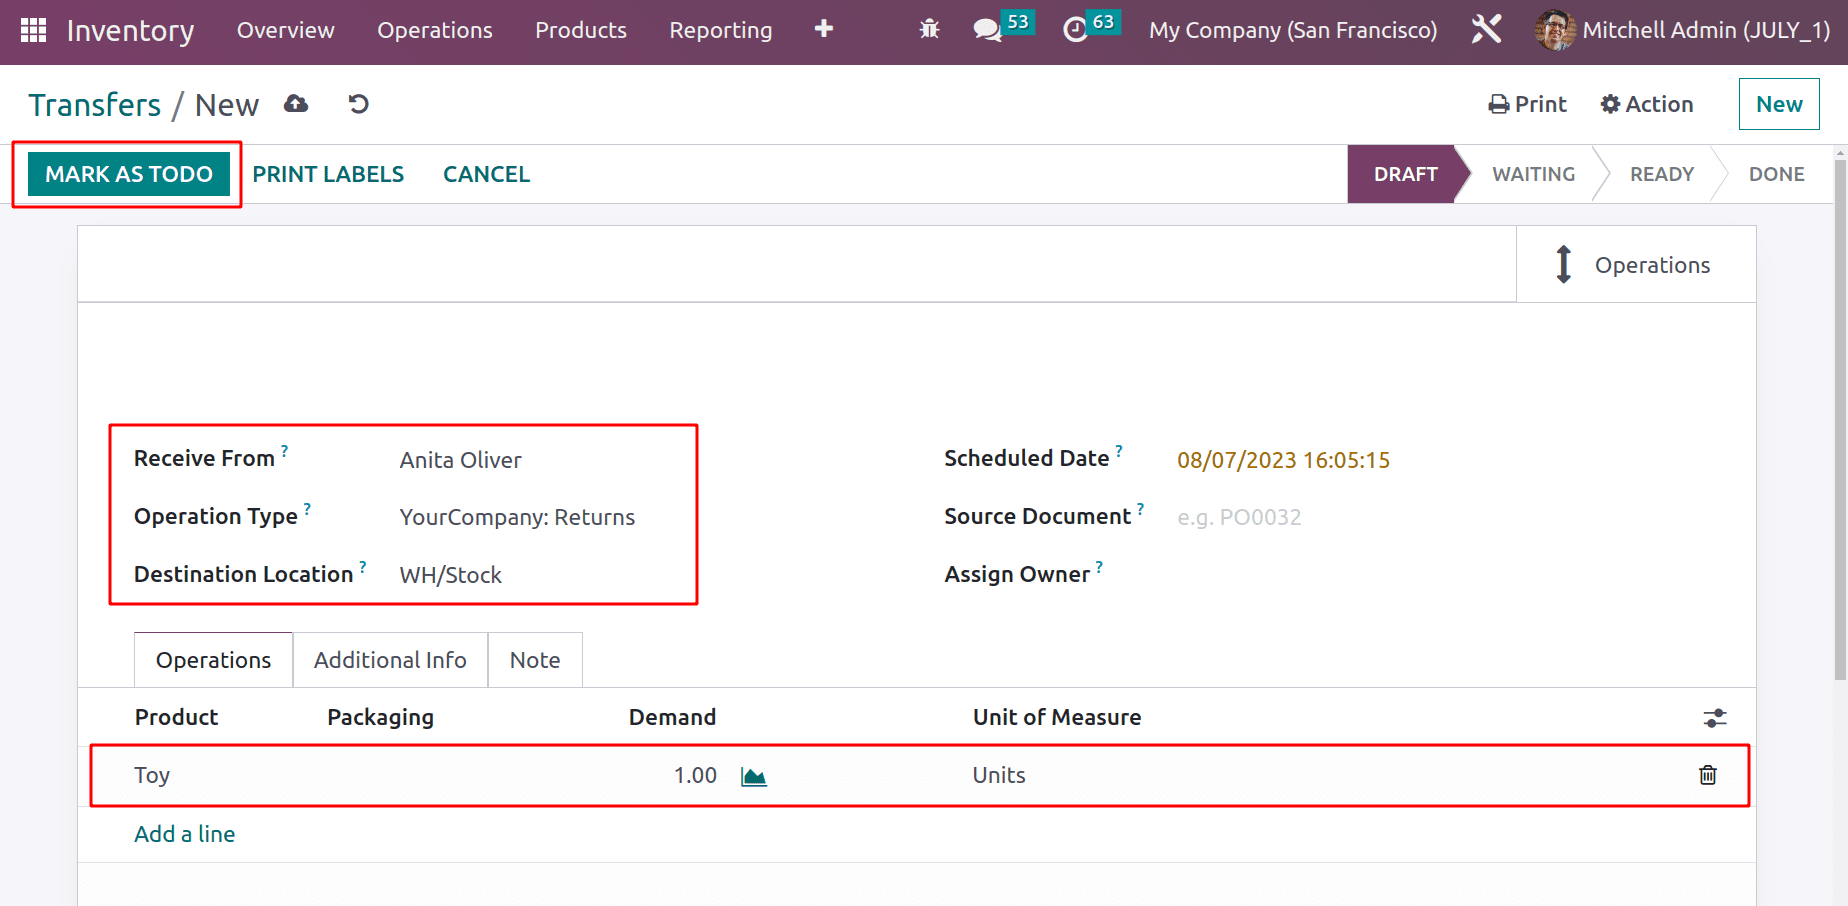
Then click on the NEW button. The created transfer said that the customer, Anita Oliver wishes to return the product ‘Toy’ of 1 quantity. The product is moved to the company stock location. To start the transfer, click the MARK AS TODO button.
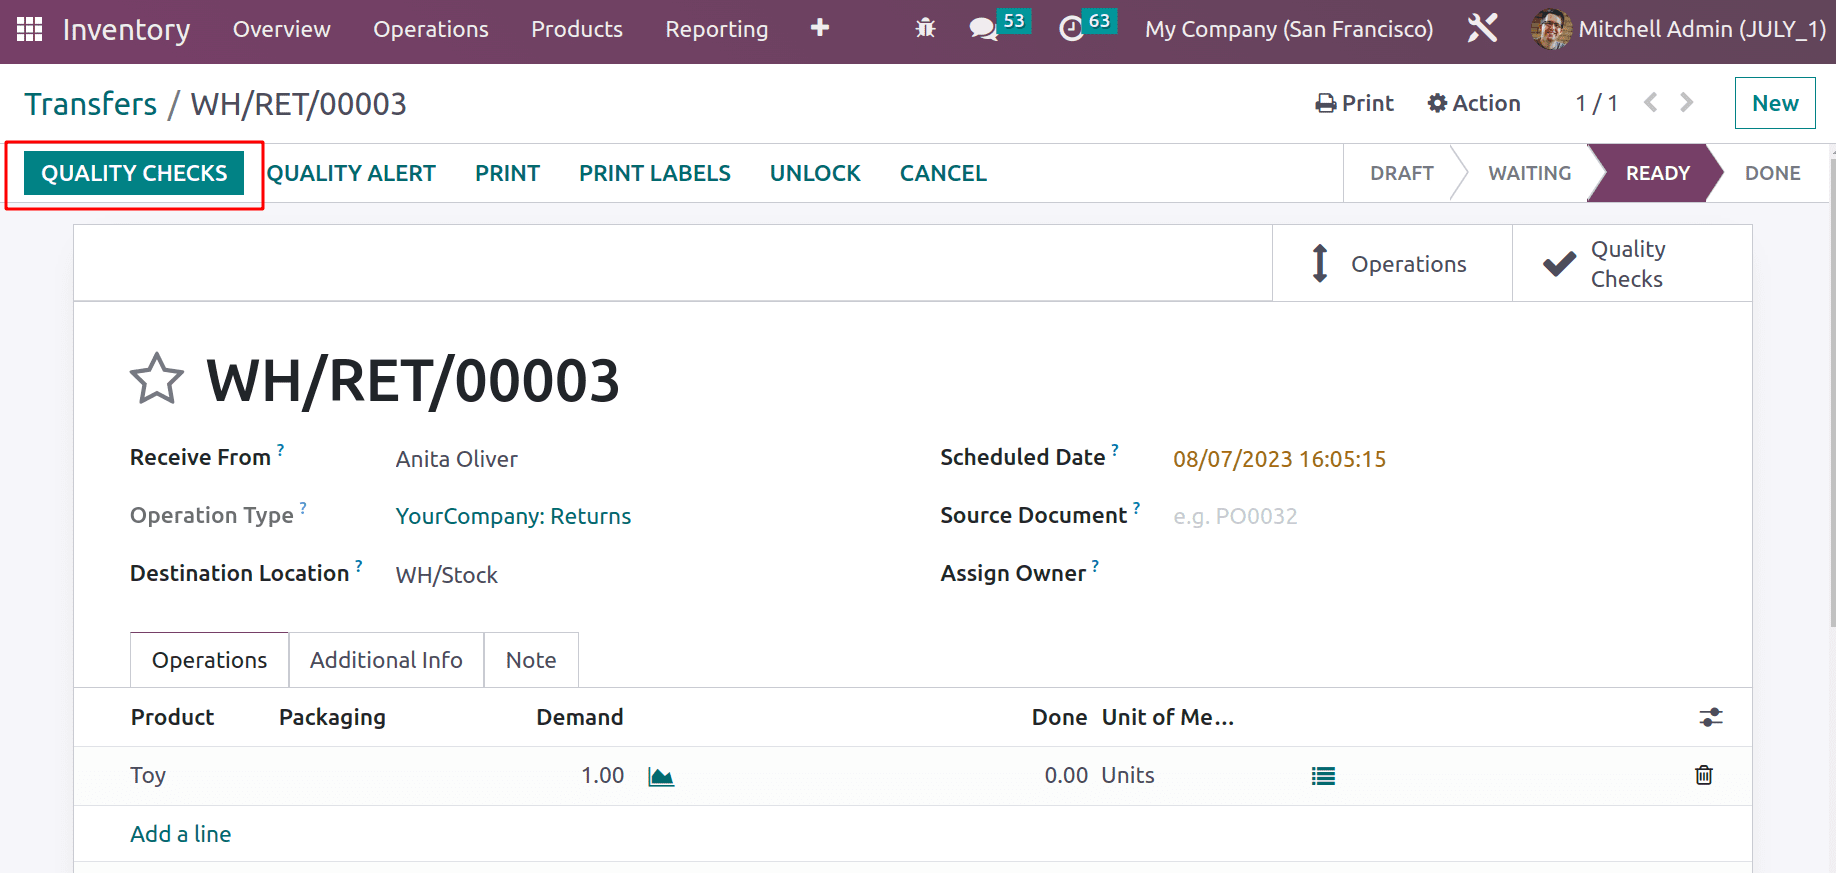
A button to check the quality of returned products will appear there. So click on the QUALITY CHECKS button to conduct the quality checking. Only after completing the quality checking the user can restock the product to the stock location.
The popup window is to do the quality check. The quality checking type is Add a Picture, so the user can add a picture of the product. So upload the picture there.
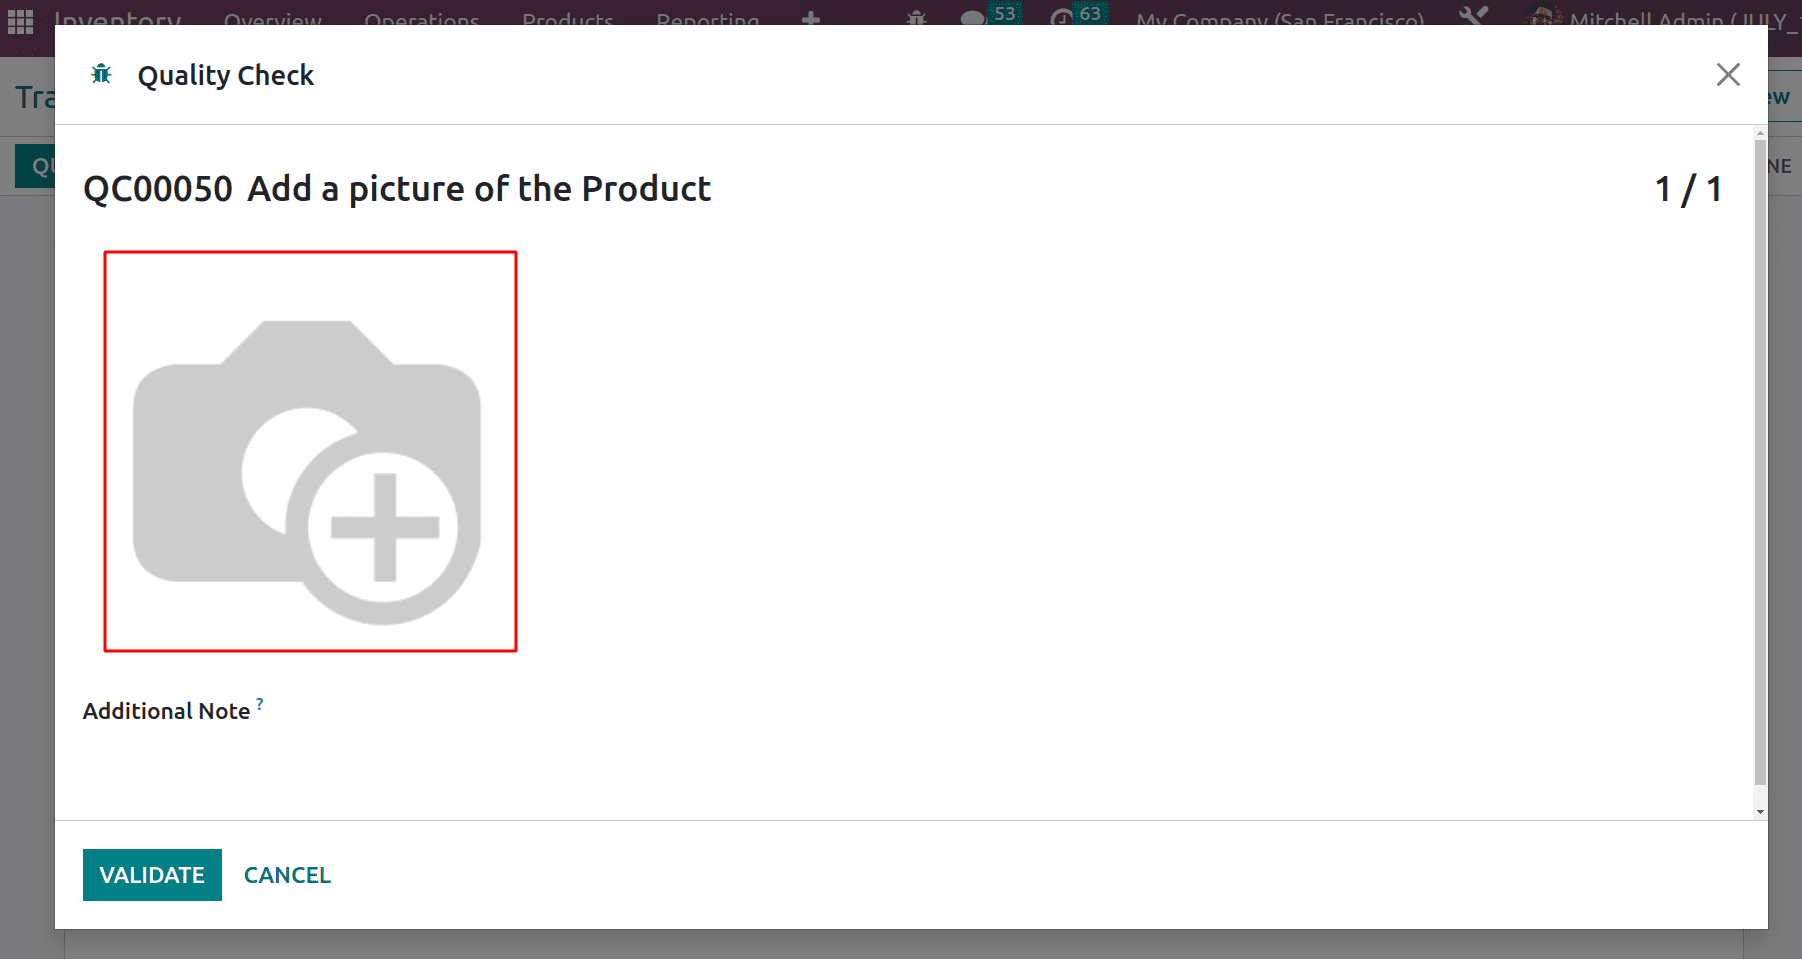
After adding the picture, click on the Validate button to complete the Quality checking. It is also possible to add any additional notes there.
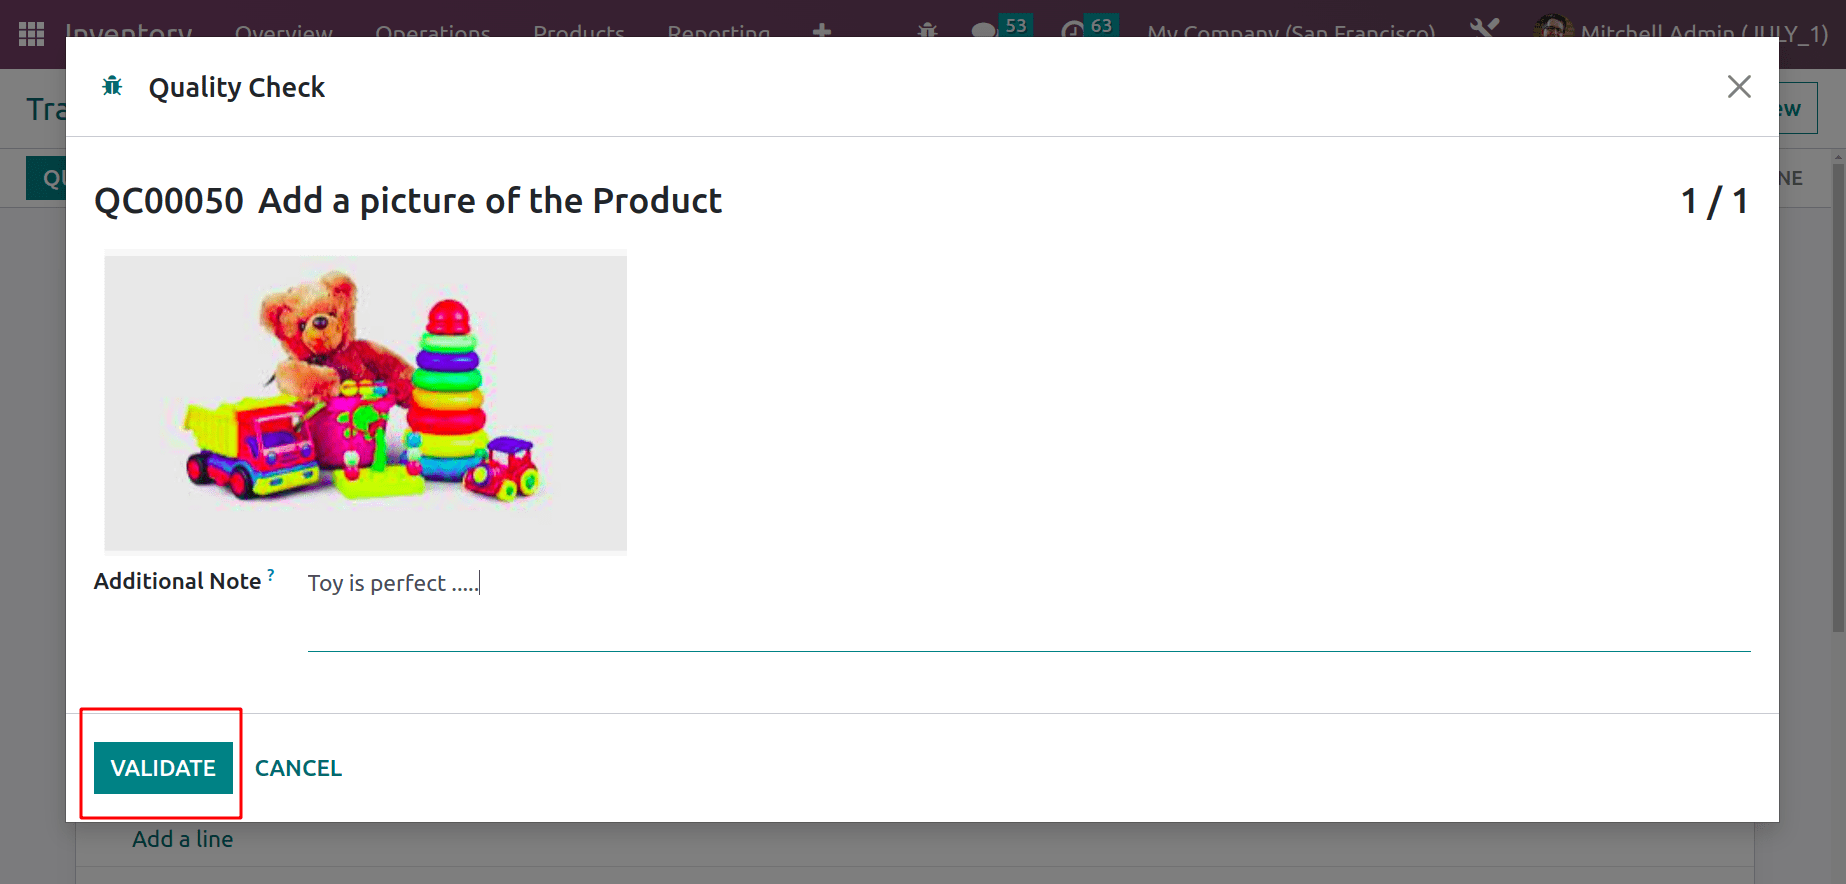
The output of quality checking shows that there are no issues with the product. So the user can validate the process. A green-colored smart tab named Quality Checks is shown there, the green color indicates that the quality check passed.
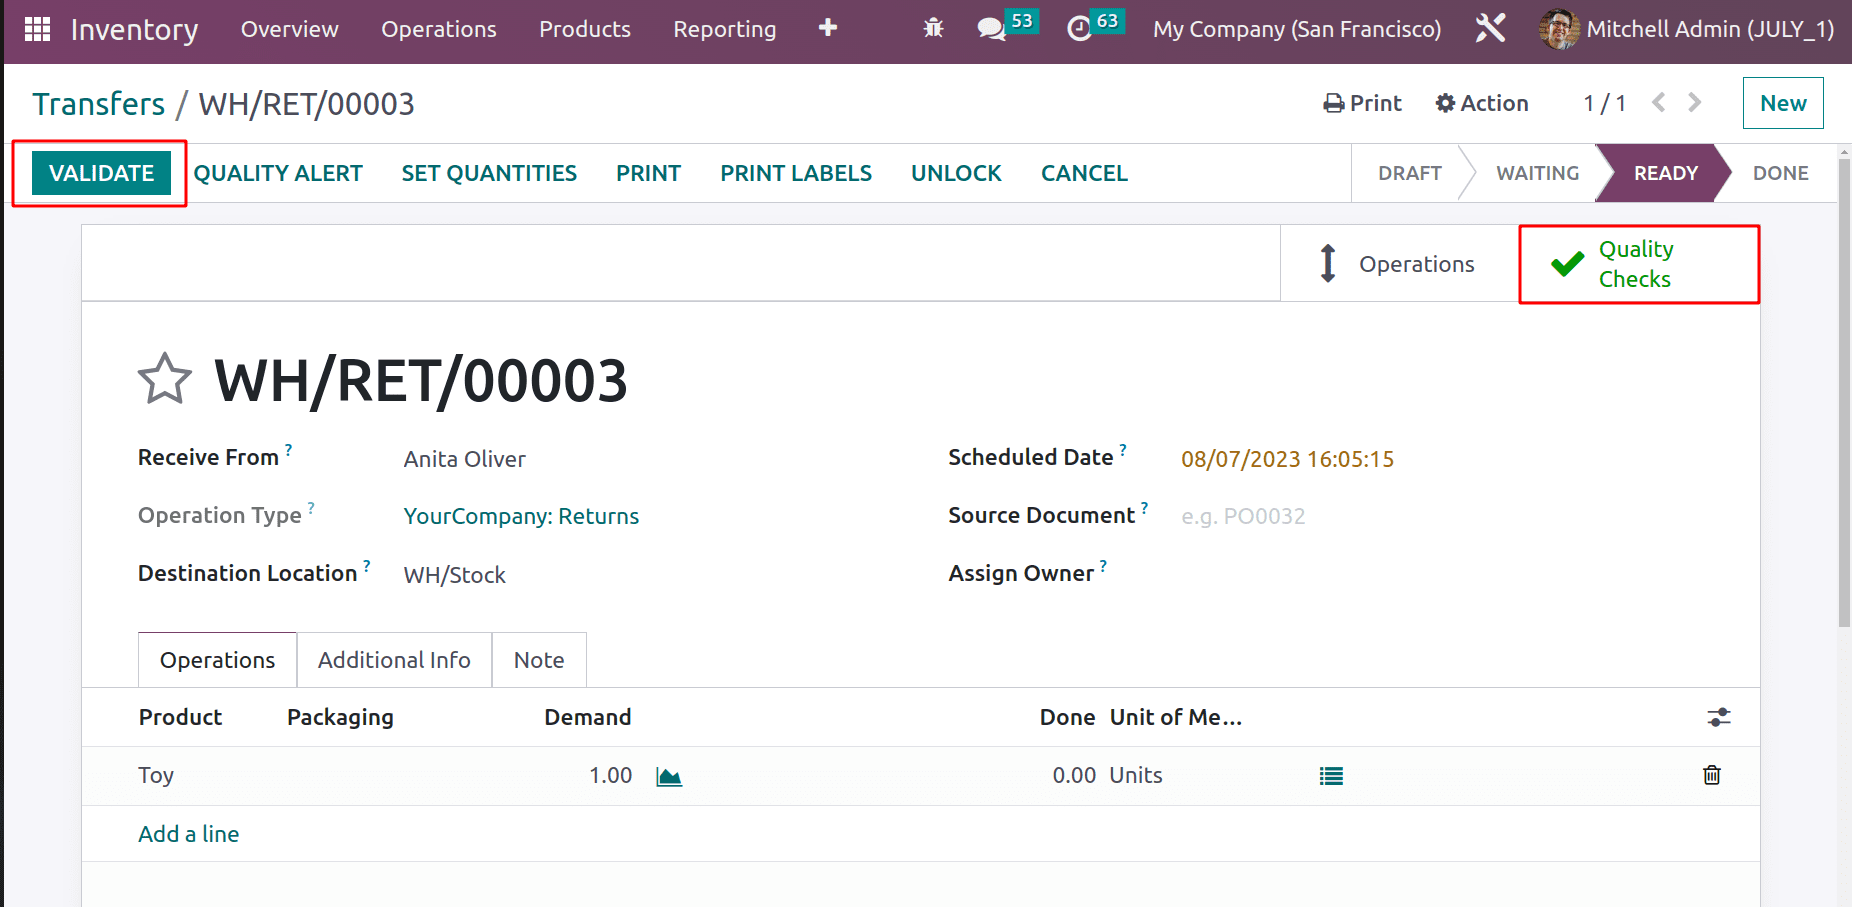
If any customer returns any product to the company, the user needs to check these quality checks because the control-point is per the Operation, so the quality check happens on every Return Operation.
Control Per Product: In this case, the quality checks happen on the product. This means here we mentioned an operation and a product. So when the mentioned operation happens on the mentioned product, a quality check is mandatory there to complete the operation.
Here created a new Quality control point for the product Acoustic Bloc Screen. The title was added as ‘Quality Control Point on Acoustic Bloc Screen’ and choose the product name in the section. The operation chosen is Internal transfer. This means when an internal transfer is created for the product Acoustic Bloc Screen, it will transfer from the source location to the destination only after completing the Quality Checks per product.
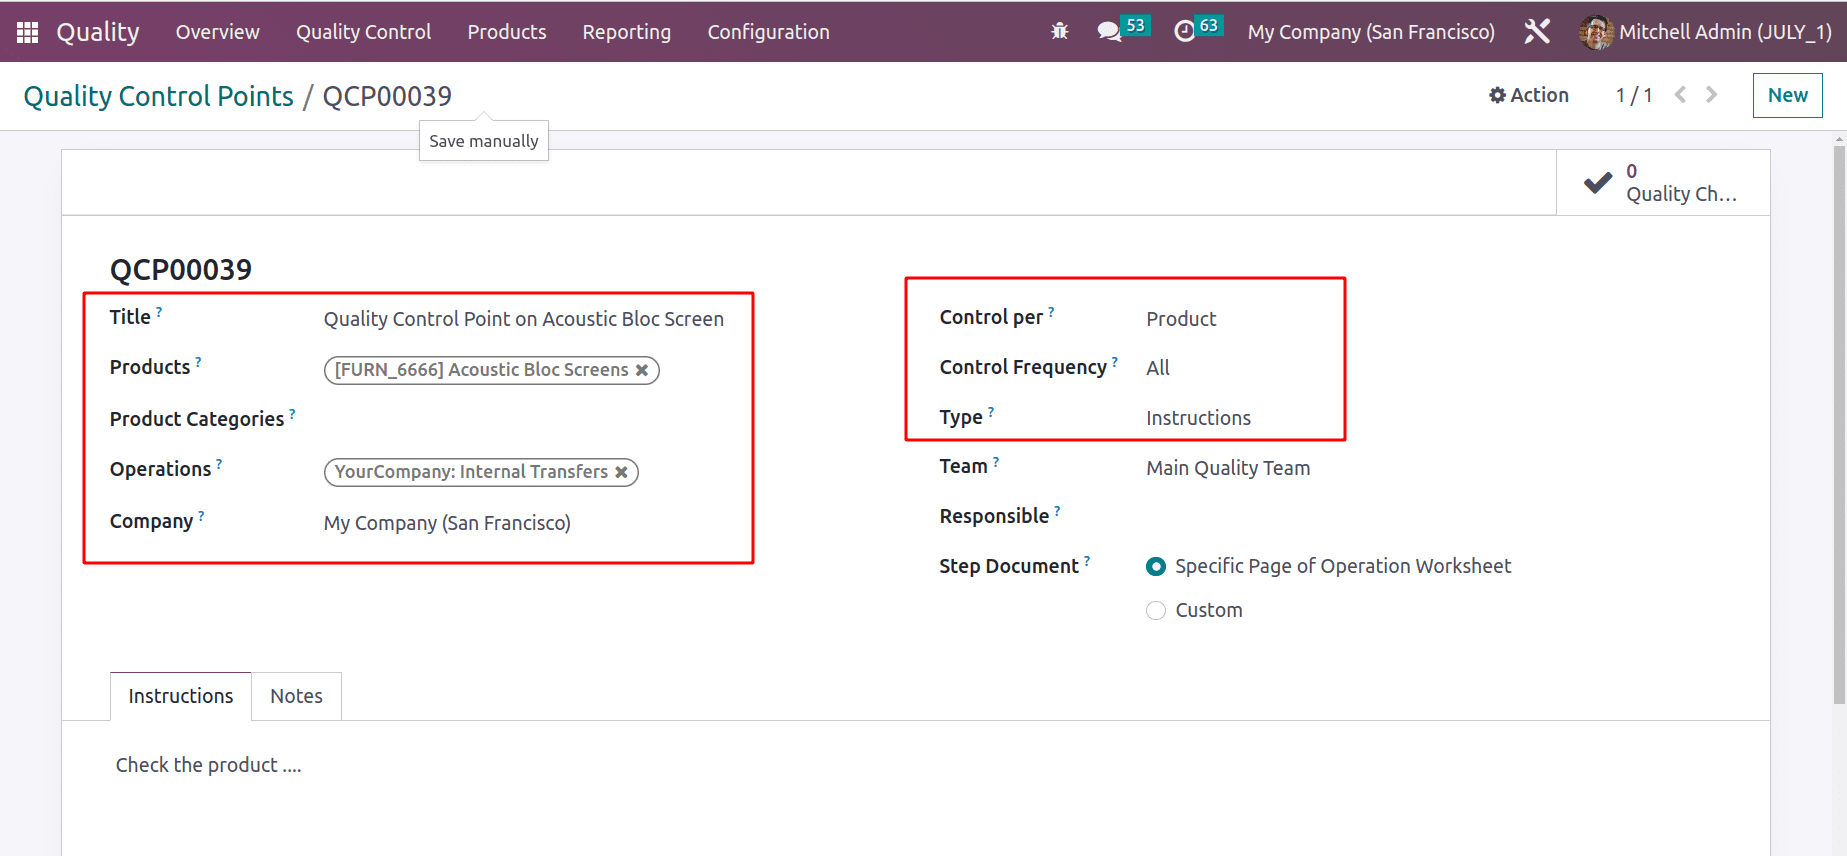
Control per product and control frequency ‘All’ is mentioned here. The quality type picked is Instruction, so the instructions can be added in the Instructions tab. Save the control point.
Create a new internal transfer for that particular product. So move to the inventory module and choose the Transfers option from the Operations tab.
: Operations > Transfers > NEW
Here, an internal transfer is created. The product wants to transfer from the Stock location to Shelf 1. So the operation type is Internal transfer. Two quantities of Acoustic Bloc screens are added inside the Operations tab. To do the process, click on the MARK AS TO DO button.
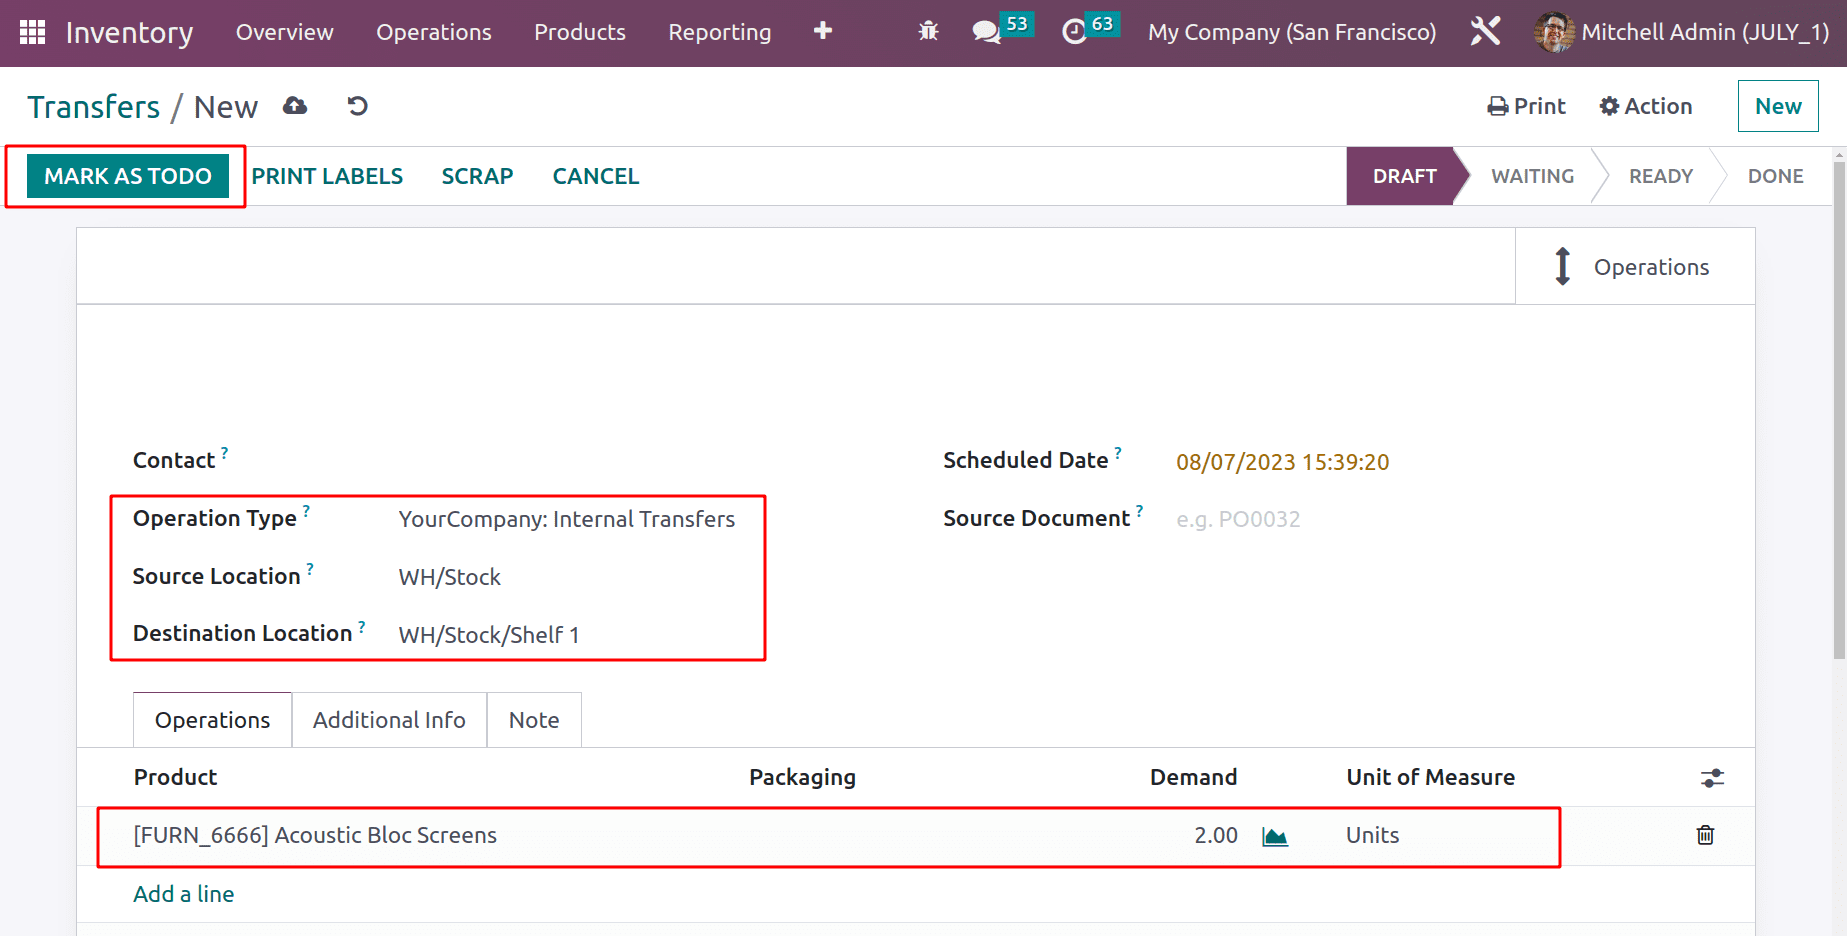
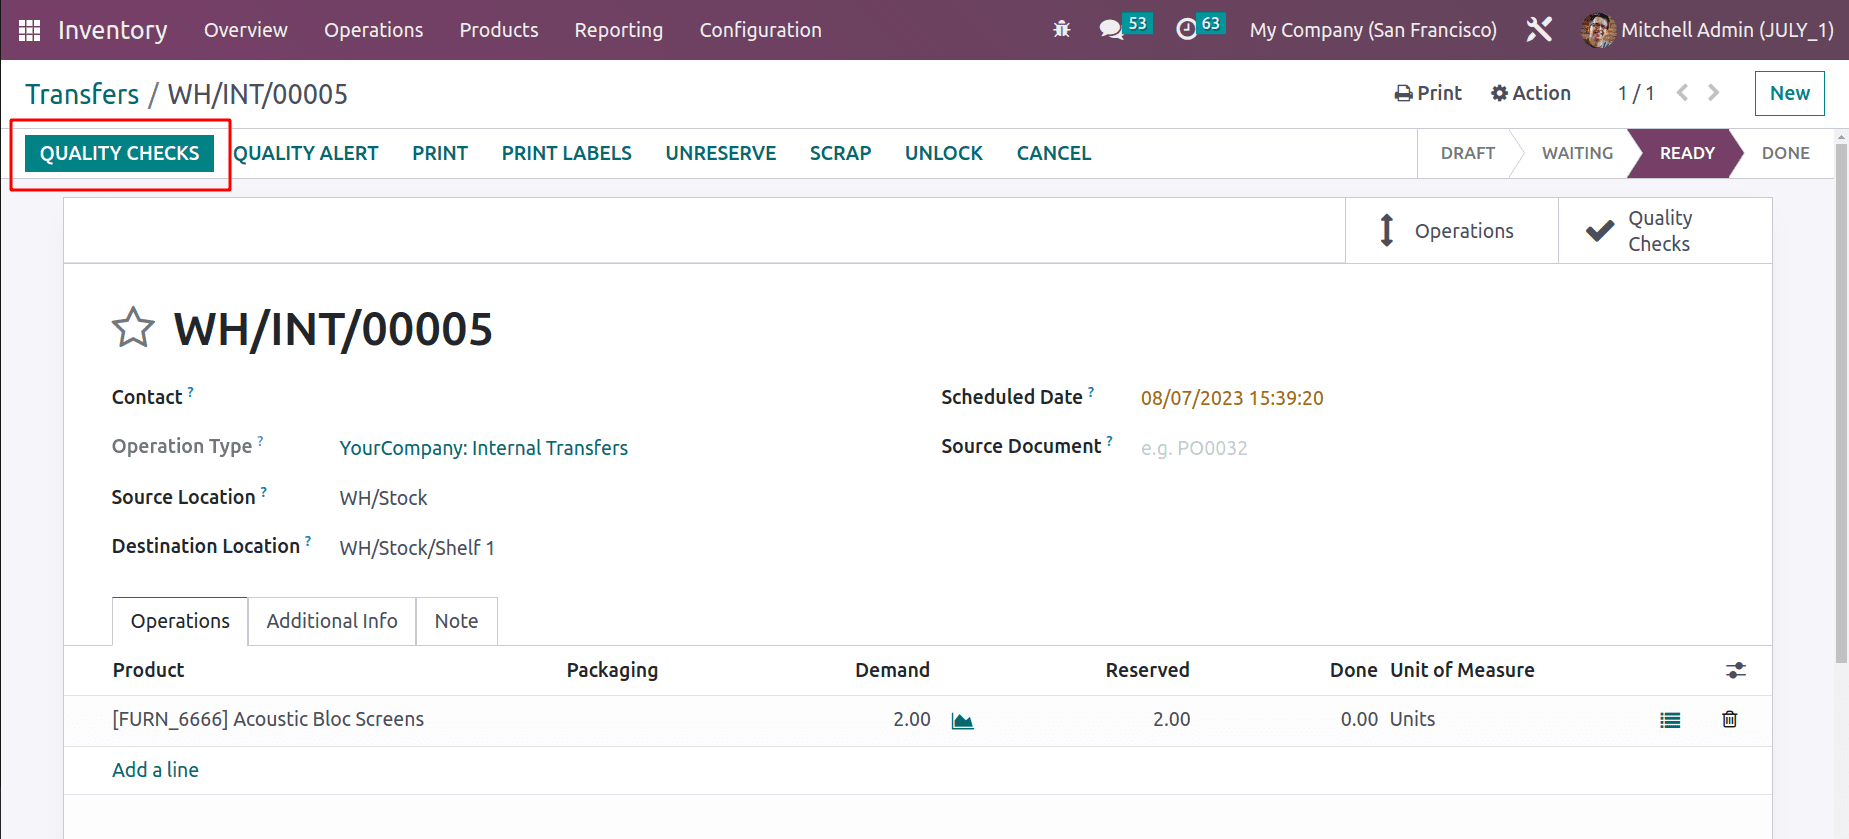
Now the transfer is directly moved to the Ready stage from the Draft stage. The Waiting stage is skipped here because the stock location contains the necessary quantity of product. A new button, QUALITY CHECKS will appear there. This is because we added a control point.
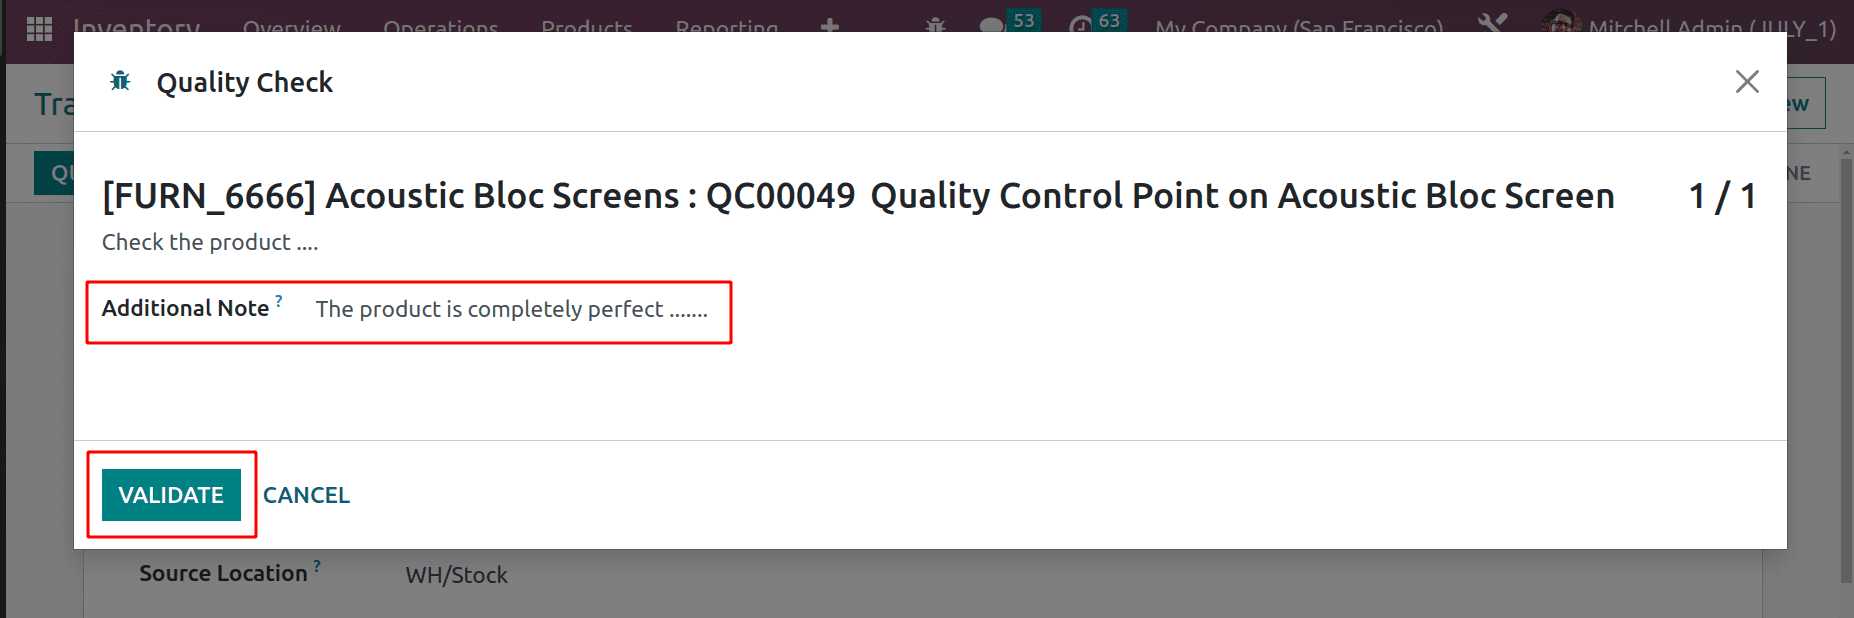
Click on that button to check the quality of the product. Then a popup window will appear with the same title which we gave inside the Quality Control Point. The instructions are also visible there. The user has a chance to add some additional notes about the quality check. Then Validate it.
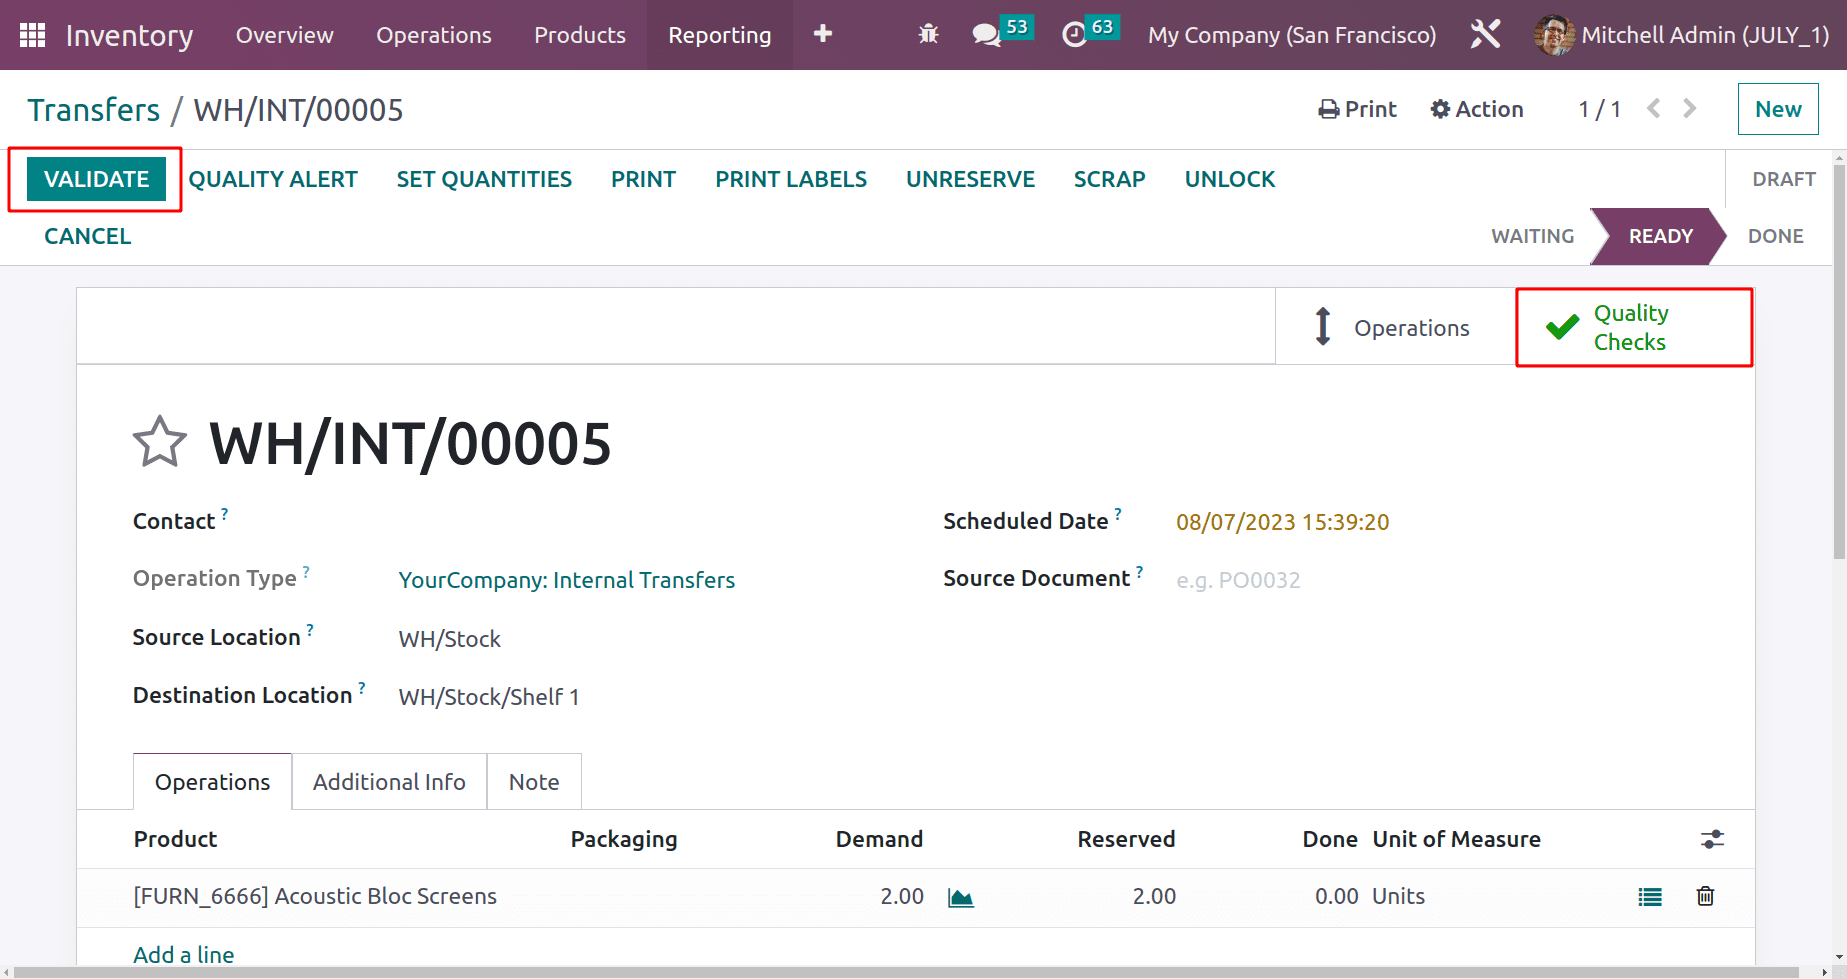
Now the Quality checking is completed. So the smart tab named Quality Checks became green in color. Now the user can complete the transfer.
Here the control per Product is set inside the Control Point. So this particular quality check happens only if an internal transfer of the Acoustic Bloc Screen happens.
Control Per Quantity: In this type, the quality checks will happen on each quantity of product. Sometimes the user needs to check the entire quantity to analyze the quality, or sometimes a percentage of the mentioned quantity only goes to the quality checks to analyze the quality of entire products. In both cases, this type can be used.
The control point is created for the operation Receipt. The Control per is defined as ‘Quantity’. So here, each quantity of the received should be checked.
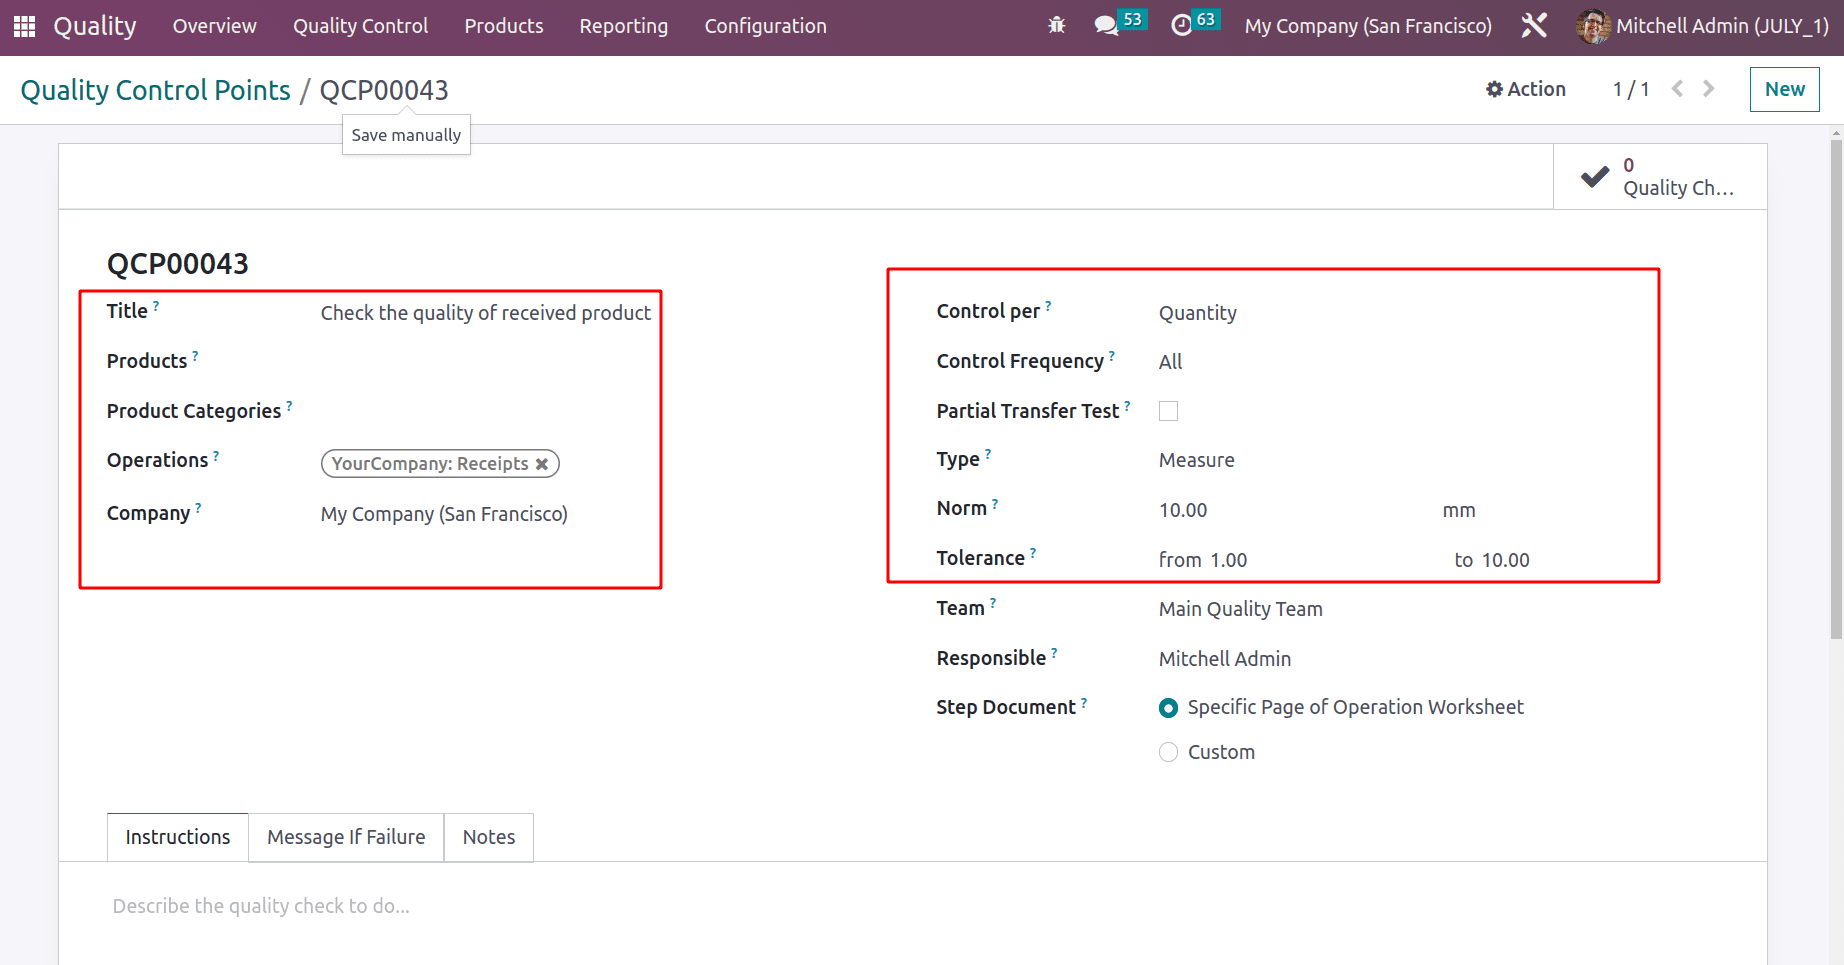
If the Control per Quantity is chosen, then an additional option will appear there, which is a Partial Transfer Test. If we only need to check the partial quantity of received goods. Here Partial Transfer Test is disabled, so the user needs to check each quantity.
The Type chosen here is the measure. So measurements like Norm and Tolerance are added here. The measurement of the received goods should be in between the given tolerance to pass the quality check.
Let's create a new receipt from the transfers option. So again, go to the inventory module for that. The created receipt is from the Vendor Anita Oliver. 10 quantities of Table is the product. So click the MARK AS TO DO button.
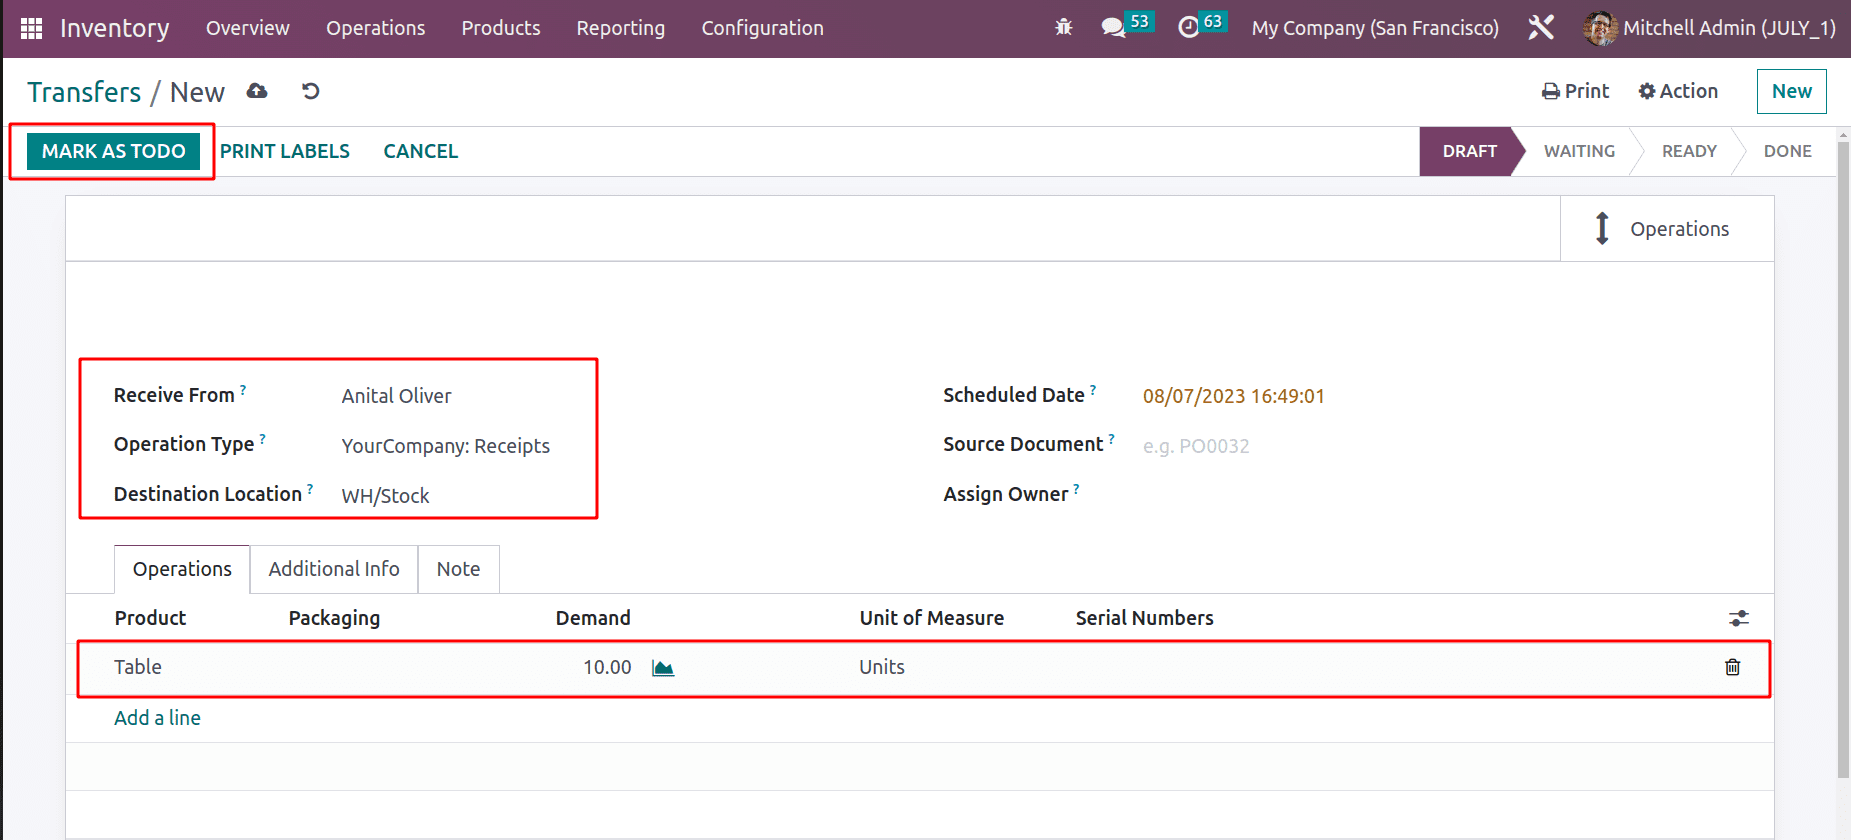
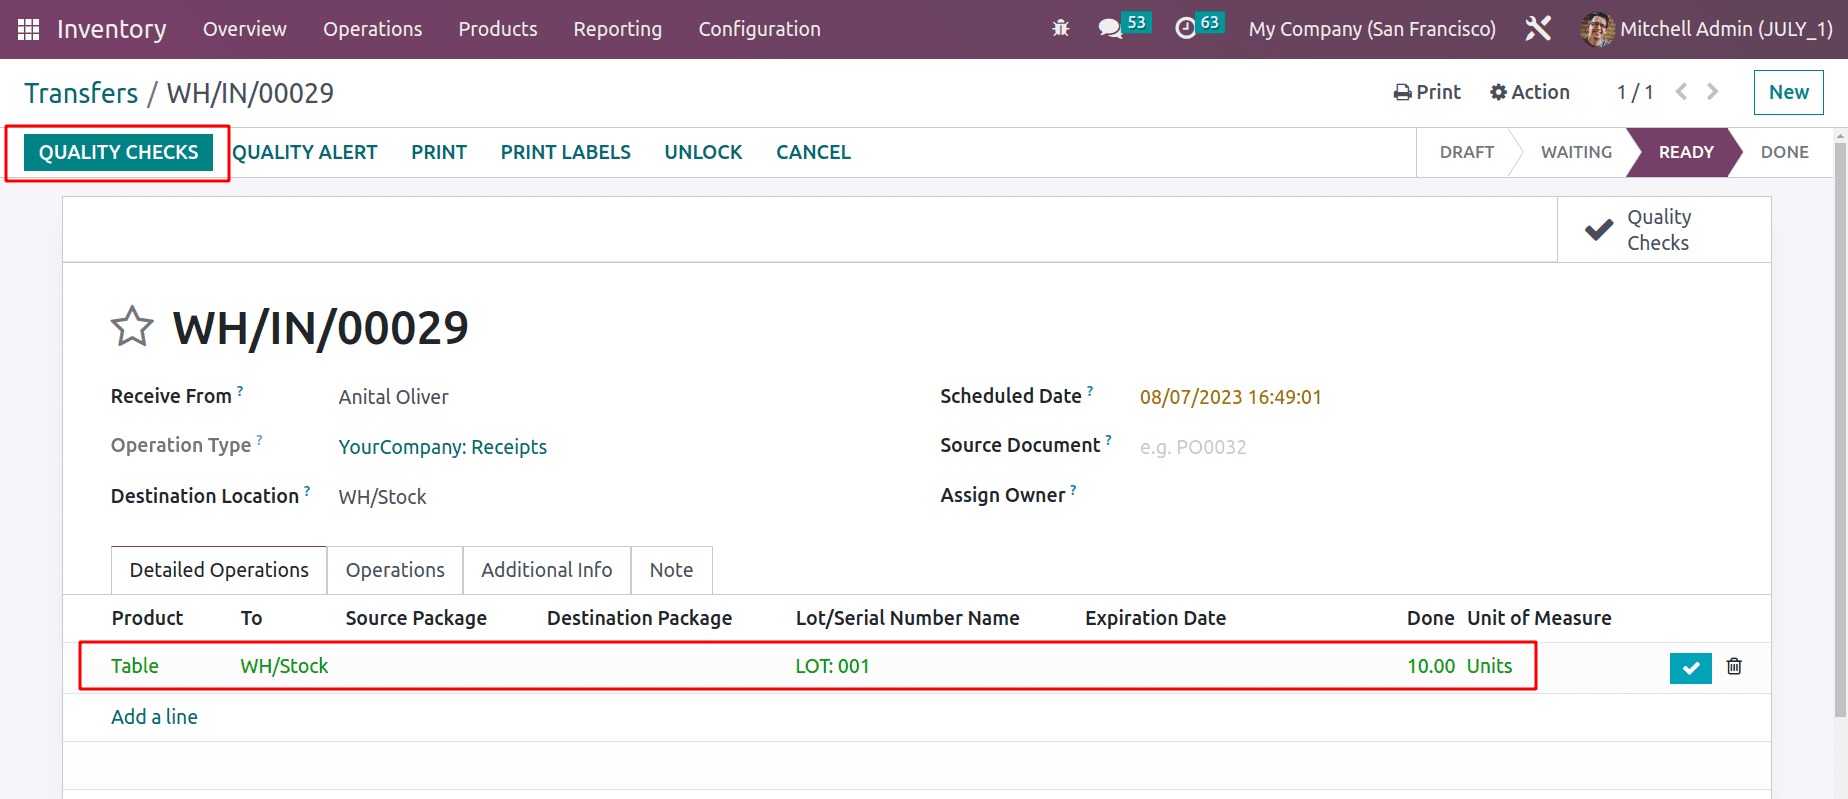
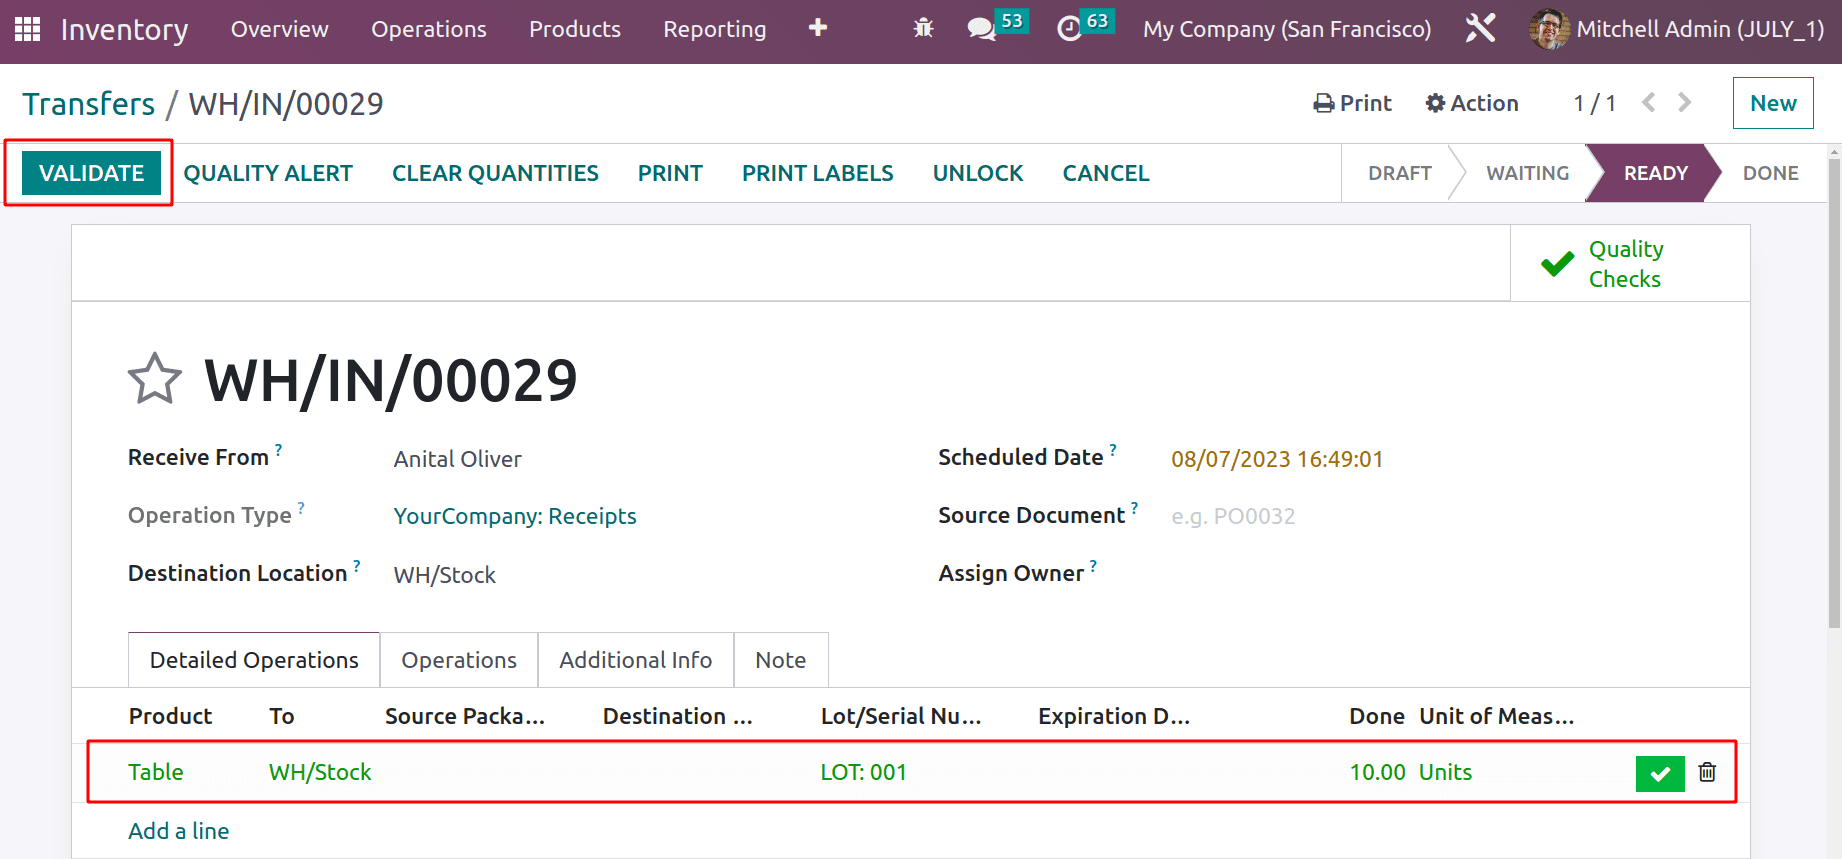
The product is traceable, so a lot number LOT: 001 is added for the 10 quantities. So before validating, complete the quality checks.
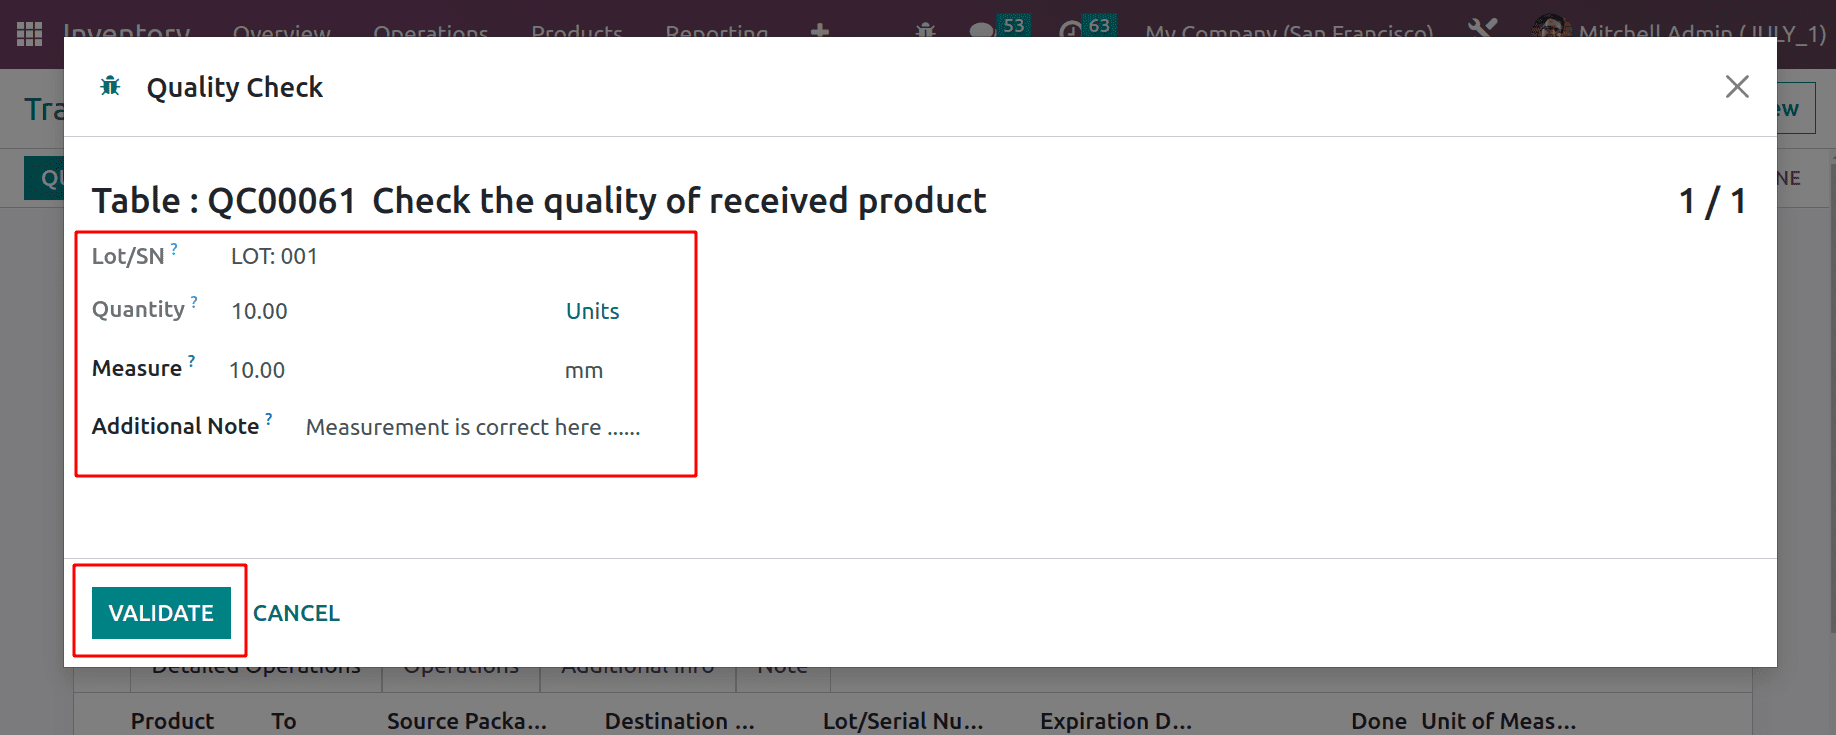
Here, the quantity is 10. Add the measurement. The measurement should be between 1 to 10. Then validate the quality checks.
Then the receipt can be validated now. A green tick mark will appear inside the Operations tab.
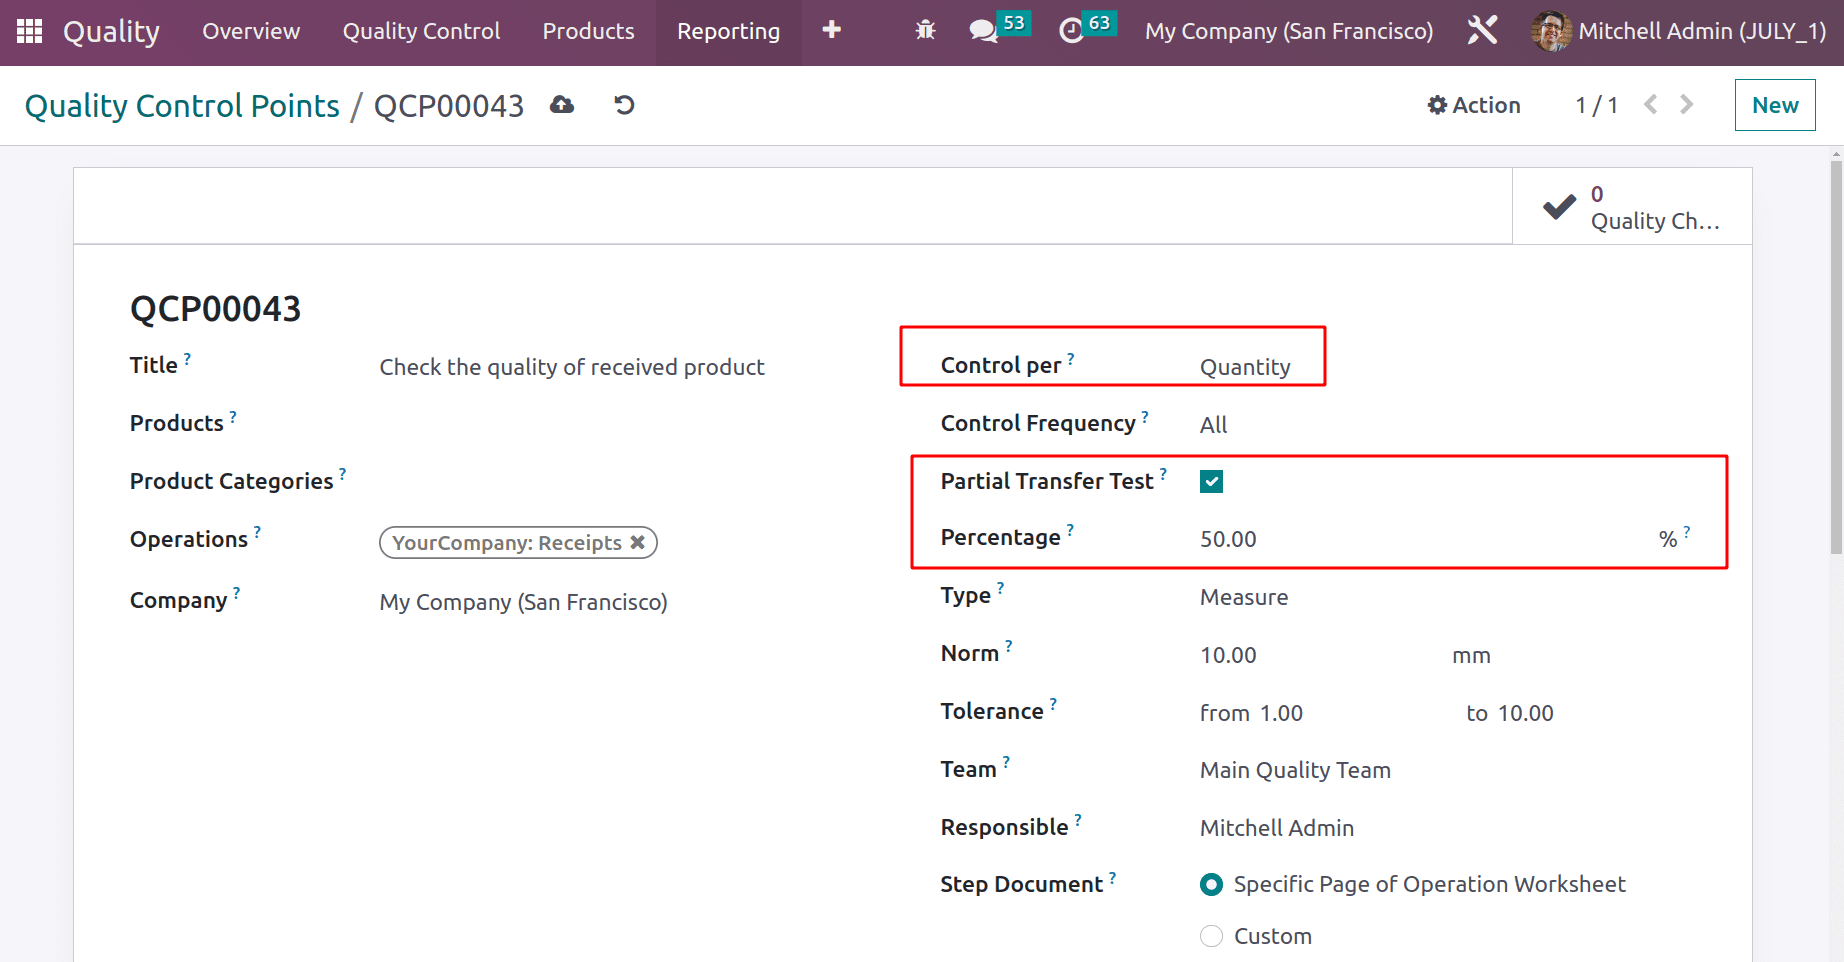
Sometimes there is no need to check the entire quantity to ensure the quantity of received goods. In such cases, they enable the Partial Transfer Test. Here the same quality control point is updated.
The Partial Transfer Test is enabled. Then another field, "Percentage’, appears there. There 50% is added. This means 50% of the total quantity is only needed to check the quality.
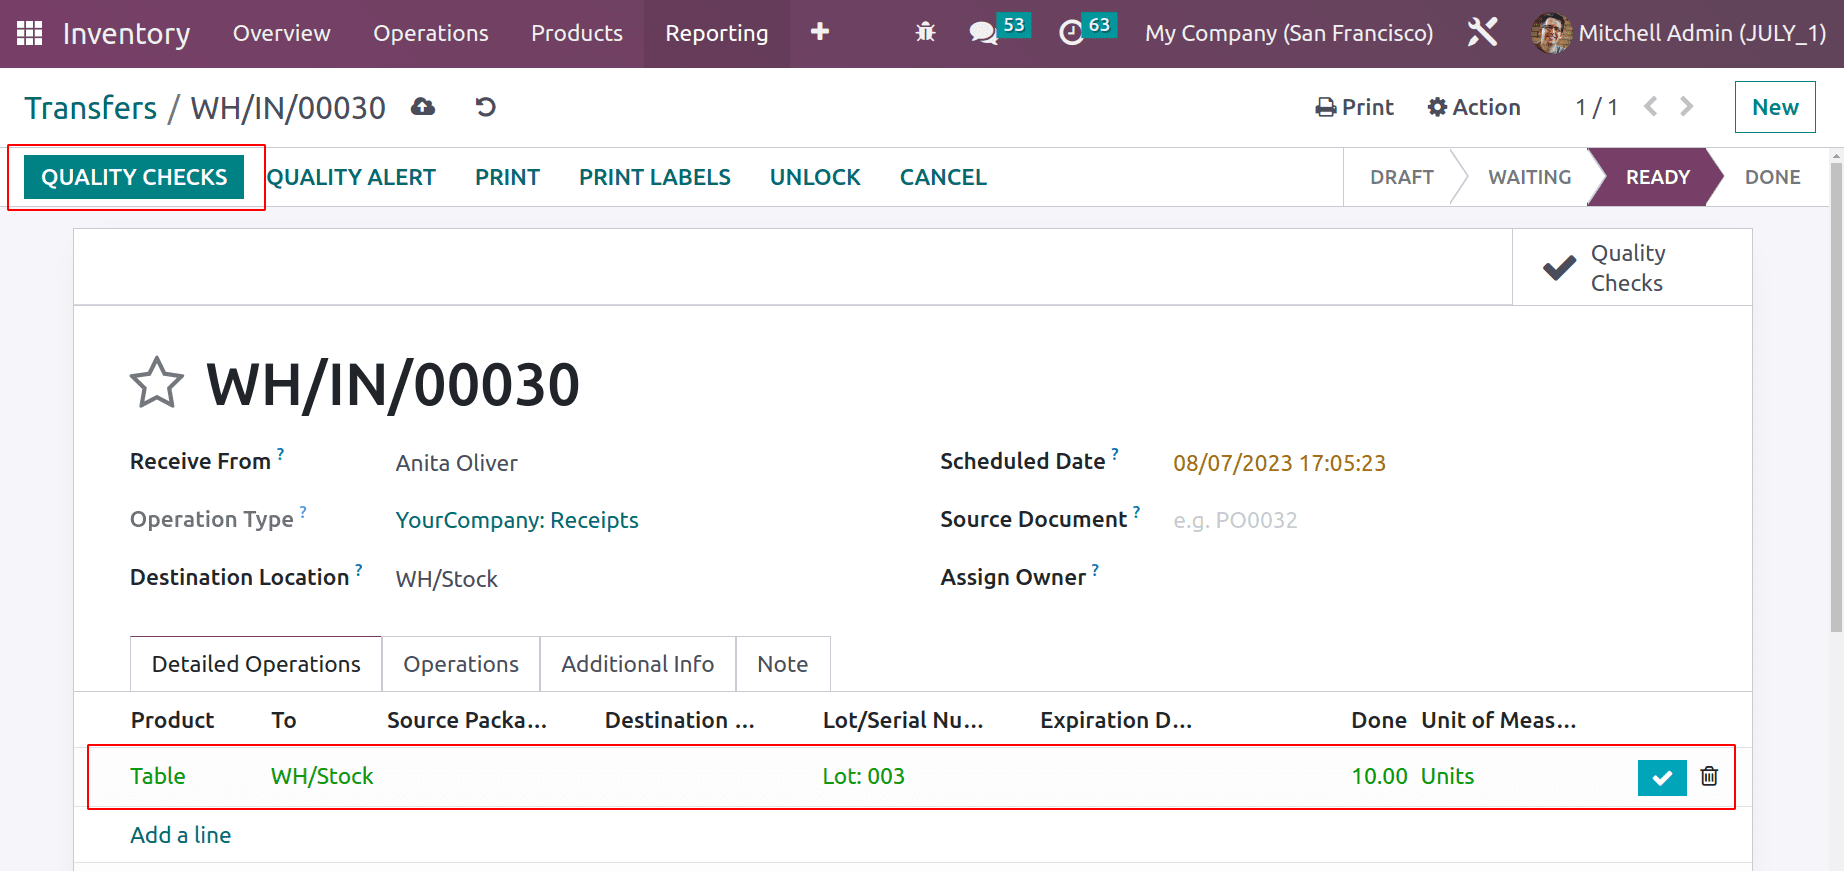
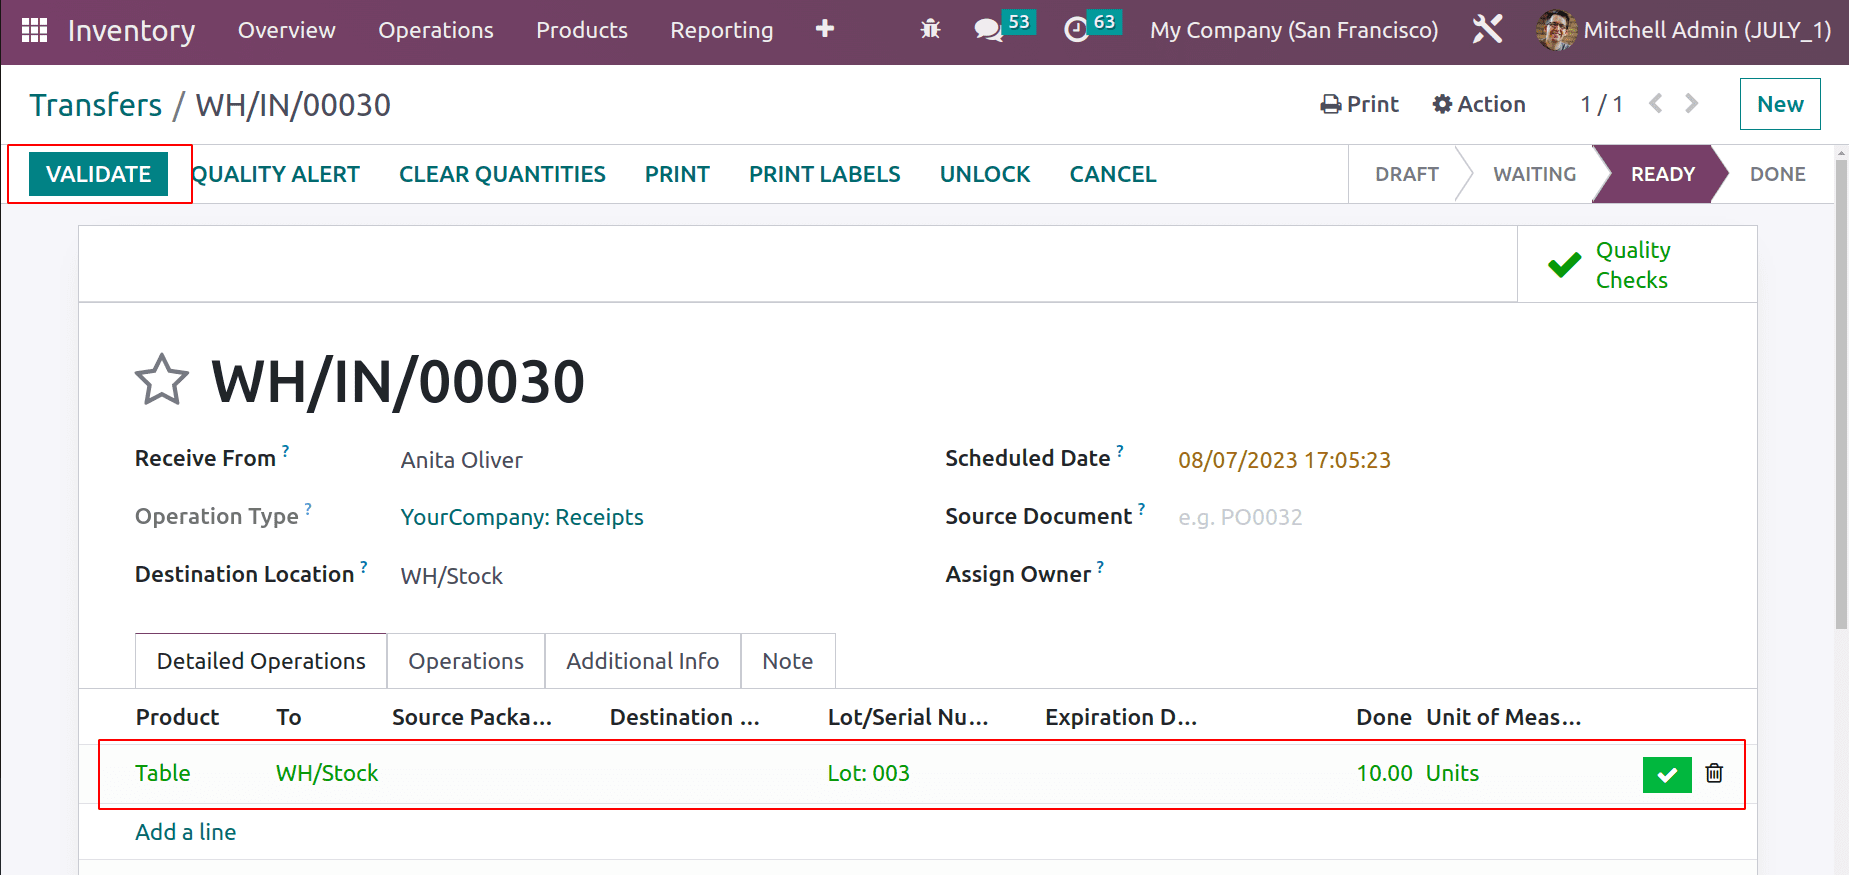
Here the same receipt is recreated, the vendor is Anita Oliver. 10 quantities of Table are chosen. Then click on the MARK AS TODO button. Here are the 10 quantities of the table with ‘Lot: 003’. So click on the QUALITY CHECKS button.
Here the total quantity is 10. But an additional field is added here. The quantity to test is 5 here, which is 50% of the total quantity. Here, the user only needs to check partial quantities to complete the quality checks.
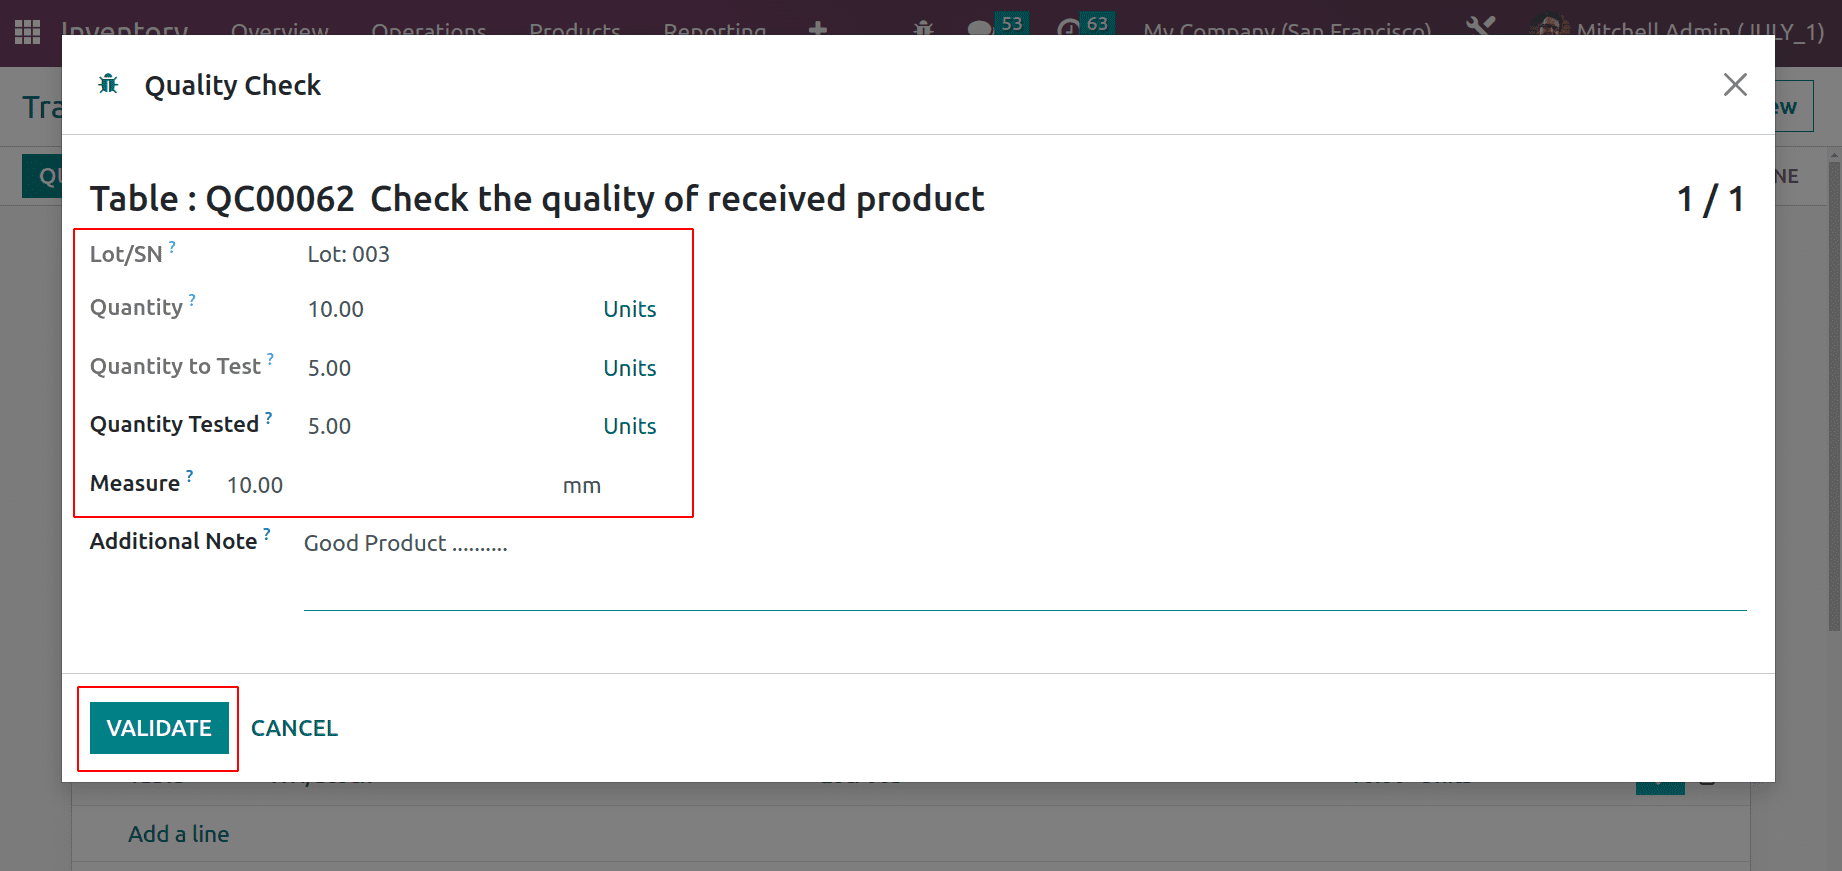
Then add the Quantity tested. Here only partial quantity is added. Validate it to complete the quality checks.
Only 5 quantities from the 10 are checked, but the entire quantity is passed the quality check here. Now the user can complete the Receipt.
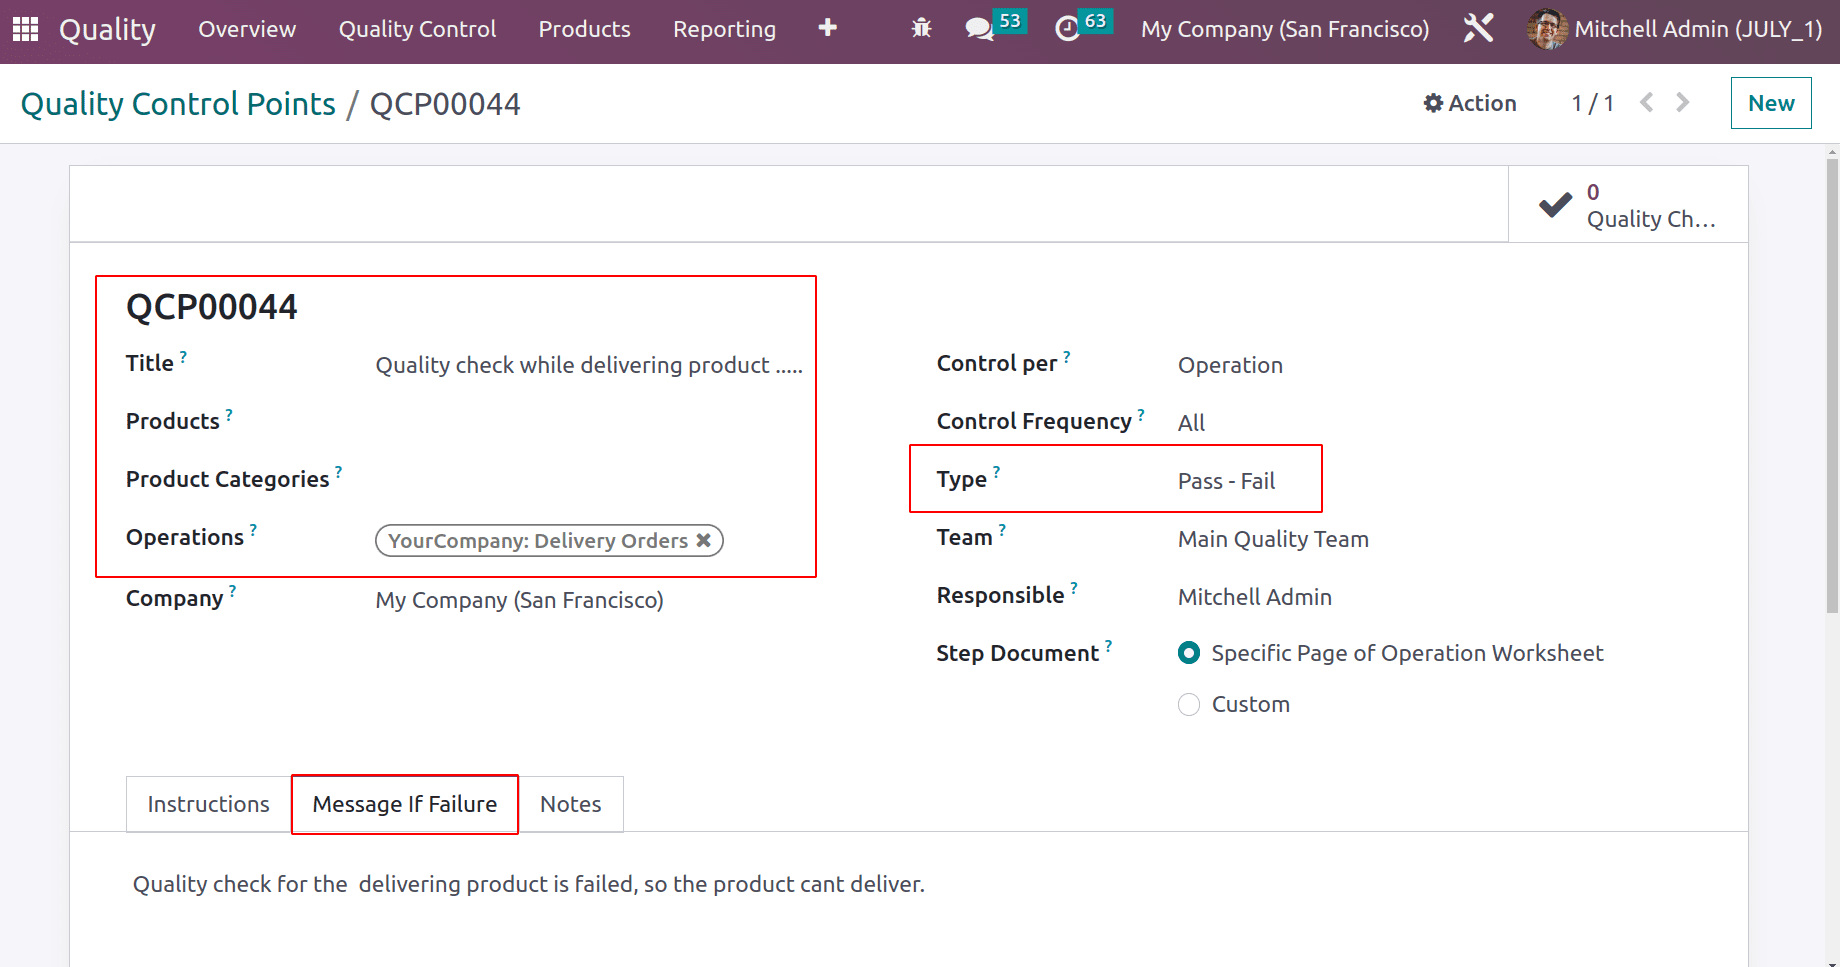
Now let's check what happens when the quality check fails. For that, create another quality control point.
Here the control point ‘Quality check while delivering product .....’ is added per Operation, the operation added is Delivery and the type is Pass-Fail.
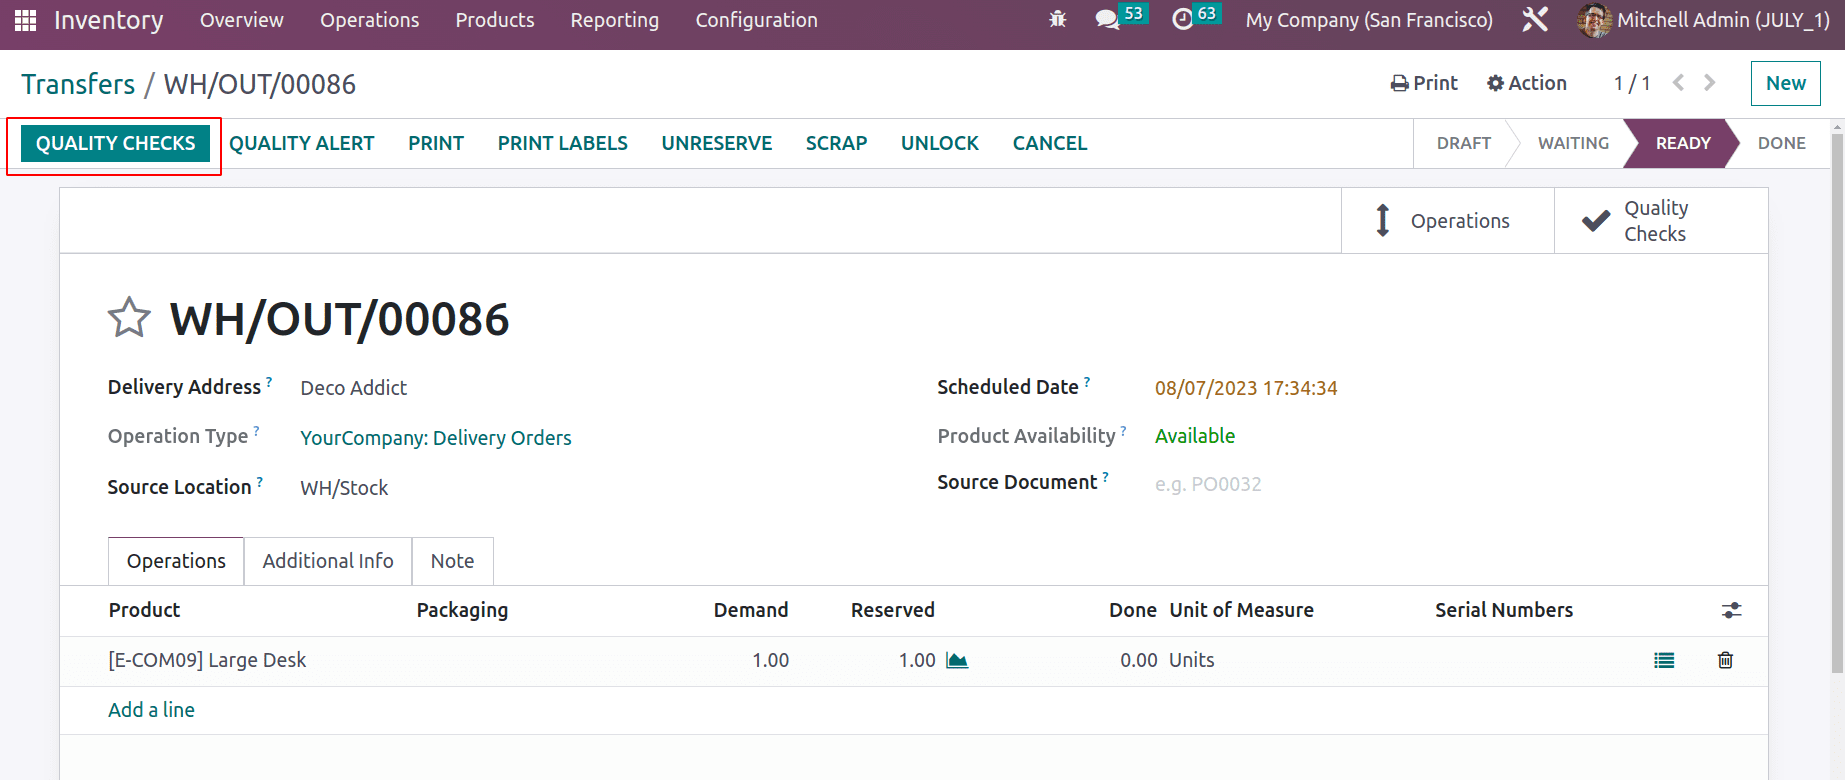
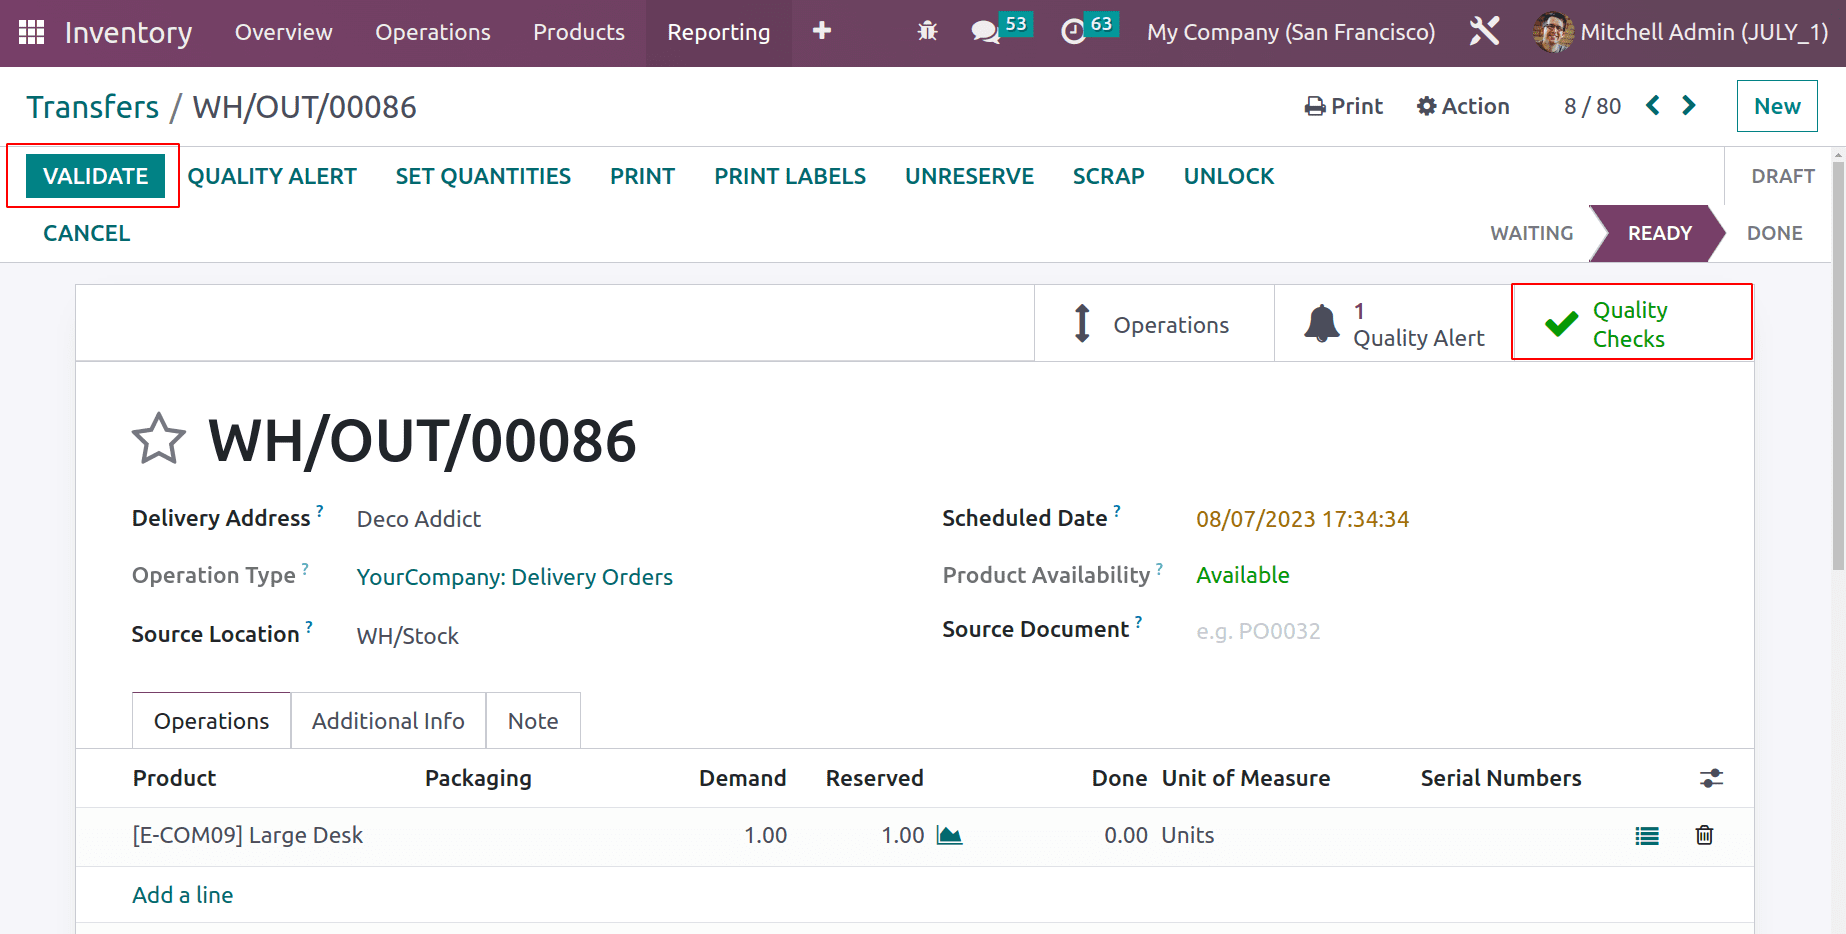
Then create a delivery operation from the inventory transfer. The customer here is Deco Addict and the product chosen is Large Desk. So as said before click on MARK AS TODO. Then the QUALITY CHECKS button will appear.
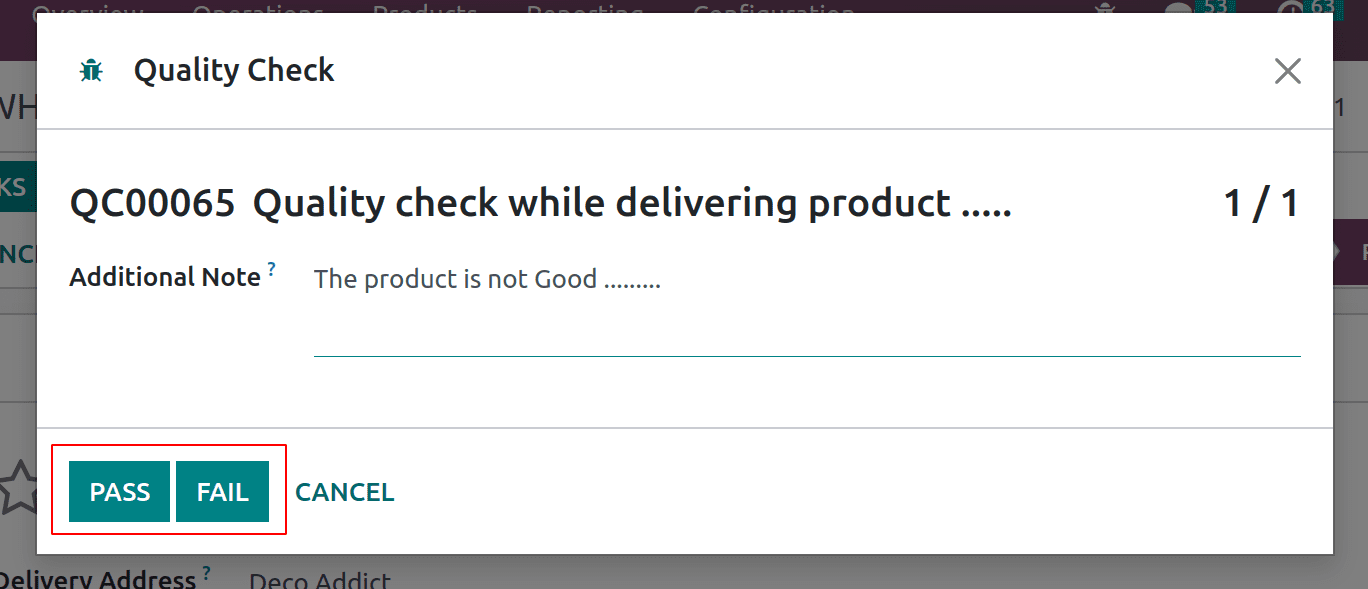
The popup shows for quality checking. The type is Pass or fail. The user can click either on the PASS or FAIL button. Here the product is not good, so click on the FAIL button.
So another popup shows the Failure message added in the control point.

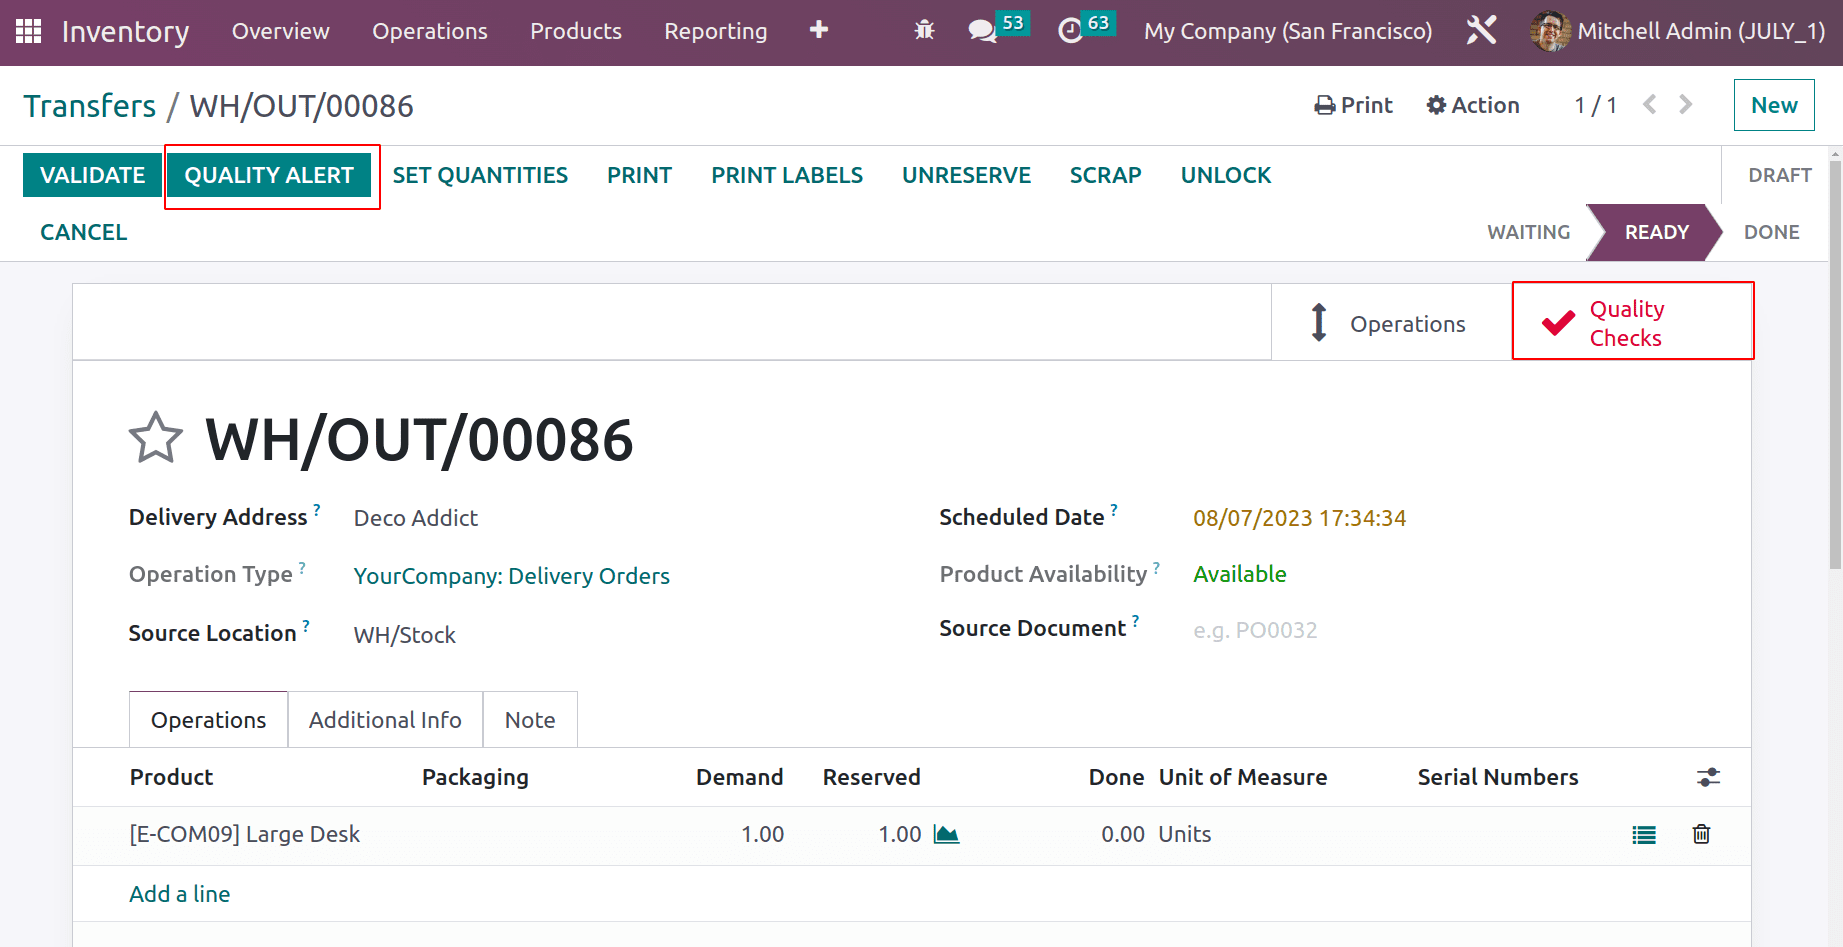
Here the quality checks smart tab is in Red color because the quality checks failed. From there the user can create a Quality Alert.
Quality Alerts
Quality alert is a feature used for managing quality issues related to a product. When a quality alert is triggered, it allows the company to efficiently solve quality issues.
Let's continue with the previous transfer. Click on the QUALITY ALERT button. Then the quality alert can be created from there.
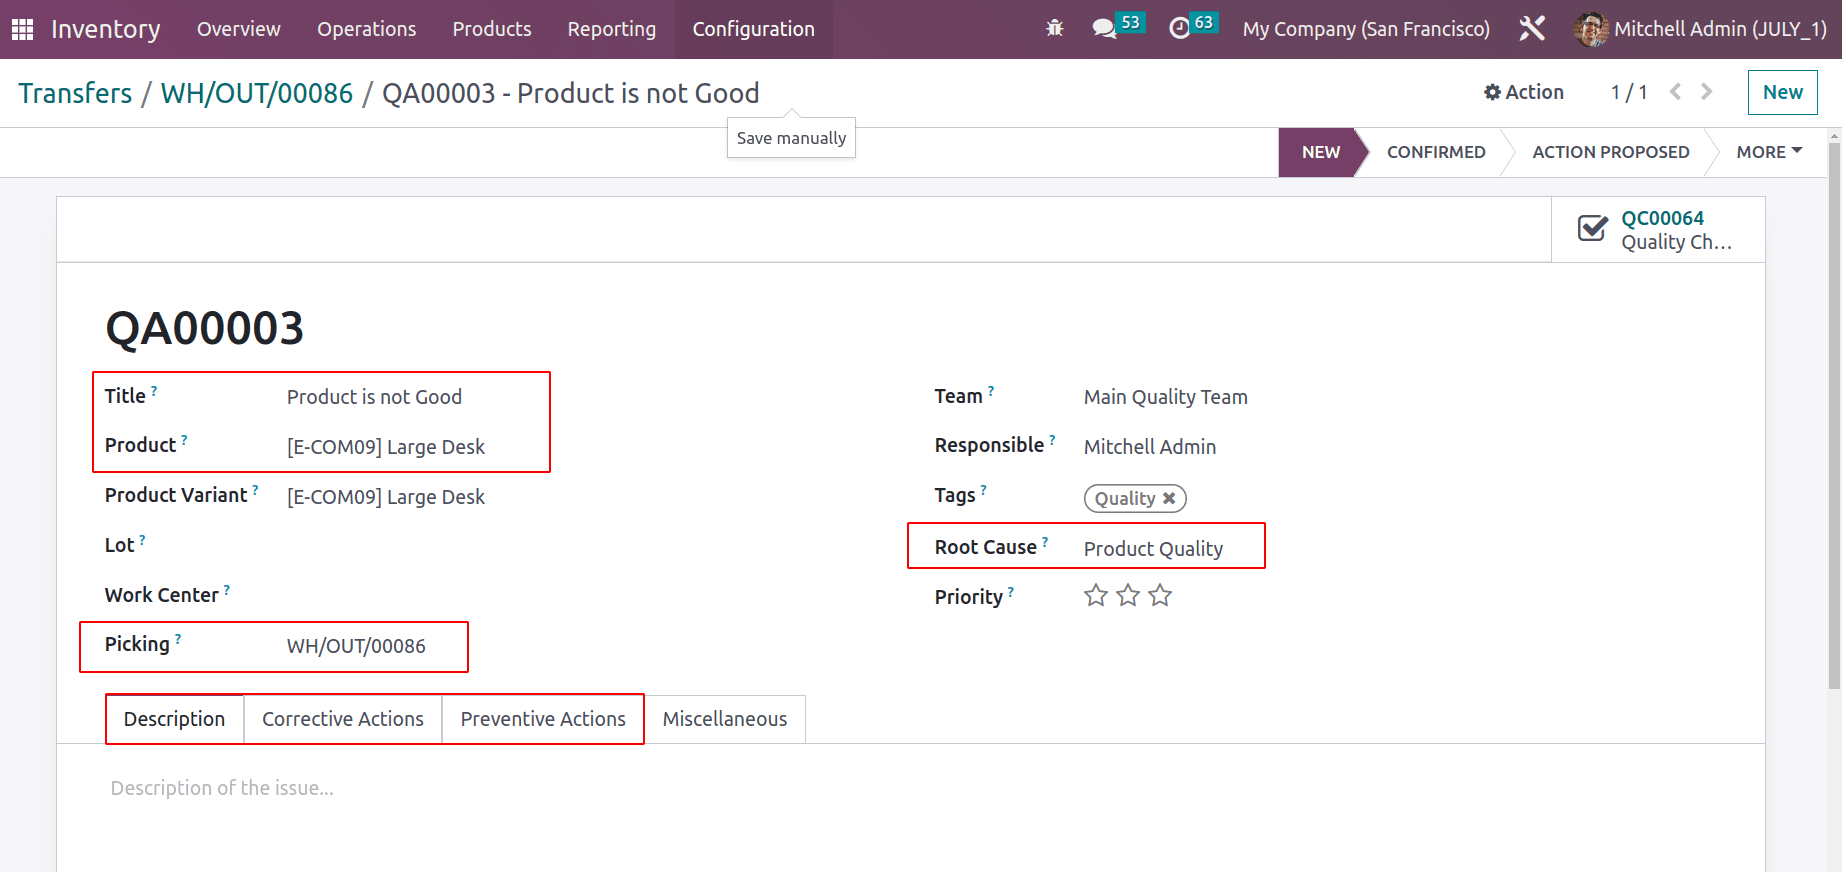
Inside the quality alert add a title about the alert. Then the product can be chosen. In the picking field, the delivery sequence number is automatically added. Then the reason for quality check failure can be chosen in the Root Cause field. Corrective Action and Preventive Action can be mentioned in the corresponding tabs. Now the alert is created.
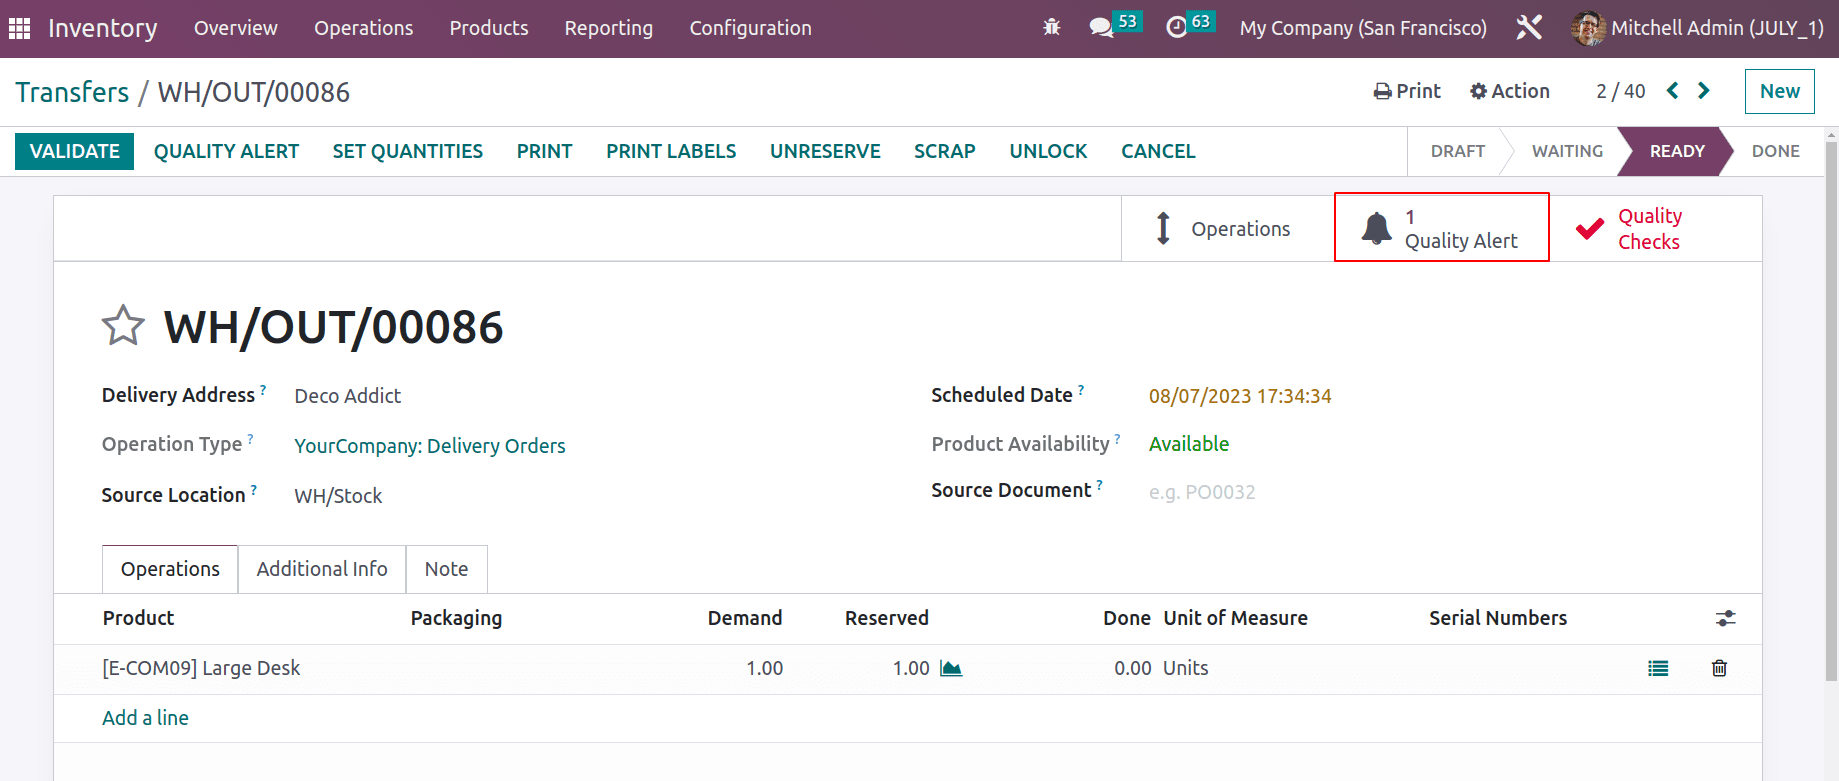
Then while checking the transfer, another smart tab, Quality Alert is added. This created Quality Alert can be viewed inside the Quality module as well.
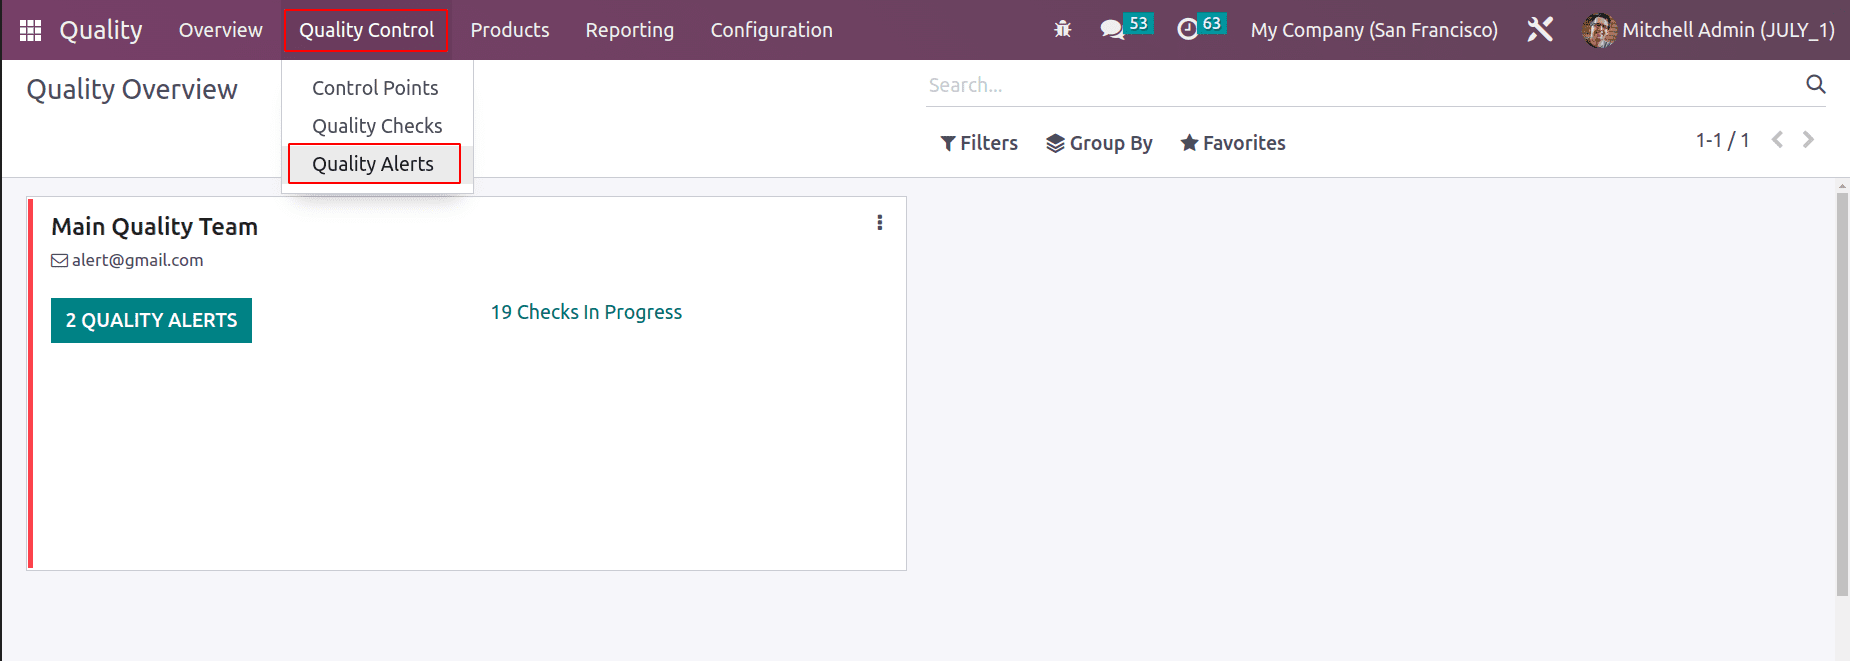
So let's move to the Quality module again. The tab Quality Control contains Control Points, Quality Checks, and Quality Alerts. So choose the Quality Alerts from there.
: Quality control > Control Alerts
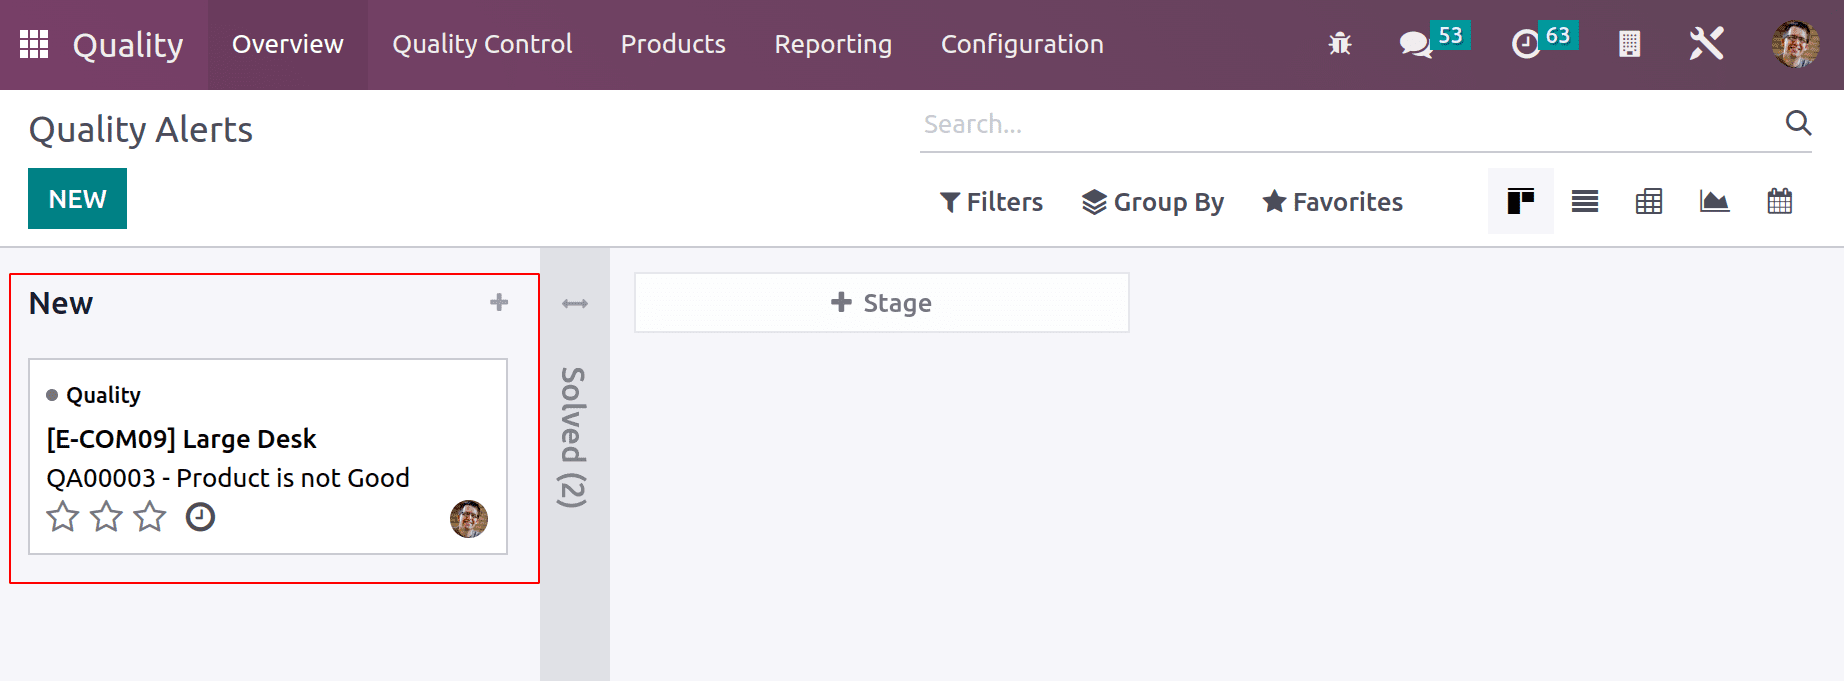
There is one Quality Alert in the New stage. Which is the same one created inside the Transfer. Open the alert.
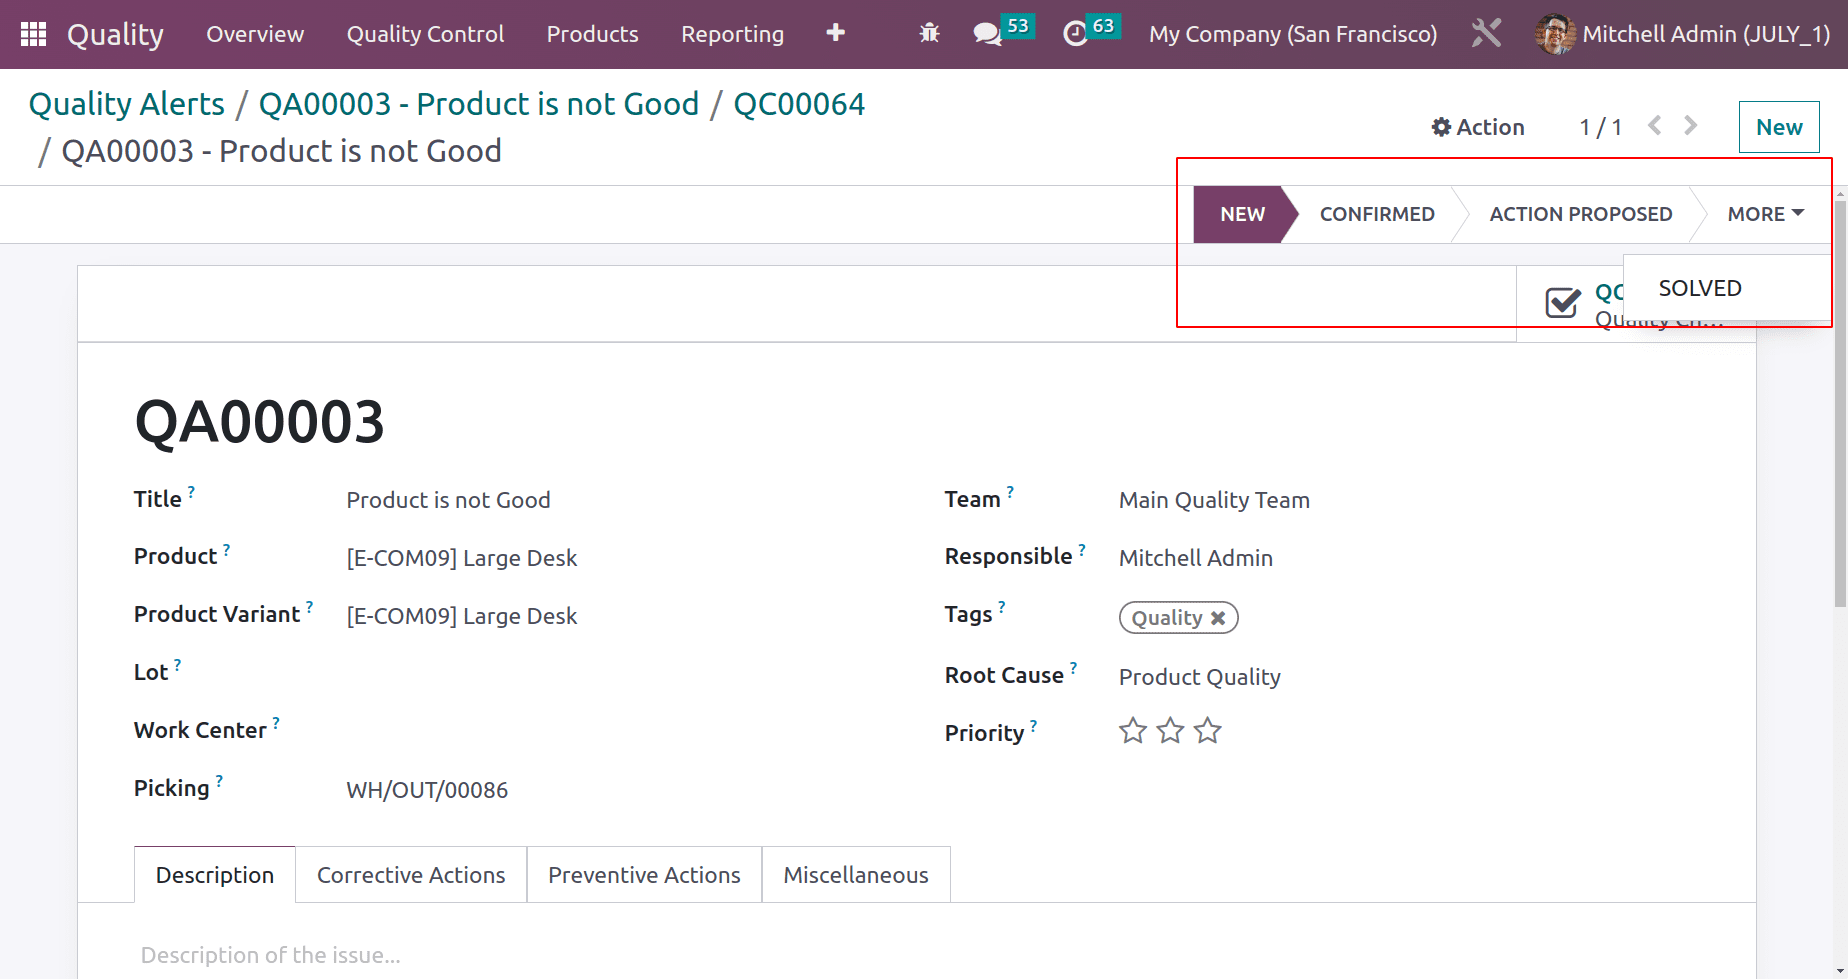
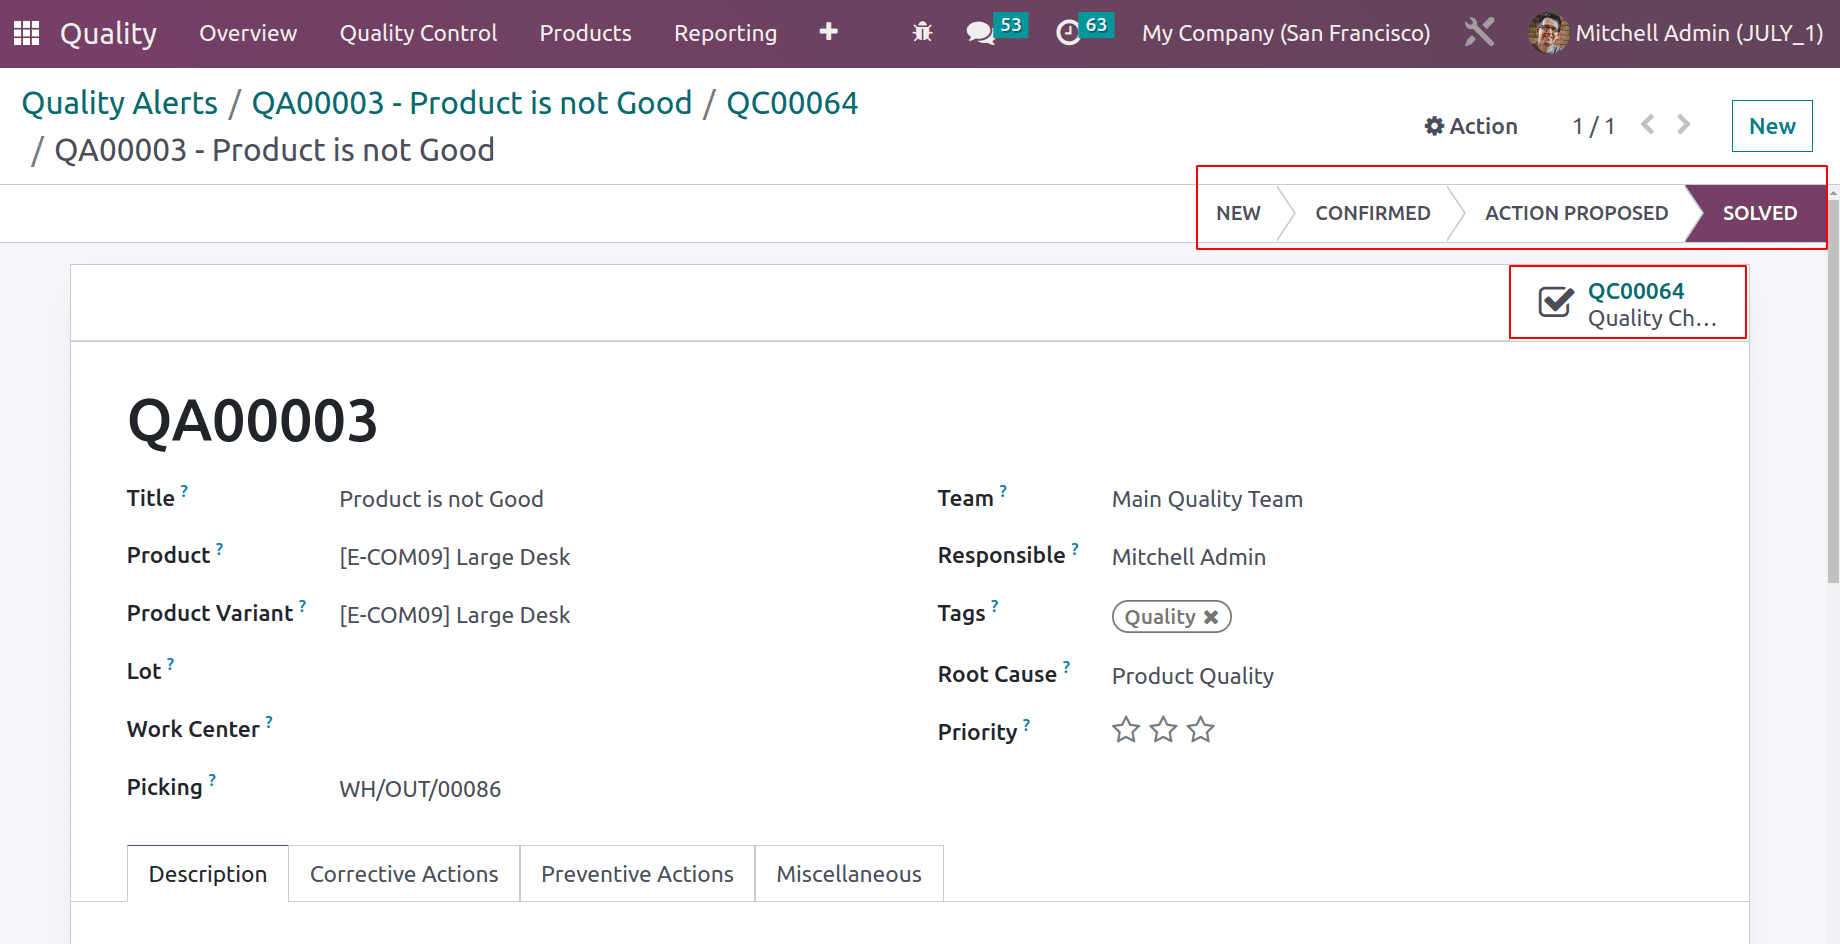
The alert also contains the details of the Responsible Person and Quality Team. The alert is now in the NEW stage. So this can be changed to further stages as the quality changes. And if the problem is solved, then change the stage to the SOLVED stage.
From the smart tab Quality checks can be used to check the quality again. So open the smart tab to view the quality checks.
While the quality checks open, there shows the PASS button. Users can click on the PASS button. Click on it to complete the quality checks.
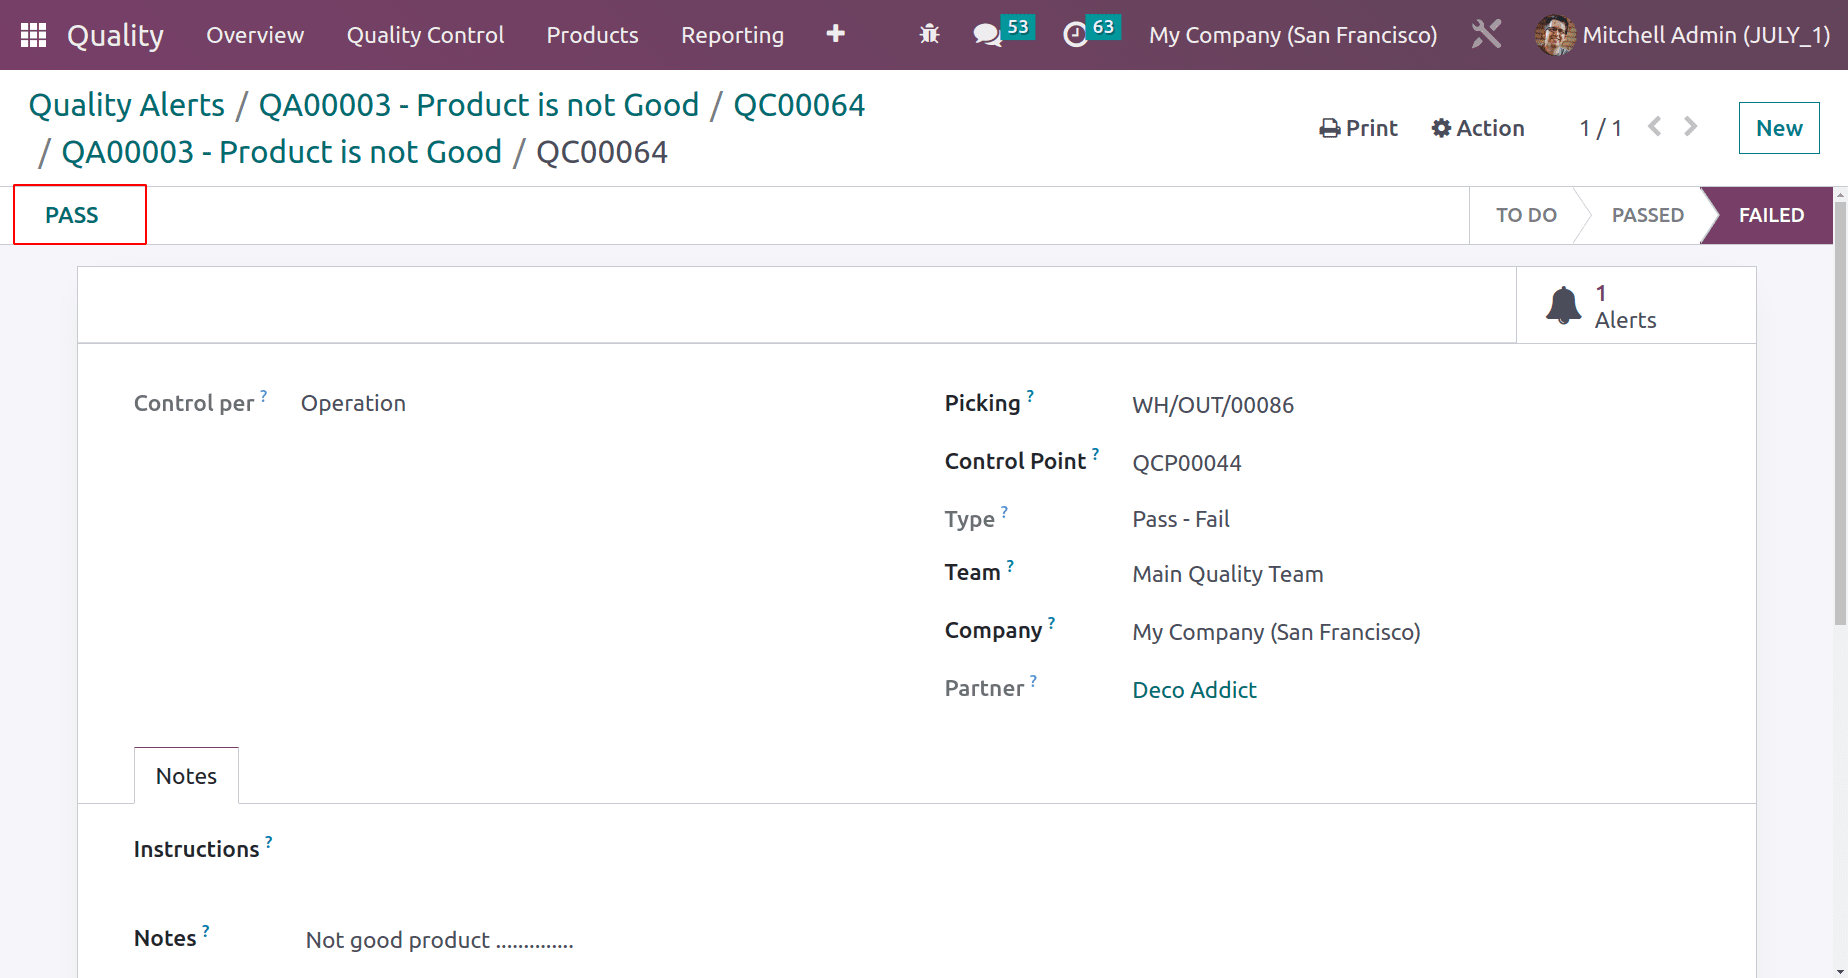
Then the stage changed to Pass from the failed stage.
Go back to the Transfers again, and open the transfer. Now the smart tab is in Green color because now the quality checks are passed. So the user can validate the transfer because the product is in good condition.
By utilizing the quality module in Odoo 16, companies can easily create and manage quality control points, and check the quality by using multiple checks and easily solve the problem. This enhances customer satisfaction by reducing complaints. Ensuring the quality of products enhances the product's life and improves the business.