Different view types in Odoo, like Kanban, form, graph, tree, pivot, search, and calendar, enhance the platform's usability by presenting records in various user-friendly formats.
In this blog, we are going to discuss the creation of a list view and the different parameters used in the list view to enhance performance.
For example, first, create a model ‘student. student’ and declare it’s fields.
from odoo import api, fields, models,_


class StudentStudent(models.Model):
   _name = 'student.student'

   number = fields.Char(
       'Name', default=lambda self: _('New'),
       copy=False, readonly=True, tracking=True)
   name = fields.Char(string='Student')
   roll_number = fields.Integer(copy=False,
                string='Roll Number')
   age = fields.Float(string='Age')
   email = fields.Char(string='Email')
   class_number = fields.Float(string='Class')
   grade = fields.Float(string='Grade')
   state = fields.Selection(
      [('excellent', 'Excellent'),
          ('good', 'Good'), ('average', 'Average'),
          ('pass', 'Pass'), ('fail', 'Failed')])
Now we can declare the action for the model, we can define the tree in the view mode of ir.actions.act_window records.
<record id="student_action_test" model="ir.actions.act_window">
   <field name="name">Student Mark</field>
   <field name="type">ir.actions.act_window</field>
   <field name="res_model">student.student</field>
   <field name="view_mode">tree,form</field>
</record>
We can now create a new record in the ir_ui_view model, specifying the ID, name, and the associated model for which the view record is intended, as well as defining its structure. Within the architecture, we can specify the fields within the <tree> tag.
<!--  Student tree view  -->
<record id="student_student_view_tree" model="ir.ui.view">
   <field name="name">student.student.view.tree</field>
   <field name="model">student.student</field>
   <field name="arch" type="xml">
       <tree string="Student">
           <field name='roll_number'/>
           <field name='number'/>
           <field name="name" decoration-bf="1"/>
           <field name="age"/>
           <field name="email"/>
           <field name="grade"/>
           <field name='state'/>
       </tree>
   </field>
</record>
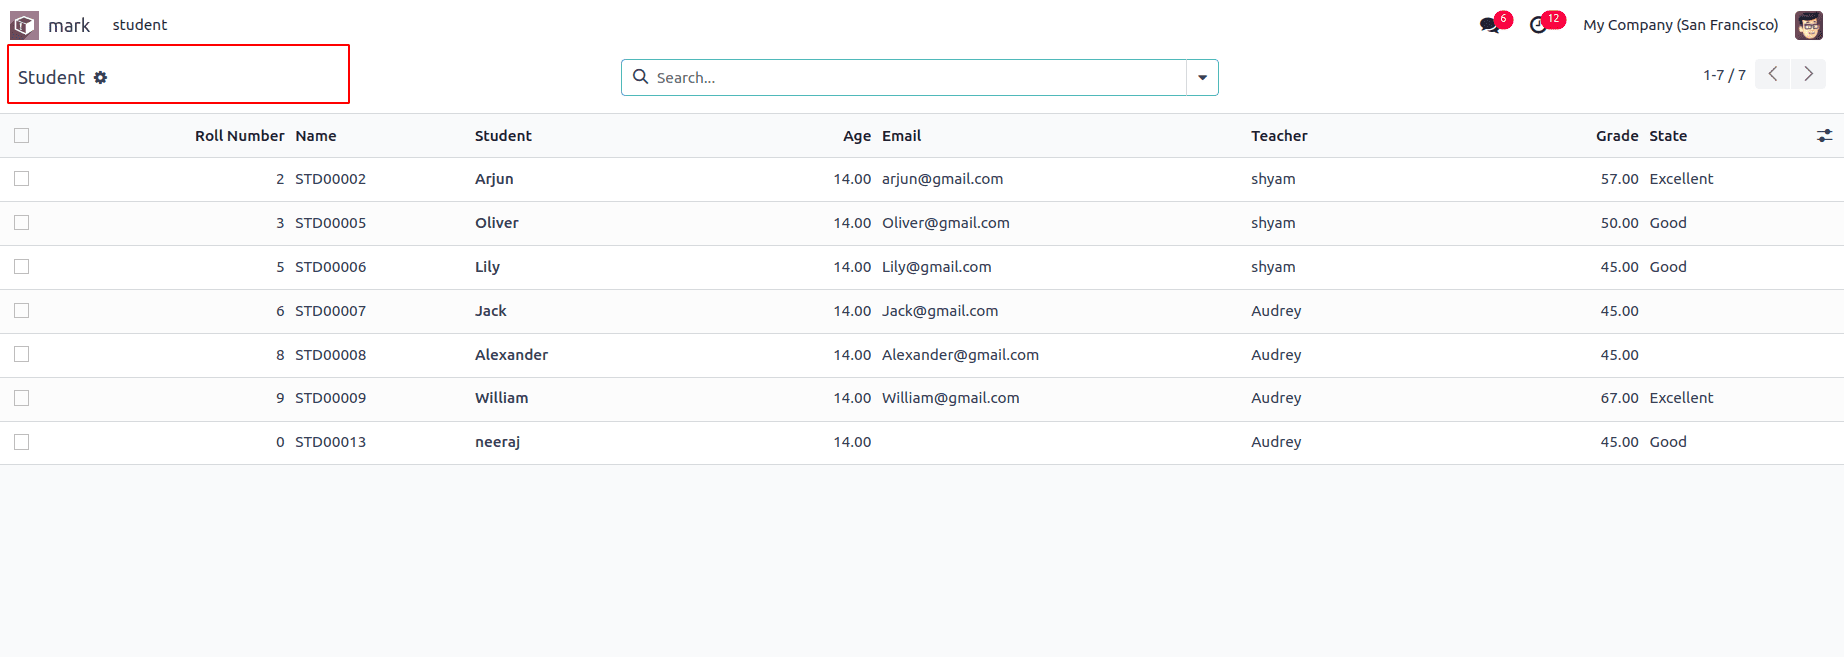
It results in the following tree view in UI.

1. Decoration: By using this, We can apply different colors to the list view data. The following are available attributes.
decoration-it – ITALICS
decoration-bf – BOLD
decoration-danger – LIGHT RED
decoration-primary – LIGHT PURPLE
decoration-info – LIGHT BLUE
decoration-warning – LIGHT BROWN
decoration-muted – LIGHT GRAY
<tree string="Student" decoration-success="state == 'excellent'"
     decoration-info="state == 'good'"
     decoration-danger="state == 'fail'"
     decoration-warning="state == 'average'">
It results in the line in the tree view in different colors based on our condition.
2. Editable: Used to make tree view editable, we have two options bottom and top.
<tree string="Student" editable="bottom">
As a result, we can add a new line at the bottom of the list view.

By editable=” top”, we can edit the list view at the top.
<tree string="Student" editable="top">
The following screenshot shows that we can add a new line at the top.

3. Limit: We can restrict the number of records visible in the list view
<tree string="Student" limit="6">
Only six records are visible in the list view. You can access the seventh record by clicking the right arrow shown in the screenshot.

4. Create: We can prevent the creation of records. By default create=” True”
<tree string="Student" create="False">
The following screenshot depicts that the user has no provision to create new records.

5. Delete: We can prevent the deletion of records. By default delete=” True”
<tree string="Student" delete="False">
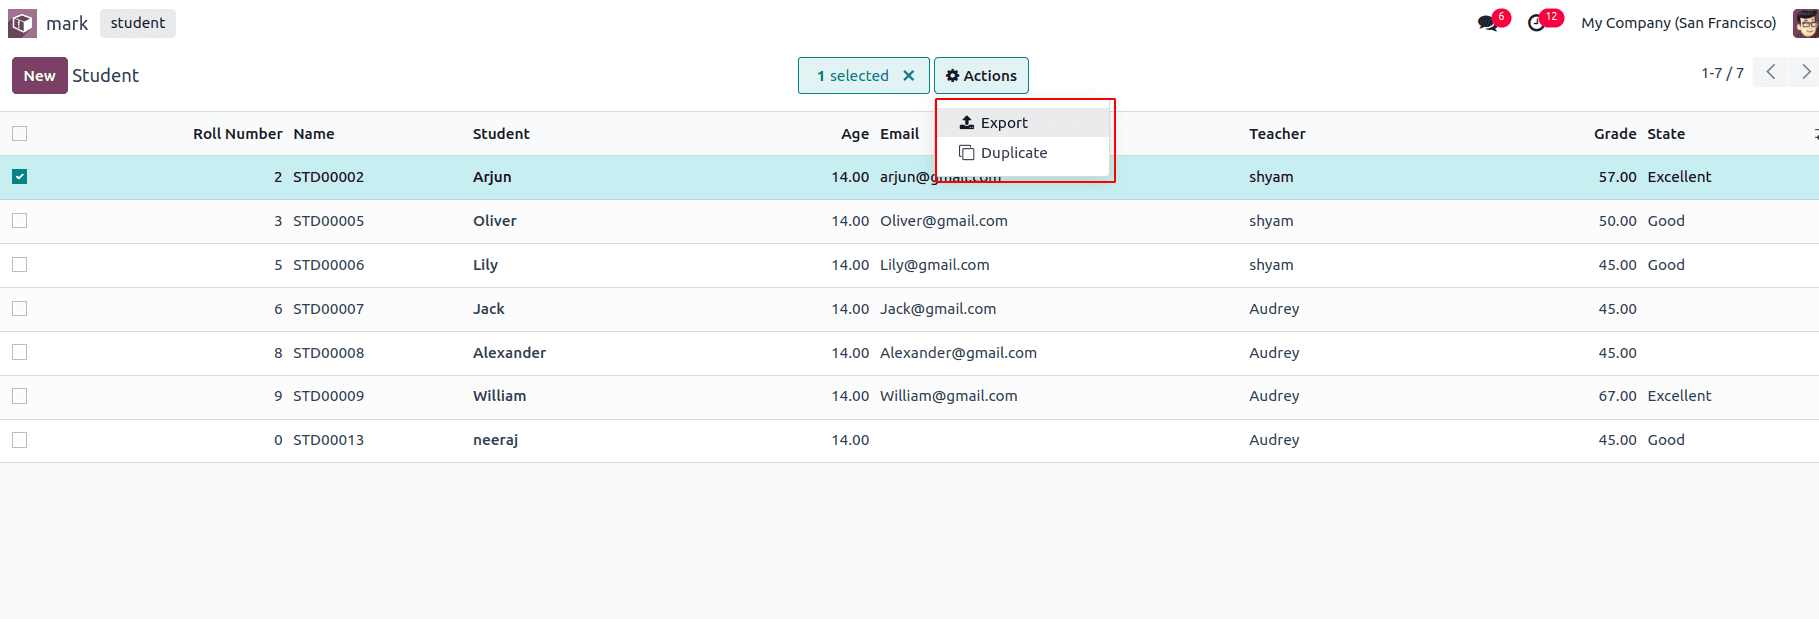
The following screenshot depicts that the user has no provision to delete the records in the list view. It removes the delete button in the action menu.

6. Multi_edit: This parameter helps to edit multiple records at the same time.
<tree string="Student" multi_edit="1">
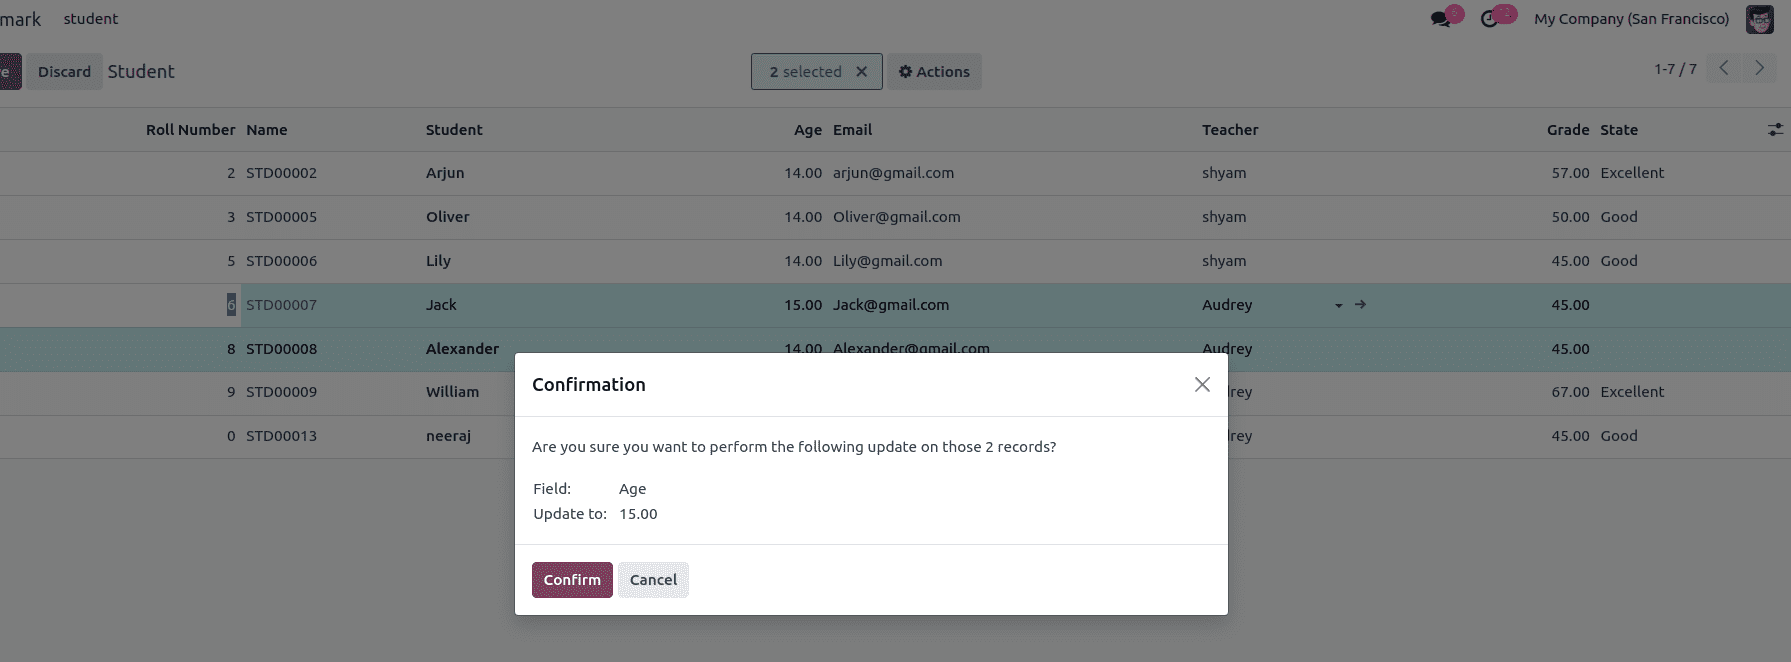
The first user wants to select the records to be edited, choose the appropriate column, and enter the new value as shown in the screenshot.

A confirmation dialog box will then appear. Click "Confirm" to proceed with editing the records. The records will then be edited.

7. Open_form_view : This parameter enables opening a form view if the record is editable in the tree view.
<tree string="Student" editable="bottom" open_form_view="True">
For example, if the tree view is editable and the user wants to see the corresponding form view, the 'open_form_view' parameter adds a view button to the last column of the list view.

The following screenshot depicts that the user can see the form view of the corresponding record by clicking the ‘view’ button.

8. default_order: This parameter helps to define the sorting options for the list.
<tree string="Student" default_order="roll_number desc">
We can specify which field is used as the sorting parameter and whether it should be in ascending or descending order. By default, sorting is done in ascending order. The following screenshot shows that the records in the tree view are sorted in descending order based on the roll number.

9.default_group_by: This parameter helps to group the records in the tree view.
<tree string="Student" default_group_by="teacher">
Here, we can specify which field is used to group the records.

Expand: The expand parameter allows viewing the records within their respective groups.
<tree string="Student" default_group_by="teacher" expand="1">
Here, we can see the records are visible in each group.

Groups_limit: this parameter helps to determine how many groups are visible per page.
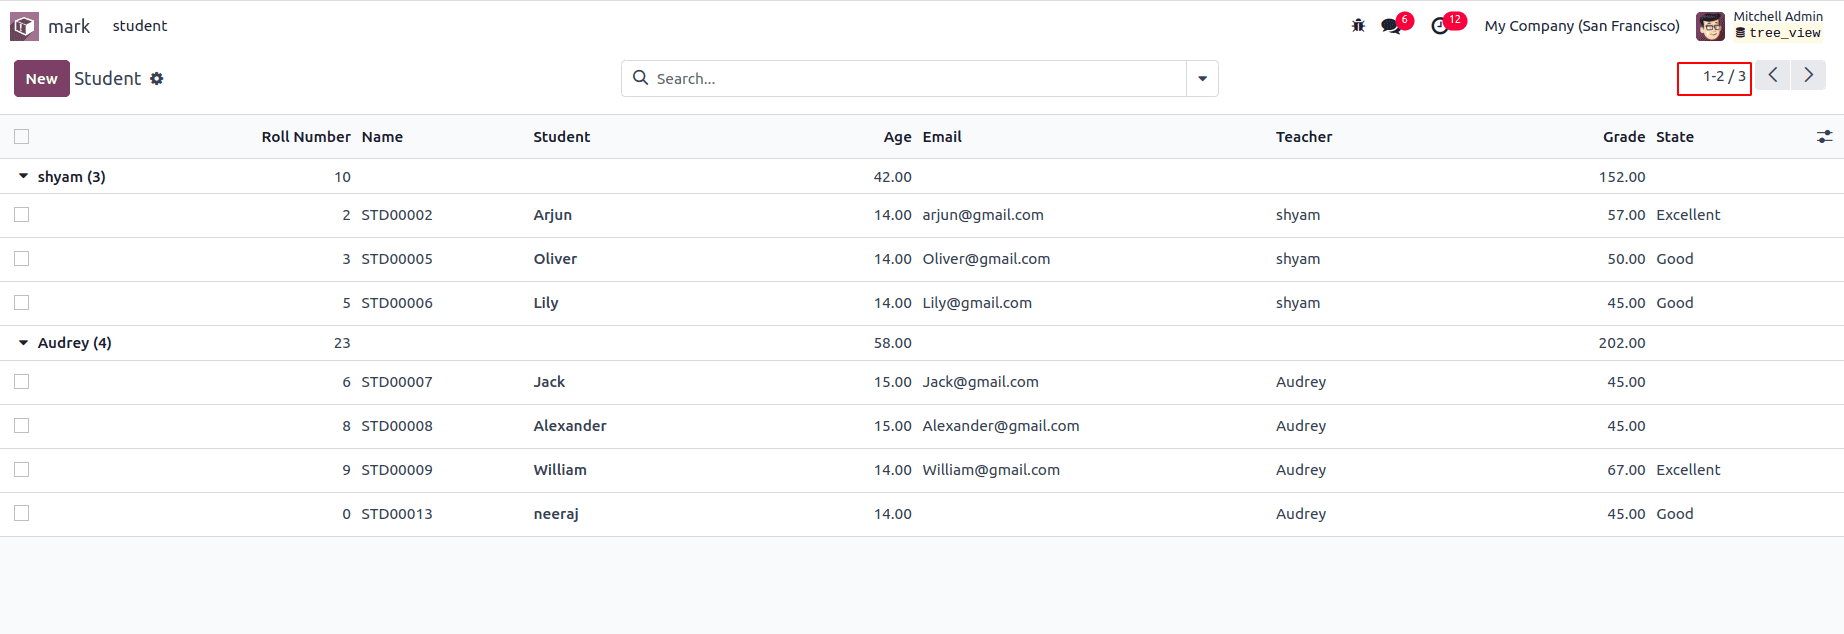
<tree string="Student" default_group_by="teacher" expand="1" groups_limit="2">
In the screenshot, we can see only two groups displayed. To access the rest, click the right arrow marked in the screenshot.

In conclusion, the ListView on the Odoo platform is one of the best views available. It provides users with a clear overview of all the records and can be configured to meet the business's operational needs.
To read more about List View Parameters in Odoo 16, refer to our blog List View Parameters in Odoo 16.