The removal of irrelevant documents in a company is a complex task. Using Data Cleaning software, we can avoid errors in the company files and work smoothly. ERP software is vital for a business to manage various company operations. The data Cleaning app in the Odoo 16 enables users to manage and validate several records in a firm. Odoo 16 Data Cleaning module provides a Field Cleaning feature that assists users in validating documents in an organization. All the company operations run smoothly using Odoo 16 Data Cleaning app.
This blog points out how to configure Field Cleaning Rules in Odoo 16 Data Cleaning module.
We can specify a model or cleaning mode and apply various rules when creating a new field cleaning rule. It is easy to verify data per your model's created rules. Users can access field cleaning records after selecting a model in the Field Cleaning window. Let's see how to configure Field Cleaning Rules with the Odoo 16 Data Cleaning module.
To Develop a Field Cleaning Rule in Odoo 16
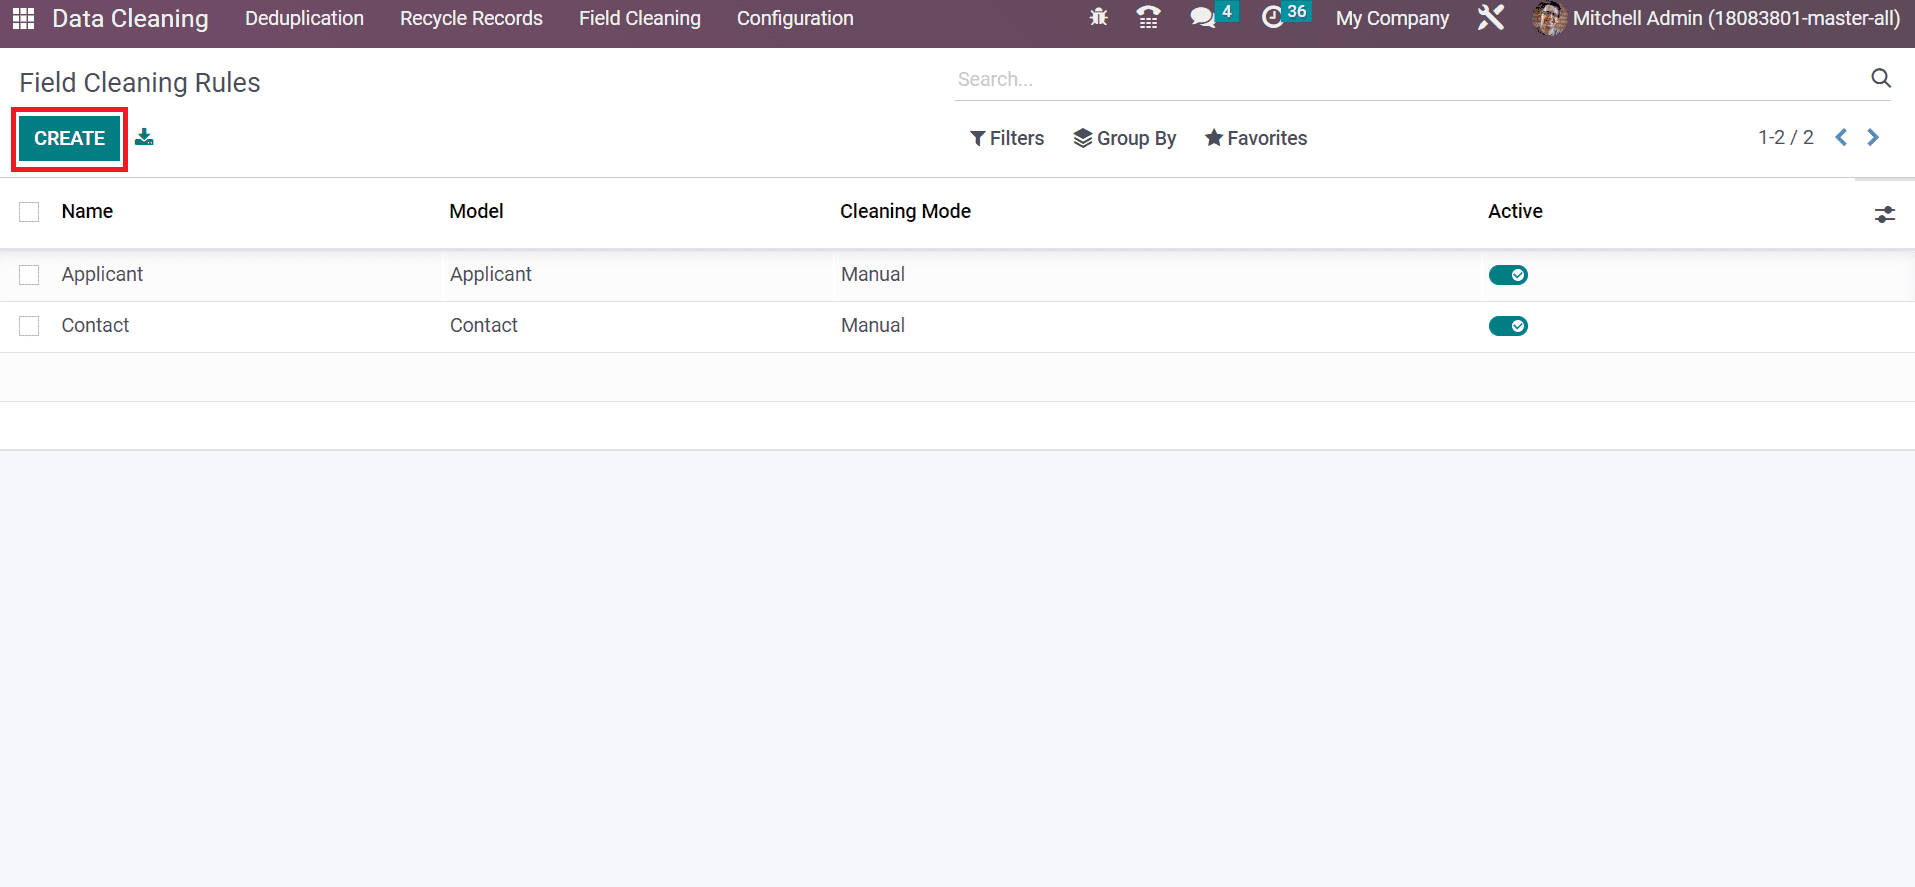
Choose the Field Cleaning menu below the Configuration tab to develop a new rule. You can obtain several models in the Field Cleaning Rules window. The information about each rule, including Model, Name, Active, and Cleaning Mode, is viewable to the user. Press the CREATE button to generate a new field-cleaning rule to validate documents, as demonstrated in the screenshot below.
In the new Field Cleaning Rules window, enter the rule name and choose your model to clean inside the Model field. The Cleaning Mode takes place in automatic and manual methods, as denoted in the screenshot below.
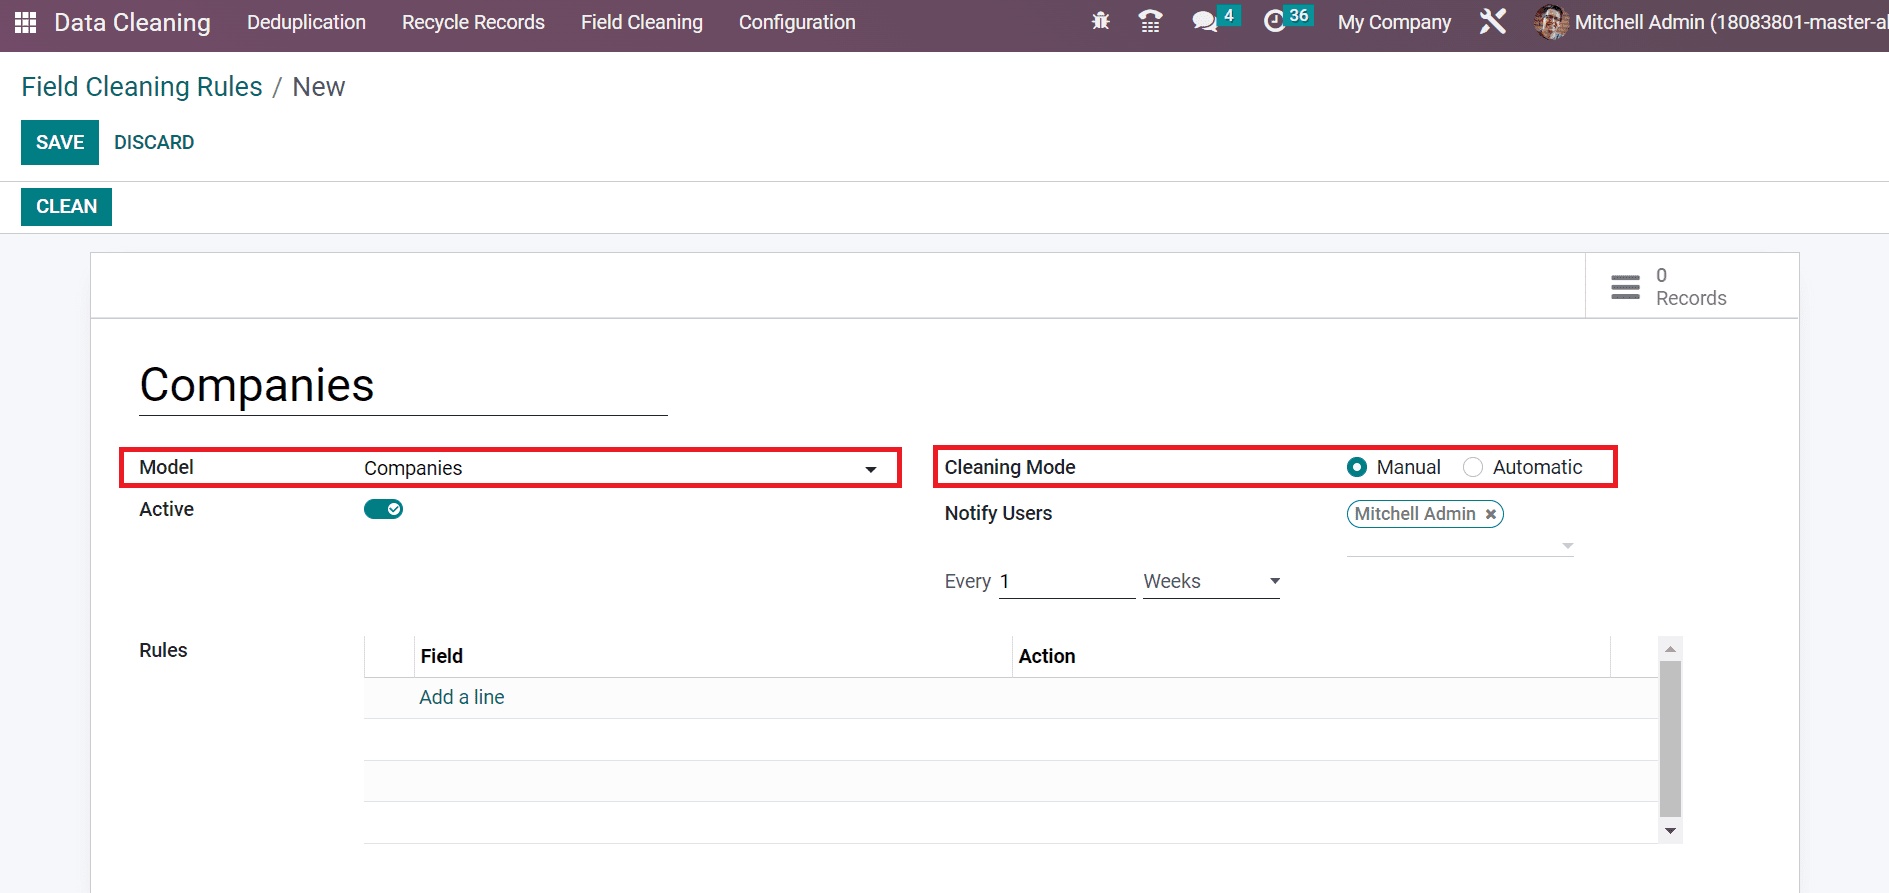
Users can clean the data in both manual and automatic ways. Data is validated automatically by choosing an automatic option in the Cleaning Mode field. However, you can set the instructions for clearing data manually by choosing the Manual option inside Cleaning Mode. We select the Manual Cleaning Mode for the Model Companies, as mentioned in the screenshot below.
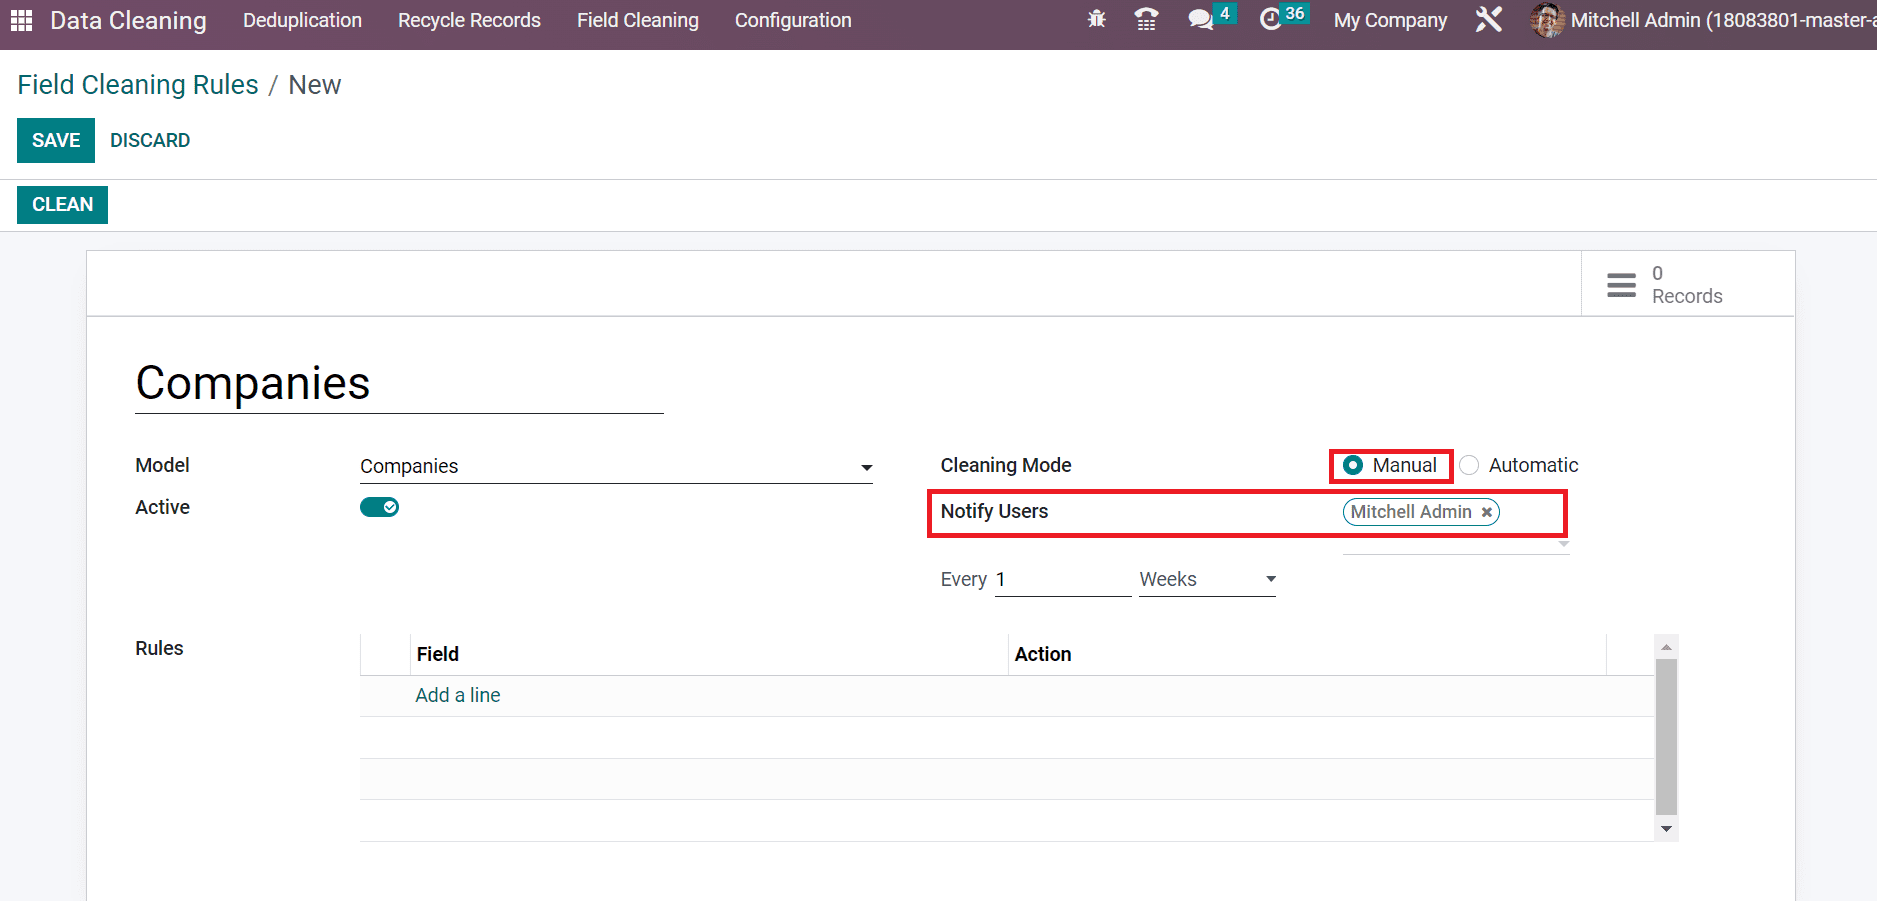
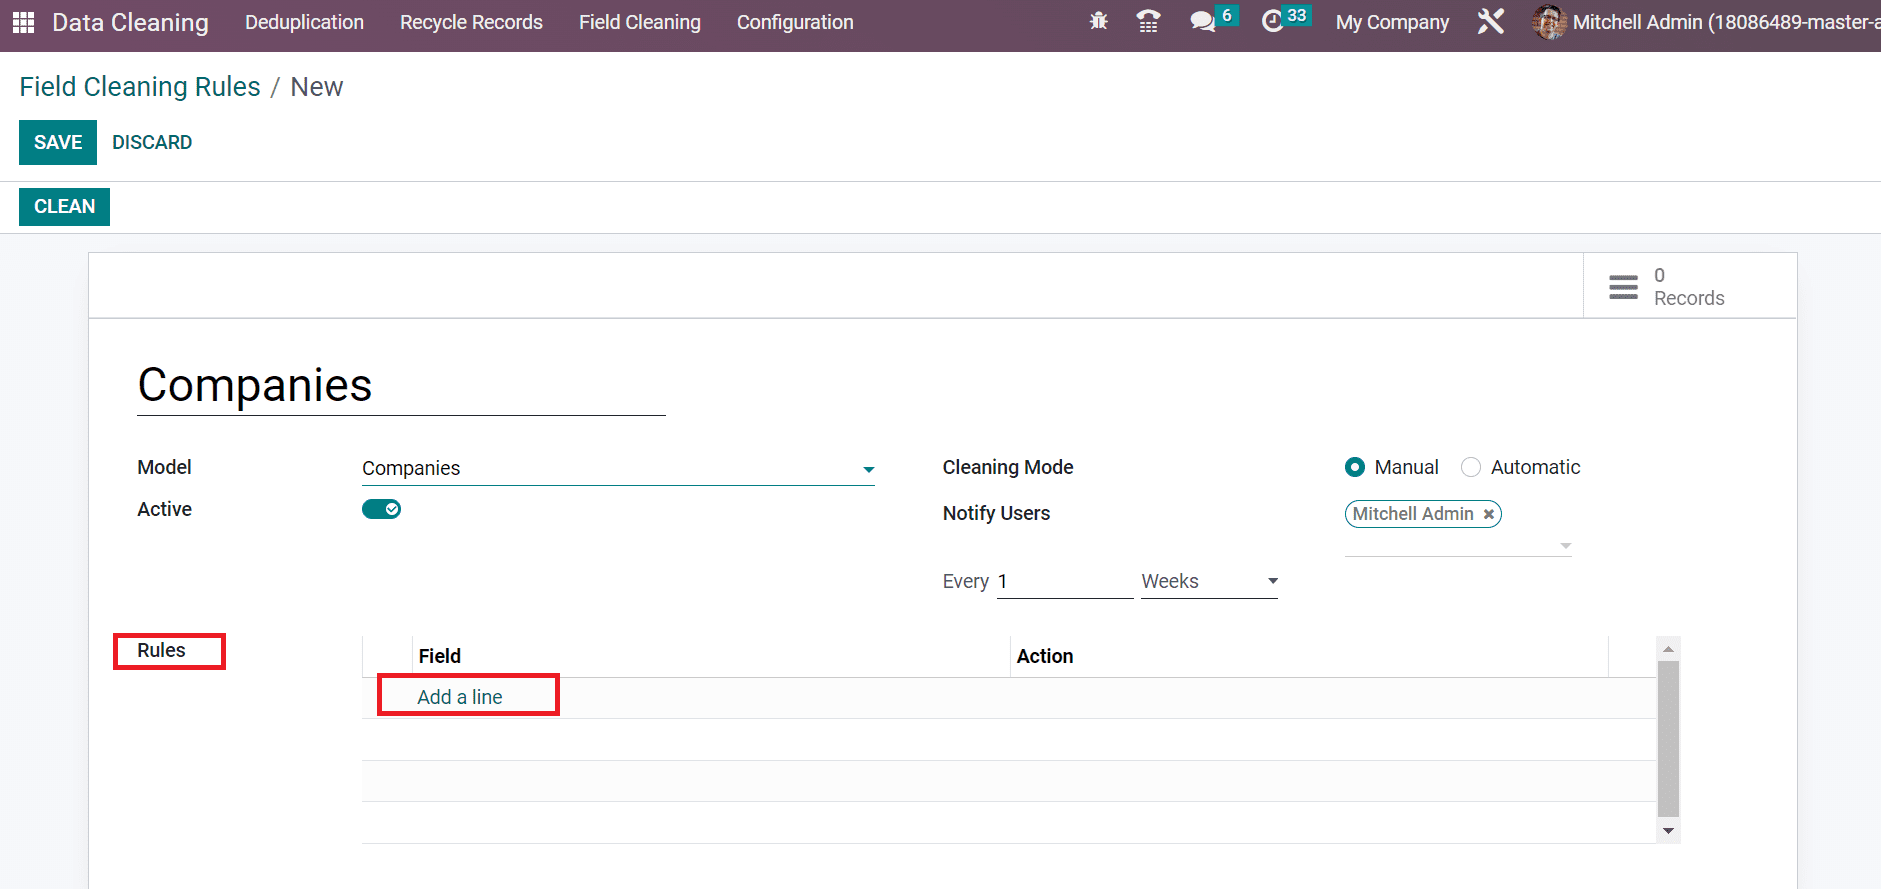
After choosing the Manual option, a Notify Users field appears before the user, as shown in the above screenshot. Select the users to send a notification of clearing documents within the Notify Users field. It is possible to notify users in a day, month or week. Next, we can apply specific rules for the selected model inside a Field Cleaning Rule. By choosing Add a line option below the Rules section, you can specify new rules to substantiate data as marked in the screenshot below.
A new Create Rules window is visible to you after selecting the Add a line option. Choose the cleaning data inside the Field to Clean option.
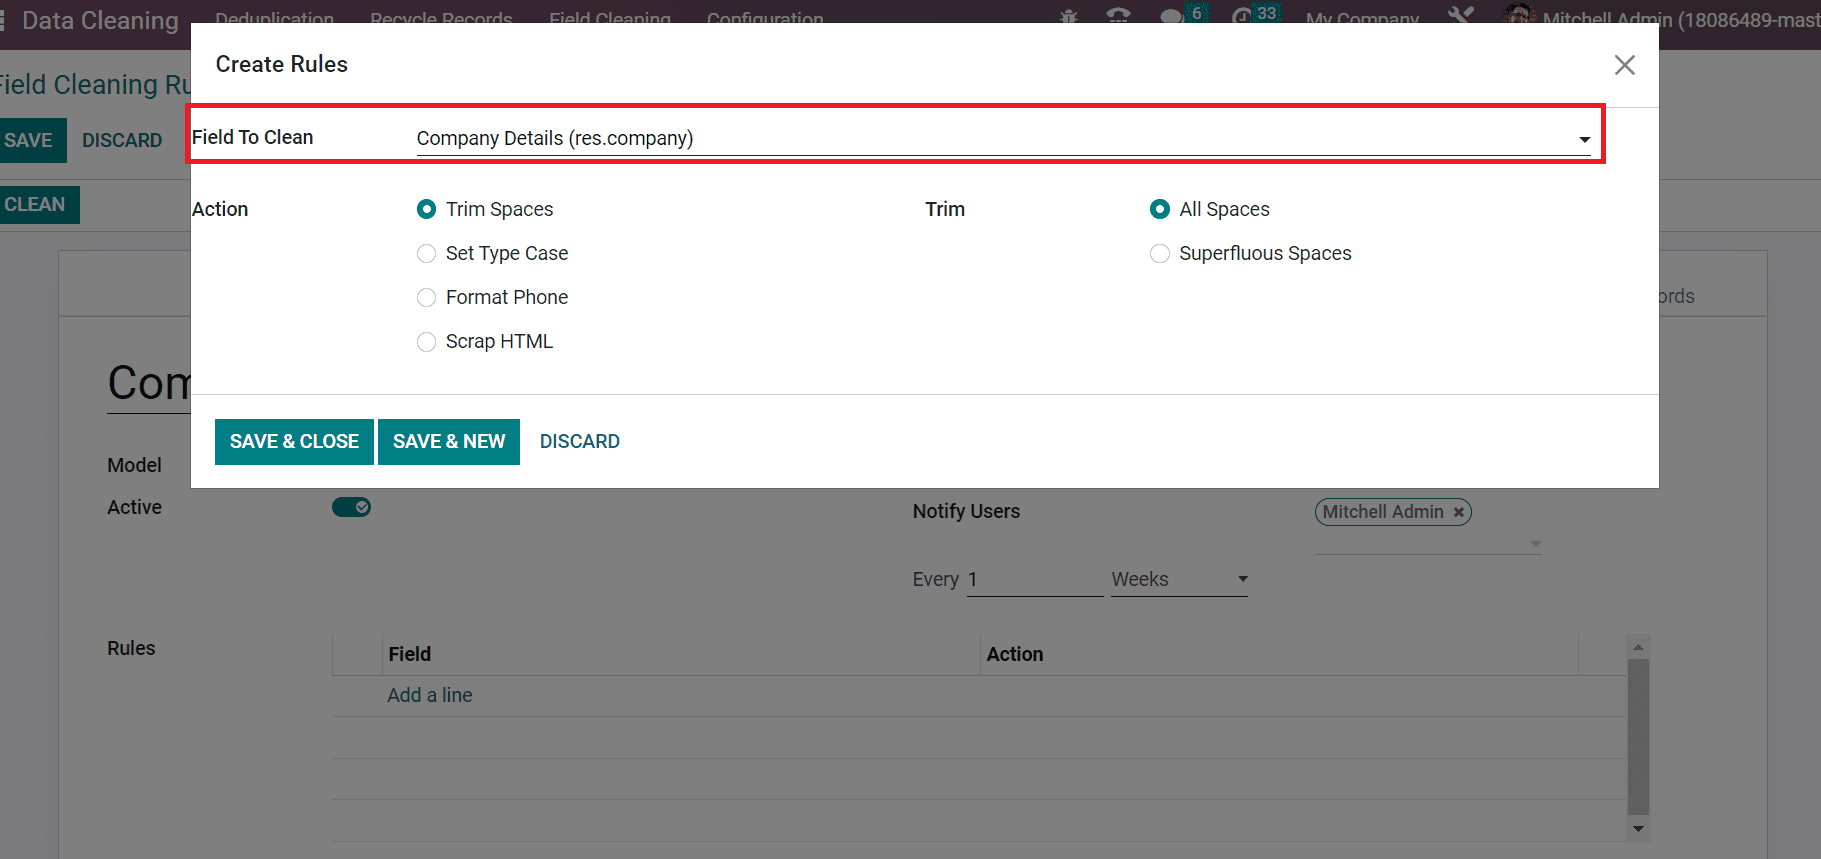
Here, we add the Company details field to clean using the Field Cleaning rule. Next, you can pick an action to clean the files. The Action is classified into Scrap HTML, Format Phone, Set Type Case, and Trim Spaces. We select the Action Trim Spaces, and a Trim field appears to you, as marked in the screenshot below.

It is possible to trim All and Superfluous Spaces. After selecting the All Spaces option, click the SAVE & NEW button, as shown in the above screenshot. Now, the user can pick another field to clean and choose the Set Type Case in the Action field.
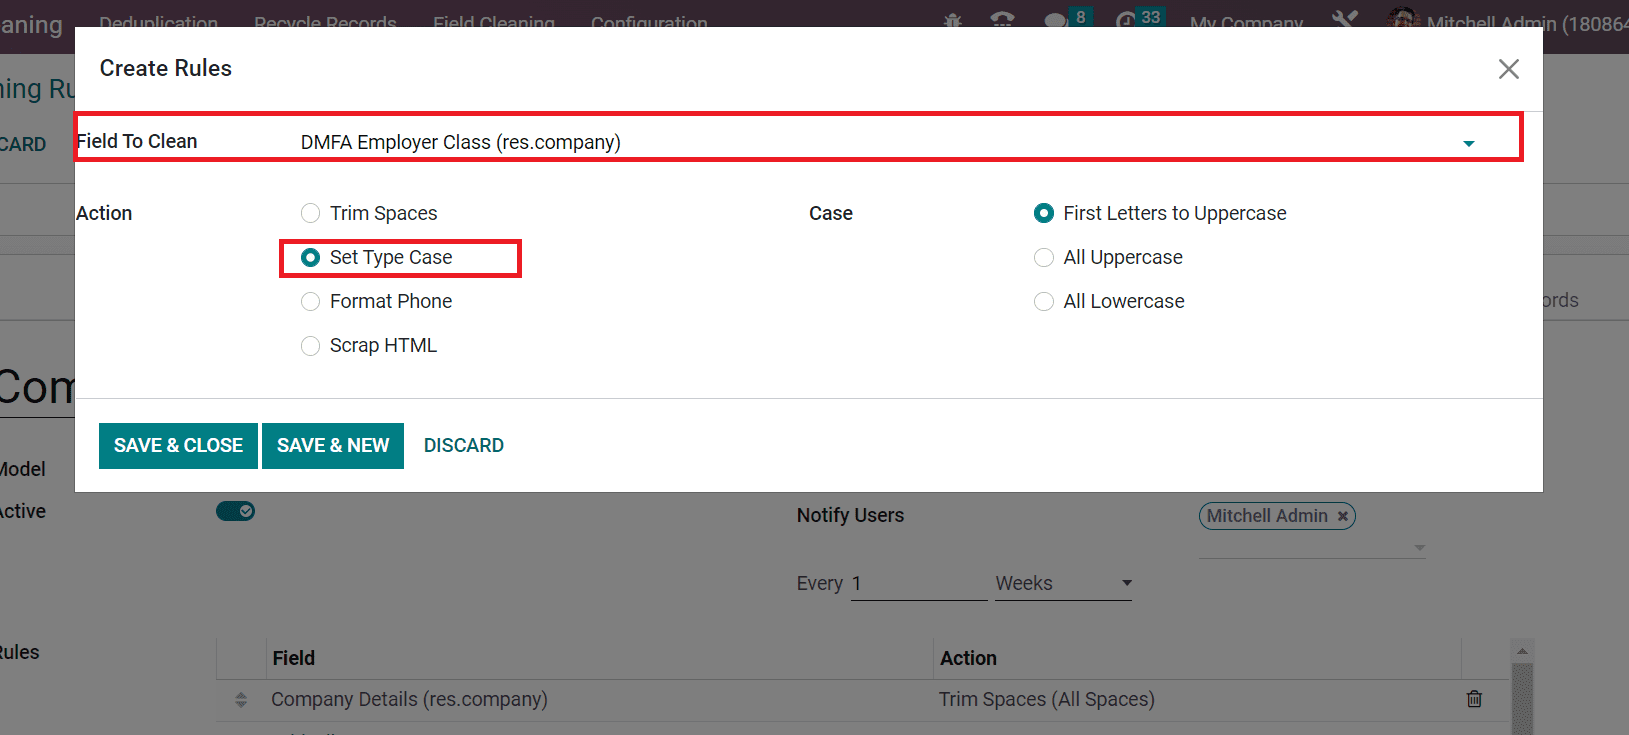
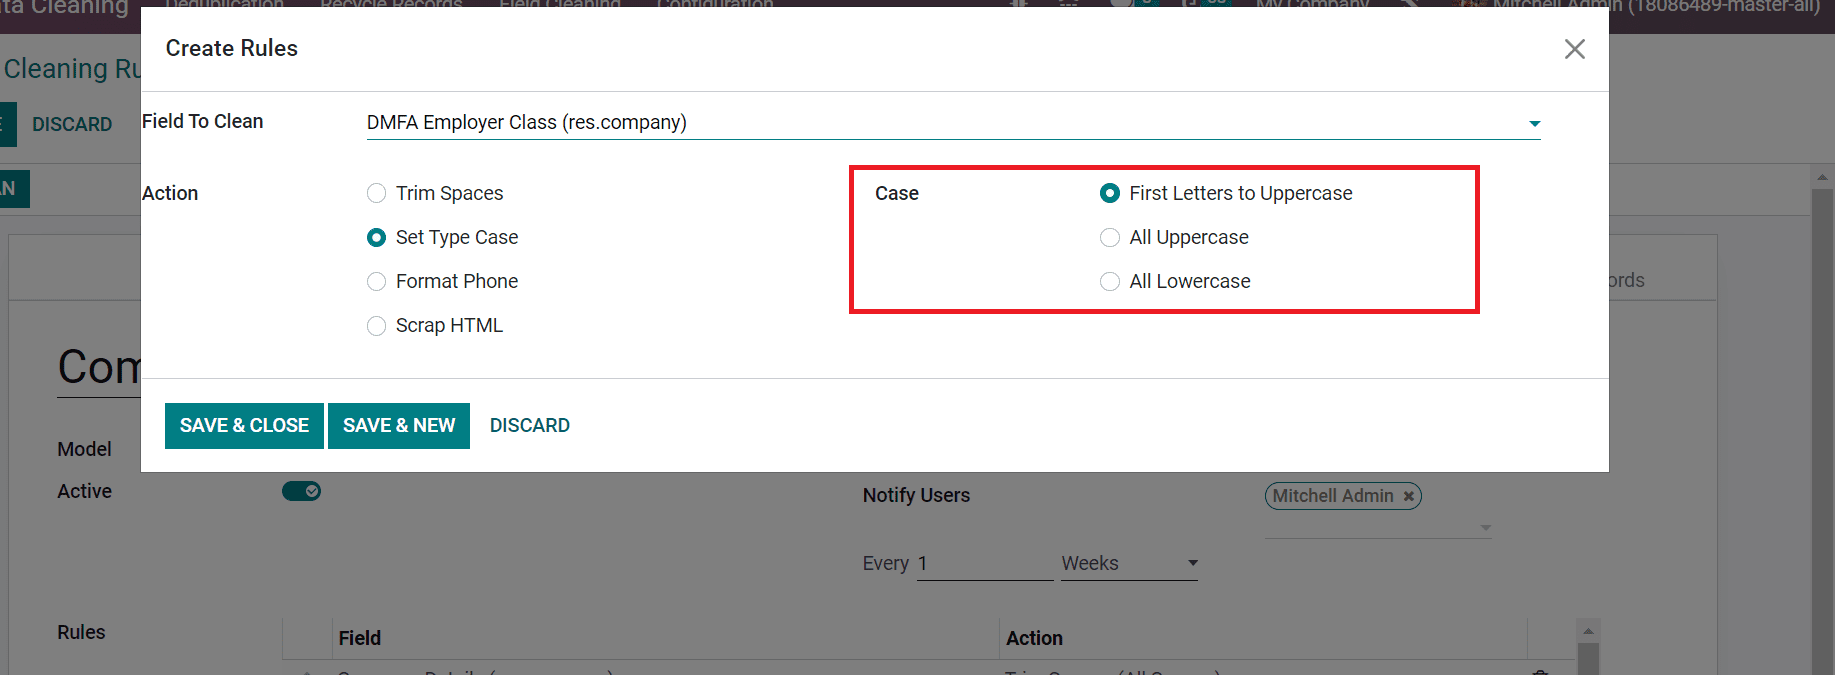
By choosing Set Type case, a Case field opens before you. Three such instances as All Lowercase, First Letters to Uppercase, and All Uppercase are accessible for the Set Type Case Action as presented in the screenshot below.
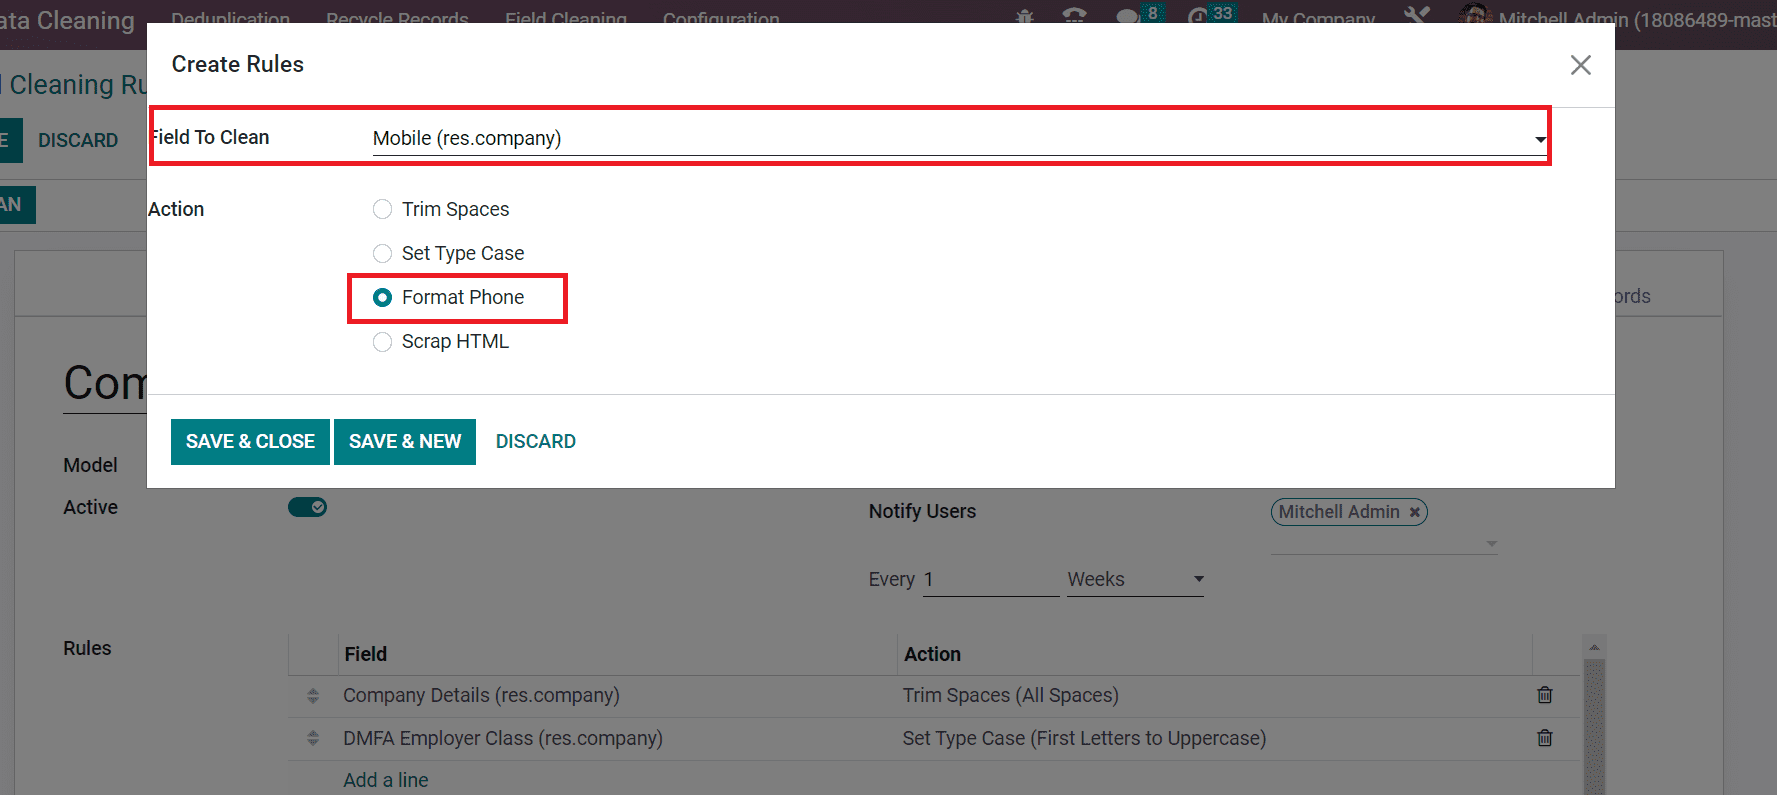
Press the SAVE & NEW button, and we can apply another clearing field. Phone formatting is a tough task for most companies and businesses. Individuals use various commands and spacing for the formatting of phones. Using the Format Phone action, the user can format the numbers per the country extension based on an international phone schema. For that, Choose the Mobile option in the Field to Clean Field and select the Action as Format Phone.
After saving the data, we can set another field to clean based on the Scrap HTML action. By selecting the Scrap HTML option, you can remove Html data and remain the text plain.
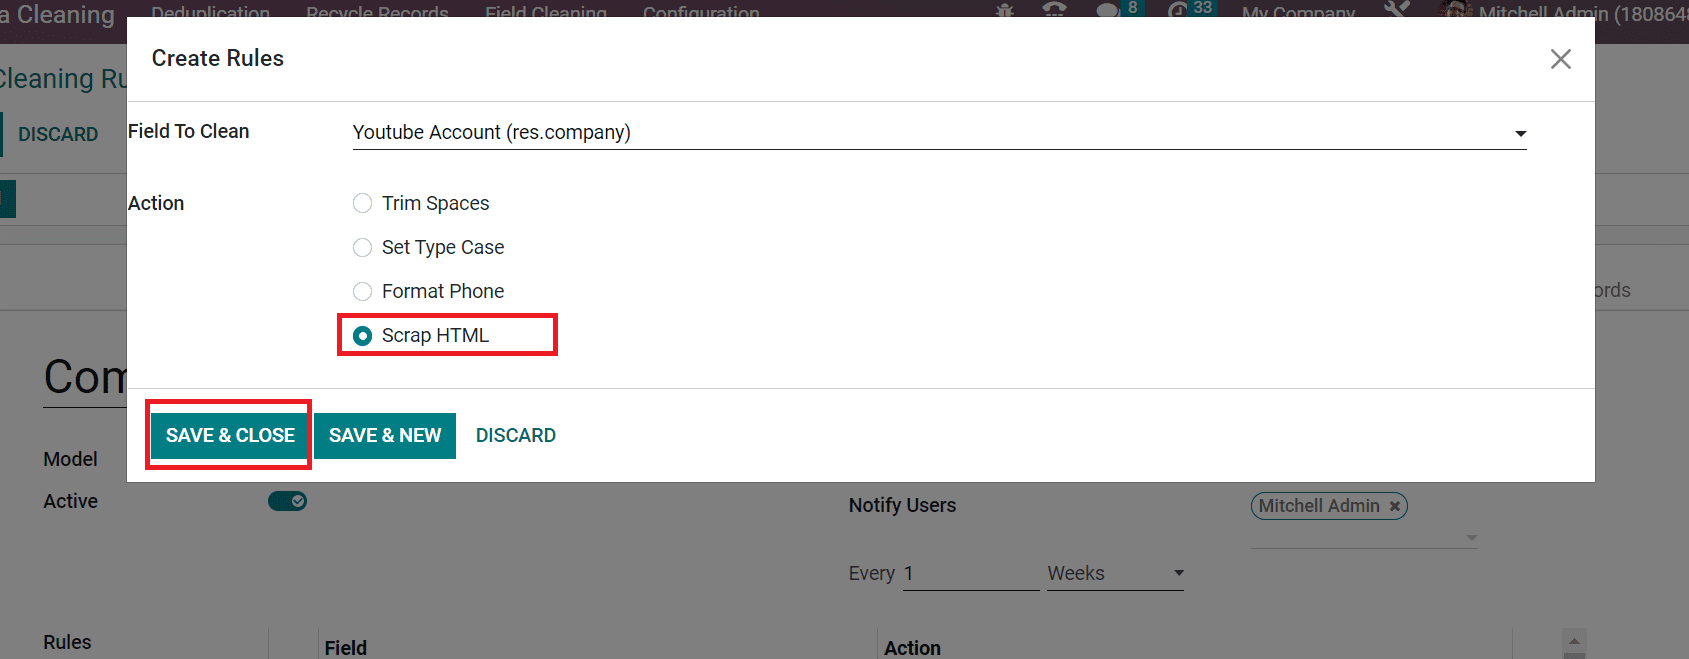
Click the SAVE & CLOSE button after applying all rules to clean specific fields. Users can access all developed rules inside the Rules section in the Field Cleaning Rules window.
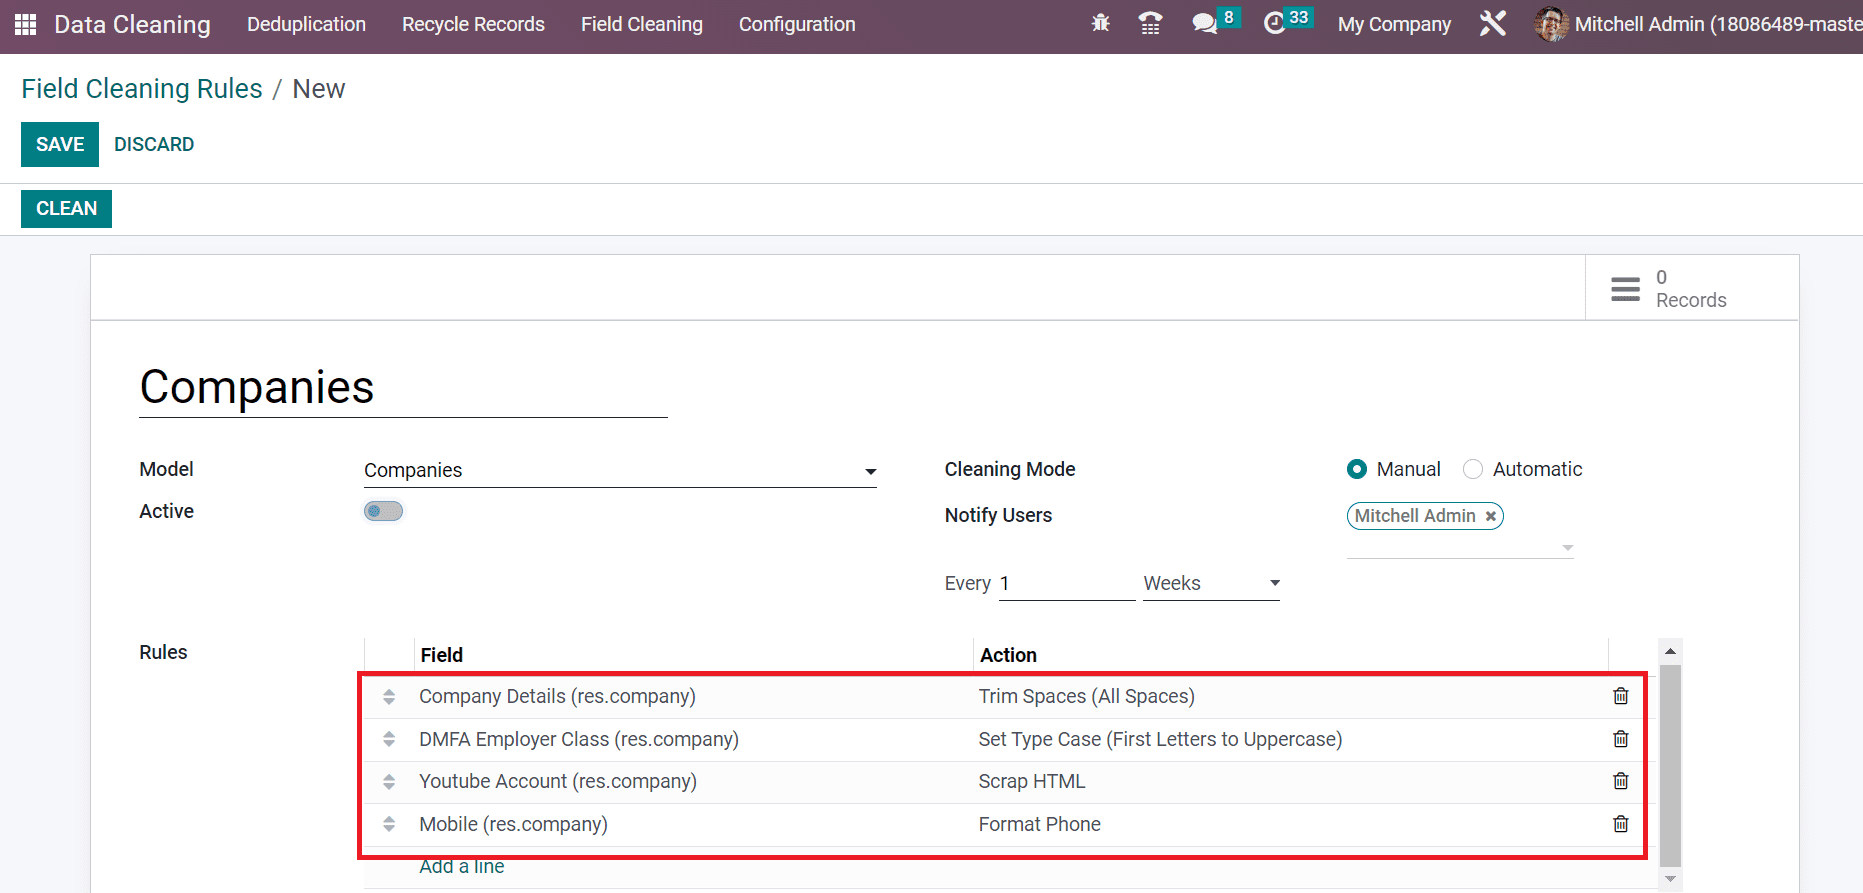
After applying all data related to your field cleaning rule, choose the SAVE button.
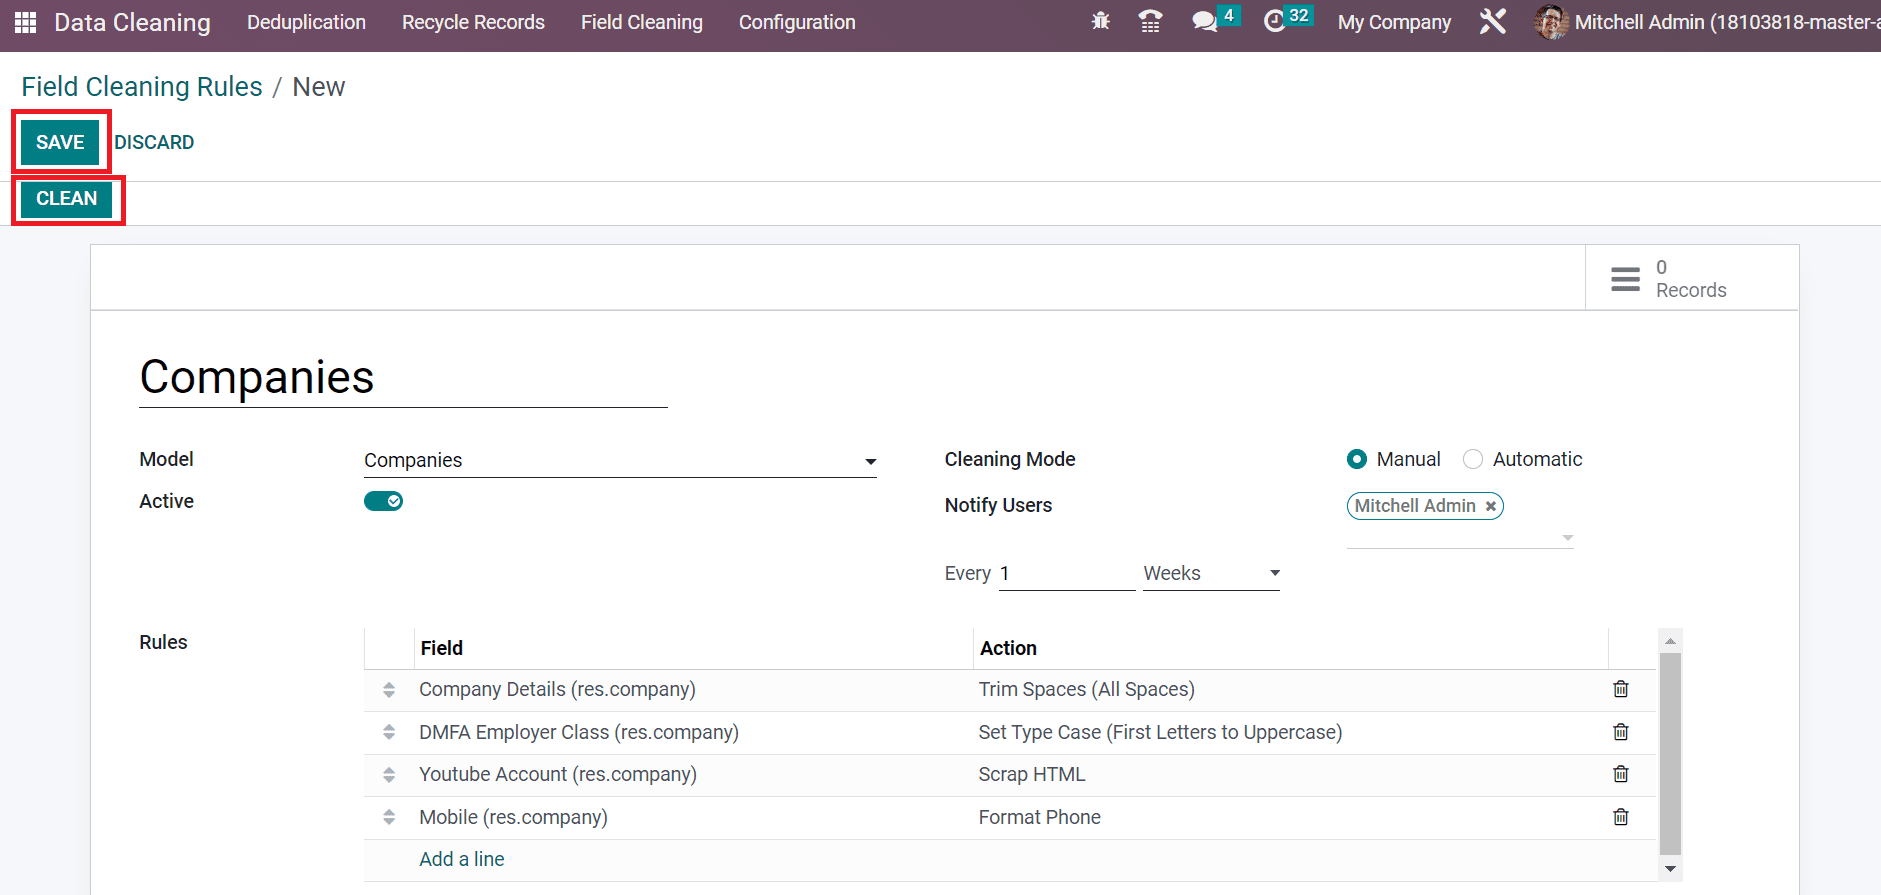
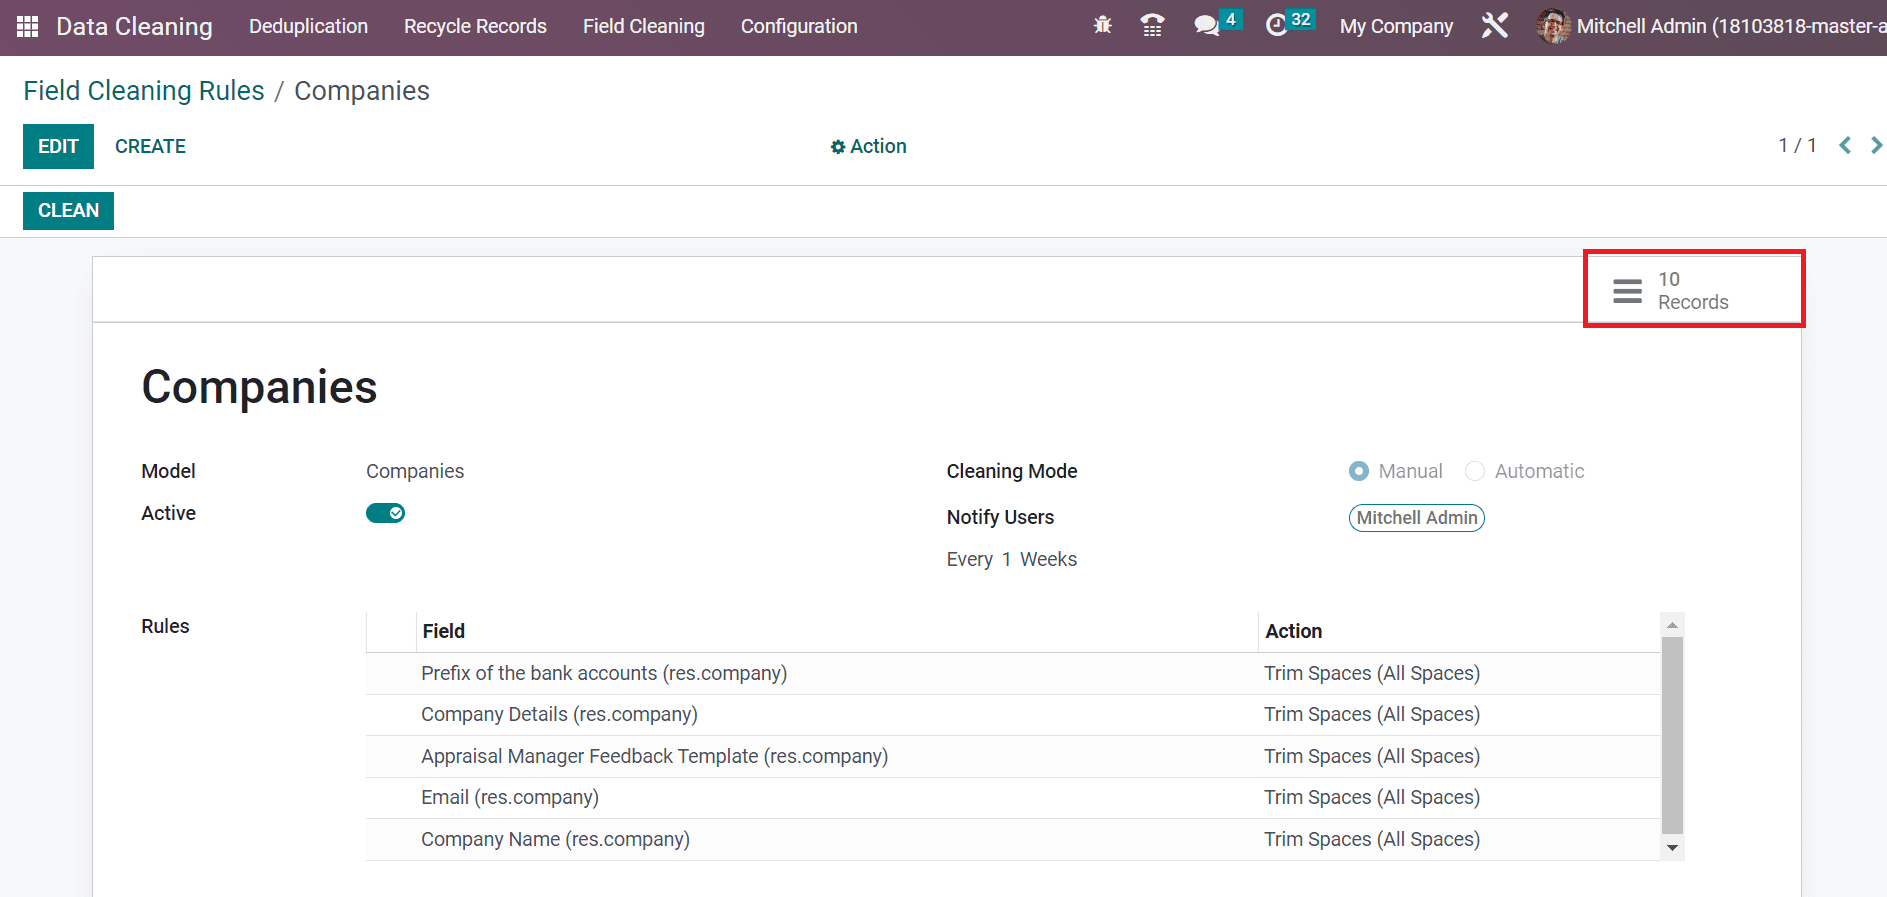
By selecting the CLEAN icon, you can clear the necessary fields concerning your model. We can see essential records to clean inside the Records smart button.
How to Clear Data inside the Field Cleaning Records of Odoo 16?
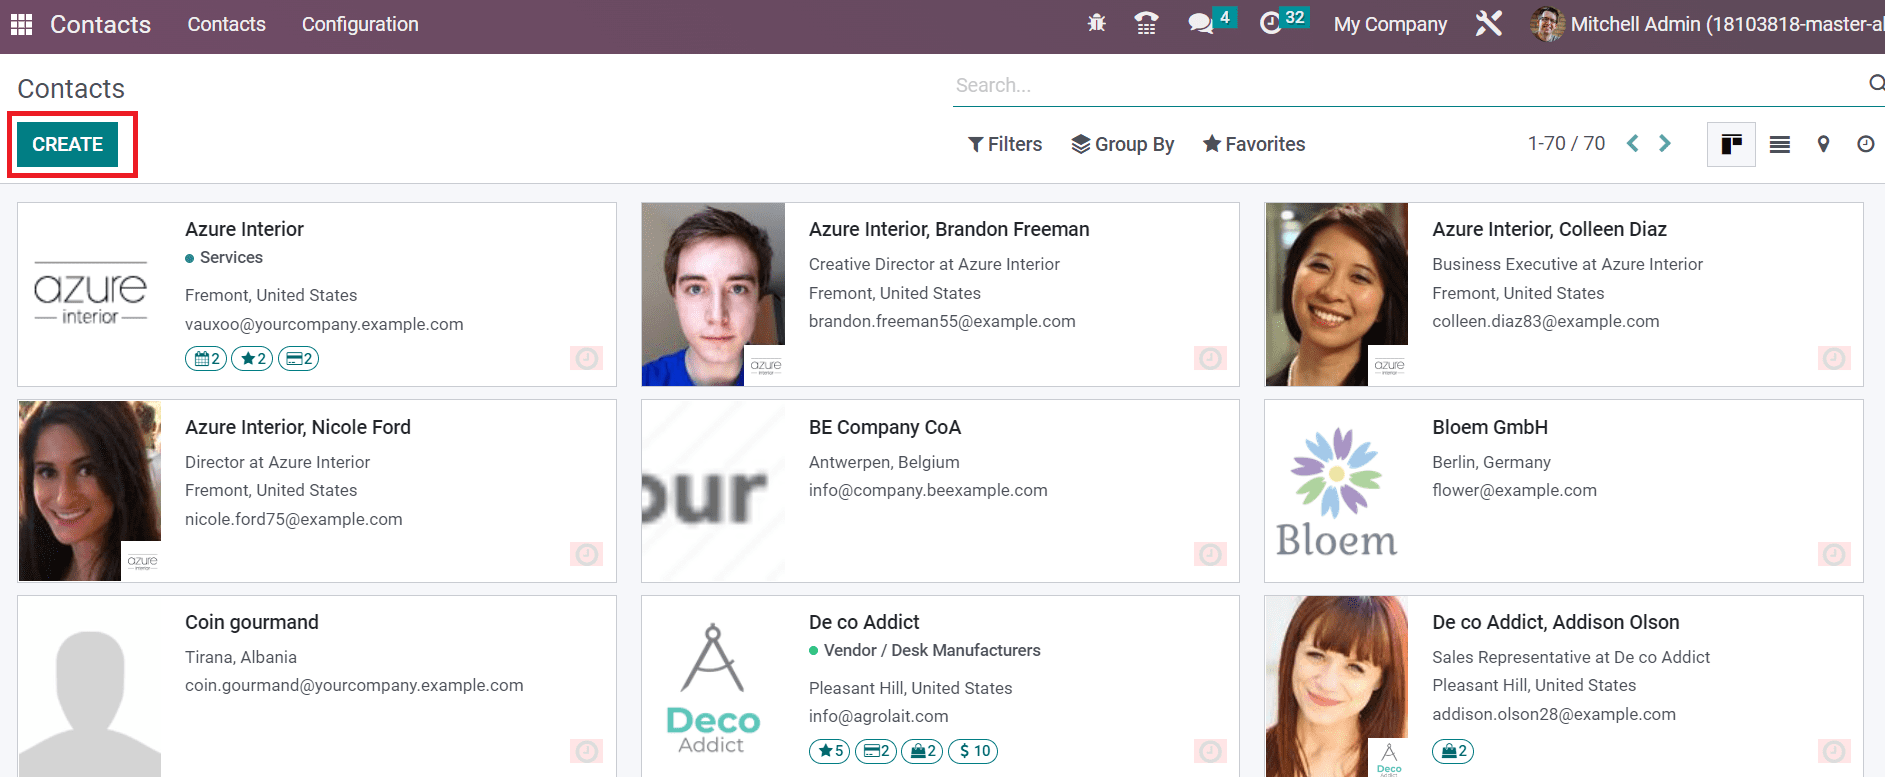
Click the Field Cleaning tab in the Odoo 16 Data Cleaning module, and each record to clean is visible to you. Before that, let's move to Odoo 16 Contacts module and develop a new contact. Choose the CREATE button in the Contacts menu of the Odoo 16 Contacts module as defined in the screenshot below.
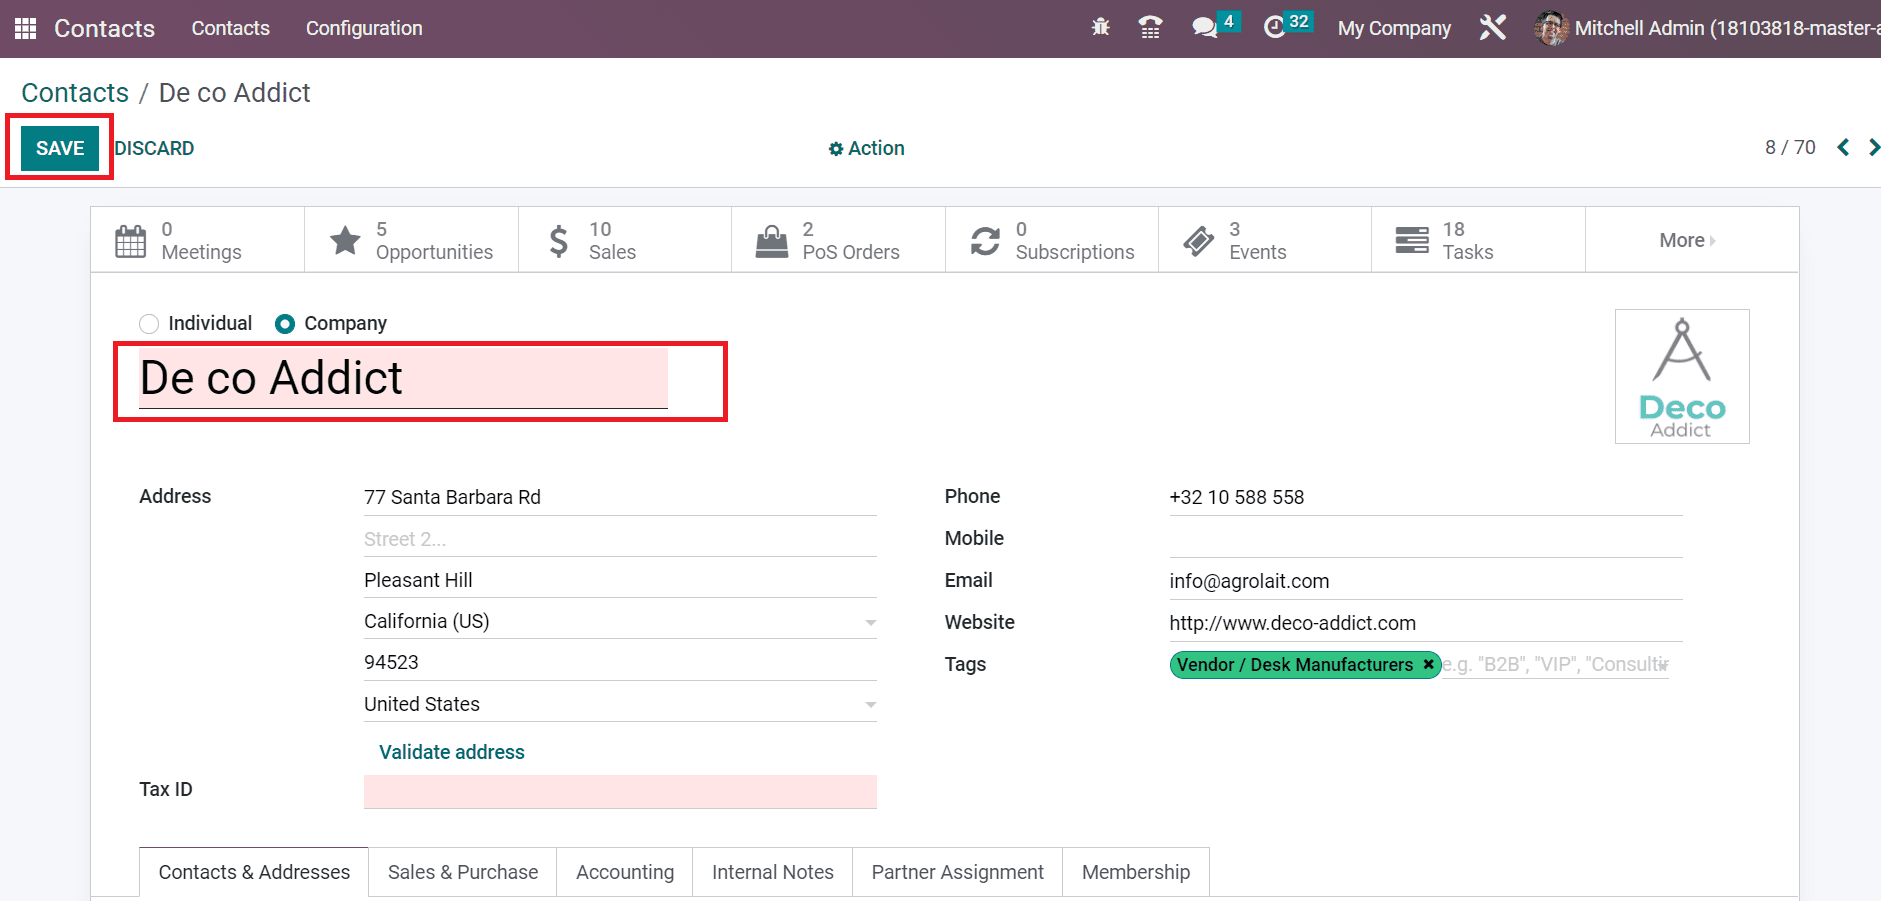
In the new window, enter the contact person's name as ‘De co Addict’. Later, click the SAVE icon after applying contact data as pointed out in the screenshot below.
Now, we can move to the Field Cleaning Records window in the Odoo 15 Cleaning module. You can access information on each record such as Field, Record ID, Current, Suggested, Record Name, etc. Users can view the created contact name in the Field Cleaning Records window after choosing the Contact option below the CLEANING RULES section.
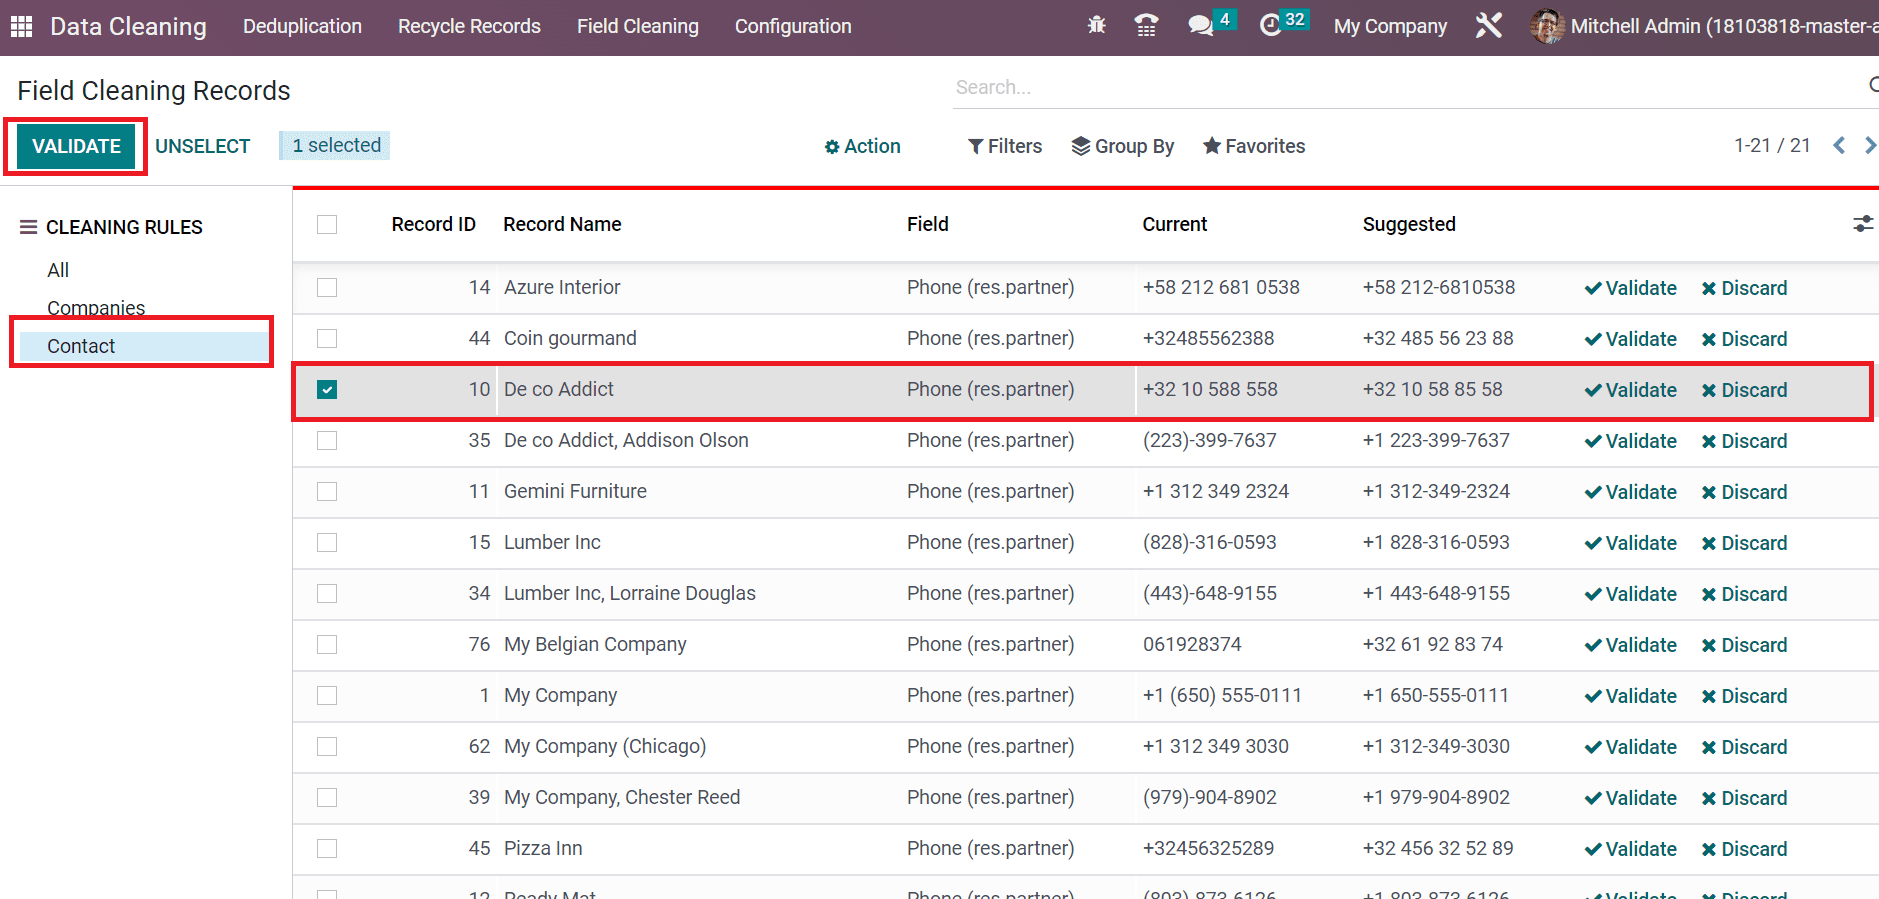
After selecting the respective record, click the VALIDATE button, as shown in the screenshot below. Next, we can move to Odoo 16 Contacts window and check out the respective contact.
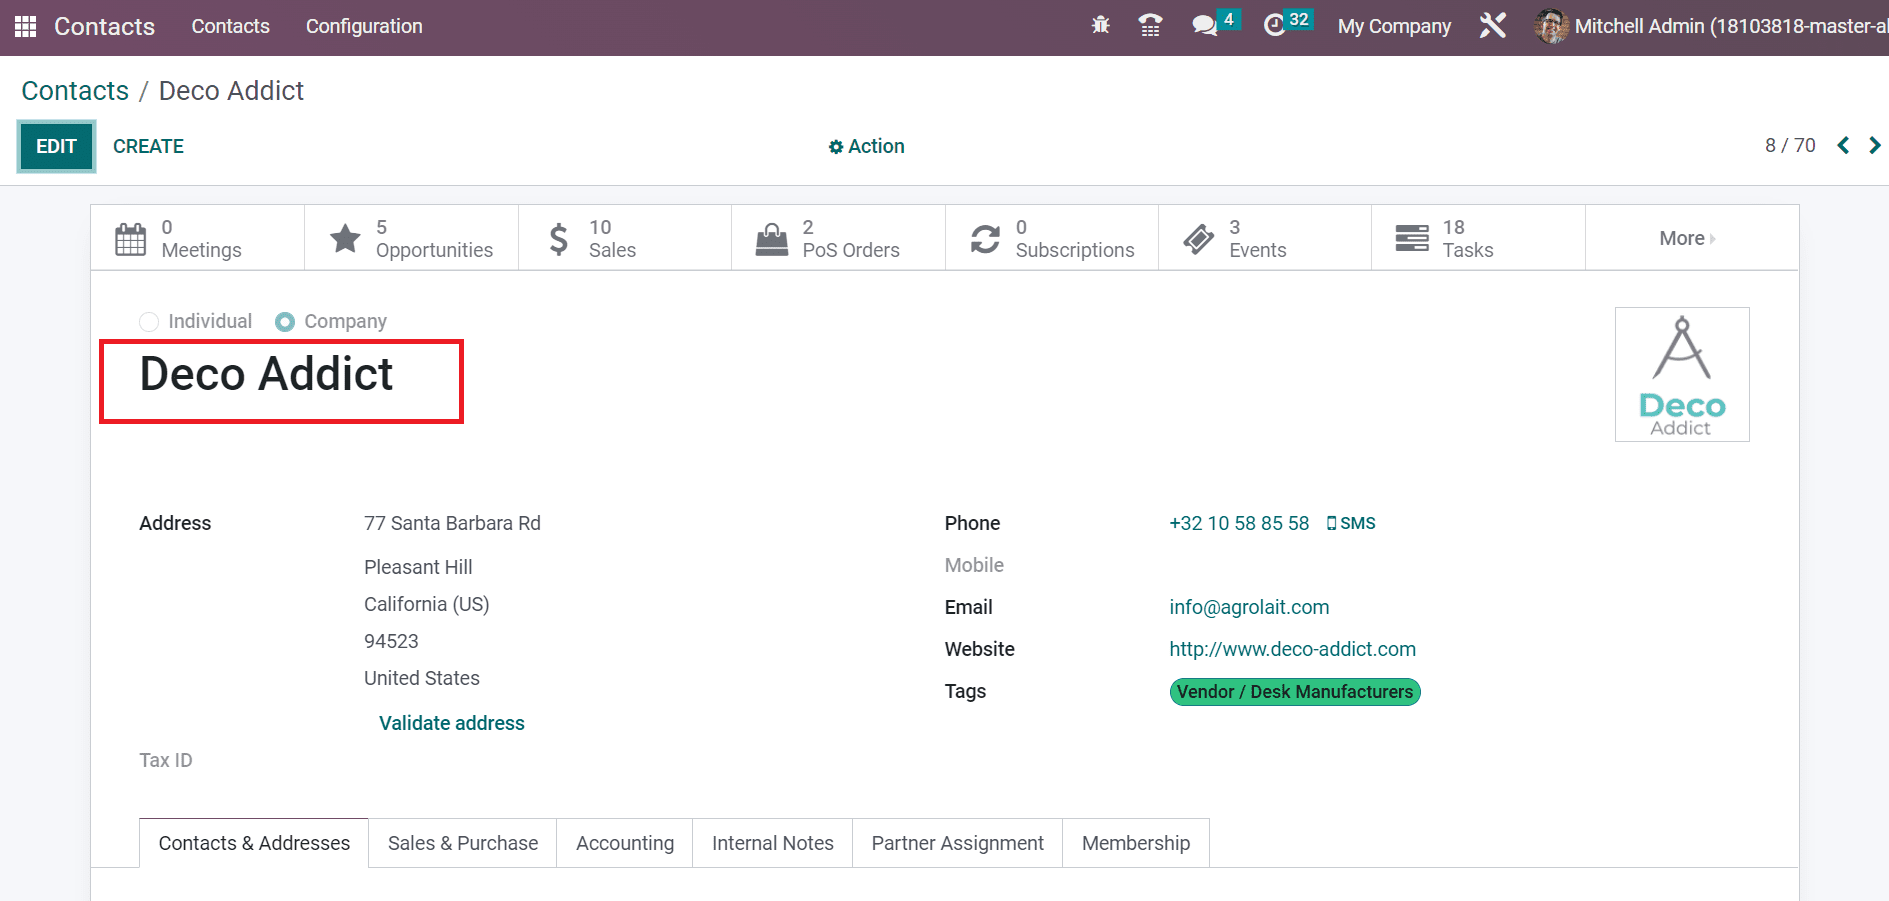
Here, we can view that the space is shortened after validating the record. So, verifying data records within Odoo 16 Data Cleaning module is easy.
Users can fastly develop field-cleaning rules to remove errors in documents. Creation of rules, models, and cleaning of records become simple using the Field Cleaning rule. We can process an error-free database with the support of the Odoo 16 Data Cleaning module and boost business productivity.