The reordering rule in Odoo is basically a set of rules that the user can set to make sure that the stock would never run out and Replenishment can determine the efficiency of your flow of goods as they move throughout your supply chain.
This blog will help you on how to use the reordering rule and Replenishment in Odoo 15
Reordering Rule
To understand the proceedings of the Replenishment option in the Odoo system you have to know about the Reordering rule. This rule makes sure that your product would never run out of stock and at least a minimum quantity is maintained. It is easy to use this feature in the Inventory module of the Odoo 15. Go to your inventory module and select any product from the list of products that you have as shown in the screenshot given below.
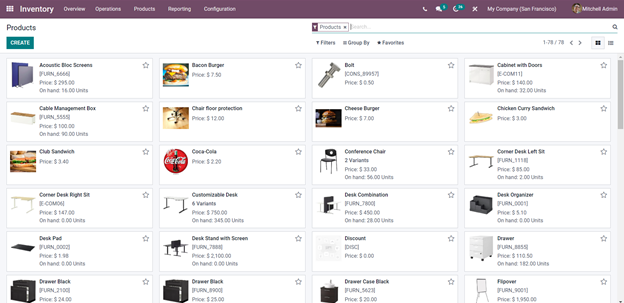
Click on the Product you want and the page with the configuration options will be available to you as shown in the screenshot given below
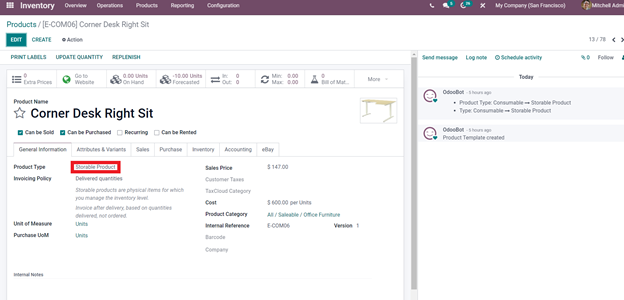
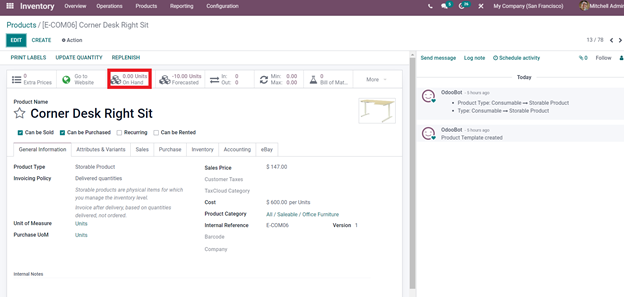
You have to make sure that the product is storable as highlighted in the screenshot given above. Here the unit in hand is 0 as highlighted in the screenshot given below.
To create a Reordering rule click on the Min/Max tab as shown in the screenshot given below.
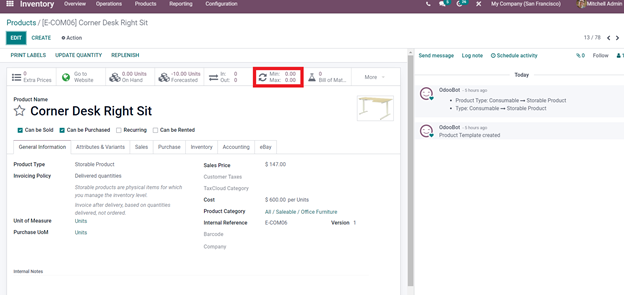
This will take you to the Reordering window as shown in the screenshot given below.
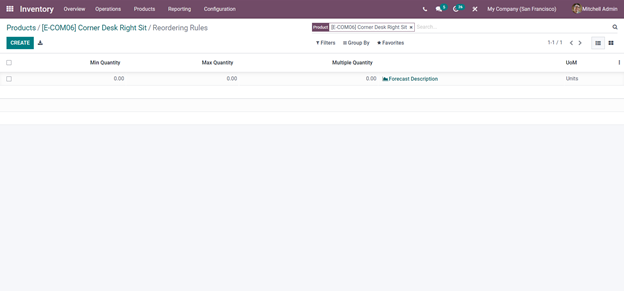
If you can t find a field click on the Create buttons and the fields will be automatically created for you For disabling or enabling the fields you need click on the three shots as shown in the screenshot given below.

From the drop down options click on the options that you want fields on as shown in the screenshot given above. The number of fields will increase as you tick on the options. Activate the fields you think are necessary and continue.
Click on the fields to edit them and enter the quantities and set the trigger. If you enter 10 as the minimum quantity then the rule will trigger or activate when the stock goes under 10. Similarly you can set the maximum amount of stock product that can be purchased.
There are two triggering options: Manual and automatic. For triggering manually, Save the rule and form the Operations tab click on Run Scheduler will give you a drop down tab as shown in the screenshot given below.

Click on Run scheduler. Open the operations tab again and click on the Replenishment option and the product will be shown there as in the screenshot given below.

So the entry is created manually and you can manually Replenish the product or generate the RFQ to replenish the product click on order once from the highlighted fields as shown in the screenshot given above and the Replenishment has been created. Now go to your purchase module and you can see that an RFQ is generated as shown in the screenshot given below.
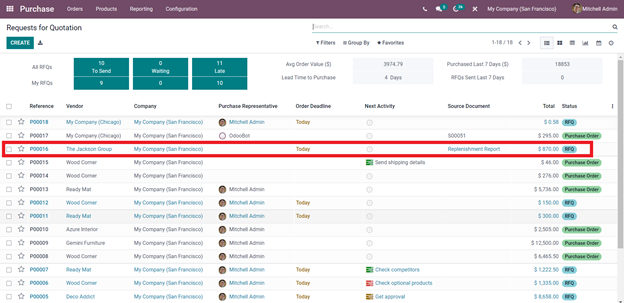
Click on the generated RFQ for more configuration options as shown in the screenshot given below.
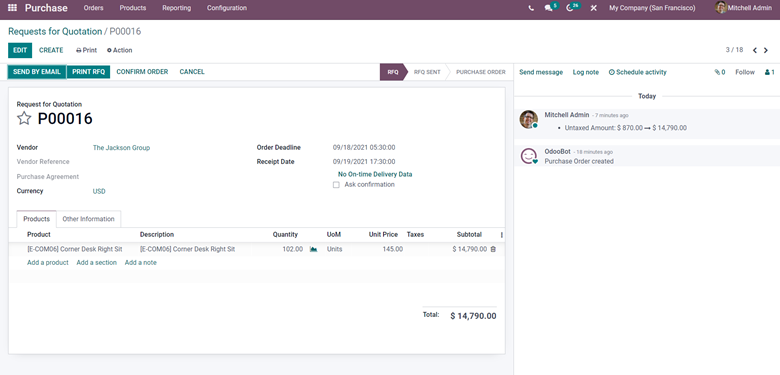
Click on the edit button for editing the options. After the configurations click on the Confirm order button then the Receive products button form the new page and then click on the Validate button. If you want to check the product go to the products tab and search for the product that you have configured and you can see that the unit has changed as shown below.
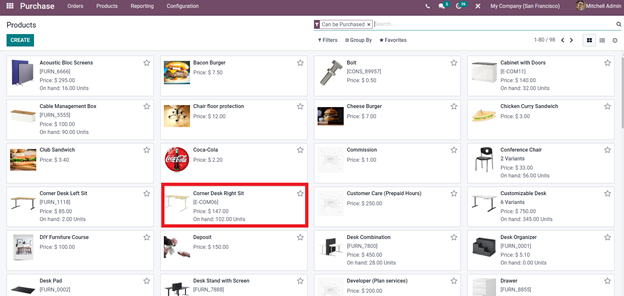
You can see that the on-hand unit of the product has changed.
For the Rule to trigger automatically click on the automatic trigger from the Reordering rules as shown in the screenshot given below.

Click on it and go to the operations tab and click on the Run Scheduler and the RFQ will be automatically created. And follow the instructions given above.
Replenishment
You can access the Replenishment feature from the Products on your Inventory module as shown in the screenshot given below.
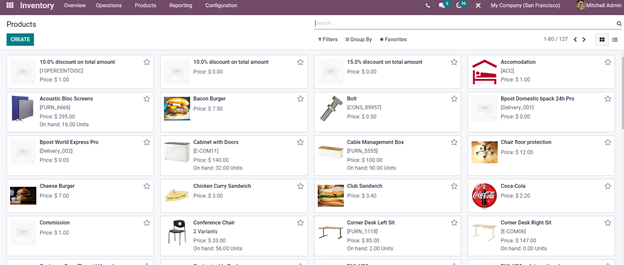
Click on any of the products for configurations and replenishment options as shown in the screenshot given below.
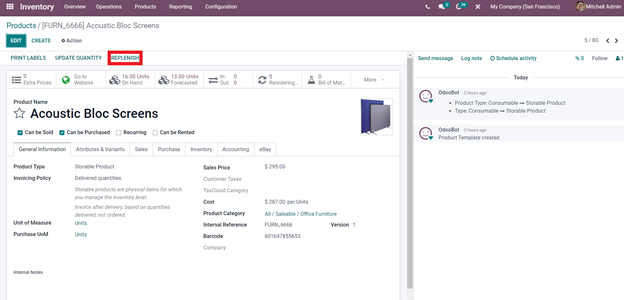
From the configuration page click on the Replenish button as highlighted in the screenshot given above and Odoo will give you a final configuration tab as shown below.
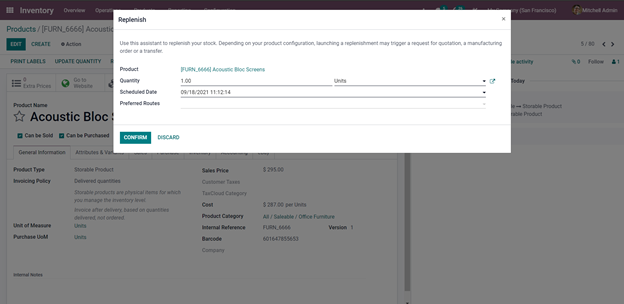
Enter the details and click on confirm to continue with the replenishment. Enter the quantity of the product units along with the scheduled date and enter the preferred routes then click on continue.
You can complete the process in another way. Go to the Operations tab in the Inventory module and click on the Replenishment options from the drop-down menu. As shown in the screenshot given below.
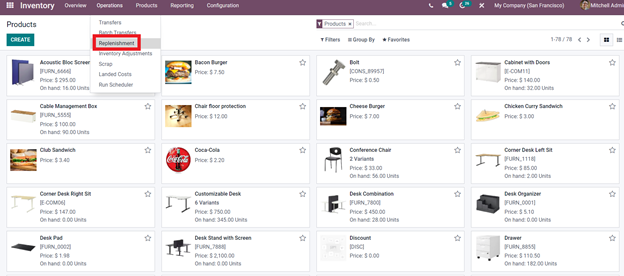
Clicking on the option will give you a Replenishment page with earlier entries.
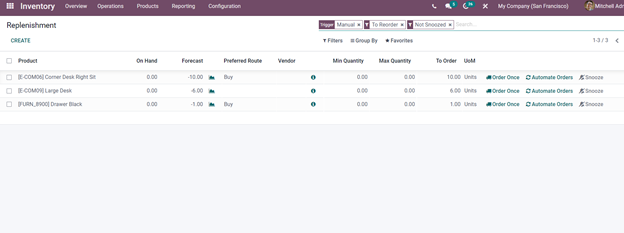
You can create the entries manually from here by clicking on the Create button as shown in the left-hand corner of the screenshot and a new entry will be created automatically as shown in the screenshot given below.

Click on the respective fields to update them with the product information along with Preferred route, Minimum quantity, maximum quantity, and To Order details. After this Order once, Automate Orders and Snooze options will automatically appear as shown in the screenshot given below.
The snooze option will allow you to hold the RFQ for a certain period of time. You can choose between the various Snooze options to hold the RFQ for a day/week/one month. as shown in the screenshot given below.

You have the option to customize the Snoozing period by clicking on the Custom button as shown above

Click on the Order once option as shown above to generate an RFQ instantly and for triggering the rules click on the Automate Orders.
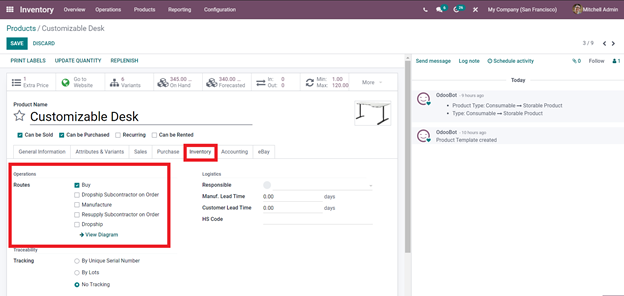
It is important to note that you have to configure the Preferred route from the product configuration. To configure this option go to your Product tab and click on the Product that you want to configure. Under the inventory tab, the product click on the Prefered route as shown in the screenshot given below.
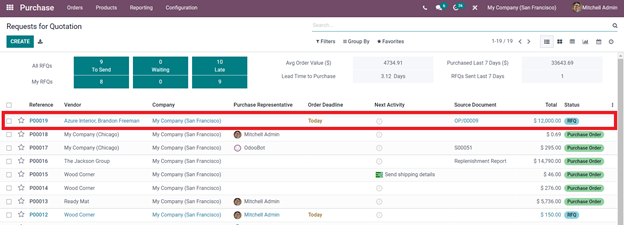
After clicking on the Order once option an RFQ will be generated in the Purchase module as highlighted in the screenshot given below.
Click on the RFQ to go to the confirm order tab as shown below.
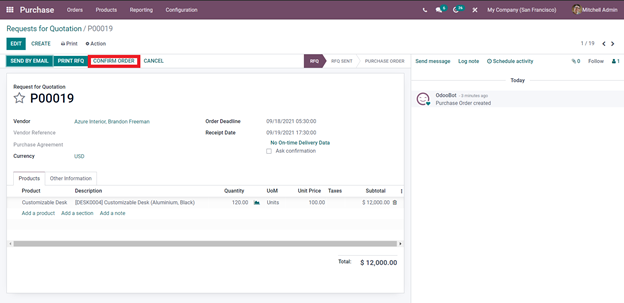
Click on the Confirm Order button as shown above. This is how Replenishment is carried out in Odoo.