Odoo 14 Accounting module is an important module in Odoo 14. This is a tool that can be useful for all types of industries. Compiling the operations of different departments and managing all finance-related requirements Odoo Accounting plays a key role in the growth of a business. It can be useful for small ventures, and large ventures.
Apart from managing different accounting-related tasks, Odoo 14 accounting also helps you to plan your business in a better way to ensure a bright future for your company. It supports efficient planning and budget preparation.
What is more? Odoo eases your bank account management and offers reconciliation support. With Odoo 14 Accounting you can set a chart of accounts for your locality and manage taxes and fiscal position with a click. It can also help you manage asset models, deferred revenue models, product categories, and other key facts.
A highlight of the Odoo 14 Accounting module is the ease to set up the module. Unlike some other ERP tools, Odoo offers the most user-friendly solution for all your accounting needs. This includes the user-friendly interface and quick setting up facility. With this blog, you can help you learn how to set up your Odoo 14 accounting with ease.
To set up the Accounting module we have to go to Configuration.
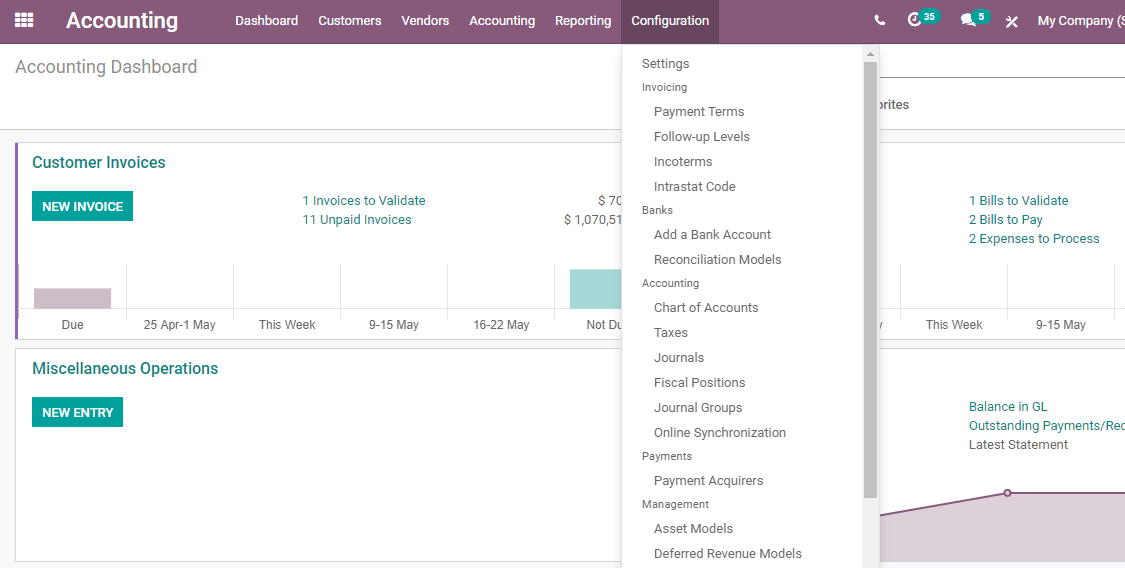
To complete the set we have to choose Configuration> Settings
On the settings page, we can view many sections. Let us see which all features we have to enable for the efficient use of Odoo 14 Accounting the best way.
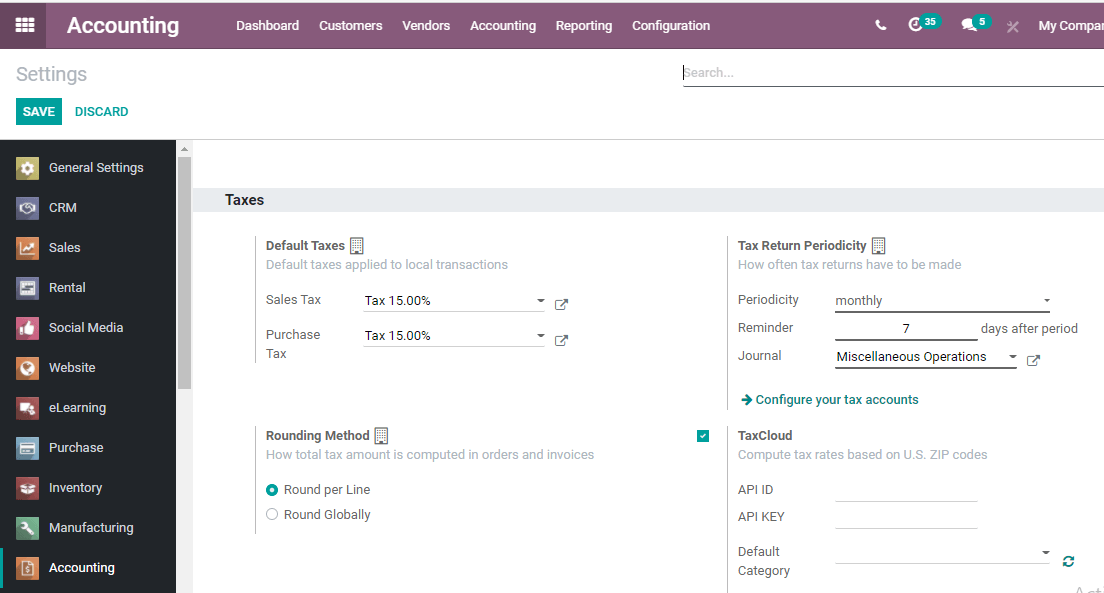
We can find different sections here. Let us have a look at the key sections.
They are Taxes, Currencies, Customer Invoices, Customer Payments, Vendor Bills, Vendor Payments, Bank and Cash, Fiscal Periods, Analytics, and Reporting.
Now it's time for us to check each section and learn the functionalities that we can set up using these sections.
Taxes
The first section here is Taxes.
Default Taxes
Underneath Taxes, we can find Default Taxes.
We can set the tax for our company with the help of default tax. Here, in the default tax, we have Sales Tax and Purchase Tax and both are 15 percent.

Tax Return Periodicity
The Tax Return periodicity column helps us to set the time period for tax return payment. This can be set by seeing the periodicity. WE have options like monthly, annually, semi-annually, every four-month, etc.
The image given above indicates that we can set reminders for our tax return. We can also manage the journal where we have to enter the tax return details. Another option we have here is to configure your tax accounts.
Rounding methods
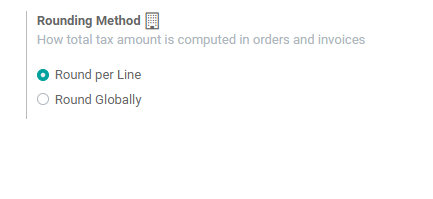
This is the method that helps us to decide how total tax amounts are calculated in Orders and invoices.
We can choose Round per Line when the product prices are fixed including the tax amount.
Tax cloud
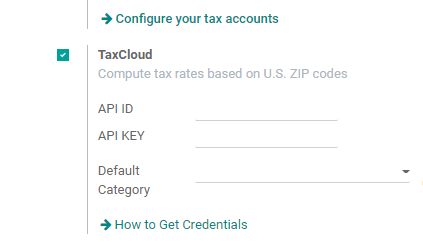
In the same section, we have Tax Cloud. Here, the tax rates can be computed based on US ZIP Codes.
Here, also we can select the default category from the list.
We also have EU Digital Goods Vat to apply the correct vat rates for the digital products sold in the European Union.
Another feature we have here is Cash Basis which allows the user to configure taxes using the cash basis. Another feature is the fiscal country setting. Once a country is selected here, we will get tax reports for that particular country alone.
Currencies
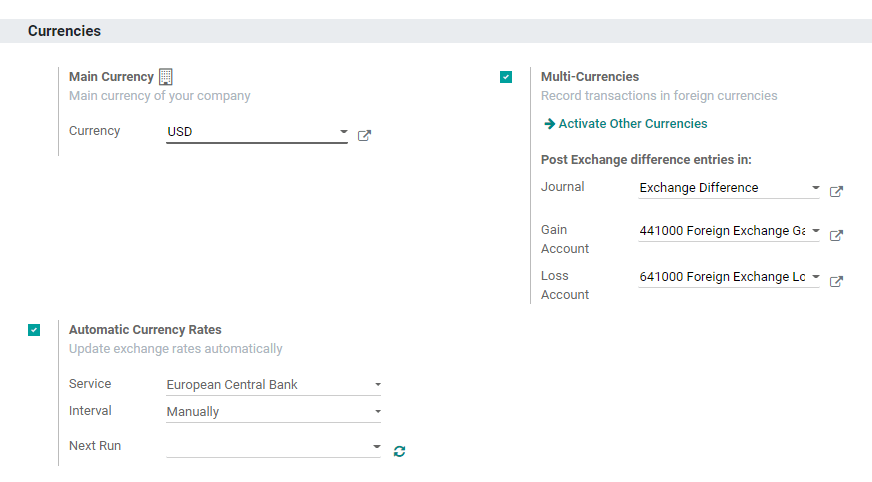
Underneath Currencies, we have subsections like main currency, multi-currencies, automatic currency rates.
Main Currency
This segment helps us to select the main currency used by our company. Suppose we are running a US-based company the main currency will be USD.
Multi-currencies
This is a feature that helps us to complete transactions in foreign currencies as well.
Here we have an option to activate other currencies.
This will help us to Post Exchange differences in different journals, gain accounts, and loss accounts.
Automatic currency rates
Another option we have under currencies is to set automatic currency rates.
This helps us to update exchange rates automatically once we set the service bank, interval, and next run.
The next run option can be used when we set the interval manually. That means we can set the date when we have to decide the exchange rate.
Customer Invoices
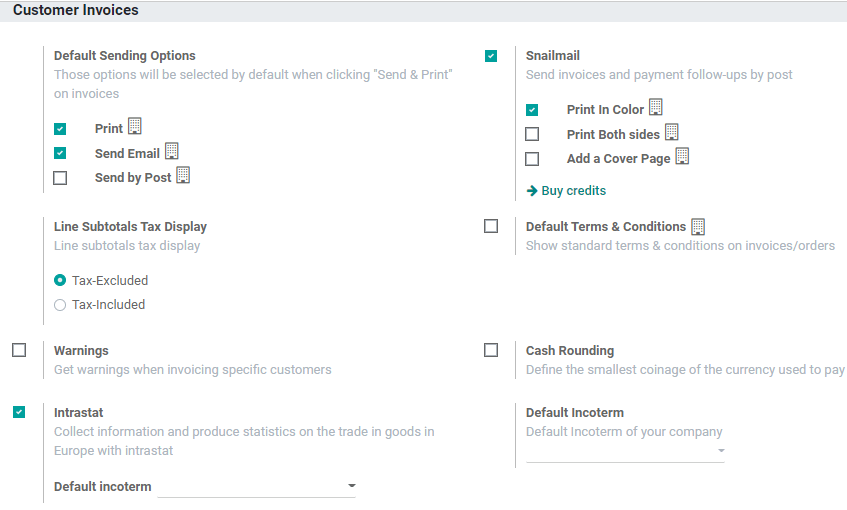
On enabling different options here we can manage our customer invoices effectively.
Default sending options
We can see a set of default sending options here which will enable you to send and print the invoices.
Here, we can find options like Print, Send Email, send by post, etc.
Snailmail
This will help us to send the created invoices as well as details of payment follow-ups by post. We can set print in color, print both sides, add a cover page option here.
Default Terms and Conditions
If we want to create some new terms and conditions that can be done here
Once we enable terms and conditions we get a column to add our terms and conditions.
Line Subtotals Tax Display
We can also view line subtotals Tax Display. This helps us to decide the way we want to display the tax. We have two options here, and they are Tax-excluded and Tax-included. Tax included means the price will be displayed including the tax and tax-excluded means the price will be displayed after excluding the tax.
Warnings
This helps us to set warnings when invoicing specific customers
Cash rounding
This feature will enable us to round the cash by defining the coinage that we use for transactions.
Interstat
This feature supports collecting information on the trade of goods in Europe. This will be done based on trade with Intrastat. We can also generate statistics with this information.
Default incoterm
We can set the default incoterm for the company
Sale receipt
Activating this we can create a sale receipt.
Customer payment

Here we can enable the options,
Invoice Online PAyment
This enables the customer to make payment online
Batch payments
This eases group payments into a single batch and this process will ease the reconciliation process
SEPA Direct Debit
This helps to collect the payment from the customer using one click. Euro SEPA service is used for this purpose. We can add a creditor and identifier here.
QR CODES
We can add QR-Code to the invoice by enabling this.
Vendor Bills
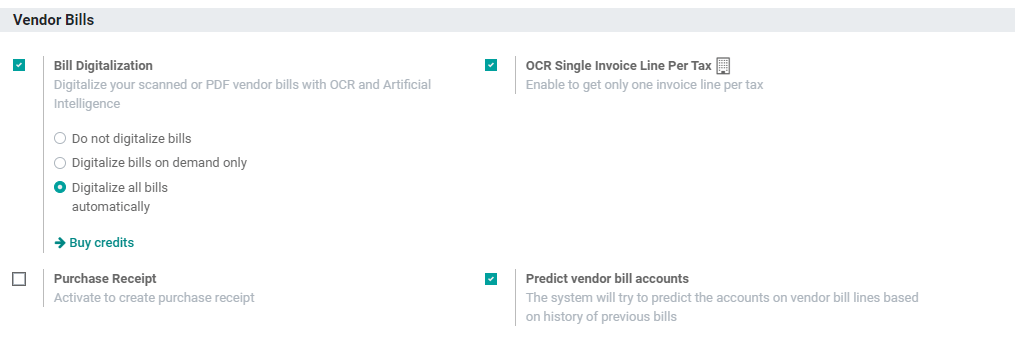
Bill Digitalization
We can digitalize our scanned bill or bill in PDF format using the OCR or Artificial intelligence. We can find three options here.
OCR Single Invoice Line Per Tax
This enables the user to get one invoice line per tax
Purchase Receipt
Enabling this we can activate purchase receipt creation
Predict vendor bill accounts
We can use the history of previous bills to make predictions.
Vendor Payment

Vendor payment can be through check or SEPA Credit Transfer. We can add other details also here.
Bank and Cash

Inter-banks Transfers
This is the account used while transferring between banks
Automatic Import
Automate bank statement import
We can import bank statements using CSV import, QIF import, OFX import,
CAMT import etc
FISCAL Period

This helps us to set the fiscal or financial year
We can also define a fiscal year of more or less than one year.
Invoice switch threshold
On giving a date here the invoices up to that date will not be taken into account as accounting entries.
Analytics

We can enable
Analytic Accounting: It helps to track costs and revenues for each project and department
Budget management: We can use the budget to compare actual and expected revenues and costs
Analytic Tags: This enables us to add analytic tags to entries
Margin Analysis: This helps to monitor product margin using invoices
Reporting
Here we have two options,
Add Totals below sections
Download data inalterability check report
To know more mail at odoo@cybrosys.com or dial +918606827707 or visit www.cybrosys.com