Odoo Inventory module has always been in the limelight for its efficiency and intuitiveness in performing various inventory operations. The business regardless of its size is largely benefitted from the application because of its operational excellence. Coming integrated to several other business management modules such as accounting, sales, purchase, manufacturing, Odoo inventory remains robust in performance.
In this blog, I will be detailing you the purchase rules in Odoo.
For describing the routes, we need rules. Because routes come as an assembly of procurement and push rules. A particular product can be sold and purchased from different modes of routes from a warehouse.
In odoo, one can manage various advanced push and pull routes configuration.
1. Routes for managing product manufacturing chains.
2. Routes for managing default locations per products.
3. Define and manage the warehouse according to the business needs such as quality checks.
4. Generating automated movement of stock for rented product management.
So these are rules that help us to configure and define the movement of a stock through a route from a warehouse.
Procurement Rule in Odoo
The prime advantage of this rule is that an end-user is free from management or storing the excess amounts of stock. And this rule can reduce the inventory levels and helps in the cost of storing the goods in the inventory.
So the action of acquiring an ideal measure of product opposed to bulk amount, the procurement inventory control starts with a customer order.
Push Rule
Push rule moves a specific amount of product from source locations to destination locations. In odoo, we can set them as both automated and manual.
Push rule will automatically make a move towards a destination or next locations when a move is anticipated to a location.
You can create new routes from following steps,
Inventories -> Configuration -> Warehouse management -> Routes -> Create
In odoo we have some default routes, they are:
Drop Shipping: In this route, goods are delivered directly from the vendor to the customer instead of keeping the products in stock.
Buy: Buy means purchasing the product.
Make-to-Order: In this route, the function does not evaluate the current stock and draft a purchase order. That means that it triggers a purchase order rather than product quantity in hand.
Pre-Configured Routes
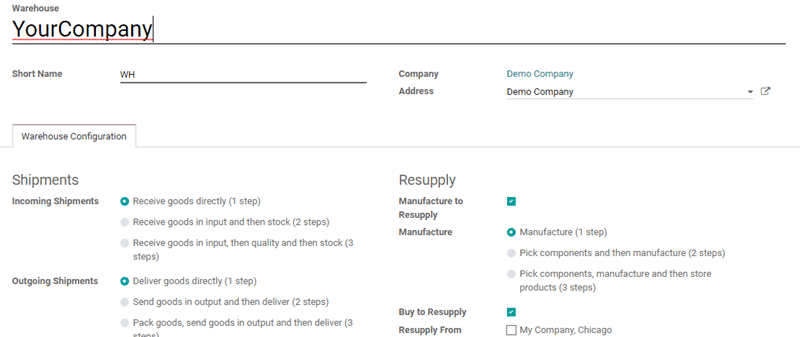
Odoo contains pre-configured routes for warehouses. For that, in the inventory application, go to Configuration -> Warehouses.
In warehouse configurations, we can set some routes according to our choices through Incoming Shipments and Outgoing Shipments.
Custom Routes
In the inventory application, go to Configuration -> Routes.
Routes applied on warehouses
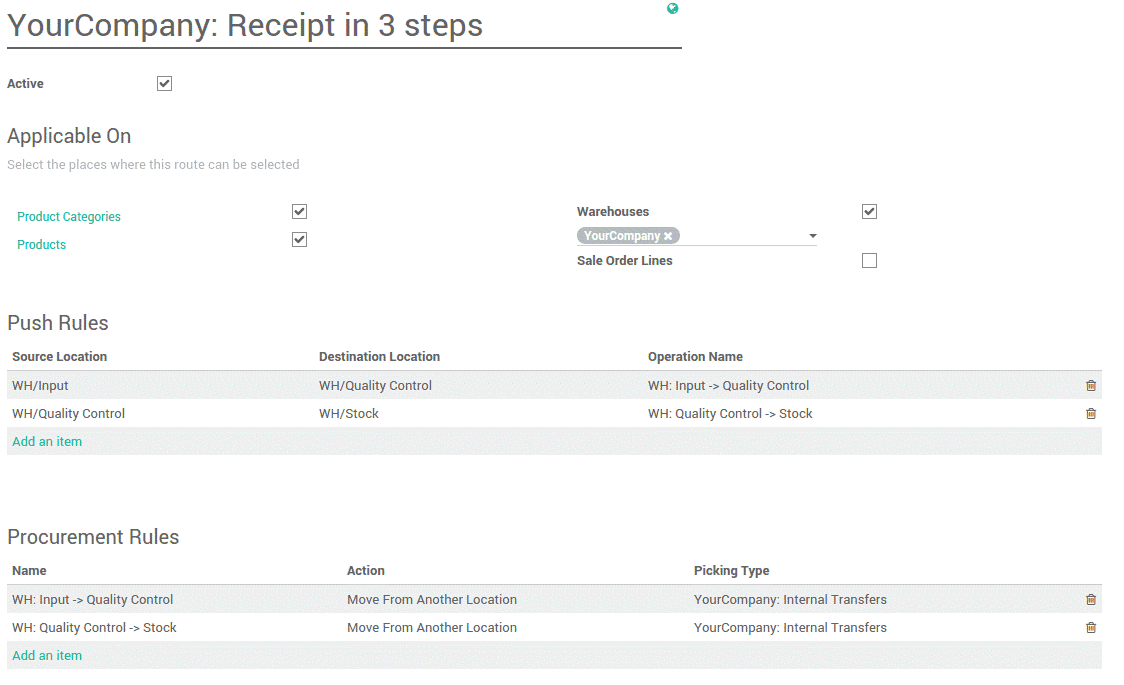
Upon ticking the warehouse, one can choose which warehouse to be applied to. As per the procurement and push rules, we can set the routes for all transfers.

Routes applied to products and Product Categories

Tick Products to manually set on which products it will be applied.
Tick Product Categories, to set manually on which categories it will be applied.
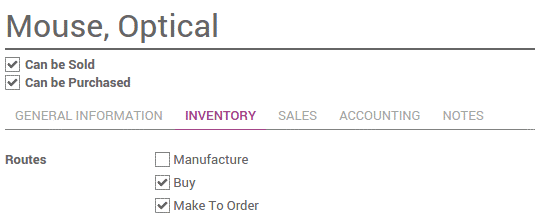
To apply routes on products , go to Inventory -> Control -> Products -> Inventory Tab
Select the route to set the route,
To apply routes on Products Categories, go to Inventory -> Configurations -> Product Categories -> Logistics
Select the route to set the route,

Routes applied on Sales Order lines
Tick Sale Order lines to manually set the route every time to make a sale order.

Routes are said to be a collection of rules. So we can discuss it through routes. We can configure 3 types of incoming shipments.
1) Receive goods directly(1-step)
2) Receive goods in input and then stock(2-steps)
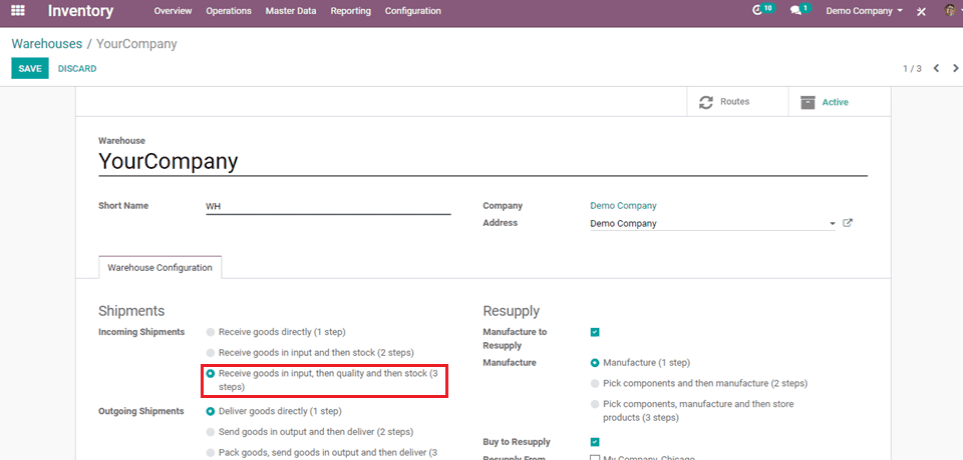
3) Receive goods in input, then quality and then stock(3-steps)
Receive goods directly (1-Step)
Click on routes to show suggested routes on received goods directly,
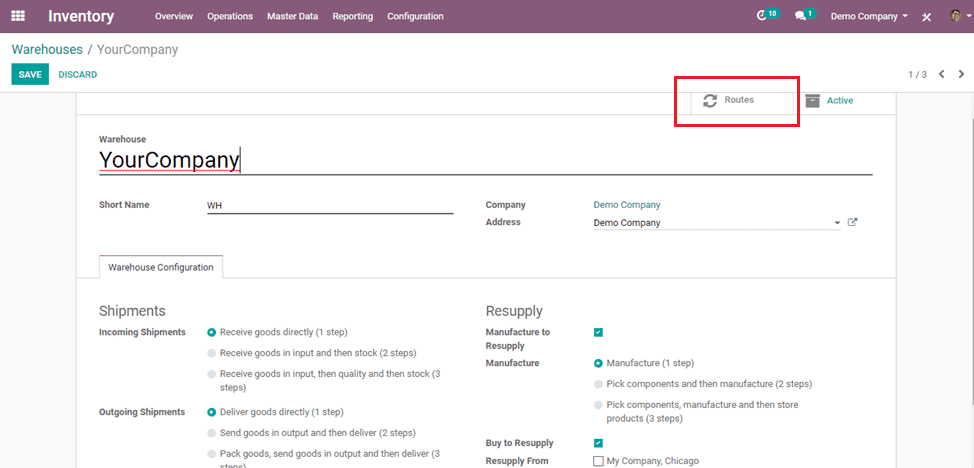
These are the suggested routes,
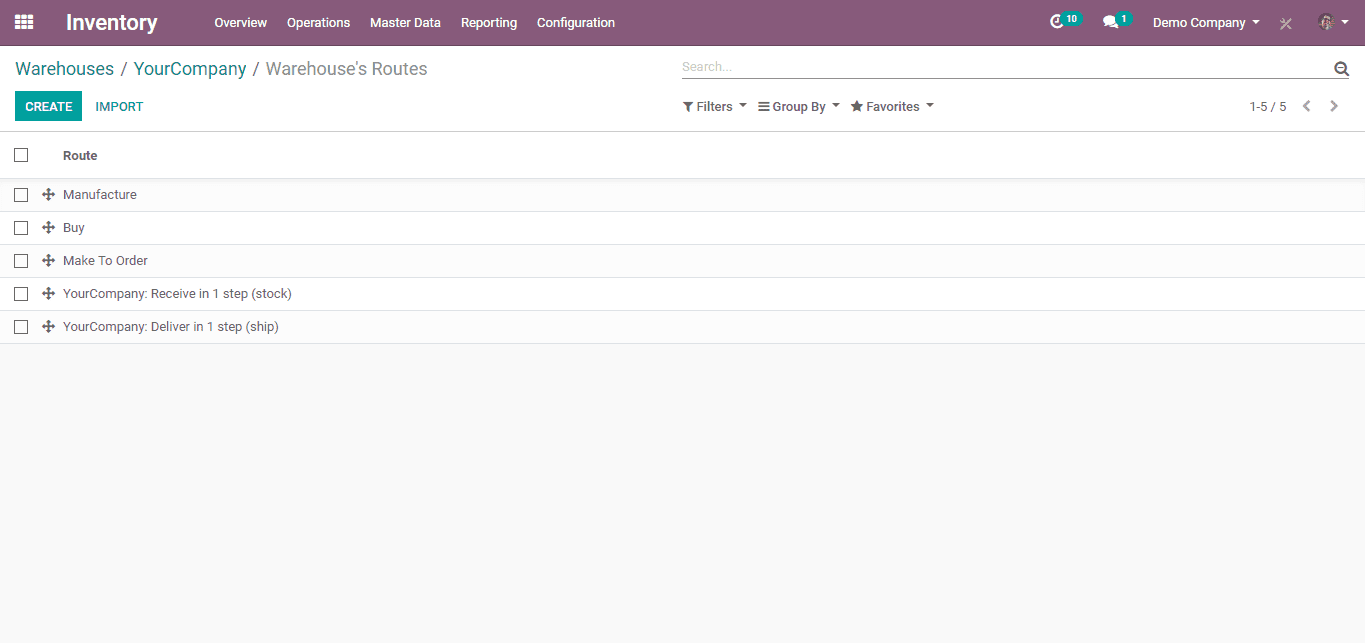
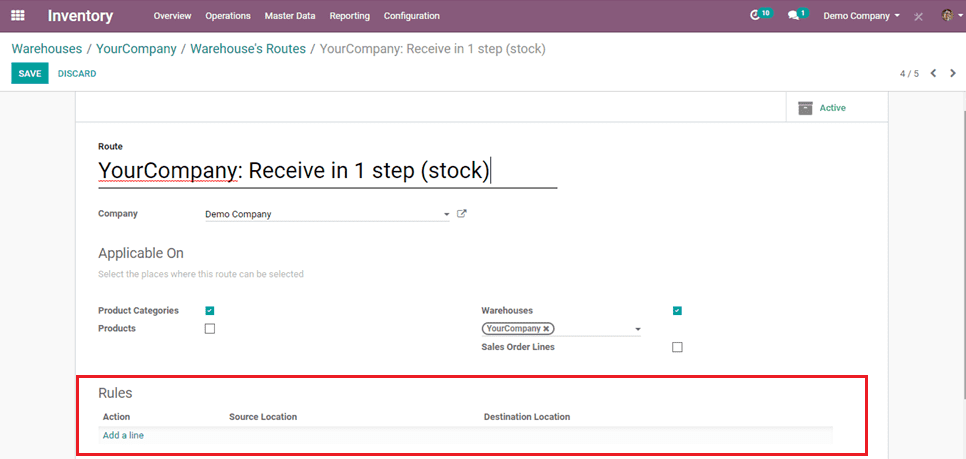
Here we can add rules. As this is one step, it needs not necessary to set the rules.
Receive goods in input and then stock (2-steps)
Here the suggested routes and for purchase, you need to select the following marked checkbox.
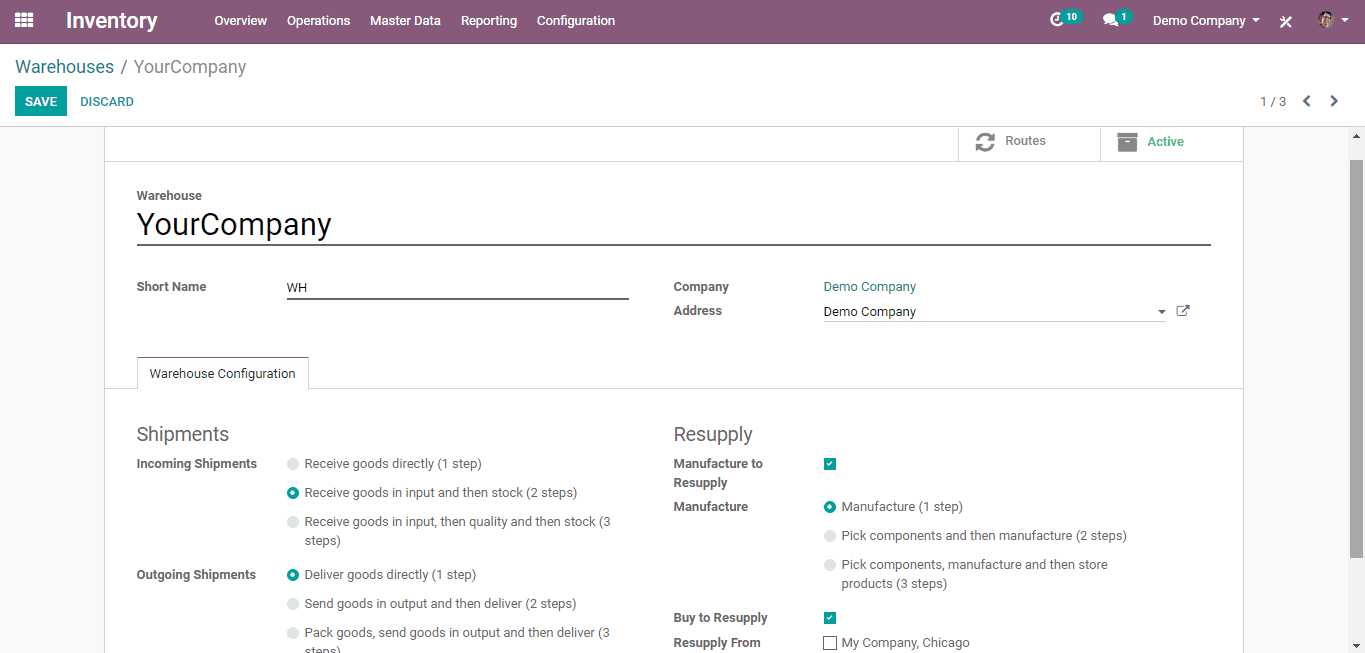
Routes for 2-step Incoming shipments.
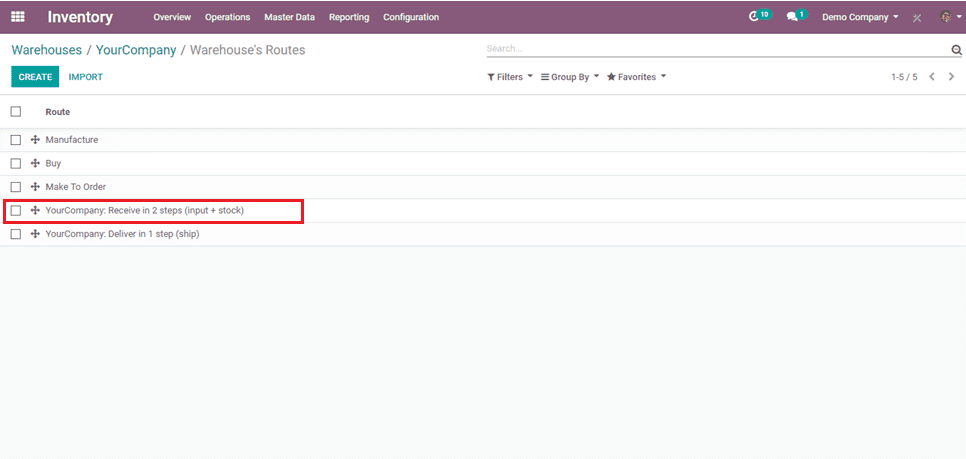
When you click on that tab, the following page will appear.
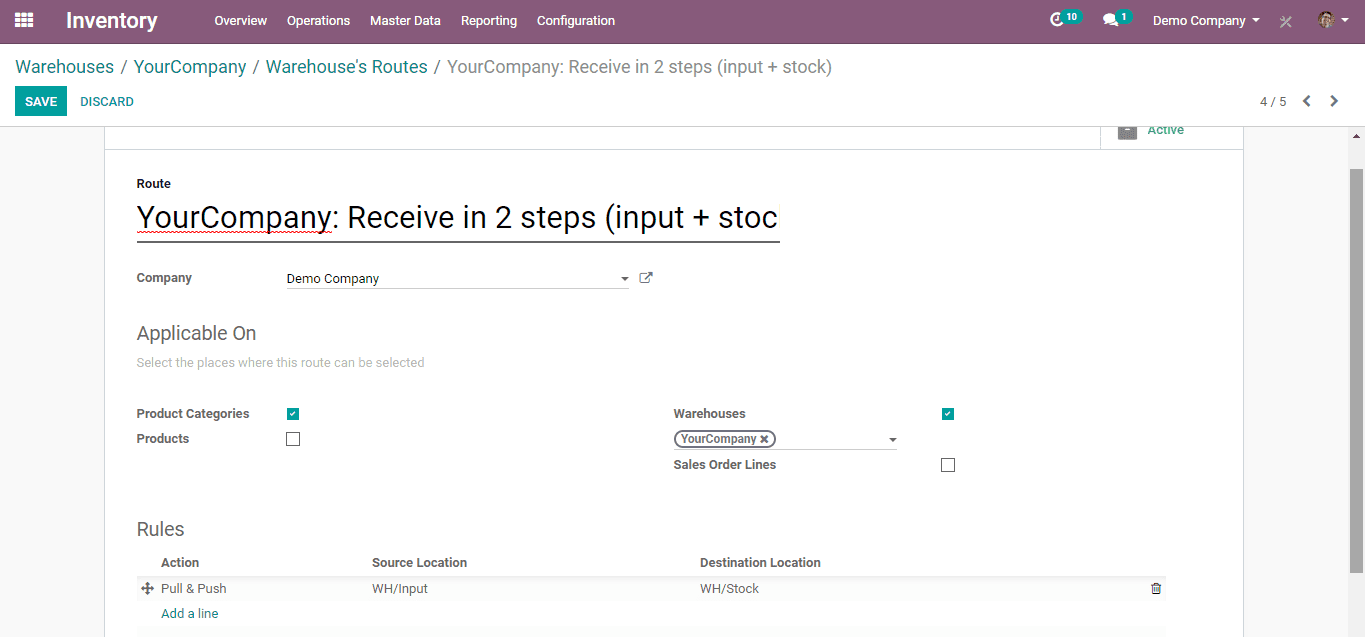
When you click the add lines in rules, you can add rules as per the need for routes.
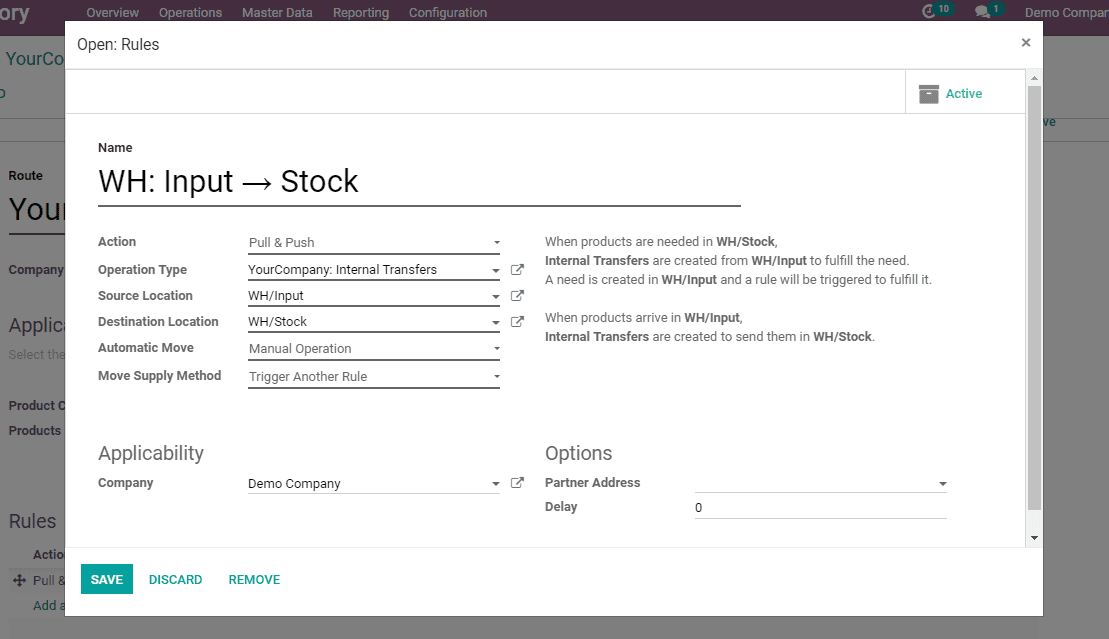
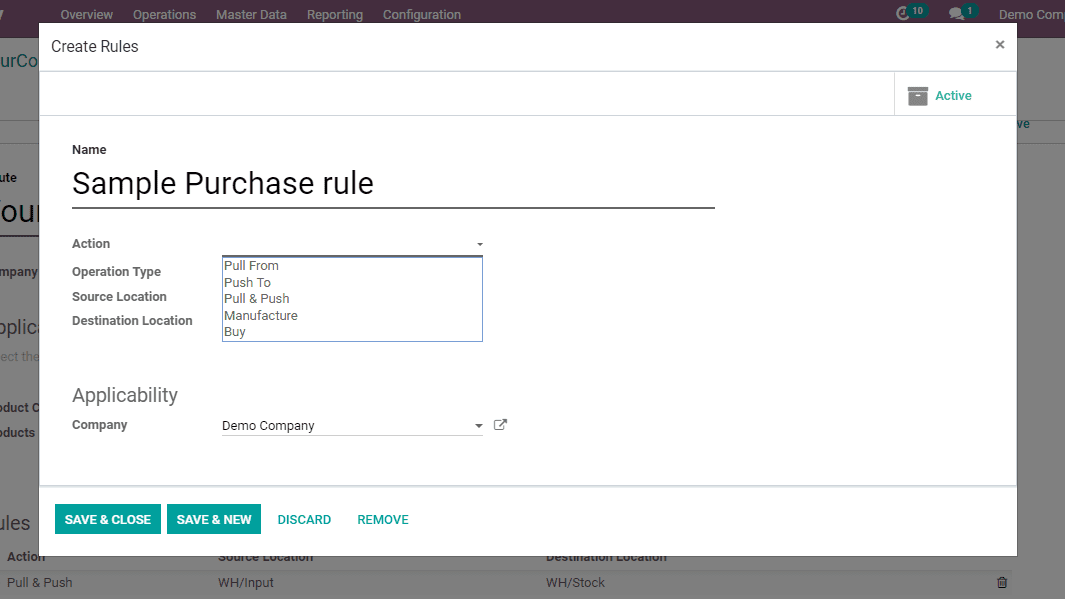
1) Action: The actions possible in rules are:
a) Pull From
b) Pull To
c) Push & Pull
d) Manufacture
e) Buy
2) Operation type: Operation type field defines the way in which the pickings are shown in the reports or the views.
Also, the end-user can provide the partner address and the delay from the above view. The routes you have created by applying appropriate procurement and push rules will be displayed under the inventory tab of the product view.
3) Source Location: Source location is the destination from where the goods are moved.
4) Destination Location: Destination location is the destination to where the goods are moved.
5) Company: One can specify the company applied to the rule.
6)Warehouse: One can specify the warehouse applied to the rule.
As we are discussing about rules in the purchase , so operation type must be in Your Company: Receipts.
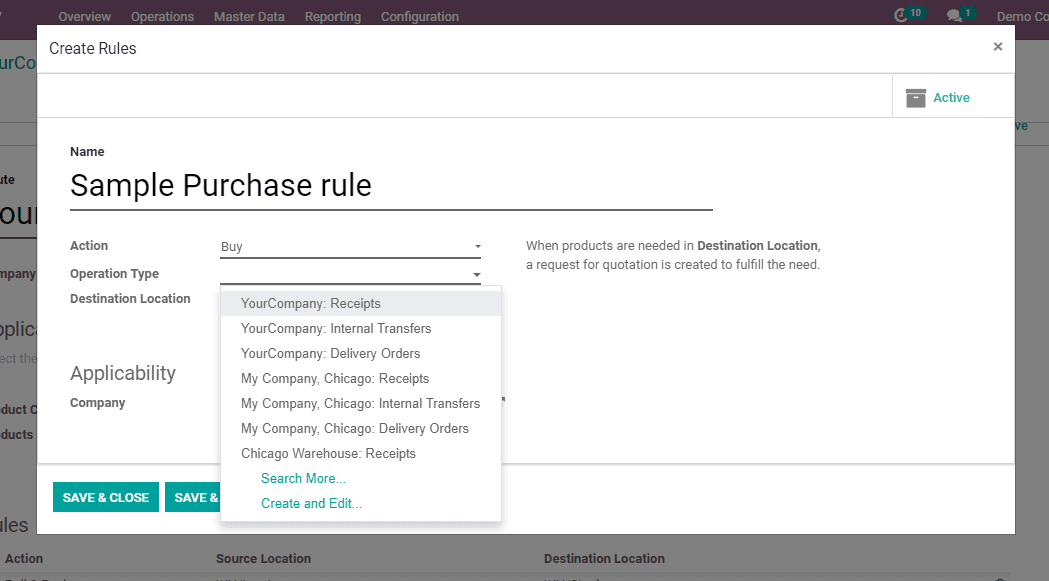
Save and Close the current tab for receive goods in 2-steps.
Receive goods in input, then quality and then stock (3-steps)
To receive the purchased product in a way that you want, you can create it through this 3-step method.
Here, in this route, you can create many rules as you want to receive the products and transfer them into other internal locations by setting the operational type as Internal Transfers.

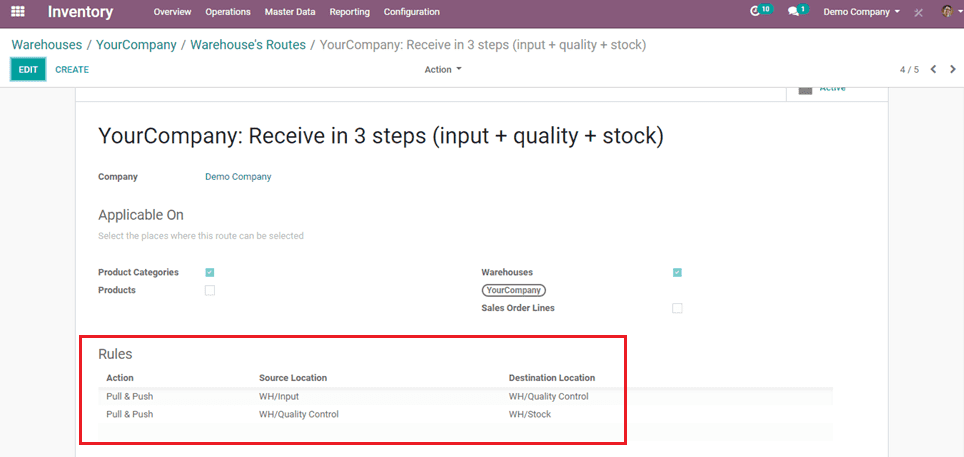
Here, we can add multiple rules as per the routes for the movements of goods that we are purchasing.
For example: If we need to check the quality when products are purchased, we can create a Quality control checkpoint in the warehouse and set the route through that by setting rules suitable for that route.
Now we can discuss the role of different actions that we can set in the rules.
1) Pull From
An example of a pull inventory control system is the make-to-order. The goal is to keep inventory levels to a minimum by only having enough inventory, not more or less, to meet customer demand.
In the example given below operation is purchasing, then operation type must be receipt & source location is from Partner Locations/Vendors.
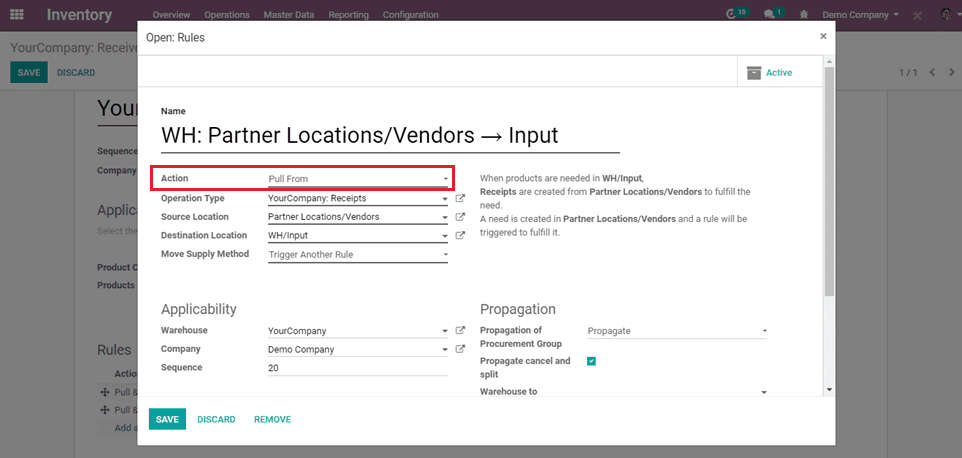
When products are needed in WH/Input, Receipts are created from Partner Locations/Vendors to fulfill the need.
A need is created in Partner Locations/Vendors and a rule will be triggered to fulfill it.
When pull from is action, the move supply method can be applied.
Move supply method is 2 types :
a) Take from Stock: The products will be taken from the available stock of the source location.
b) Trigger another Rule: The system will try to find a stock rule to bring the products in the source location. The available stock will be ignored.
2) Push To
A push flow indicates how locations are chained with the other ones. As soon as a given quantity of products is moved in the source location, a chained move is automatically foreseen according to the parameters set on the flow specification (destination location, delay, type of move, journal).
It can be triggered automatically or manually.
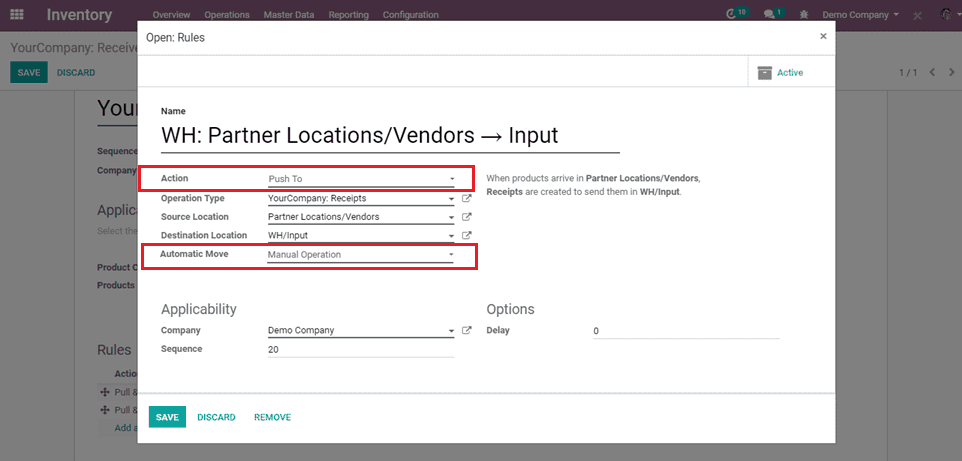
When products arrive in Partner Locations/Vendors, Receipts are created to send them in WH/Input.
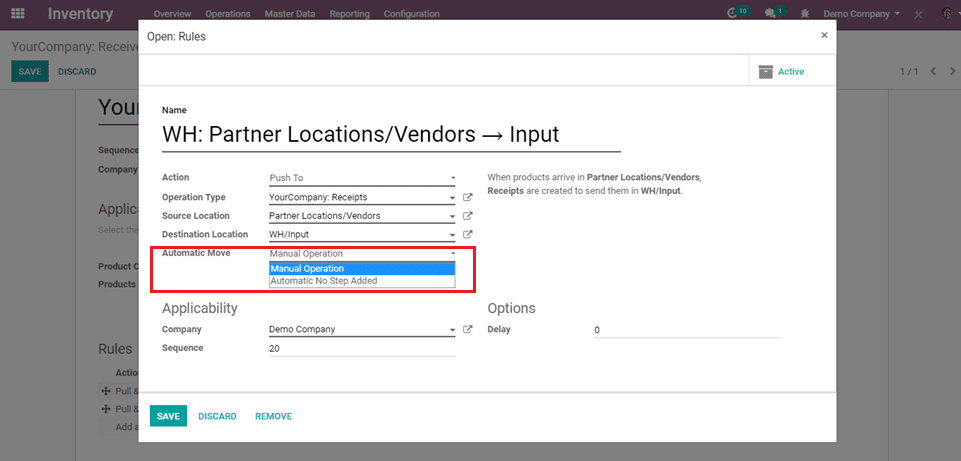
When push to action is action, automatic move is applied.
Automatic move is 2 types:
a) The Manual Operation: Value will create a stock and move the current one.
b) Automatic No step Added: The location is replaced in the original move.
3) Pull and Push
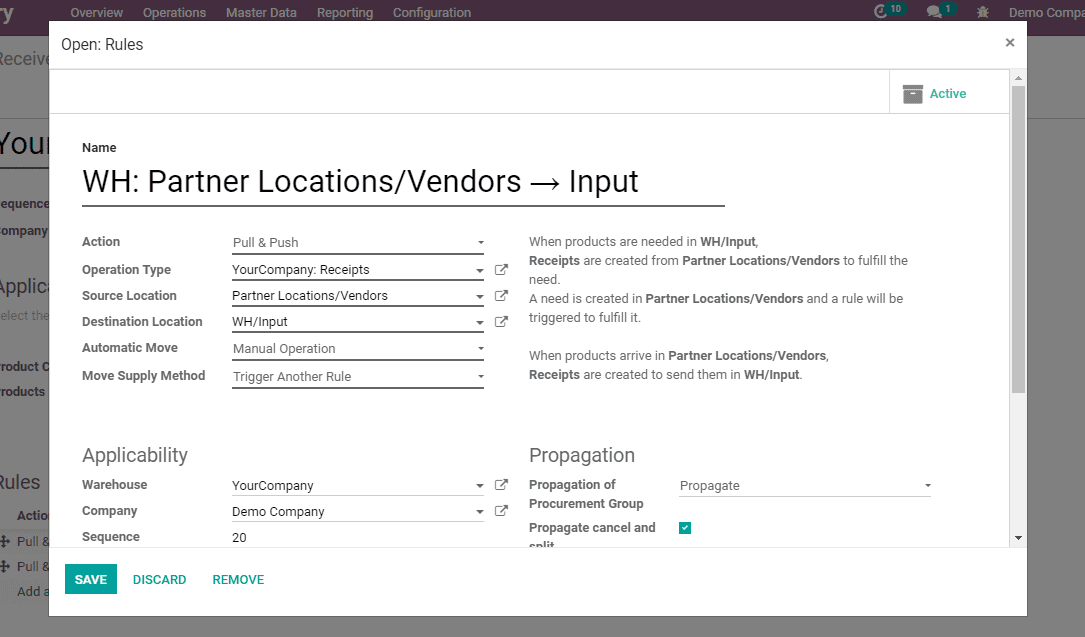
When products are needed in WH/Input, Receipts are created from Partner Locations/Vendors to fulfill the need.
A need is created in Partner Locations/Vendors and a rule will be triggered to fulfill it.
When products arrive in Partner Locations/Vendors, Receipts are created to send them in WH/Input.
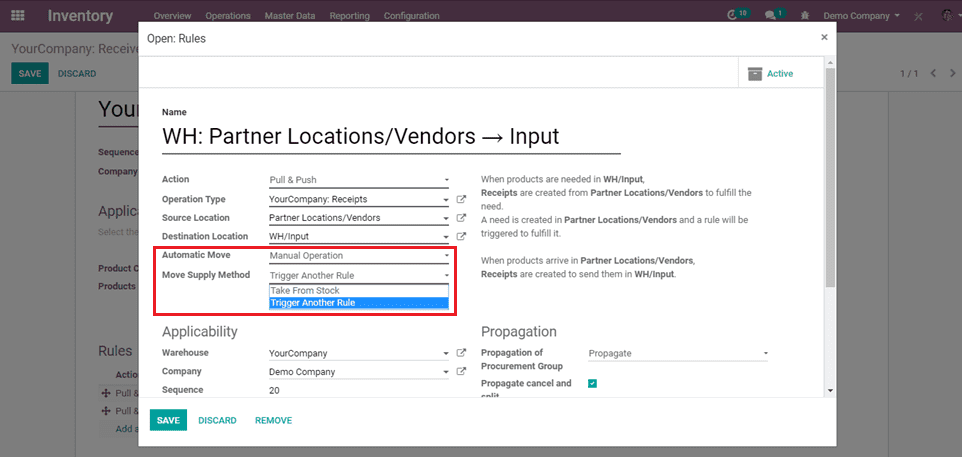
When pull and push is the action, we need to choose the move supply method and Automatic move.
4) Manufacture
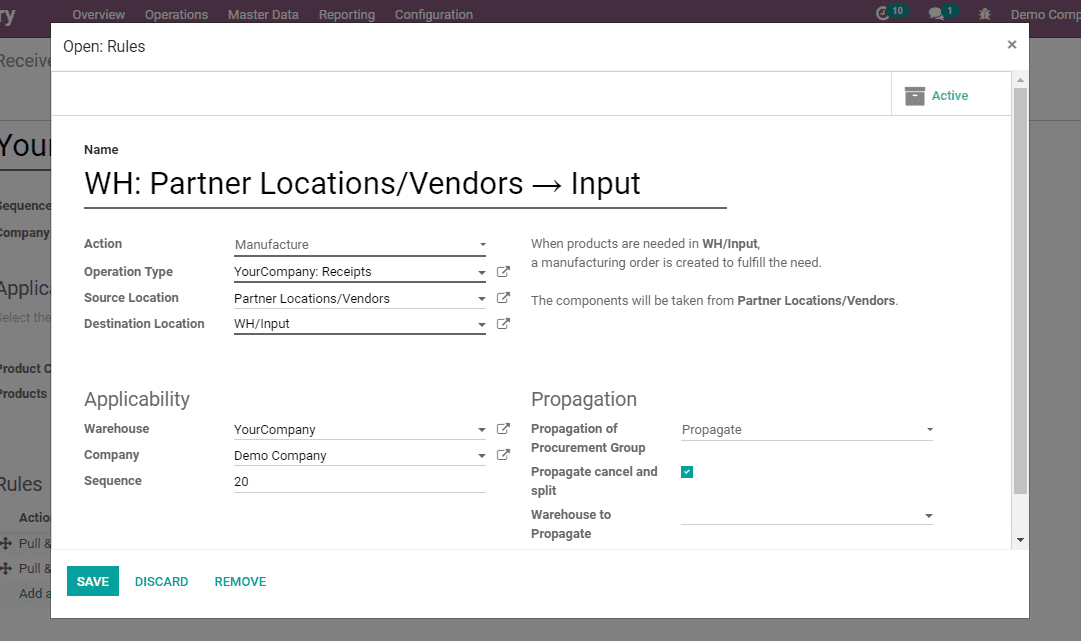
When products are needed in WH/Input, a manufacturing order is created to fulfill the need.
The components will be taken from Partner Locations/Vendors
5) Buy
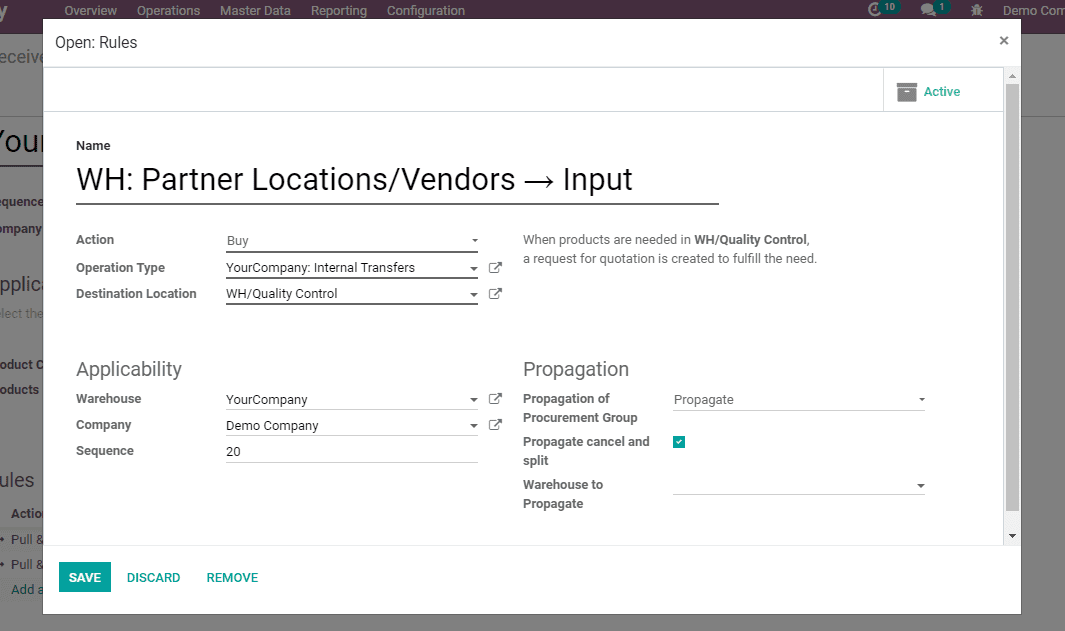
When products are needed in WH/Input, a request for a quotation is created to fulfill the need.
For example, here I have given 3 rules for 3 step incoming shipments and this route is made applicable to products and product category.
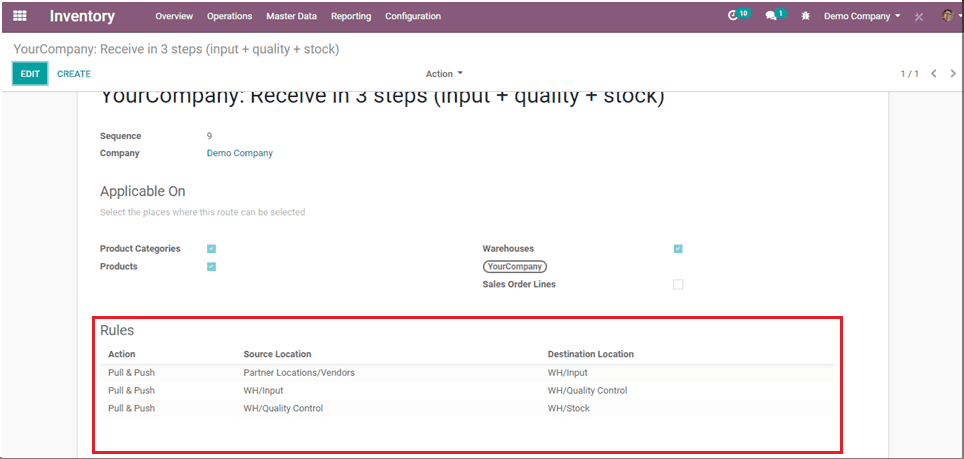
After setting the routes, select the routes on a particular product or product categories and create a purchase order & confirm the order.
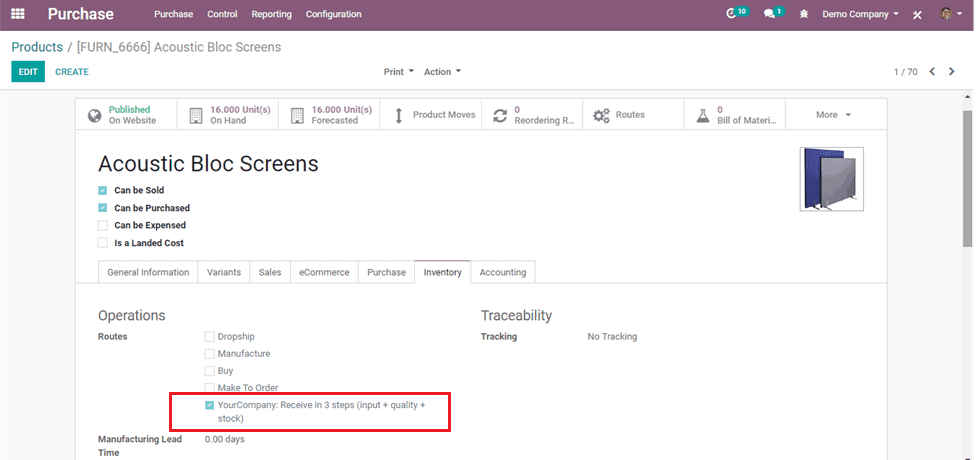
Here the route is selected for a particular product.
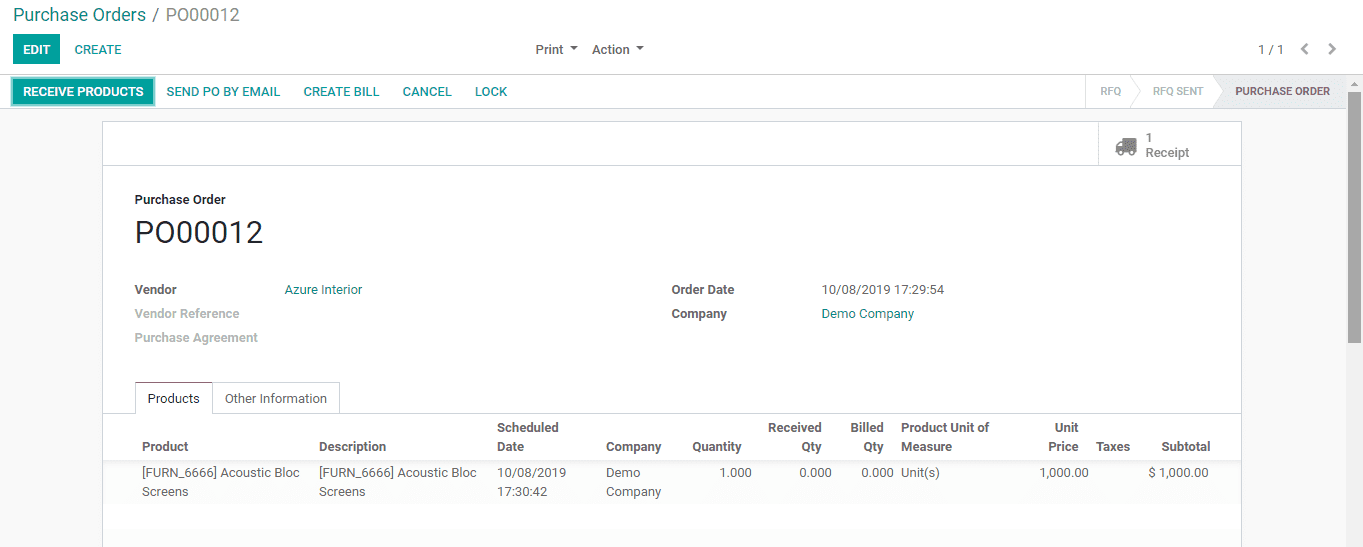
Now creating a purchase order for that product as per the rules on routes.
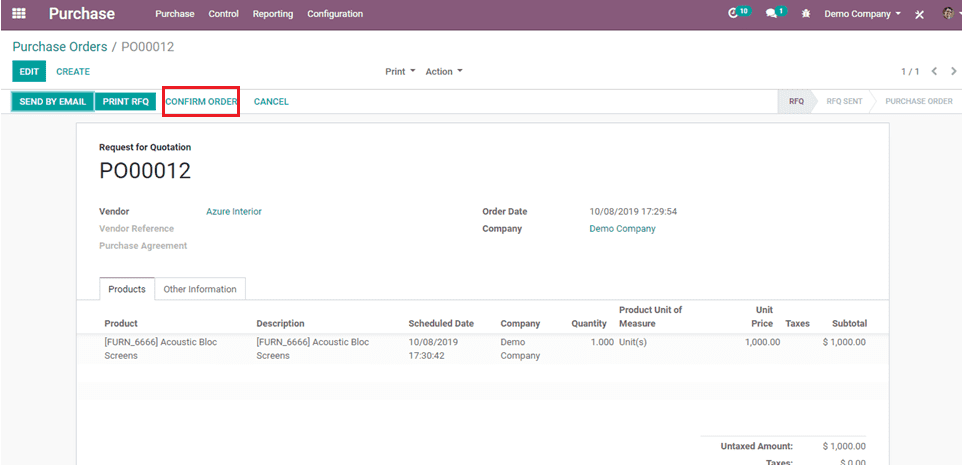
After Confirming the order, Validate it from inventory,
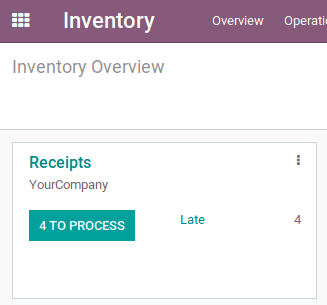
Now open inventory modules, then click on the Process in receipts for validating the incoming purchase goods.
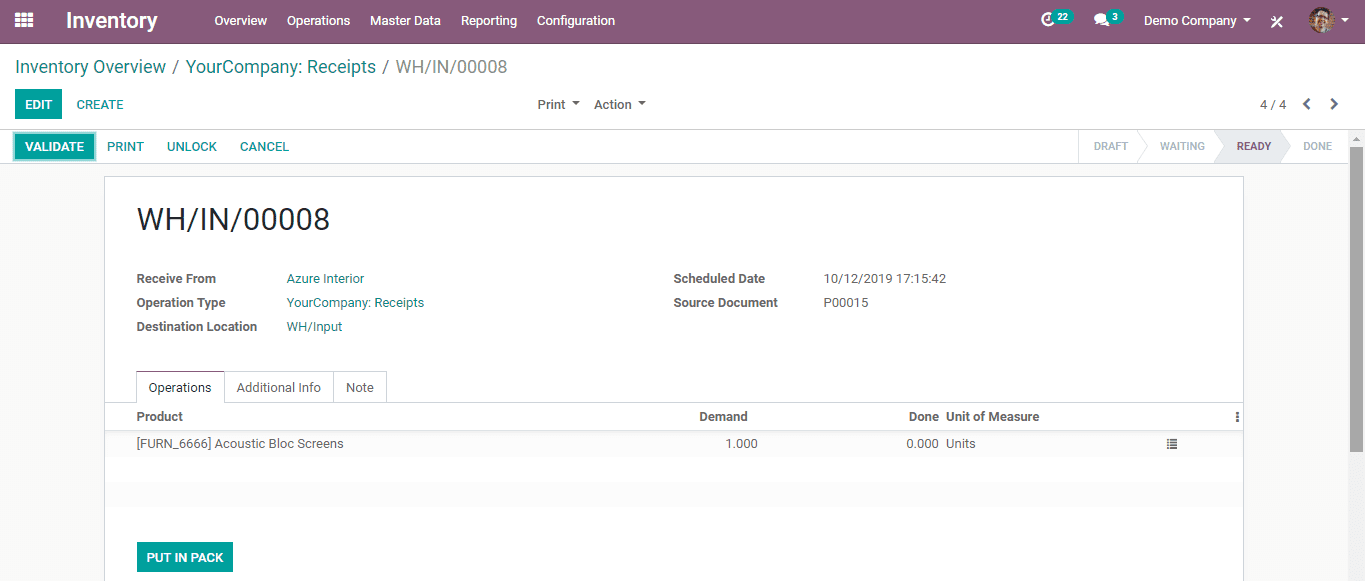
Then validate the incoming shipment goods from receipts to enter into an input location.
After validating from receipts, the product will be transferred to another internal location like Quality control. You can validate it from the internal transfer.
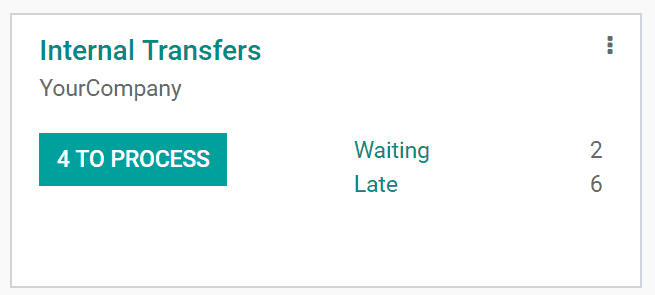
Now the status is ready state and upon validating, it becomes done state, then the purchasing process will complete by rule as we set.
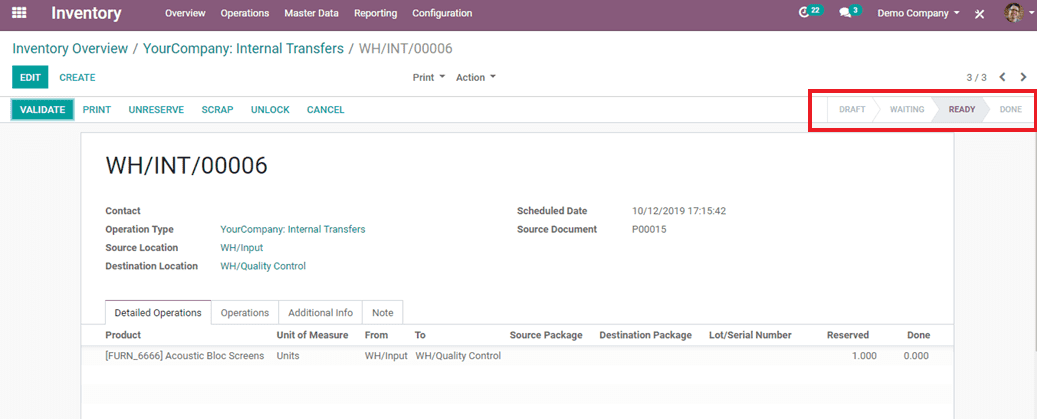
After validating goods from Quality control, it will move into stock locations.
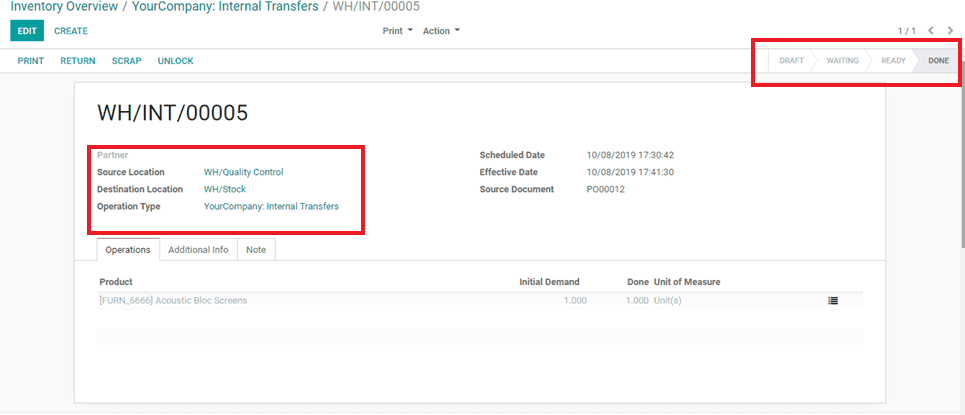
Now the status is done and the purchase is done.
You can check the difference of quantity on hand from inventory valuation by before and after the purchase order.
This is how rules work in Purchasing.