Tax revenue or government expenditure is related to fiscal, and the authority adopted to check tax evasion or maintain taxpayers is referred to as a Fiscal country. Since the laws are definite, a special tax exists for each state or country. In most organizations, we can view a change in tax rates and currency prices after completing a transaction. Most businesses work for clients in different countries, and each location contains its rules. Several rules to change accounts and taxes in a transaction create easily through fiscal positions. By imparting ERP software, managing fiscal countries and positions becomes easy. Odoo 16 Accounting module ensures users generate fiscal positions based on a specific country.
This blog gives you an overview of Fiscal positions and countries in the Odoo 16 Accounting module.
The complications related to taxes avoid easily in your business through the medium of ERP software. We can manage the Balance sheets, Journal entries, Payments, Customers, Products, and more in Odoo 16 Application. Now, let’s see the steps to configure fiscal positions in a US company.
Fiscal Country in the Odoo 16 Accounting
Users can set the domestic country related to accounting in Odoo 16. For that, select the Settings menu in the Configuration tab, and the user can access the Fiscal Country option below the Taxes section, as denoted in the screenshot below.
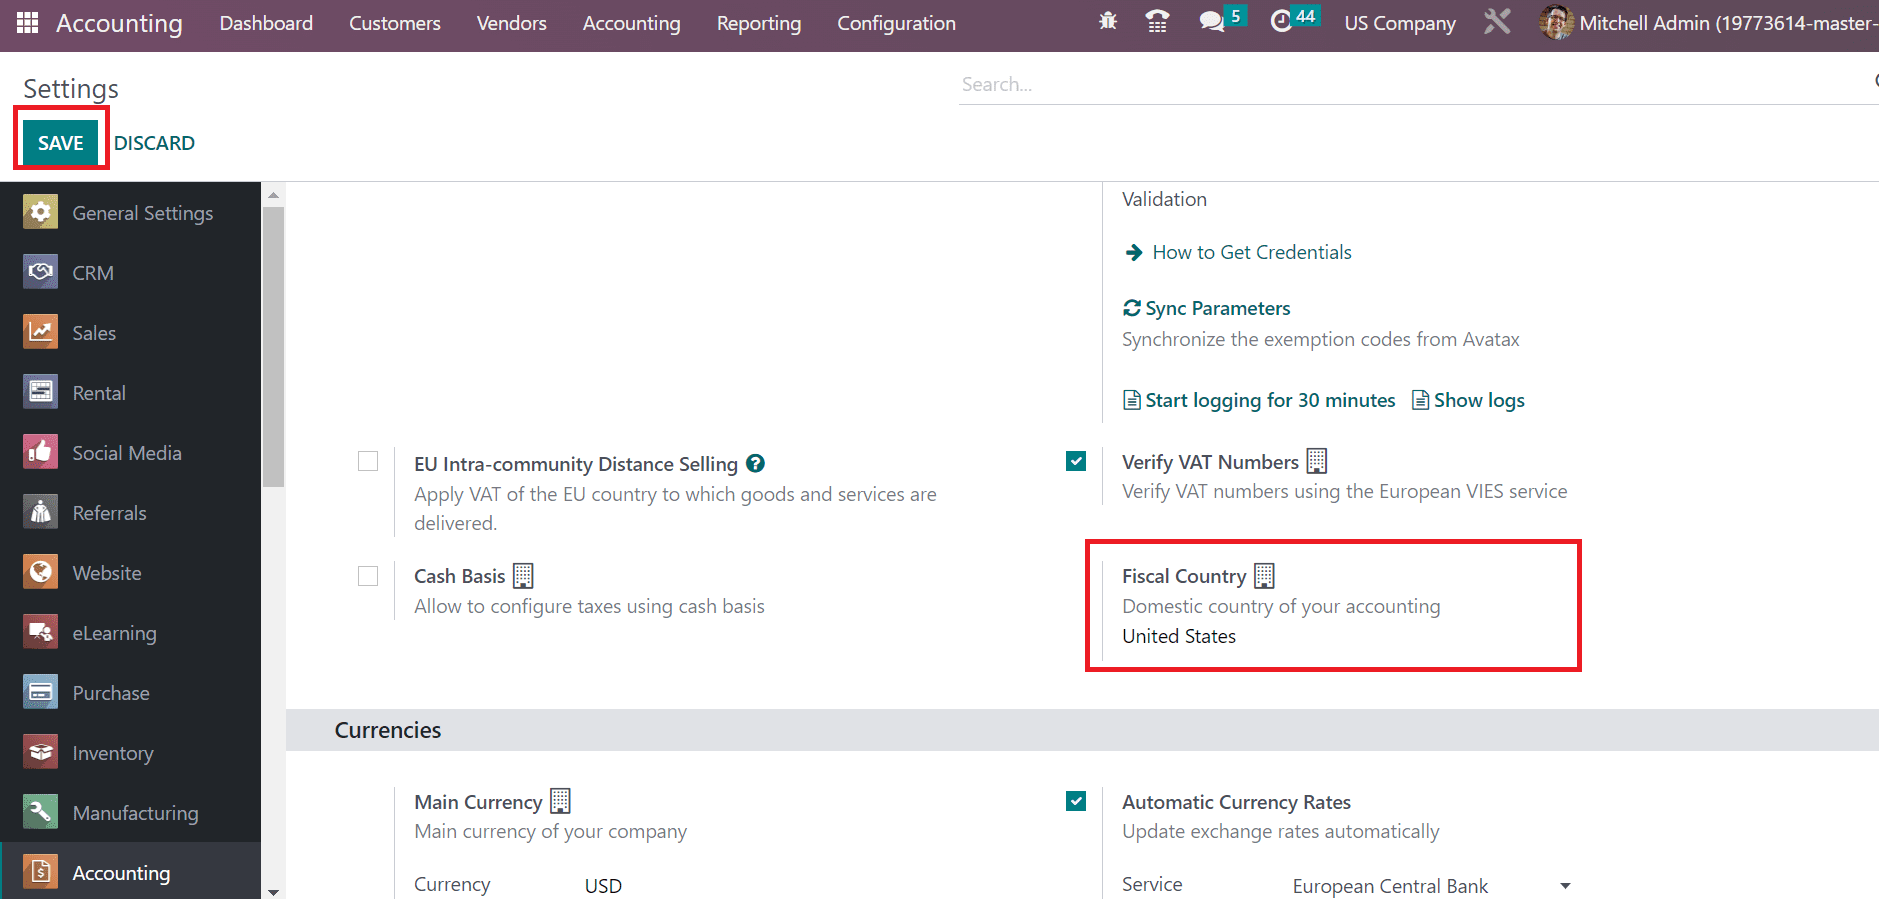
We can pick the domestic country for your accounting below the open space in the Fiscal Country field. Set the Fiscal Country as the United States as marked in the above screenshot and press the SAVE button. After saving the changes, we can set Fiscal Positions for the US Country in the Odoo 16 Accounting.
How to Configure Fiscal Positions in the Odoo 16 Accounting?
The management of various tasks is made easy using Fiscal positions. Choose the Fiscal Positions below the Accounting section of a Configuration tab. All created fiscal positions are visible to the user within the Fiscal Positions window. Users can acquire detail such as Company and Fiscal Position as defined in the screenshot below.
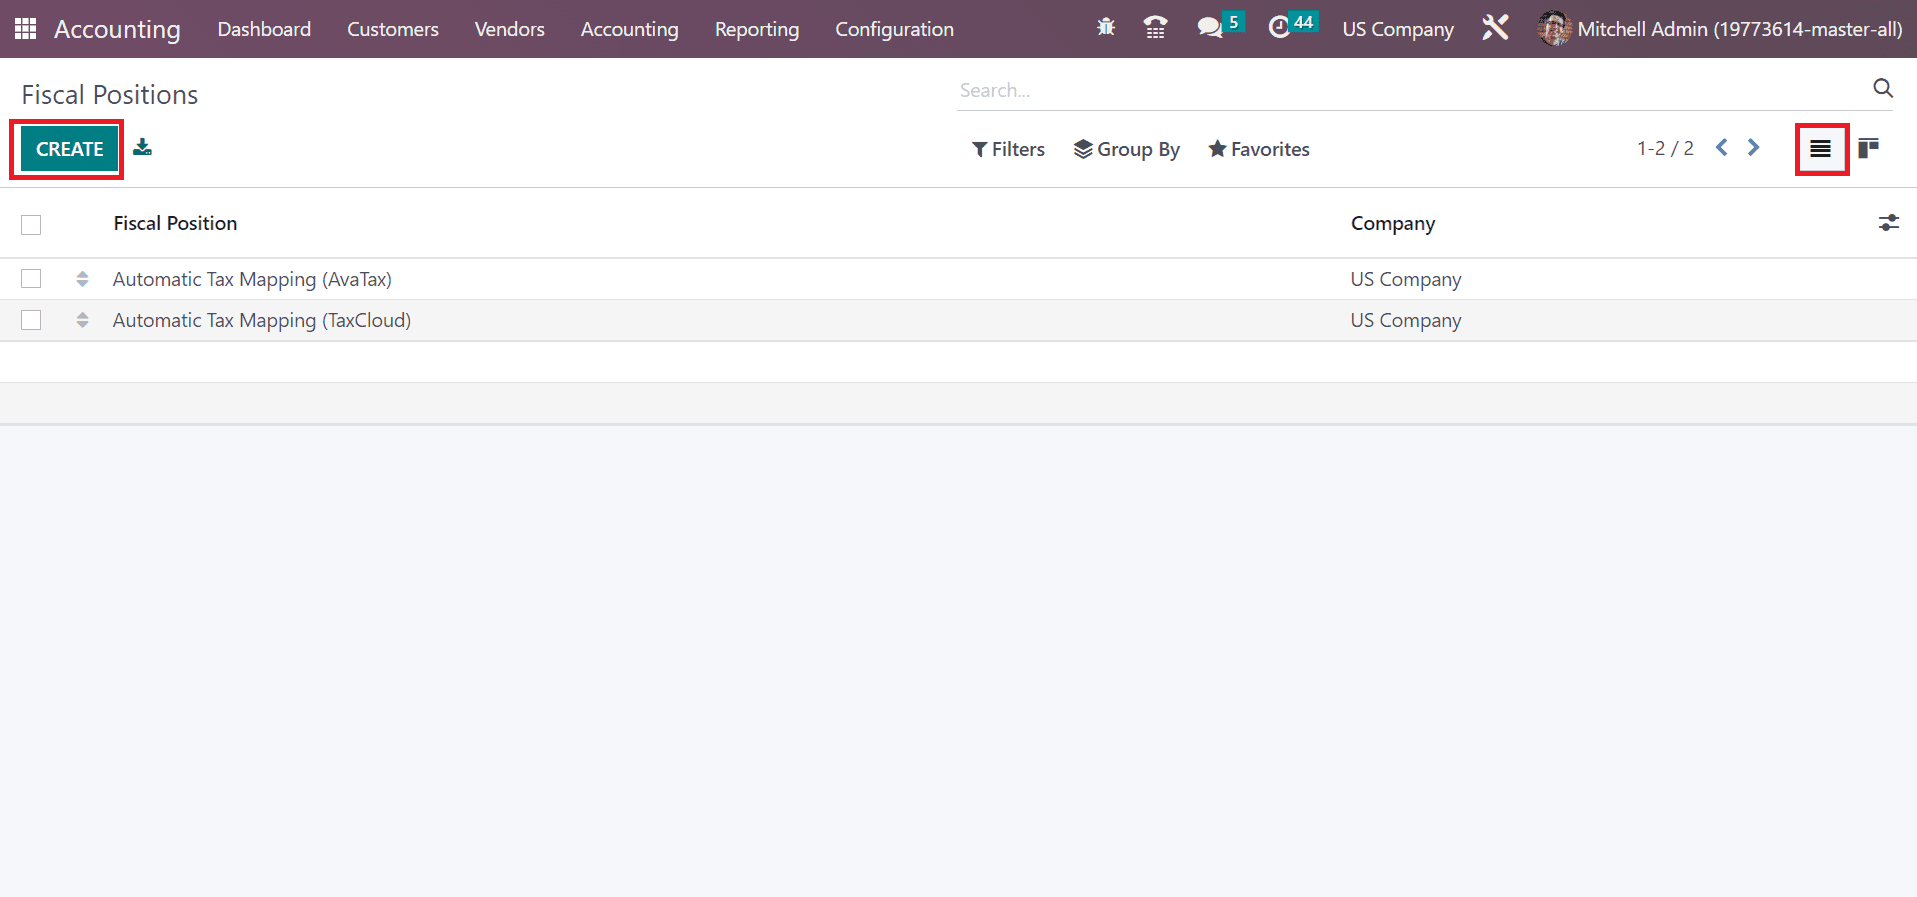
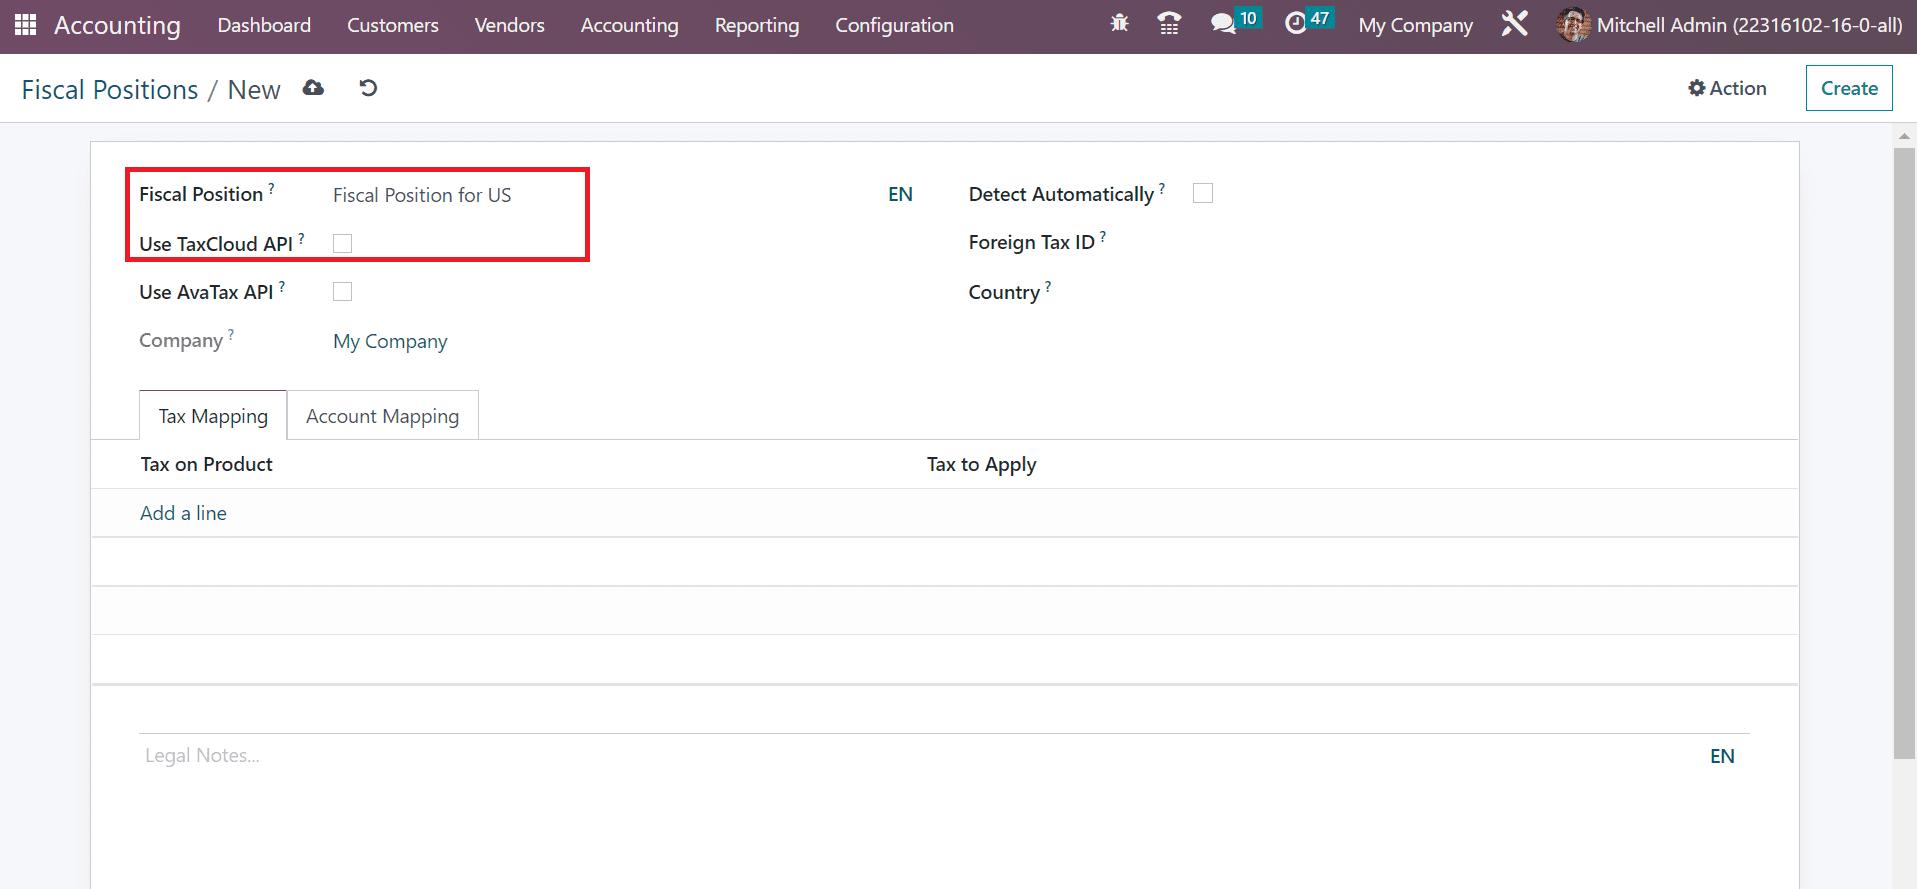
Click the CREATE button in the Fiscal Positions window to formulate a new one, as pointed out in the above screenshot. In the new window, add the name of Fiscal Position as Fiscal Position for the US. Users can activate the Use TaxCloud API field to compute tax rates automatically with the help of TaxCloud credentials, as mentioned in the screenshot below.
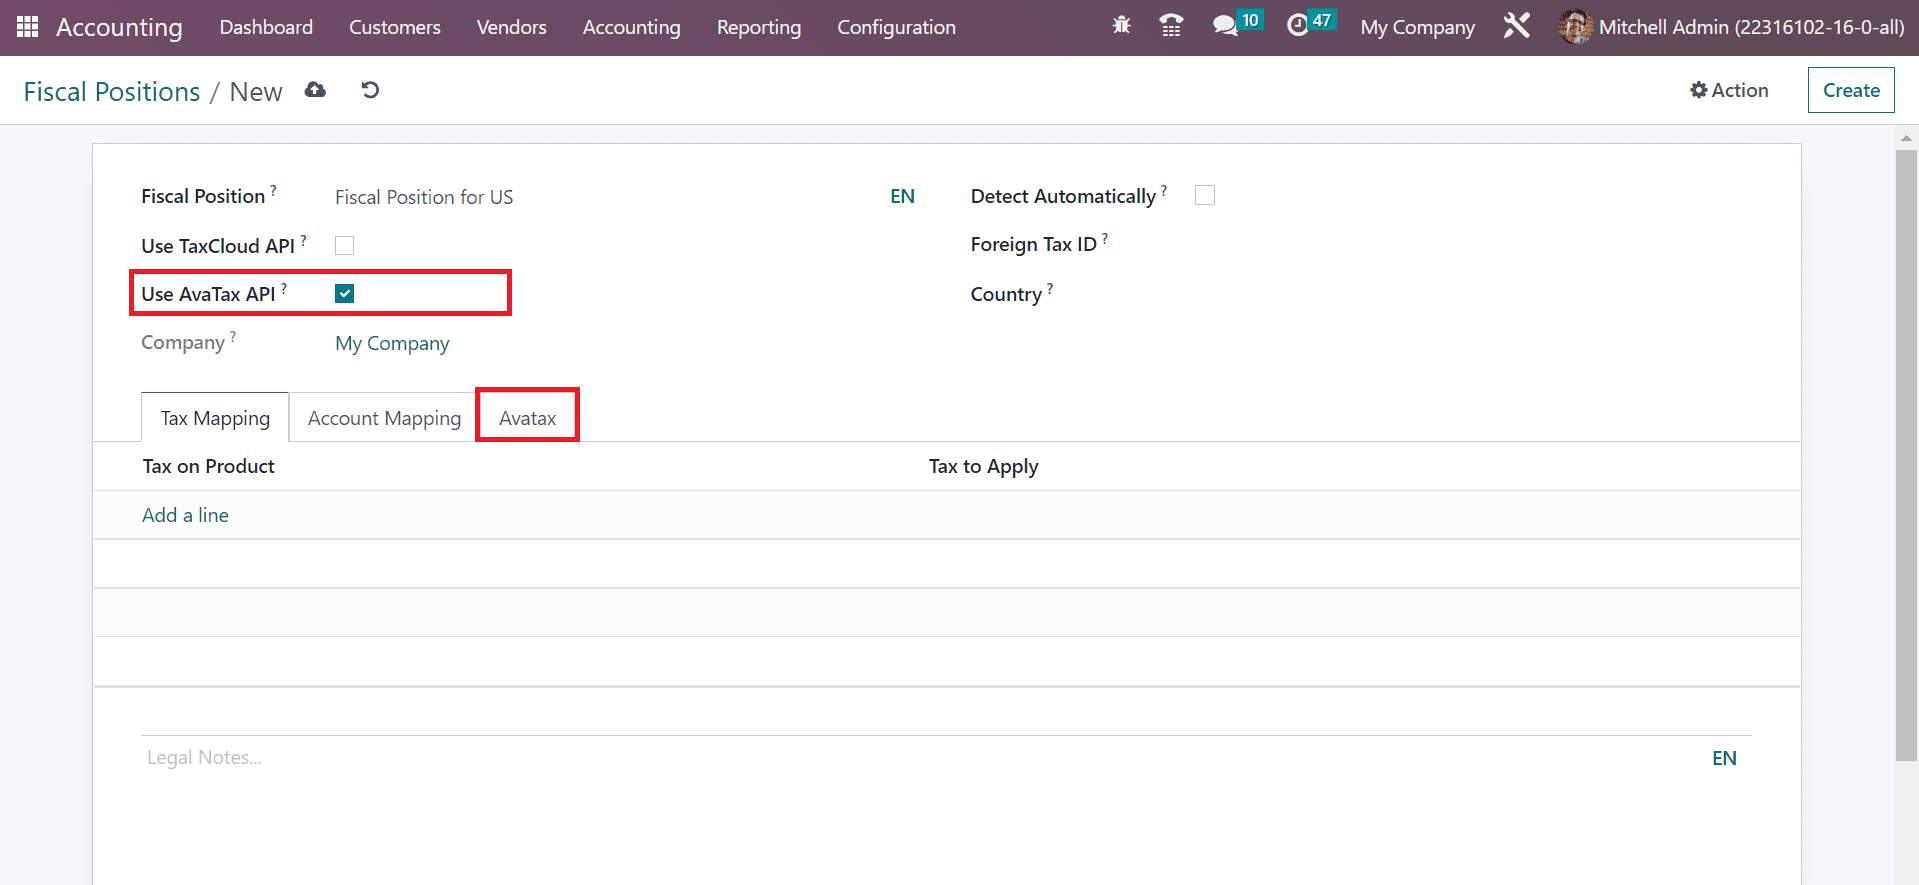
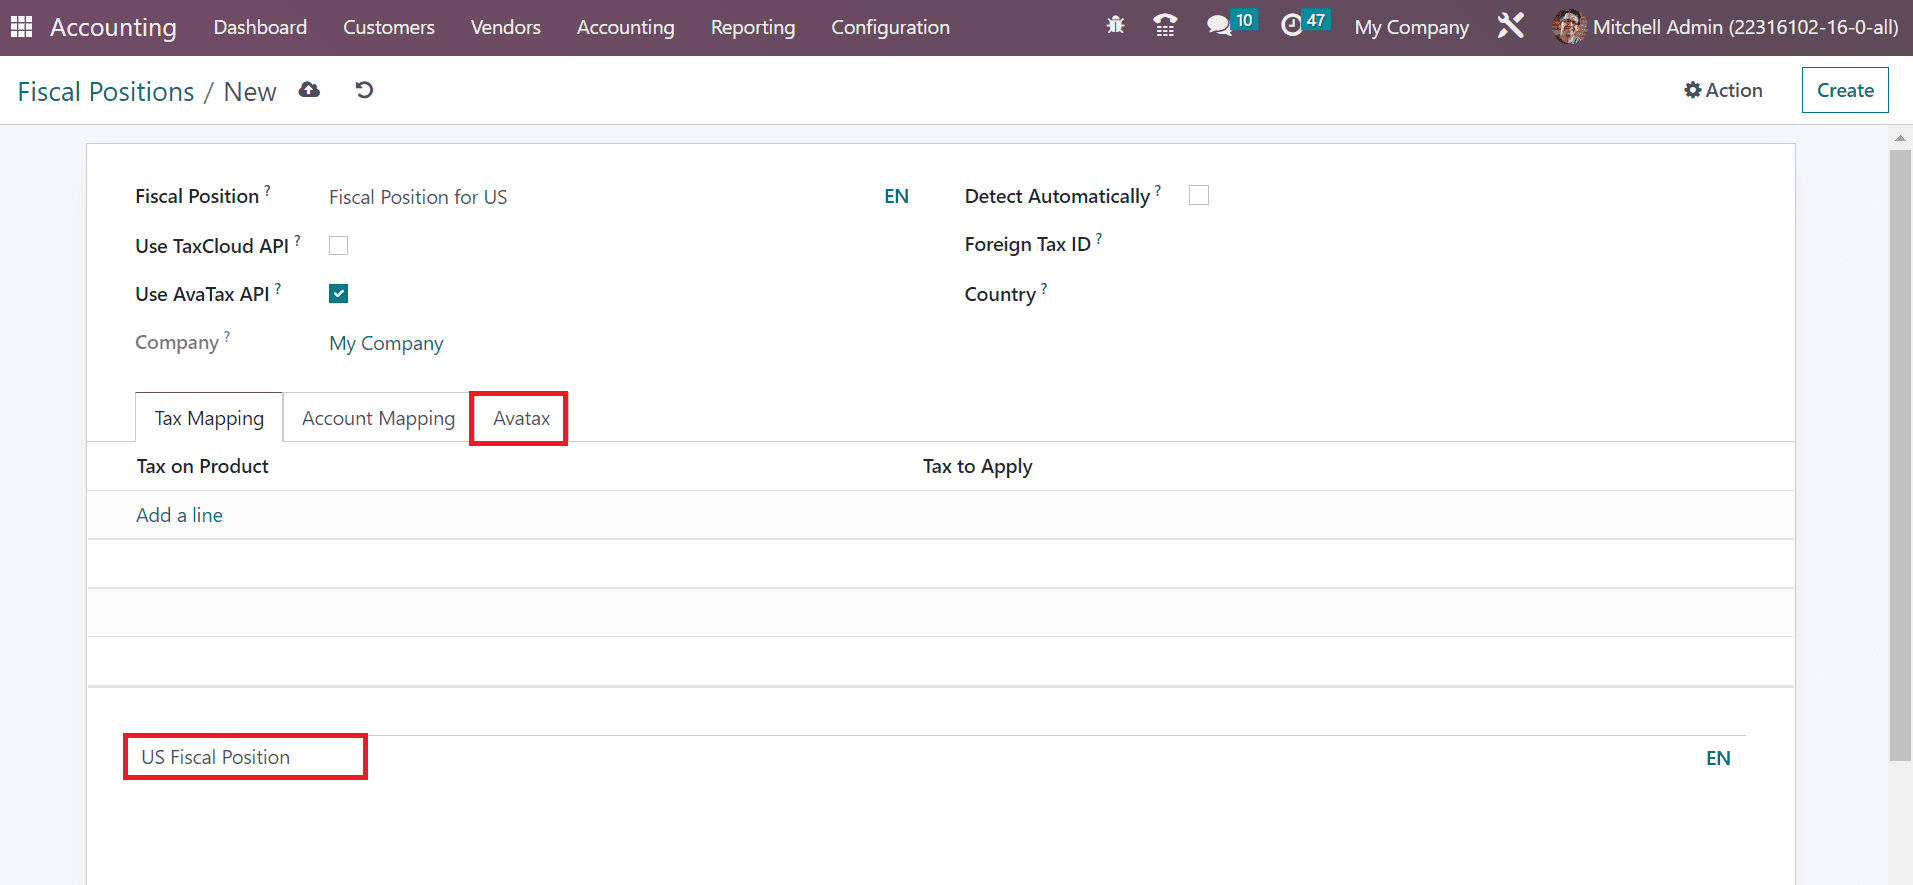
We can also configure taxes with the help of the AvaTax application after enabling the Use AvaTax API field. After turning it on, the AvaTax tab is viewable in the Fiscal Positions window, as portrayed in the screenshot below.
Below the AvaTax tab, the user can pick the account used for invoices in the AvaTax account within the Avatax Invoice Account field. Moreover, choose the AvaTax account for refunds in the Avatax Refund Account field, as demonstrated in the screenshot below.
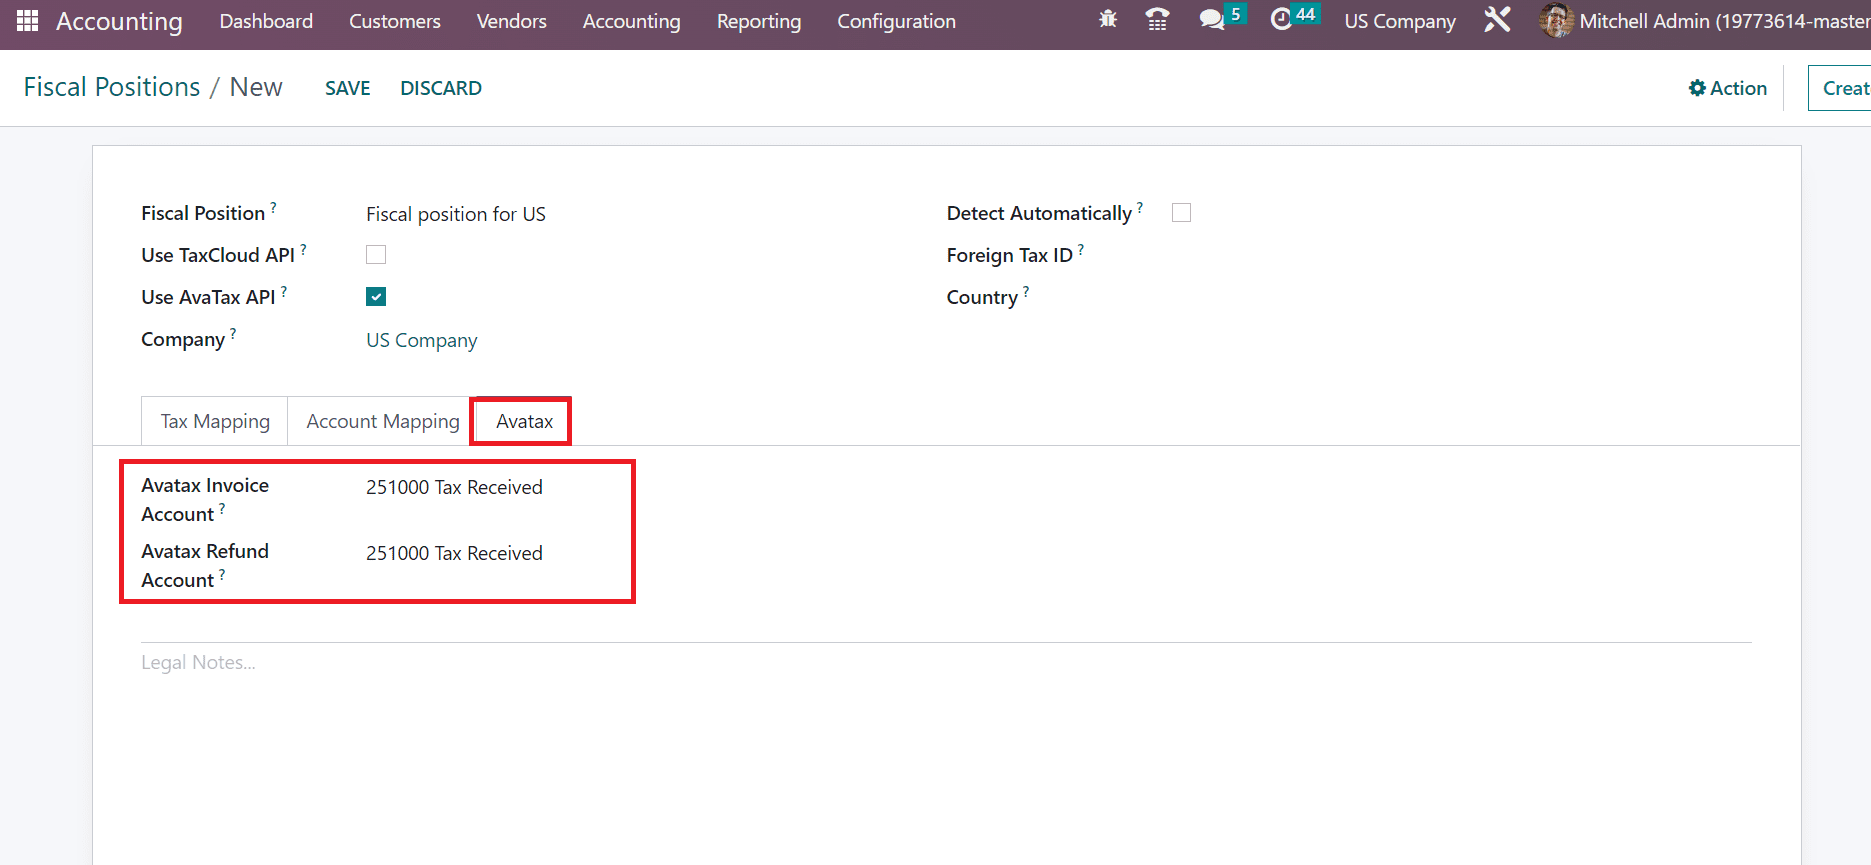
Users can specify important notes on printed invoices within the legal Notes section below the Avatax tab, as depicted in the screenshot below.
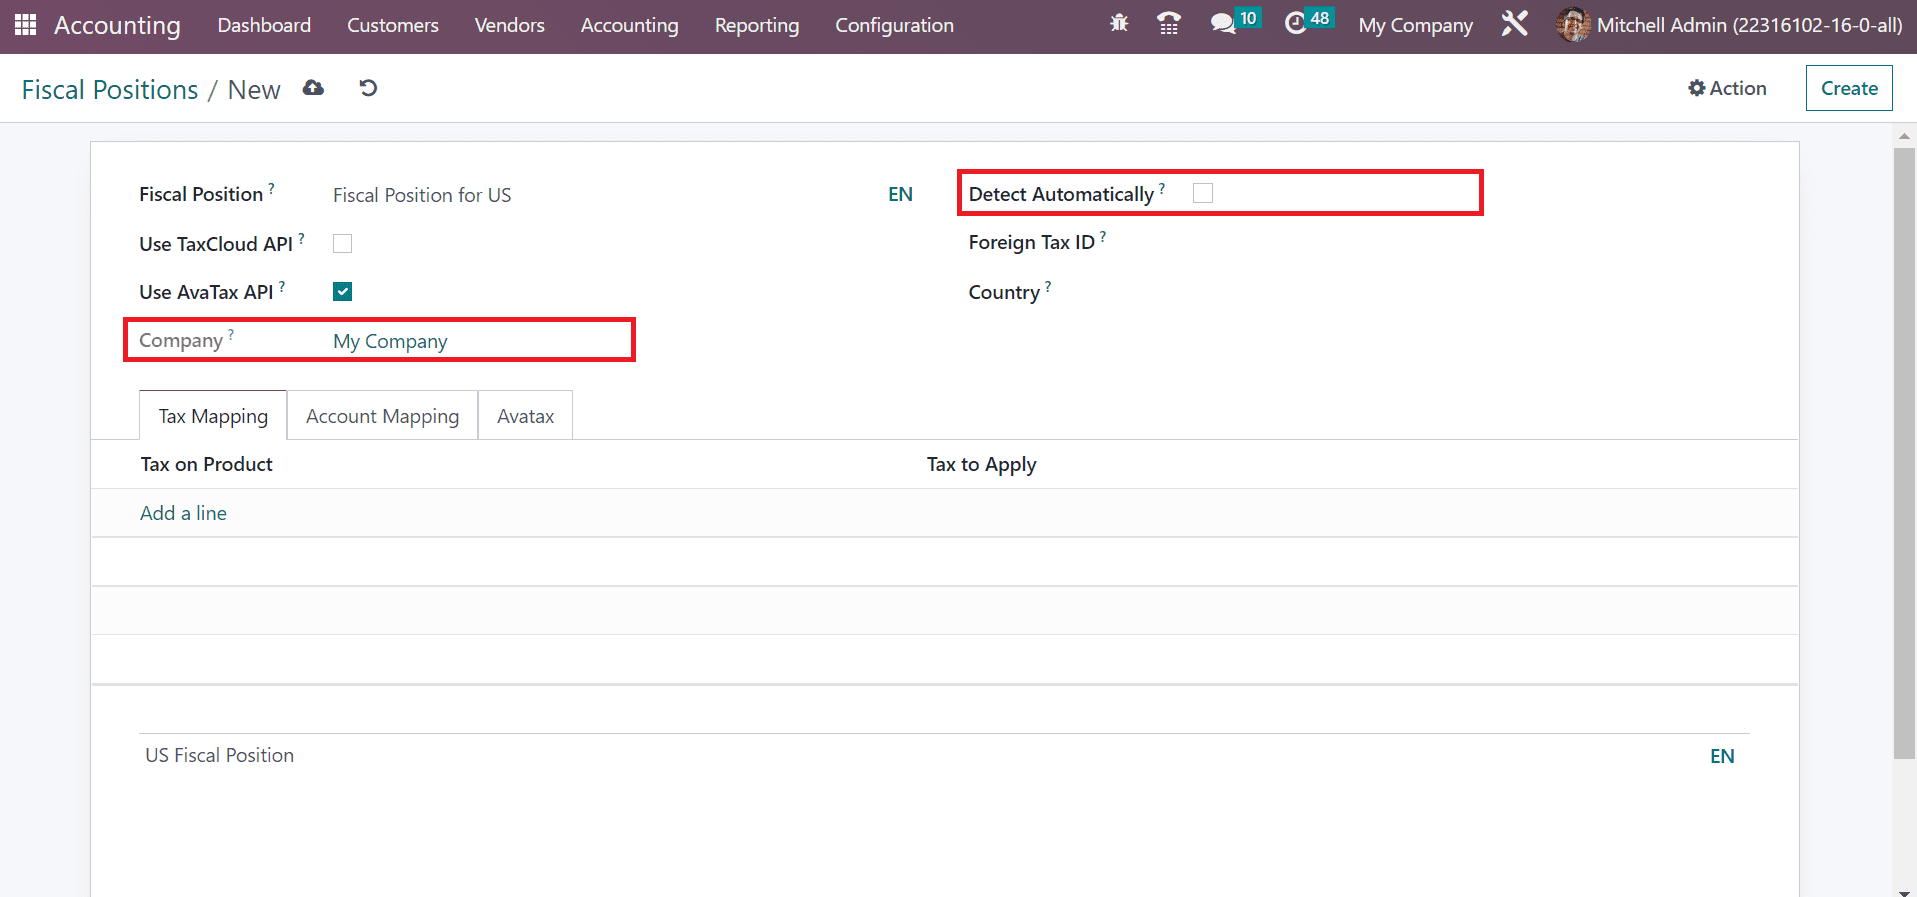
We can see US Company inside the Company field and automatically set fiscal position after enabling the Detect Automatically field, as represented in the screenshot below.
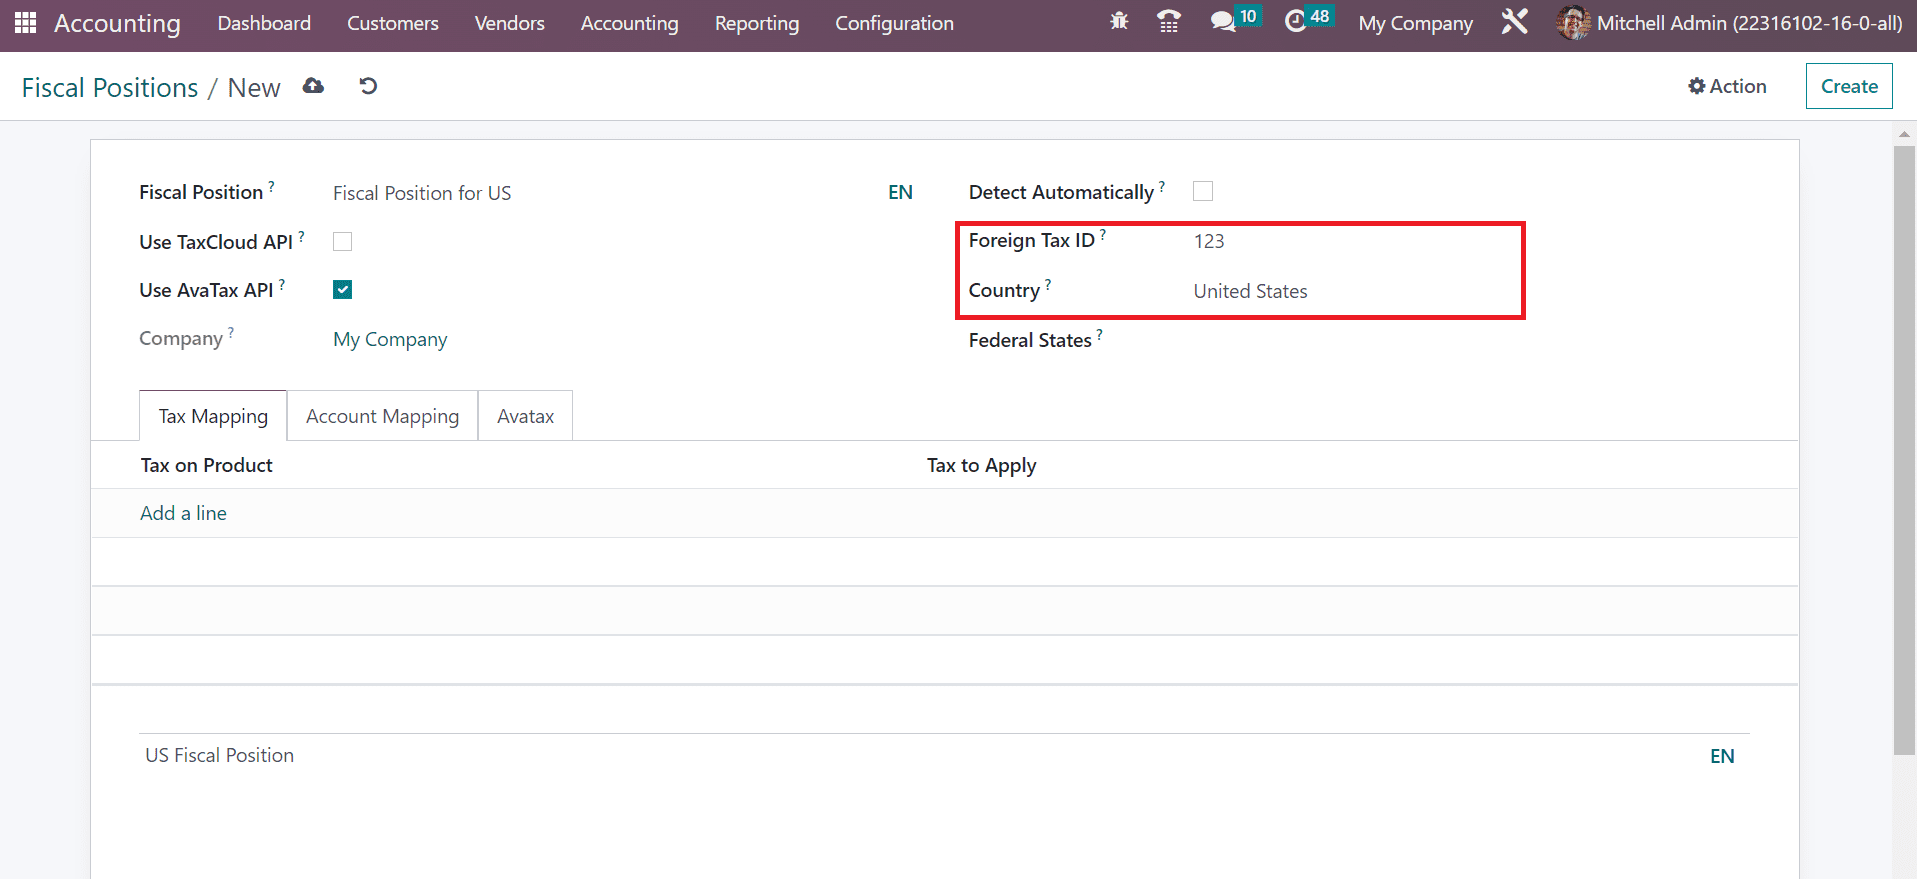
Mention the company tax id region mapped for fiscal position inside the Foreign TAX ID. Furthermore, select the United States in the Country field, as presented in the screenshot below.
Choose the state concerning US Country in the Federal States field. Users can specify the tax on products by choosing the Add a line menu inside the Tax Mapping tab, as described in the screenshot below.
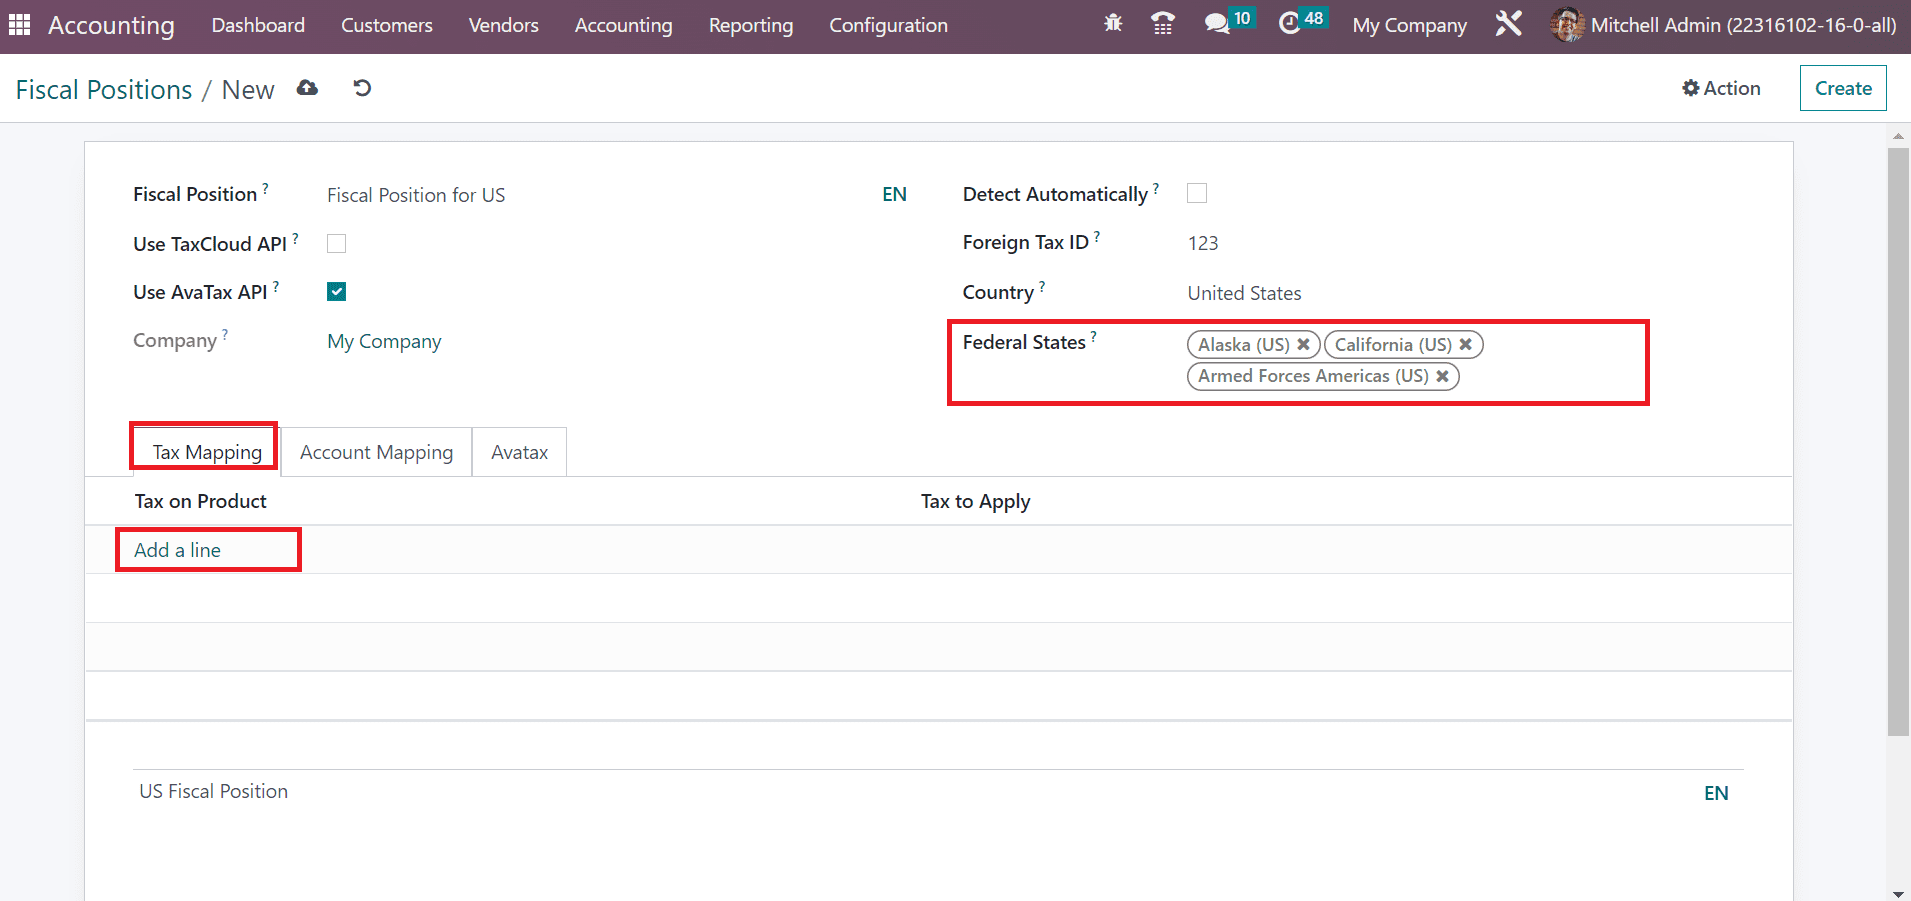
In the open space, we can create rules for a product tax that is mapped with another. The tax applied on a product is known as Tax on Product, and you can set it after choosing the Add a line option. Users can select any default tax options or create a new one for their fiscal position.
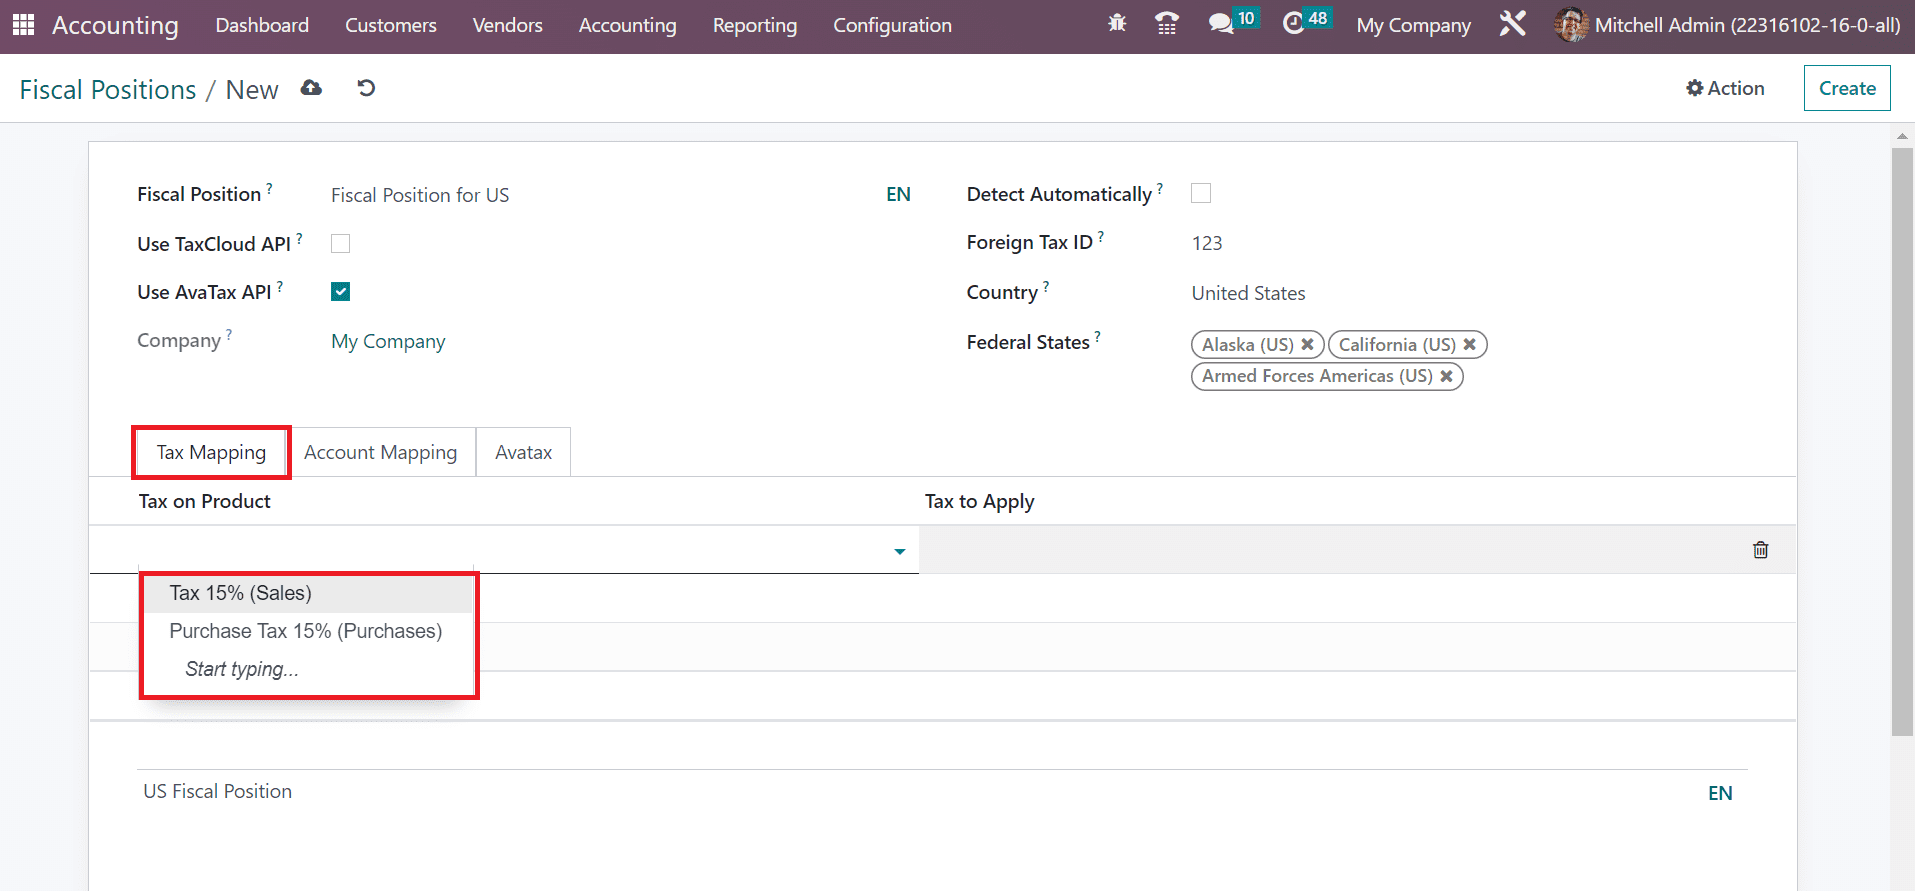
Here, we can access the default options for Tax on Product, as marked in the above screenshot. We selected the Tax to Apply as Tax 15%(Sales) below the Tax Mapping tab, as illustrated in the screenshot below.
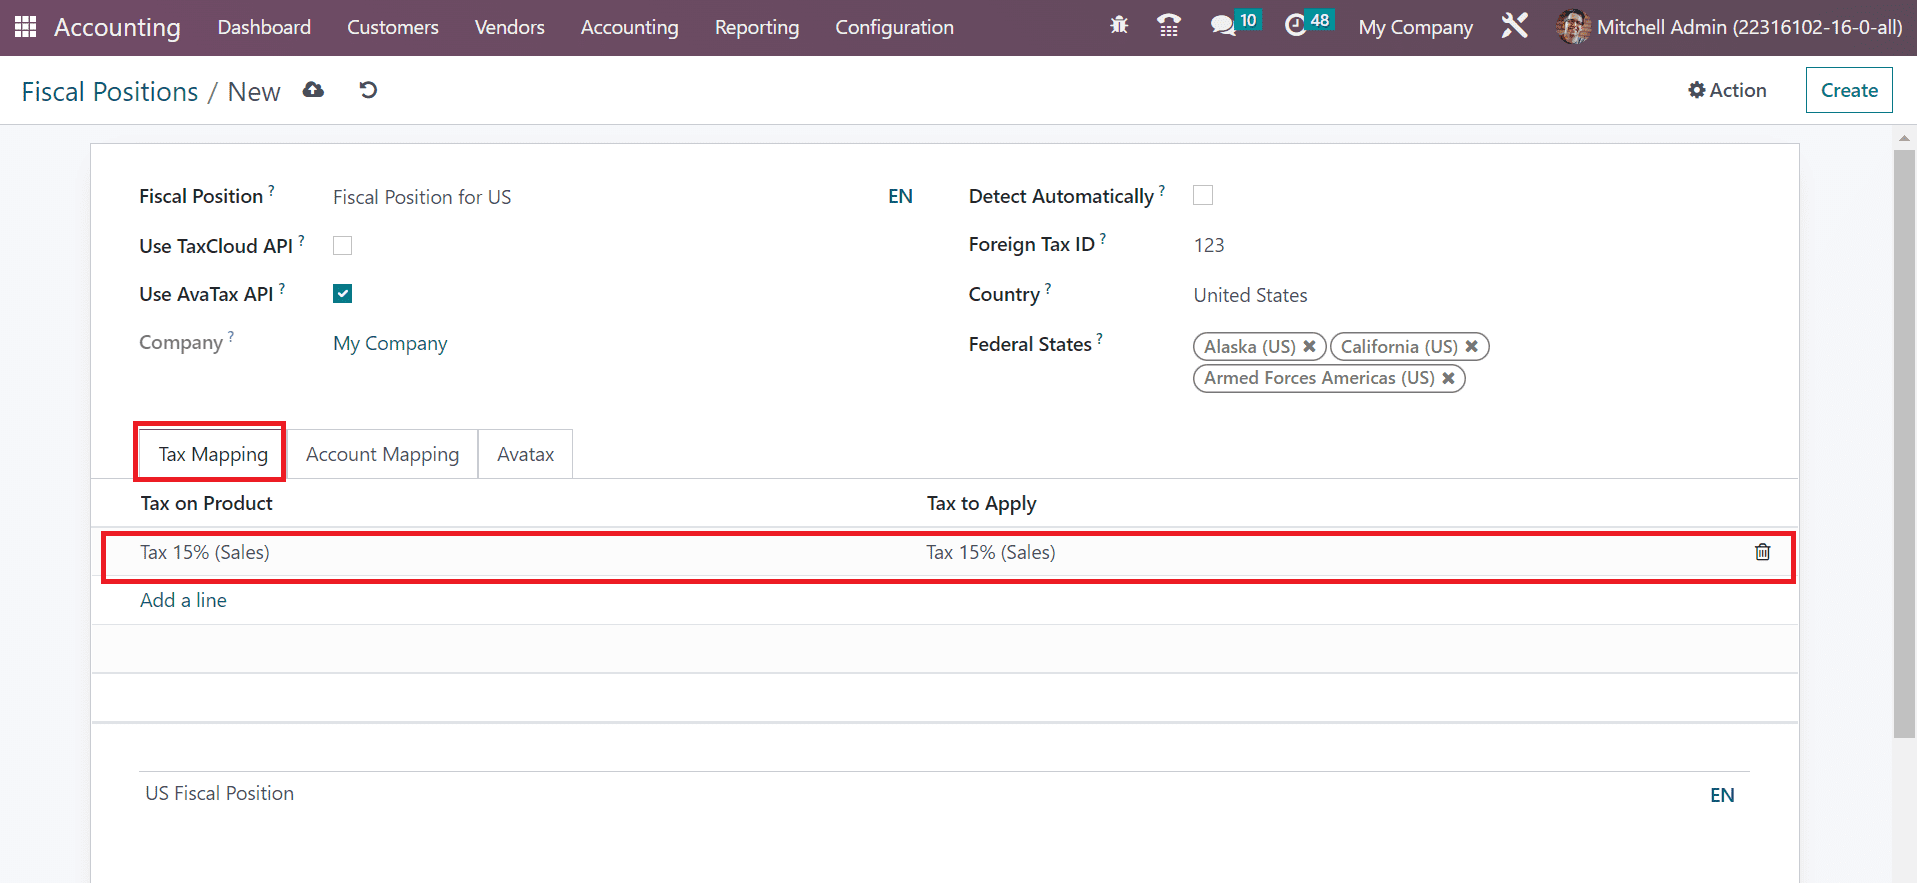
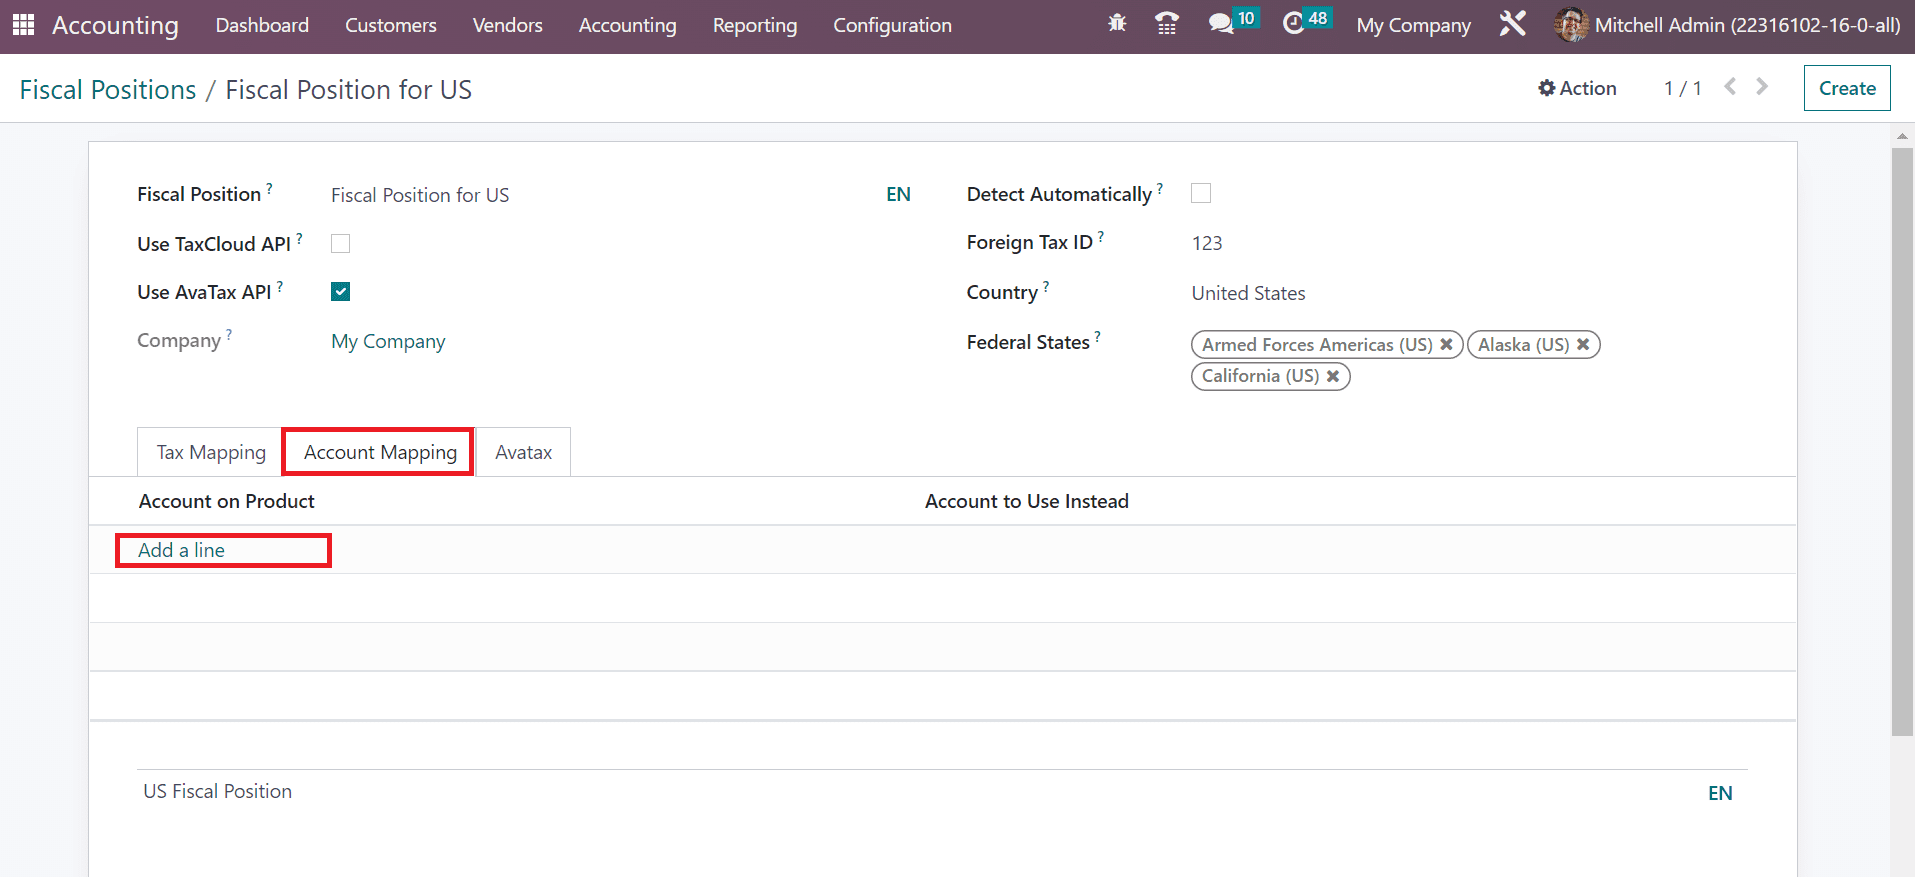
Below the Account Mapping section, the user can apply for an account on the product by clicking on Add a line option, as indicated in the screenshot below.
After entering essential details, save the fiscal position data. Now, let’s see how to set a fiscal position on a customer invoice in the Odoo 16 Accounting. Firstly, we must apply fiscal position for the customer data in Odoo 16. Choose the Customers menu, and the record of all created partners is accessible to a user. You can generate new customer information after clicking on the CREATE button in the Customers window, as specified in the screenshot below.
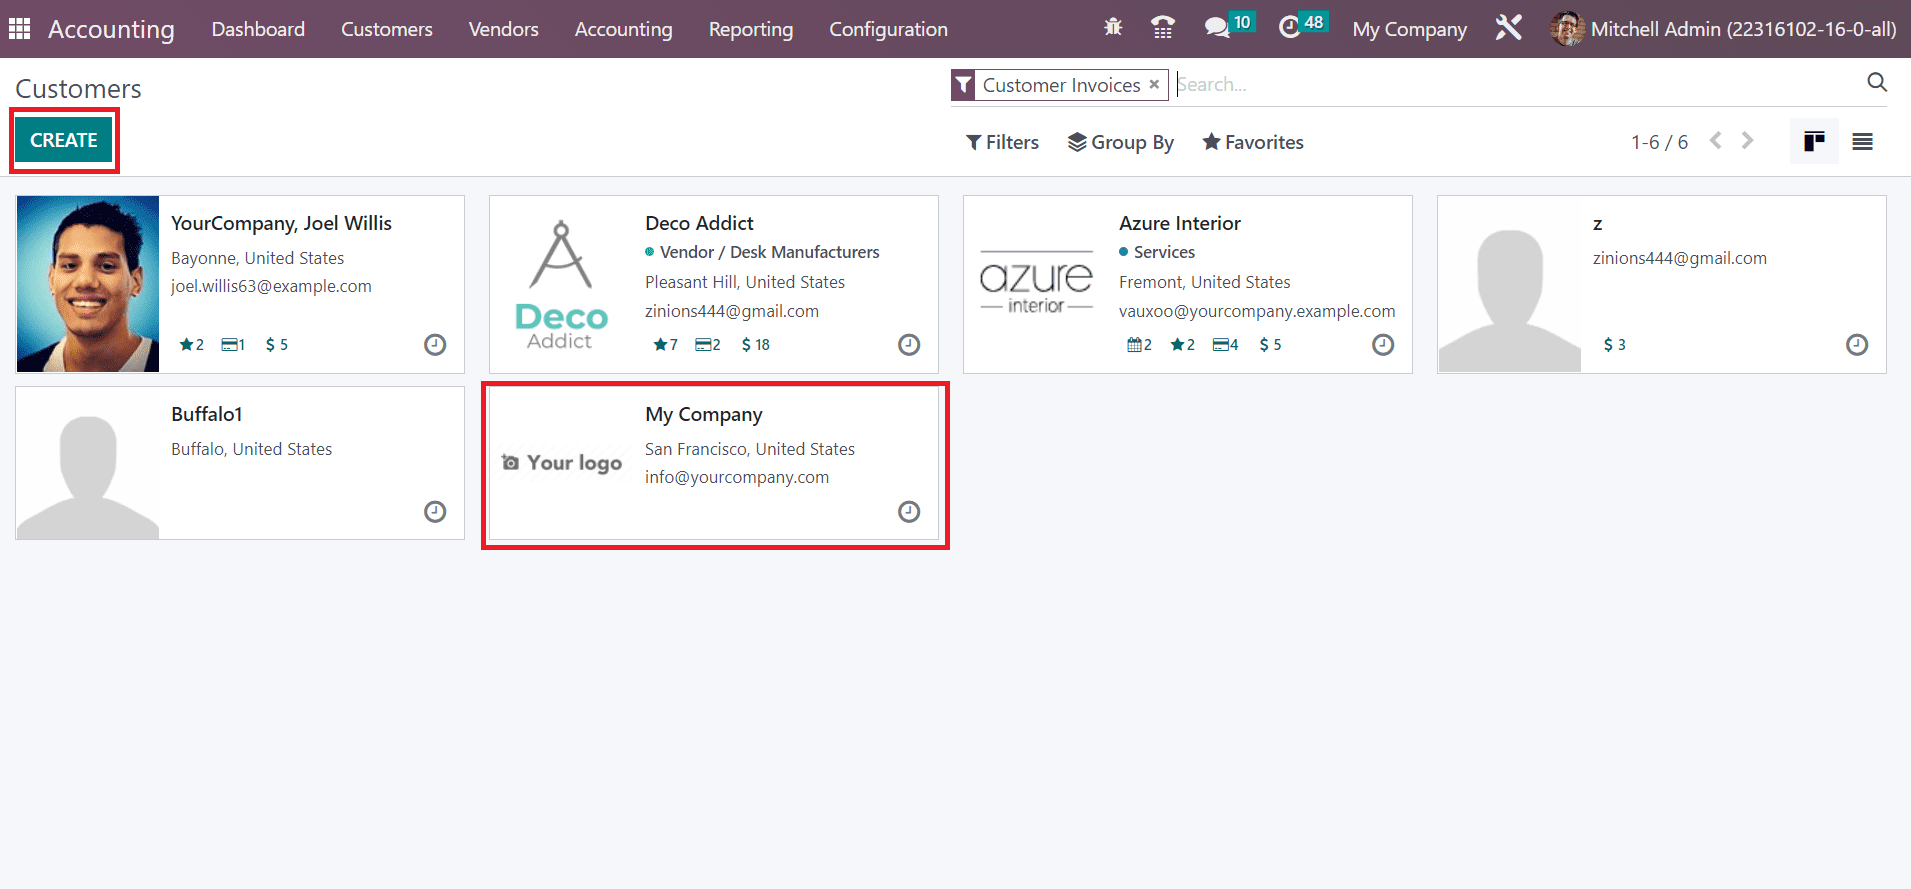
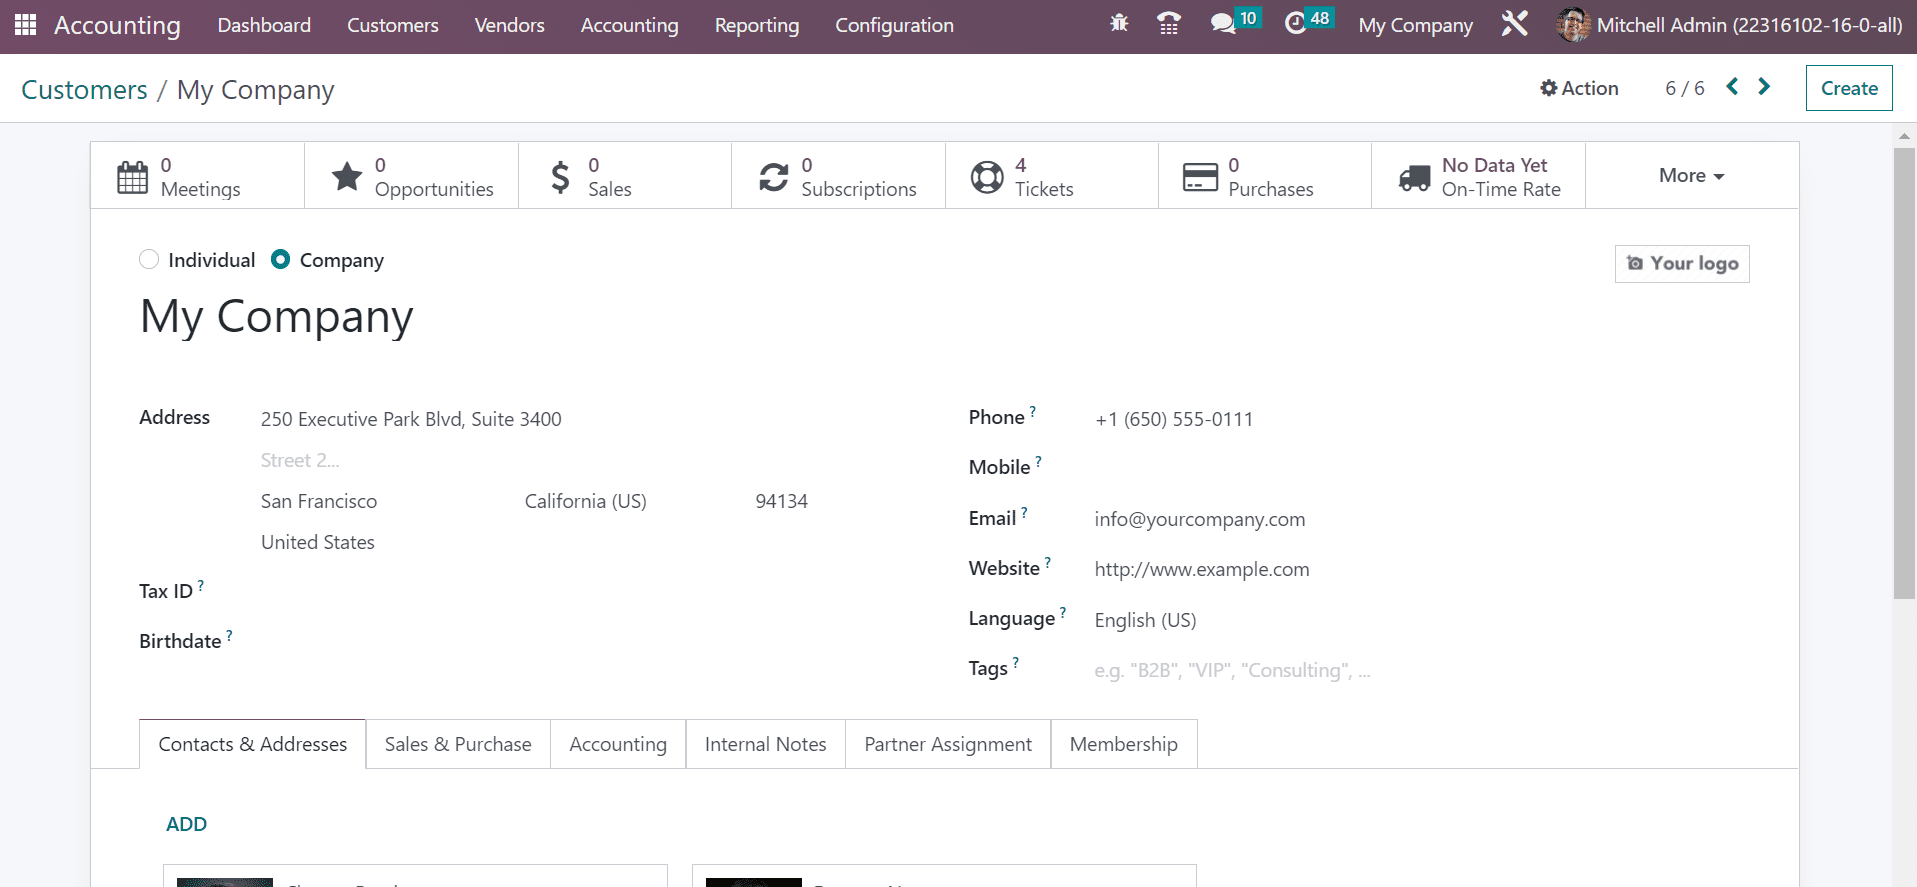
Pick My Company in the Customers window, as cited in the screenshot above. On the new page, we can identify the company Address, Email, Website, Mobile number, Contacts, and more.
Below the Sales & Purchase tab, users can see the FISCAL INFORMATION section. As noted in the screenshot below, we can choose our created Fiscal Position for the US inside the Fiscal Position field.
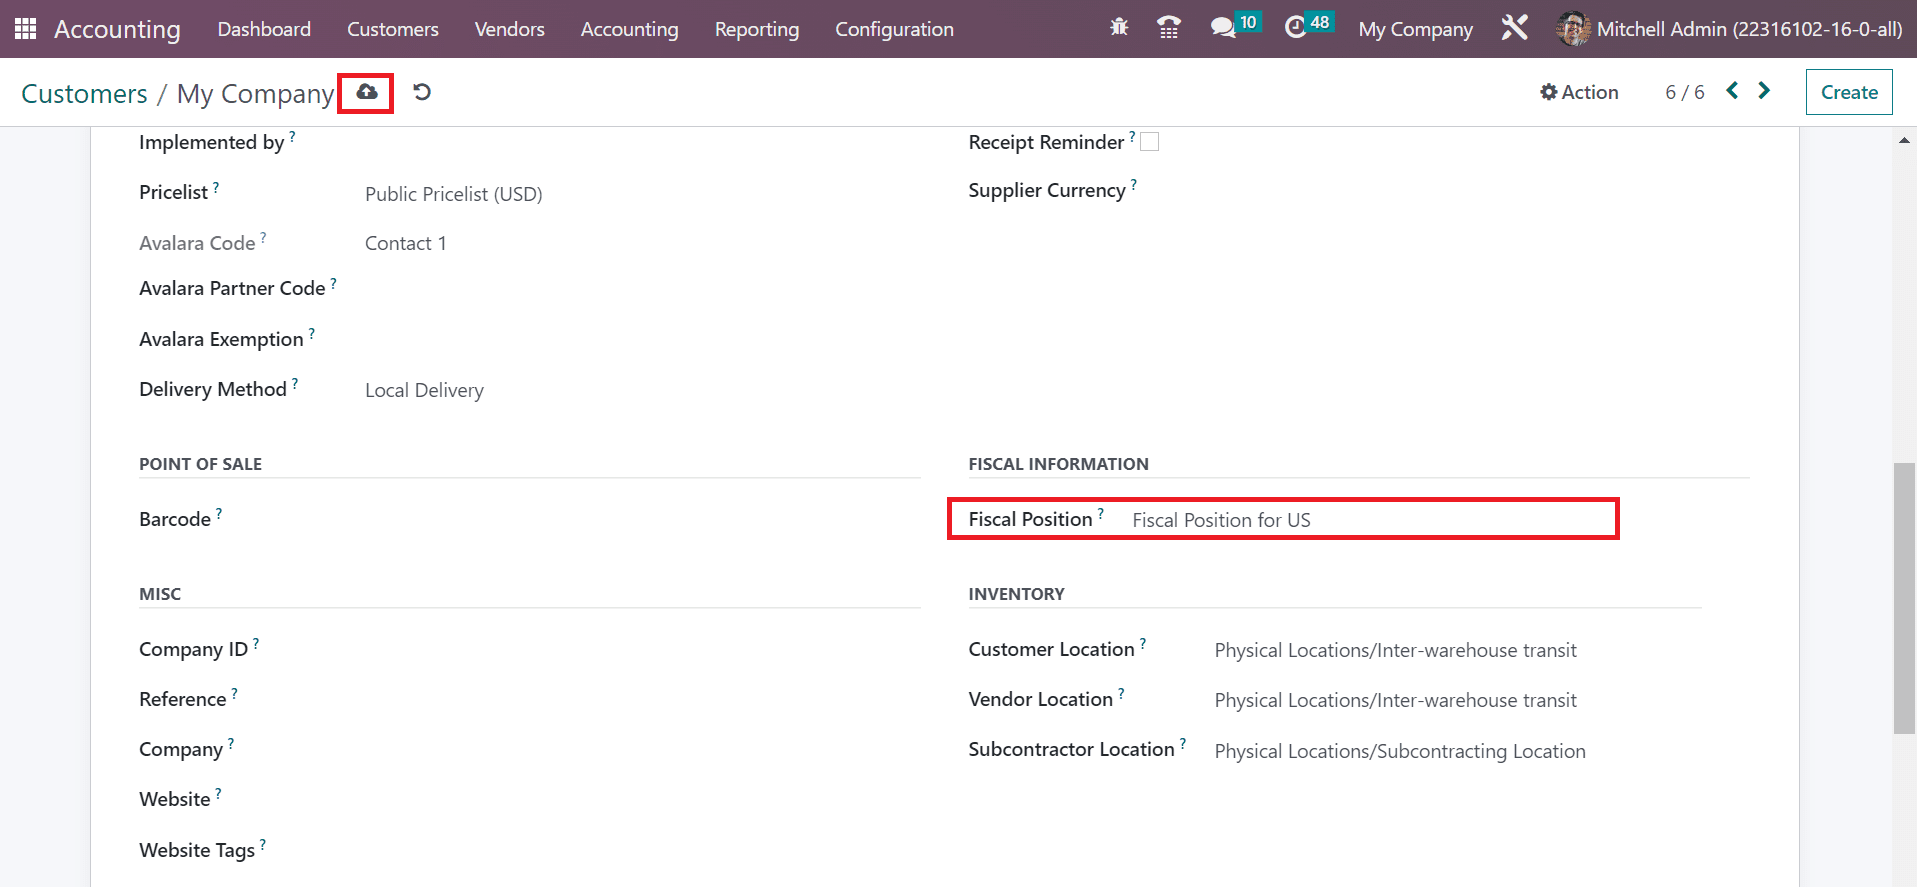
After setting the Fiscal Position, select the save manually icon in the Customers window. Next, let’s generate a customer invoice within the Odoo 16 accounting. Click the Invoices menu in the Customers tab and record that all invoices are available to the user. Details of each invoice, such as Number, Due Date, Total, Status, Customer, and more, are obtainable to a user as described in the screenshot below.
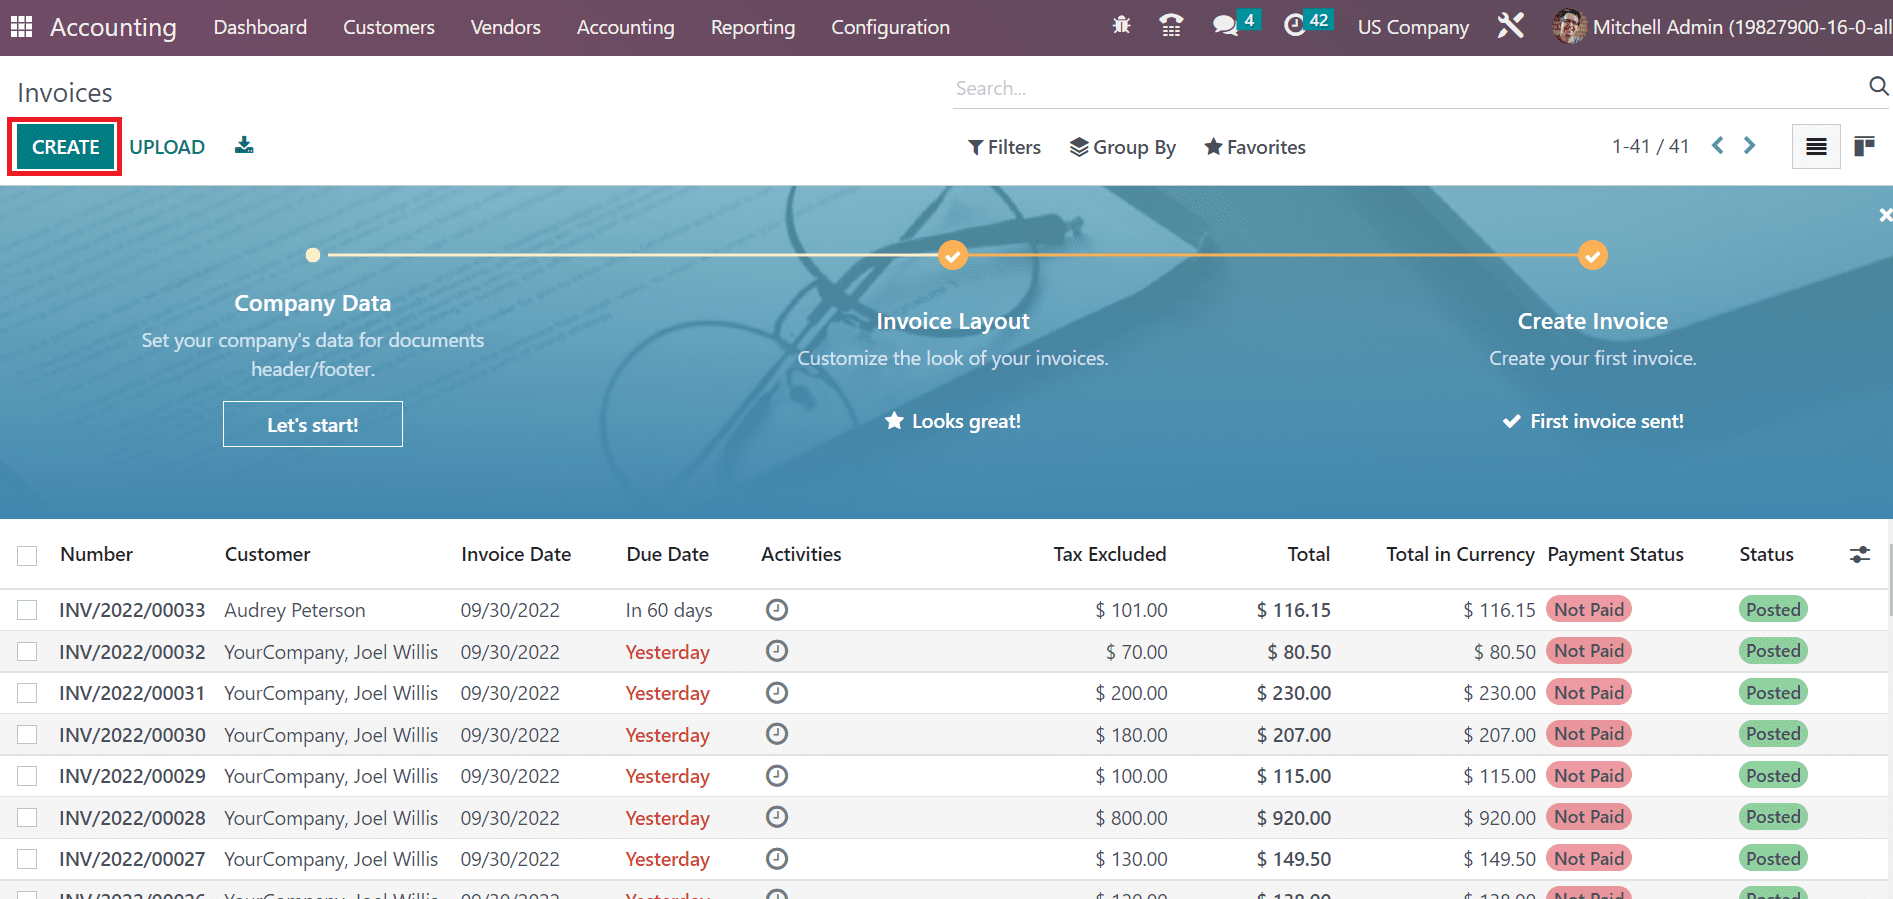
After pressing the CREATE button in the Customers window, we can formulate a new invoice. In the new window, choose the Customer as a US Company, and the Delivery Address is automatically visible to the user.
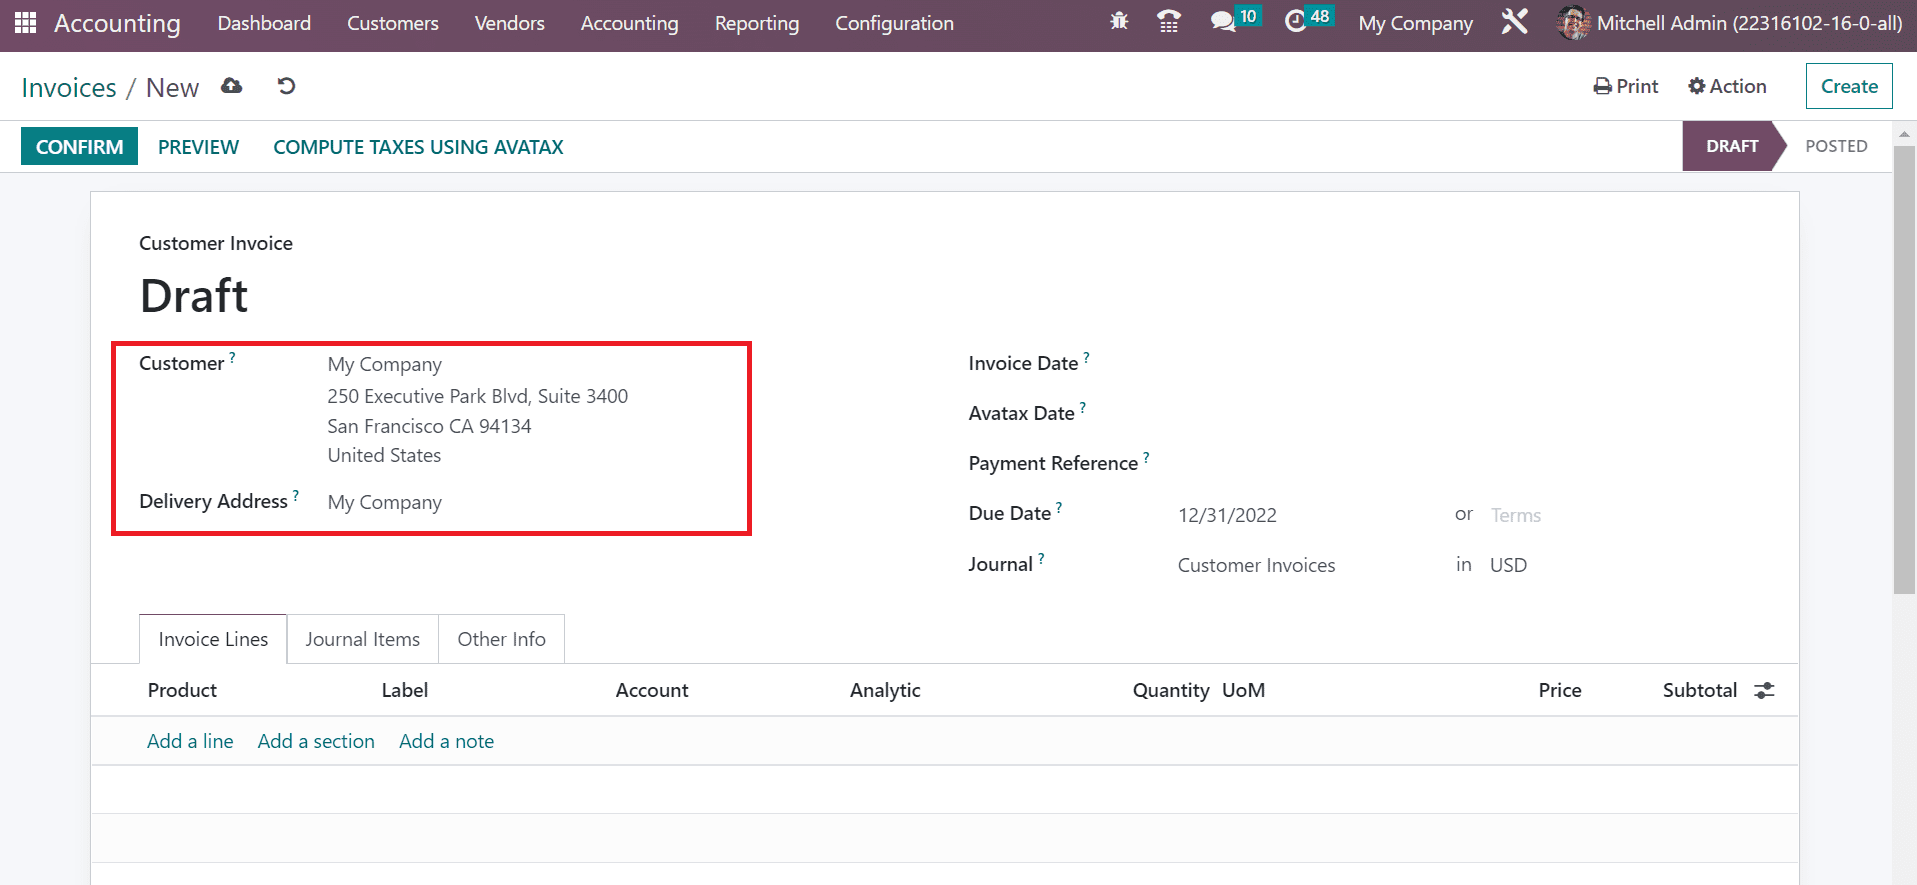
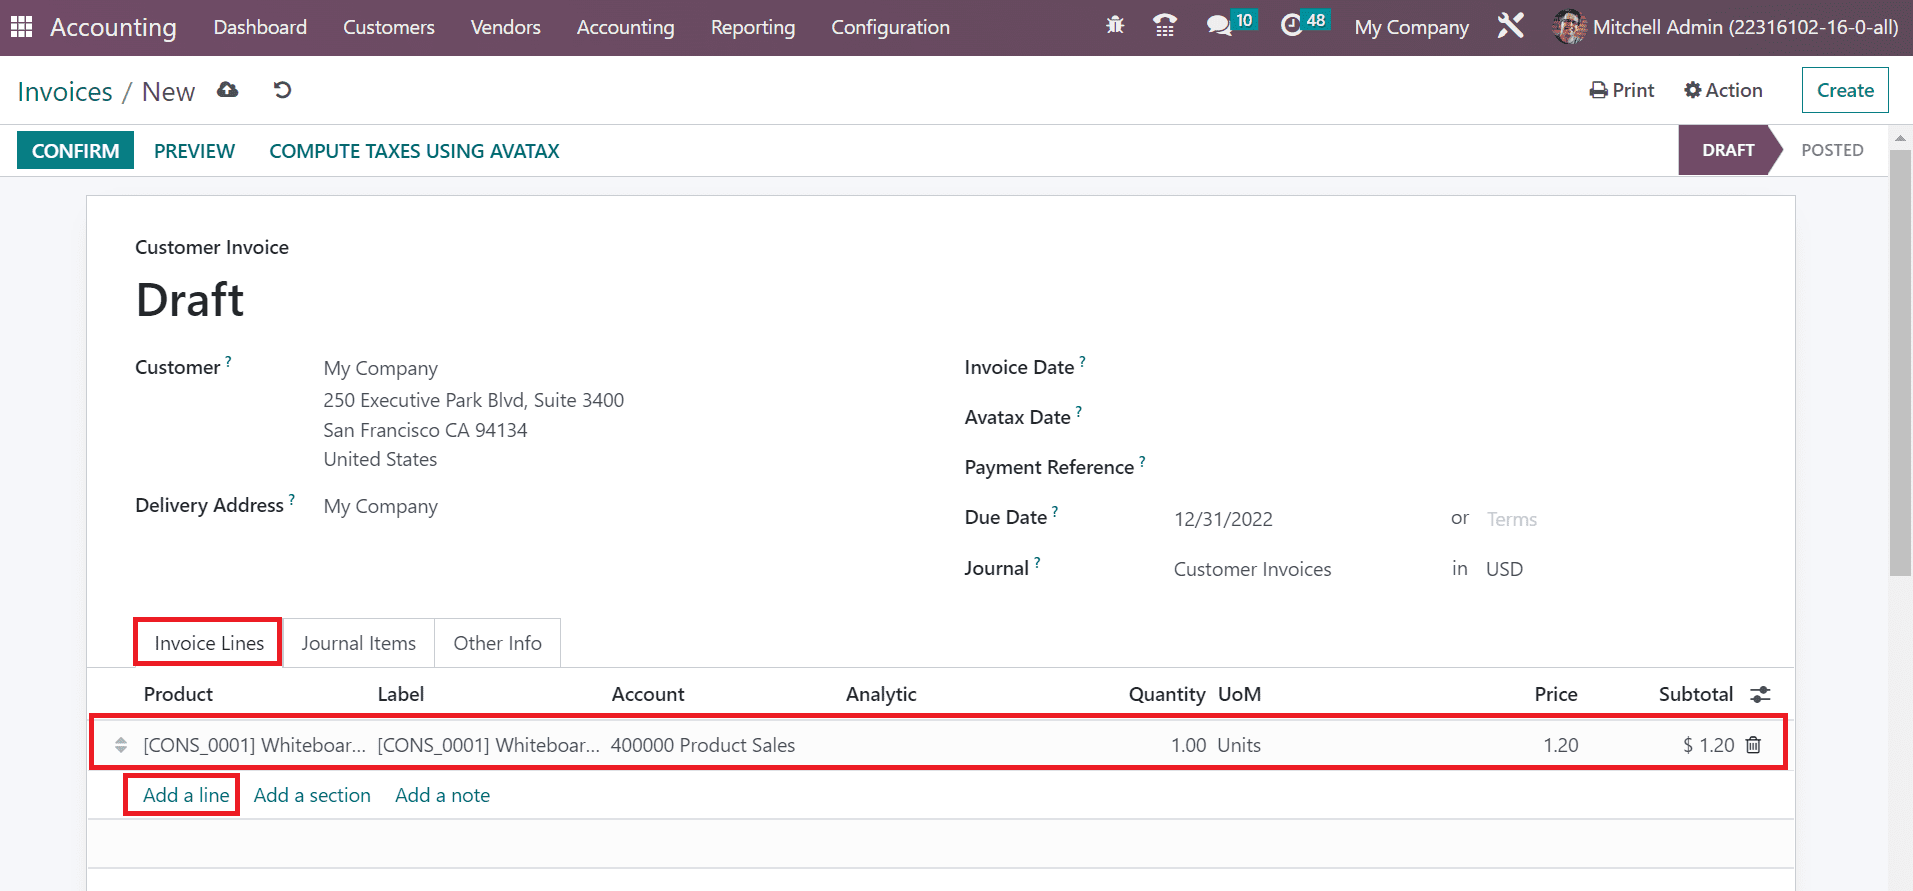
Users can pick the product by selecting the Add a line option within the Invoice Lines tab. We choose the product Whiteboard pen inside the Product title, as demonstrated in the screenshot below.
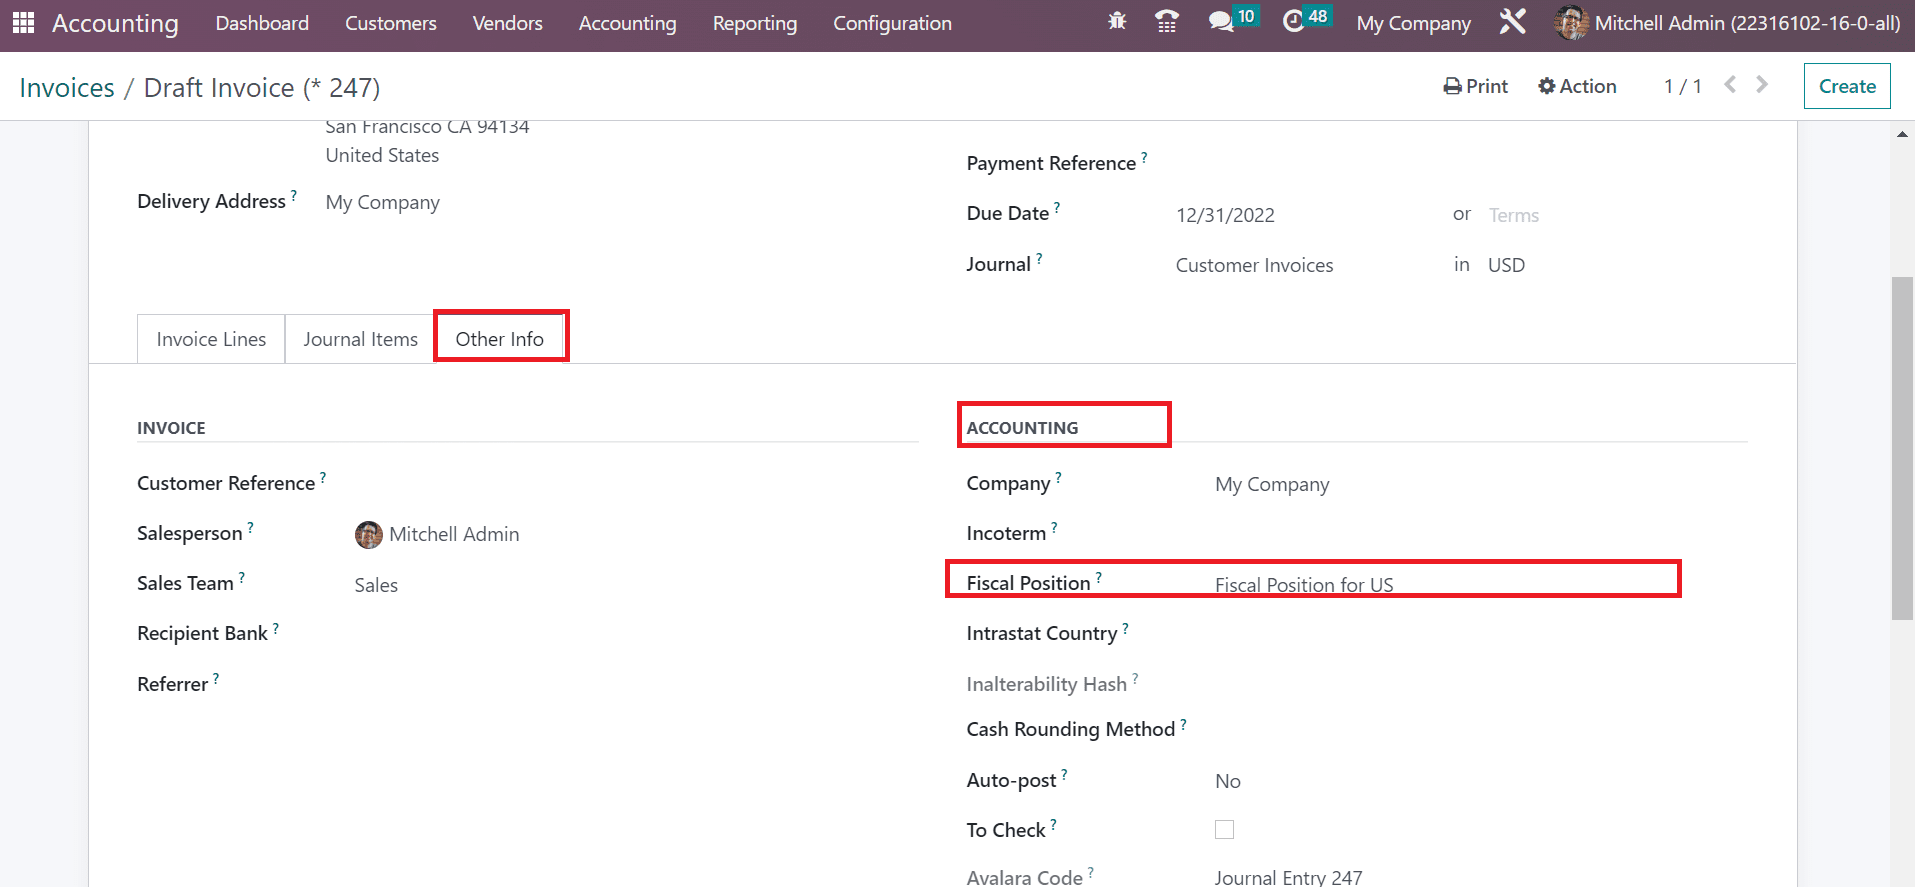
Inside the ACCOUNTING section of the Other Info tab, the Fiscal Position for the US has applied automatically after selecting the US company as a Customer because we set Fiscal Position for the US for the Customer US Company before in Odoo 16 Accounting.
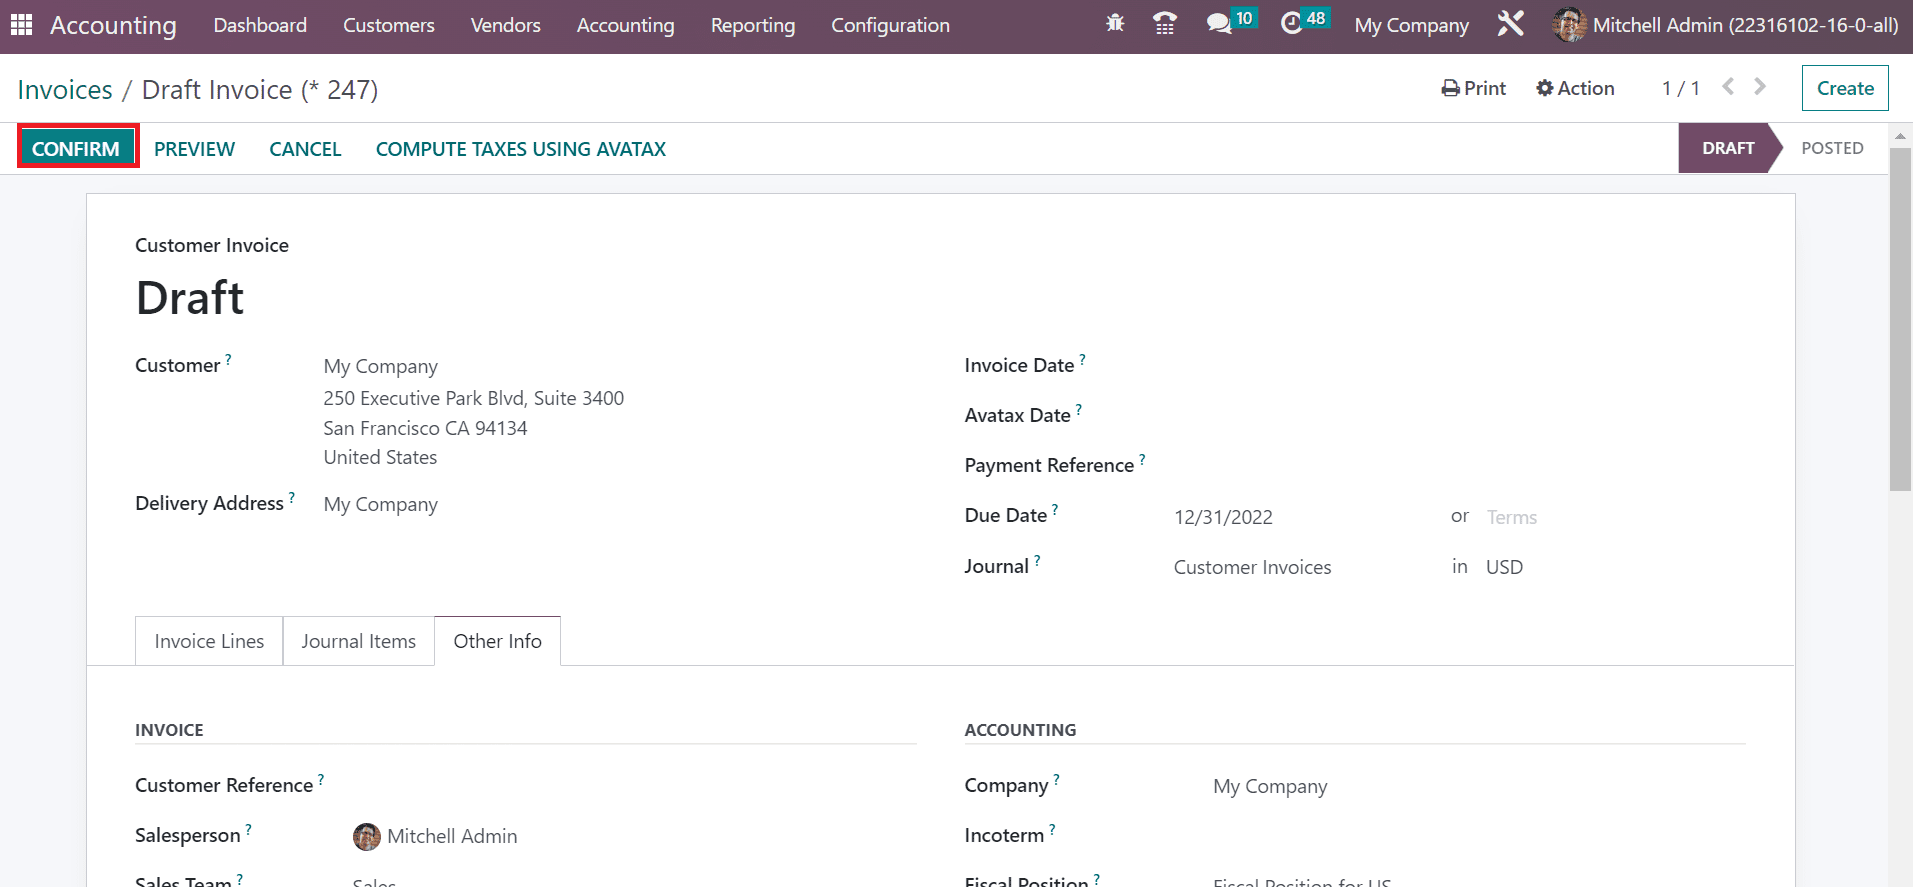
Now, we can verify the order by clicking on CONFIRM icon in the Invoices window.
The invoice for customers is created easily after the confirmation in the Invoices window. Hence, it is easy to process a fiscal position within a customer invoice in Odoo 16 Accounting.
Fiscal position management is based on a specific country, possible through Odoo ERP, and users can process a Fiscal Position or easily set various customer invoices based on business requirements. Tremendous growth is visible in a business by maintaining fiscal position in different countries of a company.