In the current scenario, when teammates are working remotely on the same project,
git plays a very important role in the development of a project. Developers can easily create a repository in the GitHub account and merge the code.
It is helpful to control the git directly from pycharm.
This blog will describe how version control is done using git in pycharm?
Pycharm supports various version control systems, which helps in codebase management.
Let see how it works:
Step 1: Log in to GitHub account
Go to Pycharm -> File -> Settings -> Version Control -> Github
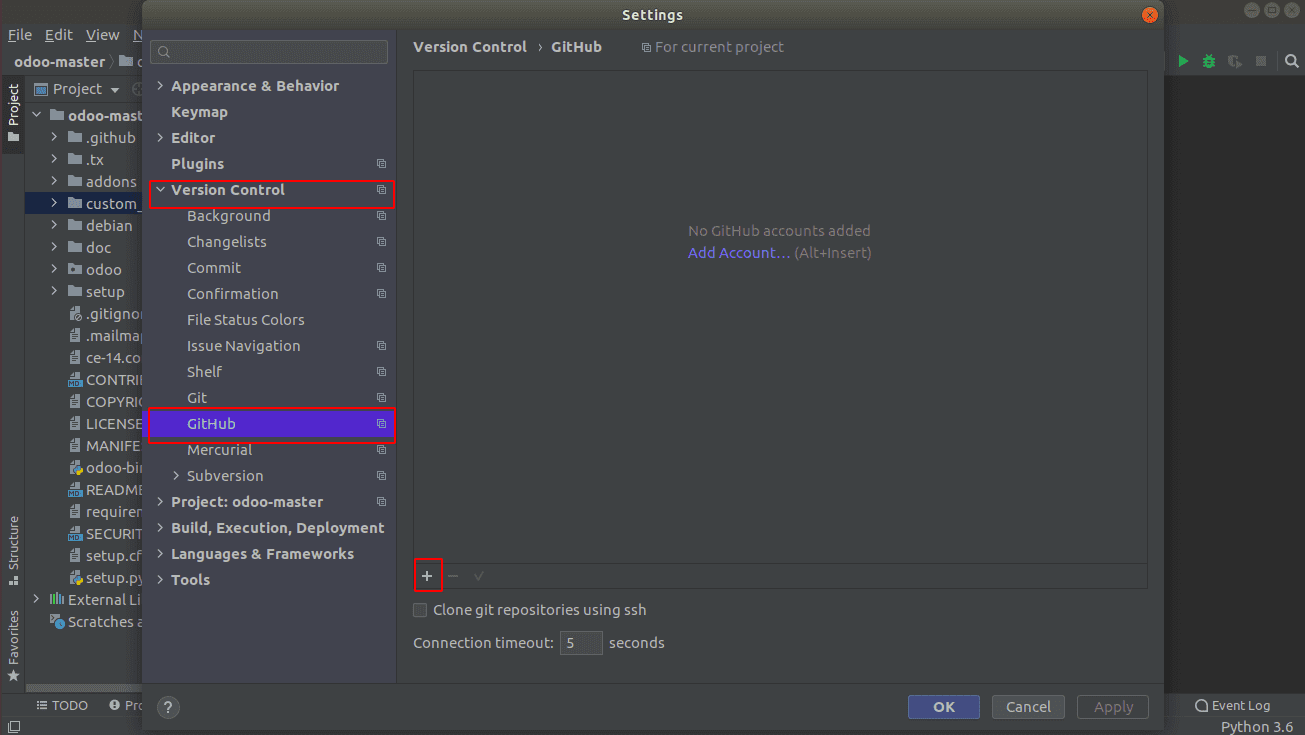
Click on the + button, where you can choose Login via Github that will redirect to Github login via JetBrains.
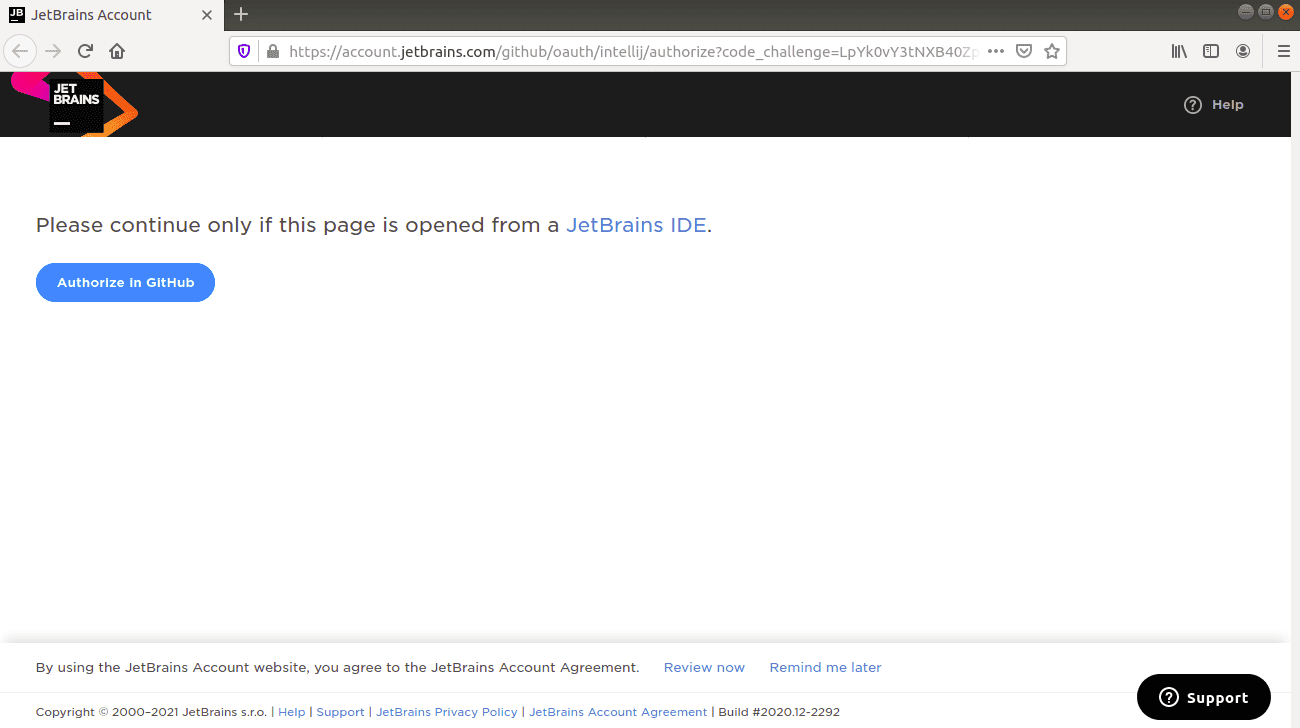
Go to Authorise in Github
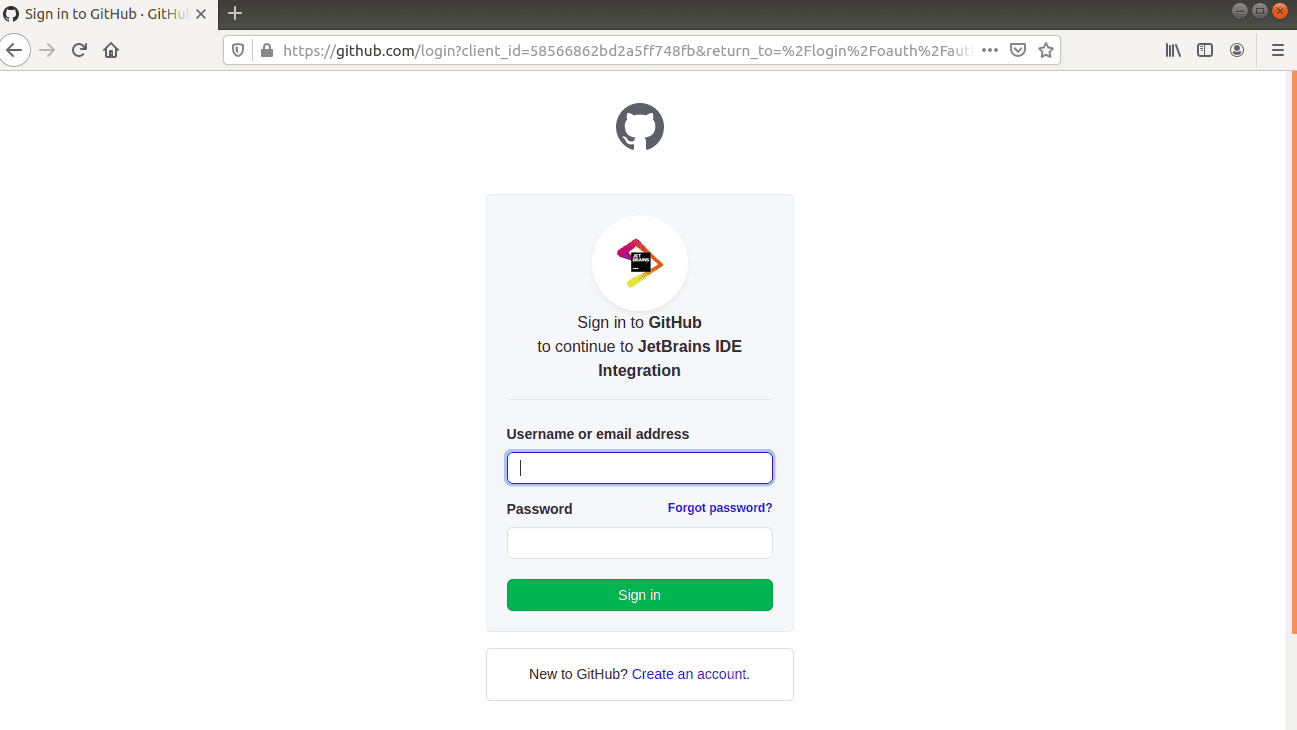
Give the necessary credentials and login to Github.
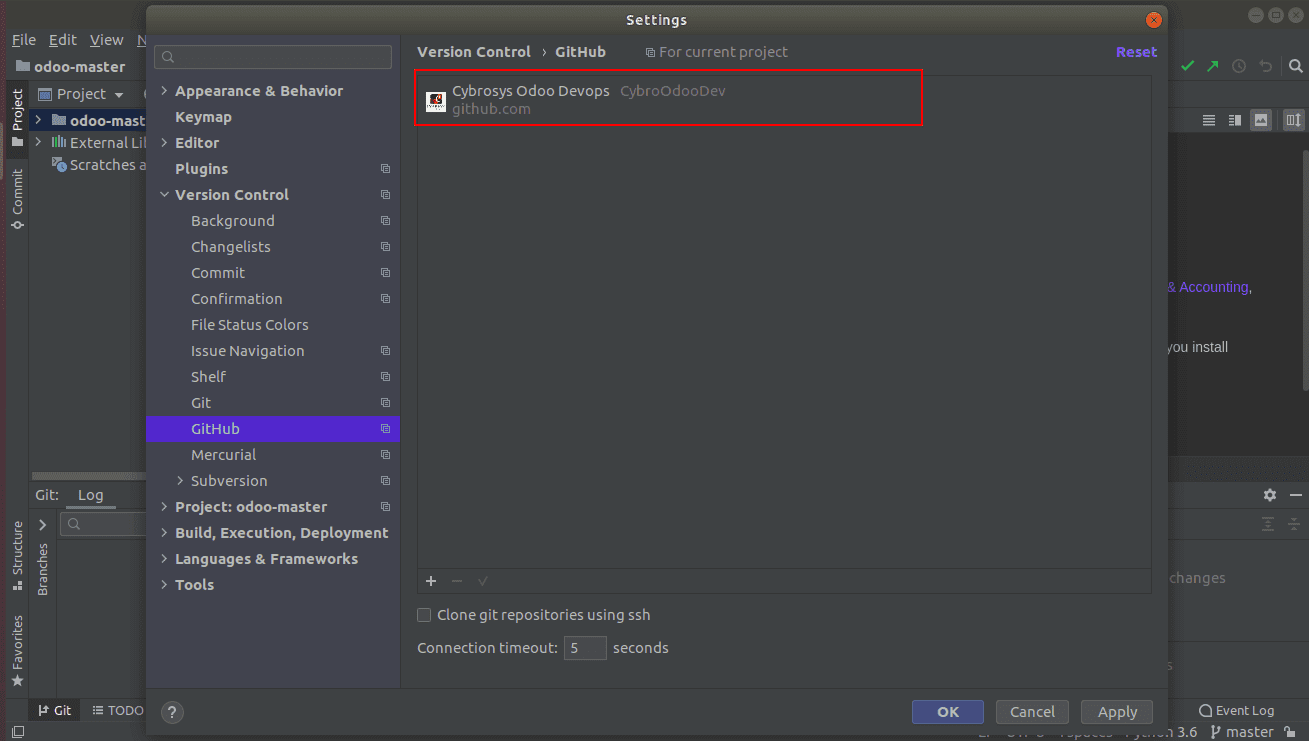
Once the login is successful, you can see the Github account has been logged in via pycharm (Pycharm -> File -> Settings -> Version Control -> Github)
Step 2: Create local git repository and clone
Create a folder (it will act as a local git repository). Here I created a folder named TestCybro in the project Odoo 14.0.
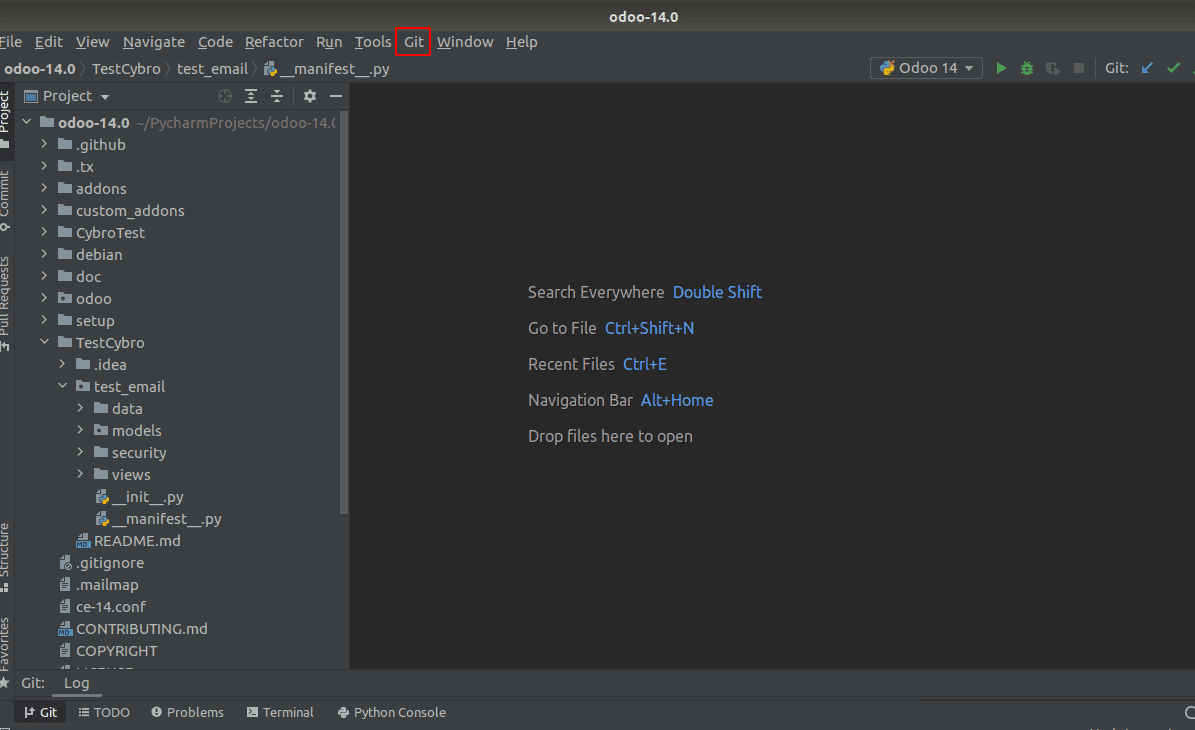
Go to -> Git -> Clone
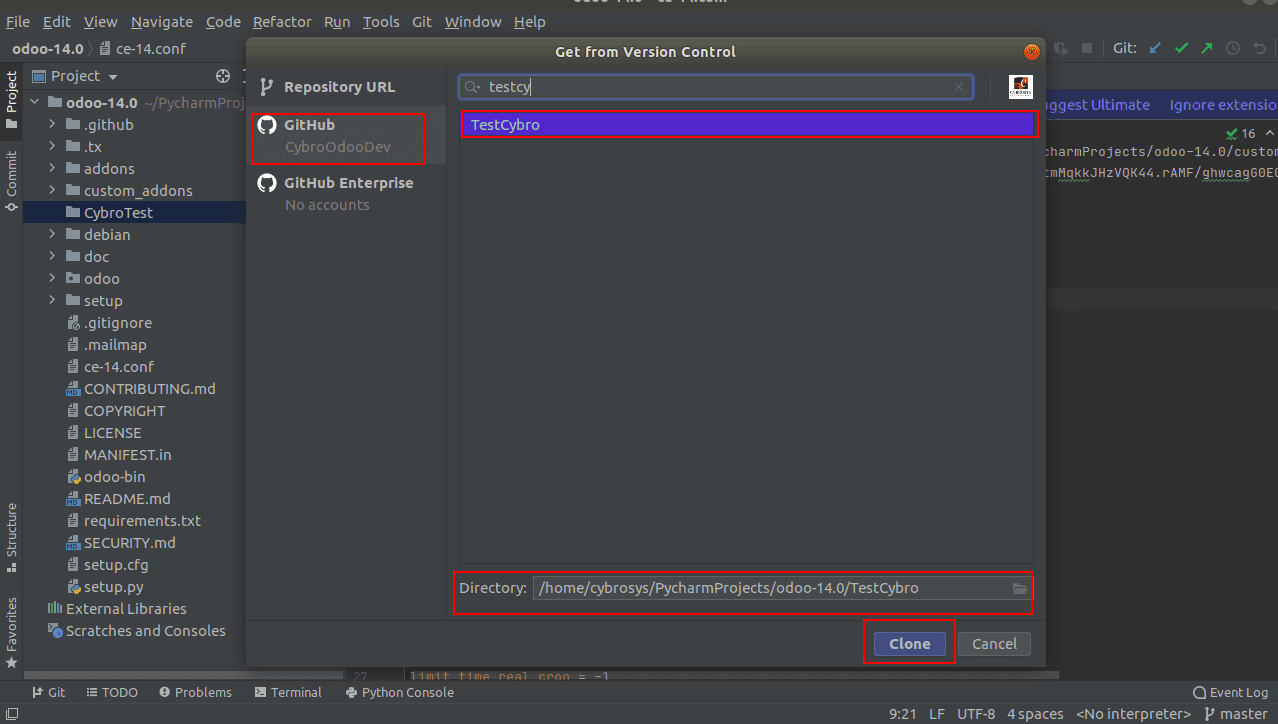
Choose the corresponding Github account (CybroOdoodev). In the repository URL, give the corresponding git repository from which it has to be cloned which is TestCybro in this case. Also in the directory, give the local folder that you have created, which will act as a local git repository(TestCybro) and clone.
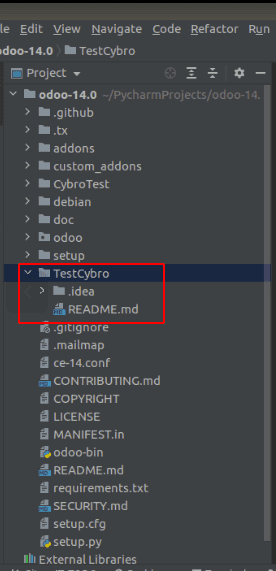
Once cloning is done, one can view the contents of the git repository in the local git repository(TestCybro). By default, it will clone the main branch.
If you need to clone from a specific branch,
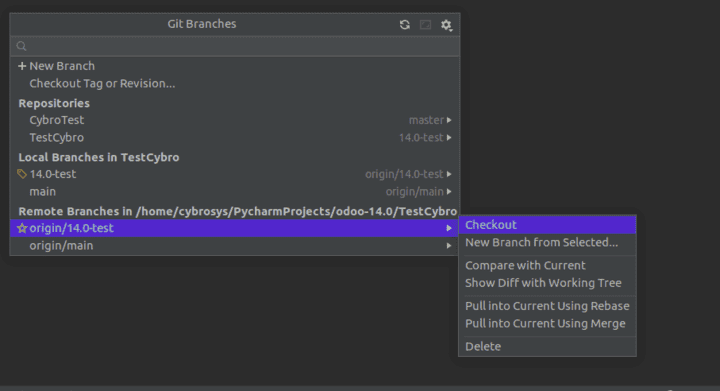
Go to -> Local git repository (TestCybro) -> Right Click -> Git -> Branches -> Choose the branch you want -> Checkout. Here I need to clone from the branch 14.0-test.
Now you can see the branch 14.0-test has been cloned. Which has the module test_email.
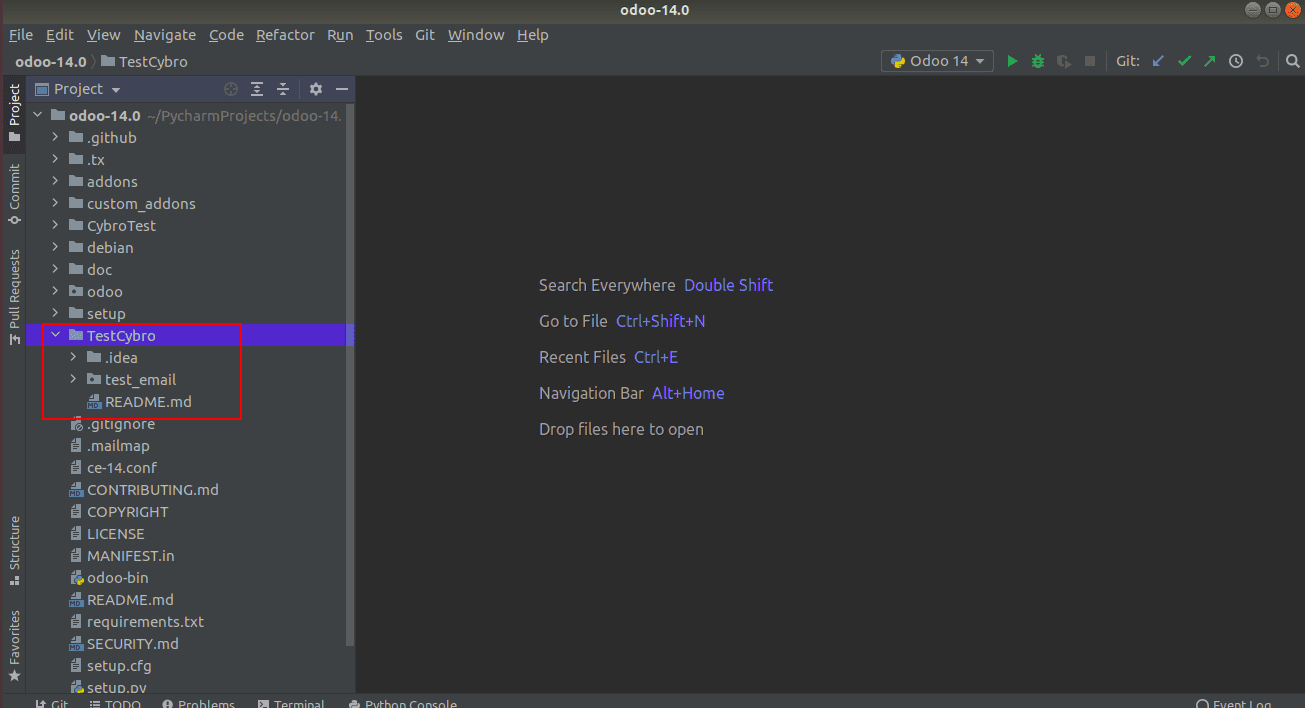
Step 3: How To Commit
Here I removed security.xml from __manifest__.py (You can make the necessary changes as required). The file appears in blue color when the changes occur, else it appears in white color.
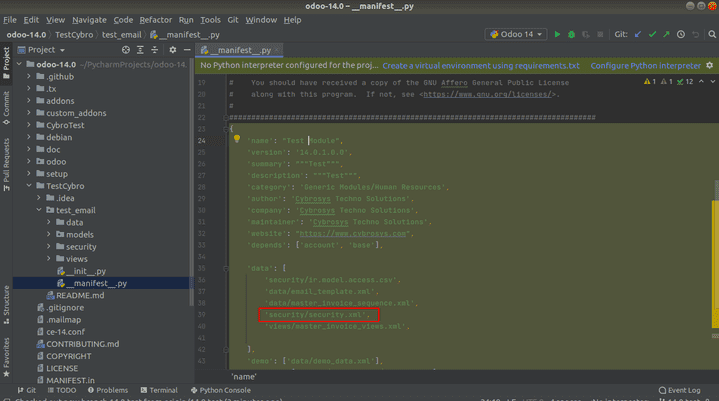
Go to -> Local git repository (TestCybro) -> Right Click -> Git -> Commit directory
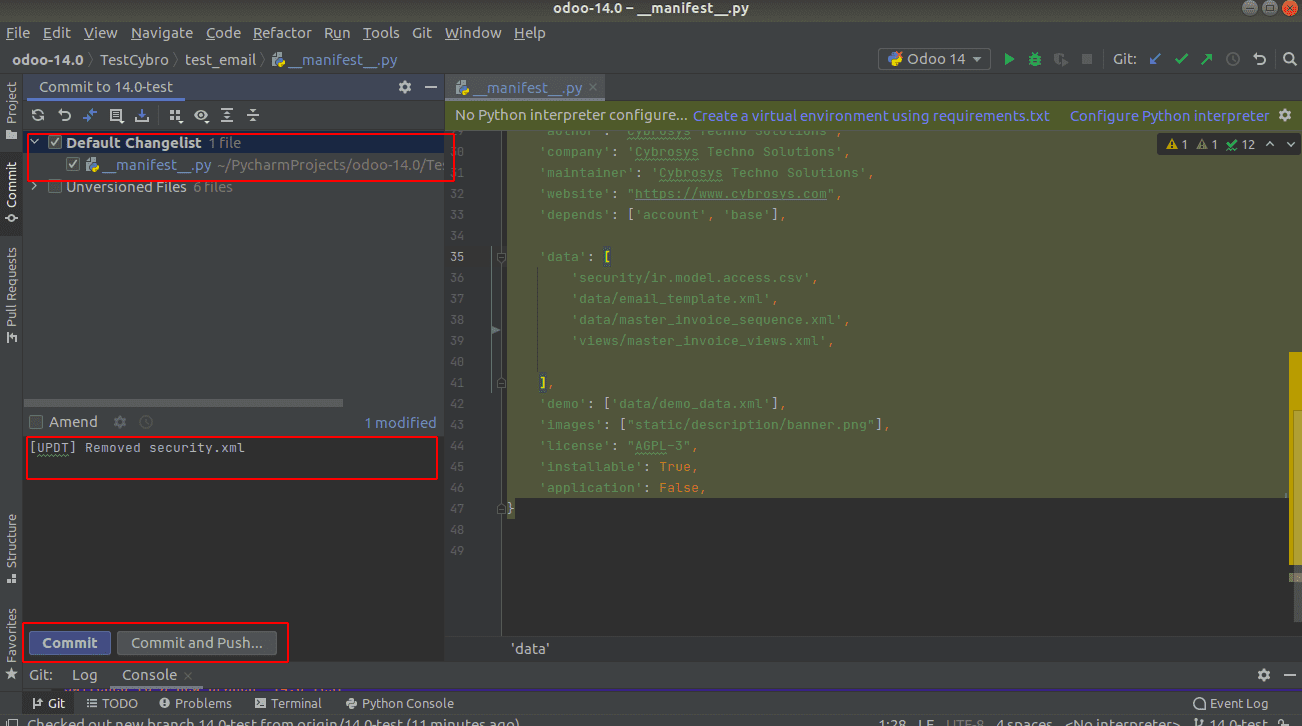
You can see the changes (__manifest__.py)
Add the commit message -> Commit
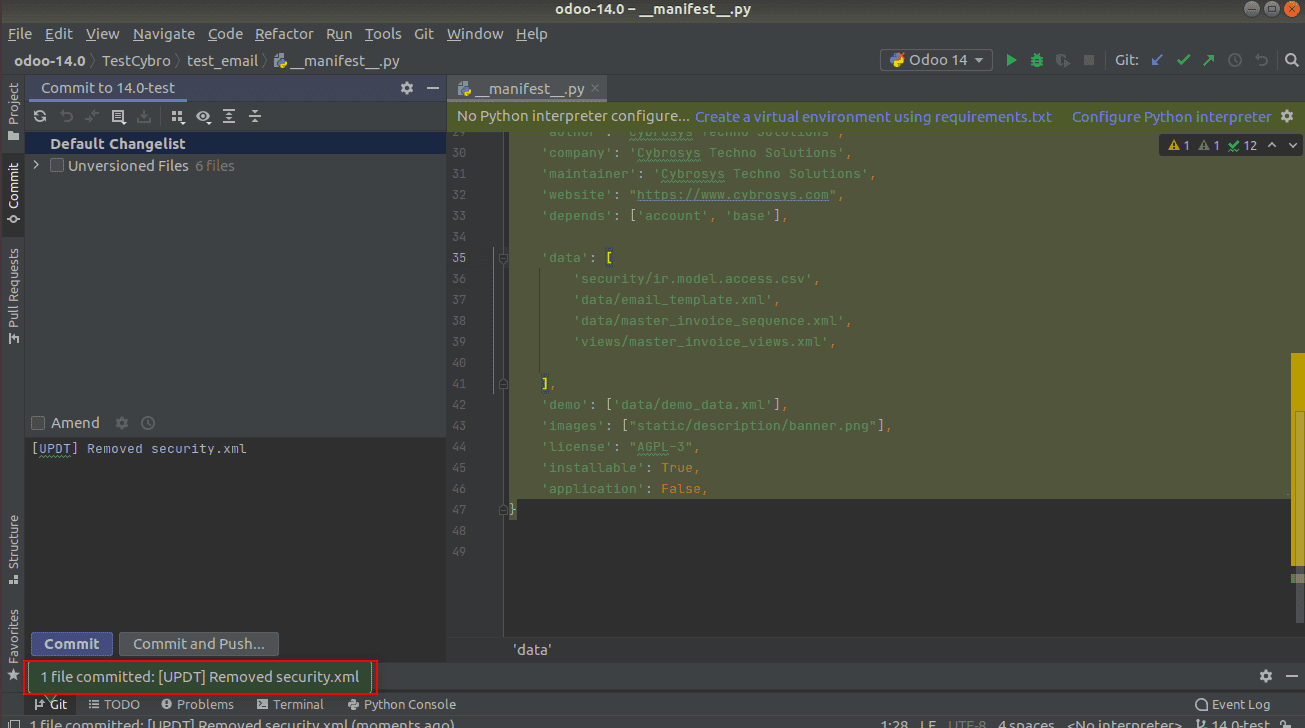
Here I did both commit and push separately. You can do it all at once by selecting Commit and Push. You are alerted with a success message if the commit is done
Step 4: How to push
Go to -> Local git repository (TestCybro) -> Right Click -> Git -> Push
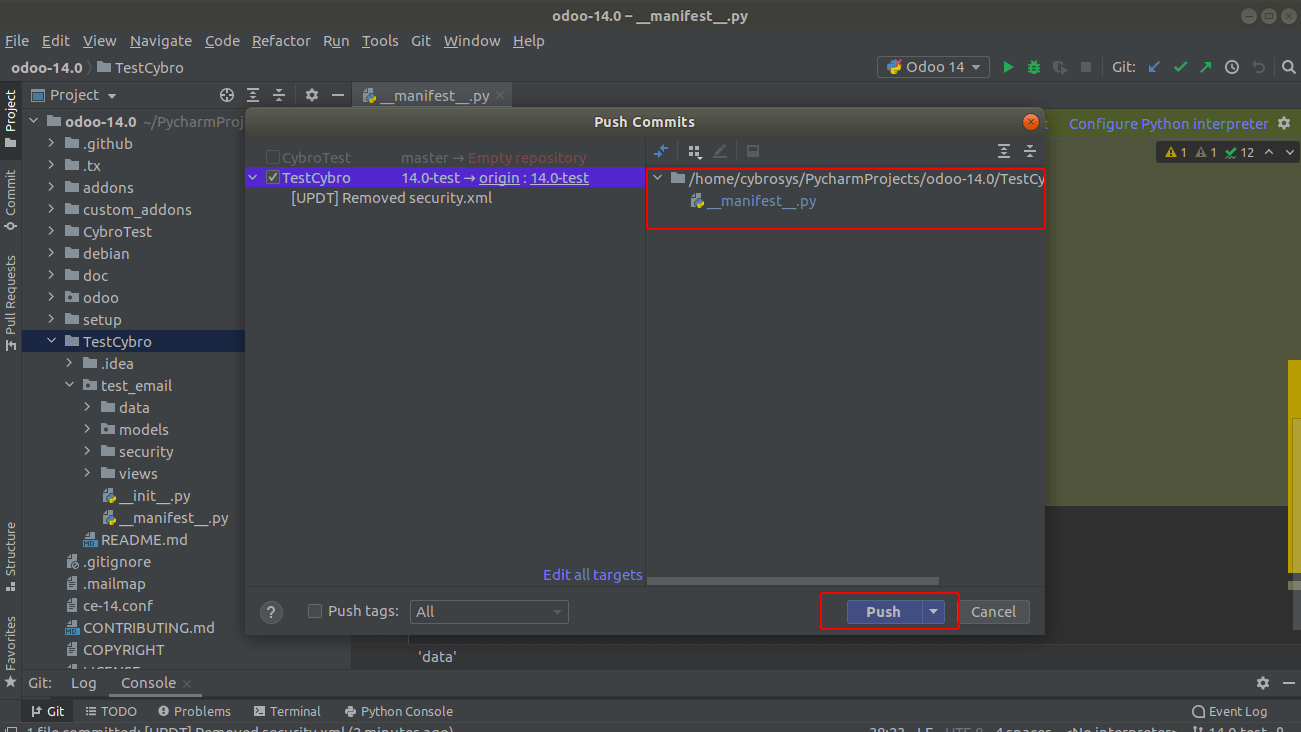
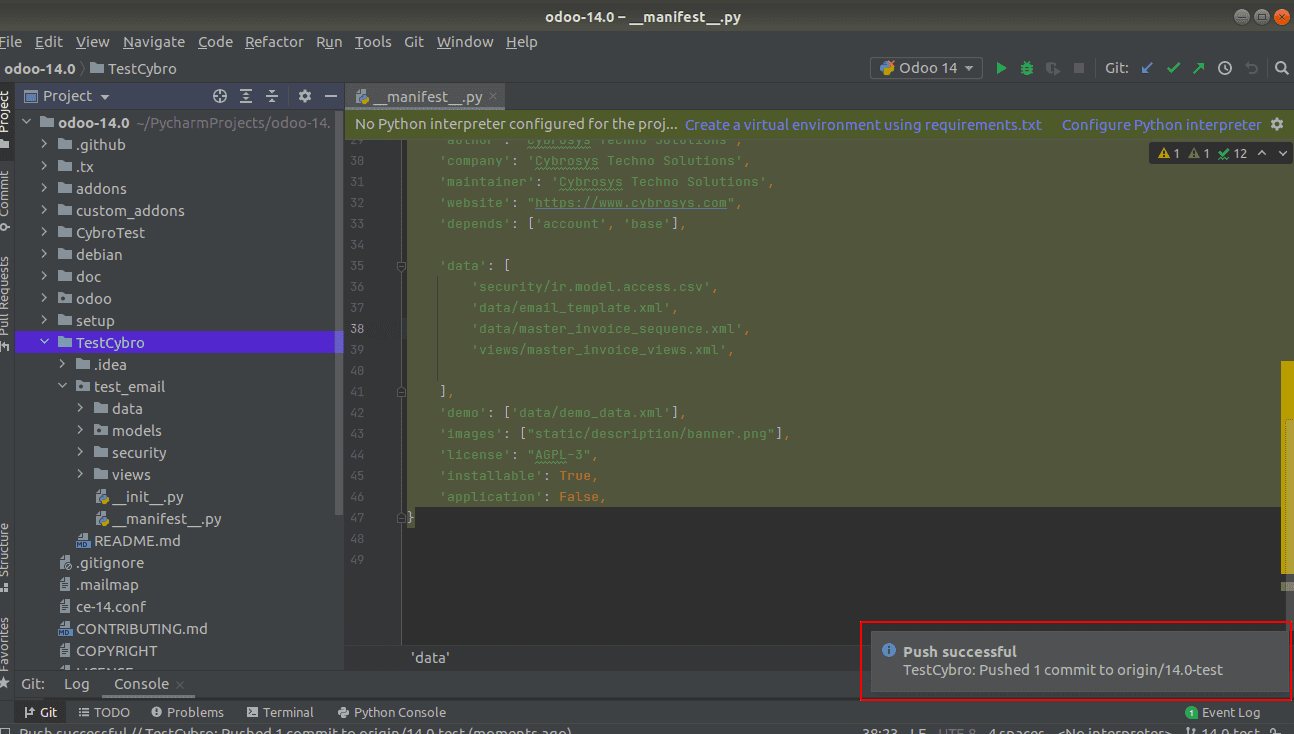
One can see push the commits by clicking the Push-button. On the success of Push, you are depicted with a success message.
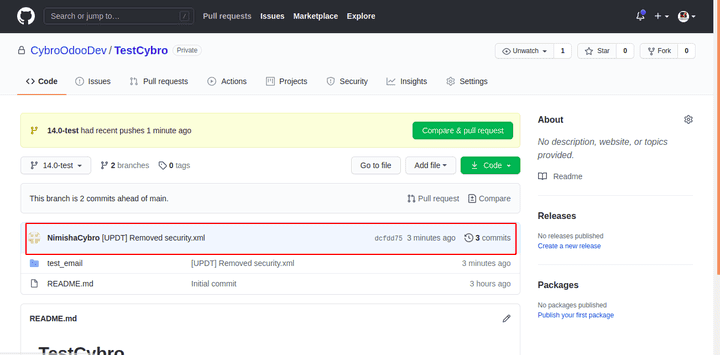
When you go to the specific branch where commits have been pushed, you can view the latest commit there.
This is how we can set up Version Control Using Git In Pycharm.