Odoo 17 is a powerful and versatile business management software that offers a wide range of applications to streamline various aspects of company operations. Among its comprehensive suite of tools, the Accounting App stands out as a key component for managing financial transactions and ensuring accurate and efficient bookkeeping.
The Odoo 17 Accounting module is utilized for its comprehensive and integrated financial management capabilities. It offers businesses a powerful solution for automating invoicing, expense tracking, and bank reconciliation processes, reducing manual errors, and improving efficiency. With a flexible Chart of Accounts, multi-currency, multi-company support, and robust reporting tools, odoo 17 Accounting module adapts to various business structures and regulatory environments.
Configuring company data in Odoo Accounting is crucial for several reasons, as it lays the foundation for accurate financial management and efficient business operations. Proper configuration ensures that the system accurately reflects your company's financial transactions and positions. This is essential for generating accurate financial reports, such as balance sheets, income statements, and cash flow statements, which are vital for decision-making and compliance purposes. Establishing the initial configuration of a company is crucial for the proper maintenance of all accounting transactions.
This blog will guide you through the process of setting up company data in the Odoo 17 Accounting App, emphasizing the crucial steps to establish a solid foundation for financial management.
Company Data Configuration in Odoo 17
The first step in setting up your company data in Odoo 17 is to configure the company settings. This involves entering basic information about your company, such as its name, address, and contact details. When customers seek to make a purchase, they often review company information to fulfill their product or service needs. It is imperative to record your company data to ensure the security of accounts and financial statements.
In Odoo 17, it is possible to configure multiple company details within the same database. To do this, navigate to the “Settings” of the Odoo 17. Under the "Settings" tab, you'll find options to input your company details. There are two methods available for updating company data in Odoo 17. The first method involves selecting the "Update info" option under the Companies section in Odoo 17 settings, as illustrated in the accompanying screenshot.
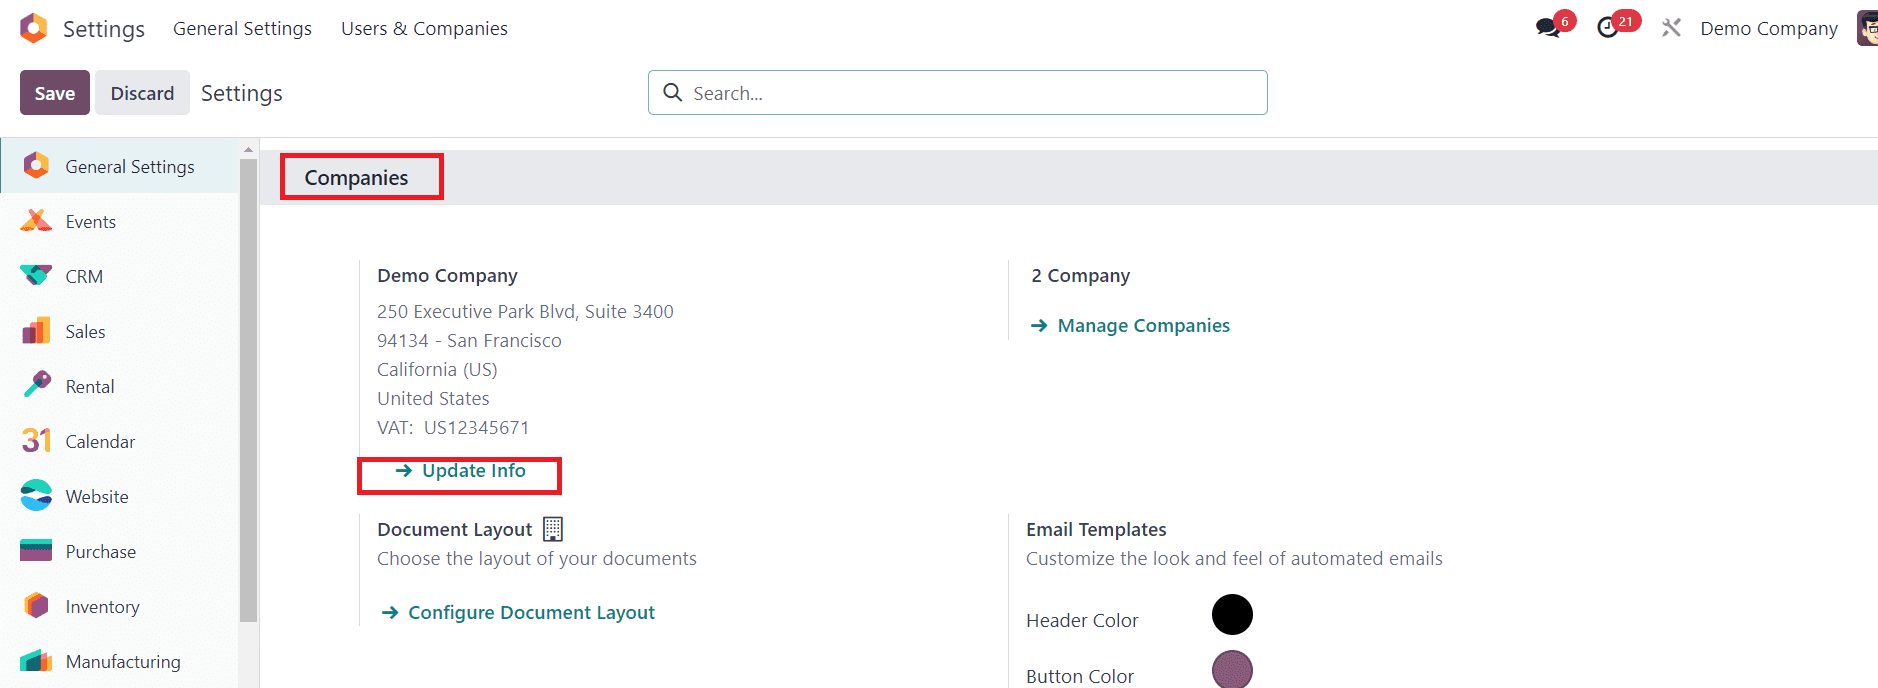
When you click on this option, Odoo will direct you to the company data page. You can update your company data from this page.
An alternative approach involves accessing the “Companies” menu within the “User & Companies” tab. This action prompts the appearance of a new window containing a list of all created companies. In this window, users can retrieve comprehensive details for each company, encompassing information such as Partner and Company Name, as depicted in the provided screenshot.

In Odoo 17, you can find the company Branches in the list view. Here, you can either edit the existing company details or create a new company.
You can use the “New” button to create new company details for your accounting operations. This will open a new configuration window. In the given space, you can mention the “Company Name” and add a suitable company logo.
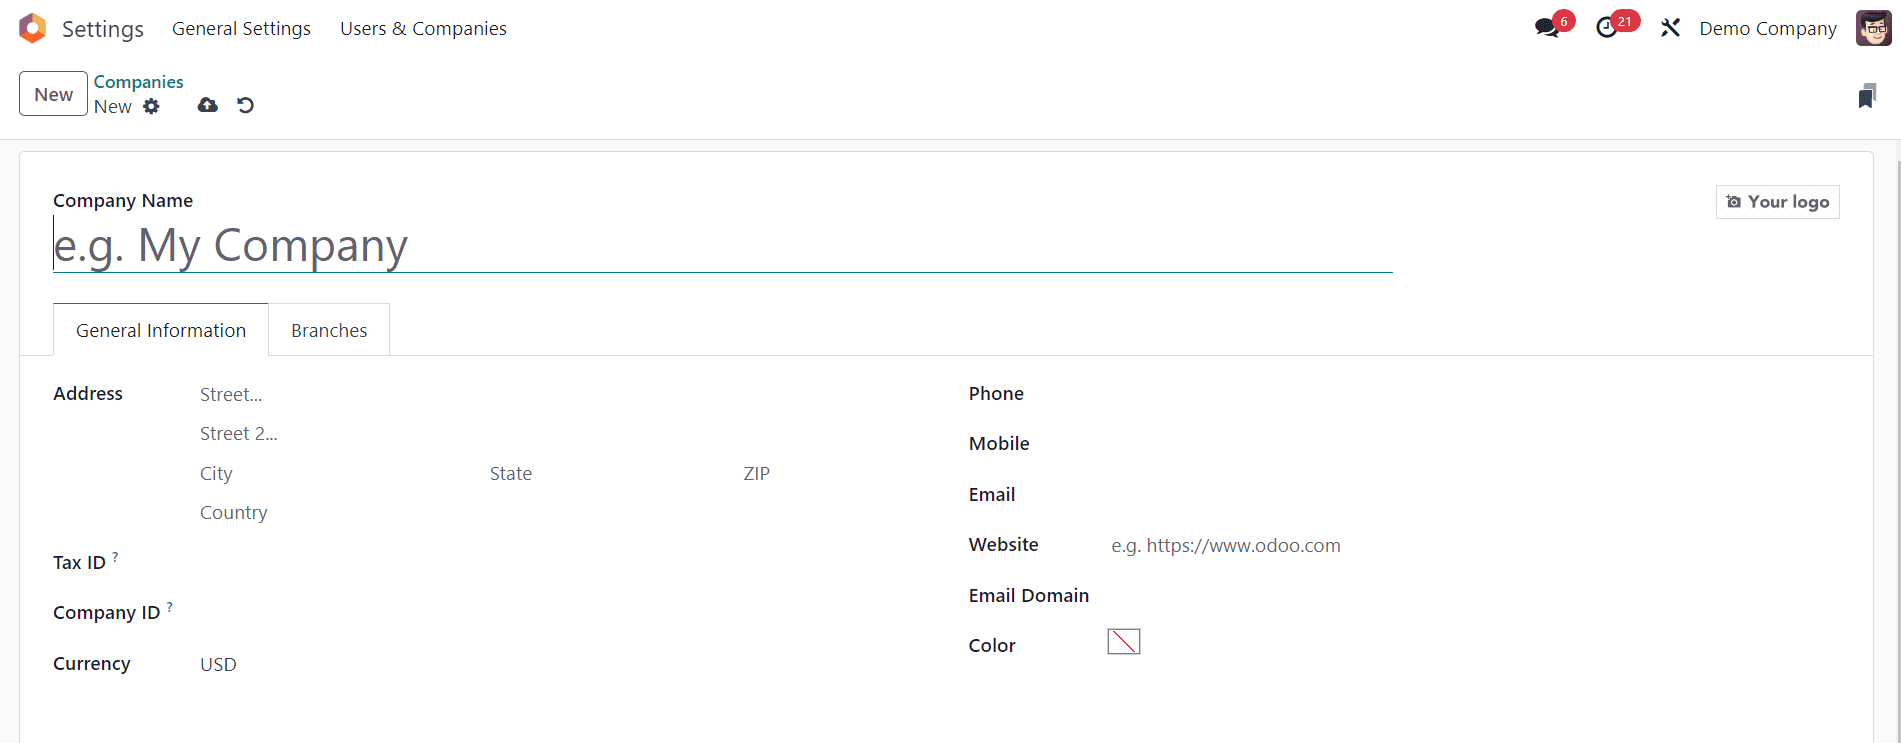
Under the “General Information” tab, mention the company Address with Street, City, State, Country, and ZIP details. Input the tax identification number of the company that will be subject to government taxes and legal statements into the “Tax ID” field.
Enter the company's registered number for all partner firms using the “Company ID” option. Following the application of the Company ID, proceed to establish the “Currency” for your specific firm. In the corresponding fields, specify the Phone, Mobile, and Email of the particular company. The link to the official website of the company can be mentioned in the “Website” field. Set an “Email Domain” and a suitable Color for identification in the respective fields.
Odoo provides a robust multi-company feature that allows users to manage multiple companies within a single Odoo database. This feature can effectively be utilized to handle different branches of a company. In Odoo 17, you can find a new feature while configuring your company data.
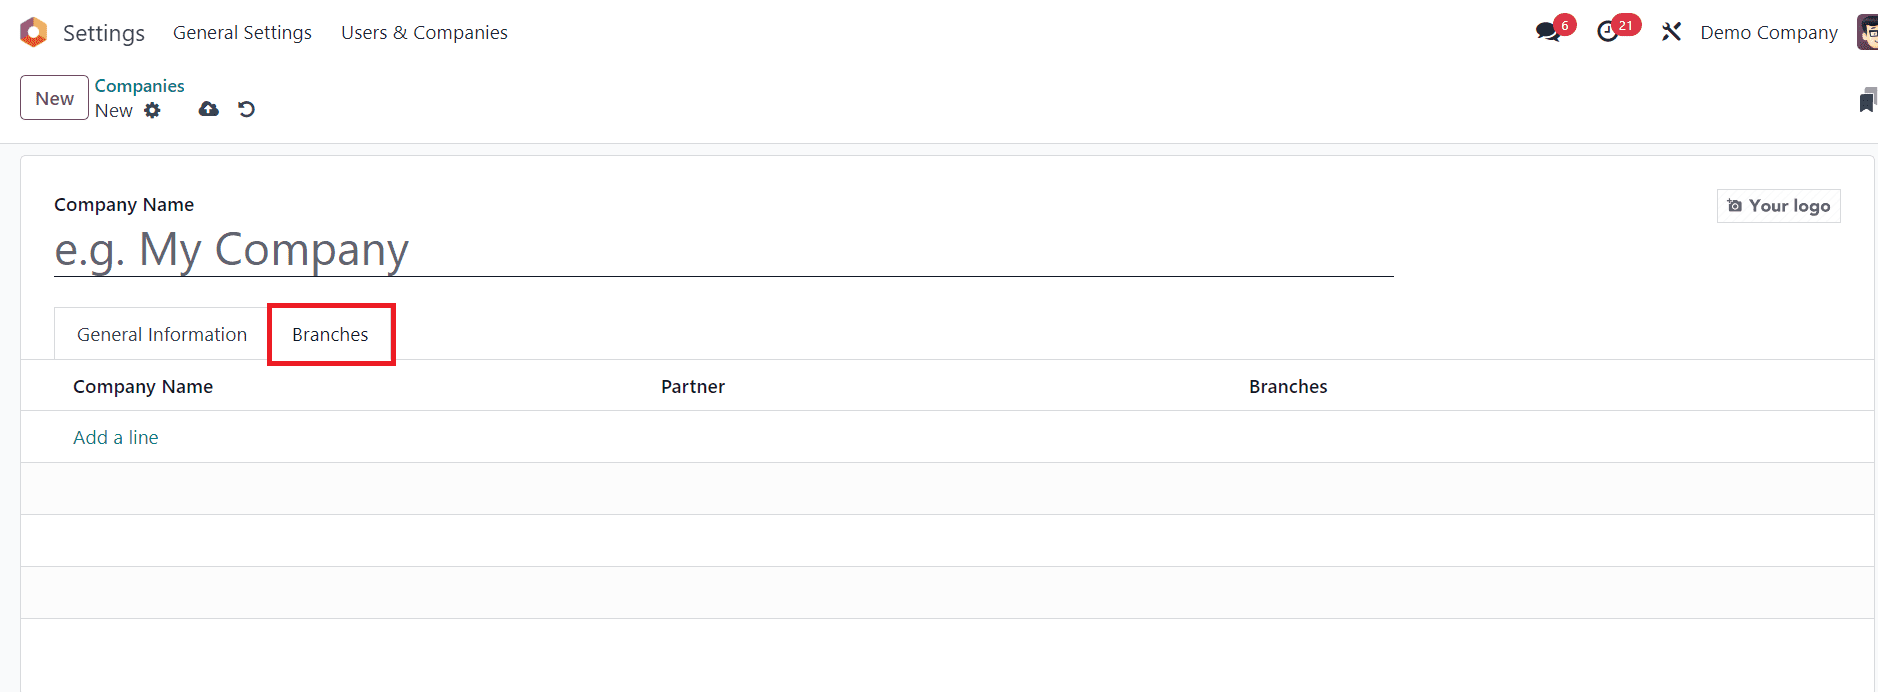
In the configuration window of a new company, you can find the “Branches” tab which allows you to configure the details of different branches of your company. Use the “Add a Line” button to add the details of the branches. Once you complete the configuration, you can save the company details.

Access the newly created company "Demo Store" within the Companies field. To activate this specific company, select the Company tab at the top. Switch your current company to the "Demo Store" as demonstrated in the screenshot below. Following the company switch, you can observe "Demo Store" displayed in the top bar of Odoo 17.

You now have the capability to generate Accounting periods, Bank accounts, Charts of Accounts, and Taxes specifically for the "Demo Store" directly from the Accounting dashboard in Odoo 17. To establish a Chart of Accounts for the "Demo Store," users can select the Review button located beneath the Chart of Accounts section, as illustrated in the accompanying screenshot.
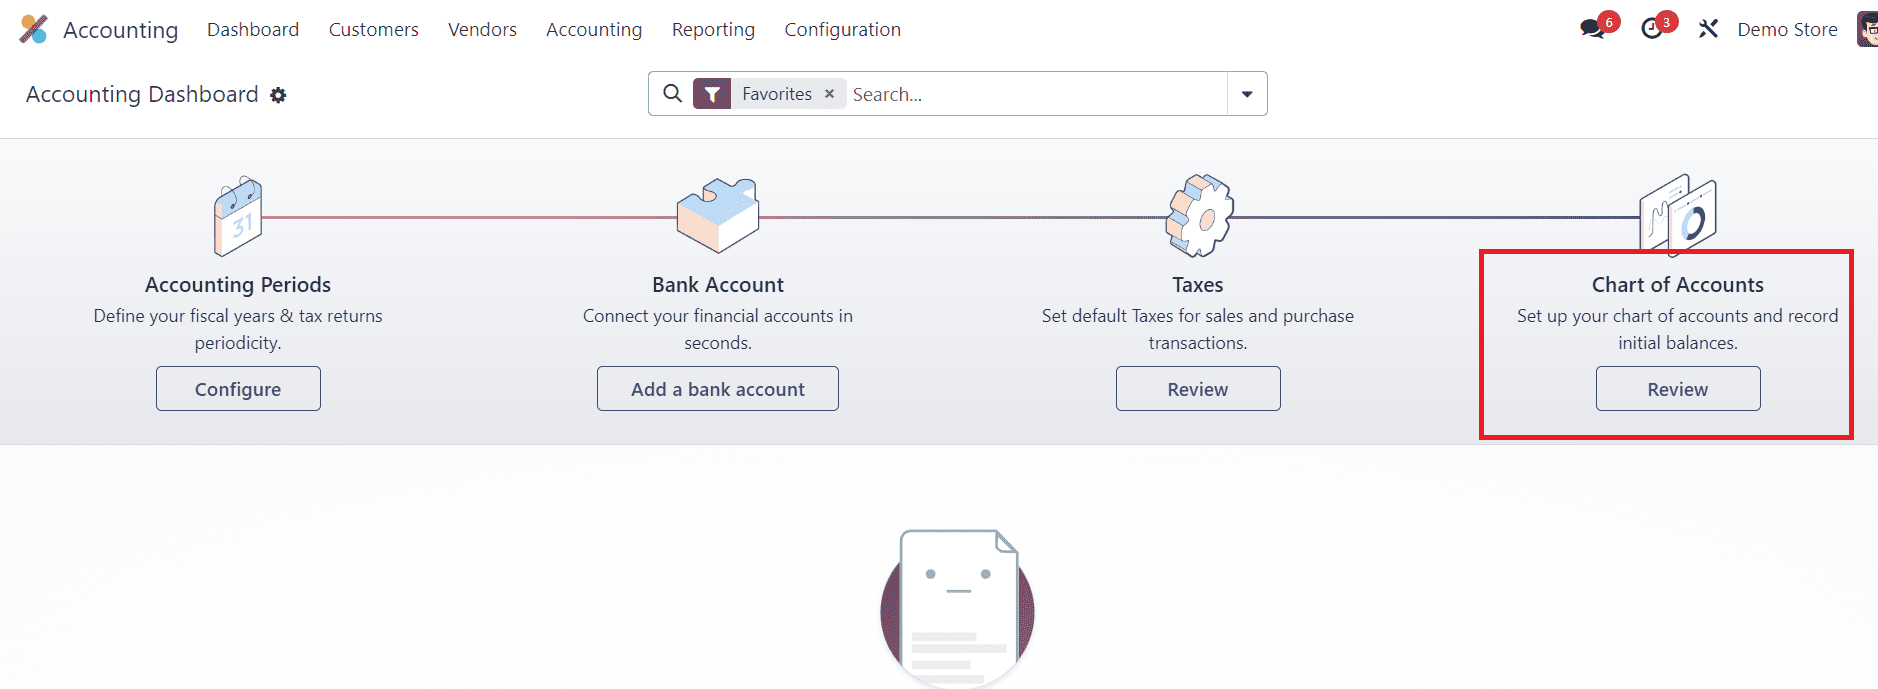
Upon clicking the Review icon, a new window emerges for the user. Choose the “New” button to formulate a new chart of accounts for your company, as demonstrated in the screenshot provided.

In the given fields, you can mention the Code, Account Name, Type, Allow Reconciliation, Opening Debit, and Opening Credit. This window will help you to configure a chart of accounts for the accounting operations of the newly configured company.
Furthermore, you have the capability to oversee comprehensive user data for the accounting module in the Settings window. Navigate to the “Users" menu within the “Users & Companies” tab, where records of all users are accessible. In the Users window, detailed information about each user, including Company, login, Status, Language, Name, and more, is readily available.

In the Users & Companies section, click on the "New" button to initiate the creation of a new user.
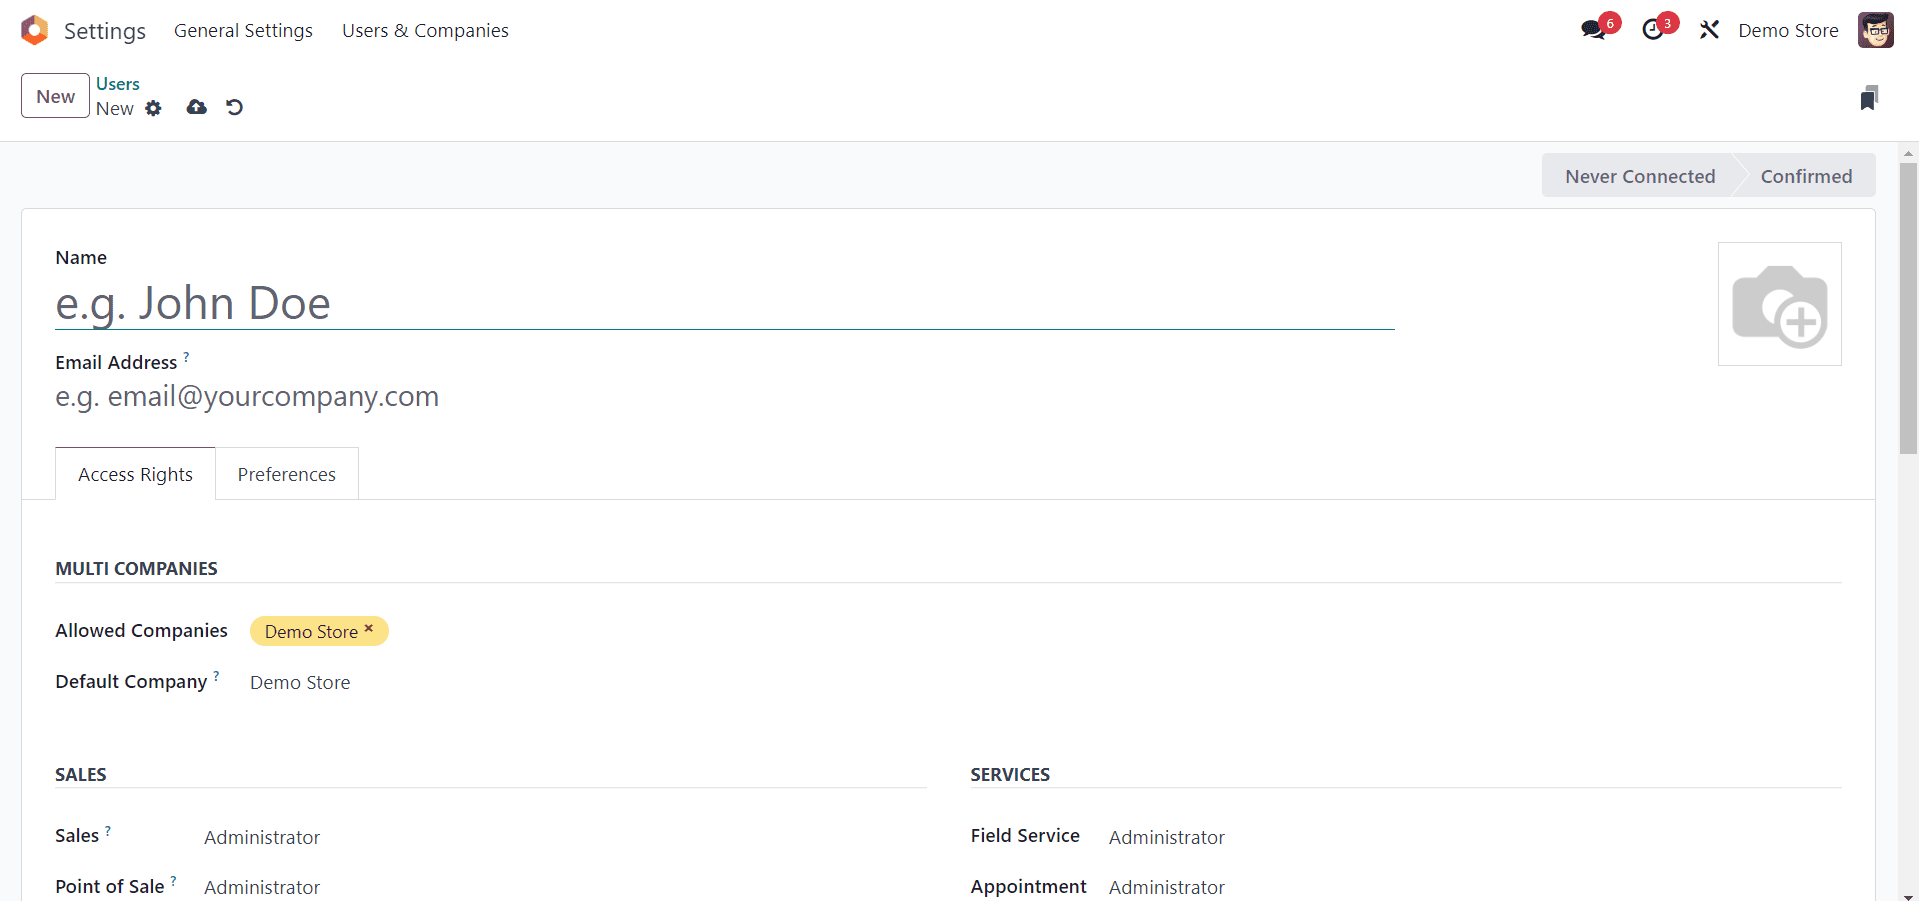
Provide the necessary information for the new user, including their Name, Email, and other relevant details. Ensure that the user's email address corresponds to the email domain configured for the company or branch.
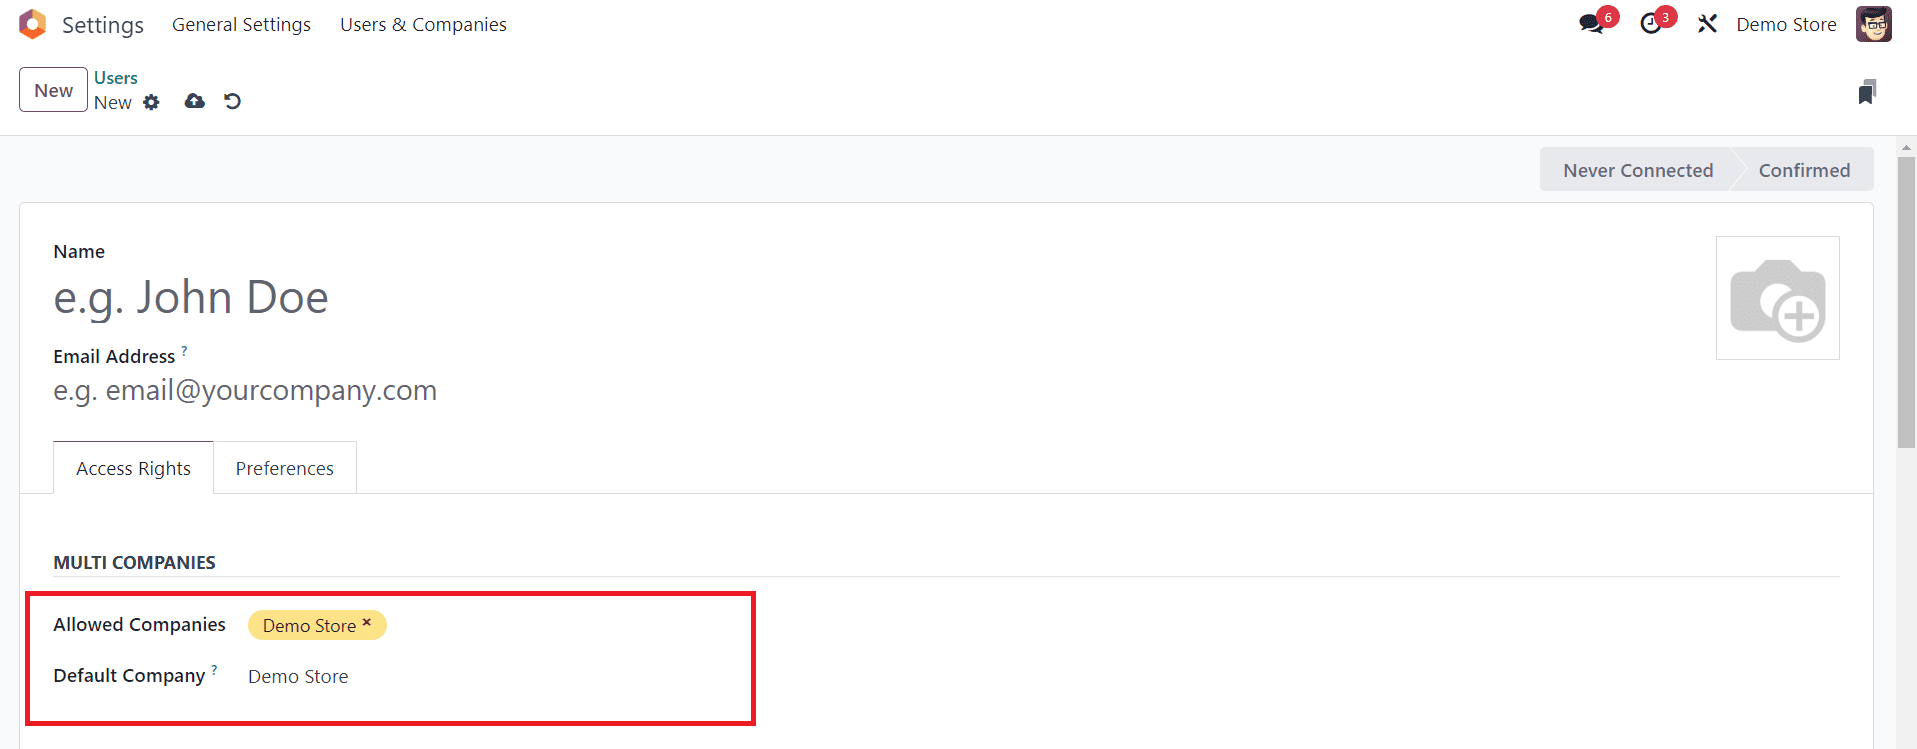
If your Odoo instance manages multiple companies or branches, assign the new user to the appropriate company. This ensures that the user has access to the relevant data. Here, we set the company Demo Store in the Allowed Companies fields, as shown below.
Specify the user's access rights and permissions. Odoo provides a granular access control system where you can define what modules, features, and records the user can access. Assign roles to the user based on their responsibilities. Roles in Odoo help define a set of permissions, making it easier to manage user access without configuring individual permissions.
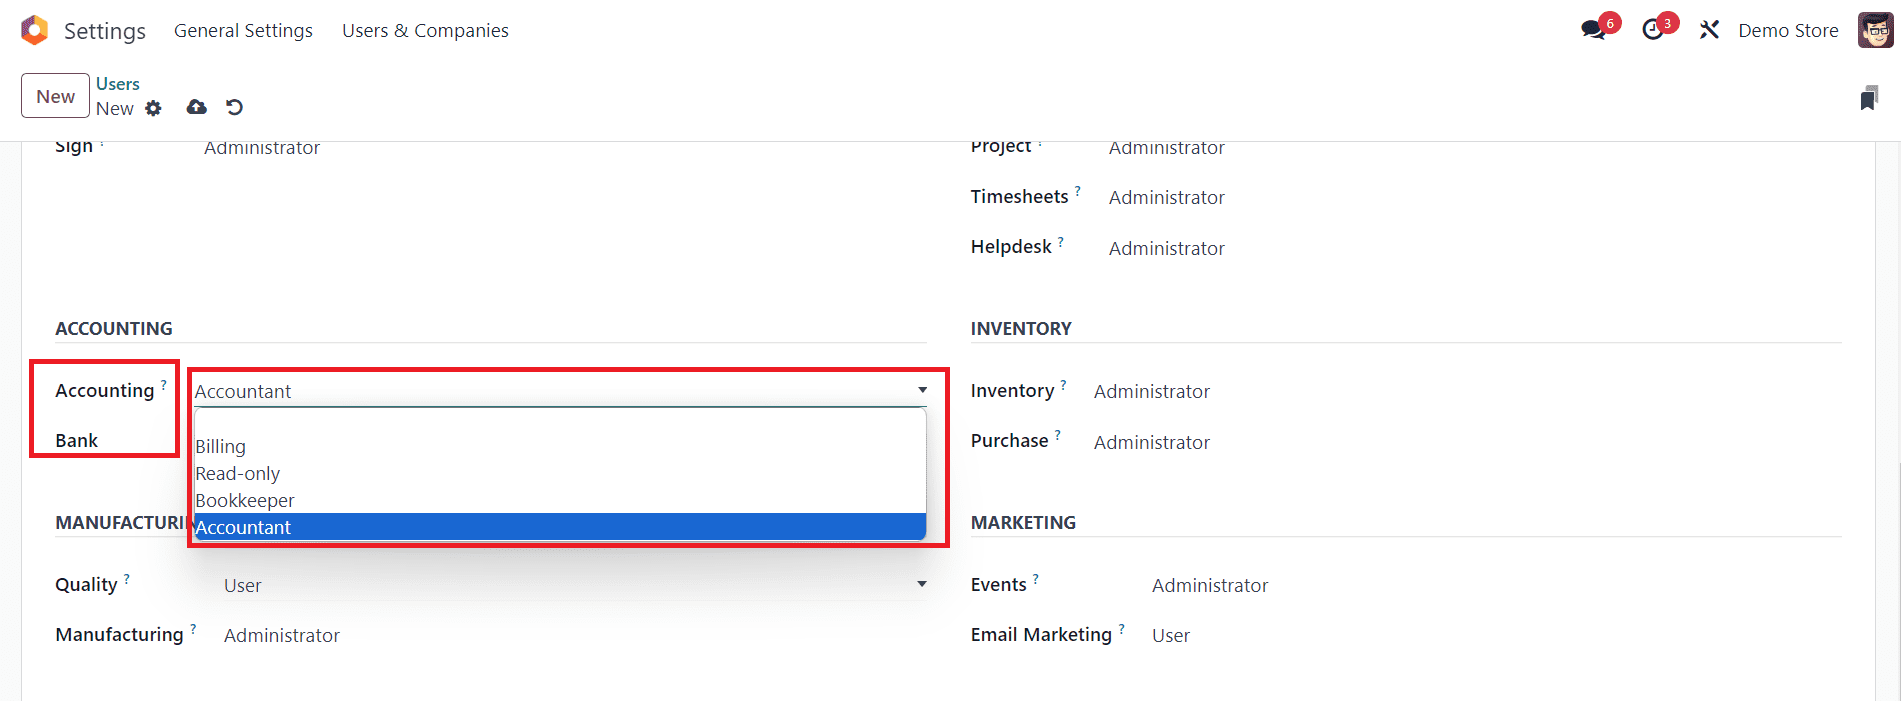
User data related to the Accounting module can be overseen within the Access Rights window under the “ACCOUNTING” section. The Accounting field facilitates the management of company accounts, allowing users to be designated as Bookkeepers, Billing, Accountants, Read-only, and more. Once necessary adjustments are made, save the changes in the Users window. Consequently, the setup of user configurations for the Odoo Accounting module can be efficiently established.
Setting up company data in the Odoo 17 Accounting App is a fundamental process that lays the groundwork for effective financial management. As Odoo 17 continues to evolve, staying familiar with its features and updates will empower your company to make the most of its accounting capabilities.