One of the most popular enterprise resource planning systems in use today, Odoo is an open-source program that many businesses rely on for their enterprise resource planning needs.
Odoo works hard to make its software as simple and easy to use as possible. By focusing their efforts on optimizing their operational processes, such as automating time-consuming chores, businesses can save time.
The feature-rich Odoo web development platform makes managing and creating eCommerce websites easier. It's one of the greatest tools for managing websites because of its ready-to-use themes, website builder software, and other capabilities.
Without the hazards of coding methods, the Odoo Website module offers a complete framework for developing e-commerce platforms and websites. Users can create eCommerce websites with the aid of this web development platform. With features like website builder software and ready-to-use templates, it is among the greatest solutions for managing websites.
Website layouts, content, media additions, banner changes, and page management are all simply manageable by users. Developers will find it easier to use application-specific modules if ready-to-use themes are used. The Odoo platform's website builder app is special since it handles the time-consuming, practical parts of making a website. Additionally, the module offers a wide range of features and operations, including
Multi-websites: Utilise the same database to power several websites and share products amongst them
Convert Website Visitors into Leads: Use shrewd marketing techniques to convert website visitors into leads. For example, track visitors' IP addresses, include strategic call-to-actions, develop powerful forms, etc.
Website Articles: By posting blog entries, you can quickly change the content of your website.
Search engine optimization tools: To produce material that is search engine friendly, use SEO tools. Make your image titles and meta descriptions unique.
Odoo offers eye-catching themes for website builders.
Offers a highly customizable platform with website builders, animations, color gradients, and other website-developing features.
Download graphics, films, and photographs from the application platform without paying royalties.
Multilingual translations are made easy using inline translation and GeoIP-based visitor language recognition.
Social media integration: Odoo push notifications, social media marketing, email marketing, and website builder are all fully integrated.
Material tailored to individual visitors: Customise your page's material according to the country, industry, advertisements, etc. of your visitors.
Real-time dashboard: Track the most engaging website visitors and reach out to them with a single click via push alerts, SMS, live chat, and other means.
Users can use the flexible and user-friendly Odoo website module to create their e-commerce platform. To increase user attention, e-commerce features and functions provide drag-and-drop functionality, a large selection of construction blocks, and a range of themes. They are also incredibly user-friendly and effective. E-commerce entities can be created by users in a few easy steps.
We'll go over how to use the features and functionalities of the Odoo 17 platform to sell a product in this blog. The processes involved in selling a product are somewhat similar to those found in the Events, Sales, and Purchase Modules. Furthermore, the form arrangement is similar to the basic Odoo forms.
First, we can use the "Products" part of the "E-commerce" menu, as shown in the picture below, to create a new product for sale.
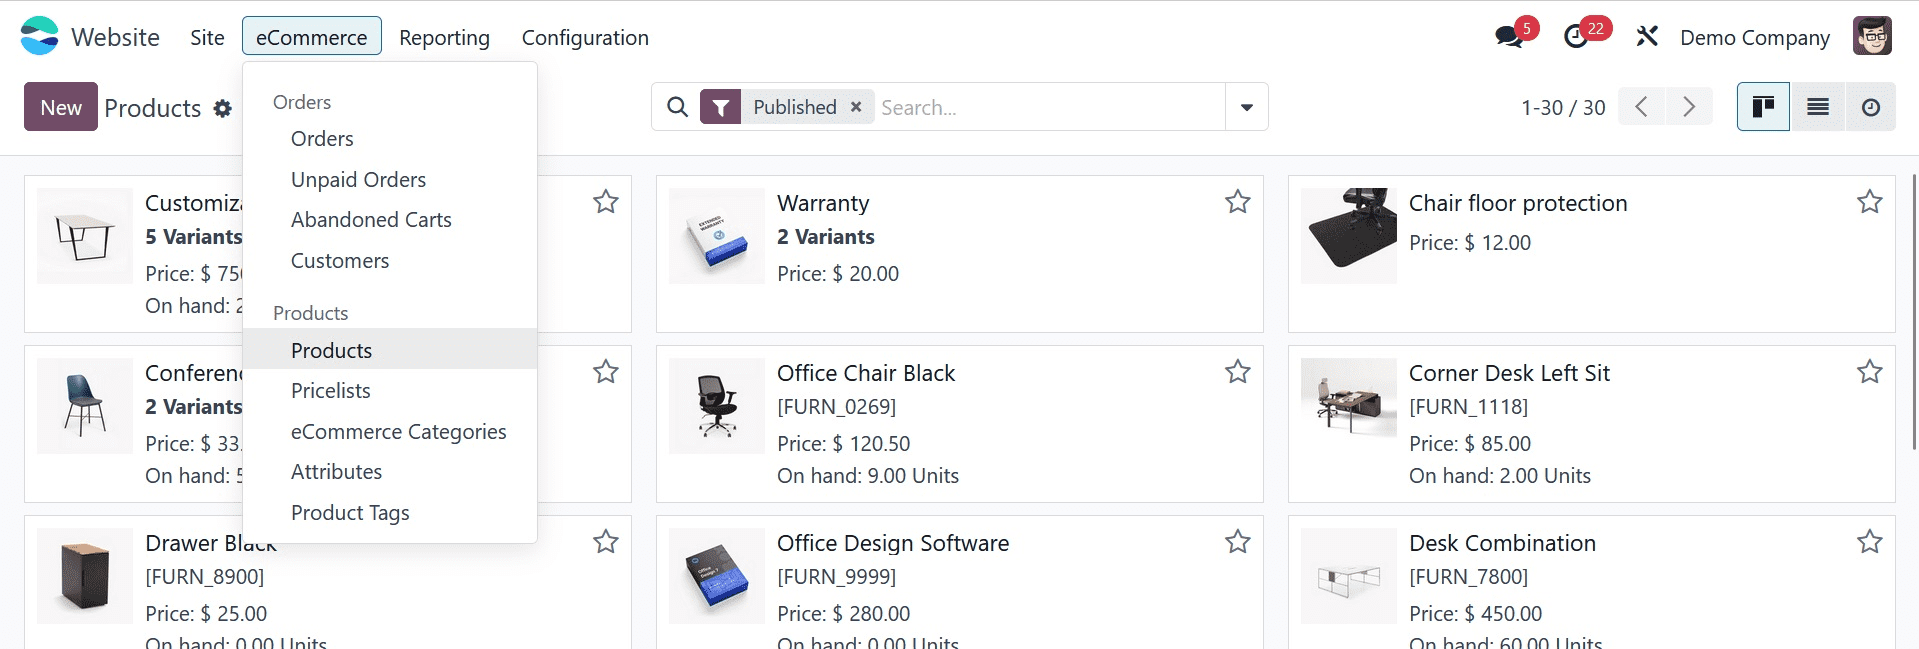
A dashboard view with a list of different goods that have already been developed and organized in a Kanban view will emerge when you select the "Products" option. By selecting one of the other visualization icons available in the form view's top right corner, we may additionally alter the view.
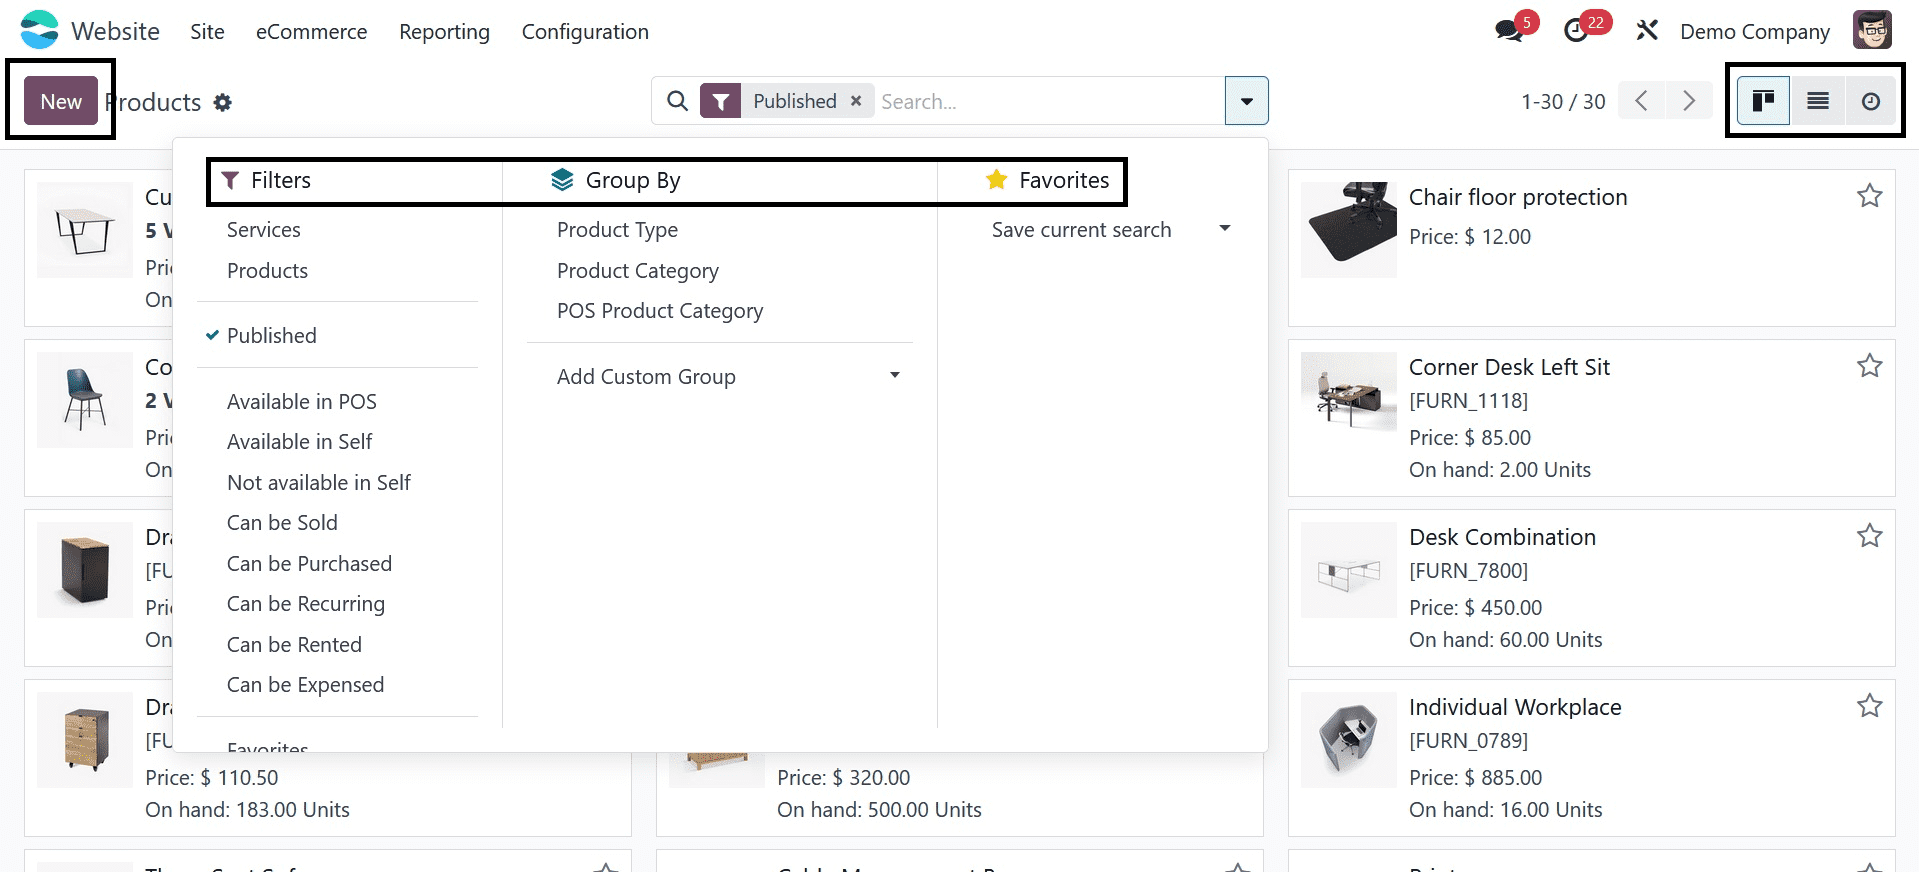
By selecting the “NEW” button located beneath the “Products” title, we can generate a new product for sale. This opens a form view that allows us to create any new product for sale using the form view, as seen in the screenshot below.
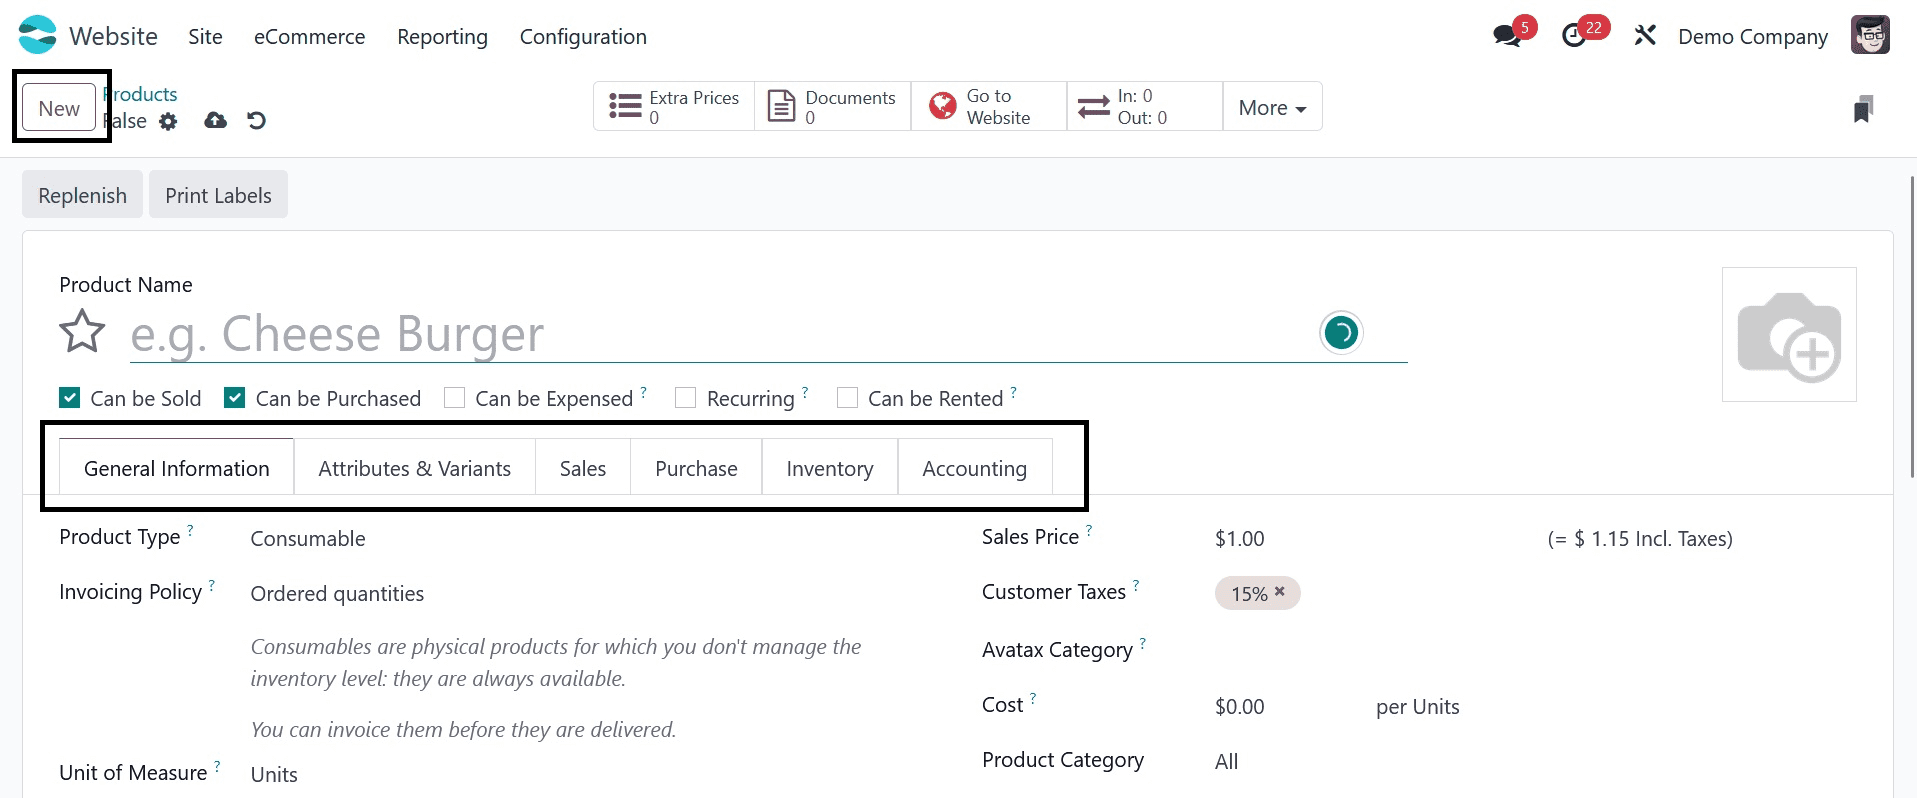
The method of developing and maintaining a product is quite similar to how products are set up in the modules, including sales, purchases, inventories, and rents, as the screenshot illustration shows.
On the product configuration form, users are required to enter the product name and details as well as complete the six categories listed there, including General Information, Attributes and variants, Sales, Purchase, Inventory, and Accounting.
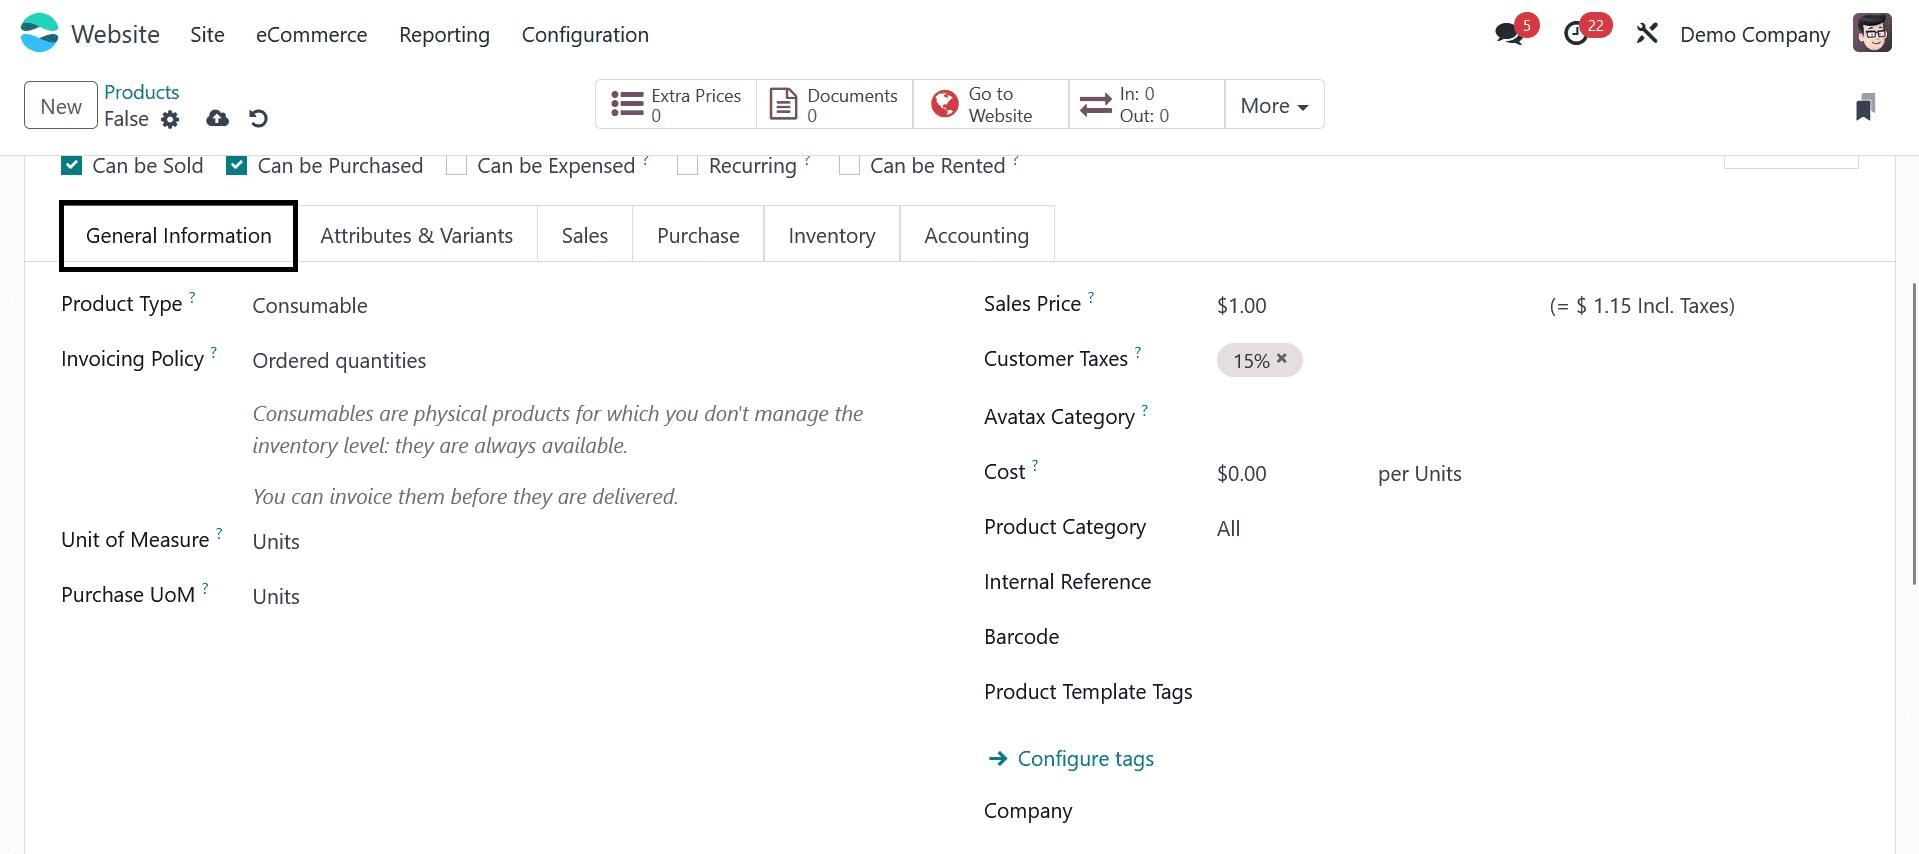
General Information
Product kind, Invoicing Policy, Unit of Measure, Purchase Unit of Measure, Sales Price, Customer Taxes, Cost, Product Category, Internal Reference, Barcode, Product Tags, and Company Details are among the basic product details that need to be filled out in this area.
Attributes and Variants
As seen in the example below, users can enter values for several versions' attributes of the specific product in this category's "Add a line" field.

Sales
The sales category includes elements for point of sale, e-commerce shop, extra product media, upselling and cross-selling, and sales description.
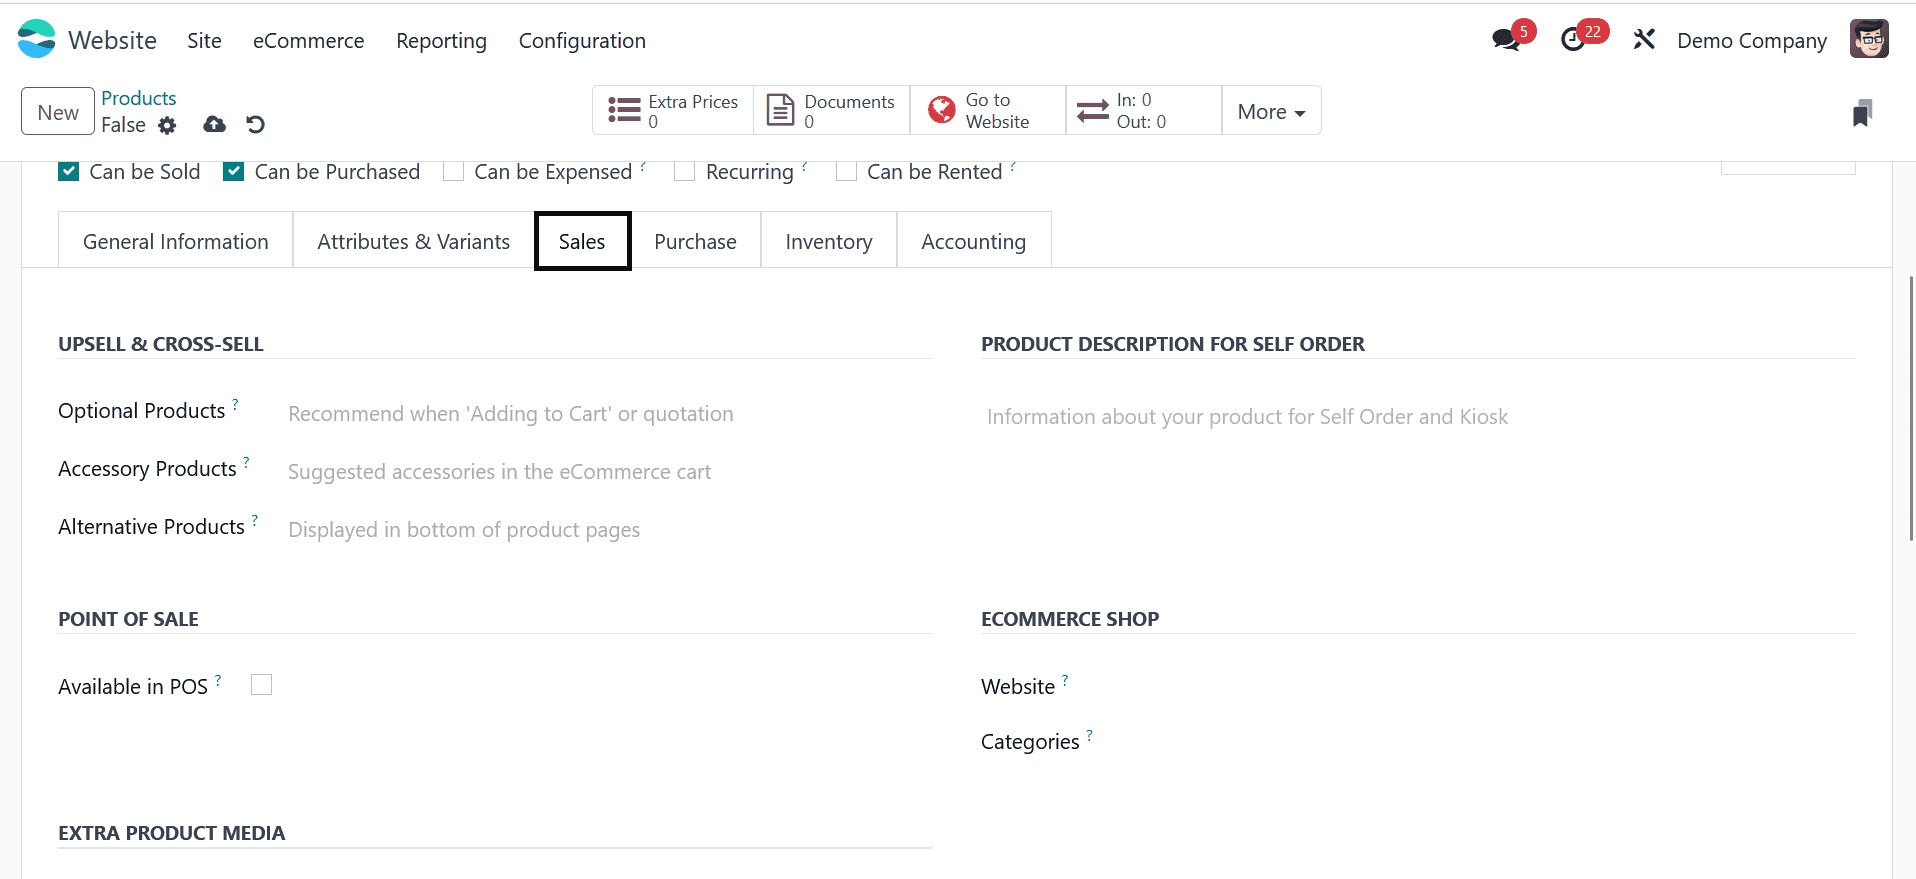
In the Upsell & Cross-Sell section, users can enter details about optional products, accessory products, and alternative products.
Purchase

Users can provide vendor data in this area, including vendor name, vendor bill, taxes, control policy, and purchase description. As seen in the screenshot above, the vendor name is selectable from the "Add a Line" drop-down menu located under the "Vendor" form.
Inventory
Operations, Logistics, Description for Receipts, and Description for Delivery Orders are the four sections that make up the inventory section.
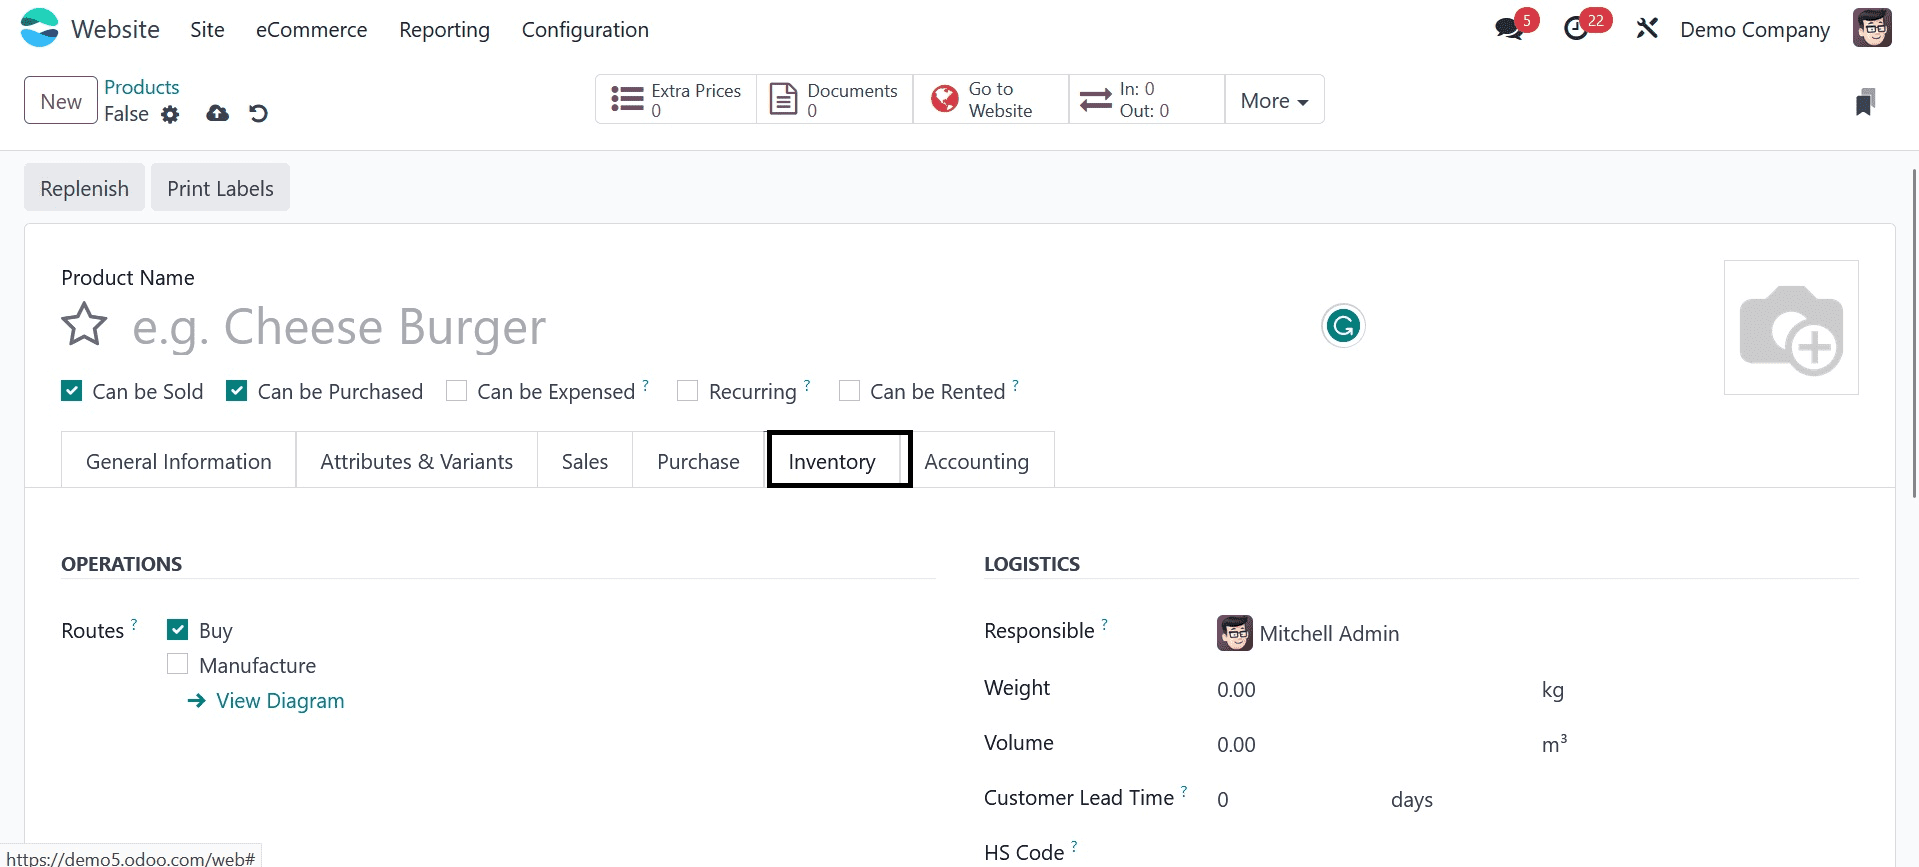
The Product Routes and the User Name in charge of this Product can be listed.
As seen by the screen grab above, please also include the weight, volume, customer lead time, HS code, origin of goods, description for receipts, and description for delivery orders.
Accounting
As seen in the screenshot below, the Accounting area is divided into the Receivables and Payables sections. In these sections, users are required to specify the Income Account, Expense Account, and Price Difference Account.
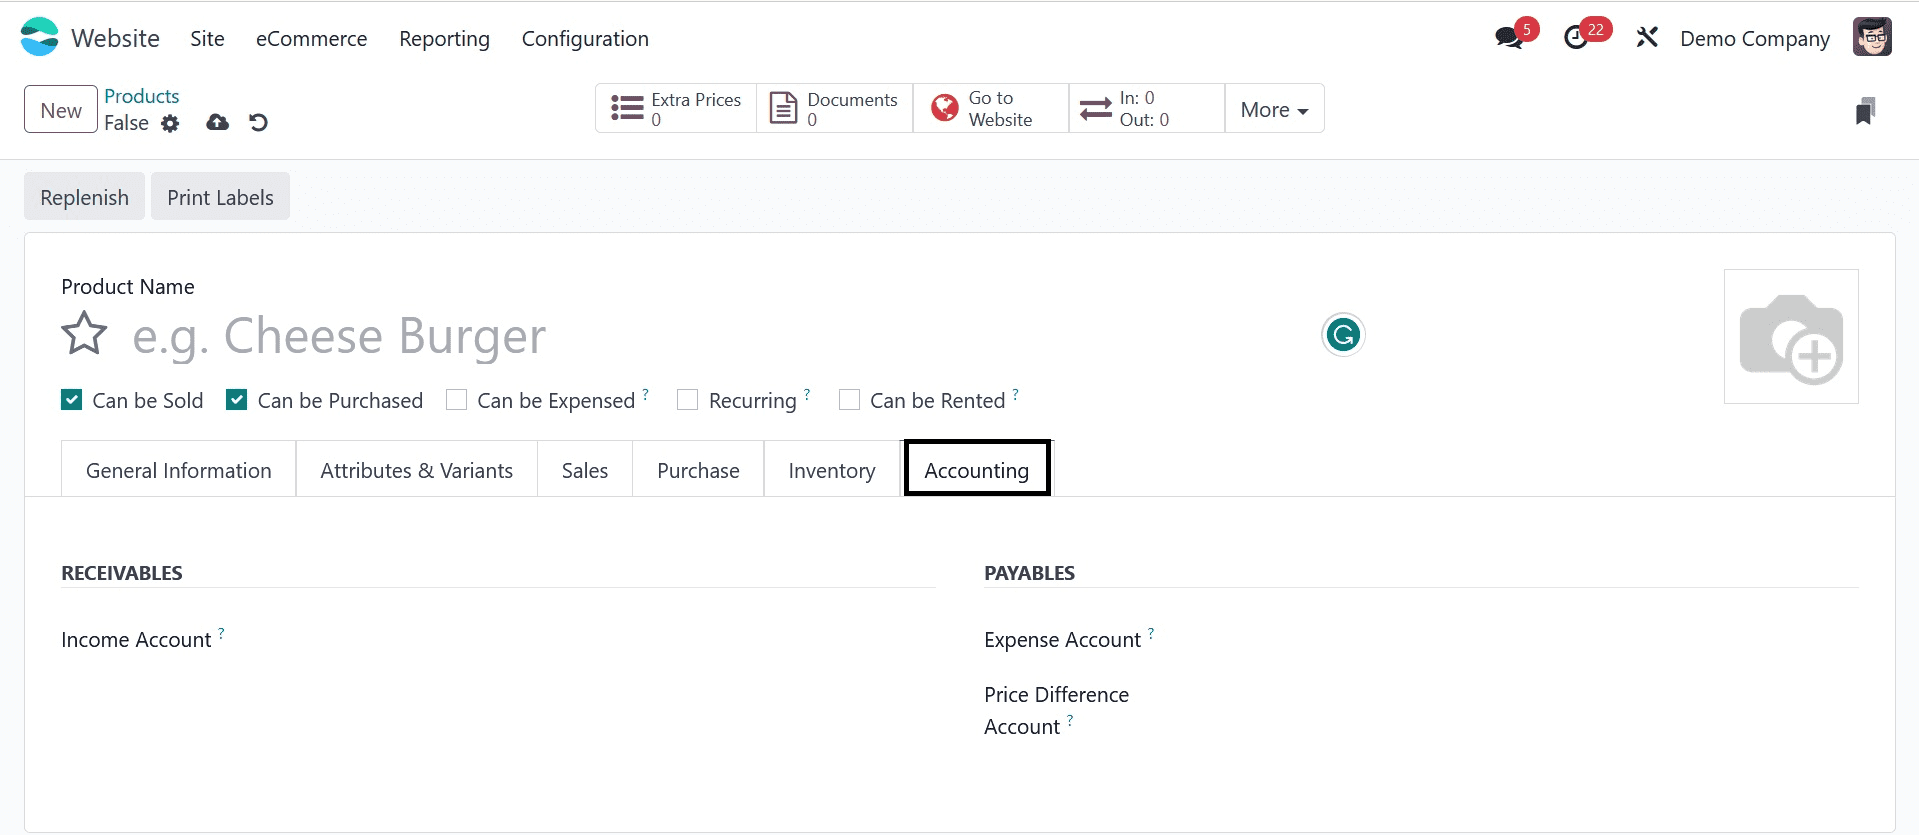
Users have the option to add a new bank account or choose from the dropdown list that corresponds to the relevant fields.
Once the necessary information has been edited, use the save icon that appears in the form view's top left corner to save the modifications. Additionally, you can use the "Go To Website" option offered in the form menu, as shown below, to publish the product for sale and view a preview of the website.
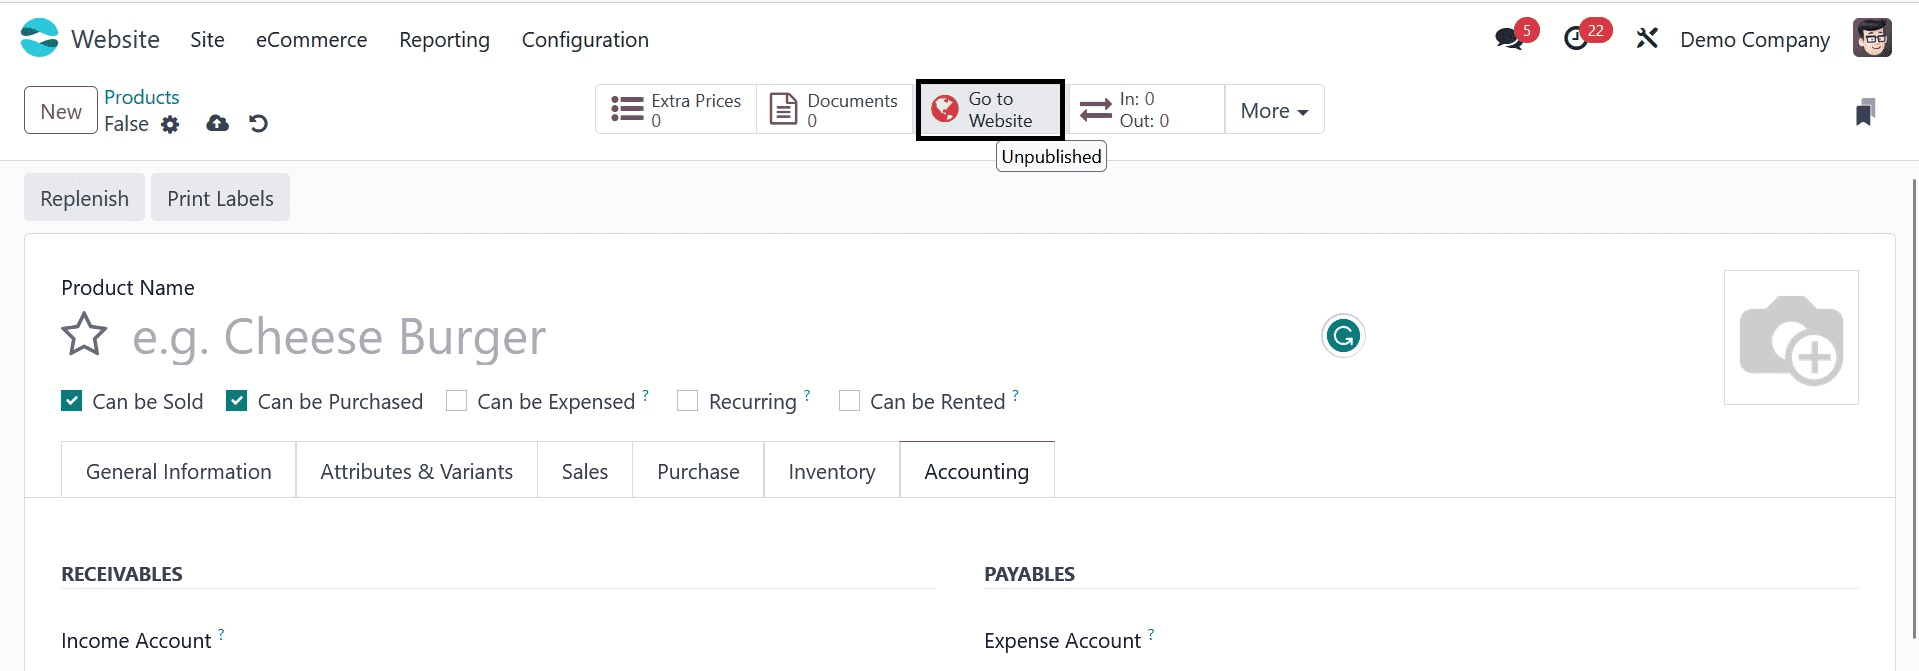
As seen in the screen grab below, we can publish the developed product from the main menu of the website page.
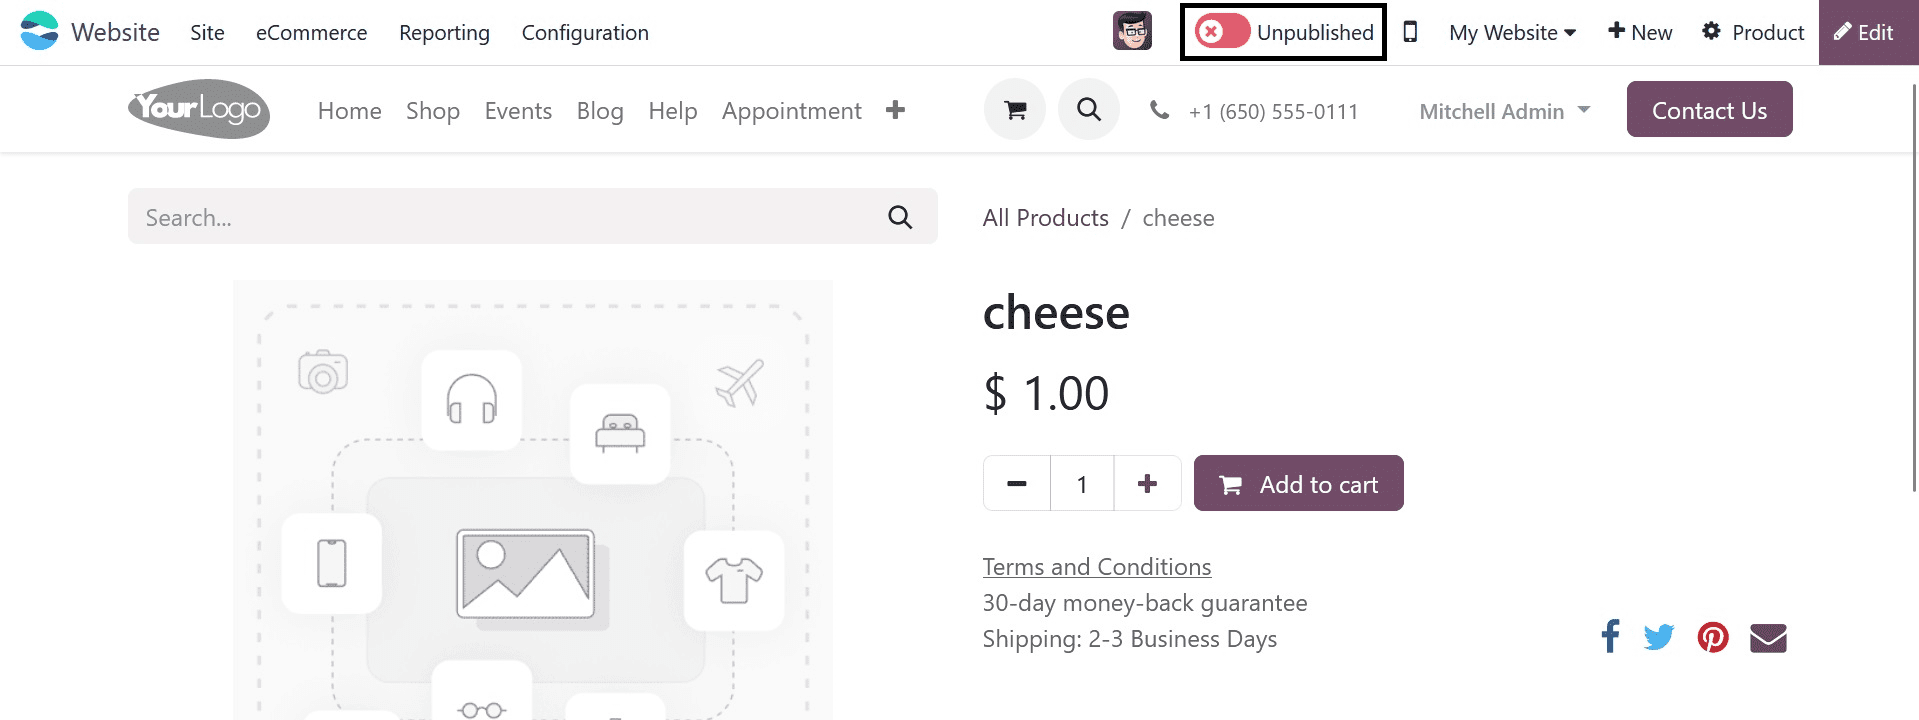
Simply pressing the "Unpublished" button allows users to publish their products; the button goes green and changes to "Published" in the process.
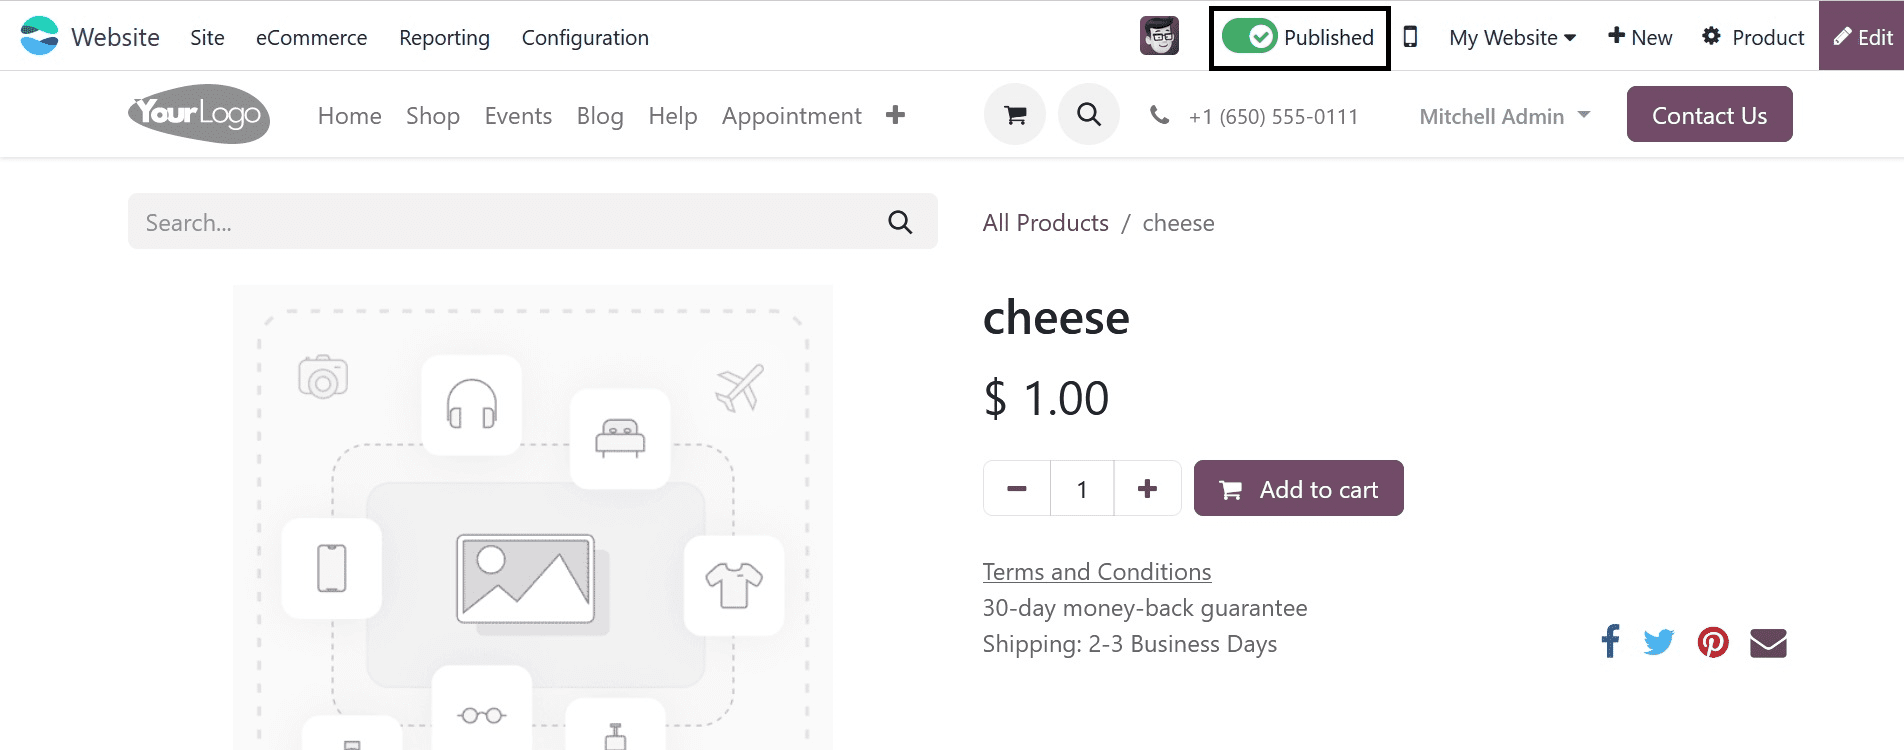
By selecting the mobile phone icon that is located next to the publish button, we can also see the shopping cart's mobile preview.
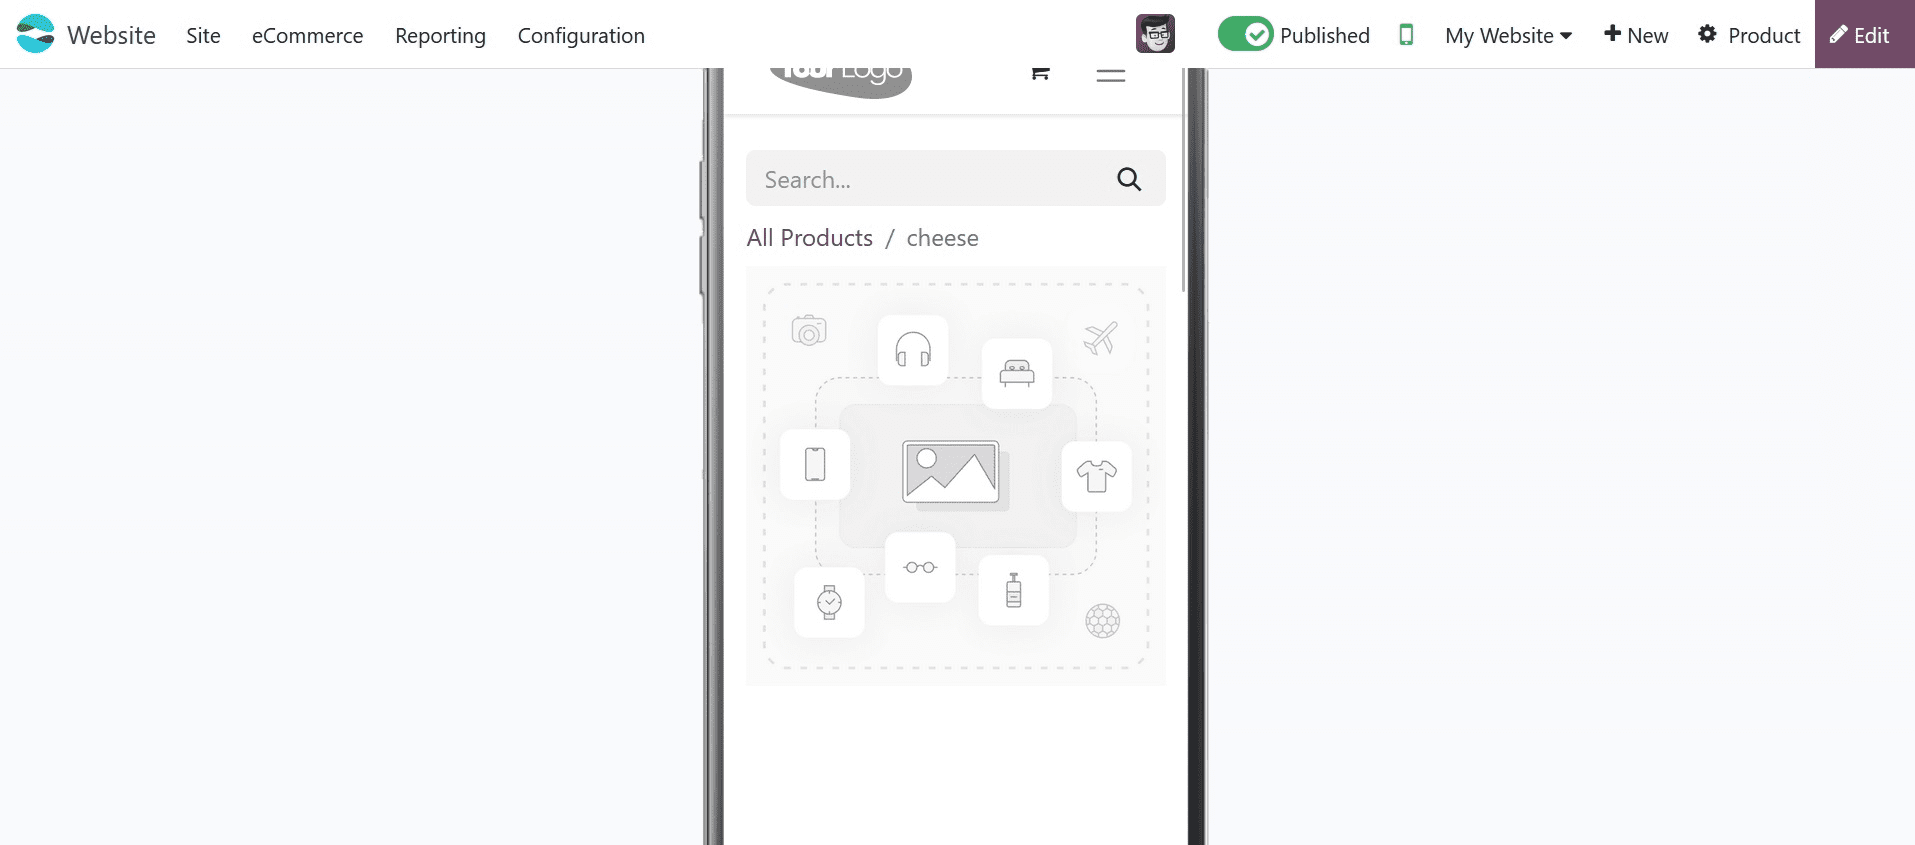
Our recently developed product is now prepared for sale.
We've talked about the thorough procedure involved in developing a product for the market. Customers can now purchase or place orders for the goods via your website.
Like all other Odoo ERP Modules, the processes involved in this blog are very simple and easy to comprehend, so even users with little prior knowledge may manage their items and update their websites.