A firm needs a budget because it acts as a financial blueprint that directs decision-making and guarantees that resources are distributed effectively. It assists companies in keeping an eye on spending, managing expenses, and maintaining financial alignment. Furthermore, improved risk management, strategic planning, and long-term growth are made possible by a well-planned budget.
Odoo 18 introduced two different types of Budget Management. The first one is an Analytic Budget and the second one is a Financial Budget. So let's discuss each one separately.
Analytical Budget Management
In Odoo 18 accounting, the analytical budget is crucial for monitoring financial performance across particular projects, divisions, or operations. It enables companies to precisely manage resources, keep an eye on spending, and instantly compare actual performance to budgeted amounts. By offering comprehensive and useful insights, this function facilitates strategic planning, strengthens financial control, and improves decision-making.
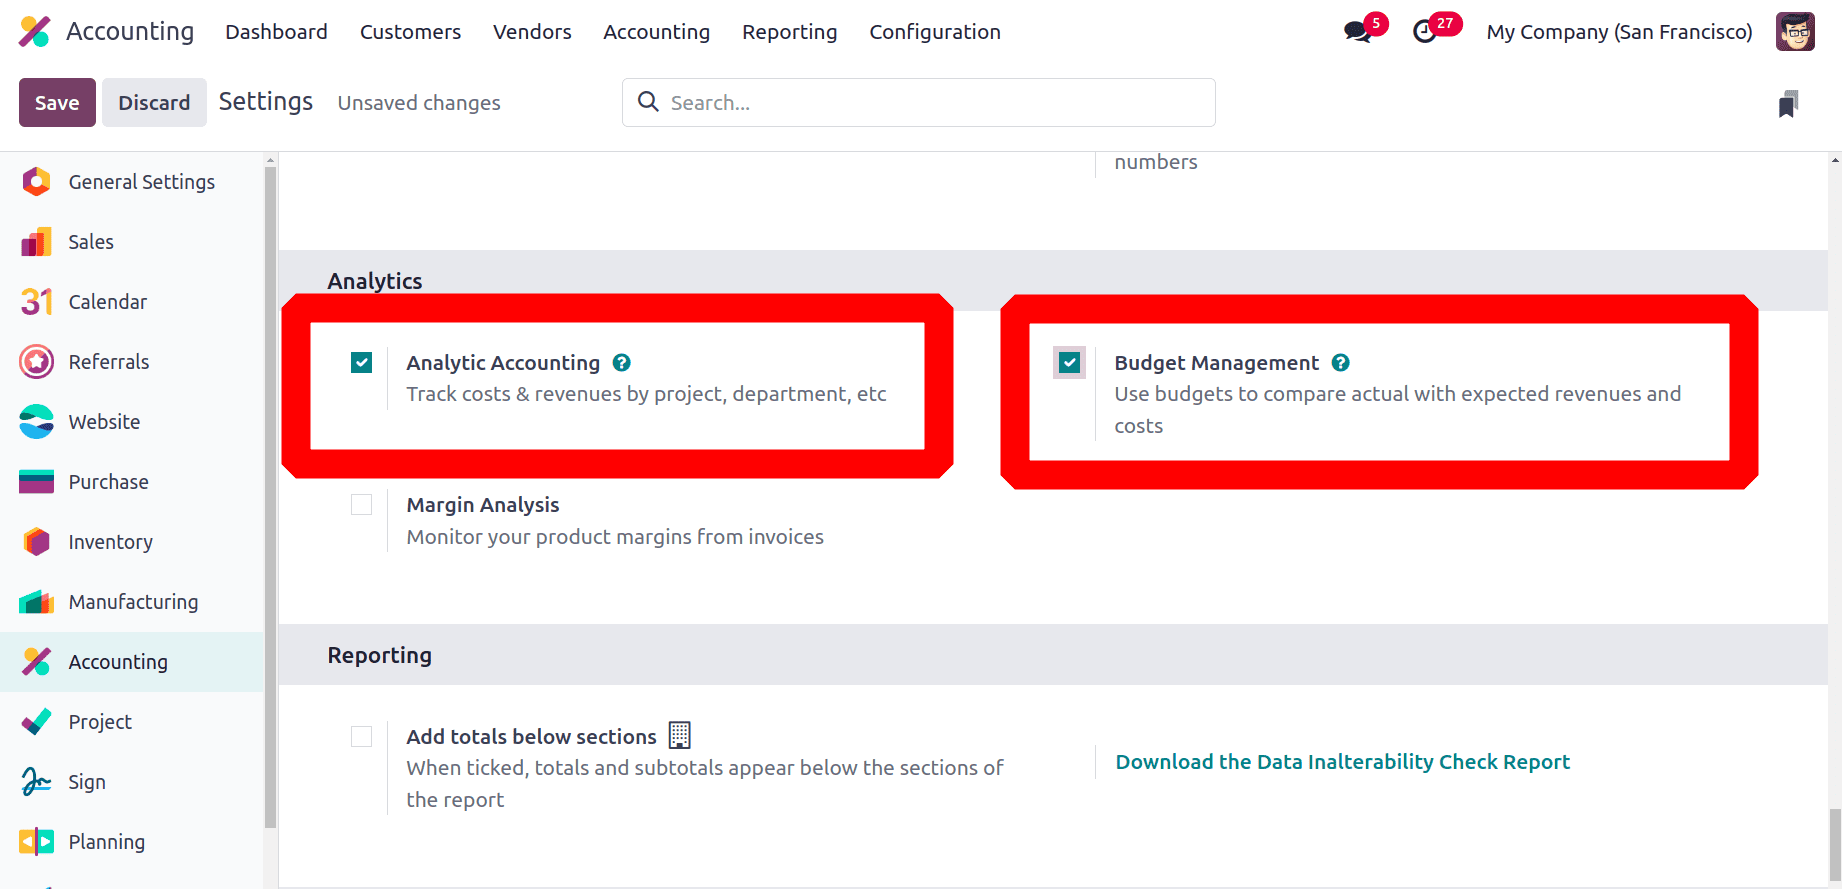
So to get the newly introduced analytic budget, users first need to enable both the Analytic Accounting and Budget Management. Analytic Accounting helps to track the cost and revenue by project, department etc. the Analytic Budget uses to compare actual with expected revenue and cost. Then save the settings.
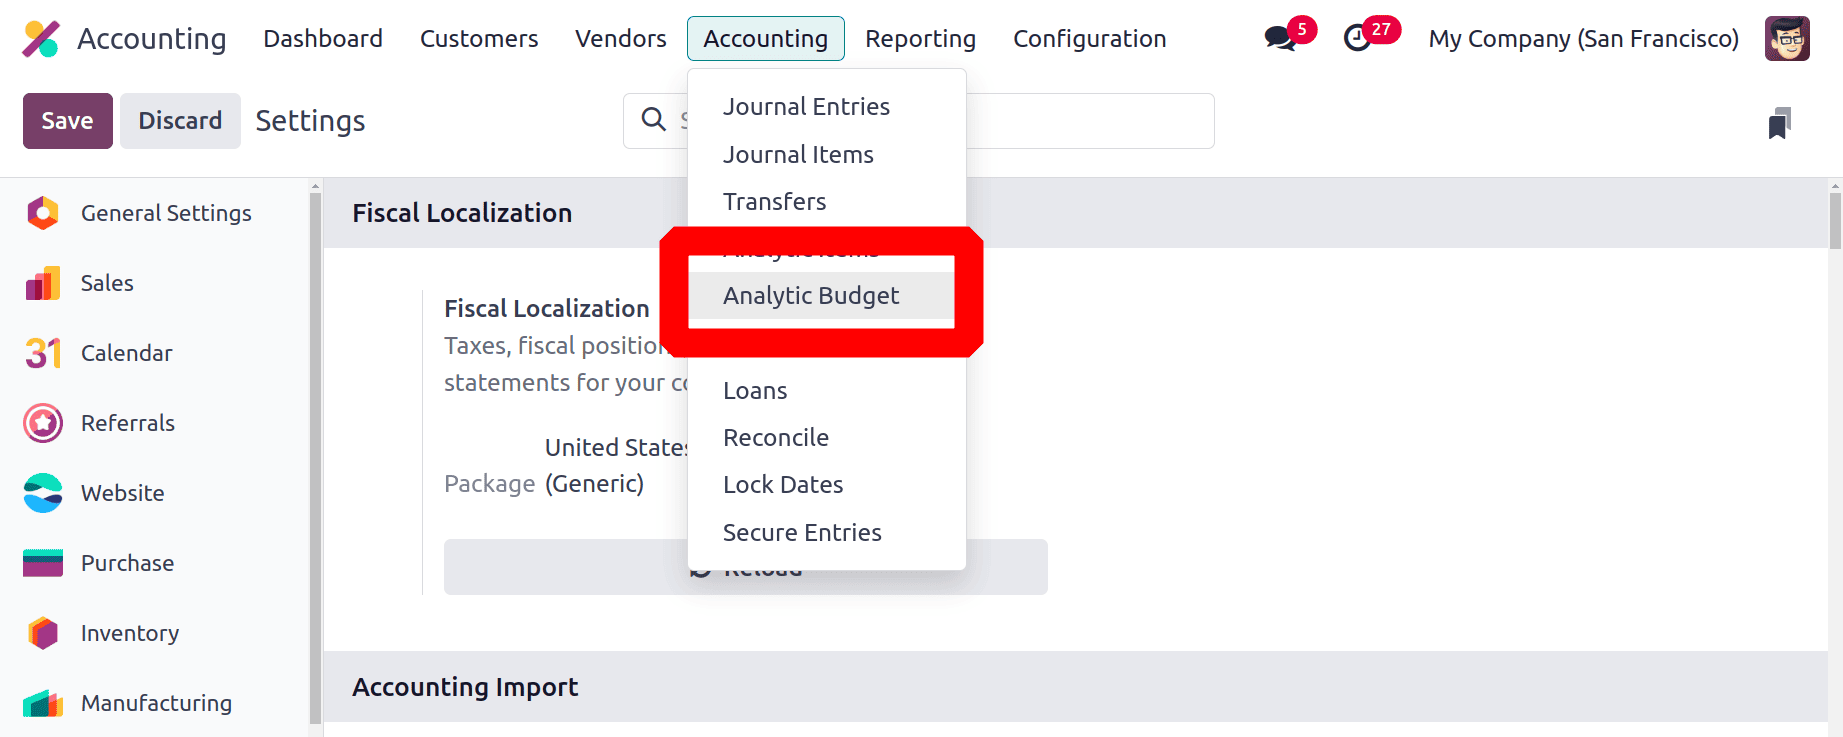
Then move to the Accounting menu. There the Analytic Budget is shown in the list. So click on the Analytic Budget to view the details.
A list of created budgets shown there. The details like Budget Name, Start date, Responsible person Activities and status are shown there.

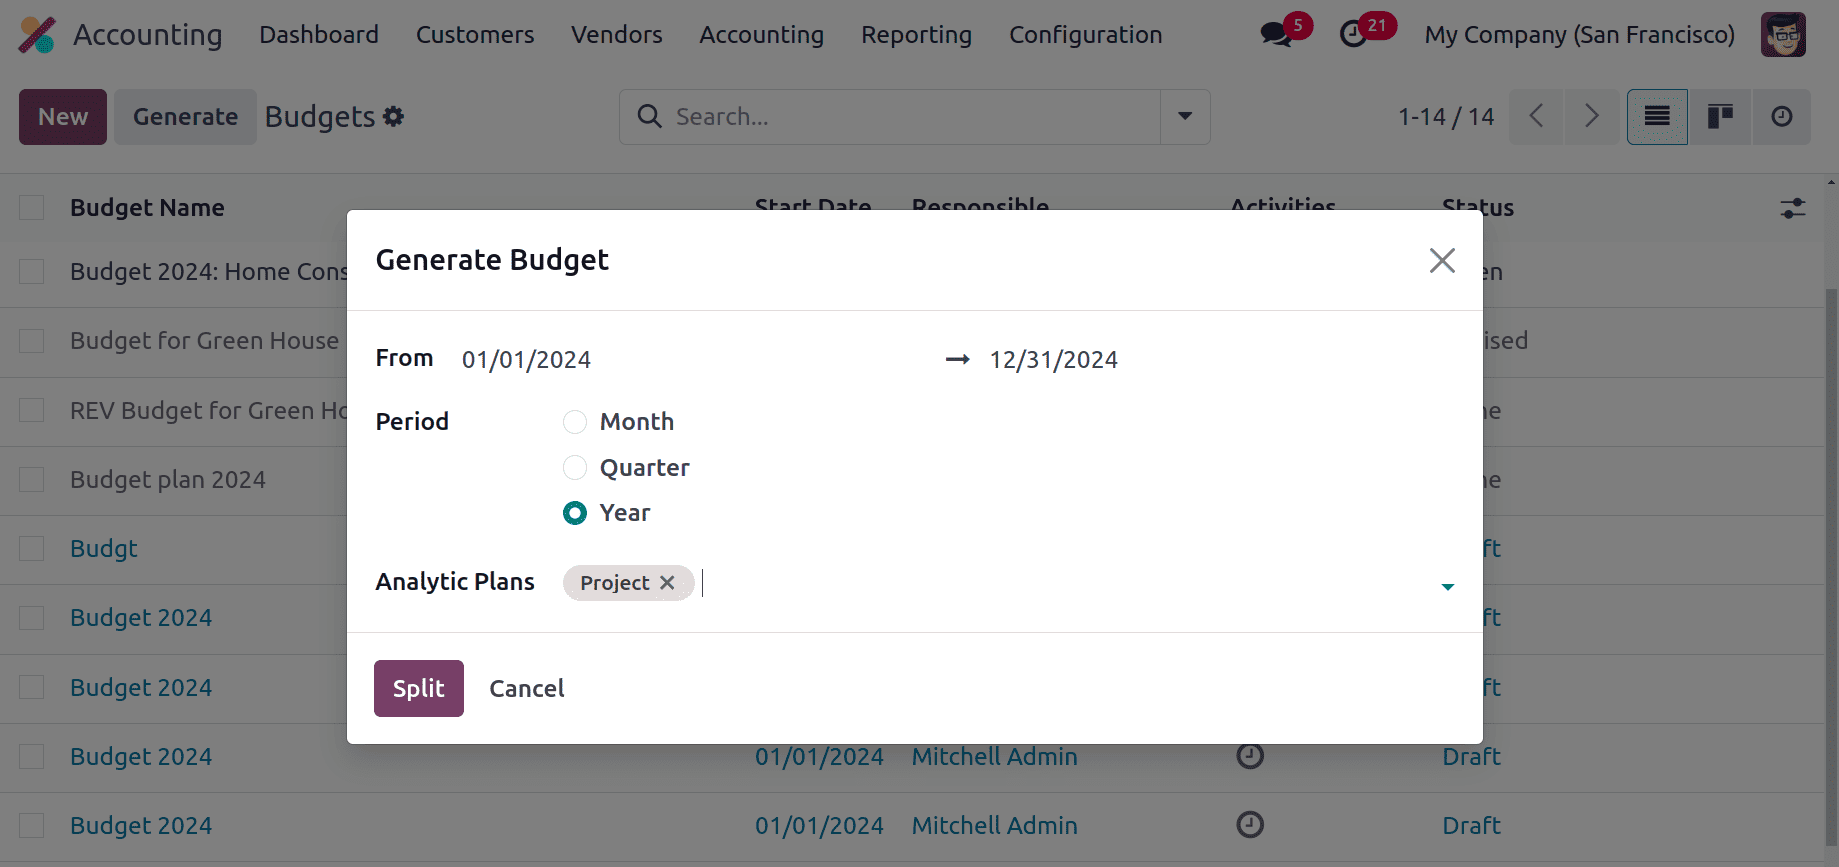
There are two buttons: New and Generate. While clicking on the Generate button, a window as shown below will be visible. Add the Budget period From and To dates, then choose the Period. Click on the Split button.
After that, all the possible combinations of the chosen Analytic Plans will be displayed there as shown in the screenshot below.
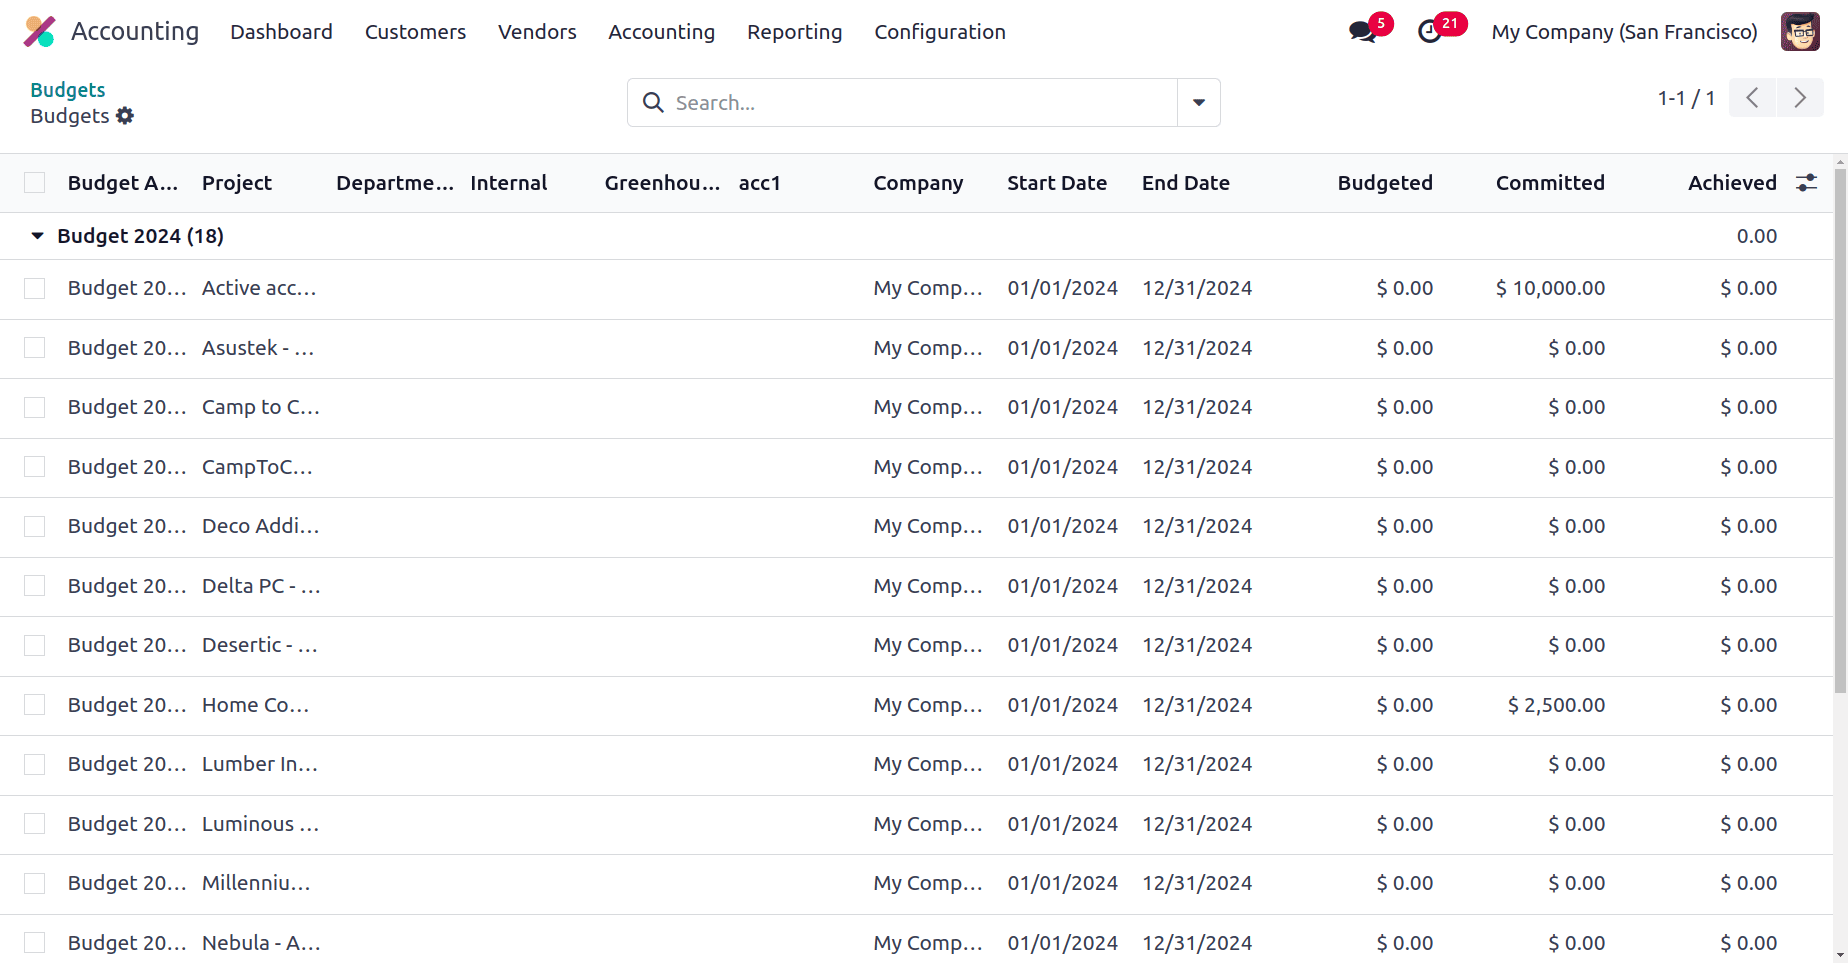
By using this users can easily create some combinations of analytic accounts, so it's not necessary to input those information.
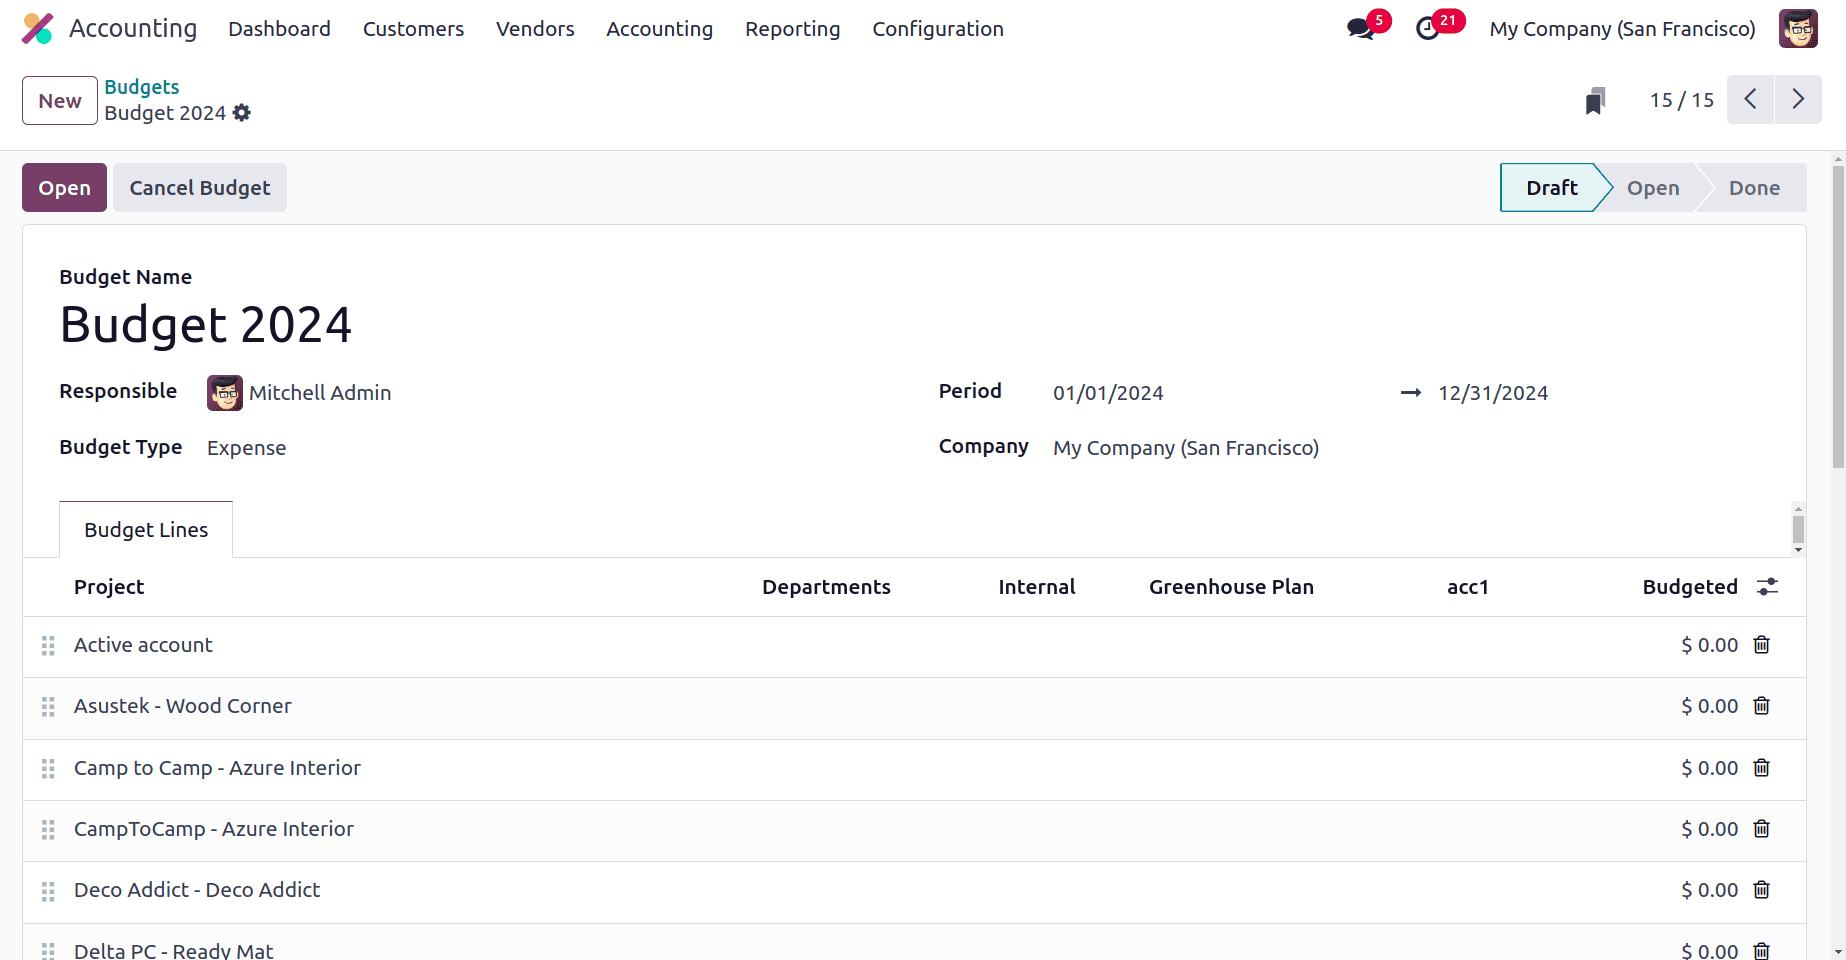
Then to add a new budget, click on the New button. Here the first user needs to add the name of the Budget. It's created for checking the total expense for the Solar Plan, so it's named “Solar Plan Expense Budget 2024”. Add the other details like the Responsible Person, period, Budget Type, and the Company name. The Budget type can be Expense, Revenue, or Both. The Period indicates the time limit of the created budget.
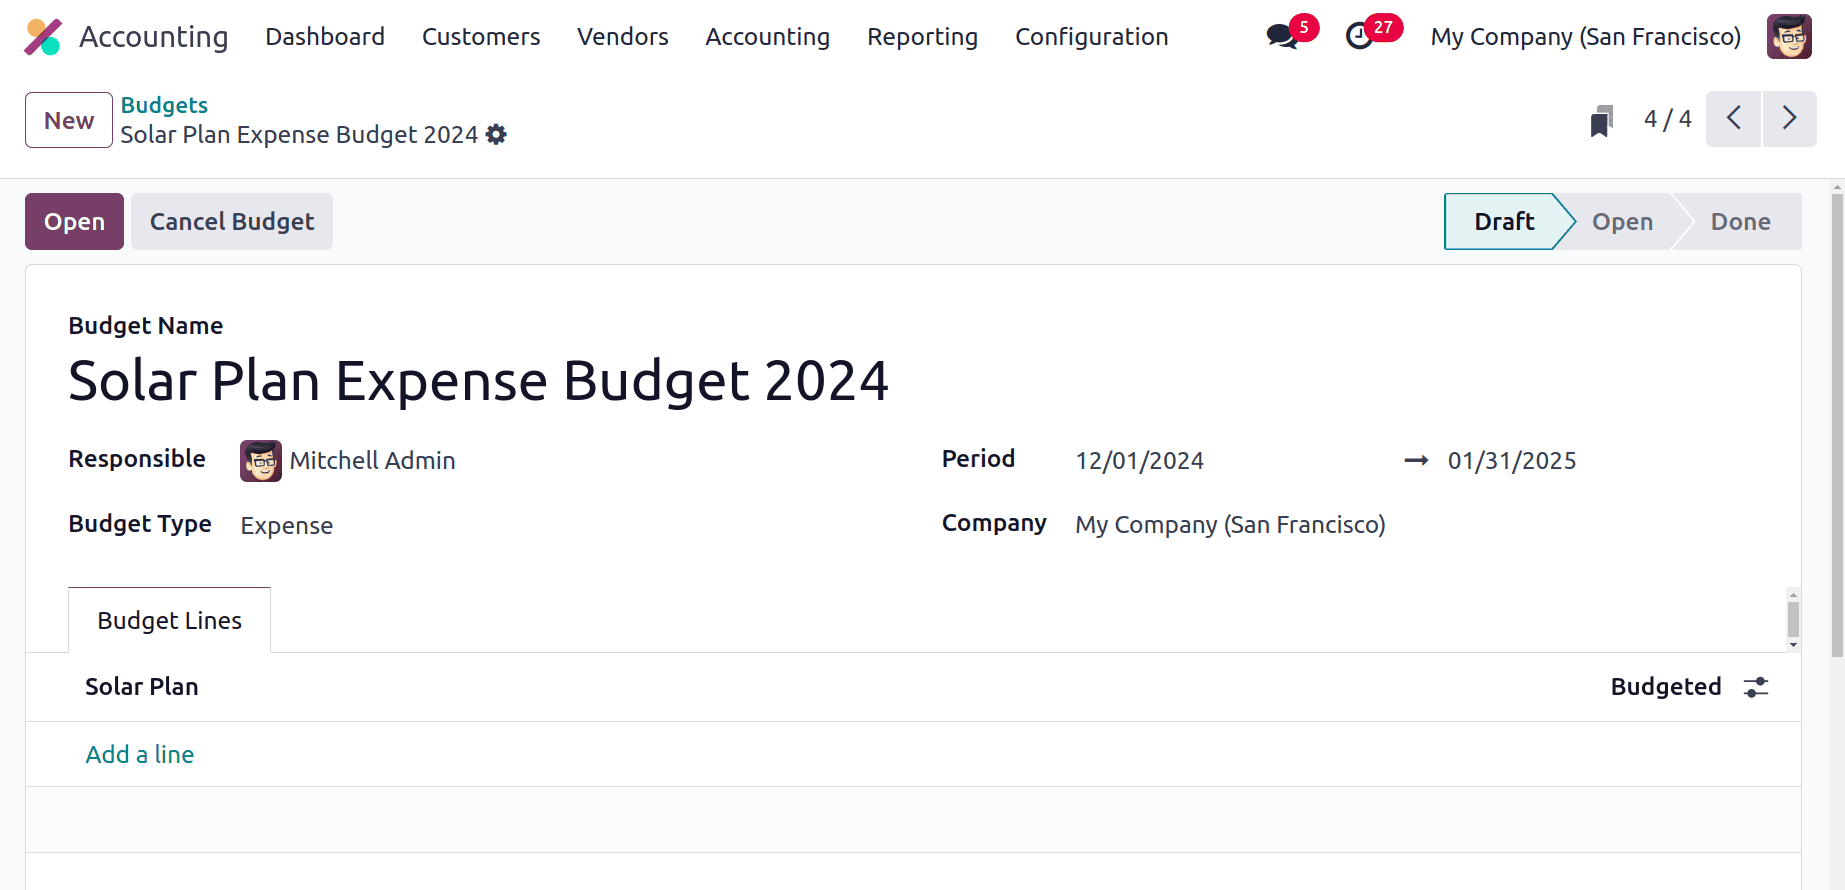
The Budget Lines show the created Analytic Plans. So click the Add a line option to add the Analytic Account. Here the created account, Solar Plan Account is chosen and the budgeted amount is 5000 dollars.
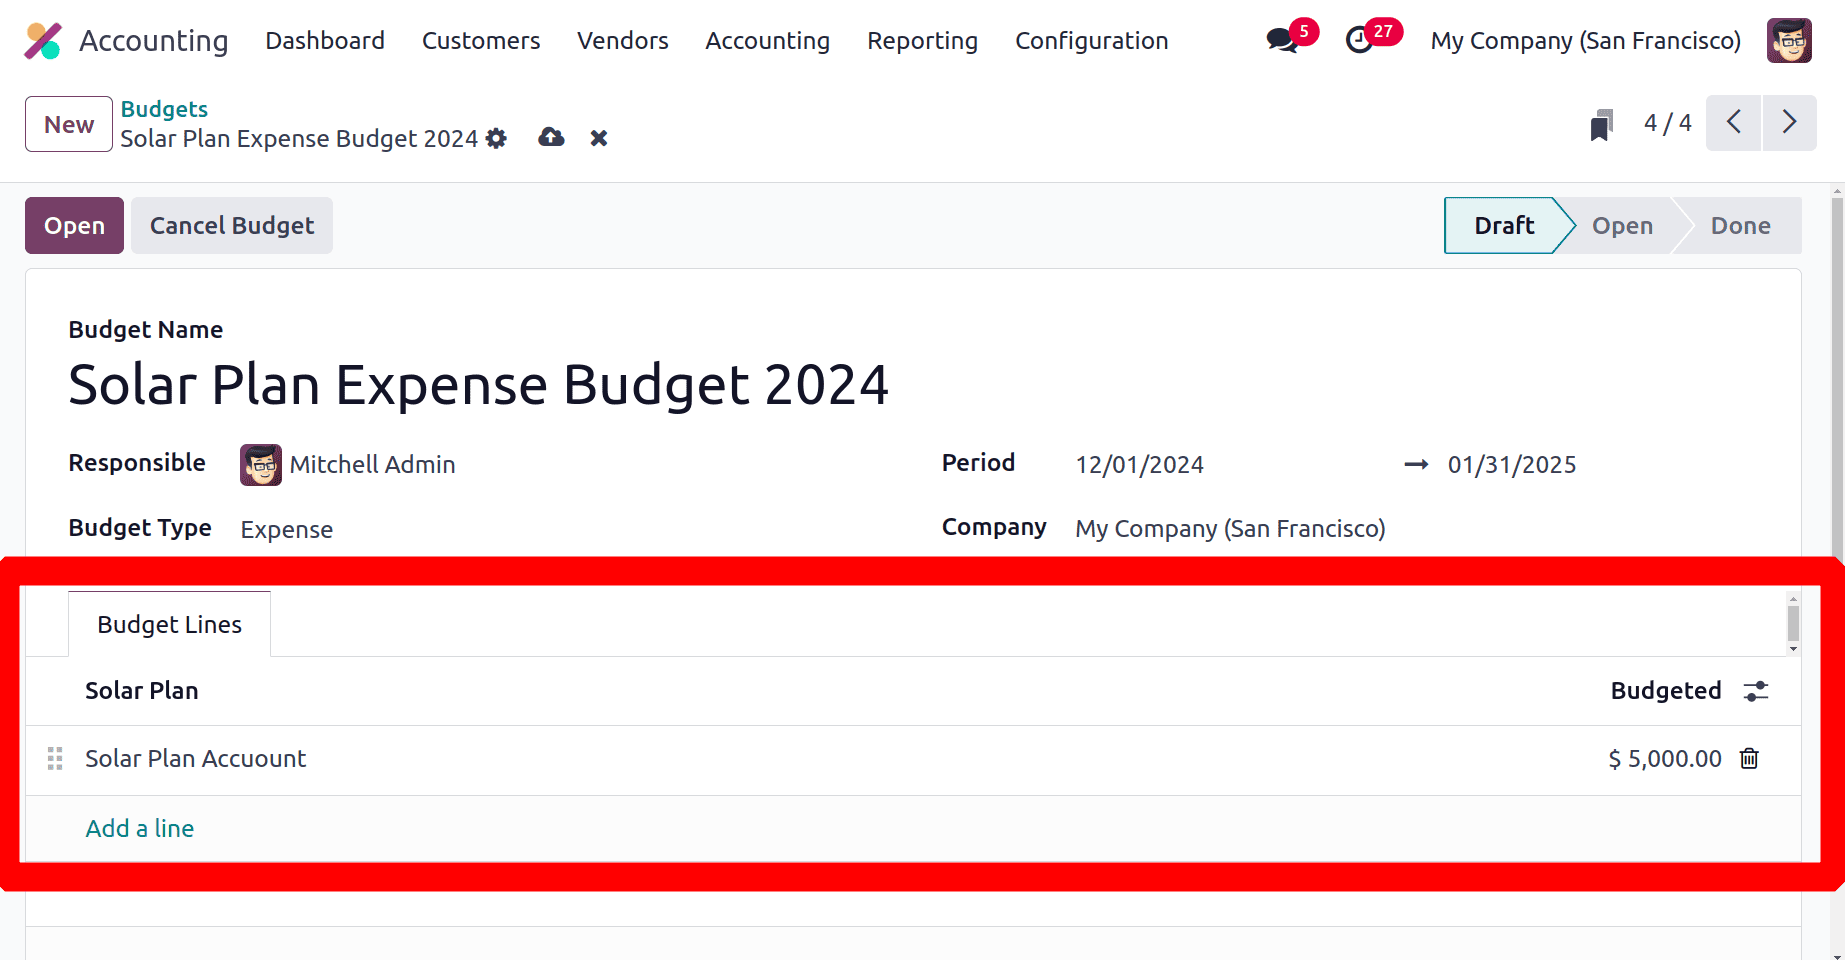
So here, the budget configuration is completed. And the budget is in the Draft stage. So the user needs to click on the Open button to start the budget.
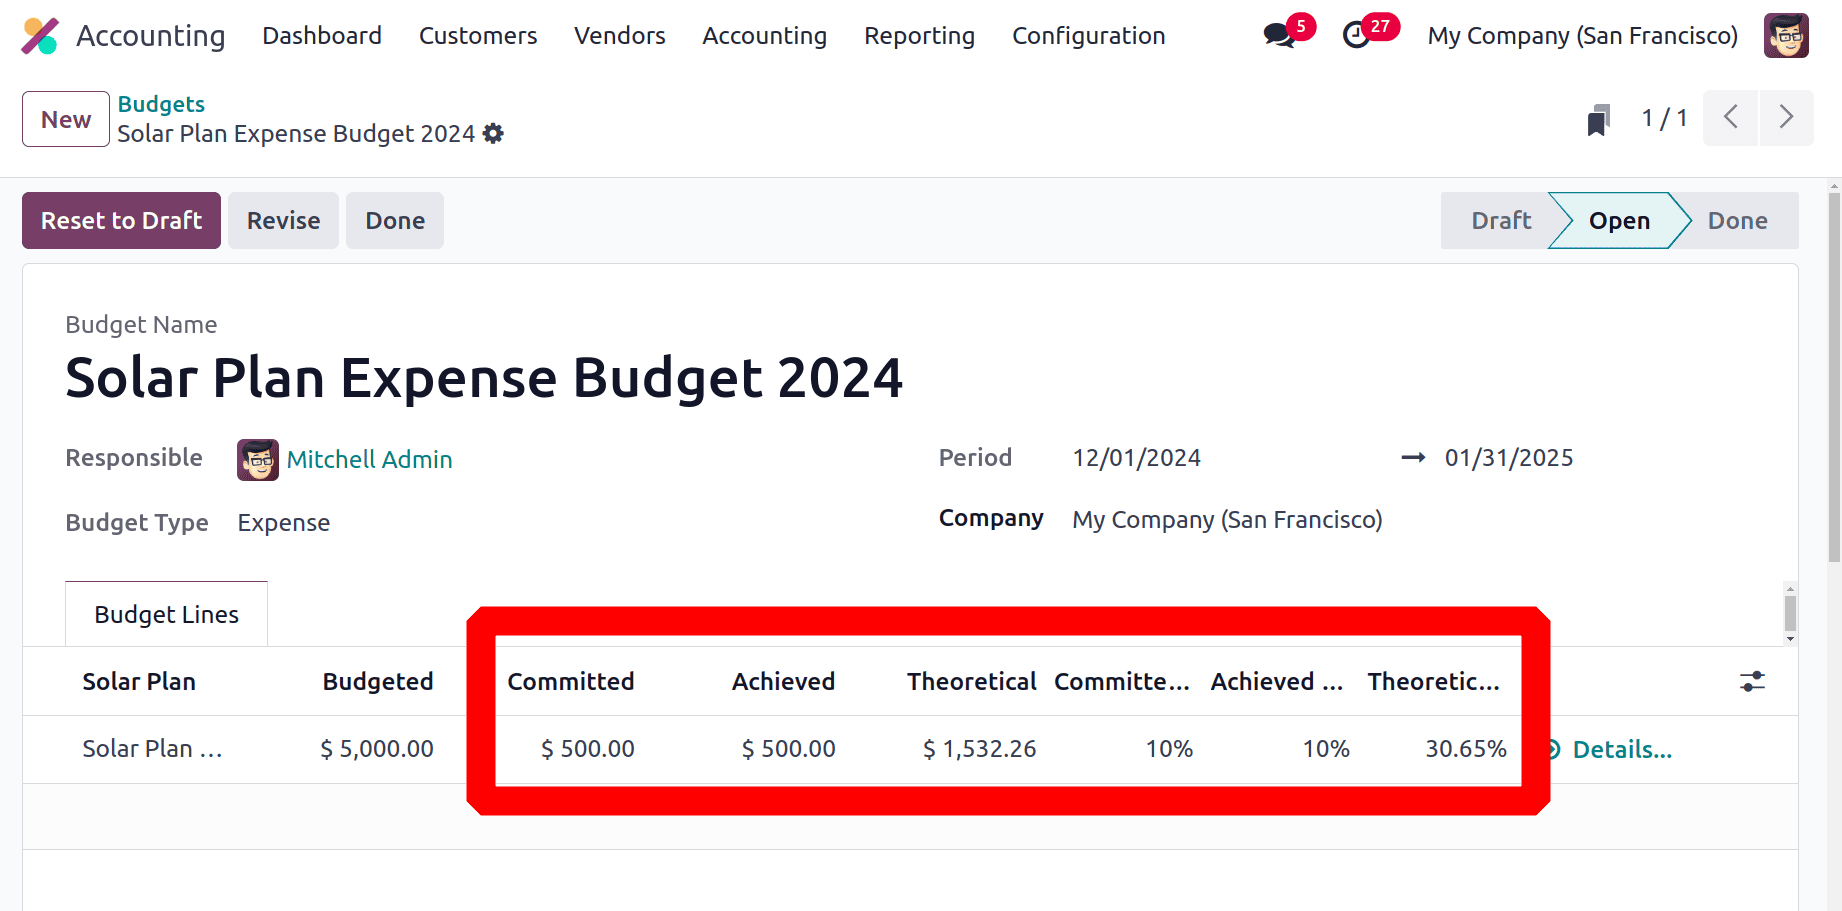
In an open budget, here the Theoretical value and the Theoretical % is calculated. Theoretical value is the amount supposed to be invoiced or billed till the date.
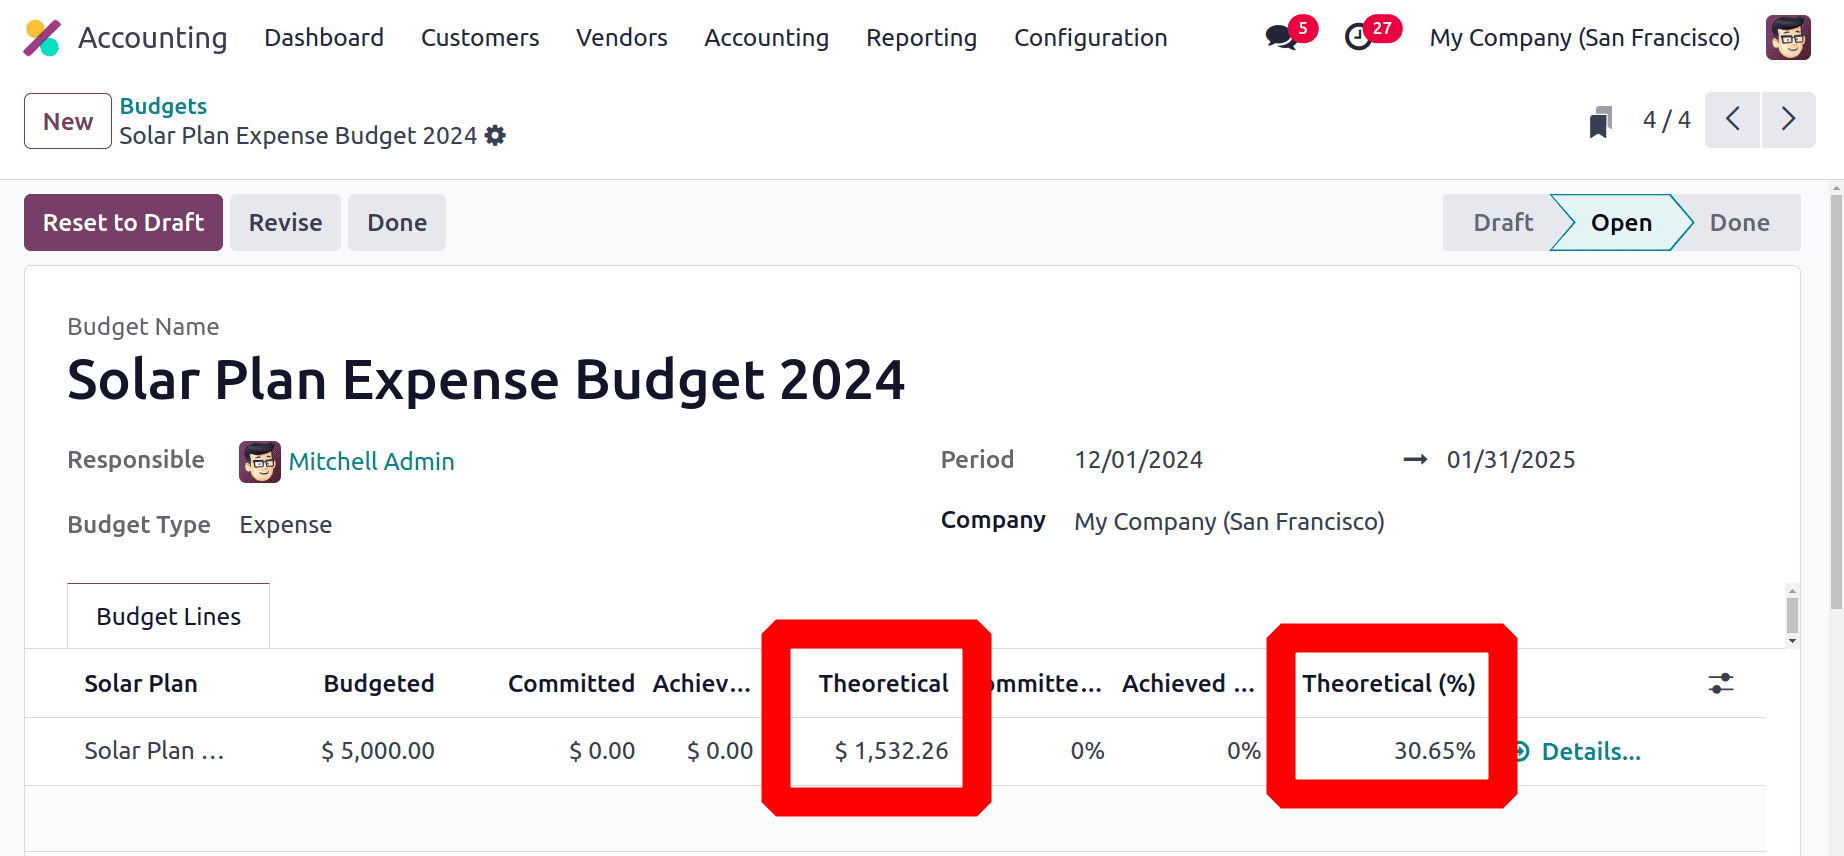
The budget period is from December 1st to January 31st, and the budgeted amount is 5000 dollars. The formula to calculate the Theoretical value is (Budget Amount / Budget Days) * Budget Days Completed.
So Budget Amount is $5000, Budget Days is 62 and the Budget Days Completed is 19 days. The theoretical value is (5000 / 62 ) * 19 = 1532.26.
The percentage of the Theoretical value is calculated by ( Theoretical value / Budget Amount ) * 100. Theoretical Percentage value = (1532.26 / 5000 ) *100 =30.65 %.
Lets assume that the user purchased some products for the Solar Plan project. For creating a new purchase order, move to the Purchase module. Then create a new order by clicking on the New button.
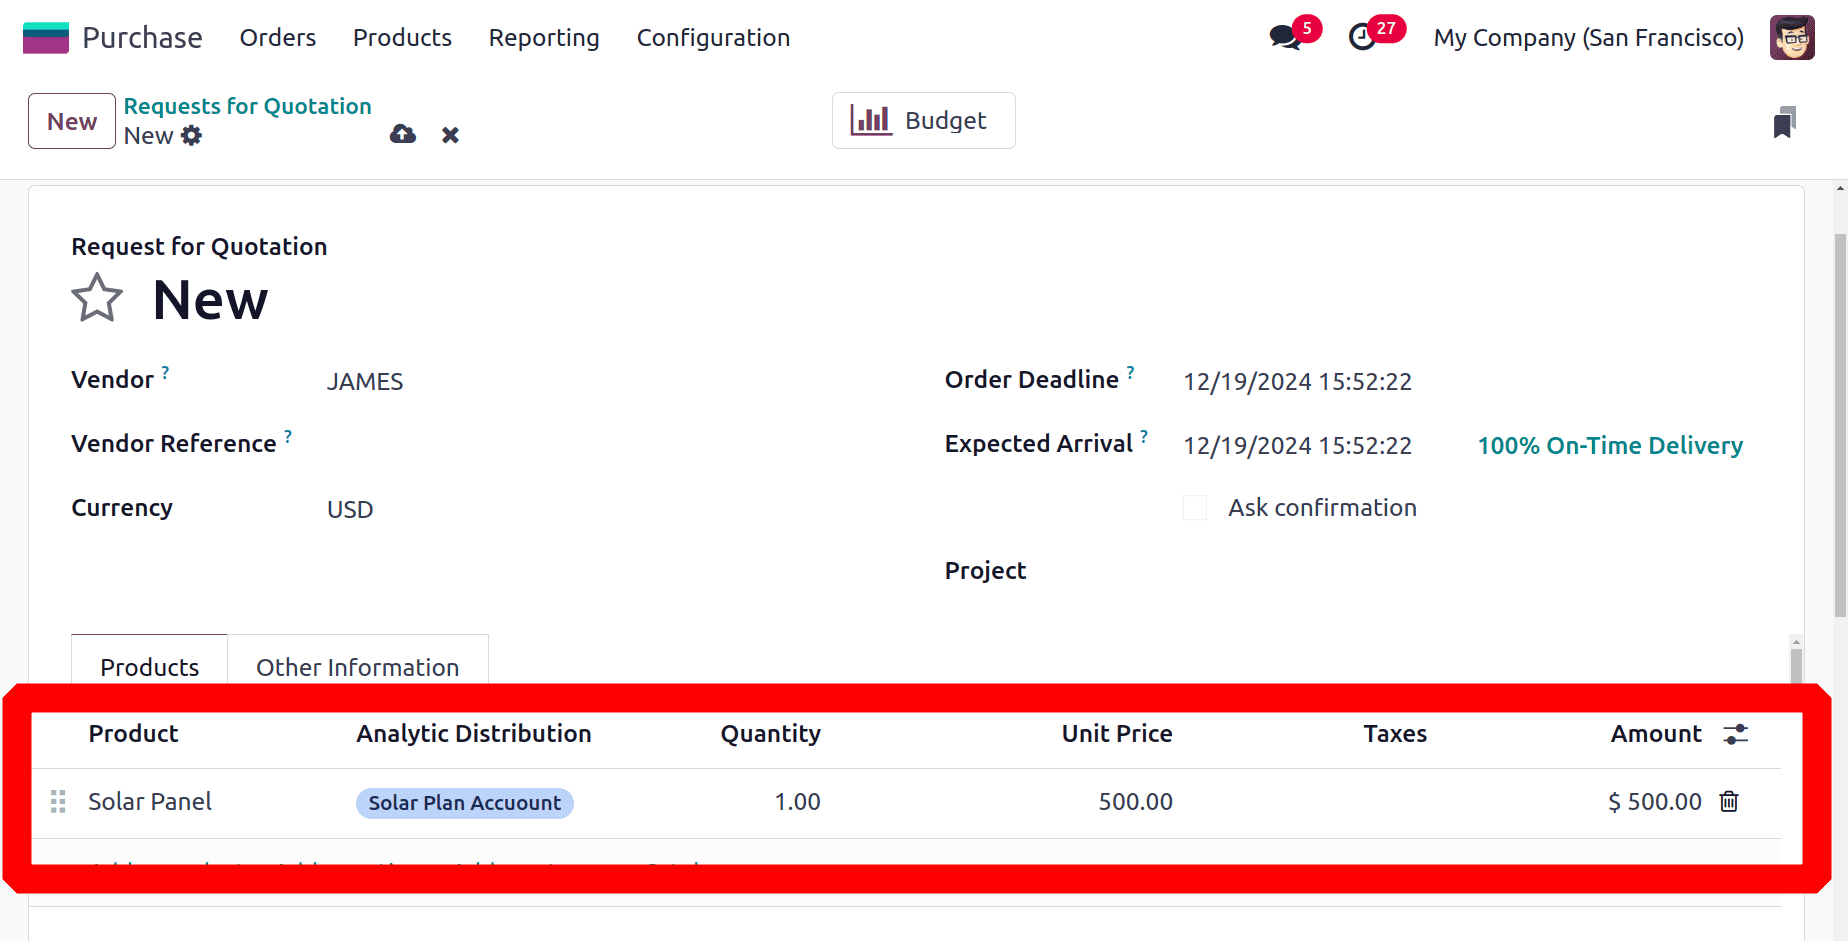
The vendor is James here. The user purchased one quantity of Solar Panel with a cost of $500. Before confirming the purchase, the user needs to add the Analytic Distribution. The same Solar Plan Account. Then confirm the order.
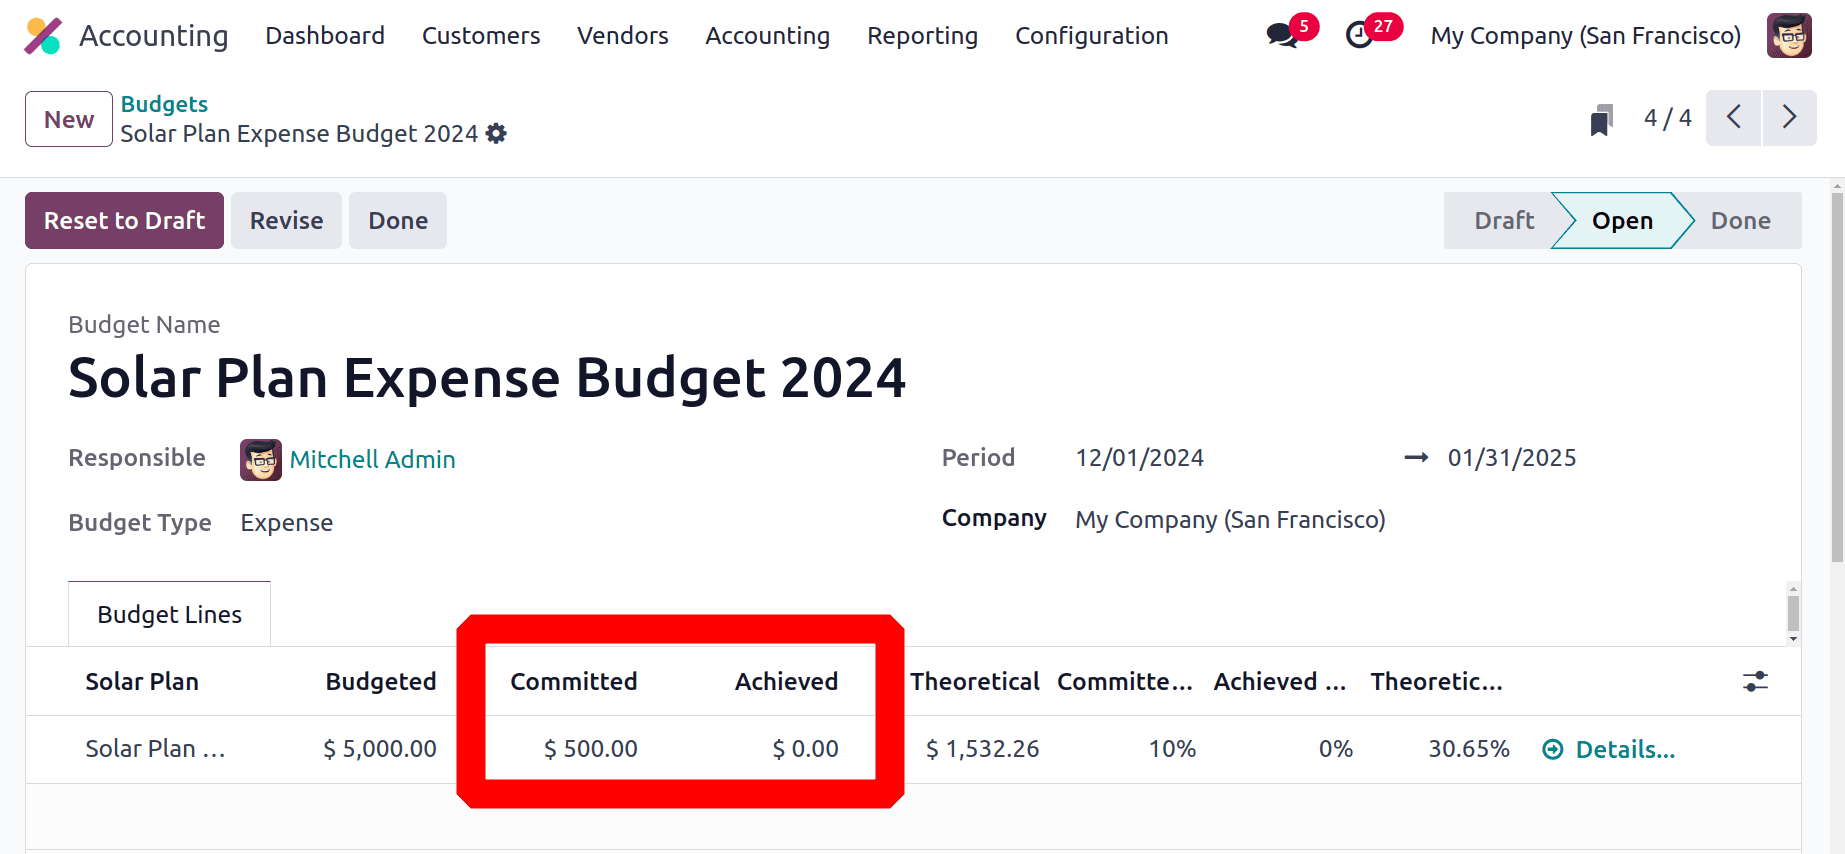
Move back to the Accounting and check the Analytic Budget again. The order amount is added inside the budget, the value added as the Committed amount as shown in the screenshot.
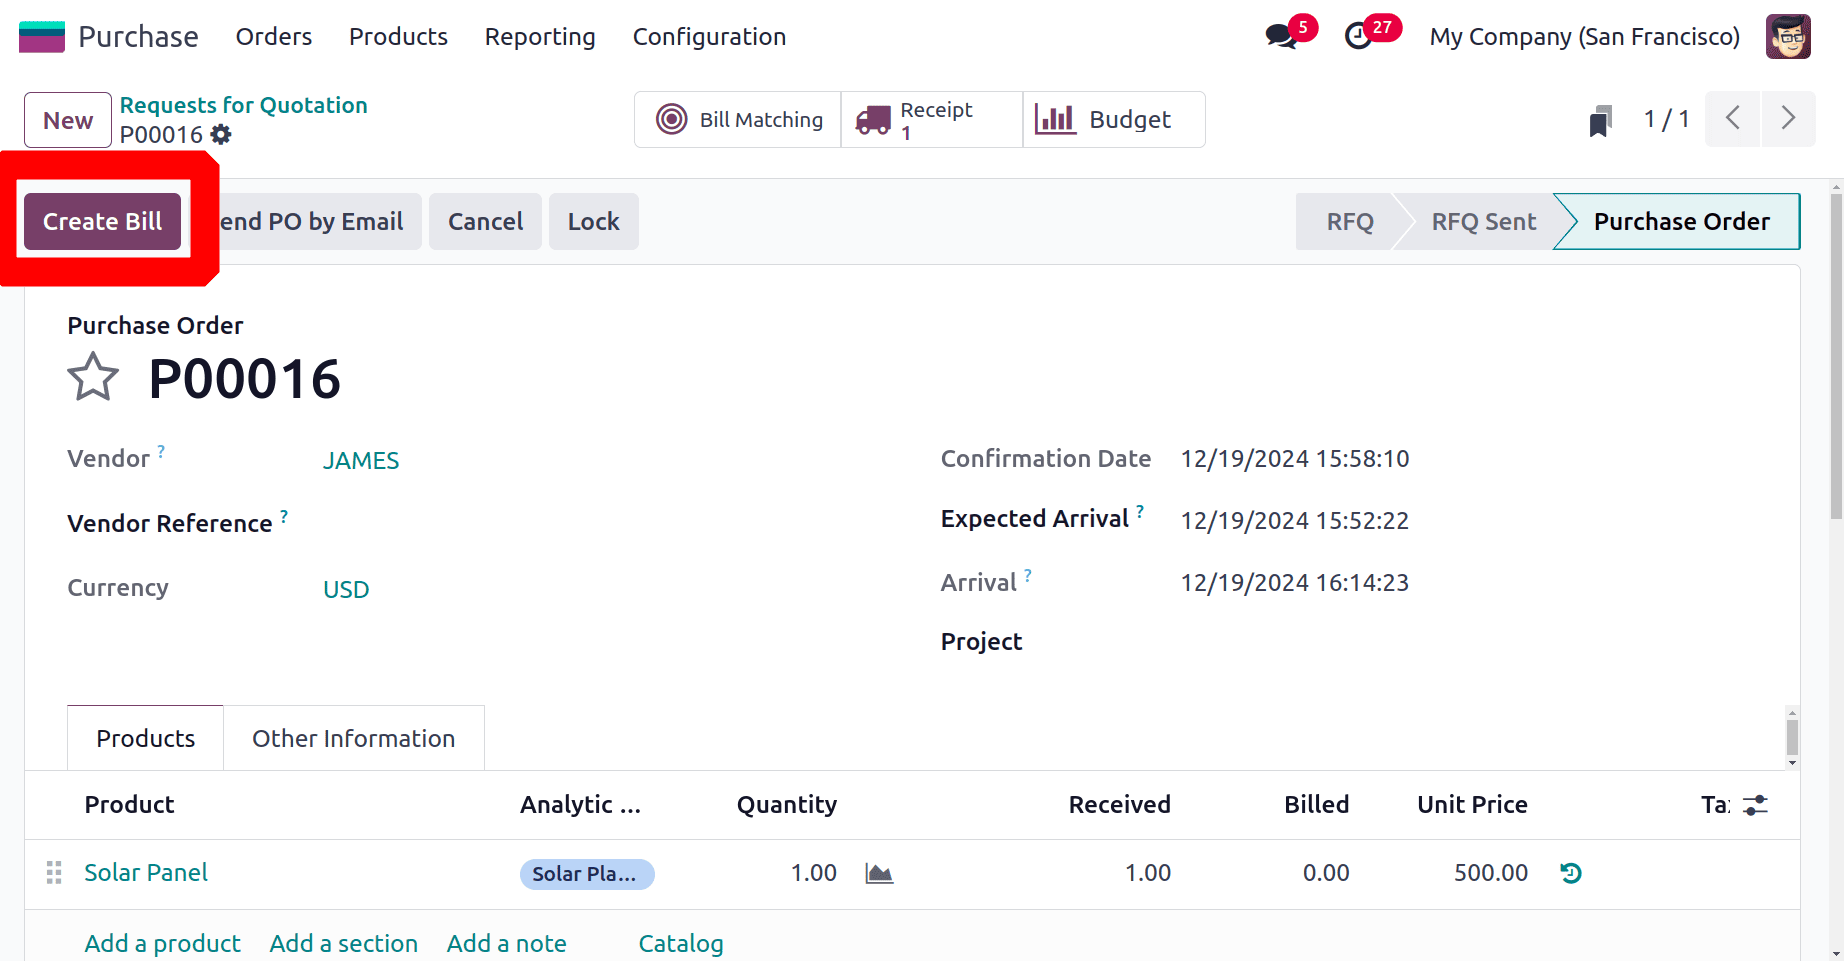
Move back to the purchase order. Then the product is received first, then creates a bill for the purchase order. For that click on the Create Bill button.
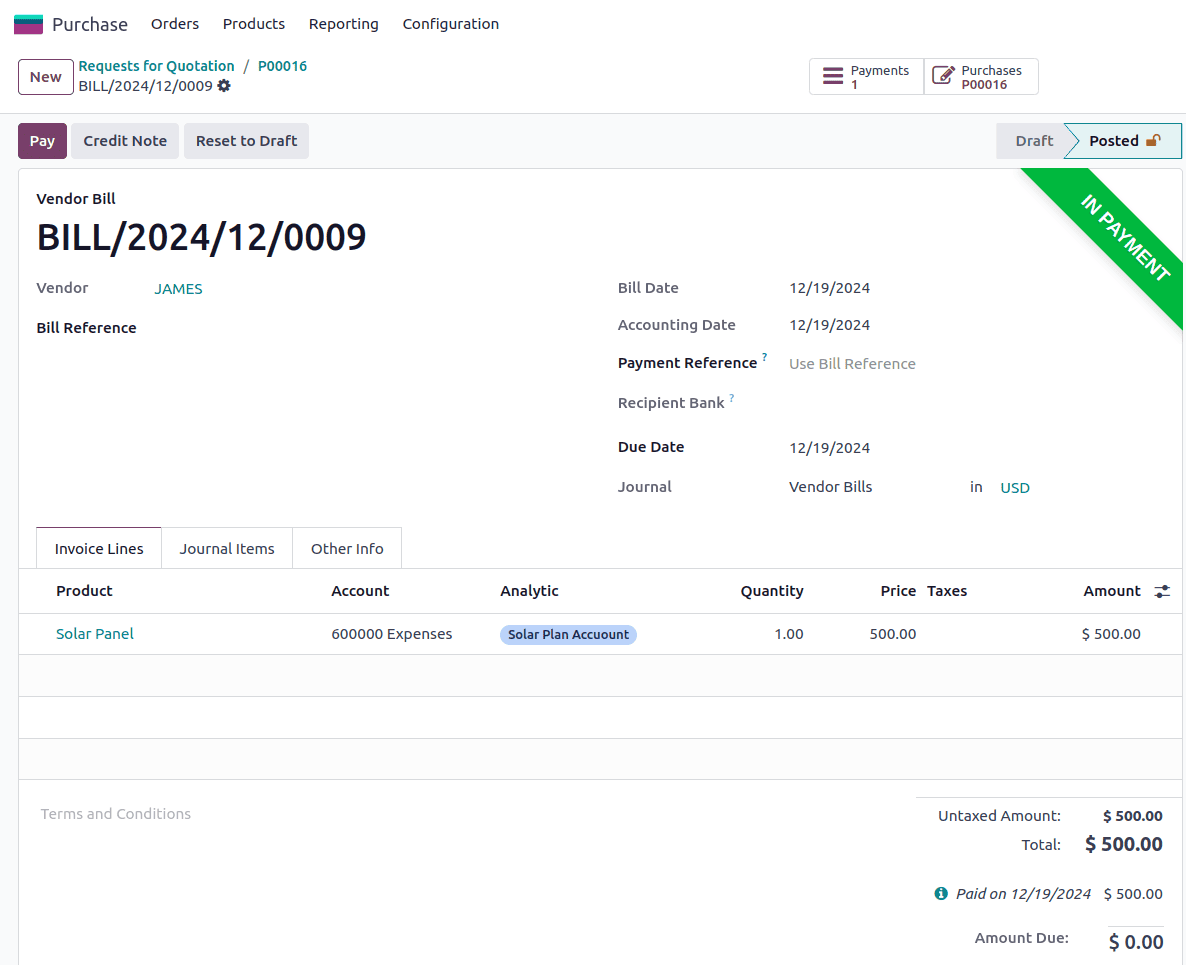
Confirm the bill after adding the Bill date. After that, pay the bill, and complete the payment.
The purchase order contains another smart tab named Budget. From the new smart tab Budget, the user can simply analyse the budget details.
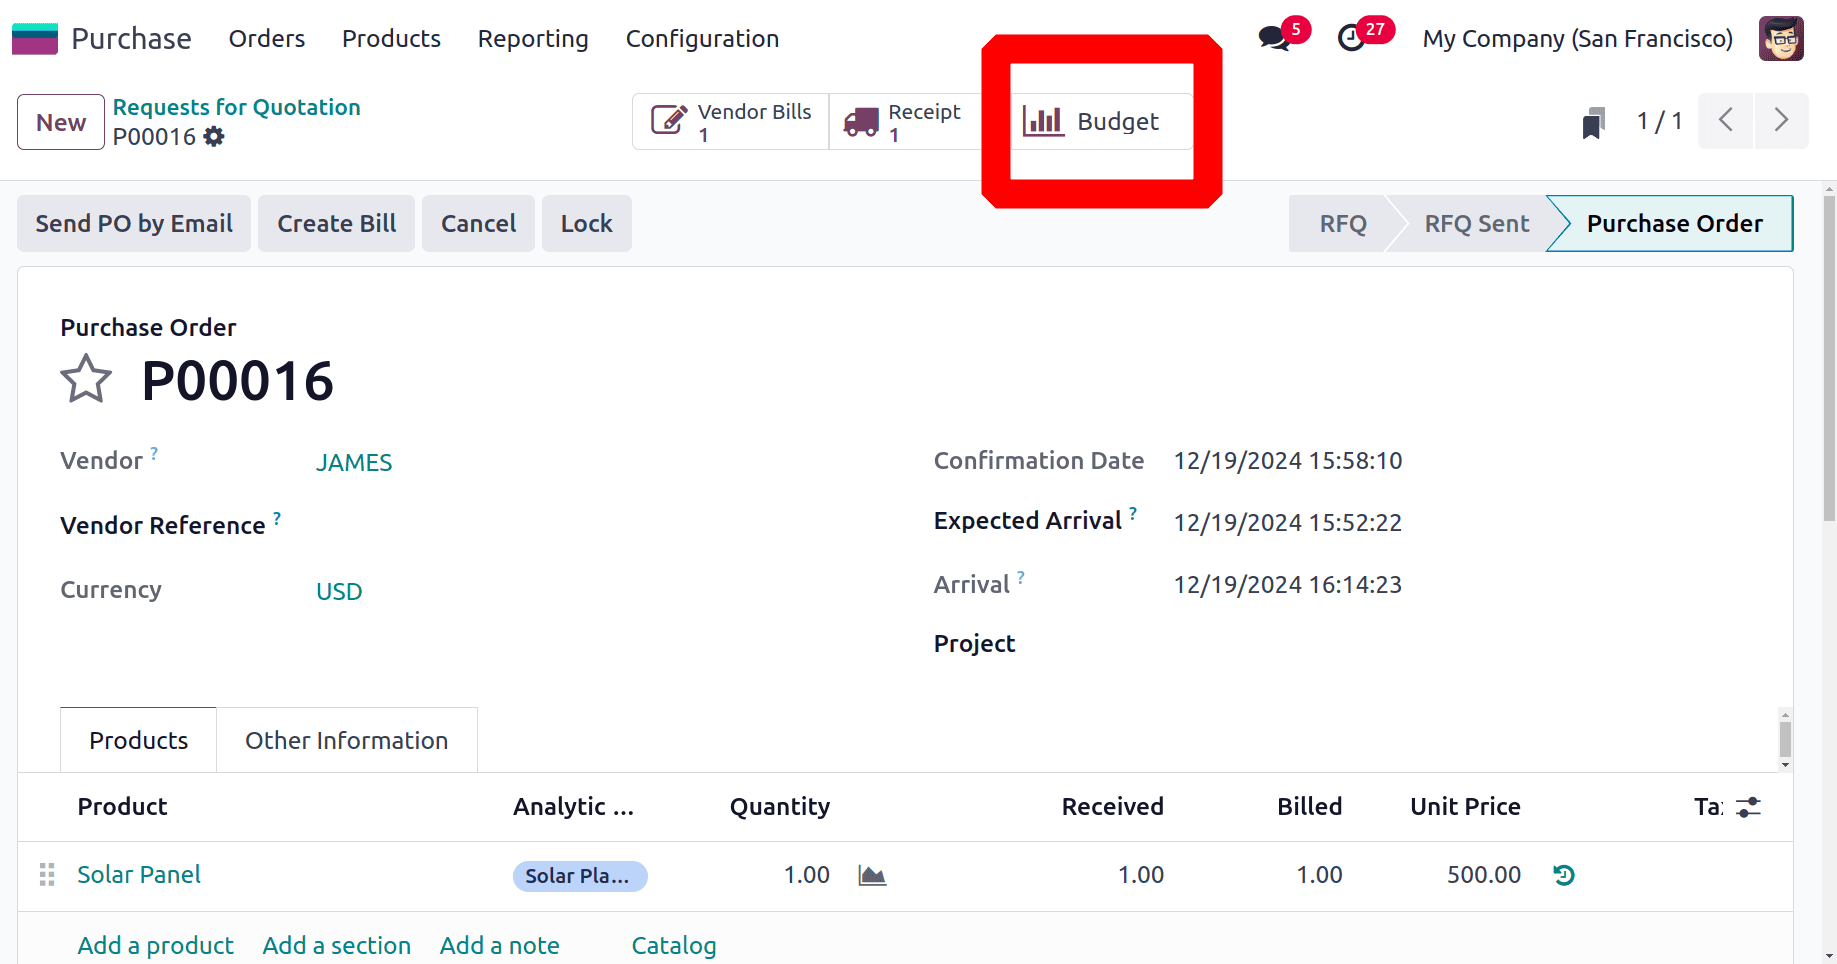
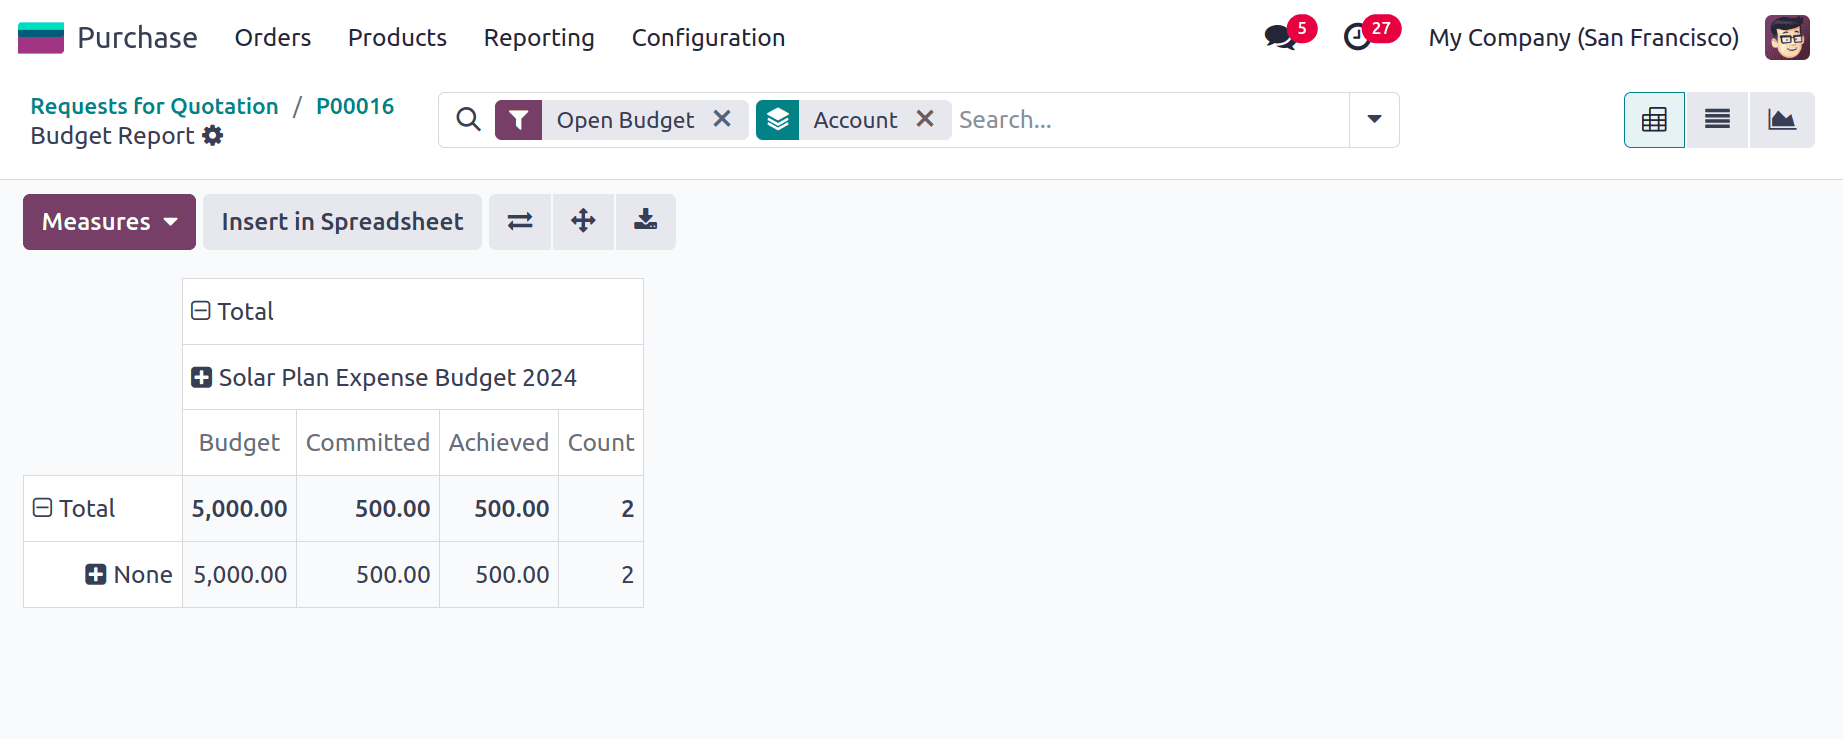
While clicking on the smart tab a new Pivot view will open. That pivot view shows the details of the budget. Budgeted amount, Committed amount, Achieved amount are shown there. Besides the pivot View, List View and Graph View are also available there.
Then again, check the Analytic Budget. This time the amount was added to the Achieved Amount. And the total Committed percentage and the Achieved percentage are visible there.
It's possible to revise the budget. For that, click on the Revise button. Then another Budget is created with the name of “REV Solar Plan Expense Budget 2024”. There the user can view that which is revision of the previous budget.
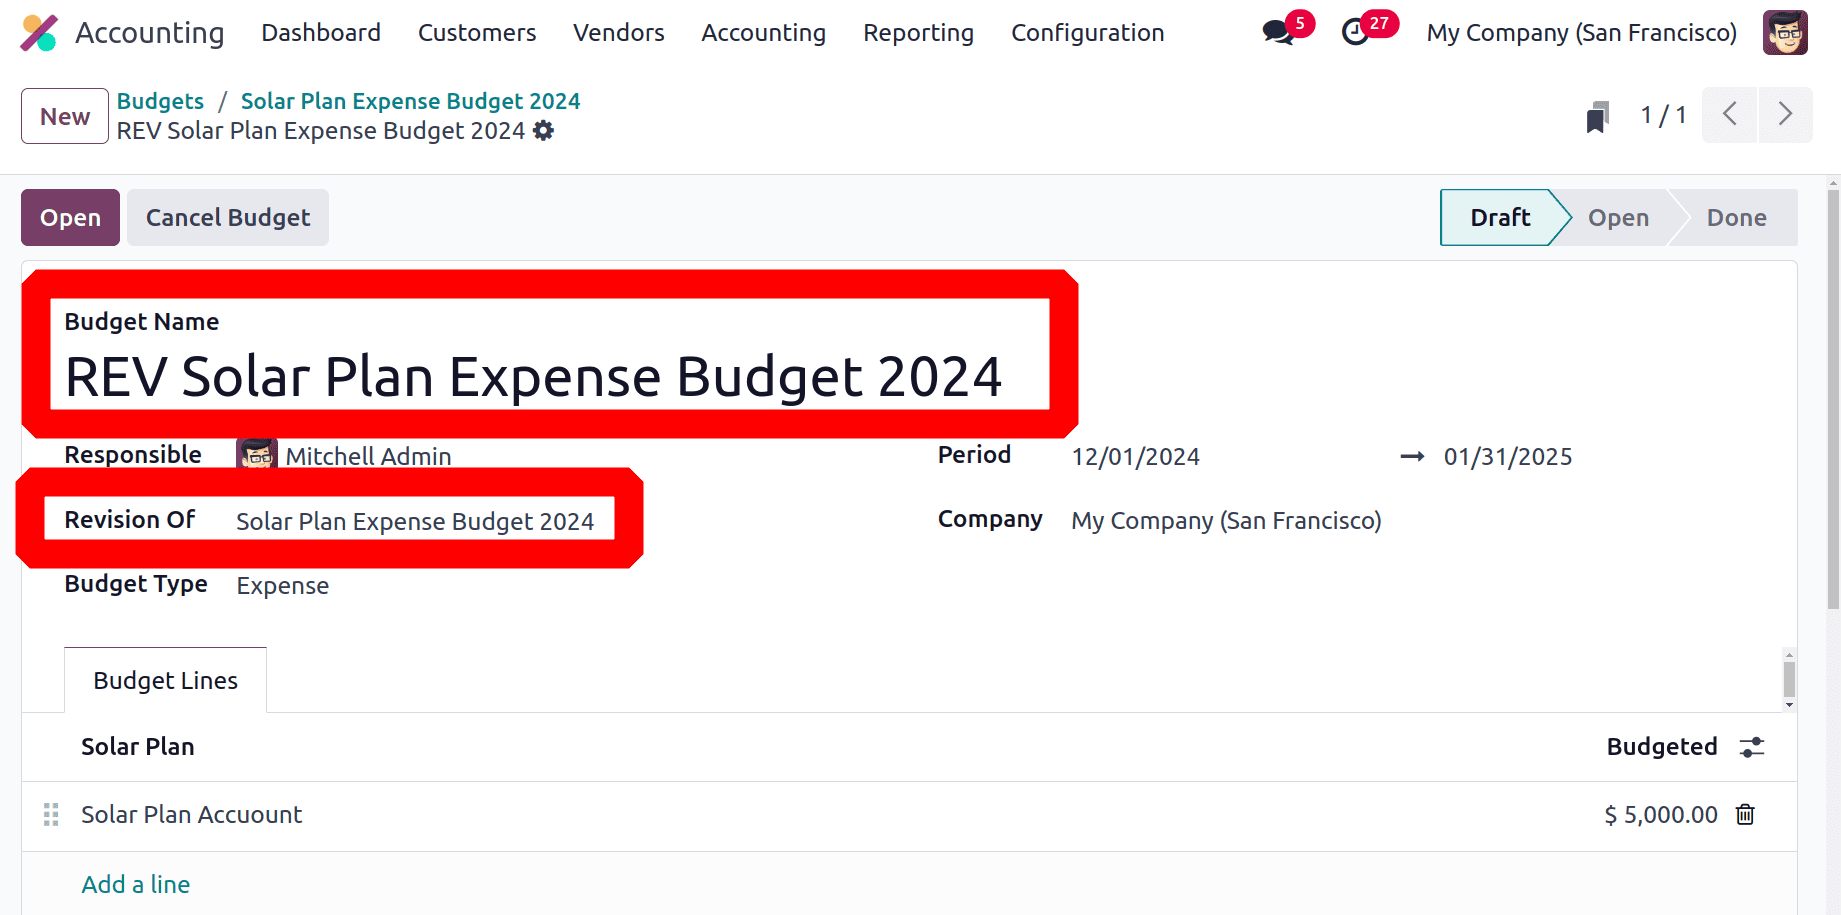
Here the revised version is in the Draft stage. Users can simply change the configurations. After that the same procedures can repeat.
Financial Budget Management
By establishing income and cost goals, the financial budget in Odoo 18 accounting is essential for overseeing a business's entire financial well-being. Effective planning, financial performance monitoring, and variation identification between budgeted and actual results are all made possible by it. Better financial control, strategic decision-making, and the accomplishment of long-term corporate objectives are all facilitated by this.
The financial budget option appears on the Configuration menu. Choose the Financial Budget from there. Click on it.
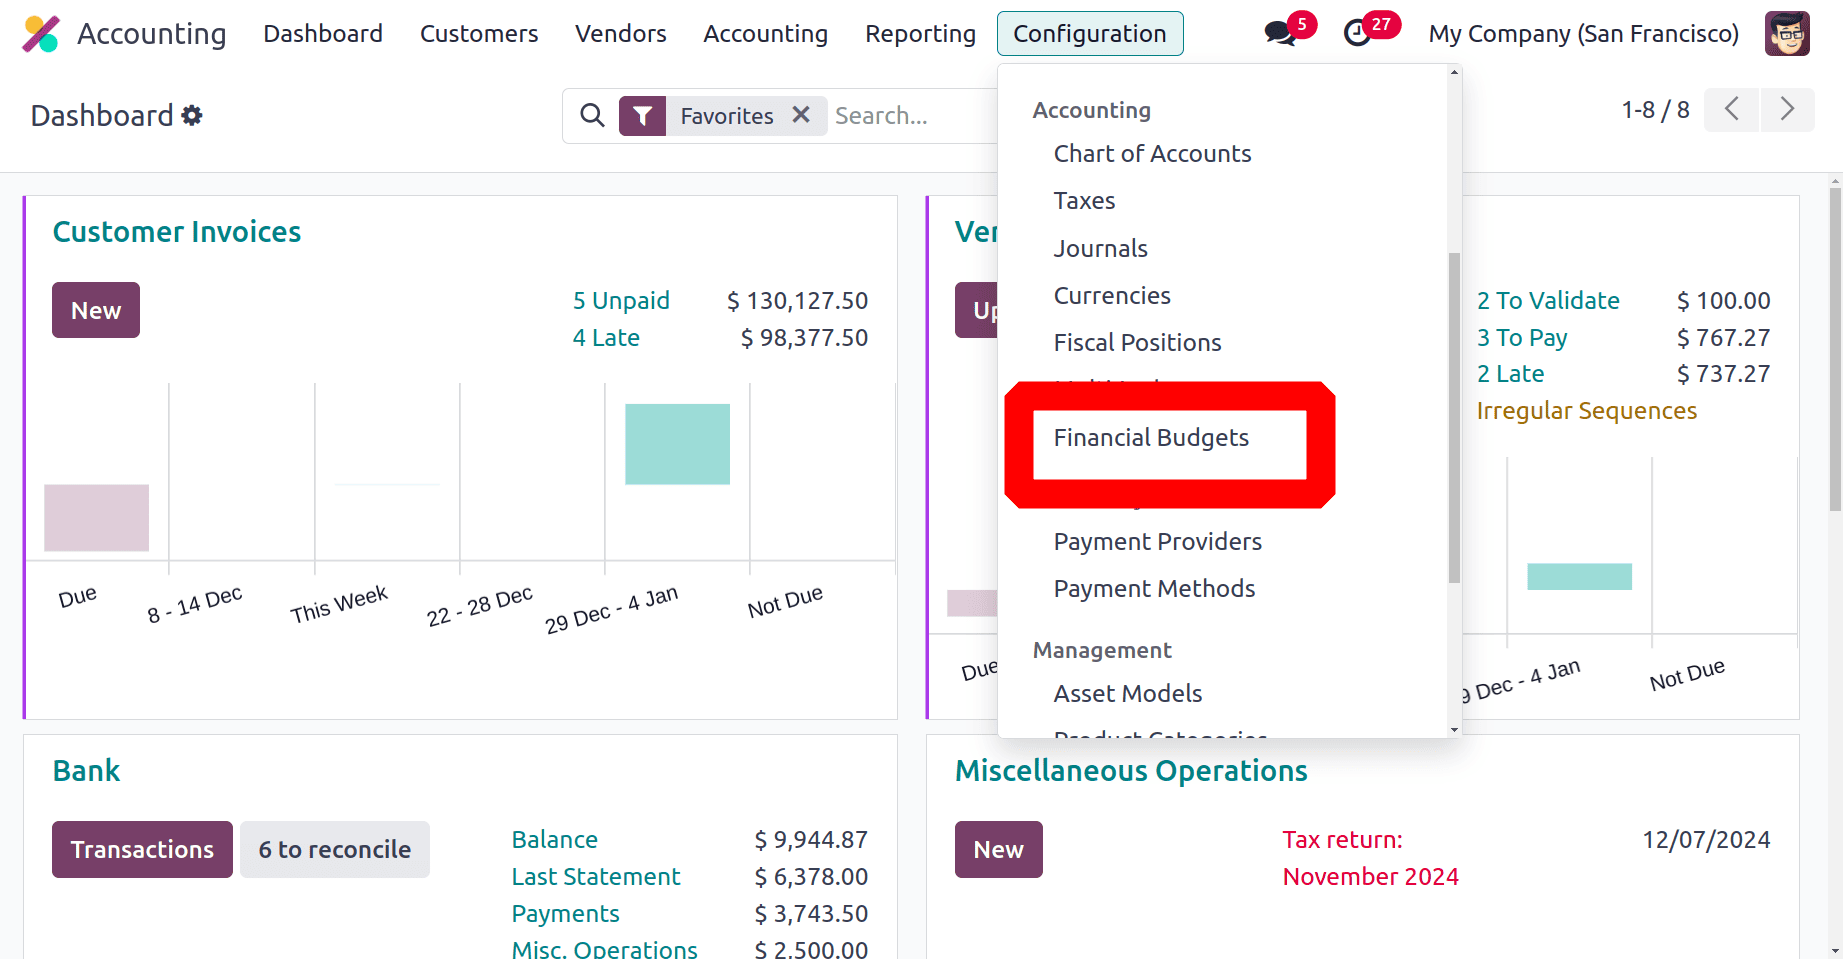
Then the created financial budget is shown as a list. The list contains the budget name and company name. To add a new one, click on the New button.

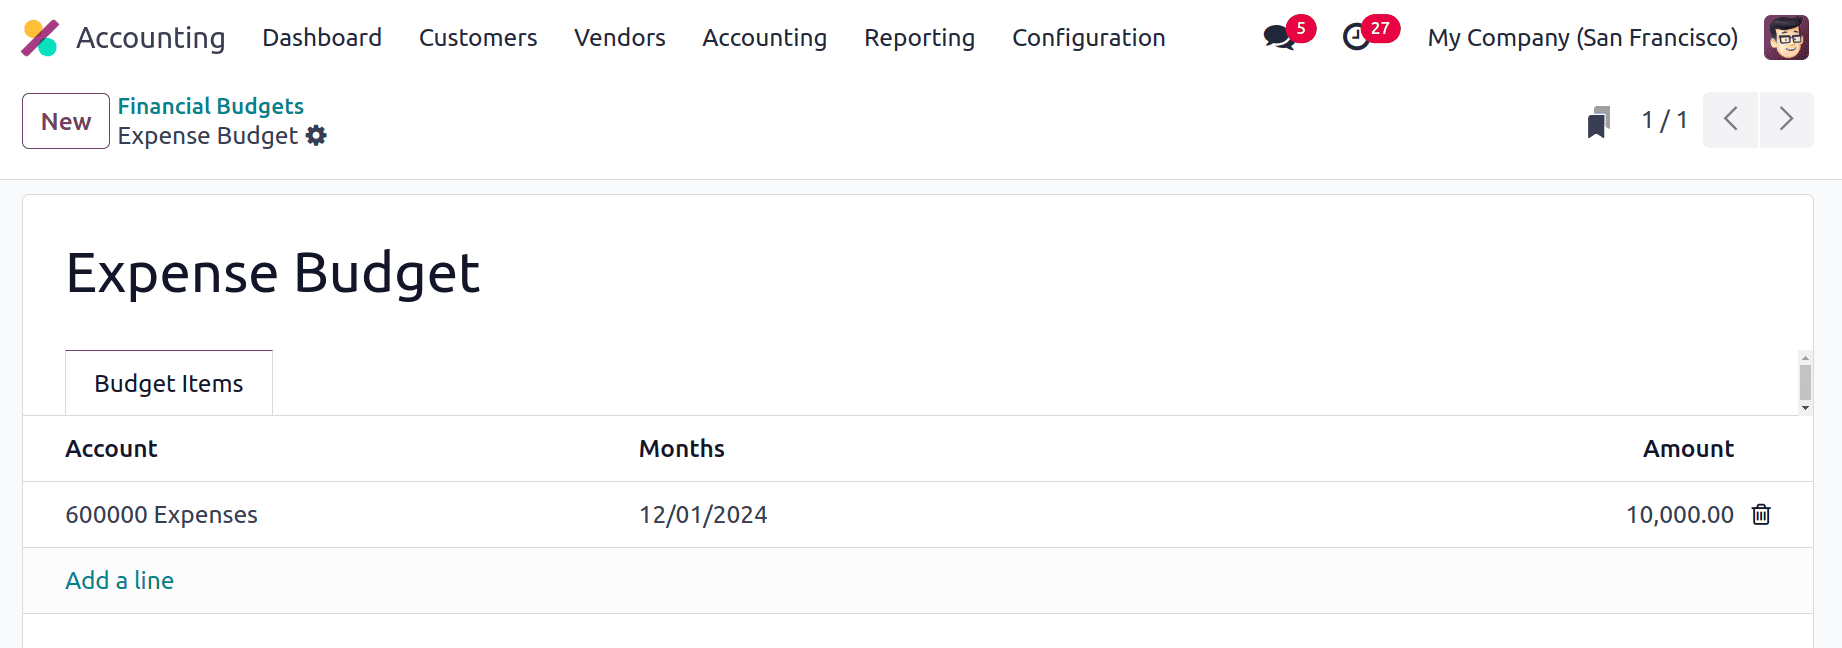
Inside the creation window, add the name of the financial budget and the budget items. Here the budget name is added as Expense Budget. In the Budget Items the Account, Month and Amount are added there.
The Financial Budget is used for comparing the accounting entries in a profit & loss report. So open the Profit & Loss Report. There is new filter named Budget on the upper right corner.
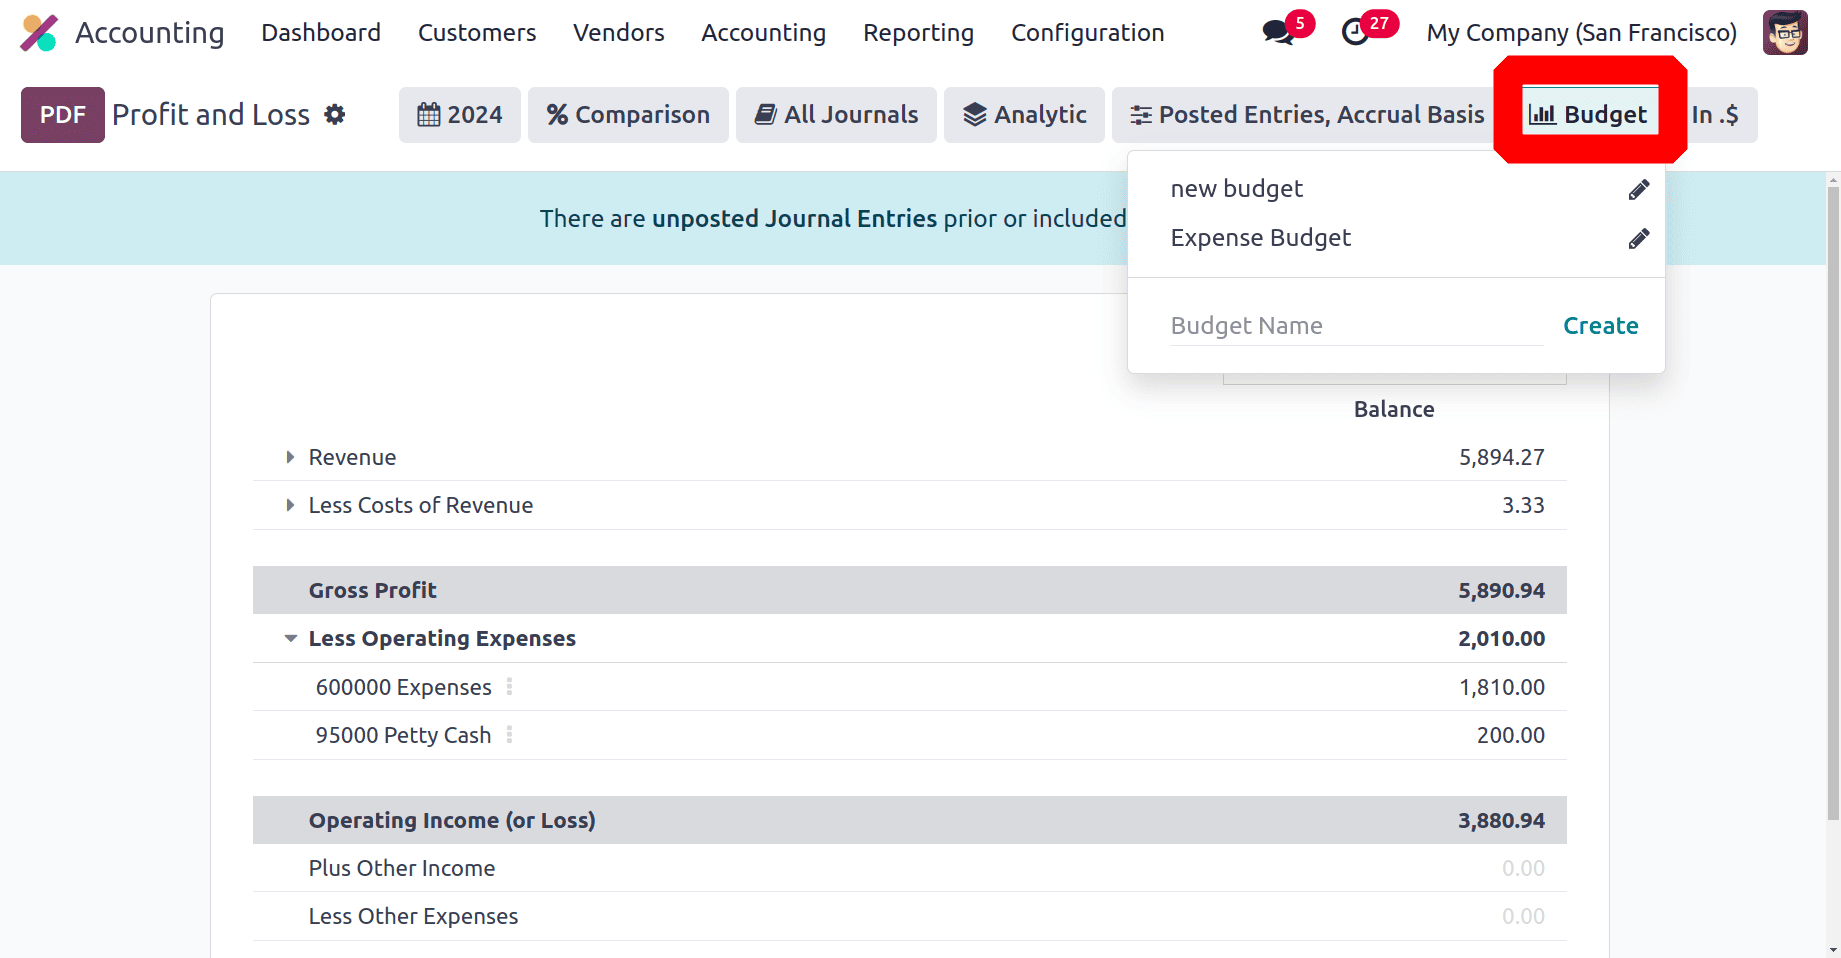
So chose the created budget from there. There, the created budget is also shown. The account balance and the budgeted amounts are shown there as a comparison.
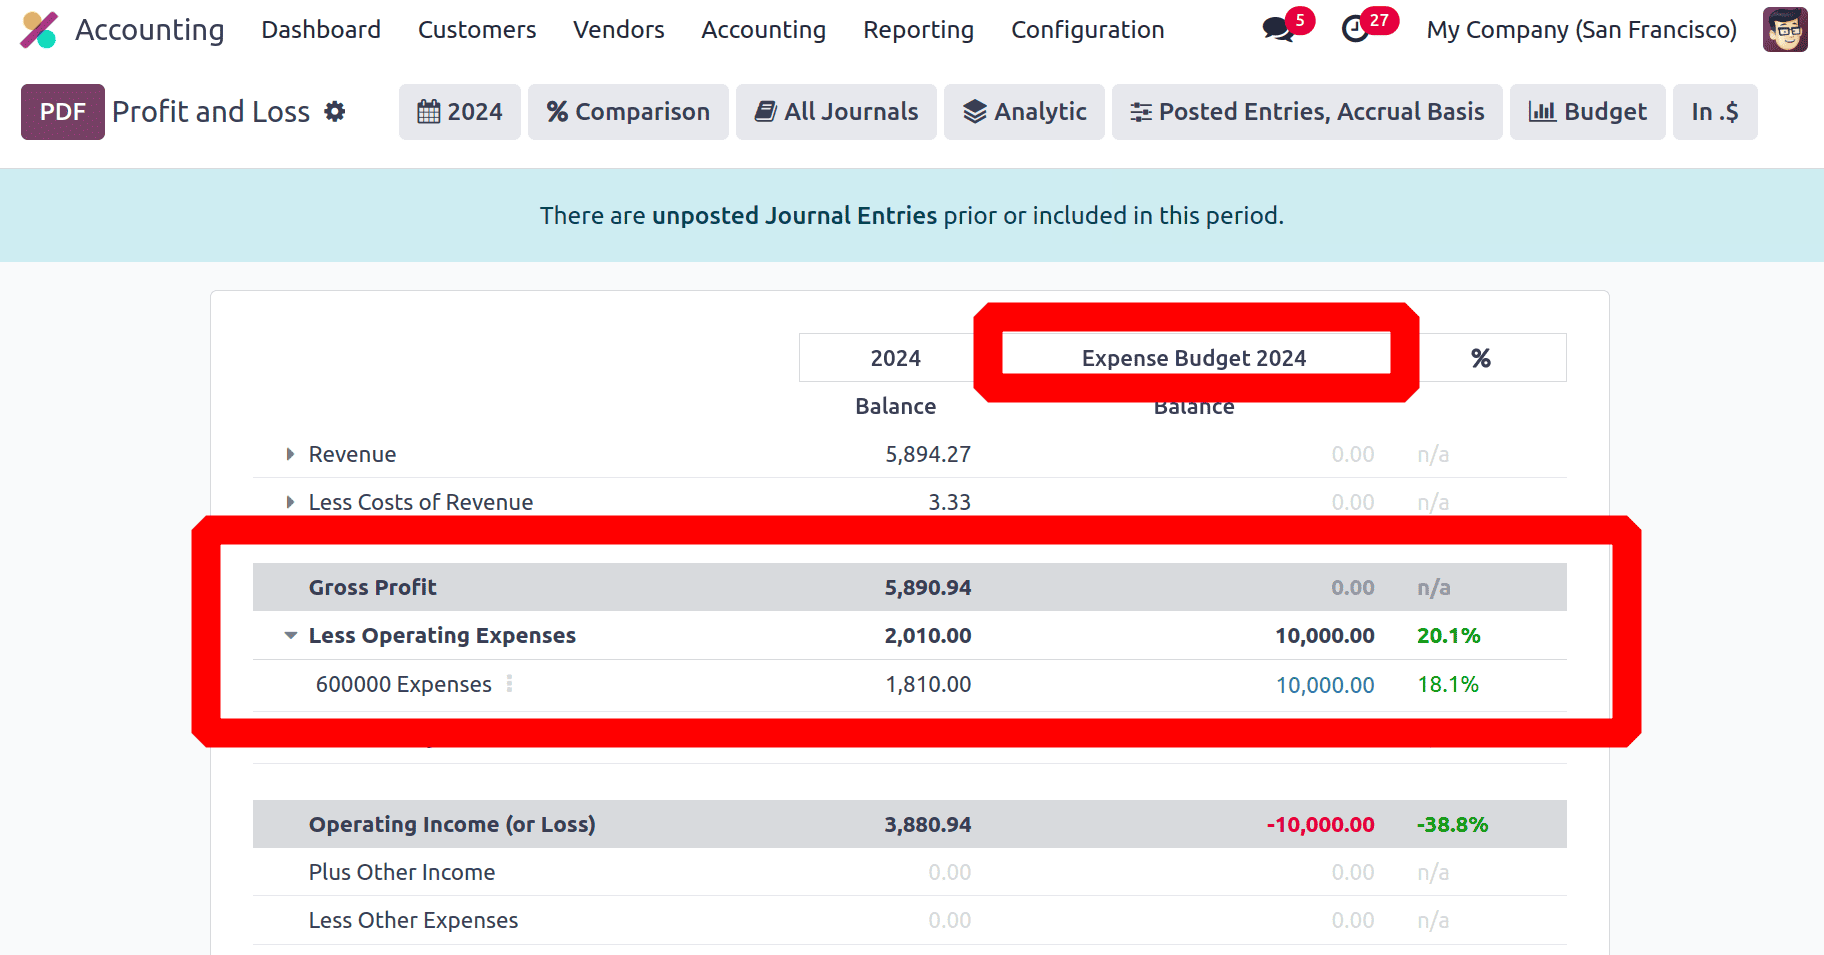
So from the Profit & Loss report using the Financial Budget, the users can easily compare and analyse the account balance with the target value.
By providing real-time insights and automated methods for managing expenses and revenues, Odoo 18's budget management module simplifies financial planning and tracking. Businesses may efficiently make data-driven financial decisions thanks to its strong capabilities and user-friendly layout.
To read more about How to Manage Your Company Budget Using Odoo 17 Accounting, refer to our blog How to Manage Your Company Budget Using Odoo 17 Accounting.