Effective budget management is crucial for the success and sustainability of any company. With the advent of advanced ERP solutions, managing company finances has become more streamlined and efficient. Odoo 17, a comprehensive business management software, offers robust features for accounting and budgeting. The accounting module in Odoo provides a user-friendly interface and a range of tools to handle financial transactions, invoicing, and budgeting seamlessly. Odoo 17 allows you to set up budgets for different departments, projects, or cost centers. Define your budget goals, allocate resources, and establish spending limits. The system enables you to create budgets for specific time periods, providing a clear overview of planned expenditures.
One of the key advantages of using Odoo 17 Accounting is the ability to track expenses in real time. As transactions occur, the system automatically updates your budget, providing instant insights into your financial status. This feature helps you make informed decisions and prevents budget overruns. In this blog, we'll walk you through the step-by-step process of configuring budgets in the Odoo 17 Accounting module to empower your organization with precise financial planning.
To initiate Budget management setup in Odoo, the initial step involves activating it through the Configuration Settings of the Accounting module. Log in to your Odoo 17 instance and access the Accounting module from the main dashboard. Under the Settings menu of the Accounting module, you can find the Budget Management option to activate as demonstrated below.

When you activate the Budget Management option, the Analytic Accounting feature will be automatically activated. Once your Budget Management option is activated, go to the Budgets menu within the Accounting module. This page will show the pre-configured budgets in your database.

You can click on New button to initiate the budget configuration process. As soon as you click on this button, a new configuration window will appear on your screen where you can create a new budget for your company.
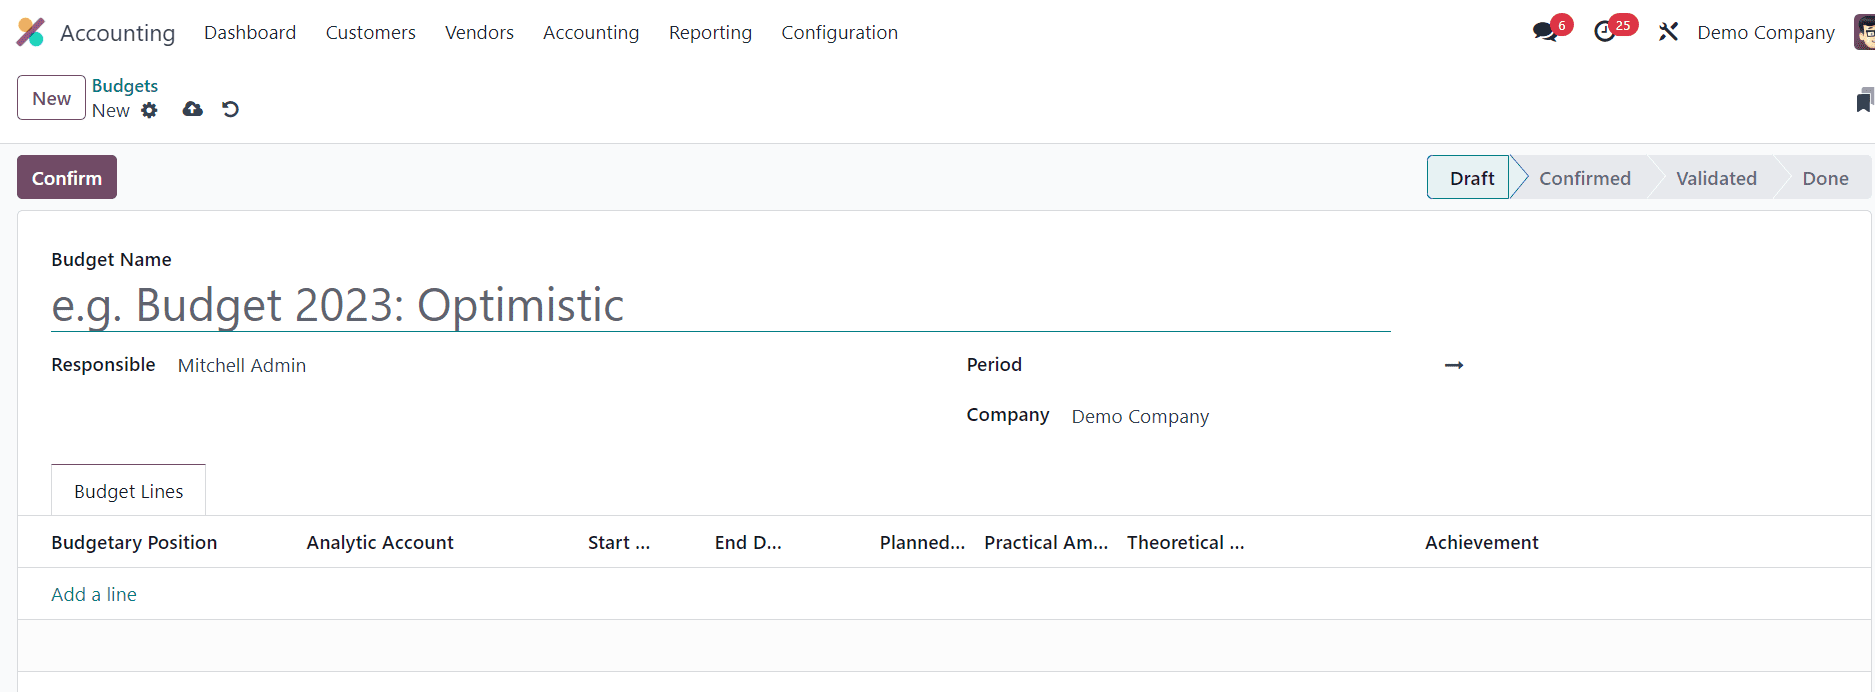
Provide a descriptive name for your budget to easily identify its purpose or the department it relates to. Specify the Period for the budget in the given space. This could be a fiscal year, a specific project duration, or any time frame relevant to your organization. The name of the Responsible and Company can be added in the respective fields.

Use the Add a Line button to add Budgetary Position under the Budget Lines. A compilation of accounts designated for budgetary management constitutes a budgetary position. This encompasses accounts related to both expenses and revenue within the framework of budgetary positions. Allocate budget amounts for each account in the Planned Amount field.
In budgetary management, the Planned Amount signifies the predetermined sum allocated for either expenditure or income. This represents the carefully outlined financial plan that guides spending or earning goals. On the other hand, the Practical Amount reflects the tangible, real figures of expenditures made or income earned. It provides a realistic assessment of financial outcomes as compared to the initial plan.
The Theoretical Amount, in contrast, pertains to the projected financial figures, offering an expectation of what should be earned or spent. The Achievement metric serves to clarify whether the actual budget rate surpasses or falls short of the predetermined financial plan, providing a clear performance indicator. Additionally, the system displays Journal Entries, offering a comprehensive view of all related transactions tied to the respective budget, facilitating thorough financial analysis and tracking.
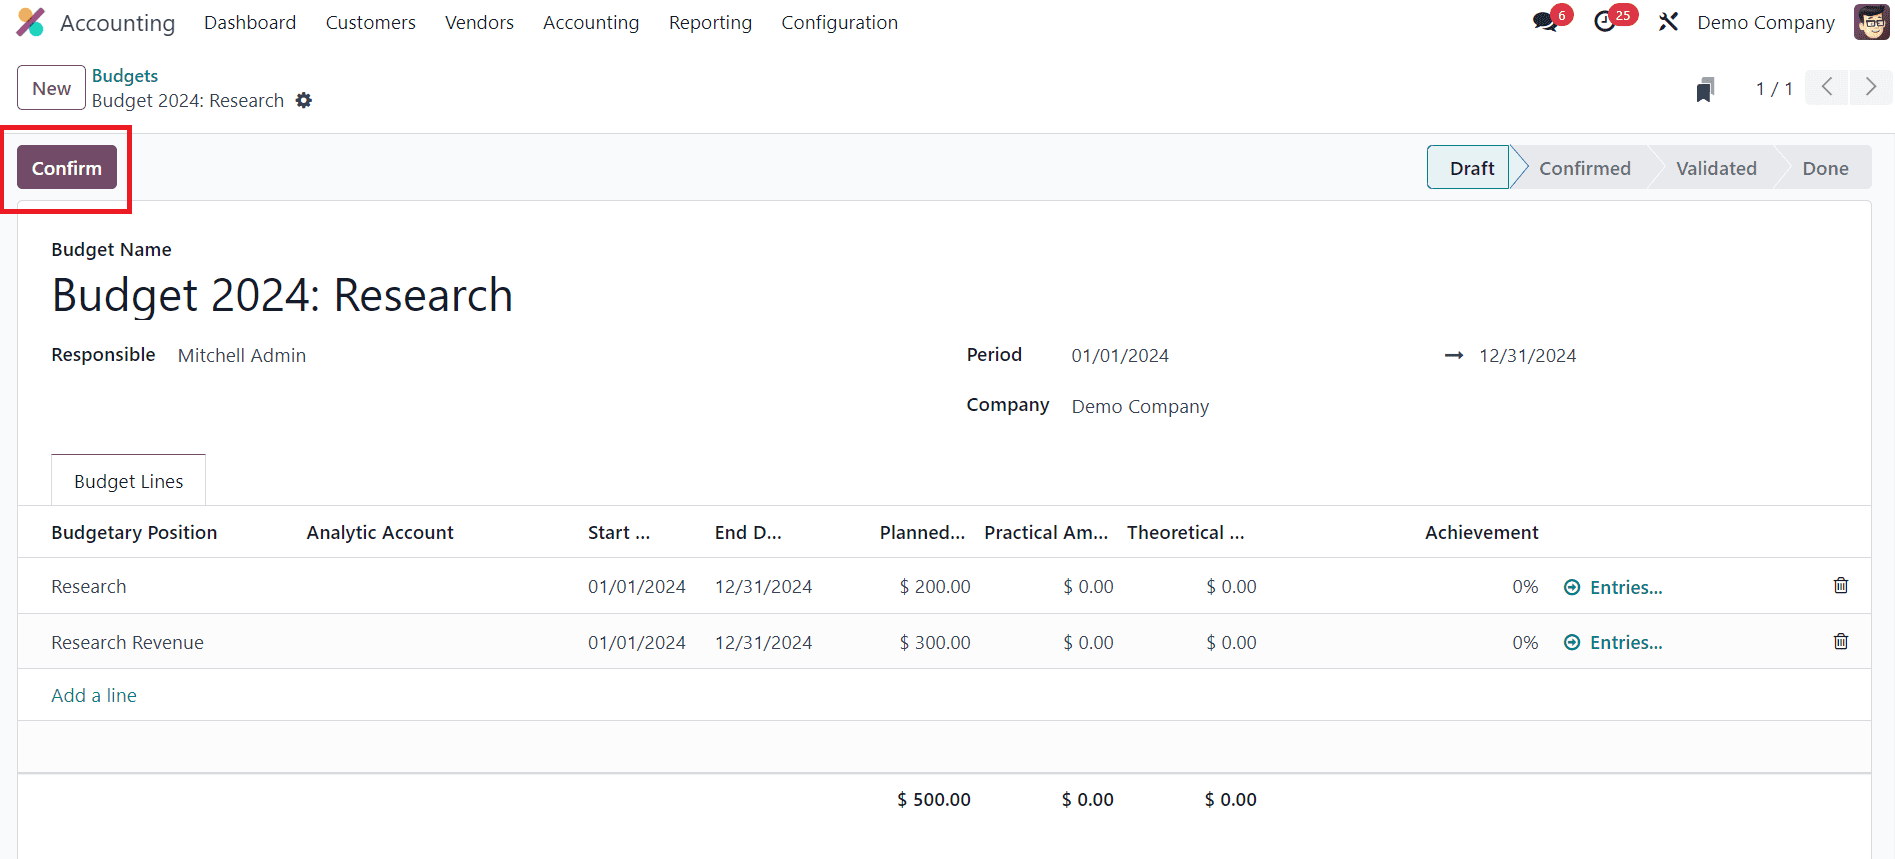
Once you have configured the budget details, save your budget. To activate the budget, click on the Confirm button. This step ensures that the budget is ready for use and enforcement.
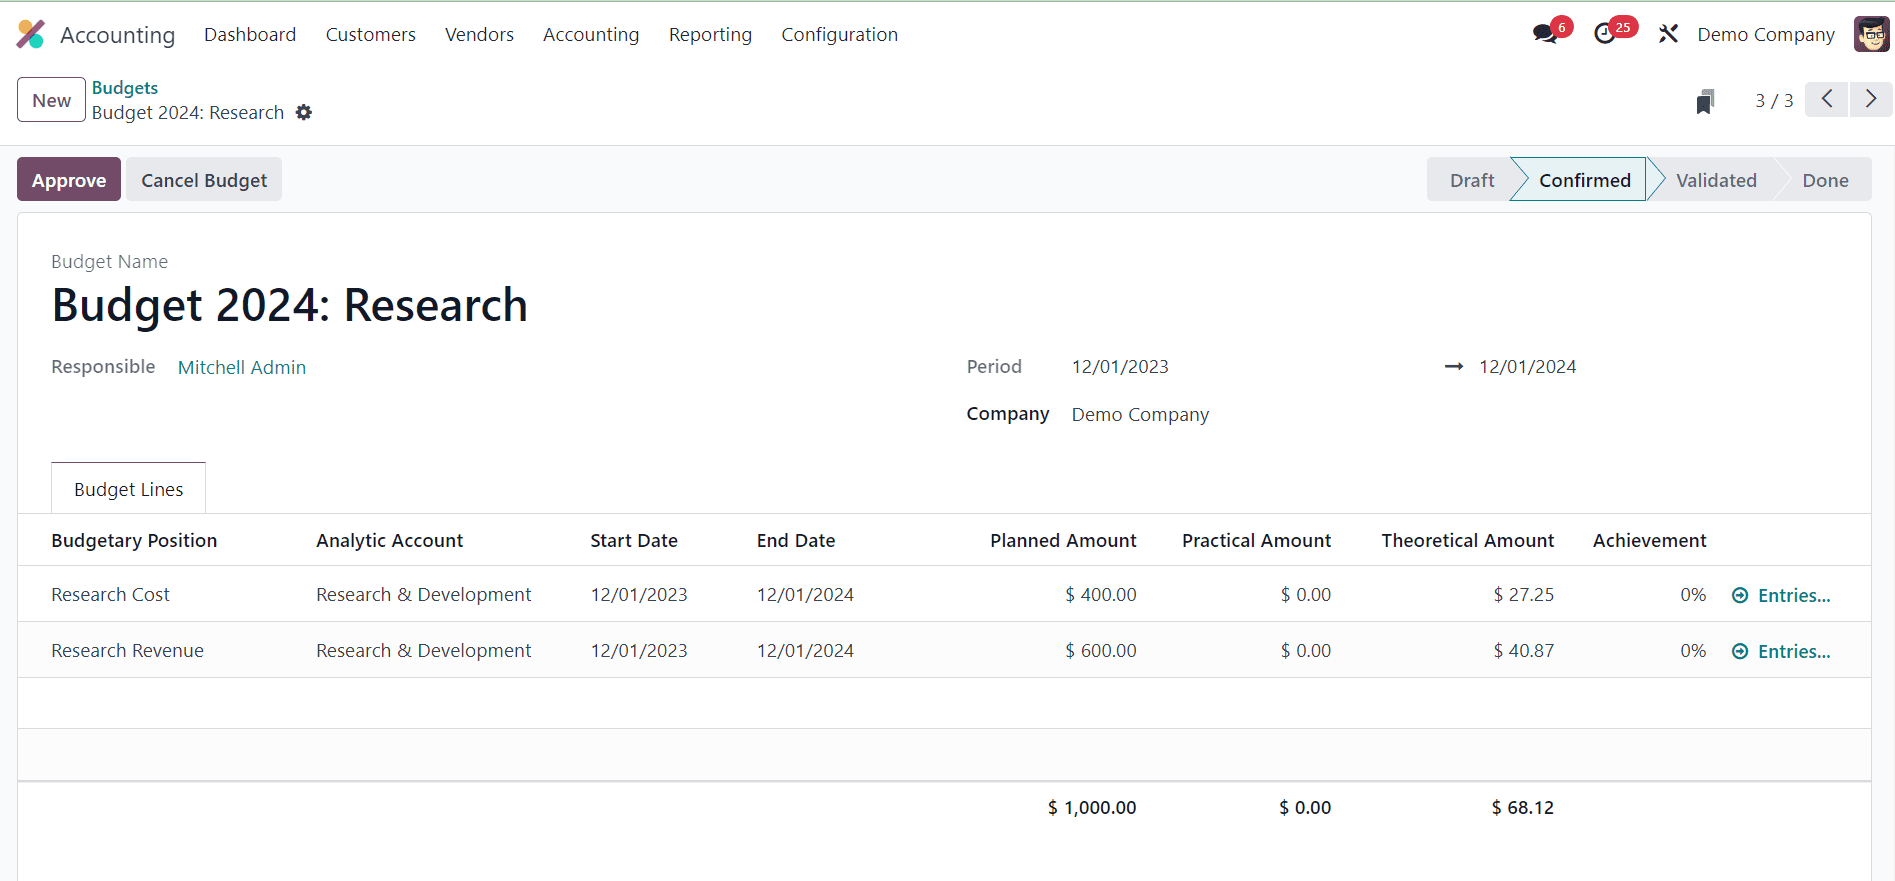
To compute the budget, you can create an operational entry linked to the configured accounts within the budgets. Here, we are creating a new customer invoice. Let’s check how this will reflect on the newly created budget.
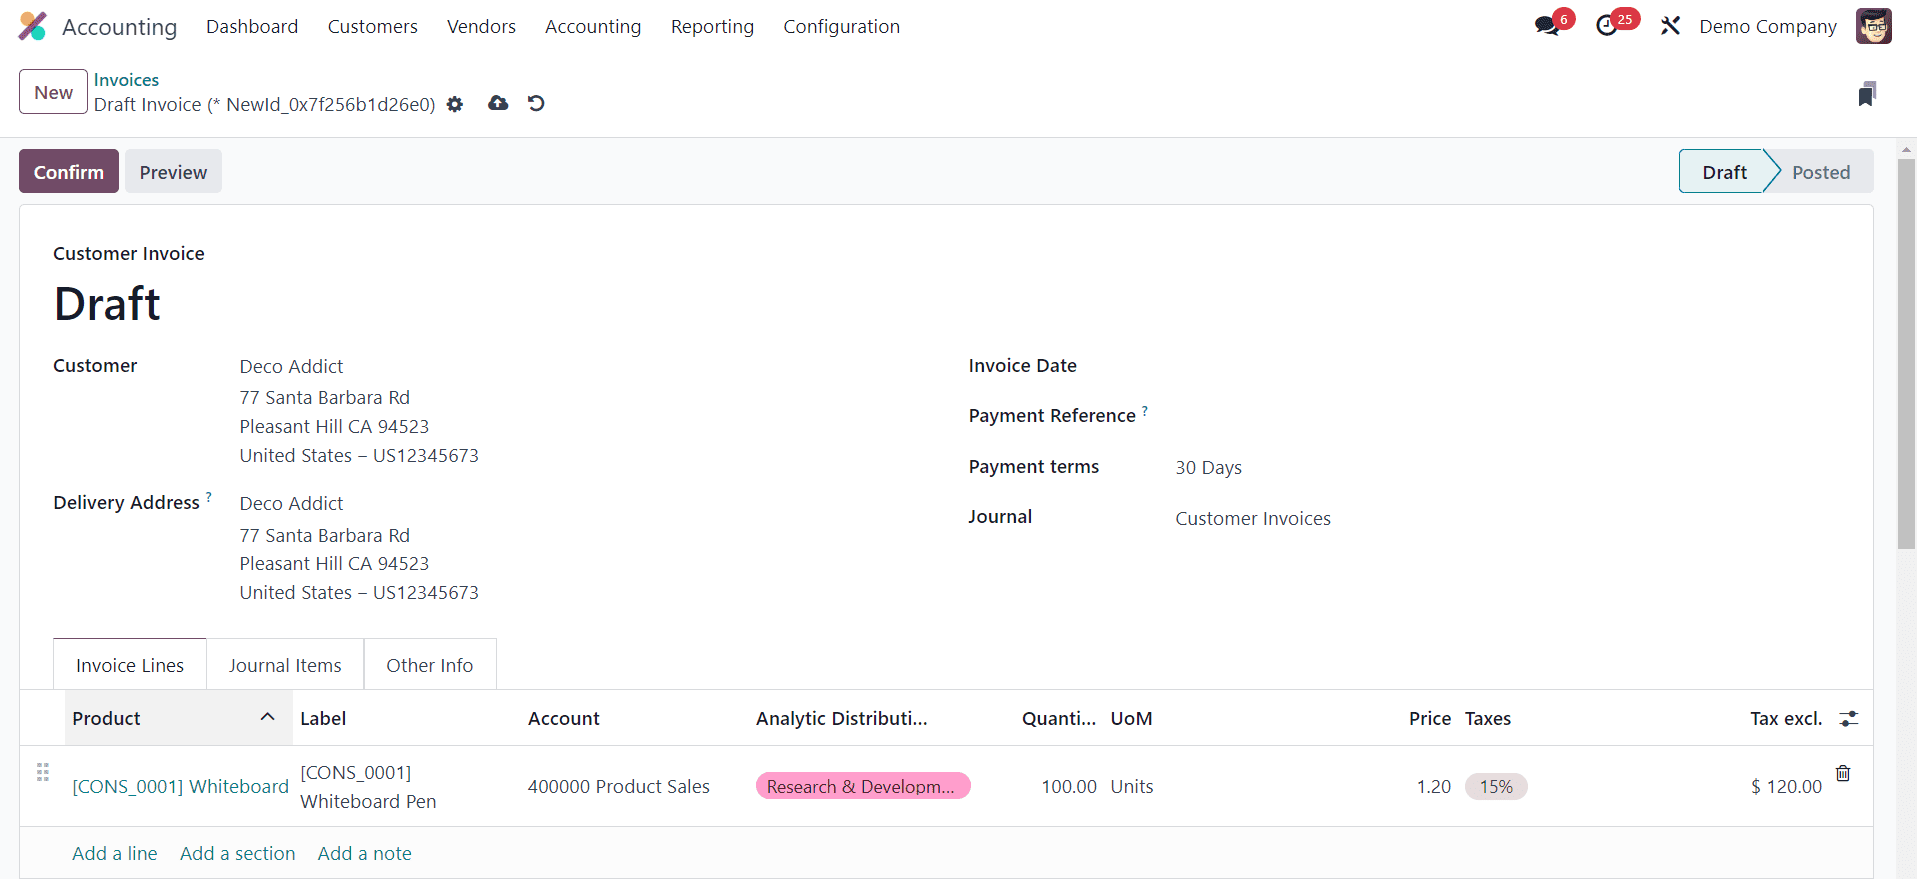
Upon confirmation of this invoice, the invoiced amount must be reflected in the practical amount of the budget. Consequently, this update is mirrored in the achievement metric and journal entries as well.
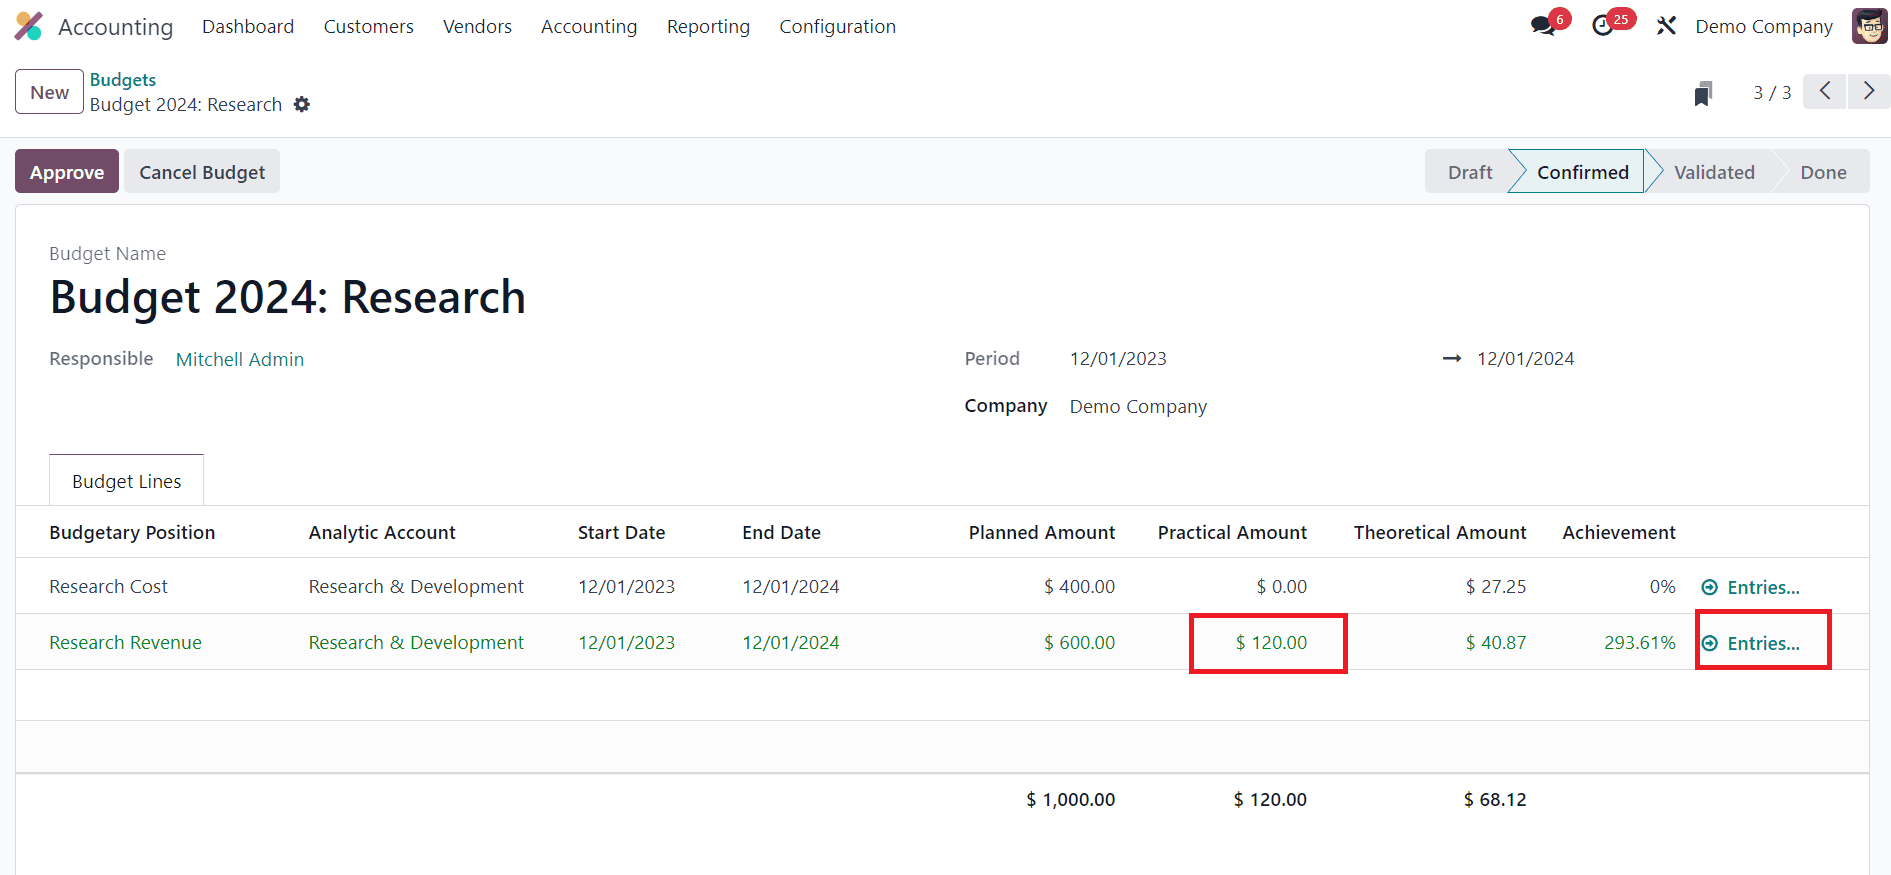
As you can see, the invoiced amount is reflected in the Practical Amount. To see the corresonding journal entry, you can click on the Entries button.

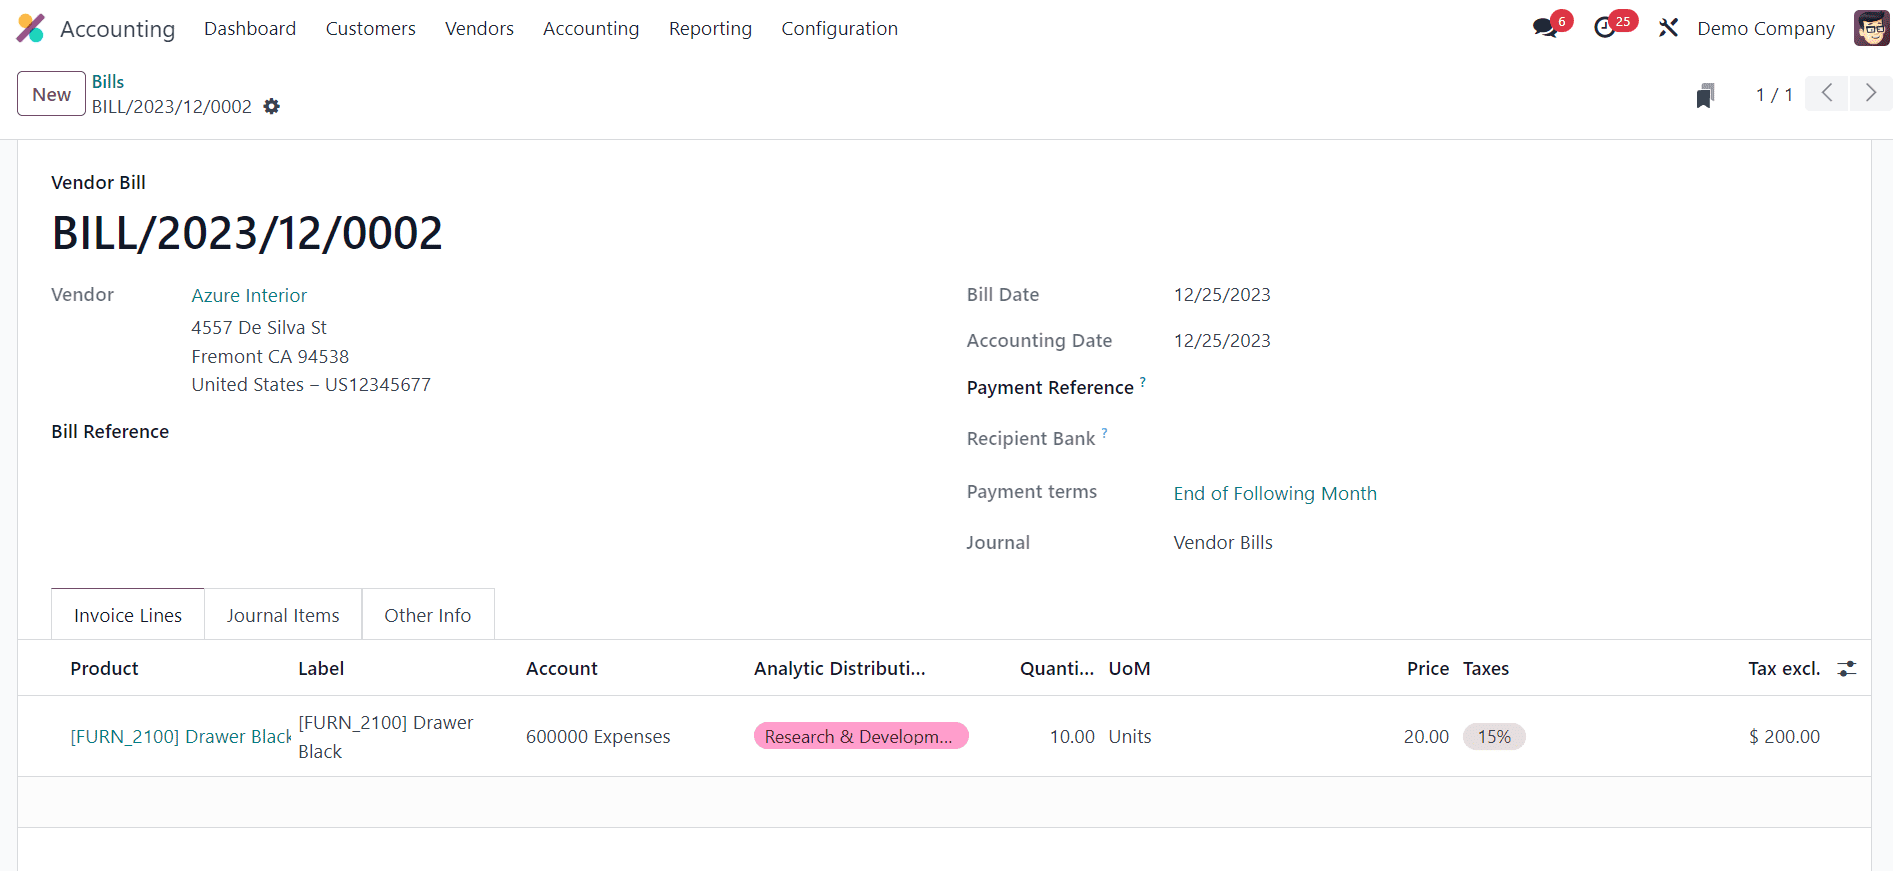
Similarly, When generating a vendor bill, the corresponding reflection should be visible in the cost line section.
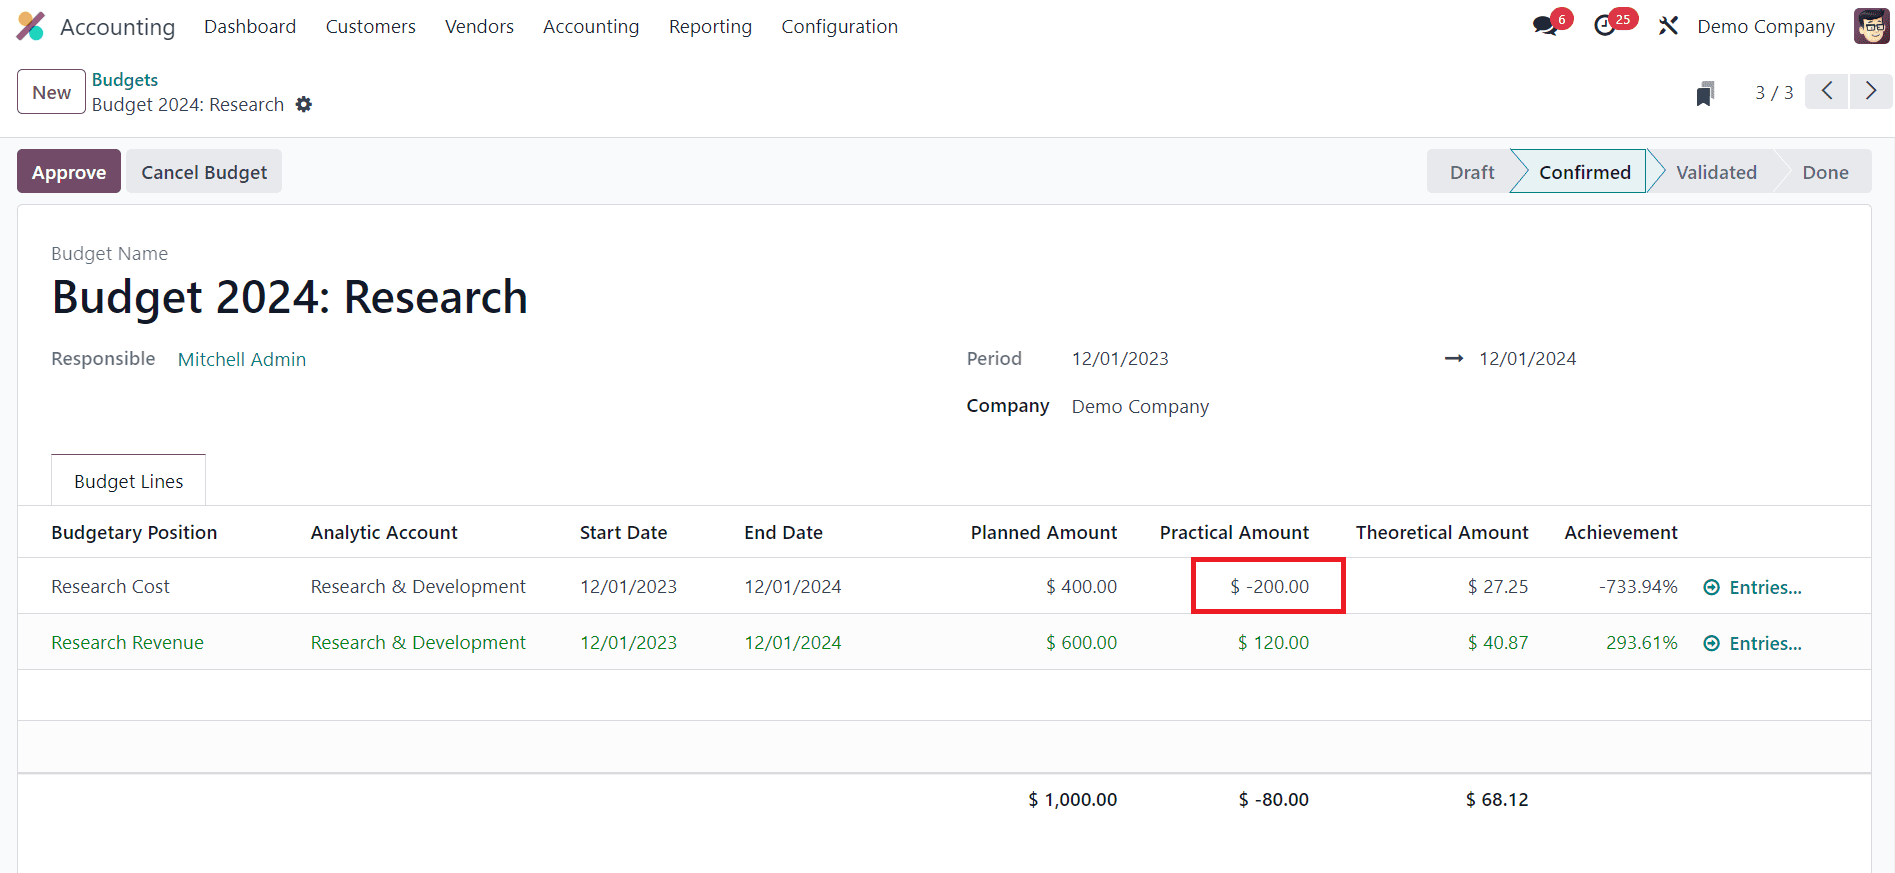
As you can see in the image above, the Practical Amount is updated as a negative amount.

When you click on the Entries, you can see all journal entries related to the particular budget account line. By following these steps, you can easily manage budget in Odoo 17 Accounting.
Regularly monitor your budget's performance by accessing the Budget Analysis option from the Reporting menu. Utilize the reporting tools provided by Odoo 17 to generate budget vs. actual reports.

Analyze these reports to make informed decisions and adjustments to your financial plans. This report presents a comprehensive overview of all budgets, offering summarized data for a comparative analysis of budgeted amounts against actual expenses and revenue activities within a specified period.

To enhance user convenience and streamline data retrieval, the report provides various grouping and filtering options. These tools empower users to efficiently locate specific information, mitigating potential complexities associated with budget data or other factors that may contribute to confusion in business management.
Effective budget management is a cornerstone of financial success for any company. By leveraging the features of Odoo 17 Accounting, you can streamline your financial processes, track expenses in real time, and make informed decisions that contribute to the overall success and growth of your organization. Embrace the power of Odoo 17 to take your company's budget management to new heights.