Users must inspect products at every stage of usage to guarantee their quality. Therefore, the Quality Module in Odoo 17 offers an ideal platform for doing such quality inspections. With its primary goal of preserving product quality across all activities, the quality module is a crucial component of business operations. It provides all the tools needed to carry out various quality checks, monitor quality control properly, and coordinate flawless problem-solving operations.
Points of Quality Control
The stages where an item needs to be verified are achieved with the use of quality control points. It's easy to find ways to assess a product's quality. To obtain these requirements, select the Control Points option under the Quality Control tab.
Control Points > Quality Control > New

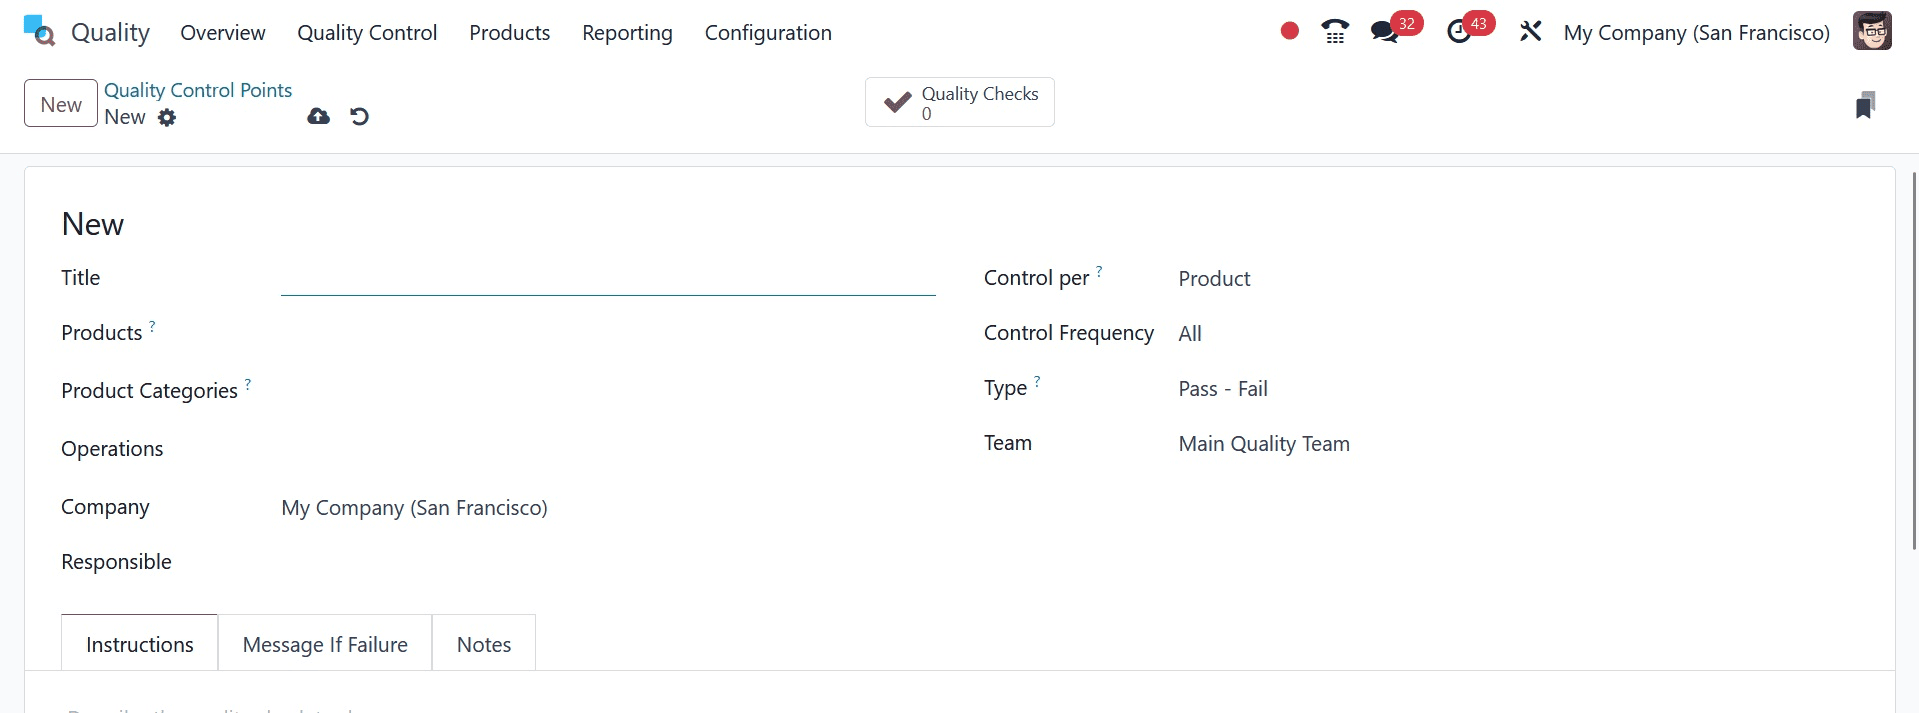
From there, quality control points can be established. Give the quality control point a title. It is possible to add quality checks for activities, product categories, and goods. Add the name of the business, the responsible individual, the quality team, etc.
The Quality Check Instructions can be added under the Instructions tab. A notification may appear if the quality check is unsuccessful. The Message Failure tab is where you can add this message. The Notes tab now has more notes added to it.
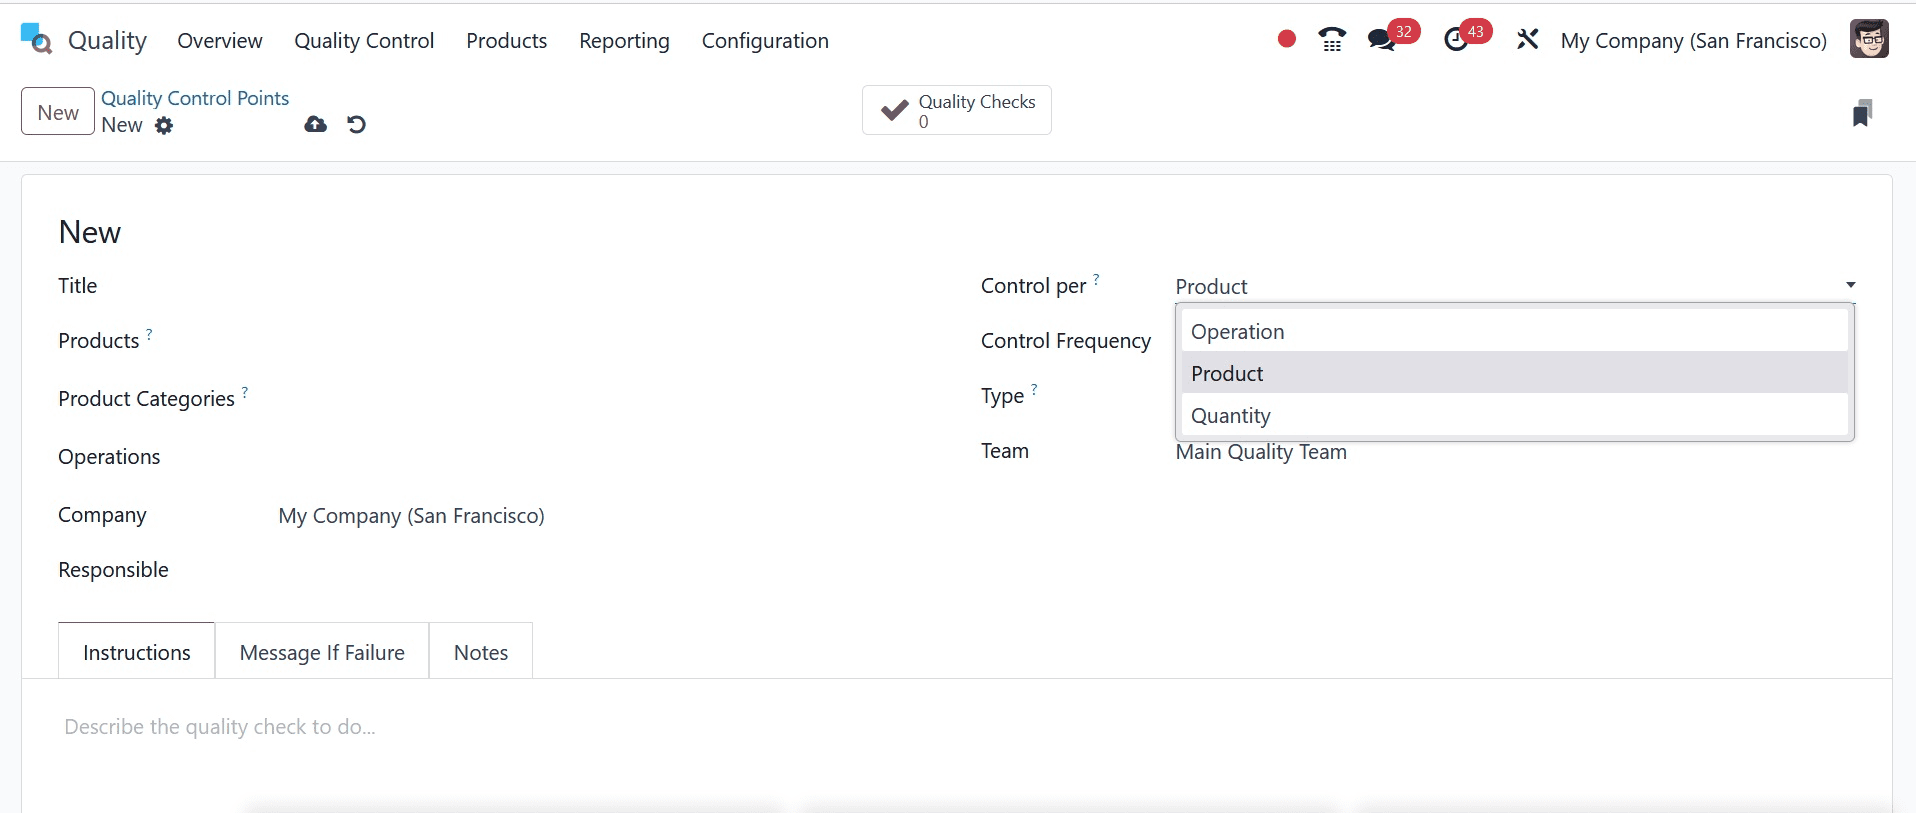
There is control over quantity, operation, and product. The quality check is asked for at the operation level if we select an operation. Selecting the product is the first step in the quality control process. If the quantity is chosen, a quality check is asked for every new quantity that is recorded; partial quality checks are also an option. Later, let's examine each one independently.
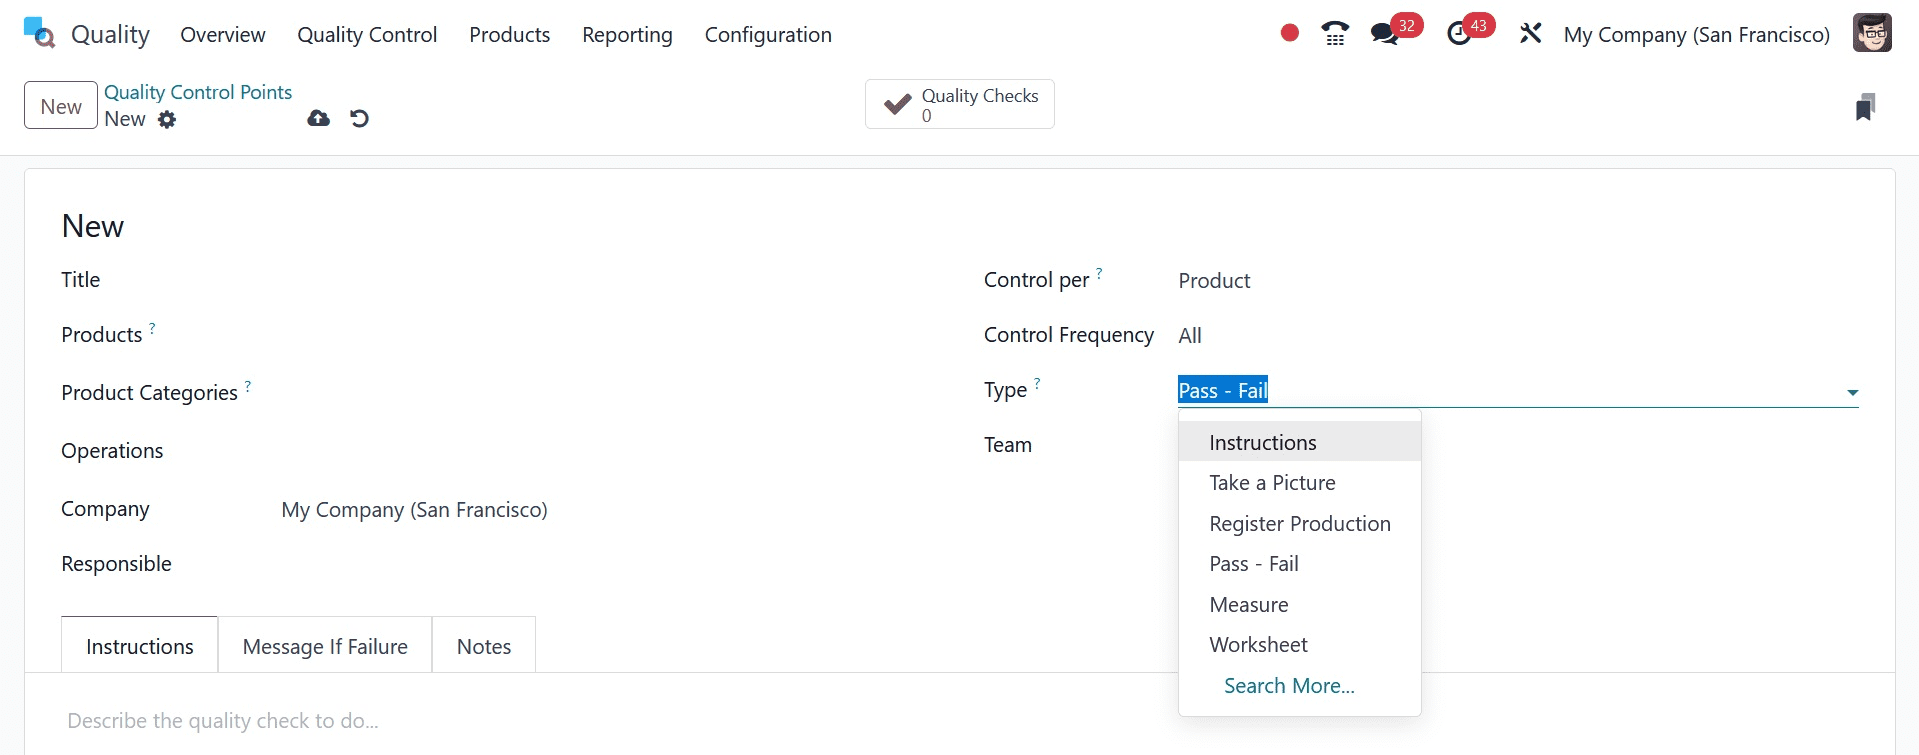
Depending on the product type, several quality tests can be carried out.
Control by Operation: Each operation undergoes a quality check. Thus, regardless of the product, quality checks will be carried out each time the selected operation is carried out.
Thus, a control point was formed. Operation is controlled, according to. As a result, the Operation field mentions the operation Return. "Take a Picture" is the type of quality check.
The kind of quality control is Take a picture, meaning that if a customer returns an item, the user will need to include a picture to verify the returned item's quality. Since no product is listed, it applies to all products used by the business for the "Returns" process.
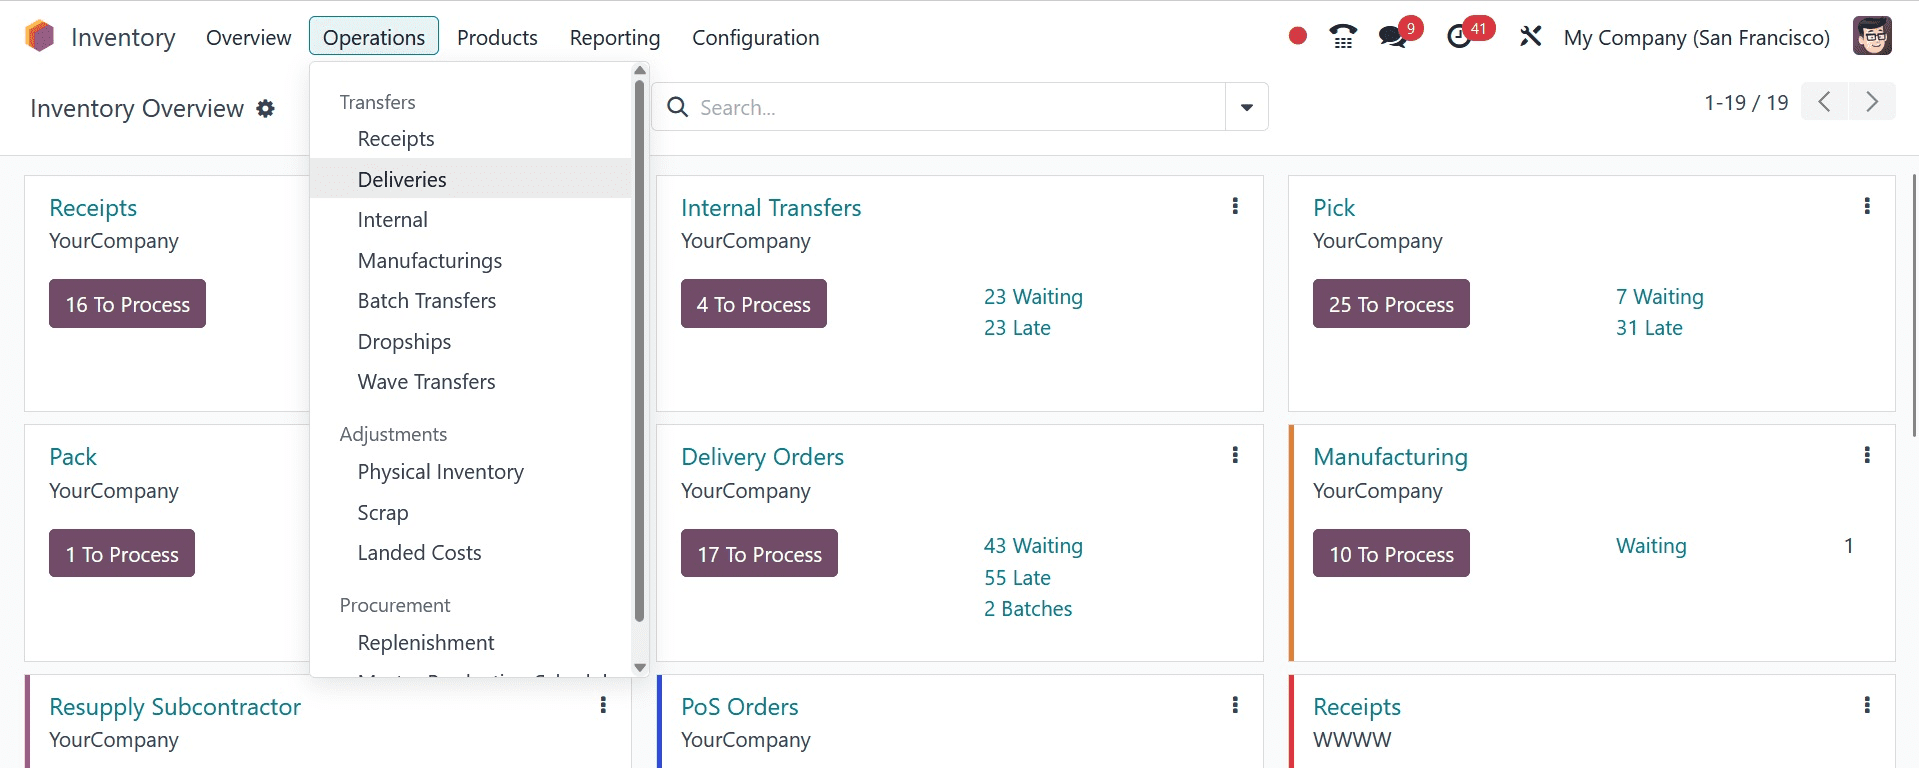
Let us now construct a Return operation. Using the Odoo 17 Inventory module makes it very simple. Click the Transfer option after selecting the inventory module from the Operations menu.
Transfer under Inventory > Operations
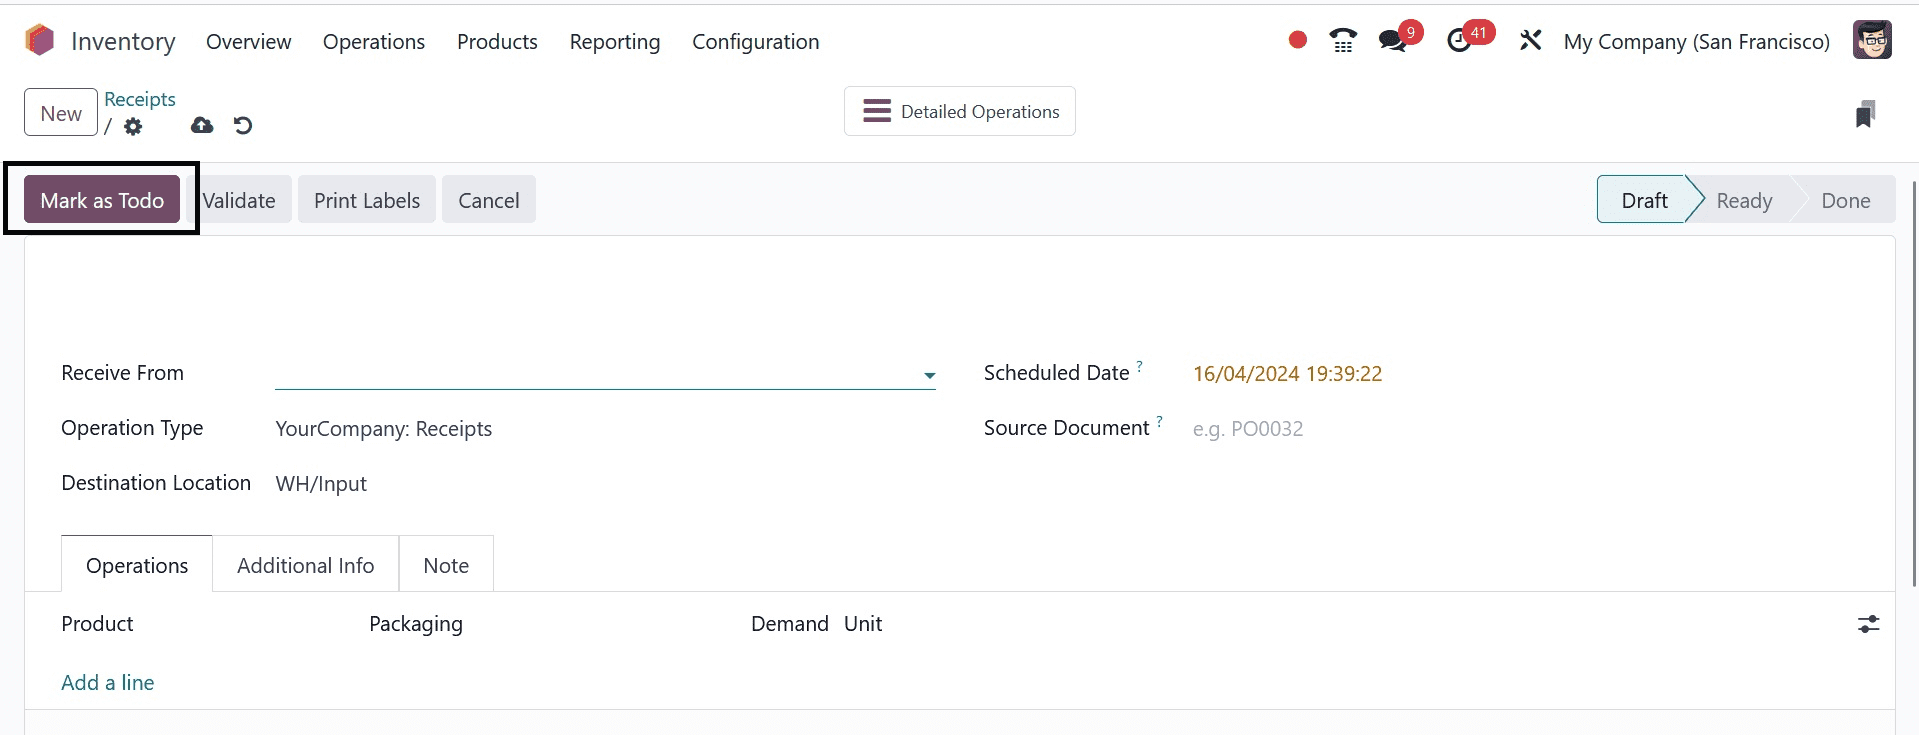
Next, press the NEW button. The generated transfer said that Anita Oliver, the client, would like to return the single-quantity product labeled "Toy." The goods are transferred to the company's warehouse. To initiate the transfer, select MARK AS TODO.
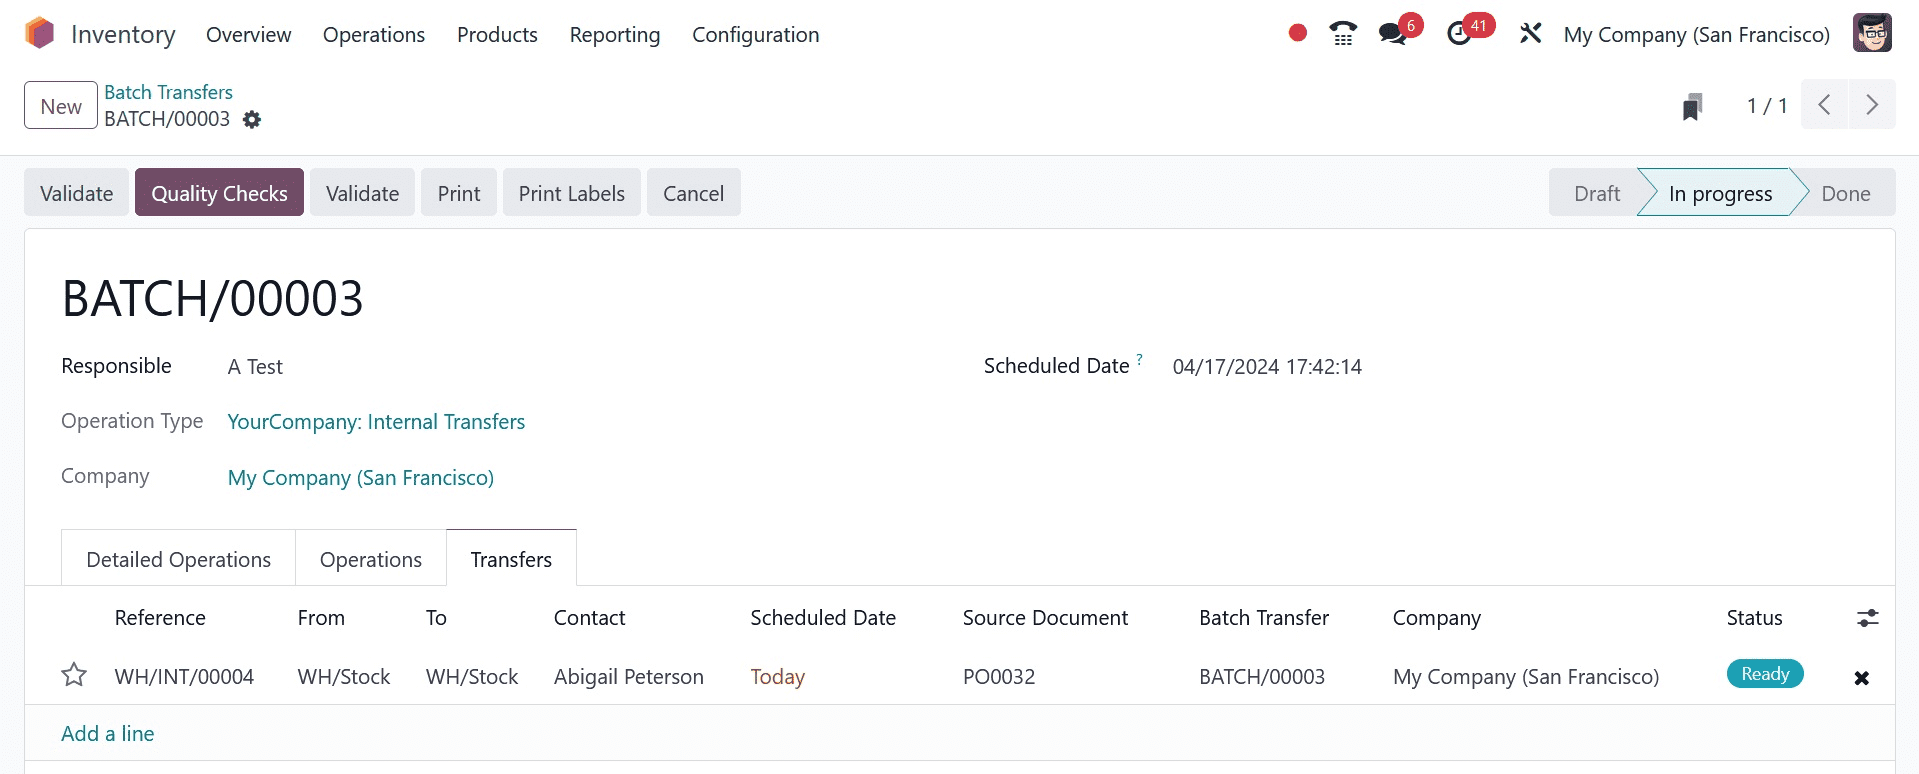
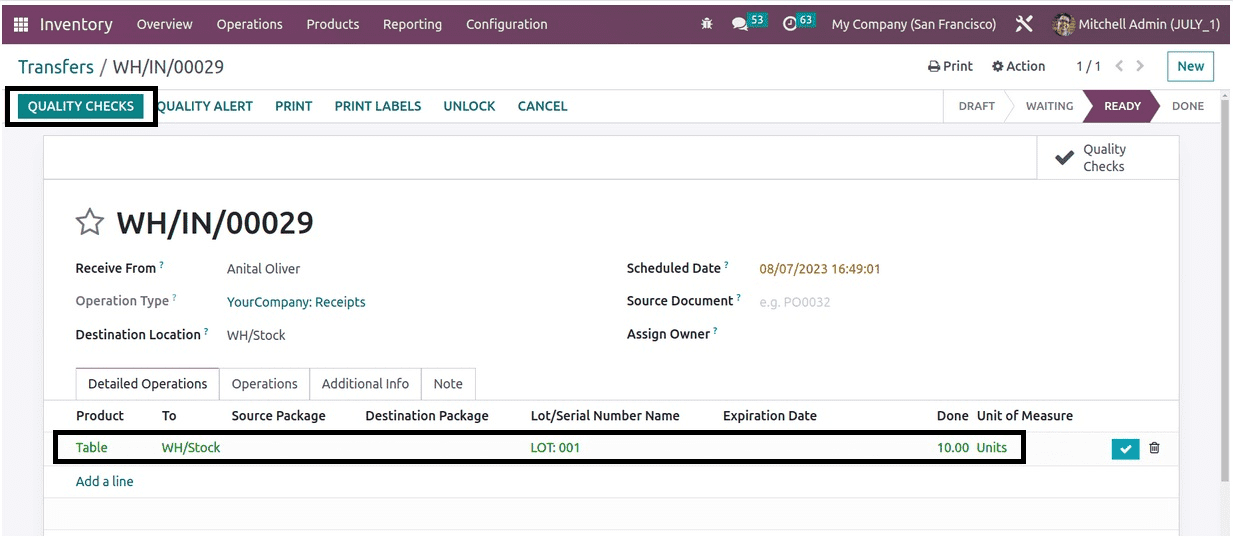
There will be a button to inspect the quality of returned merchandise. Thus, to do the quality check, click the QUALITY CHECKS button. The user cannot refill the product at the stock location until the quality check is finished.
The quality check is done via the popup window. The user can upload a photo of the product by selecting the Add a photo quality checking type. Upload the photo there, then.
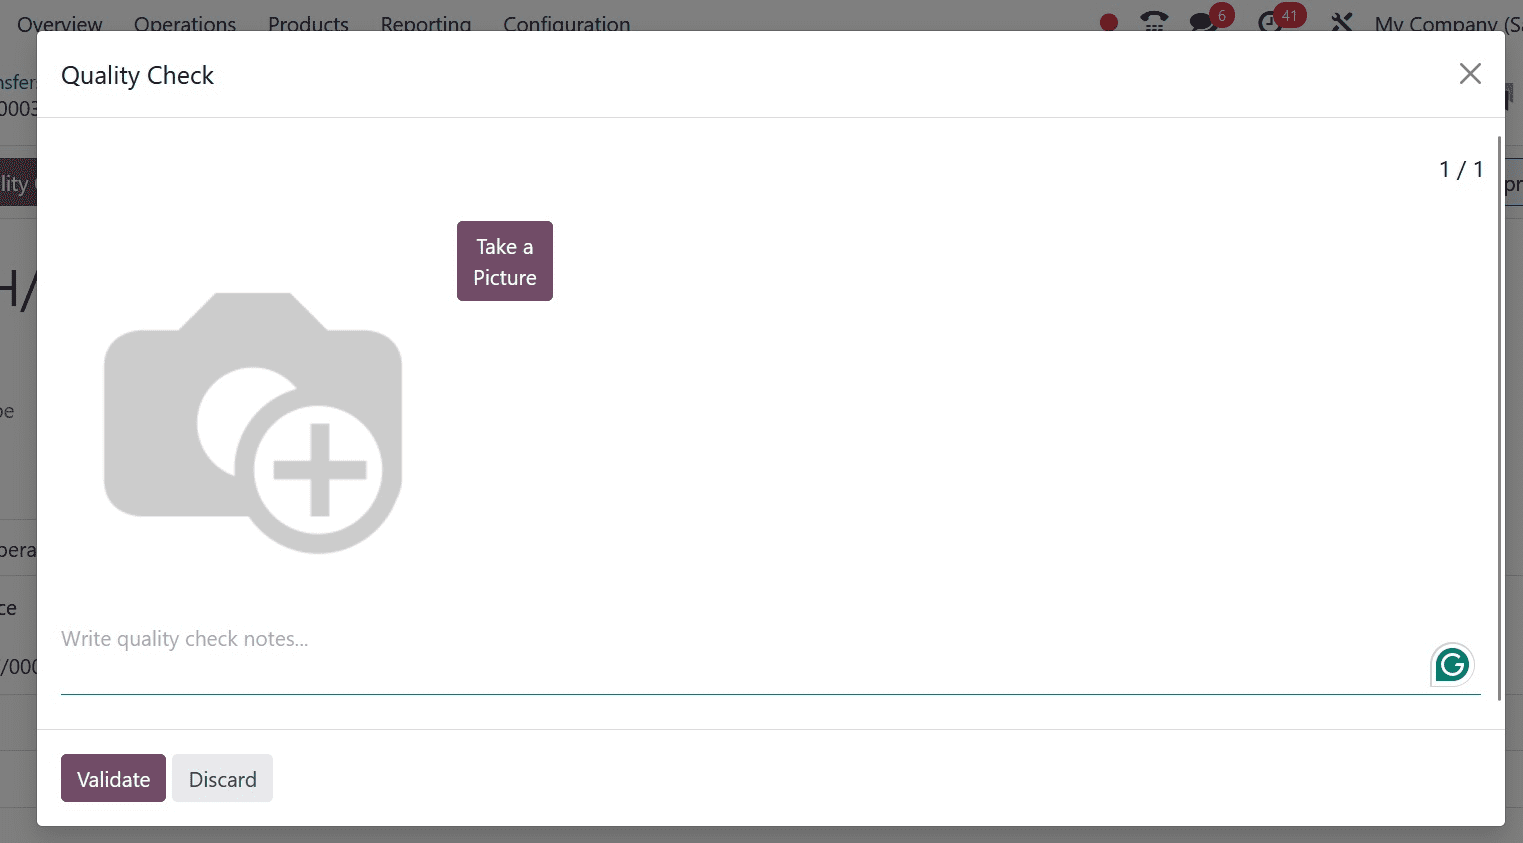
Click the Validate button to finish the quality check after inserting the picture. There, you can also include any other notes.
The results of quality control indicate that the product is flawless. for the user to verify the procedure. There is a green-colored smart tab called Quality Checks; this signifies that the quality check was successful.
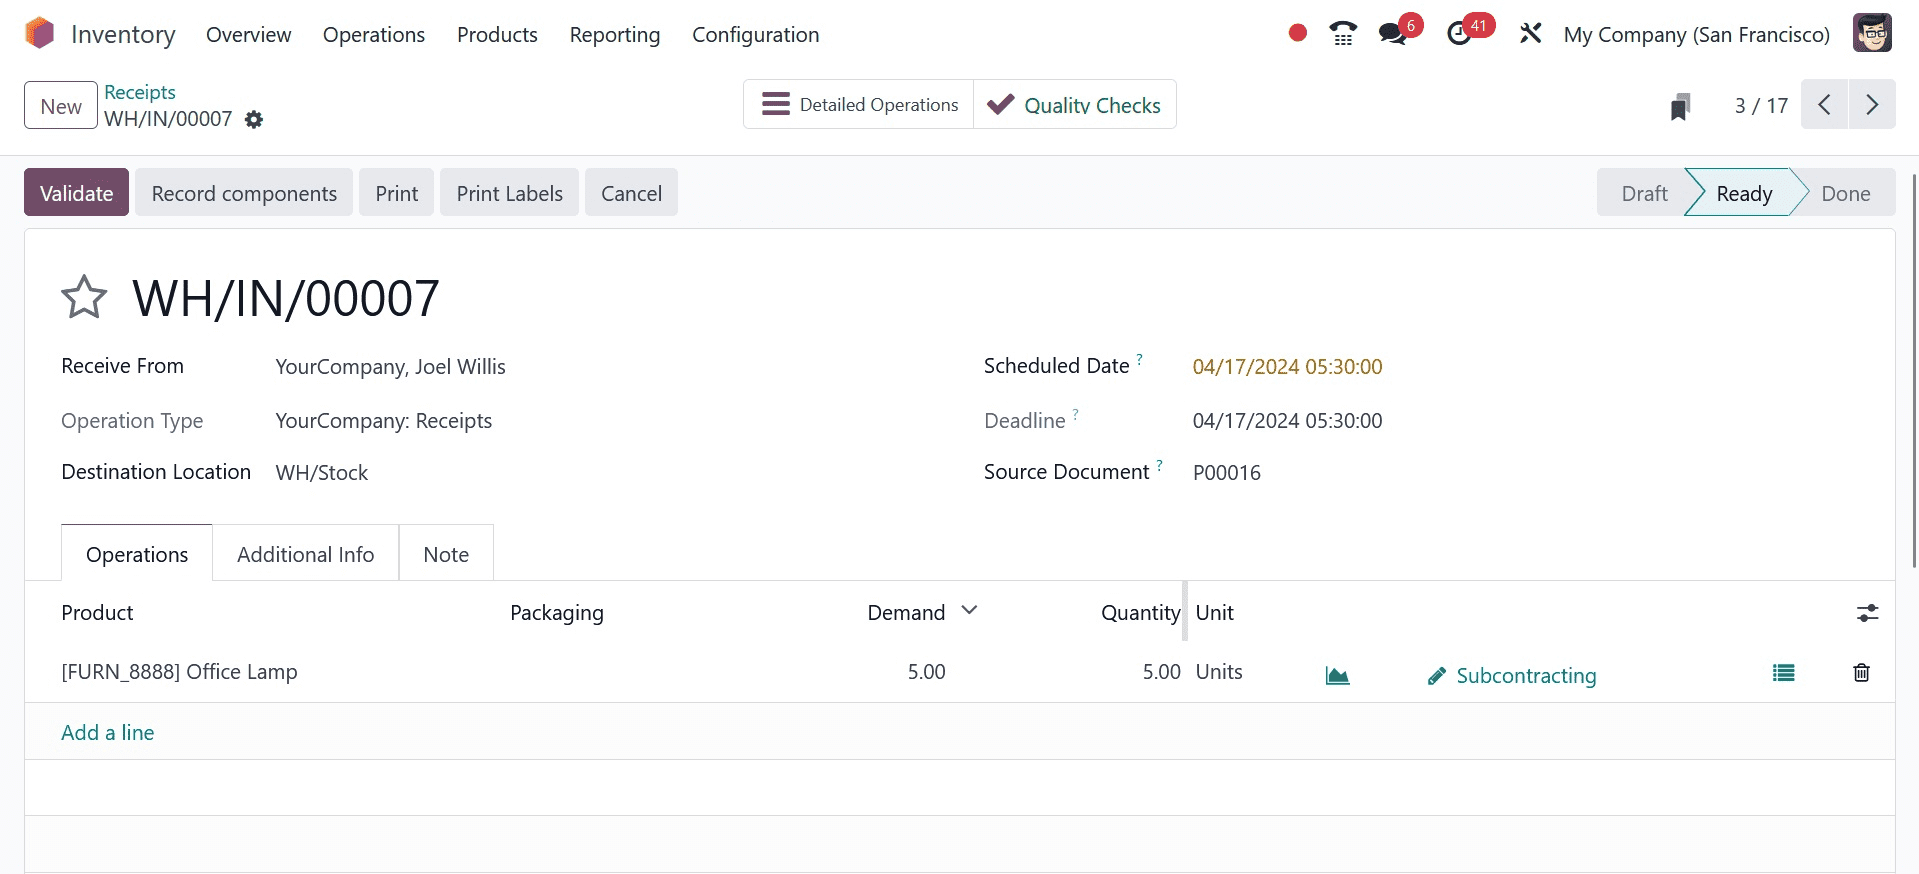
The user must verify these quality checks if a consumer returns any goods to the business. Since the quality check is performed on each Return Operation, the control point is based on the Operation.
Control Per Product: In this instance, the product is the subject of quality inspections. This indicates that we have discussed a process and a product here. For that reason, in order to finish the operation on the specified product, a quality check is required.
For the product Acoustic Bloc Screen, a new quality control point was established here. The product name was selected in the section and the title was added, "Quality Control Point on Acoustic Bloc Screen." The internal transfer operation was selected. This implies that an internal transfer for the Acoustic Bloc Screen product will only be made from the source location to the destination following the conclusion of each product's quality checks.
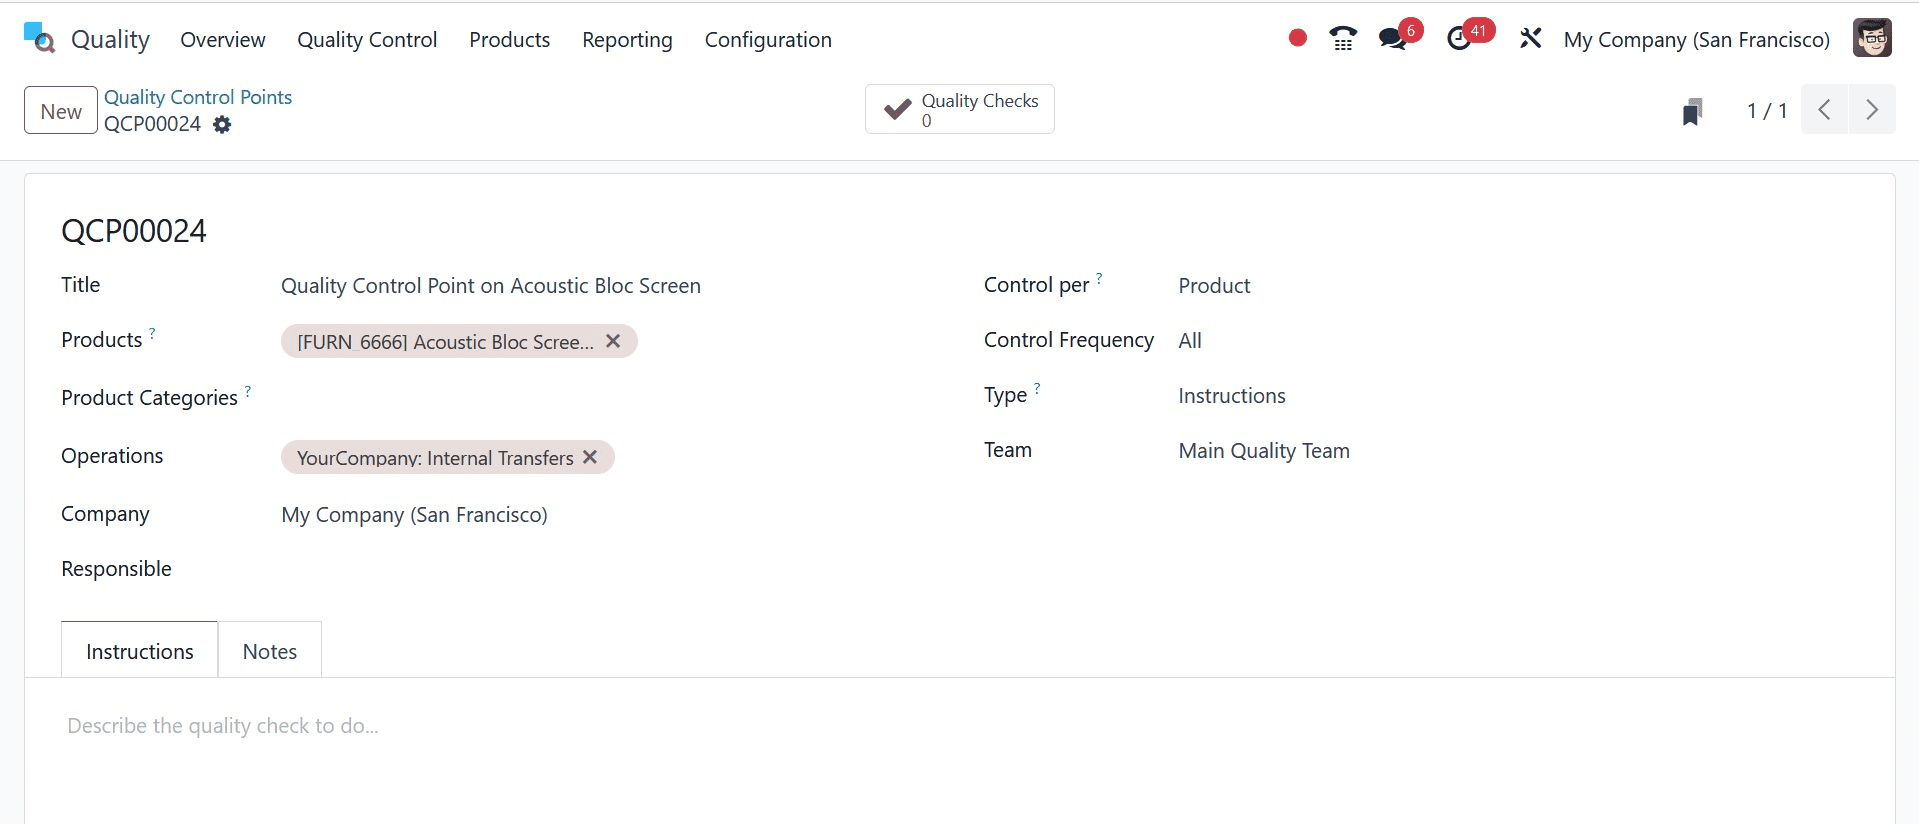
This section discusses control frequency "All" and control per product. The instructions can be added on the Instructions tab since the quality type that was selected is Instruction. Keep the control point safe.
Make a fresh internal transfer just for that product. Proceed to the inventory module and select the Operations tab's Transfers option.
Transfers > Operations > NEW
An internal transfer is made in this situation. The product desires to go from Shelf 1 to the Stock location. Internal transfer is the type of operation, then. There are two additional Acoustic Bloc panels added to the Operations tab. Click the MARK AS TO DO button to complete the process.
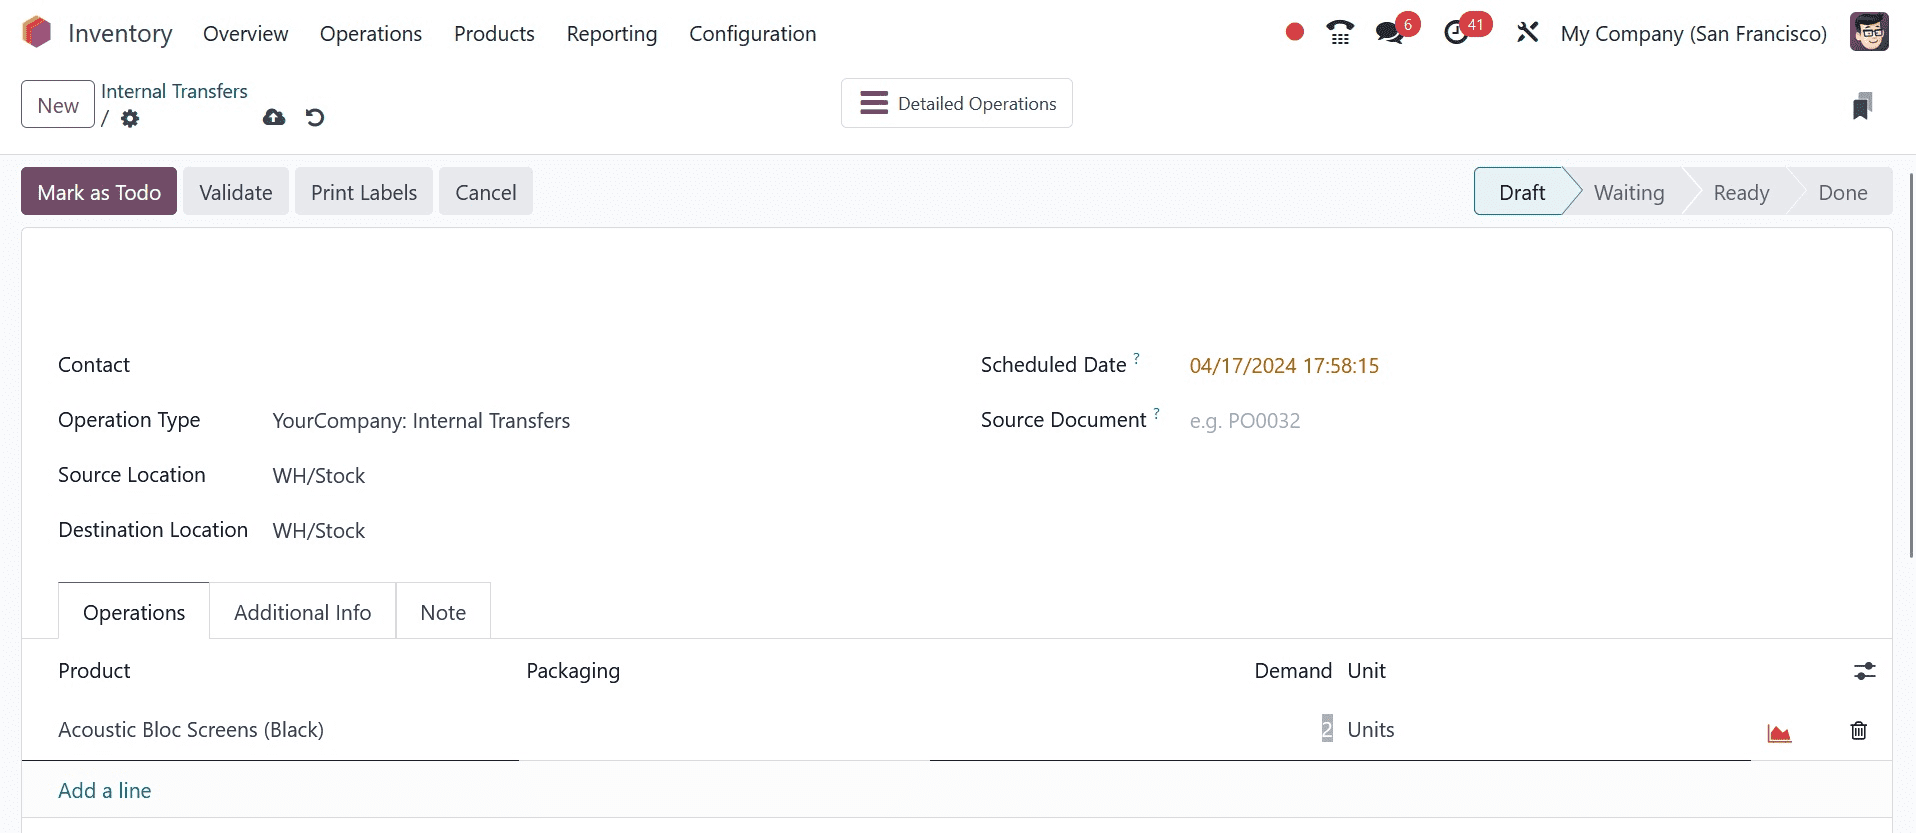
The movement from the Draft stage to the Ready stage is now instantaneous. Here, the waiting phase is omitted because the required amount of product is in stock at the stock location. There will be a new button there called QUALITY CHECKS. We added a control point, which is why.
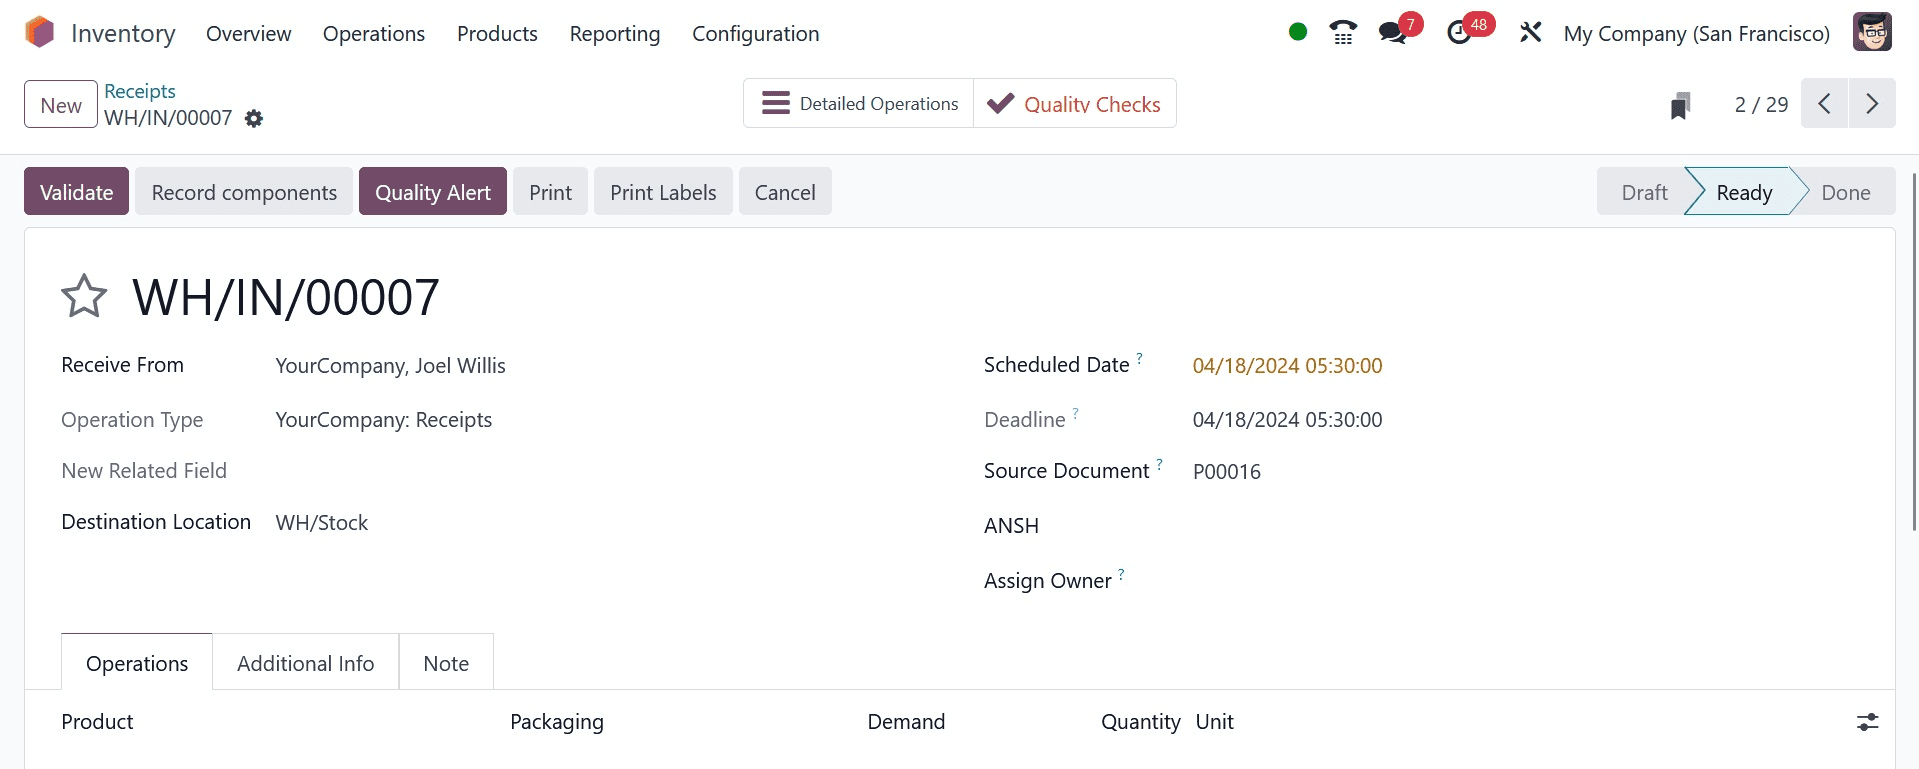
To verify the product's quality, click that button. After that, a popup window with the same title as the one we provided inside the Quality Control Point will show up. There, you may also see the directions. There is an opportunity for the user to provide more notes on the quality check. Next, confirm it.
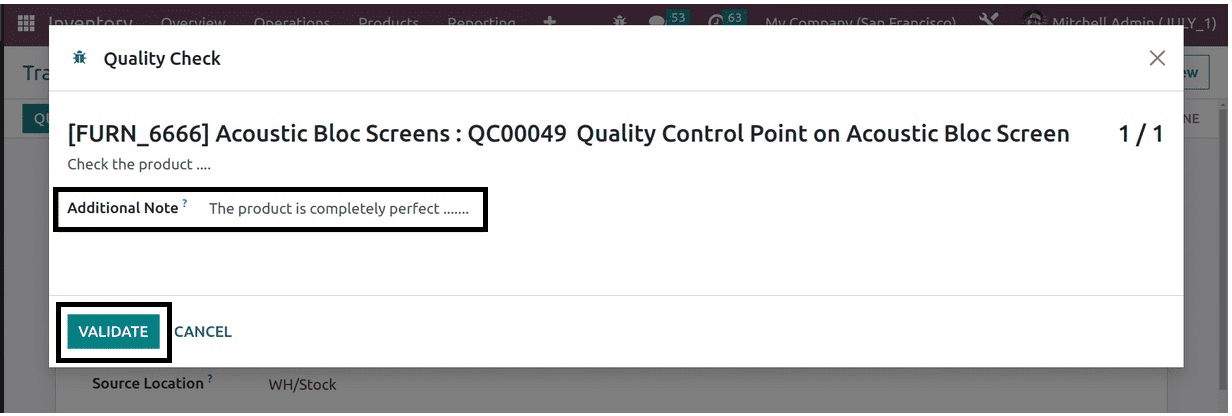
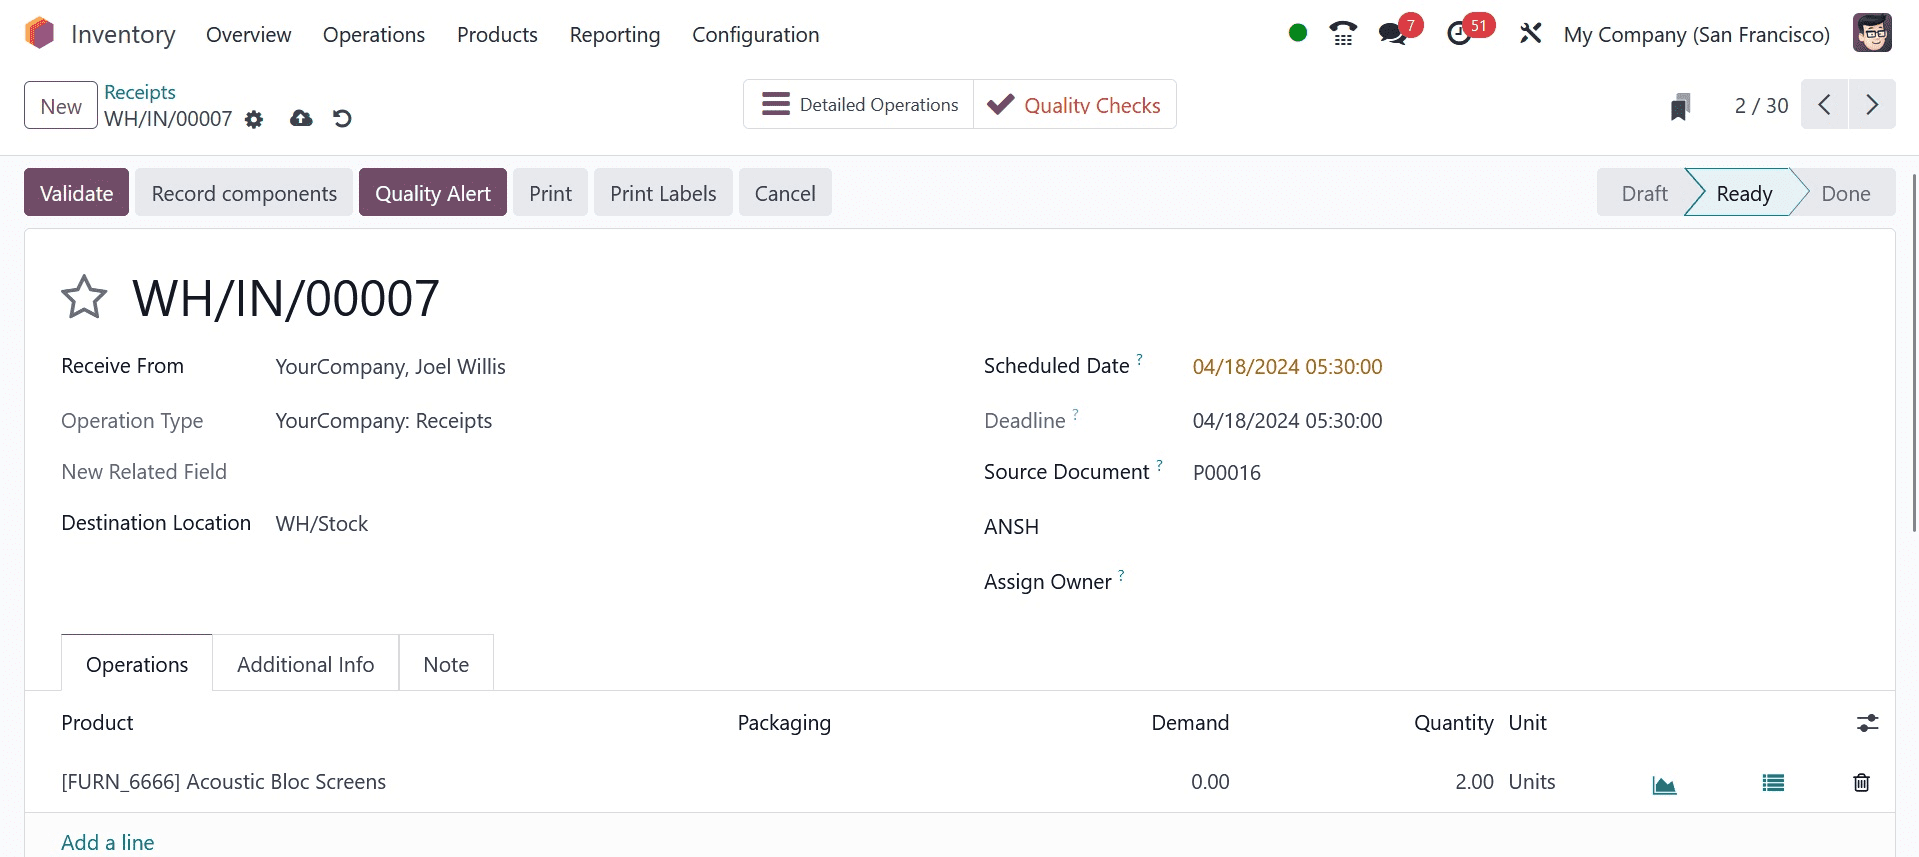
The quality check is now finished. As a result, the Quality Checks smart tab turned green. The user is now able to finish the transfer.
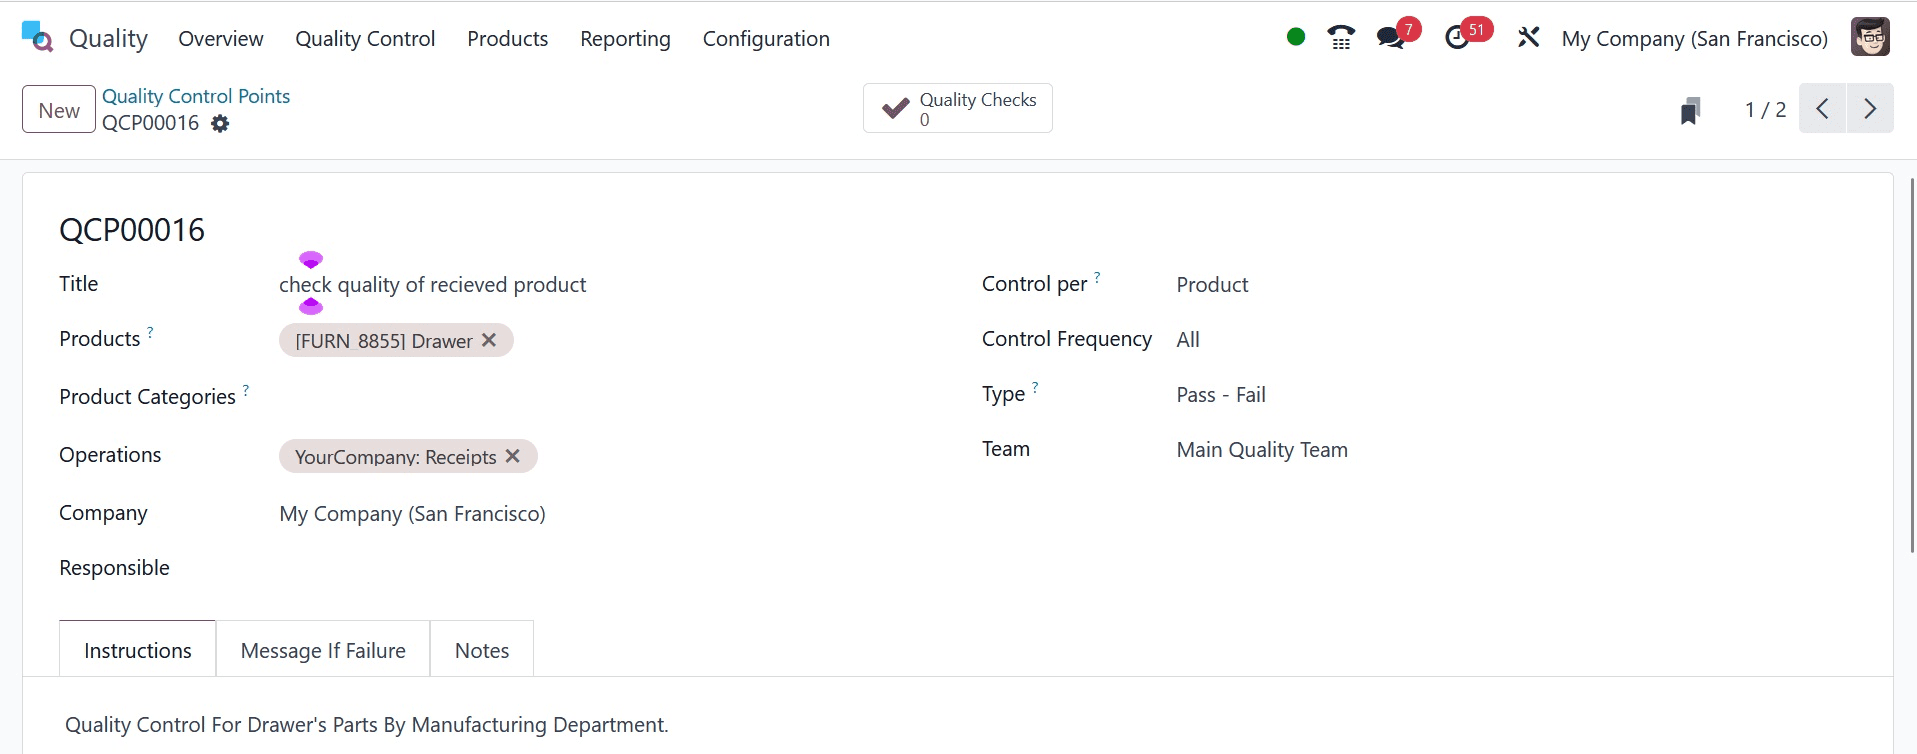
Within the Control Point, the control for each product is established here. Therefore, this specific quality check only takes place if the Acoustic Bloc Screen is transferred internally.
Control per amount: With this kind of control, every product amount would undergo quality inspections. In certain cases, the user must examine the full quantity to assess the quality, while in other cases, only a portion of the specified quantity is used for quality checks to assess the overall product quality. This kind can be applied in each scenario.
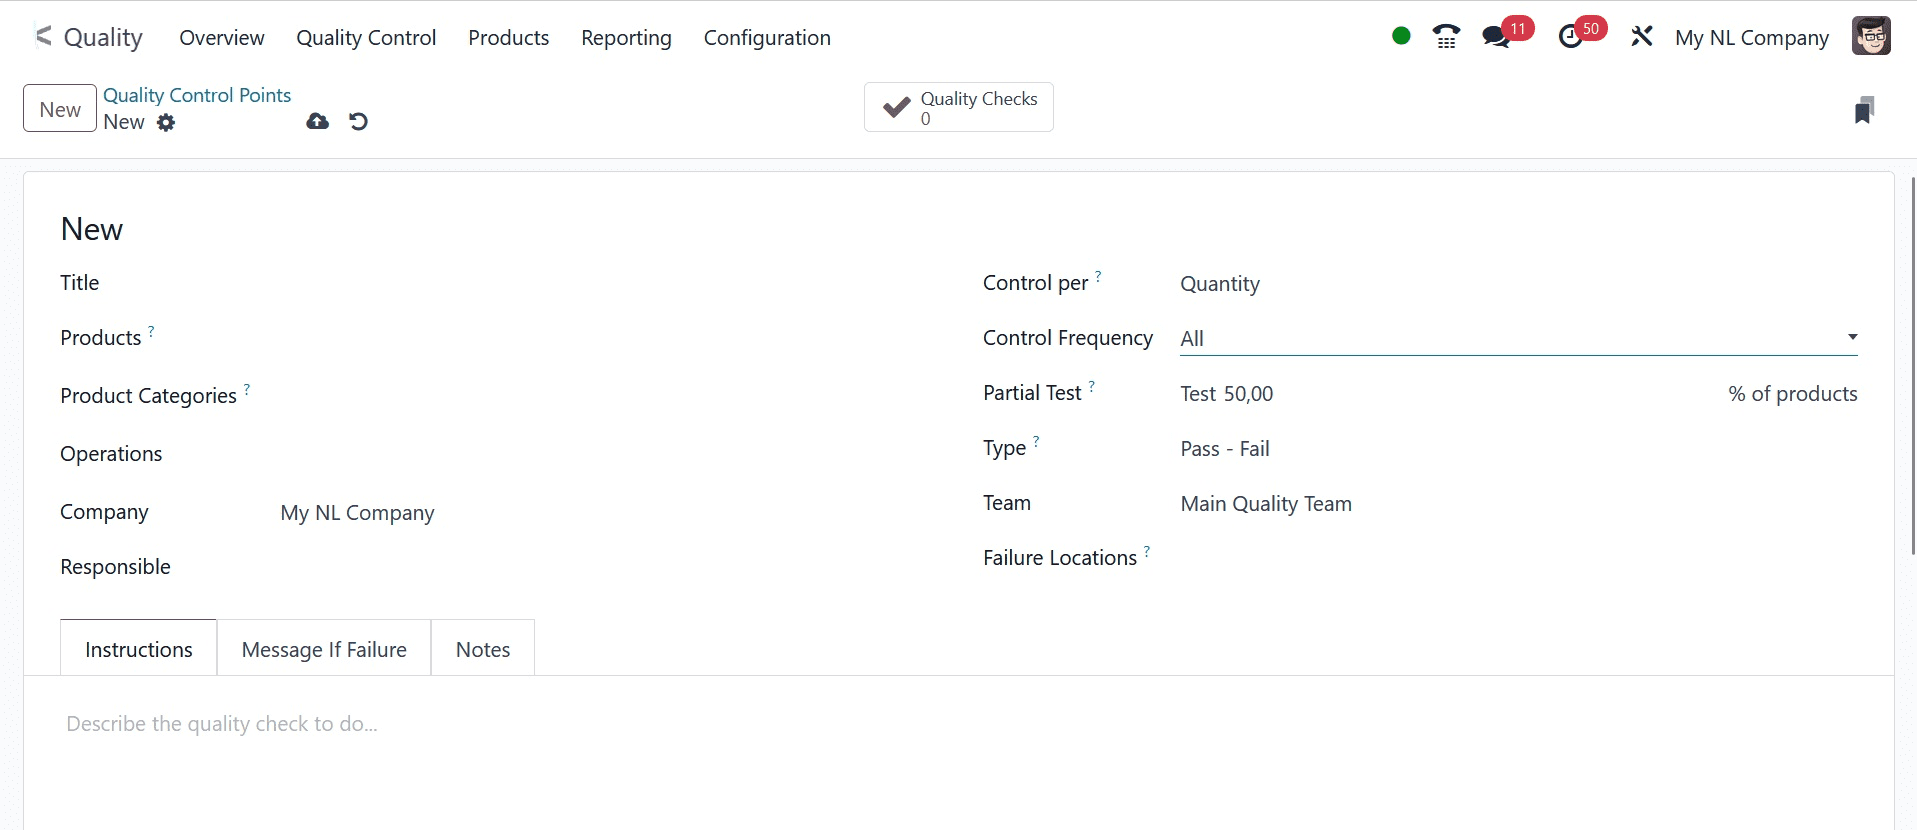
For the operation Receipt, a control point is created. The term "Quantity" defines the Control per. Thus, each received quantity needs to be verified in this case.
A Partial Transfer Test will be an additional option that appears there if the Control per Quantity is selected. If only the partial quantity of the received goods has to be checked. The user must verify each quantity because the Partial Transfer Test is not enabled in this instance.
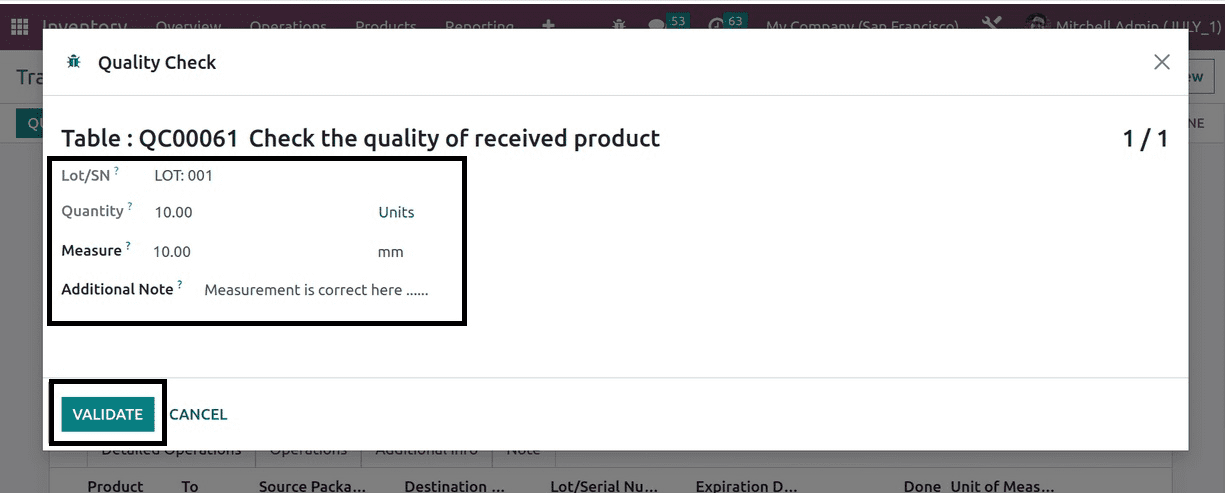
Here, the measure is the selected Type. Thus, metrics such as Tolerance and Norm are put here. To pass the quality check, the received goods' measurements must fall within the specified tolerance.
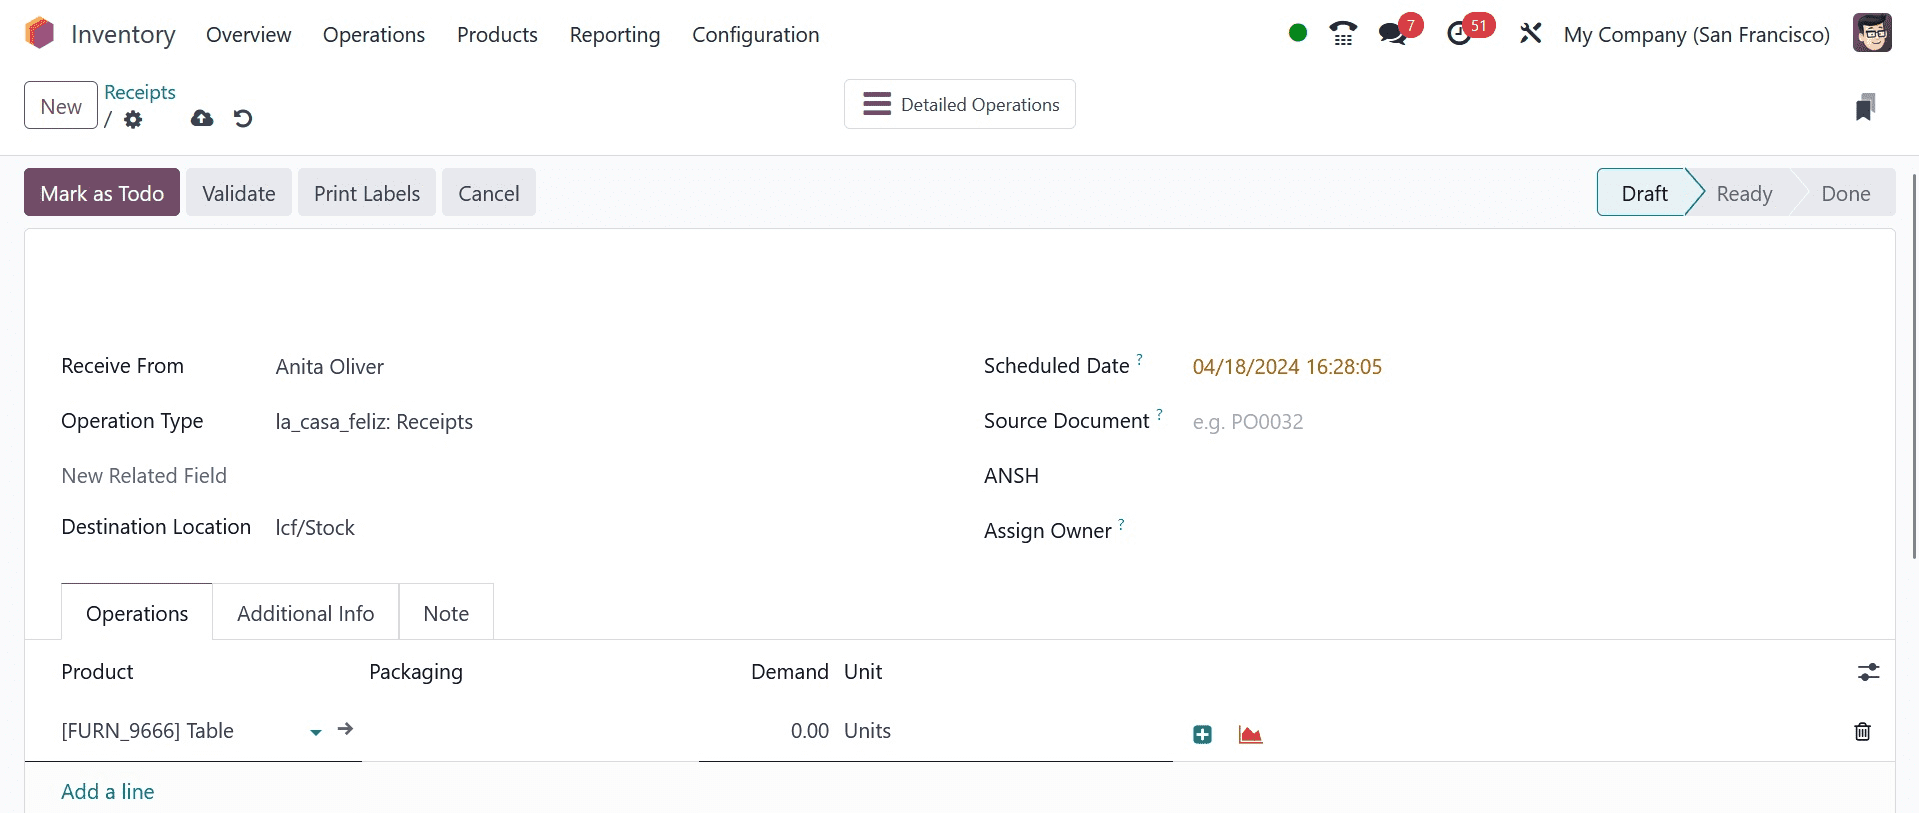
Let's use the transfers option to create a new receipt. Go to the inventory module for it once more. The vendor, Anita Oliver, is the one who created the receipt. The product is Table in ten quantities. Therefore, press the MARK AS TO DO button.
Since the product may be tracked, LOT: 001 is inserted for each of the ten quantities. Therefore, finish the quality checks before verifying.
The number in this case is 10. Include the measurement. The range of the measurement should be 1 to 10. After that, confirm the quality checks.
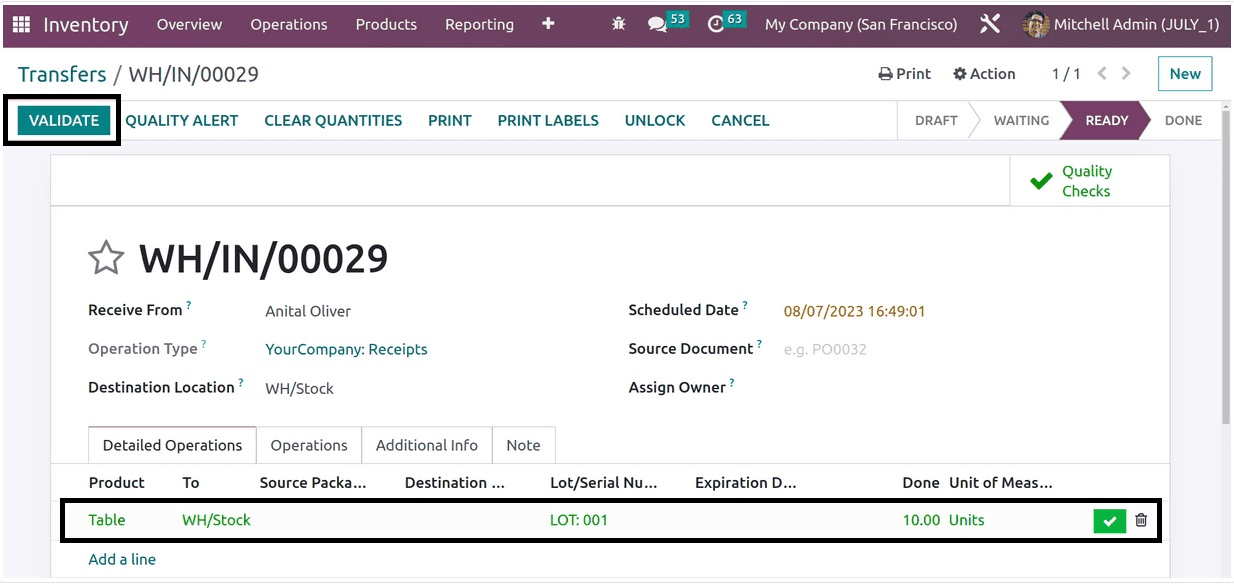
At this point, the receipt can be verified. There will be a green checkmark within the Operations tab.
In certain cases, verifying the total amount does not guarantee the quantity of products received. They make the Partial Transfer Test available in certain situations. This update pertains to the same quality control point.
There is an activated Partial Transfer Test. Then "Percentage," another field, shows up. There is an addition of 50%. This indicates that only 50% of the entire quantity is required to verify the quality.
This is a duplicate of the same receipt, with Anita Oliver as the vendor. Ten Table amounts are selected. Next, select the MARK AS TODO option. The table's ten quantities with "Lot: 003" are shown here. Consequently, press the QUALITY CHECKS button.
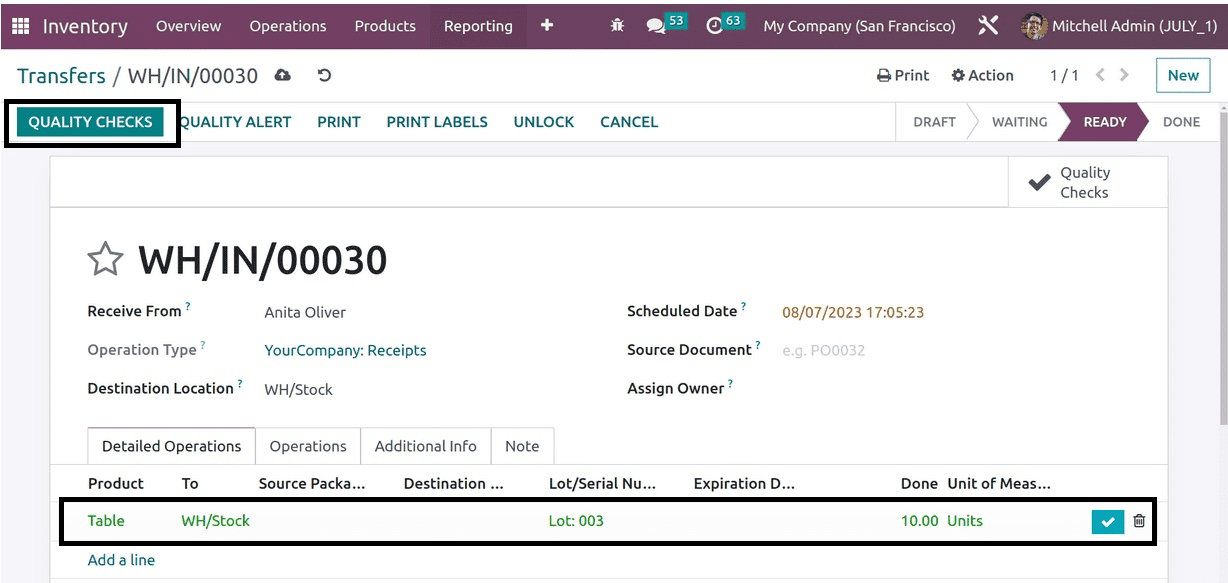
In this case, the total amount is 10. However, here is where another field is inserted. Here, 5 is the quantity to test or 50% of the total quantity. To finish the quality tests in this case, the user just needs to verify partial quantities.
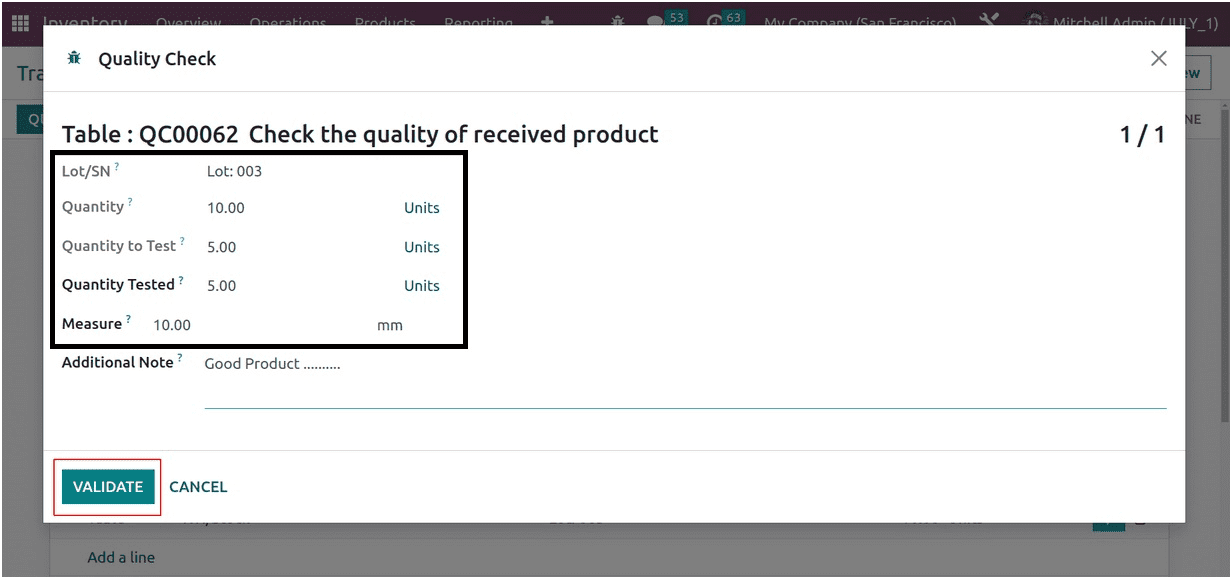
Add the tested quantity after that. A partial quantity is added in this case. To finish the quality checks, validate them.
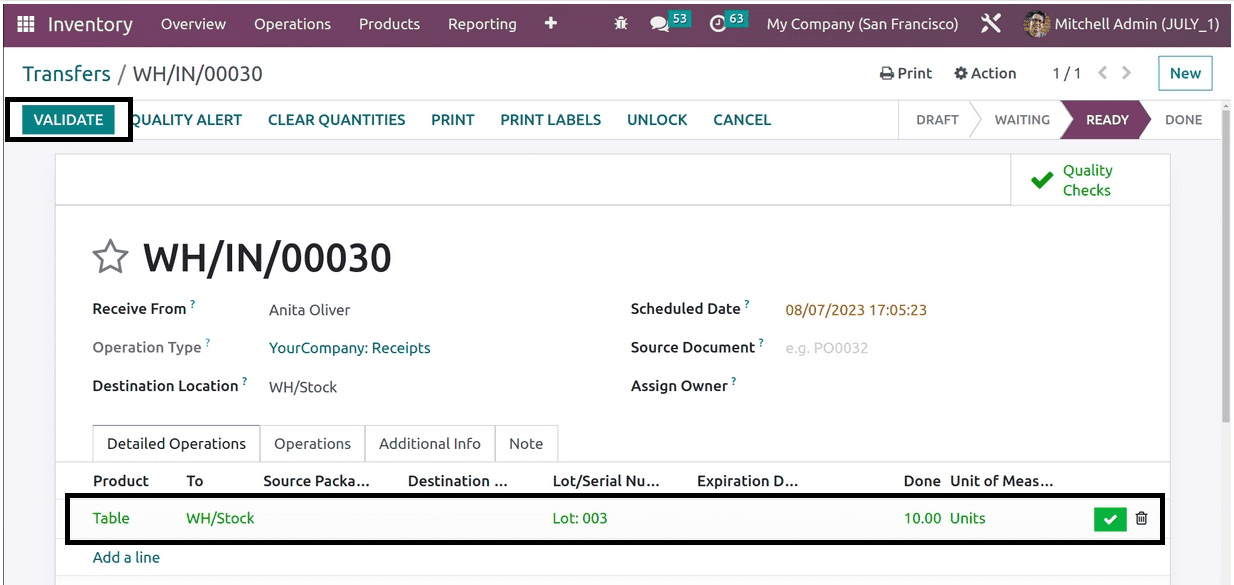
Out of the ten quantities, only five are examined; yet, every quantity passes this quality check. The Receipt can now be completed by the user.
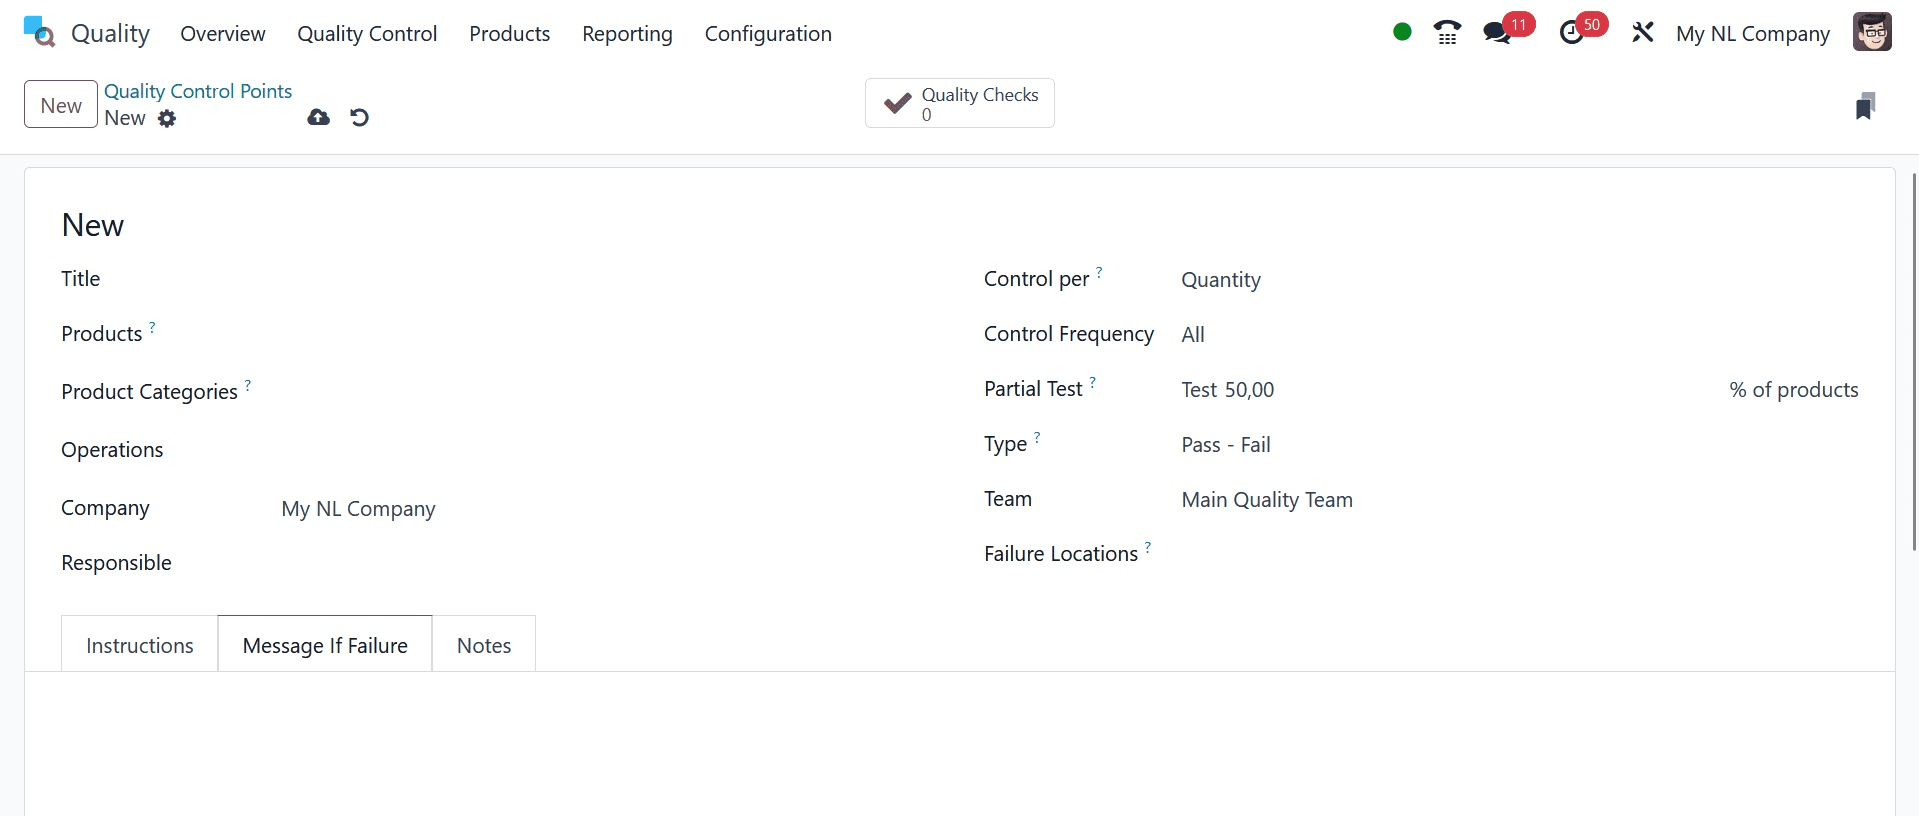
Let's now see what occurs if the quality check is unsuccessful. Make another quality control point specifically for that.
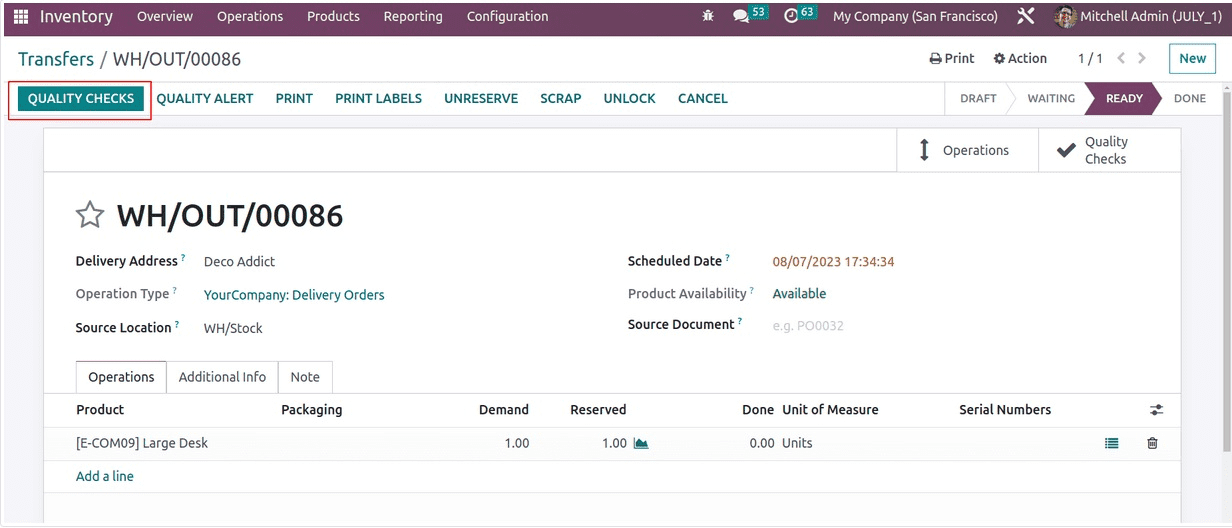
Here, the action introduced is delivery, and the type is pass-fail. The control point "Quality check while delivering product....." is added per operation.
Next, from the inventory transfer, construct a delivery operation. Deco Addict is the client in this instance, while the Large Desk is the selected item. Thus, as previously stated, select MARK AS TODO. The QUALITY CHECKS button will then show up.
To verify for quality, the window appears. It is either pass or fail. The button marked "PASS" or "FAIL" may be clicked by the user. Click the FAIL button because this product is subpar.
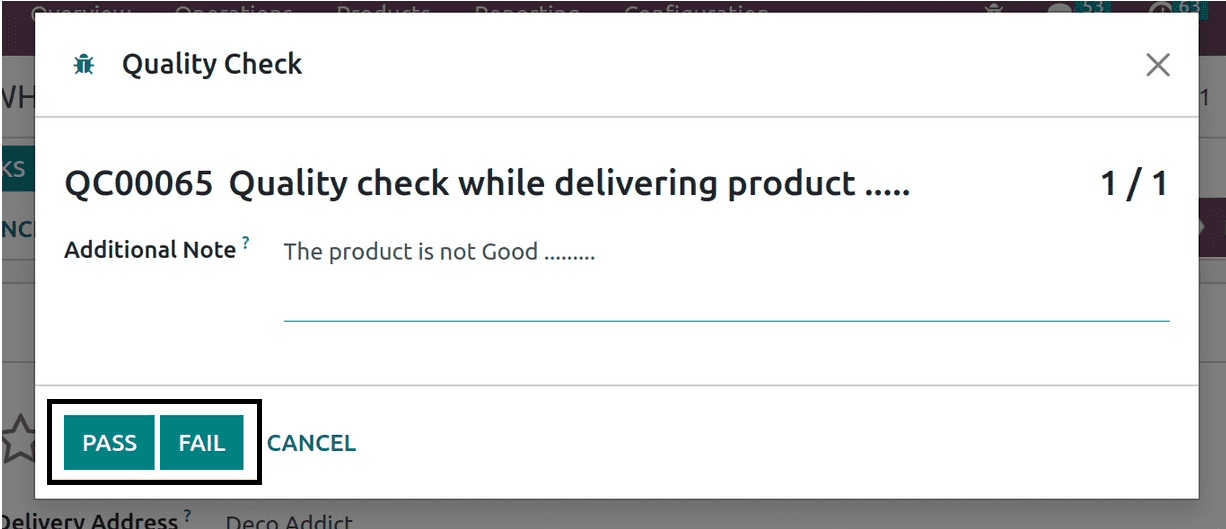
Thus, the Failure message added in the control point is displayed in another popup.

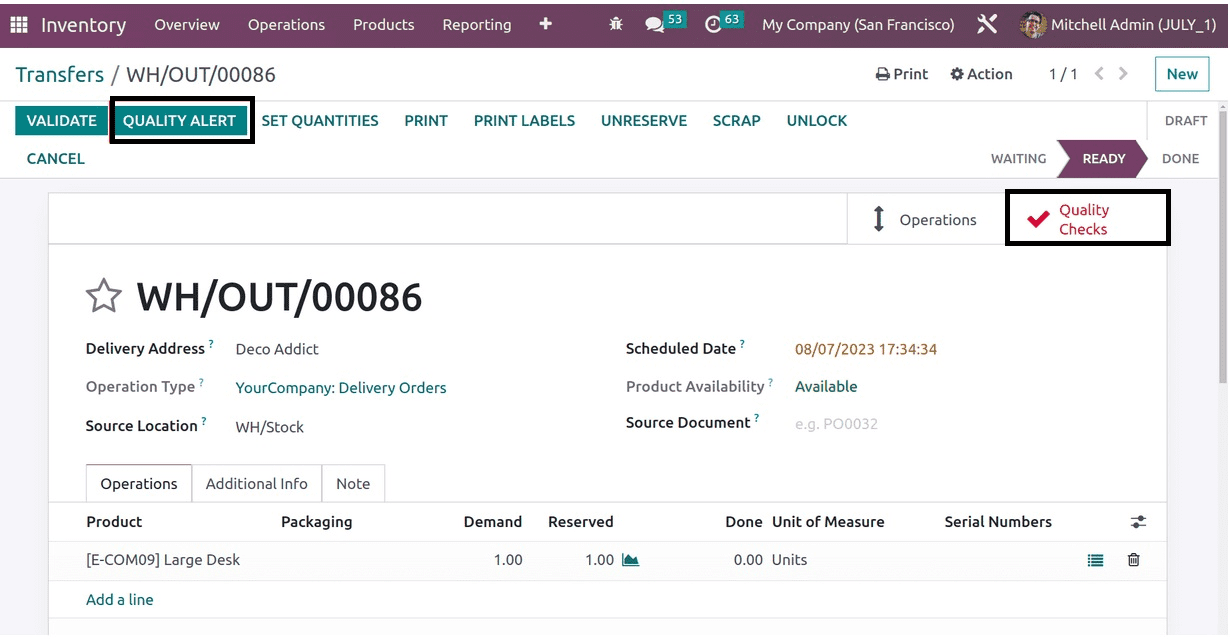
The quality checks failed, which is why the quality checks smart tab is red in this instance. The user can then proceed to create a Quality Alert.
And that's all about quality checks under the module of Quality.
To read more about setting up quality control for transfer operations in the Odoo 17 Inventory, refer to our previous blog How to Set Up Quality Control for Transfer Operations in Odoo 17 Inventory