The attendance module of the Odoo ERP Software helps you keep track of and record each employee's working hours within a company. It is essential to HRM operations in both small and large organizations. Pay for each employee is determined by the number of hours worked. As globalization continues to progress, traditional methods of arranging the working hours of business personnel are starting to become impractical. The possibility of blunders and errors increases while using the old approach. For this reason, a modern system type is needed. Such a fully integrated method reduces the error margin.
The objective of the Odoo 17 Attendance module is to keep track of every worker's office hours. Records of the works can be kept on a daily, weekly, monthly, and annual basis.
The Odoo 17 employee check-in feature may now be used from outside the app, as demonstrated in the screenshot below. The check-in time is shown only. An employee can then finish their transaction by using the transaction button. Odoo 17 came with the Systray Check-In and Check-Out feature.
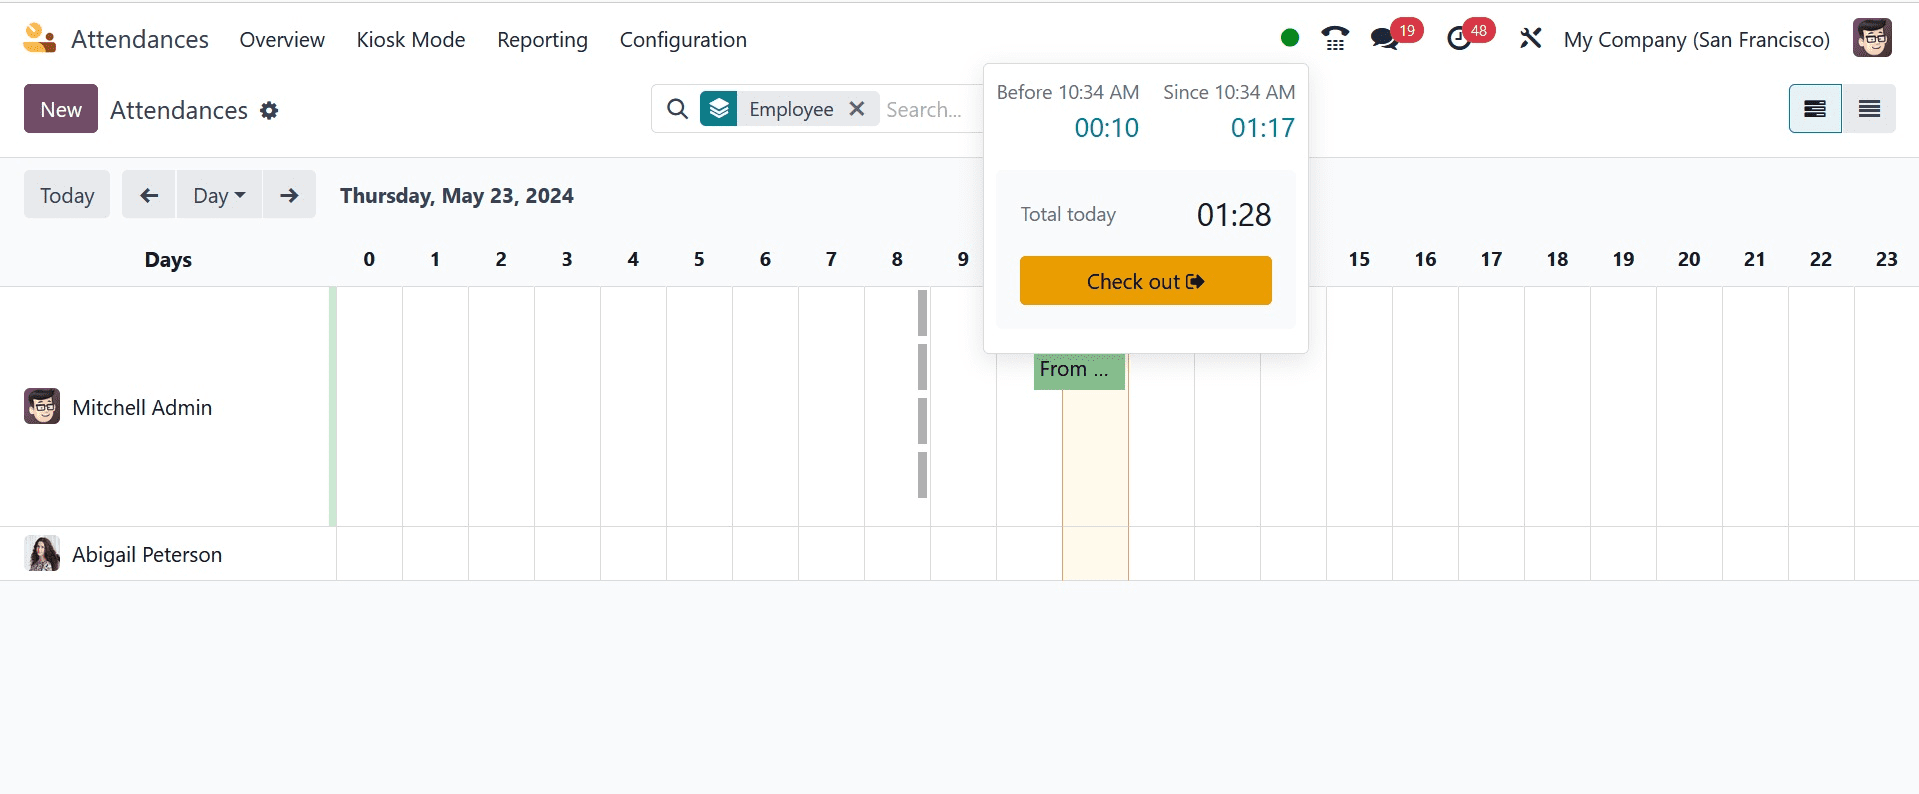
The Overview menu in the attendance module can help you learn more about the company's personnel. The page contains the name of the employee, their work hours, and their check-in and check-out times.
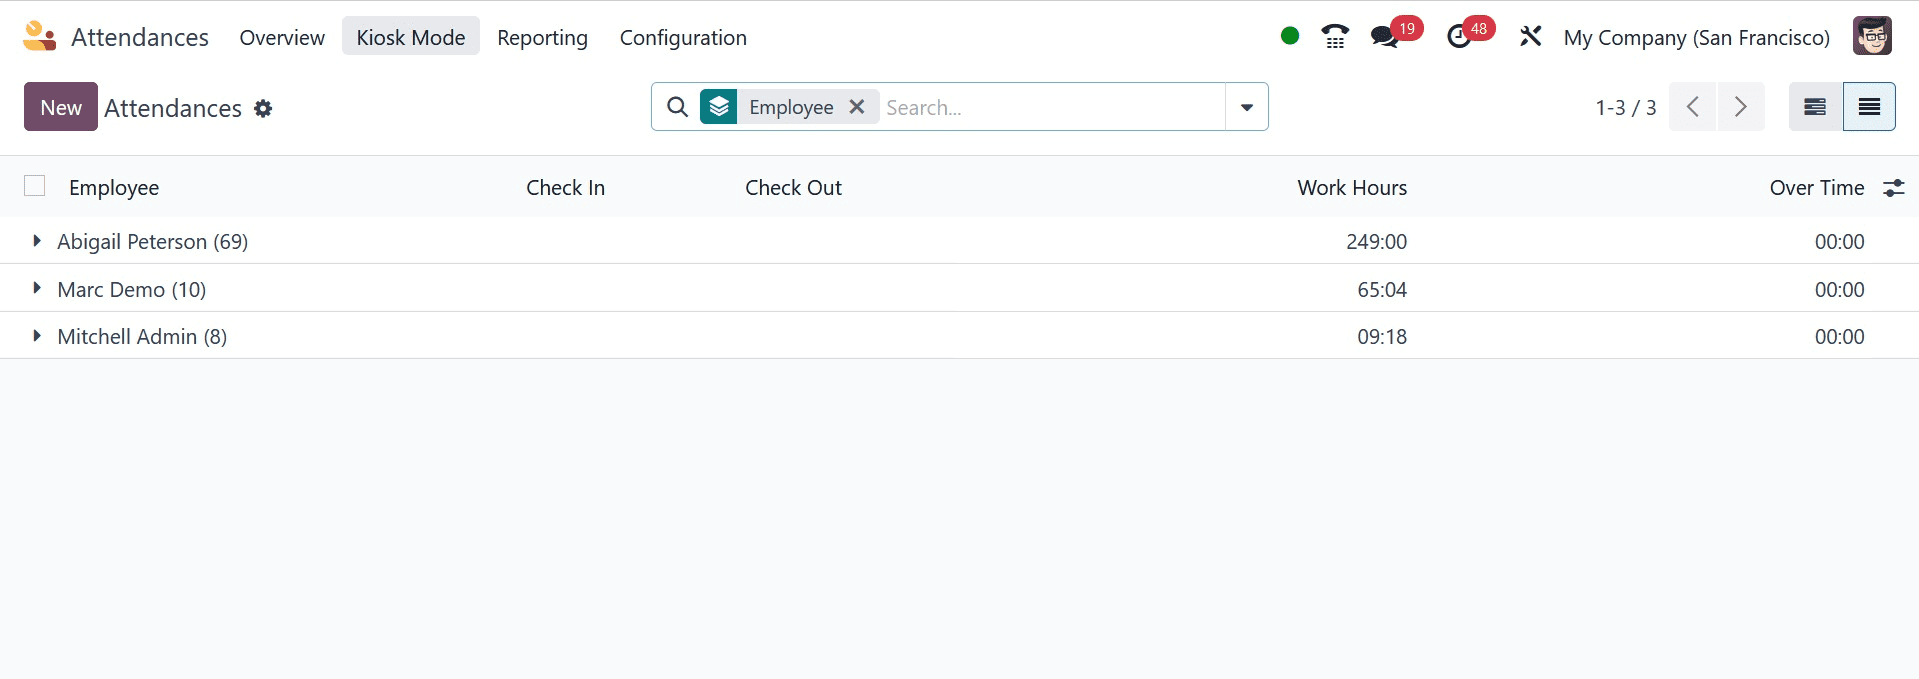
The Overview menu in the attendance module can help you learn more about the company's personnel. The page contains the name of the employee, their work hours, and their check-in and check-out times.
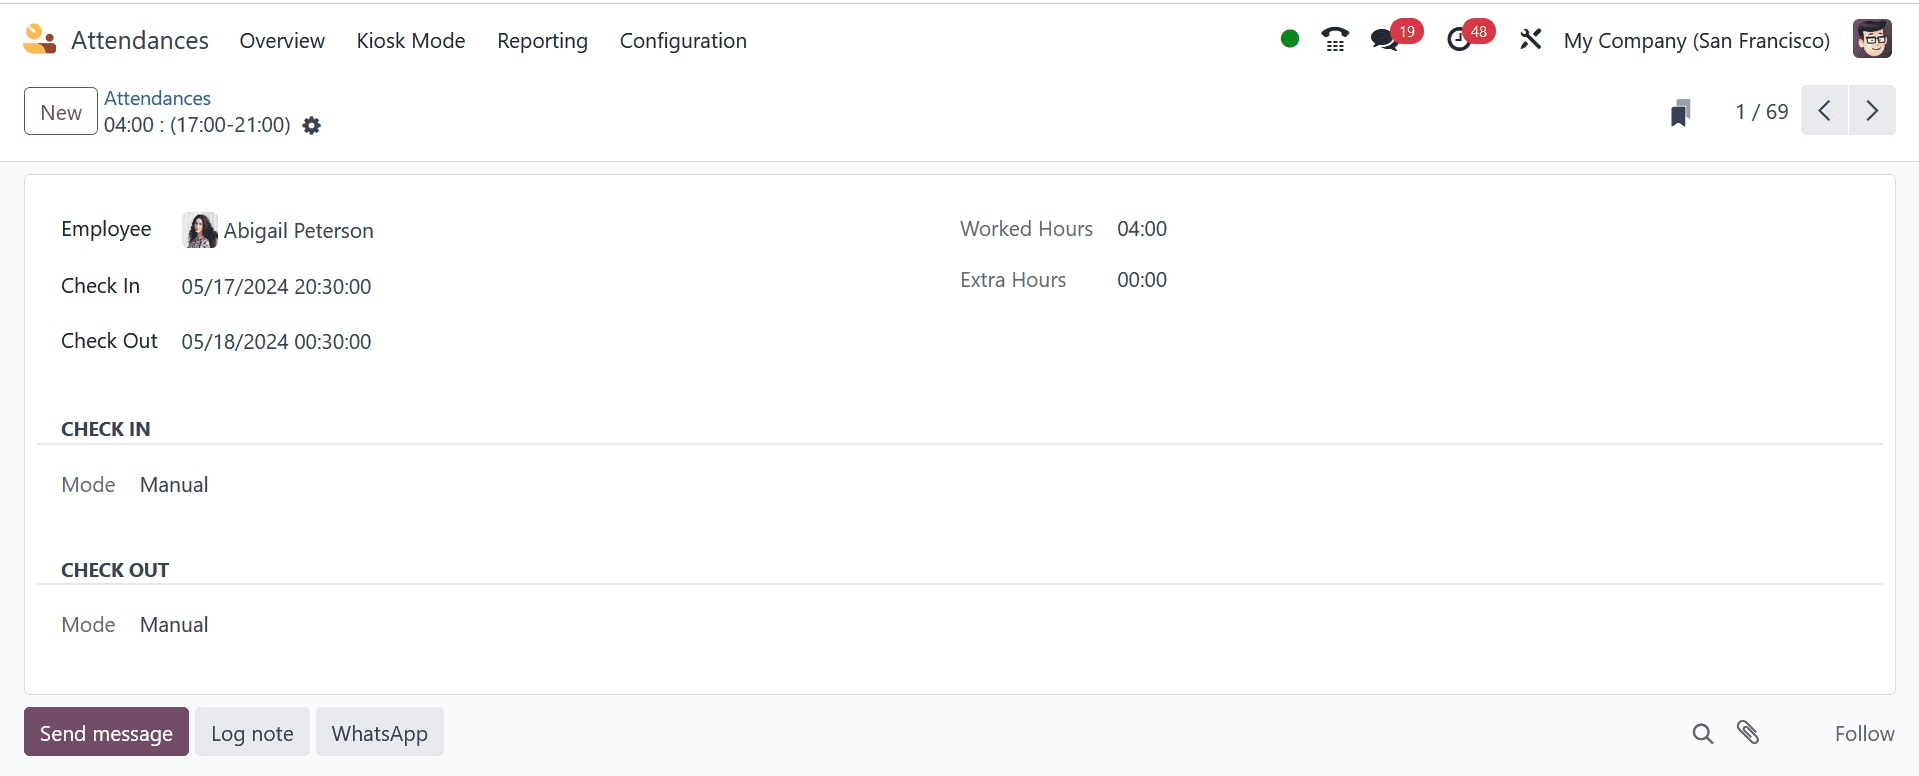
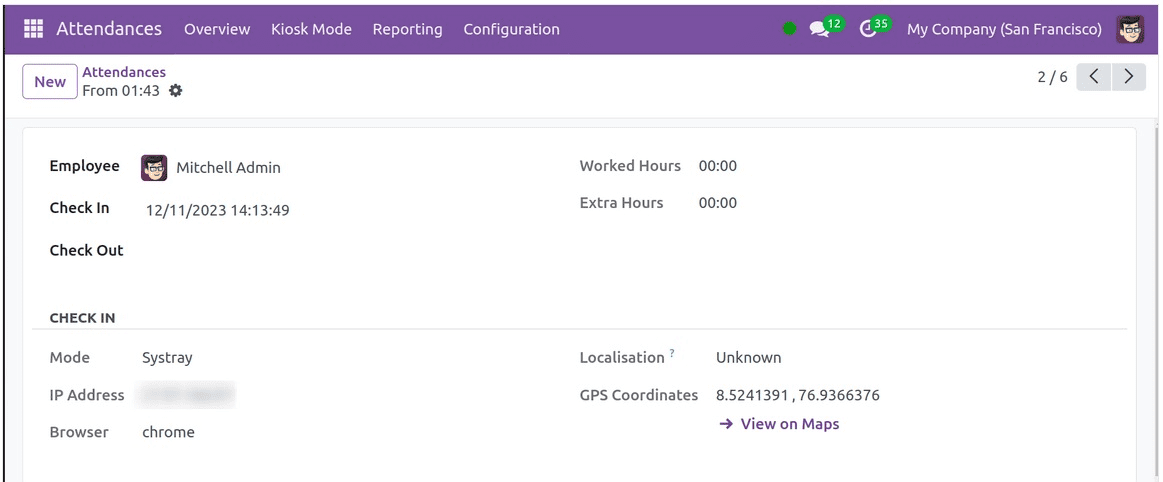
The employee's details, including name, worked hours, extra hours, and check-in and check-out times, are displayed when an attendance is opened. more check-in information, such as the browser, IP address, GPS coordinates, check-in mode, and localization. Users are sent to another map page where they may quickly locate the exact locations of the staff members when they select View on Maps.
Kiosk Mode
Employee attendance can be added and labeled with the use of the Kiosk Mode option, which works with badge scans or manual recognition.
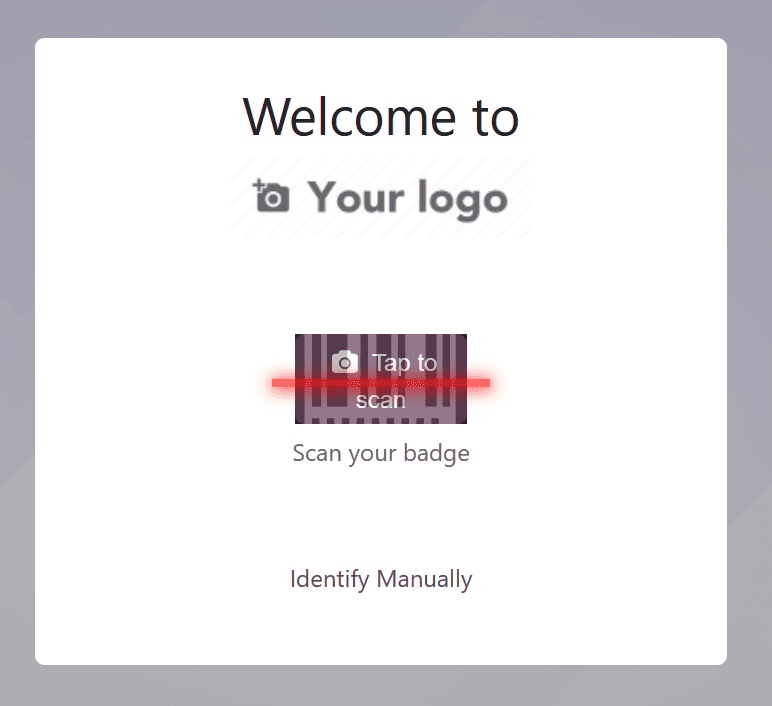
If you would like to "Scan your badge" in this scenario, you can use the employee ID. Choosing Manually is another option for marking attendance. Next, a page will be displayed to you. On the website, you can select the employee's profile before entering the PIN.
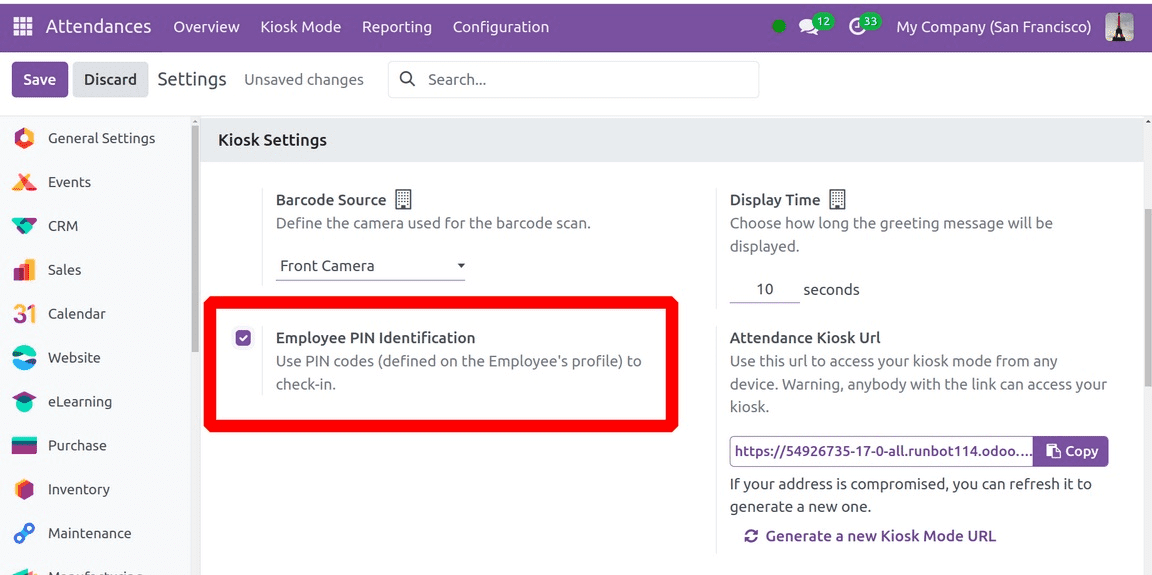
To do this, you need to activate the Employee PIN Identification option in the settings menu.
The PIN code check-in technique is now possible with this option. The PIN code can be located under HR settings on the Employee form. Using the extra hours option in the options, you can turn on the extra hours and compare them to the hours of work performed.
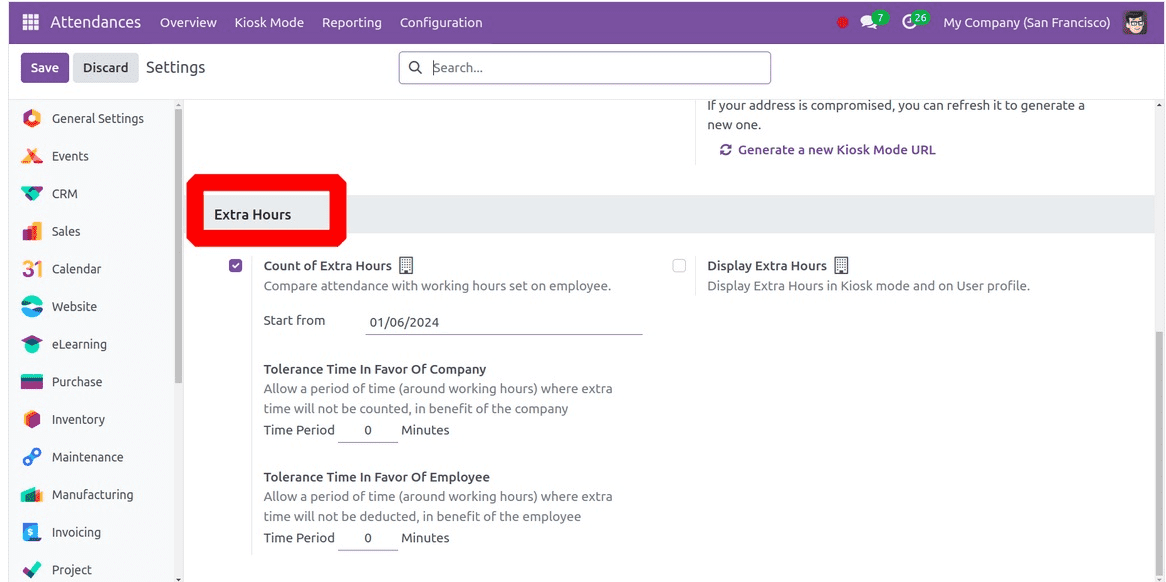
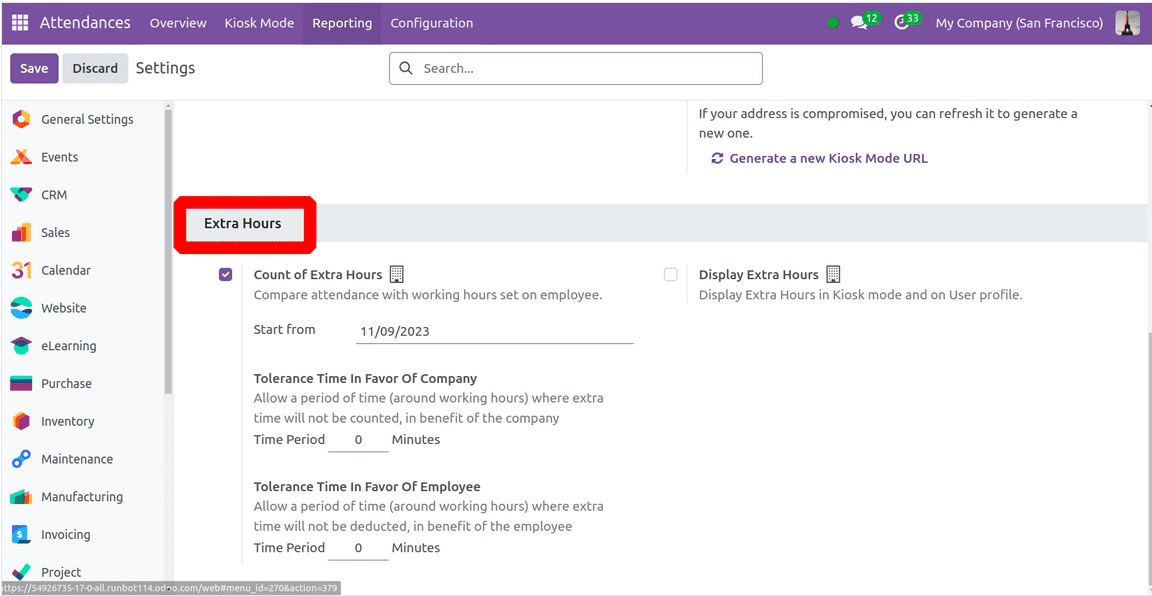
The number of extra hours will be computed beginning on the day you enter in the field designating the start of the count. Under the headings "Tolerance Time in Favour of Company" and "Tolerance Time in Favour of Employee," you can specify a window of time for which more time will not be allowed for the advantage of the company or the employee.
Creating a PIN and ID for an employee is a straightforward process. The employee module contains information on creating an employee's profile. For more information, go to the module.
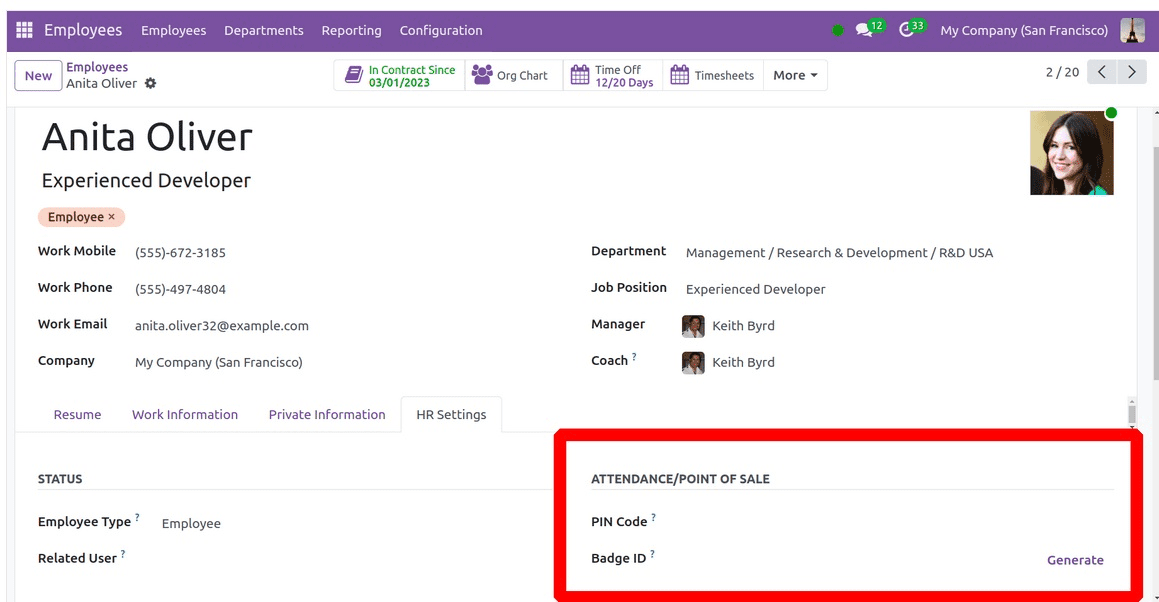
When a new employee is added to the employee module, they have the option to enter a PIN and generate a badge ID below the HR settings. Under the kiosk tab, in the PIN code field, you can check in and out by entering a code. Selecting the Generate icon will reveal the badge ID. You may print the badge by choosing the "Print Badge" button.
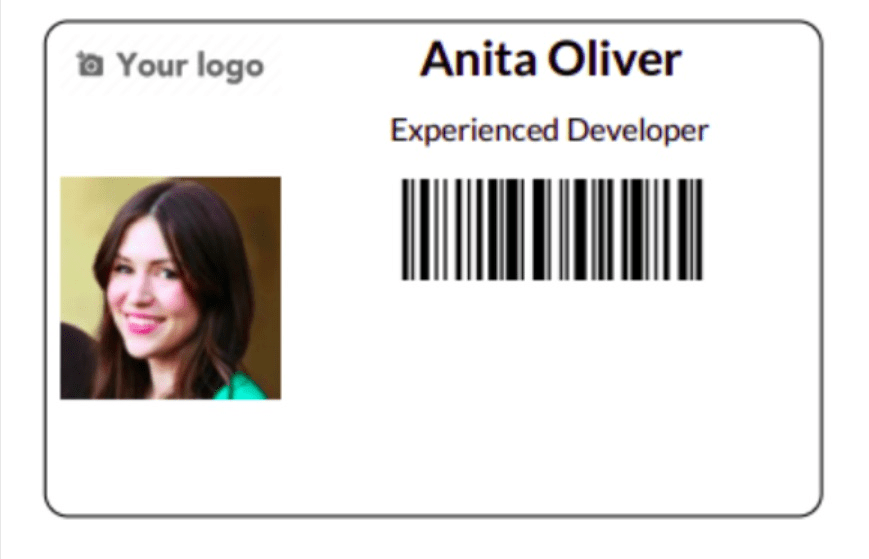
By scanning their badge on the kiosk tab, the employee can be identified. To use the PIN, select Identity Manually.
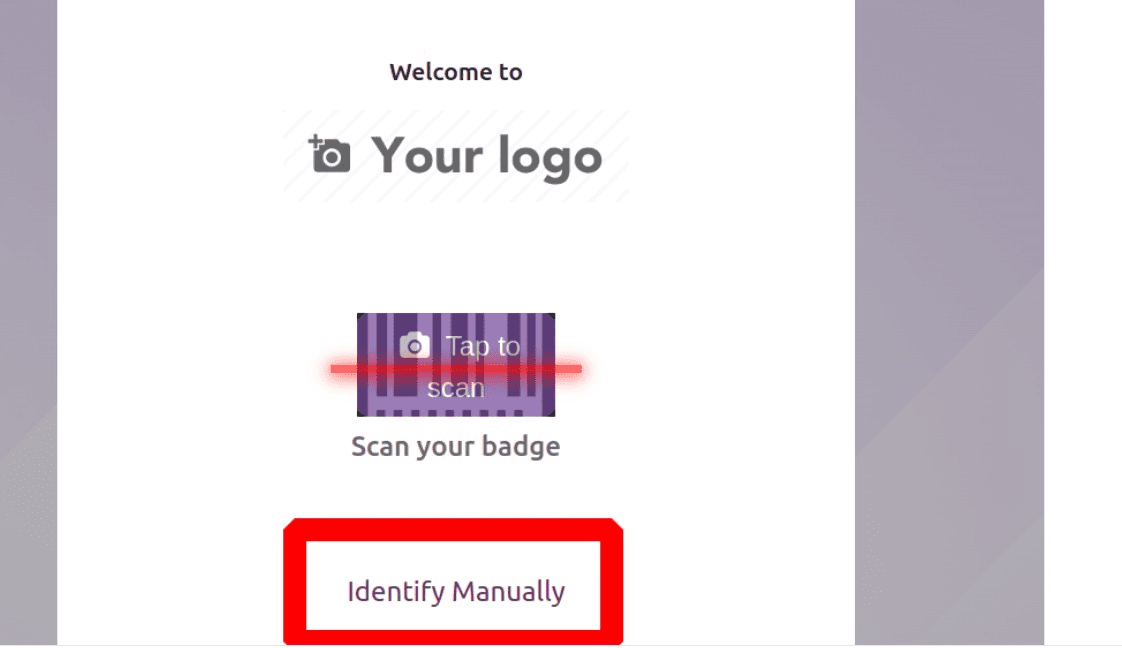
The "Identify Manually" option will direct you to a website with a list of employees.
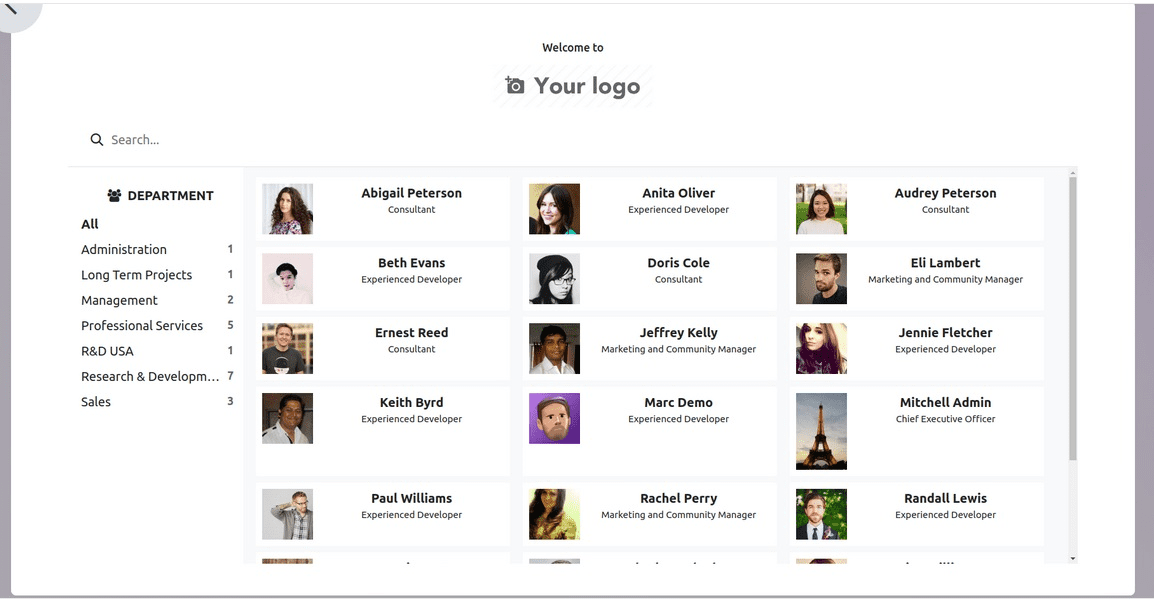
From the list, choose the required profile. This will cause a new page to open, allowing you to enter your PIN.
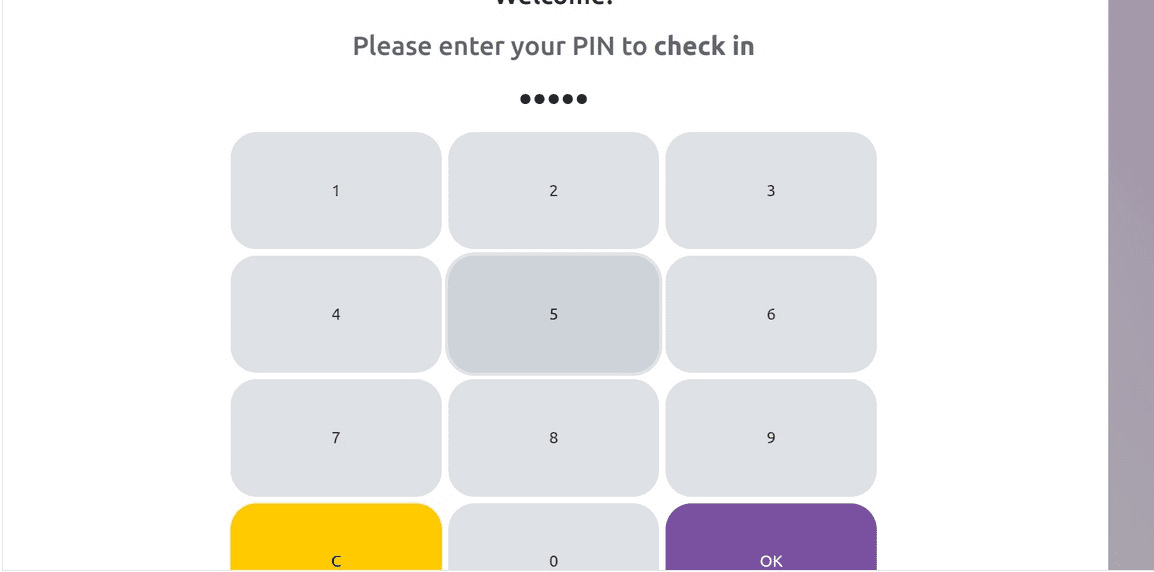
The steps outlined below should be followed to configure the attendance module for check-in and check-out.
Configuration
Selecting the Configuration menu will bring up the Settings option for the Attendance Module, as shown below.
In the Kiosk Mode area, users can choose how they want to be recognized by the kiosk program after selecting a Mode. After that, users can check in and out of Odoo by using the Attendances From Backend feature.
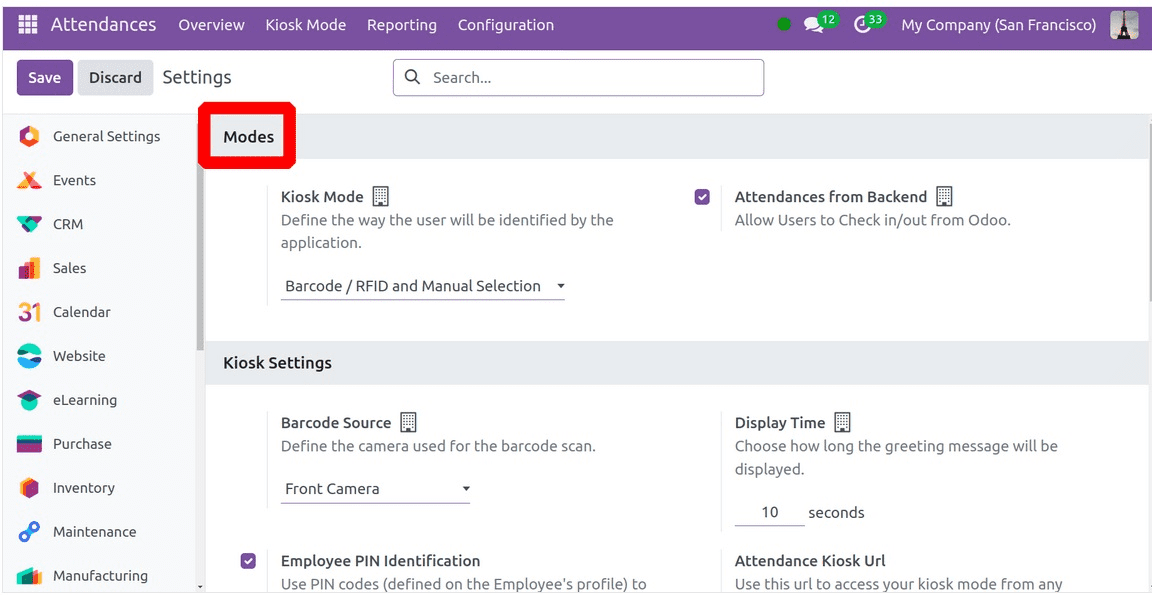
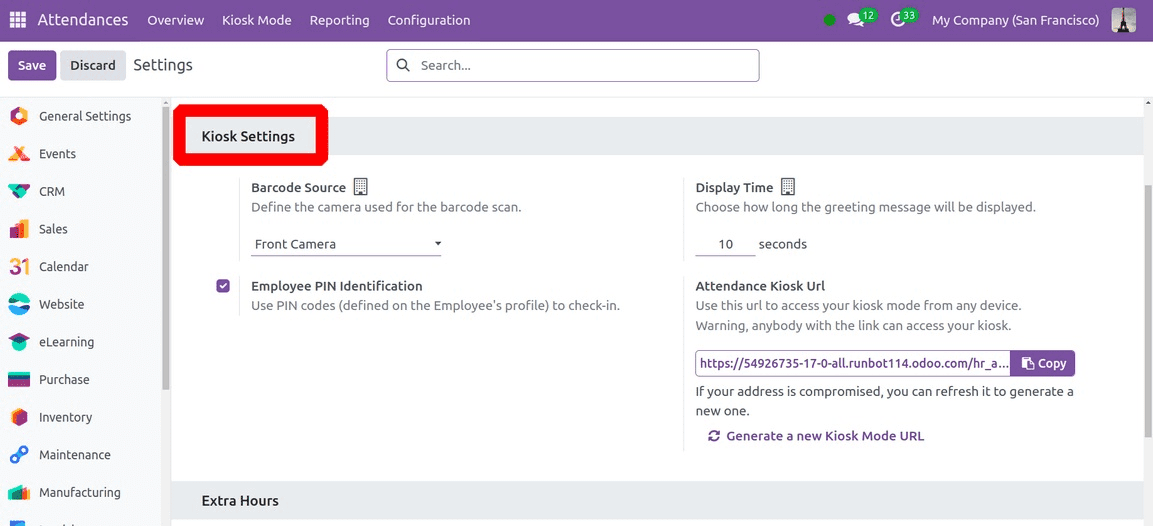
Once users see the Kiosk Settings area, they may identify each program. You can talk about the camera that was used to scan the barcodes under the Barcode Source option. With the Display Time option, you may specify how long a greeting message will play in seconds. Once the Employee PIN Identification field is activated, employees can utilize PIN codes to log in to work. Click the Save icon once you've entered the check-in and check-out details in kiosk mode. Participation uses the URL provided in the Attendance Kiosk Url section to access your kiosk mode on any device. Keep in mind that anyone with an internet connection can access your kiosk. Create a new address if it has been compromised.
Managing the additional hours that have been set up in the Odoo 17 Attendance module is the next step. You might locate the Count Extra Hours option under the Extra Hours area, which will help with the attendance count. By turning on the Count Extra Hours feature, you may choose the start date and evaluate attendance according to employee work hours. You can set a tolerance time that benefits both the employer and the employee under the Extra Hours option. You may quickly award the company-specific working hours inside the Tolerance Time in the Company's Favour. In the Tolerance Time in Favour of Employee column, you should also put the time that supports an employee and from which additional time is not subtracted.
Reporting
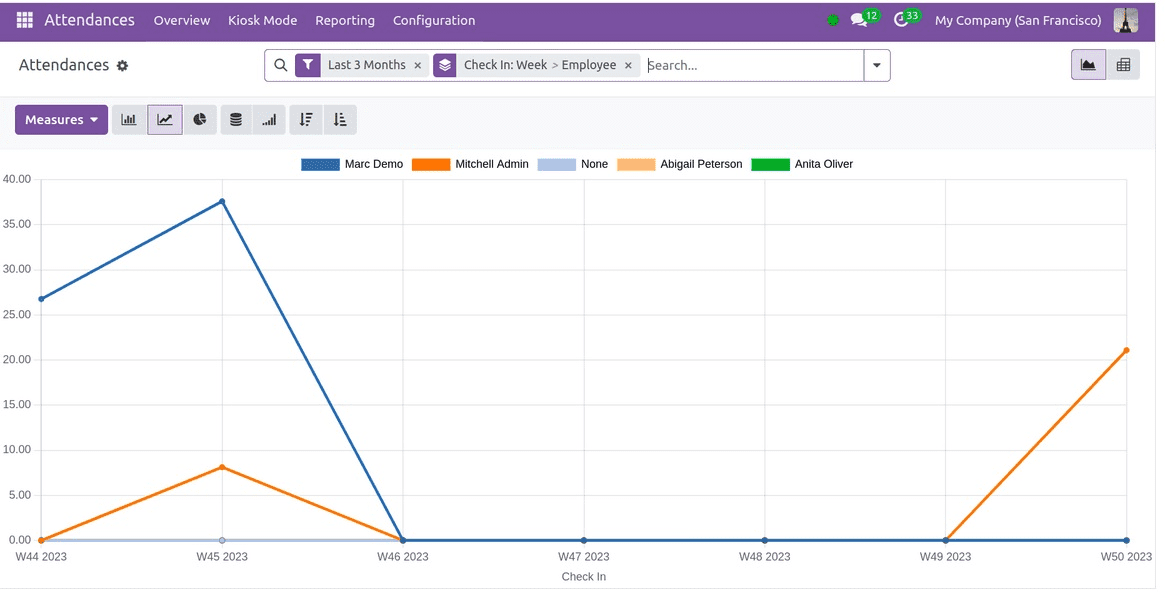
The Attendance Analysis window displays the count on the Y-axis and the employee check-in data on the X-axis. Users can see the check-in details for each employee in a range of colors on the graphical representation. By selecting the Measures icon, we can include specific data in the graph, such as employee overtime and the total number of hours worked. Reporting Users can create weekly, monthly, or annual employee attendance reports. Select the Reports tab in Odoo 17 Attendance to access attendance analysis reports.
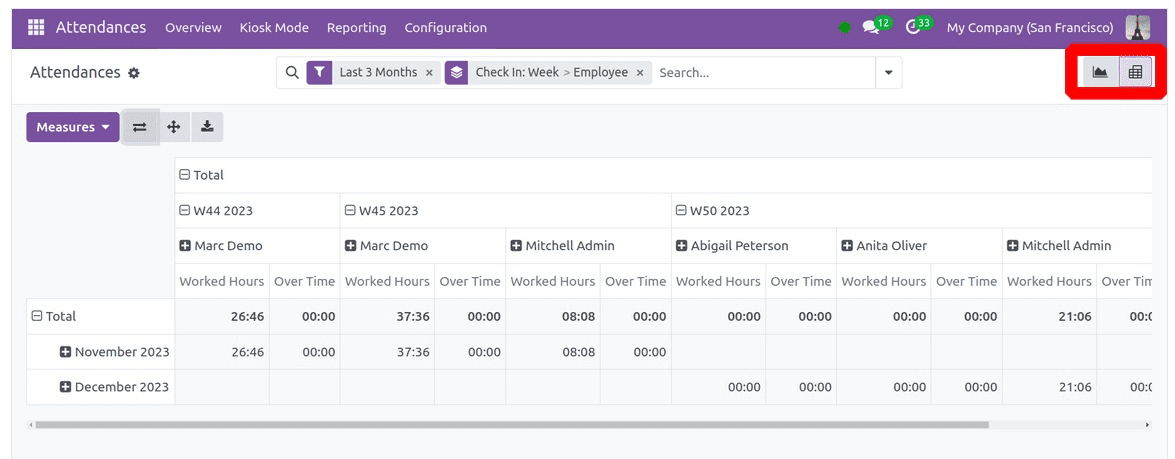
The user can view the pivot table in the pivot view, which displays the total number of hours worked by each employee separately. The user can determine an employee's actual working hours within the organization based on each month.
The Odoo 17 Attendance module makes it easy for a firm to manage its employees' actual working hours. A company might assess reports to find out more about the skills of its employees and to develop goals.
To read more about An Overview Of The Attendance Module In Odoo 16, refer to our blog An Overview Of The Attendance Module In Odoo 16.