What is PDC in Odoo 18
In Odoo, checks that are issued with a future date are known as post-dated checks. This implies that they are not refundable until the designated date. They're often employed for a number of purposes like delayed payments, etc. If a customer provides a cheque to our company for a future date, then the cheque is considered a post-dated cheque (PDC).
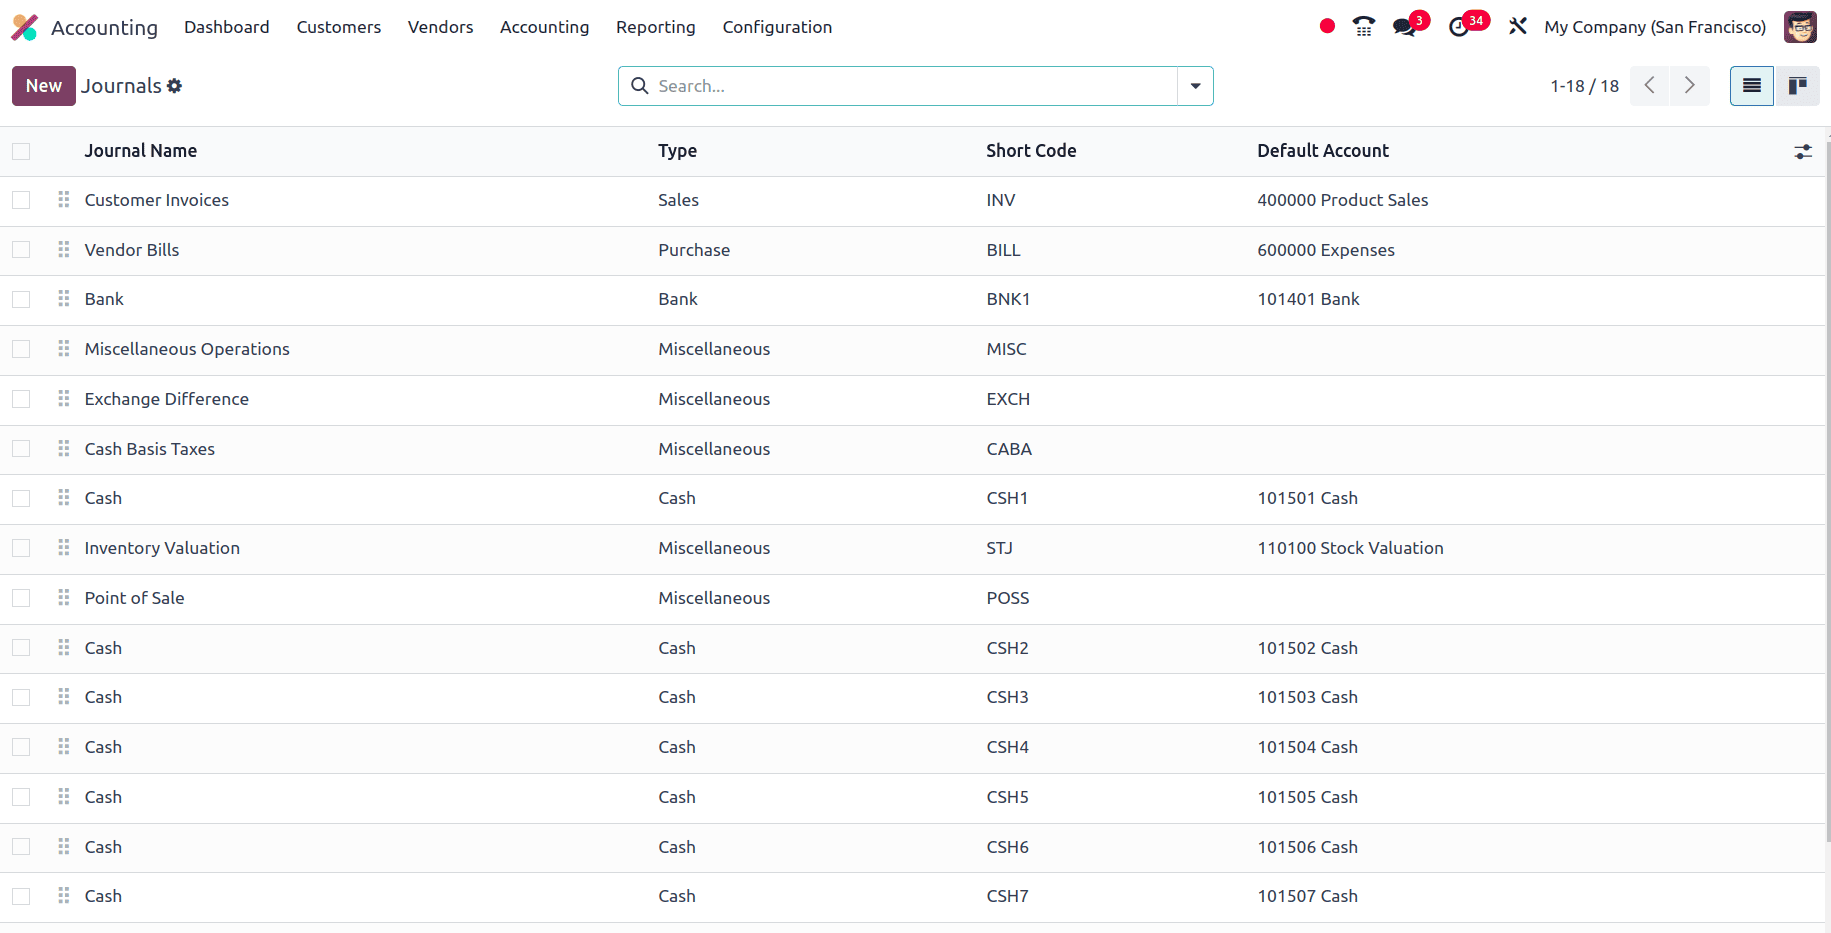
There is no default functionality to handle PDC in Odoo, but this feature can be accomplished using journals. So, in this blog, we can learn how to handle and manage post-dated cheques in Odoo 18. We can create a new journal to record PDC transactions for post-dated cheque transactions. Move to the accounting module, and under the Configuration menu, select the Journals sub-menu. There, we can see all the journals that have already been created with journal names, types, shortcodes, and default accounts for the journal.
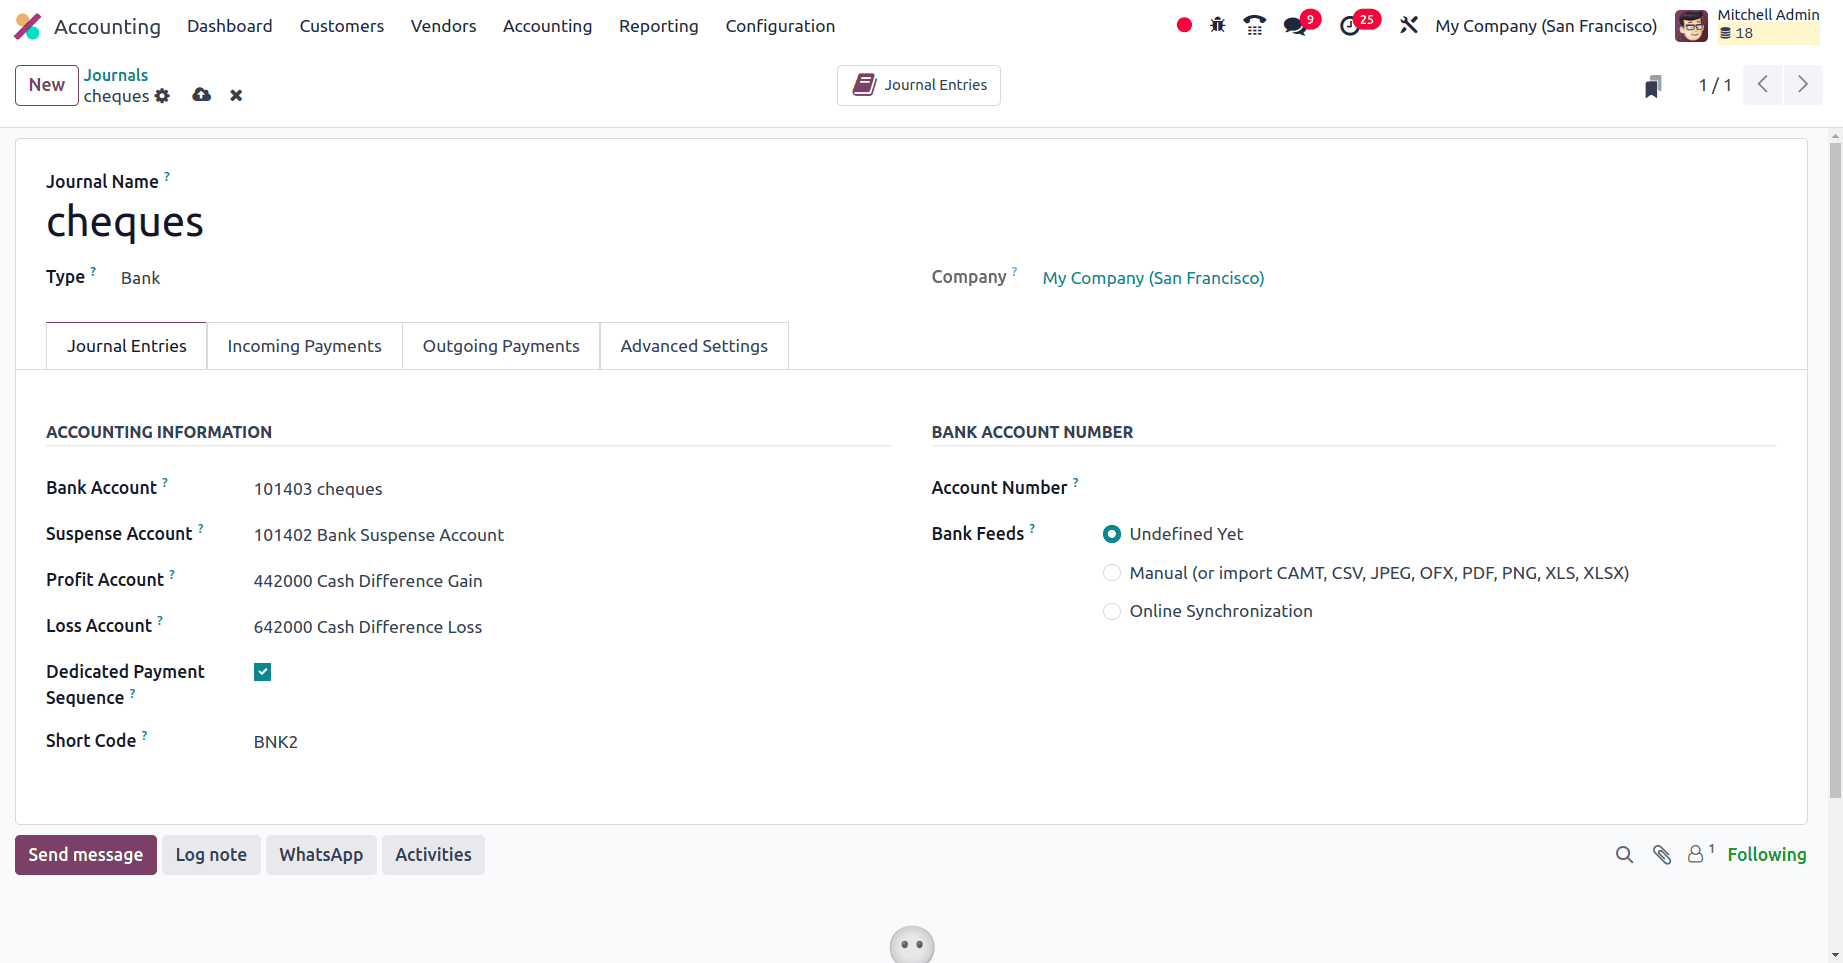
To create a new journal, click the New button and provide the name of the journal as cheques and the type of the journal as the bank. Then we need to fill in some extra fields like Bank account and provide the bank account as cheques, which is a current asset account. Odoo will automatically set the profit and loss account for the journals. Here, the suspense account is a current asset account, the profit account is an income account, and the loss account is an expense account.
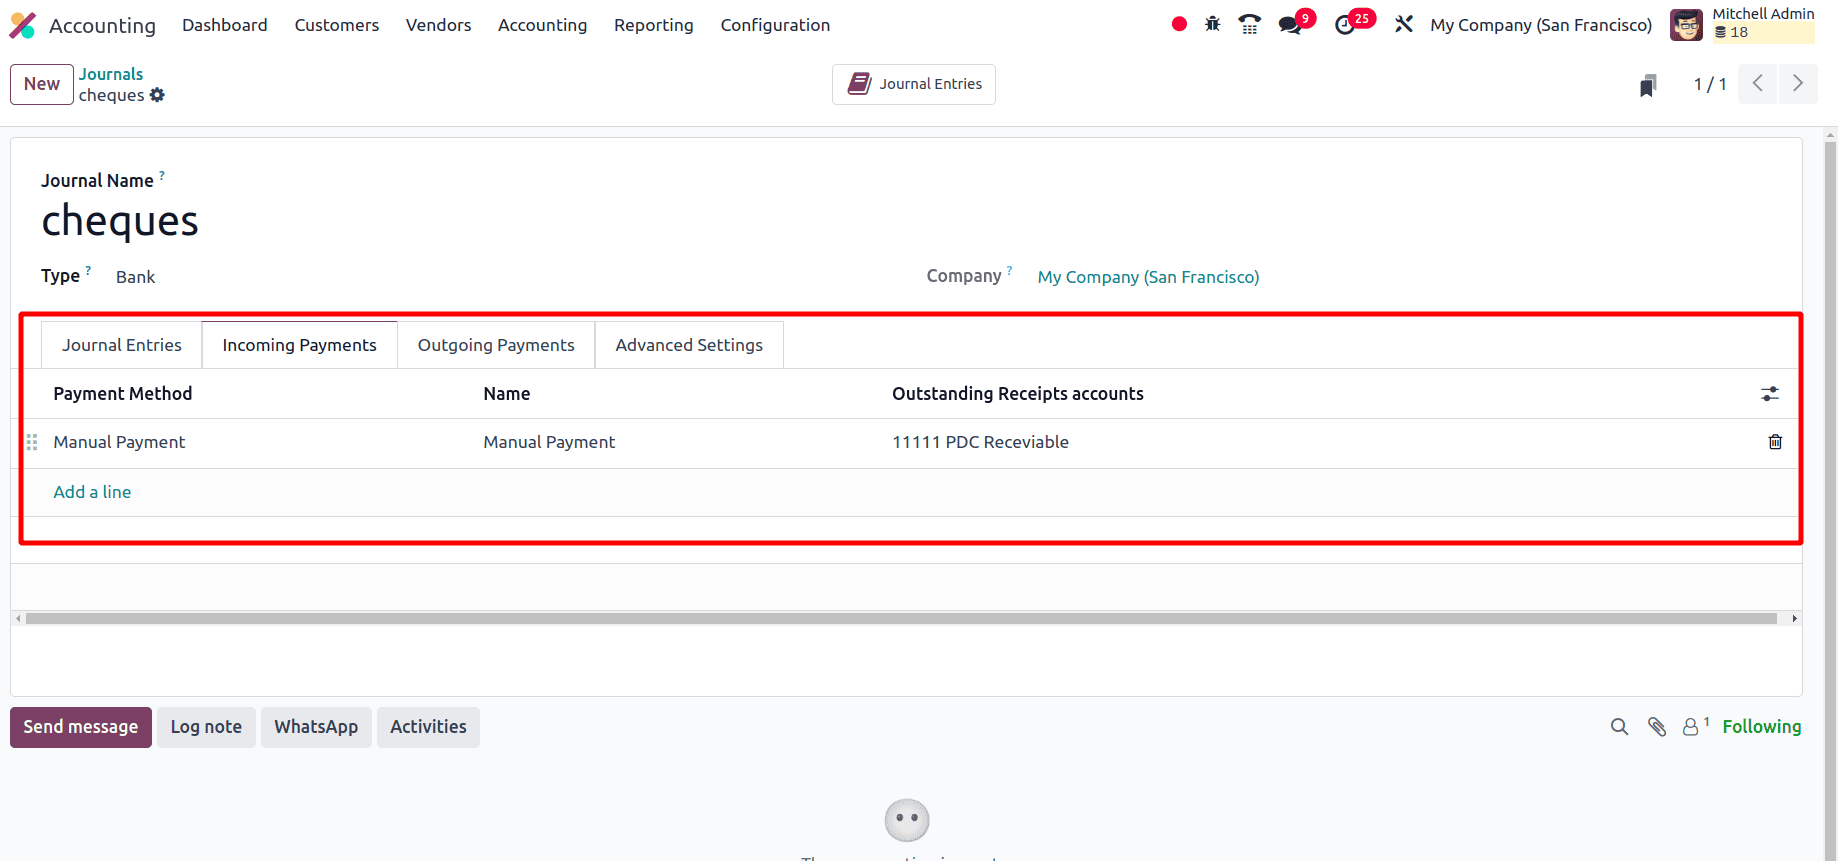
Then, on moving to the incoming payments and outgoing payments tab, under the incoming payments tab, set the payment methods manually and add the outstanding receipt account as PDC receivable, which is a current asset account.
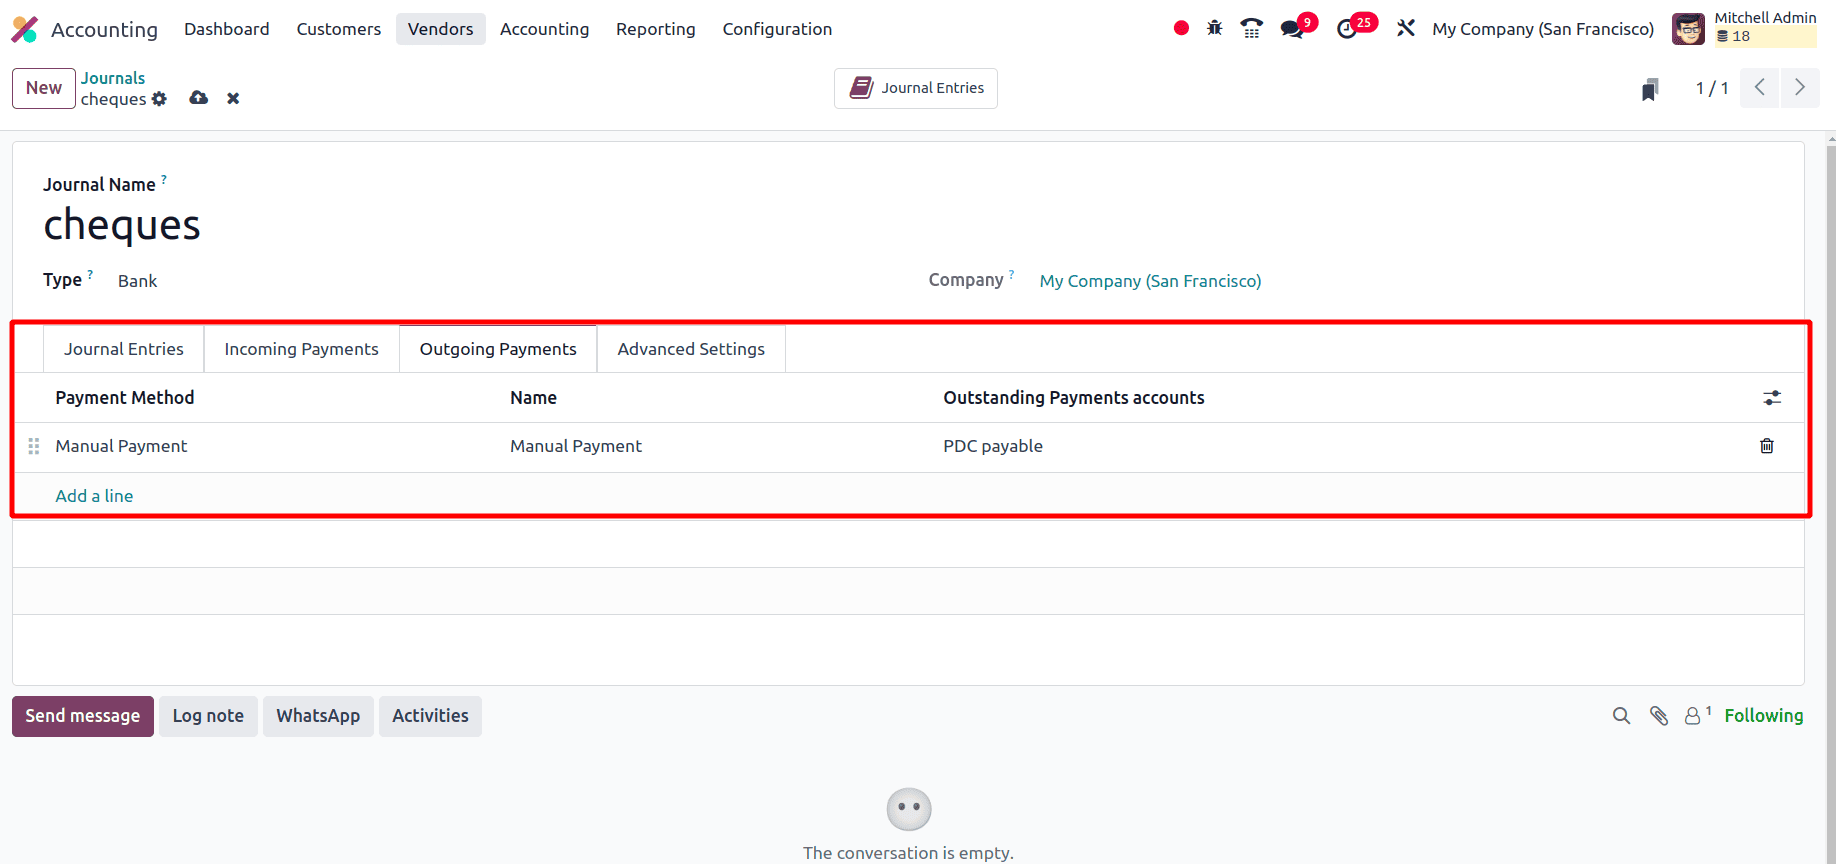
Under the outgoing payment tab, set the payment methods as manual and the account as PDC payable.
PDC for customer invoices
Here, create an invoice for a customer, and in the invoice, set the invoice date as the present date and the due date as the future date.
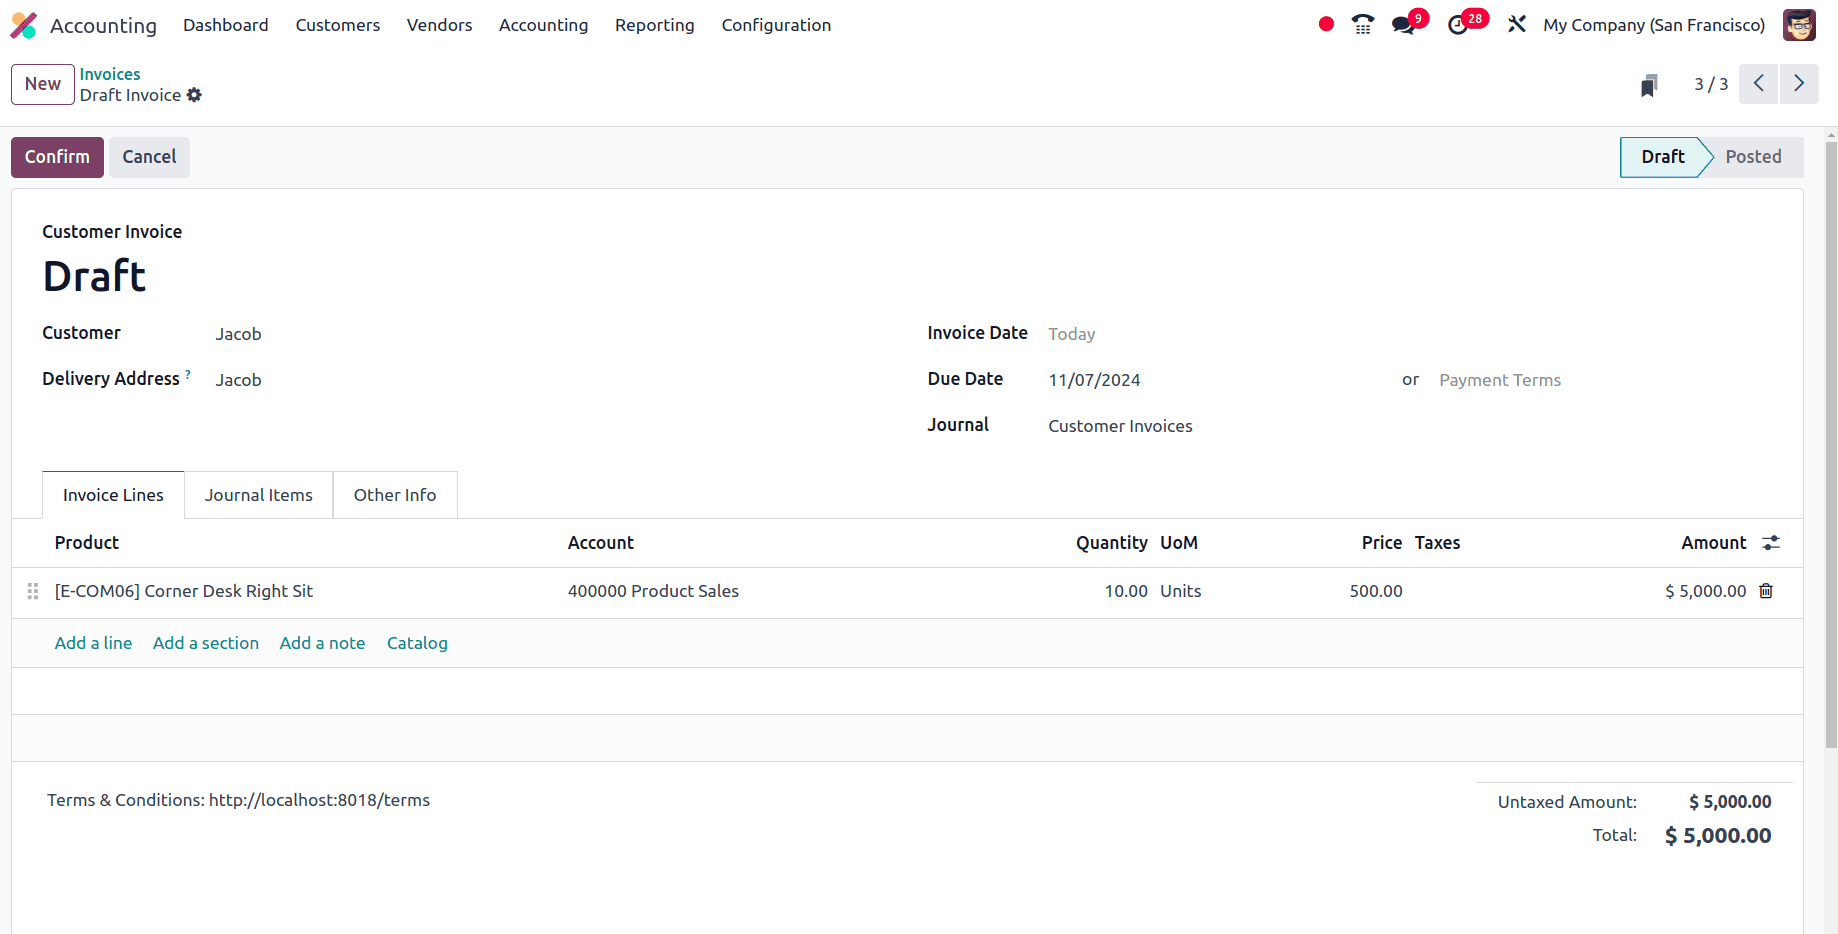
For the invoice, there is a seven-day gap between the invoice date and the due date. Now, confirm the invoice. Once the invoice is confirmed, the invoice will be moved from the draft state to the posted state.
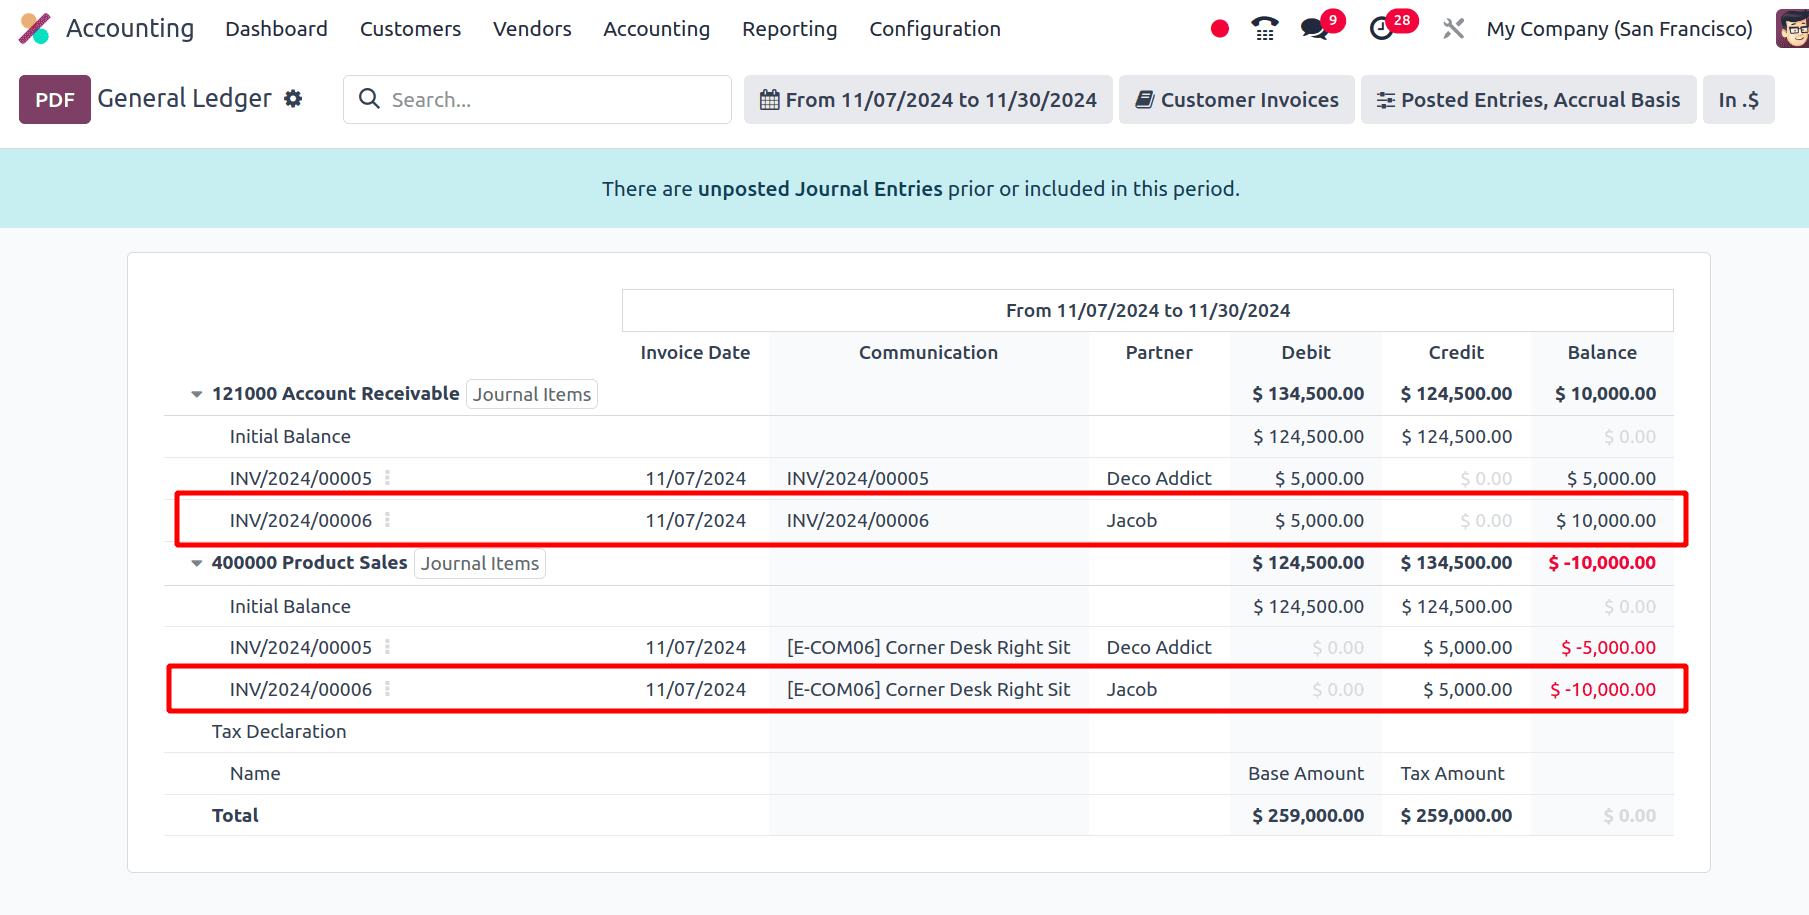
When we moved to the General ledger under the reporting menu, we could see the entries created by Odoo corresponding to the invoice.
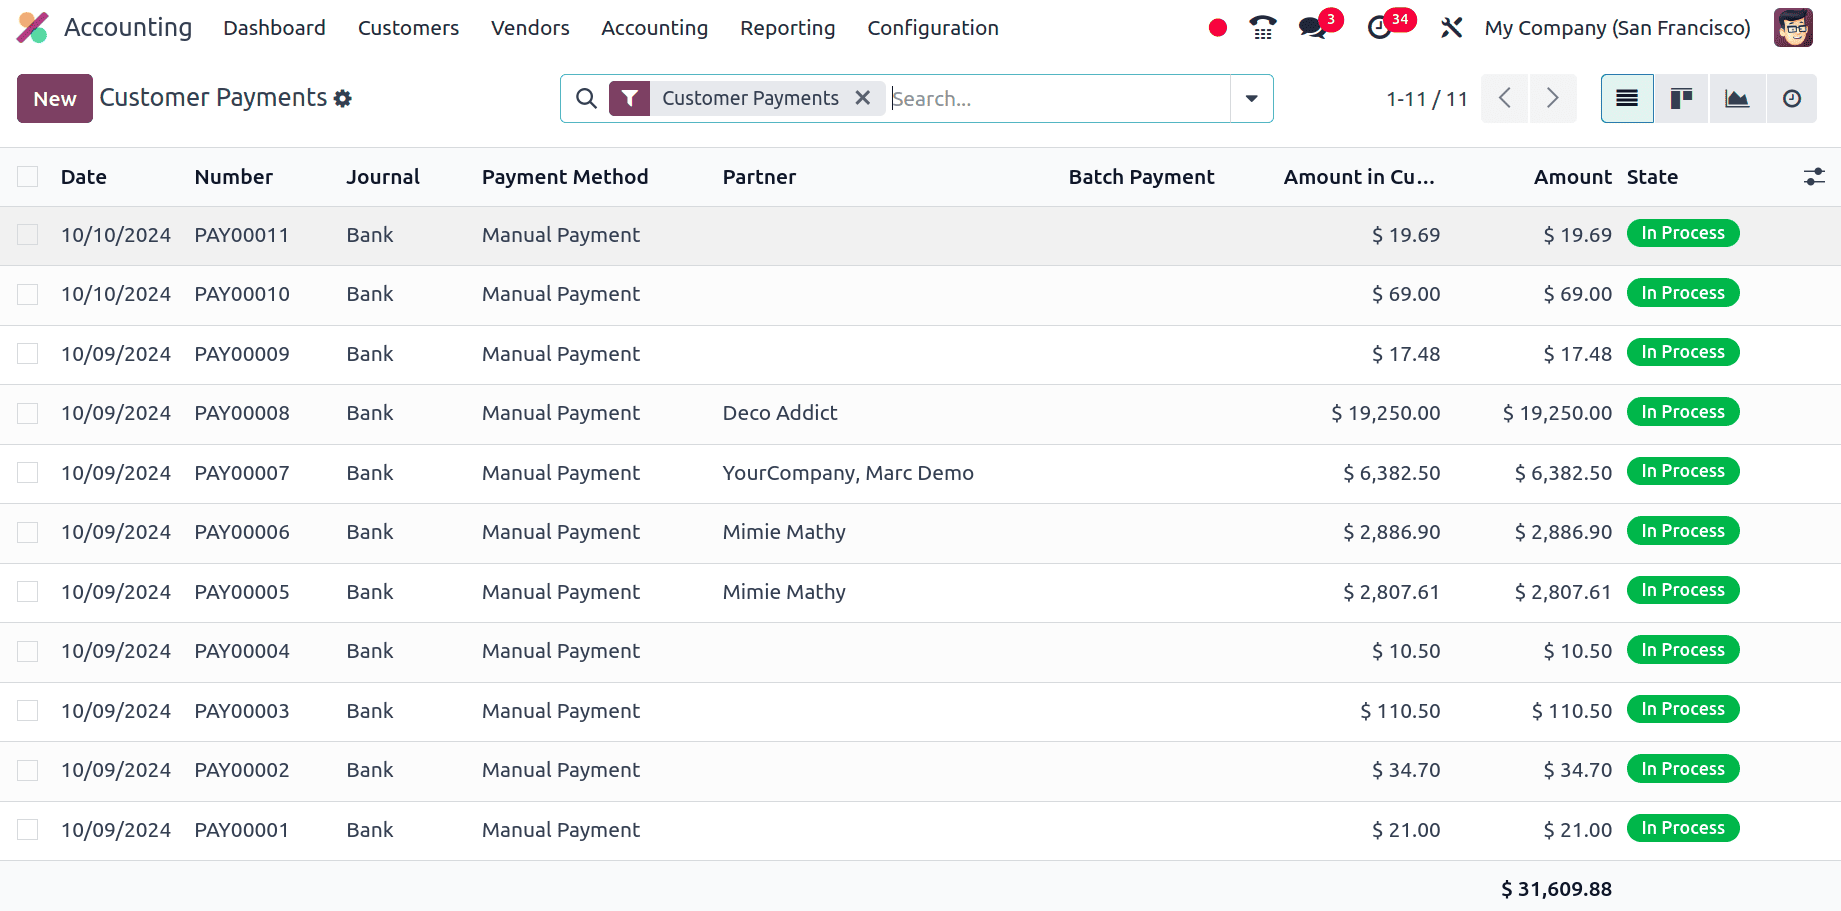
One needs to consider that the customer has made a cheque payment. For that, one can move to the Customer's menu in the Odoo 18 Accounting application and choose the Payment sub-menu. Here, one can see the already-created customer payments. Tocreate a new customer payment, click the New button.
Once clicking the New button, a form will be displayed and in the form. One can see the payment type is set here. If the payment type is set as Receive, it means that this is a customer payment, and if the payment type is Send, it means that this payment is a vendor payment.
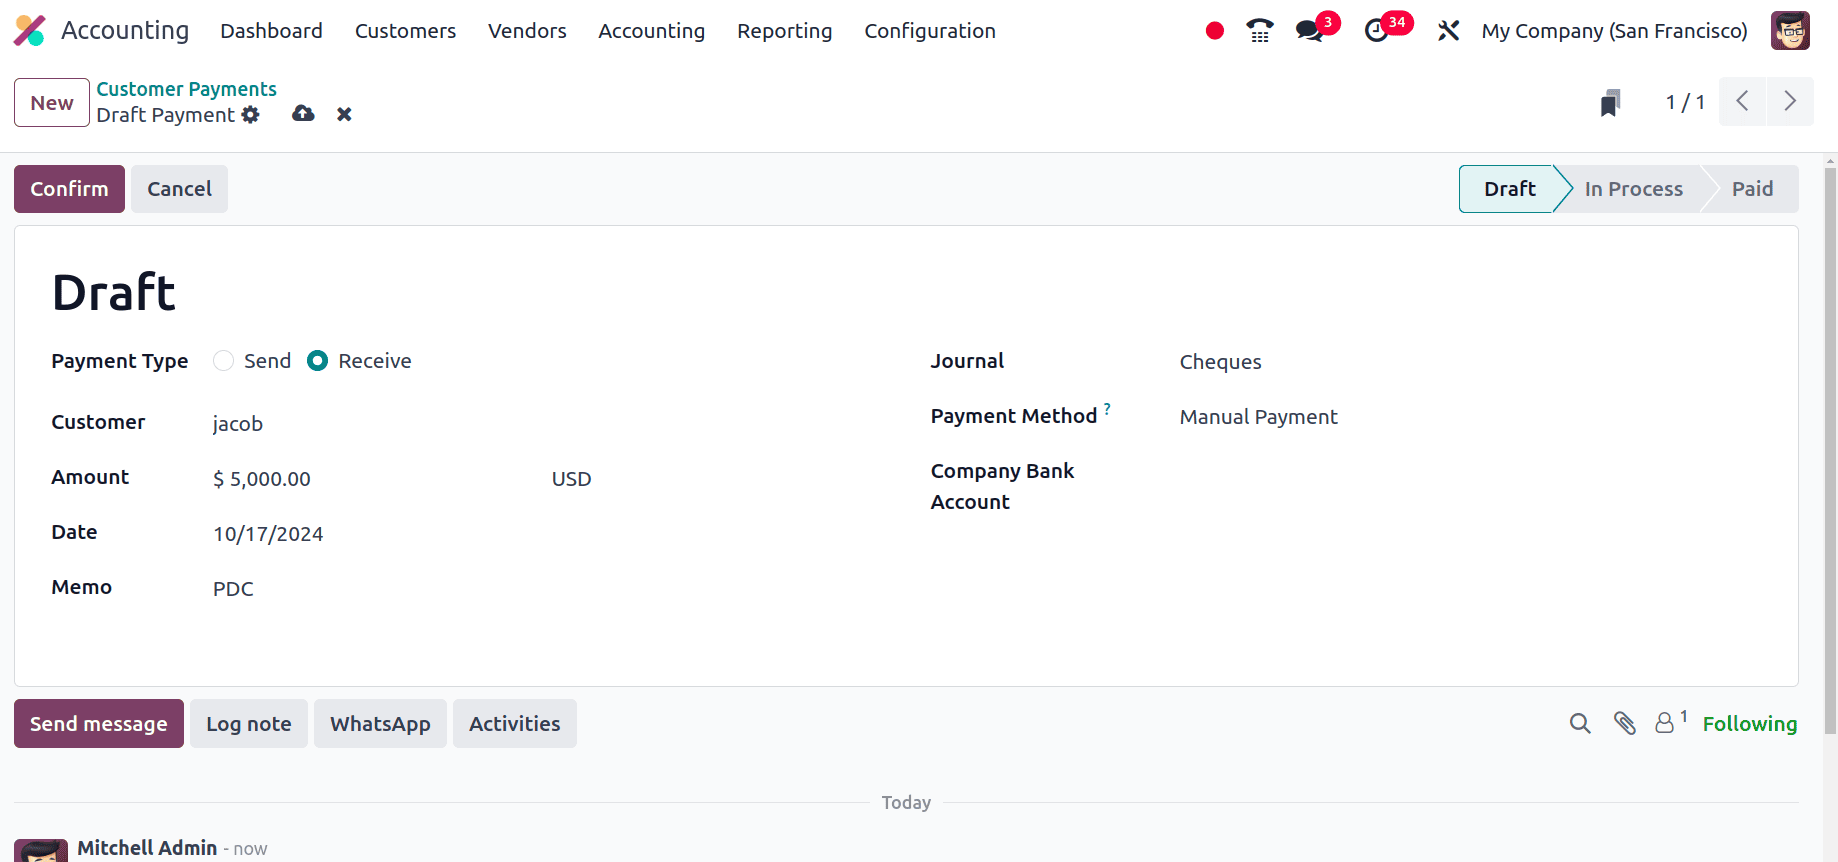
In the customer payment form, set the name of the customer to whom the invoice was created and the amount to the invoice amount. Then Set the date for this customer payment to the due date of the invoice. Set the journal for this customer payments as the Cheques that we have already created and click the confirm button. So the payment will be moved from the draft state to the in-progress state and then click the validate button to validate the payment. Then the payment will be in the posted state. Here, we can see a Journal entry smart tab and when we move to the journal entry, we will get the journal entry corresponding to the payment.
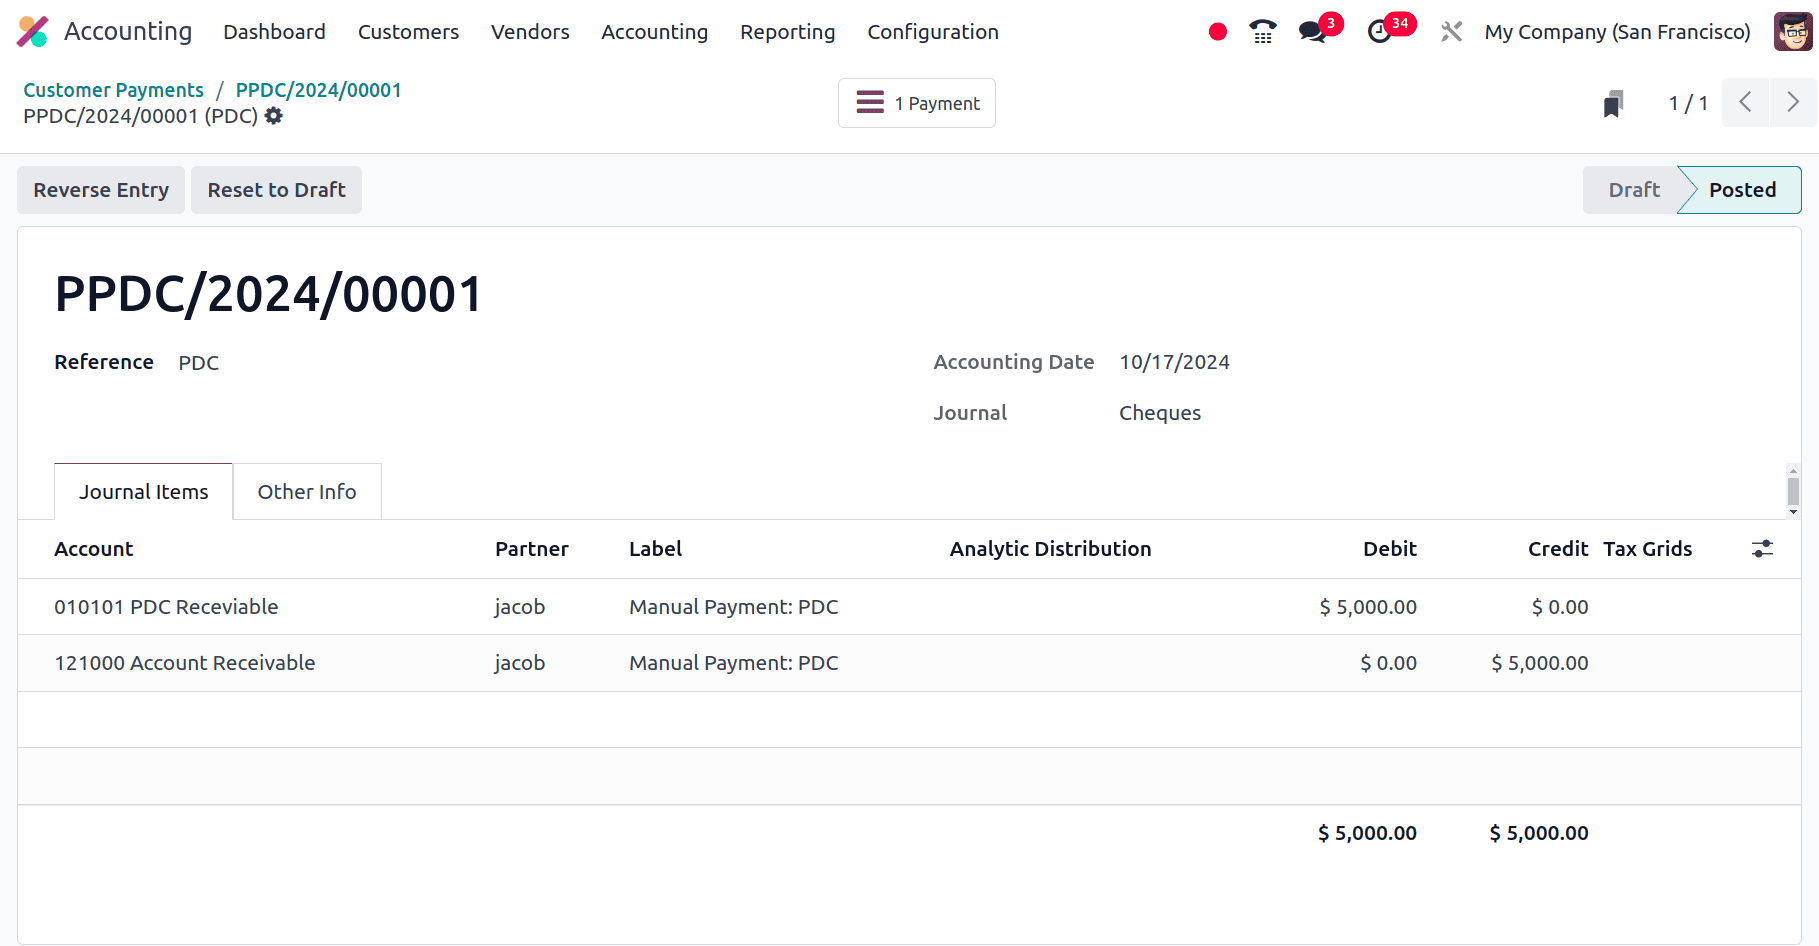
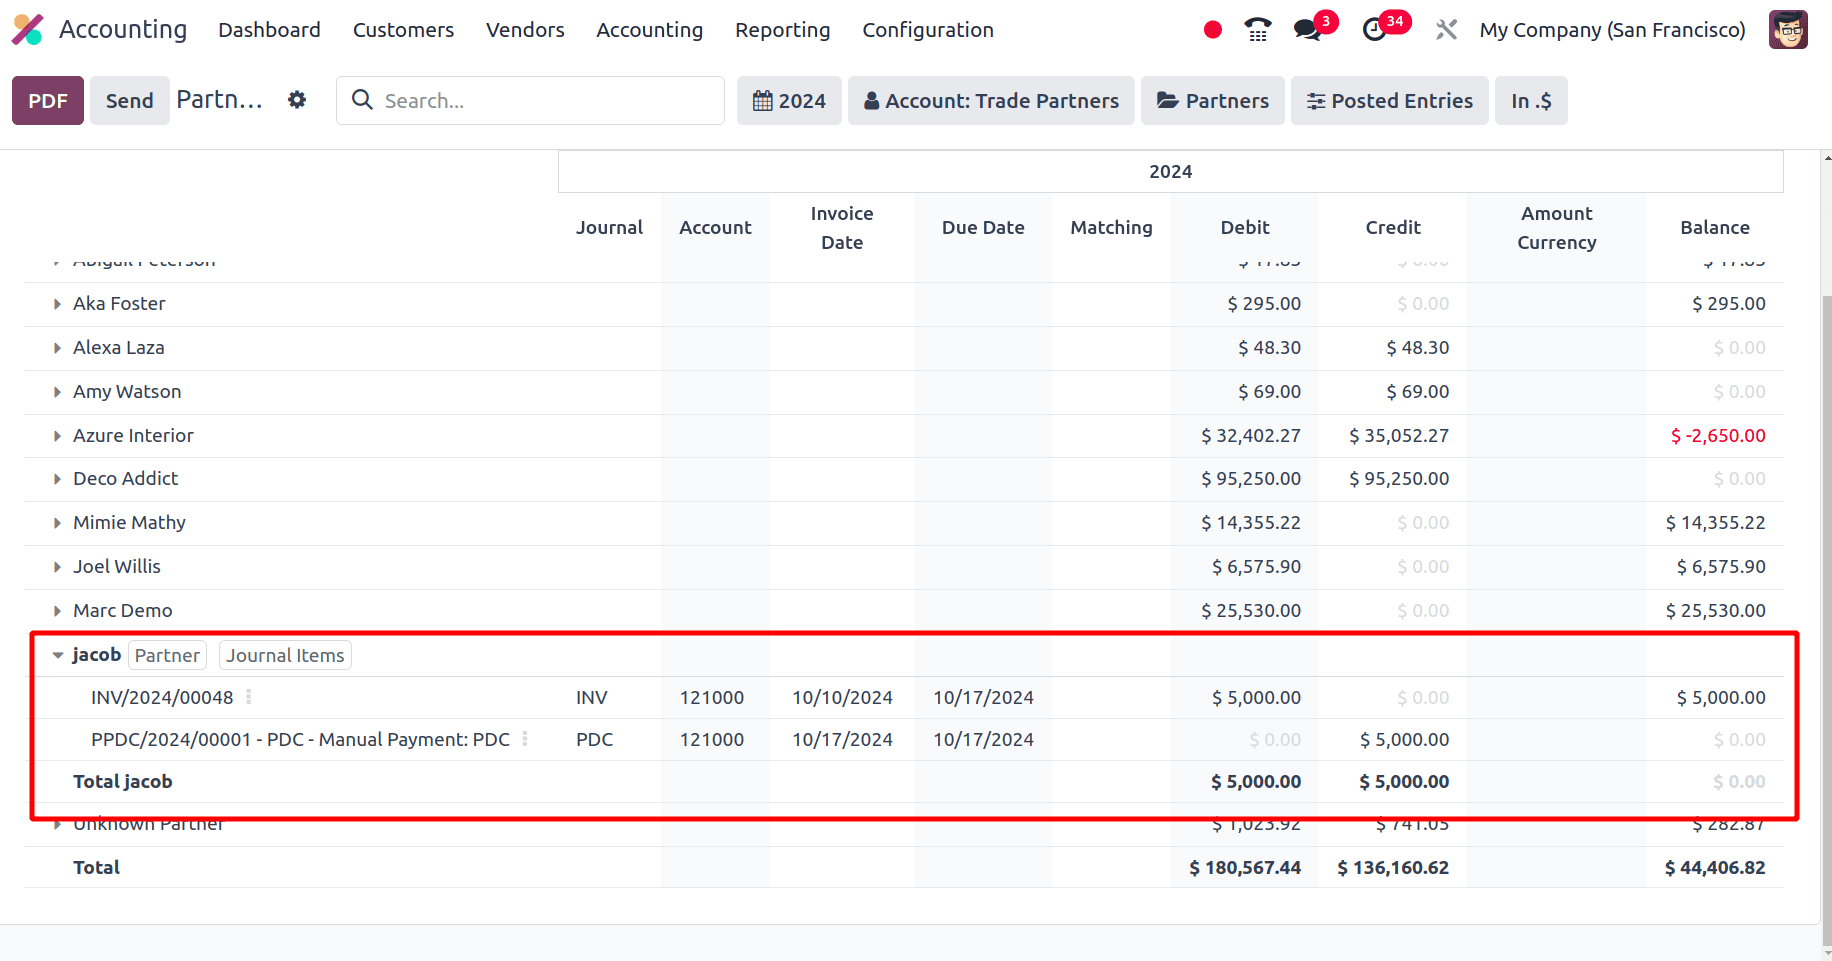
If we move to the partner ledge again, we can see there will be two entries, one for the invoice and the other for the payment for the feature date, with its debit amount and credit amount.
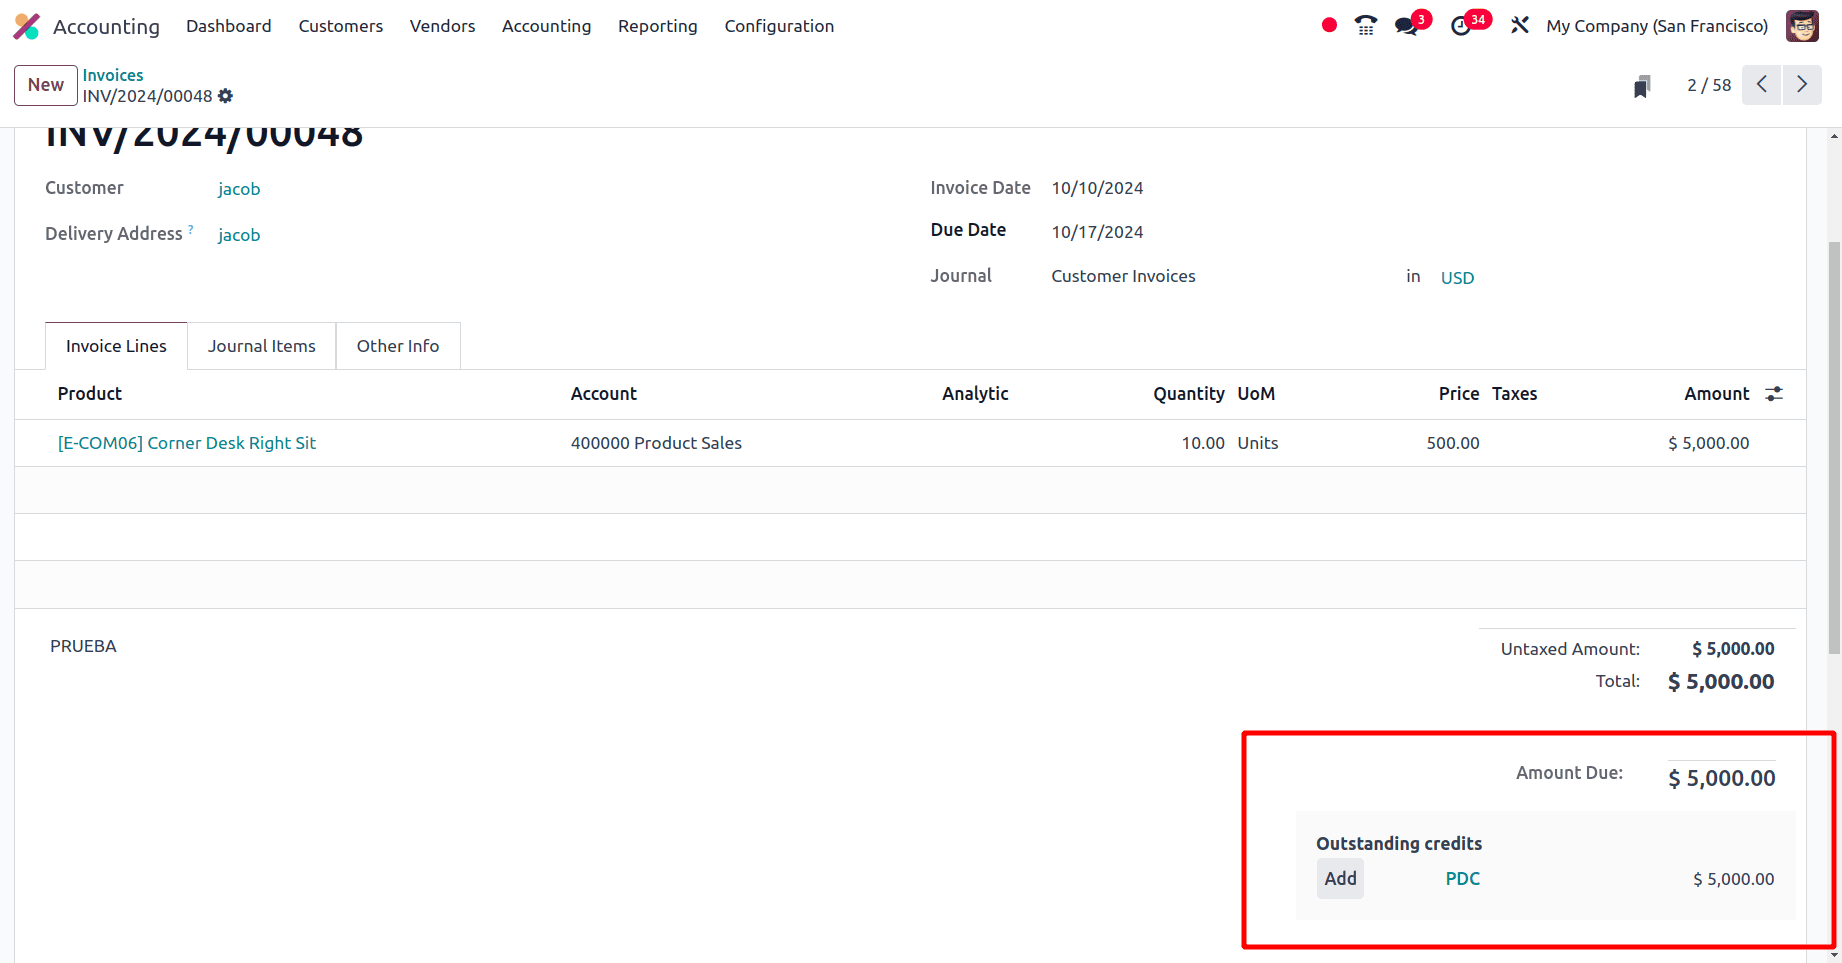
When we move to invoices, select the invoice that we have created. At the bottom of the invoice page, the customer's outstanding credits will show, and we have an option to add the customer payments.
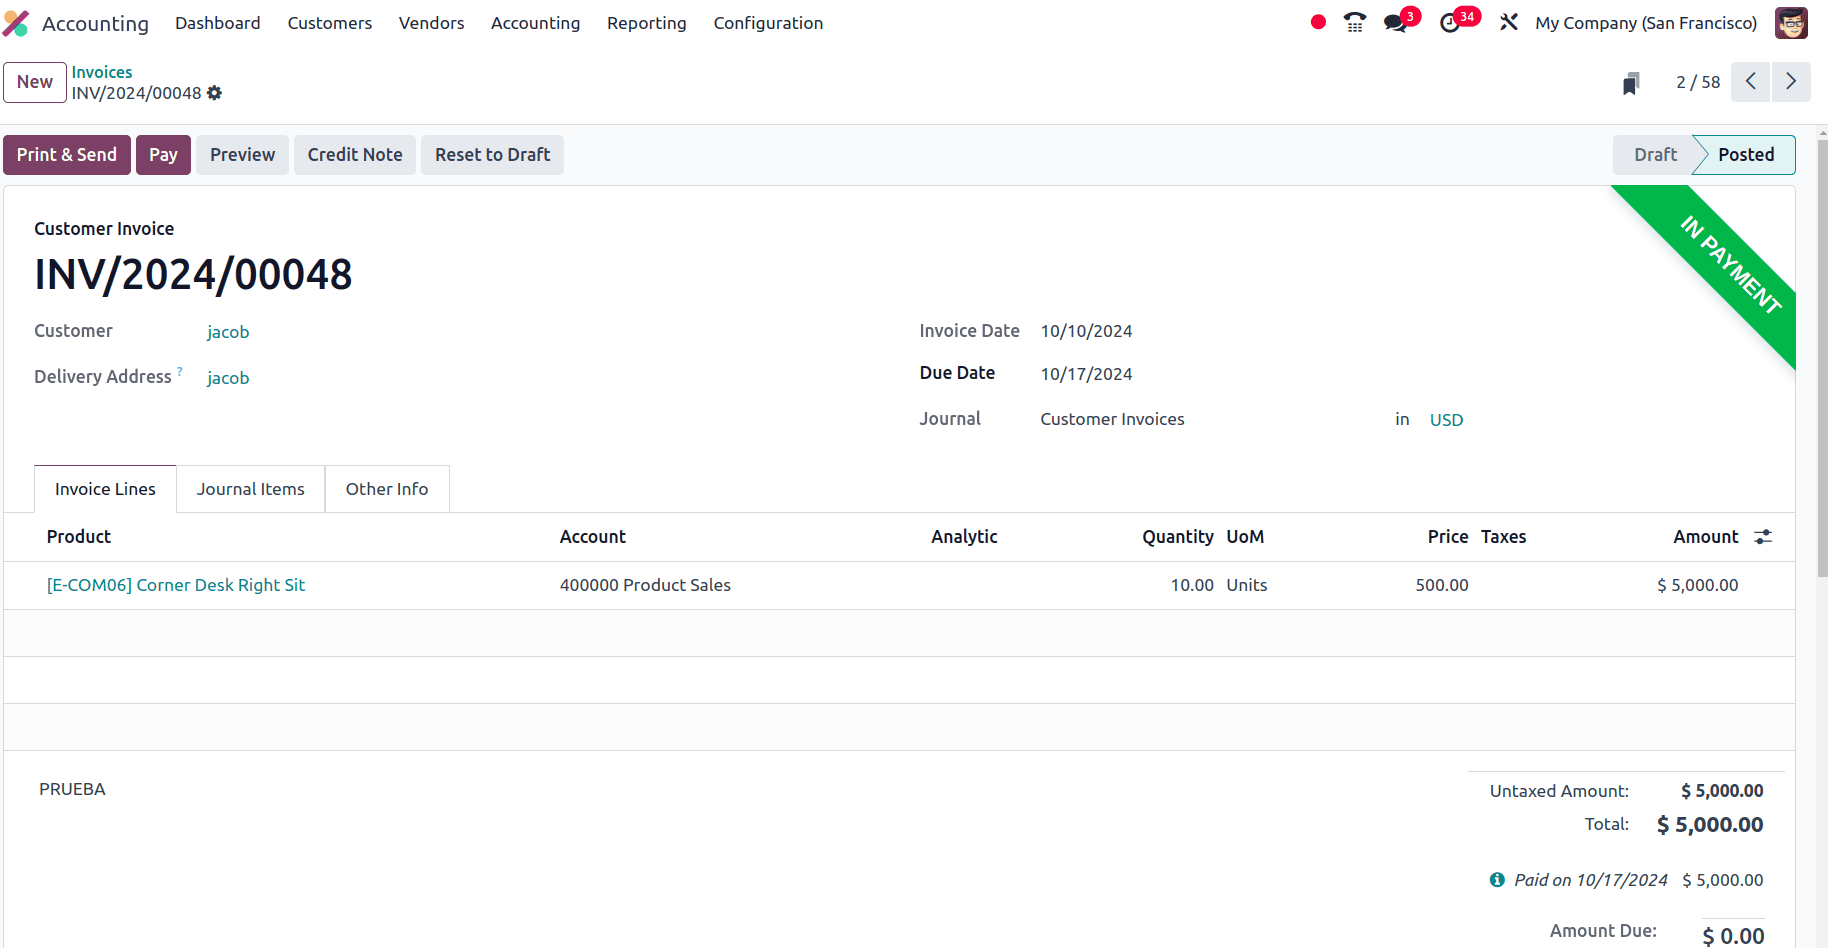
There, click the Add button to add the amount in the cheque to the invoice. Once we add the cheque payments to the invoice, the invoice will be in the ‘In payment state’.
The next step is to reconcile the PDC with the bank statement. Move to the Dashboard of the Accounting module and create a new bank statement for the customer, Jacob.
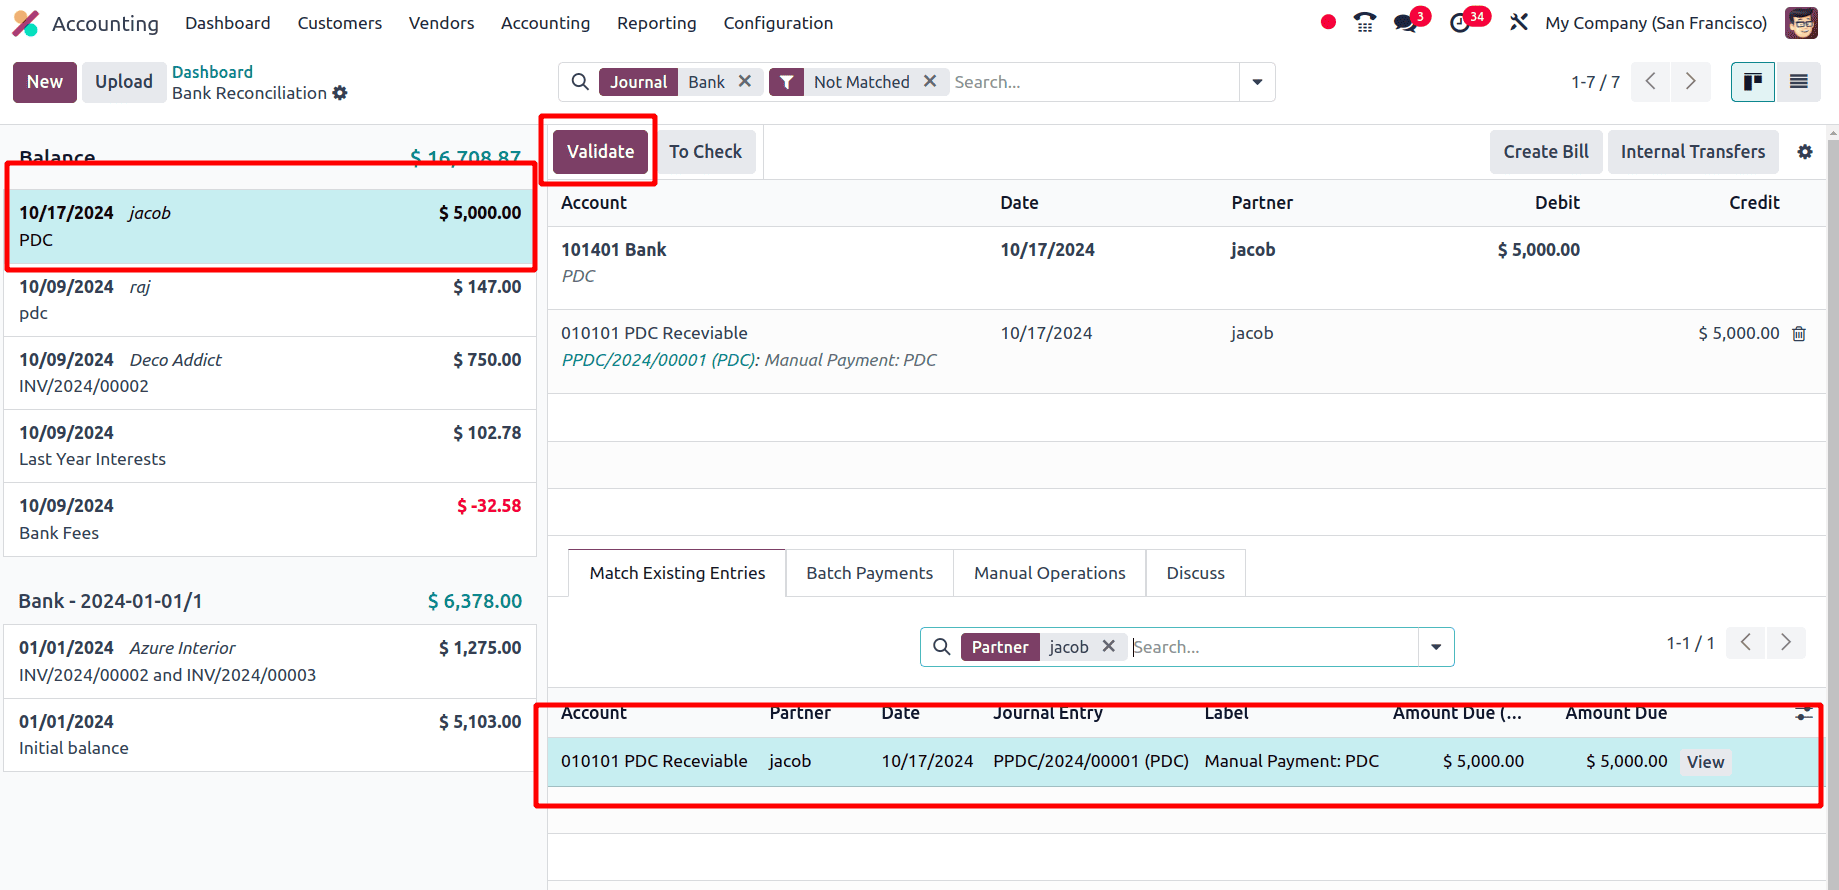
Click the validate button to validate the statement. Once the statement gets validated, move to the invoice and check its status. That is, when the PDC statement is validated, the invoice will be in the paid state.
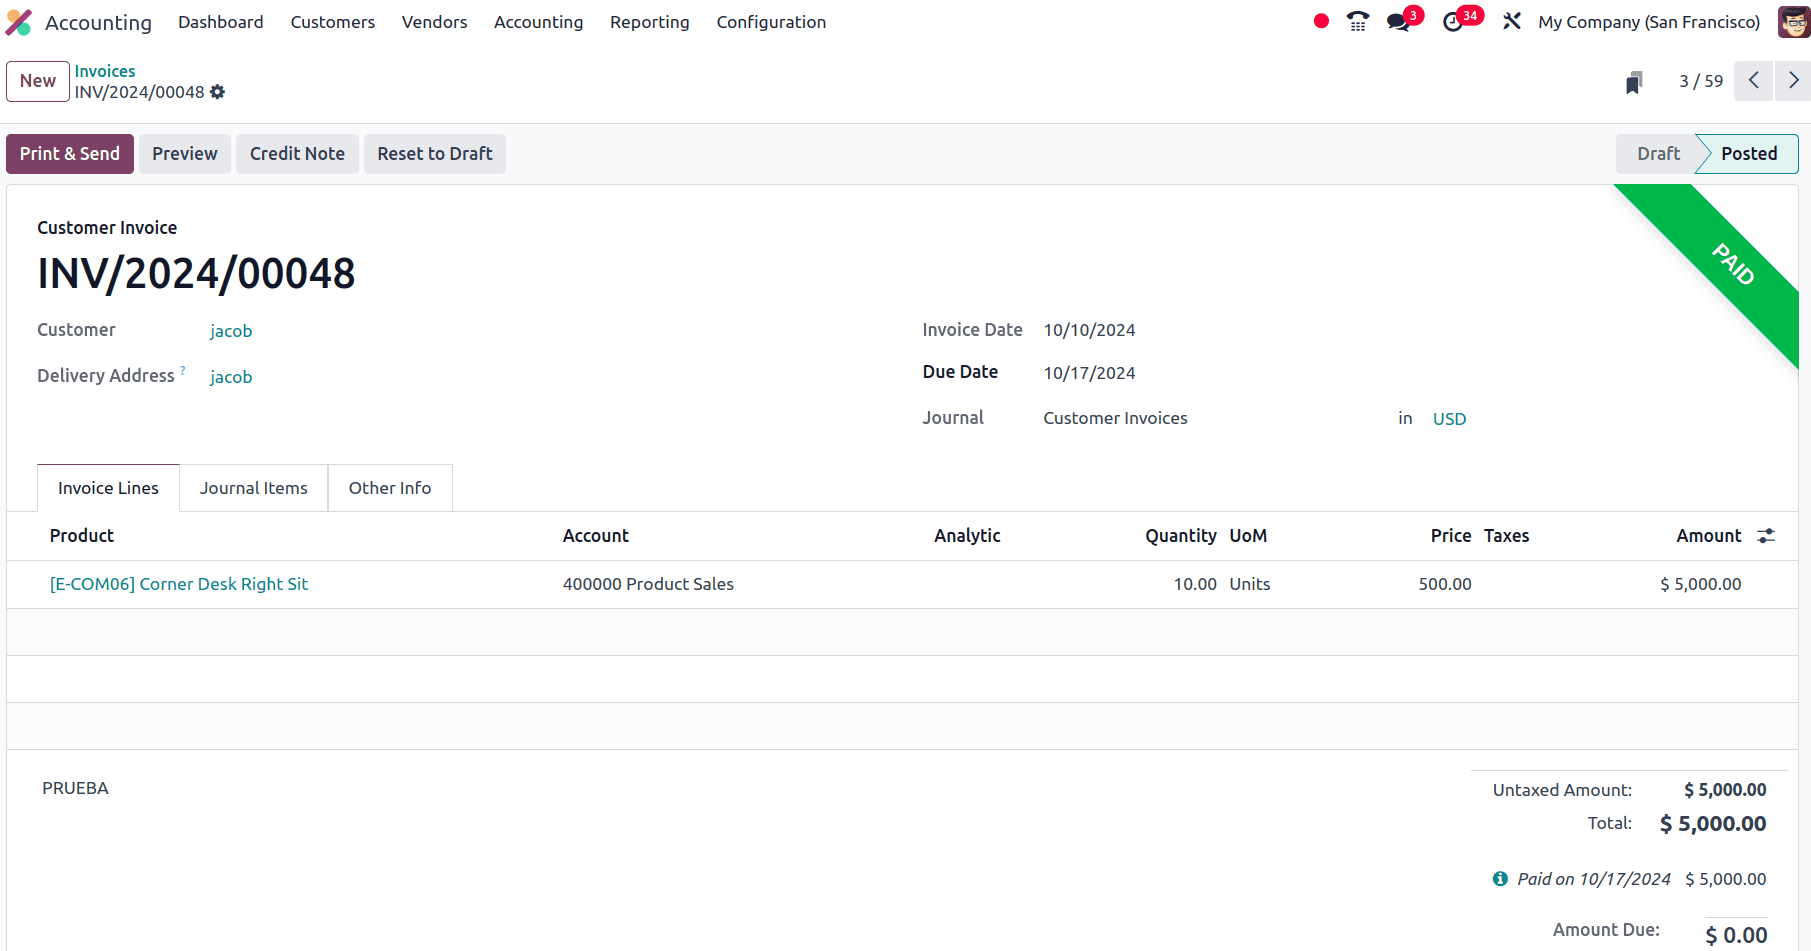
This is how we manage the Post dated cheques of the customer invoices in Odoo 18
PDC for Vendor Bills
Here, create a vendor bill for a customer and, in the bill, set the bill date as the present date and the due date as the future date.
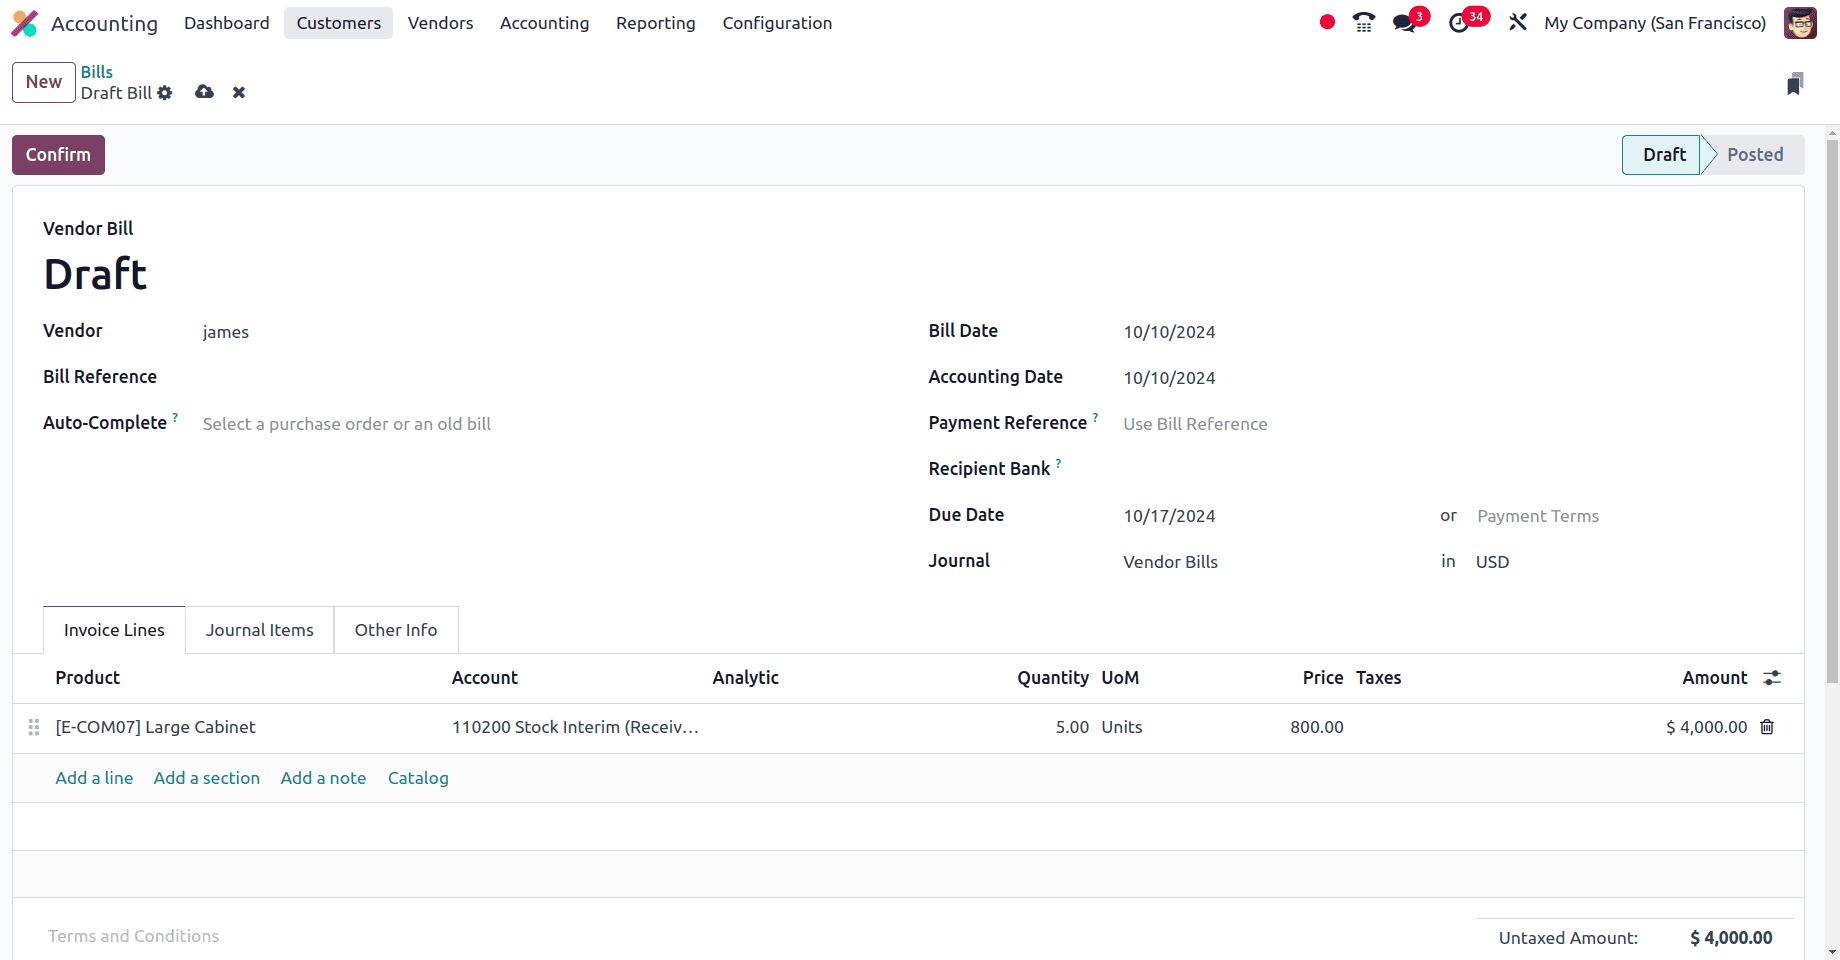
Here, for the bill, there is a seven-day gap between the bill date and the due date. Now, confirm the bill. Once the bill is confirmed, the invoice will be moved from the draft state to the posted state.
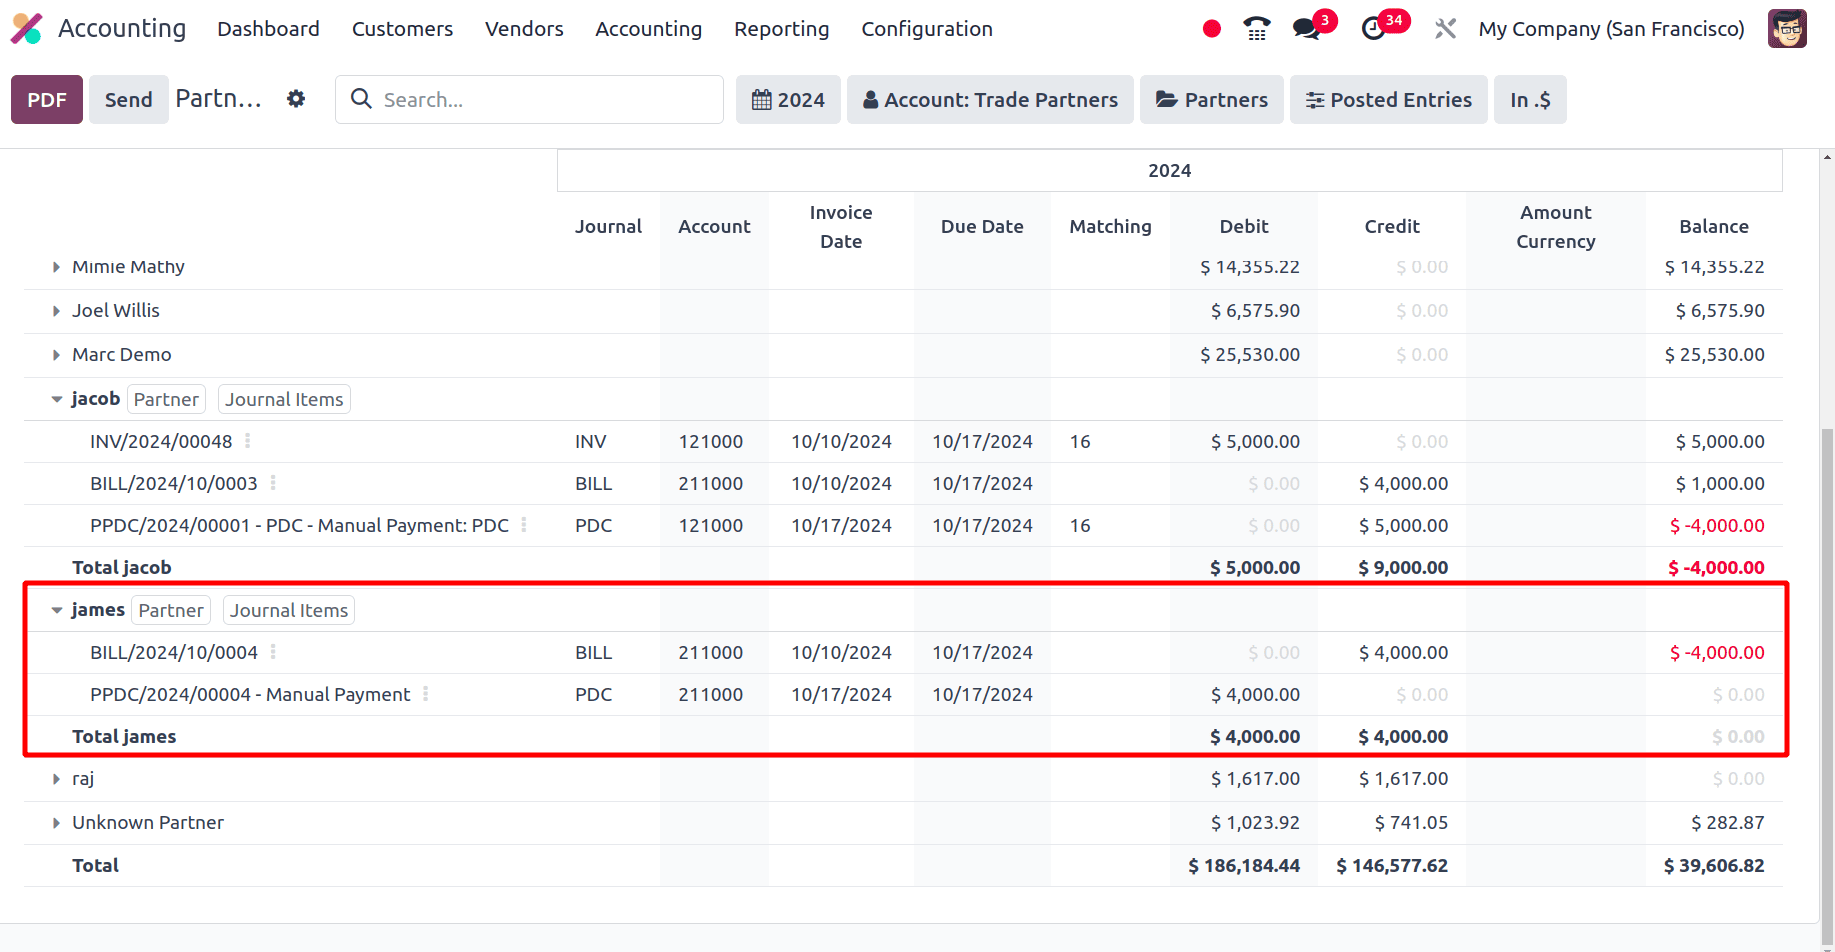
When we moved to the partner ledger under the reporting menu, we could see the partner, and when we select the partner, we will get the journal items created for the partner.
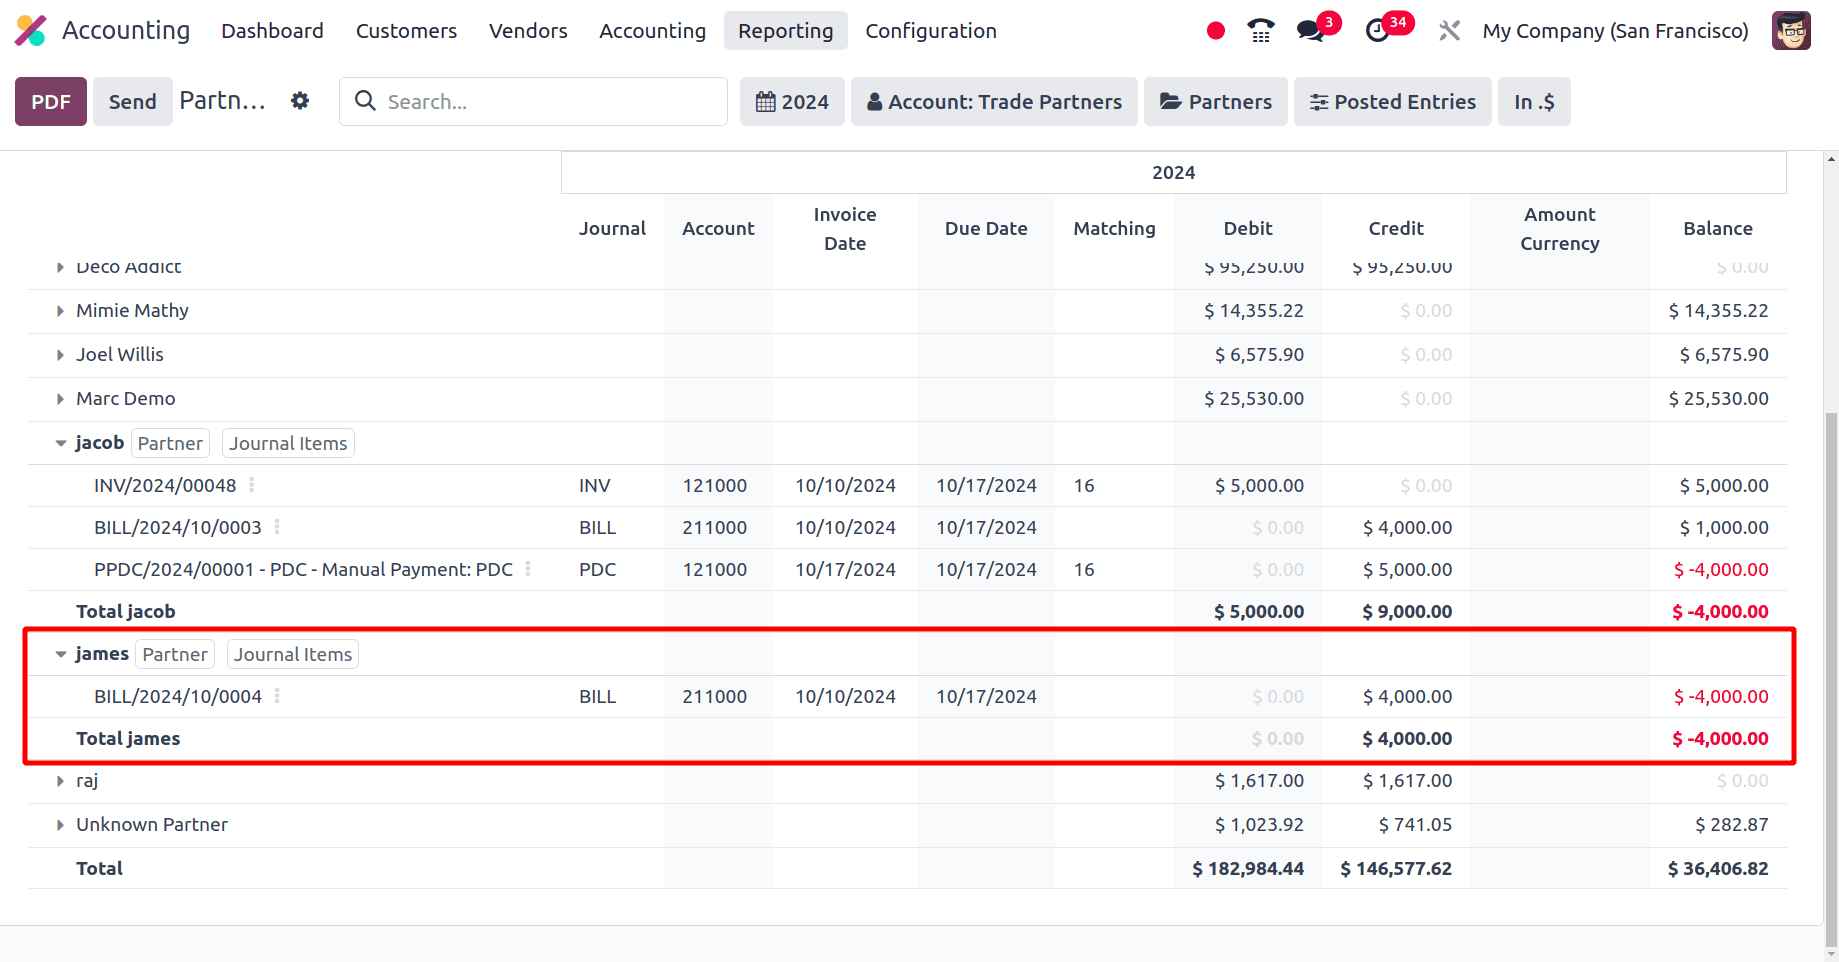
We need to consider that the vendor has made a cheque payment. For that, we can move to the vendor menu in the Accounting application and choose the payment sub-menu. Here, we can see the already created vendor payments, and to create a new vendor payment, we can click the New button. A form to fill out with the details of the payment will be provided. In the form, we can see the payment type is set here. If the payment type is set as Receive, it means that this is a customer payment, and if the payment type is Send, it means that this payment is a vendor payment.
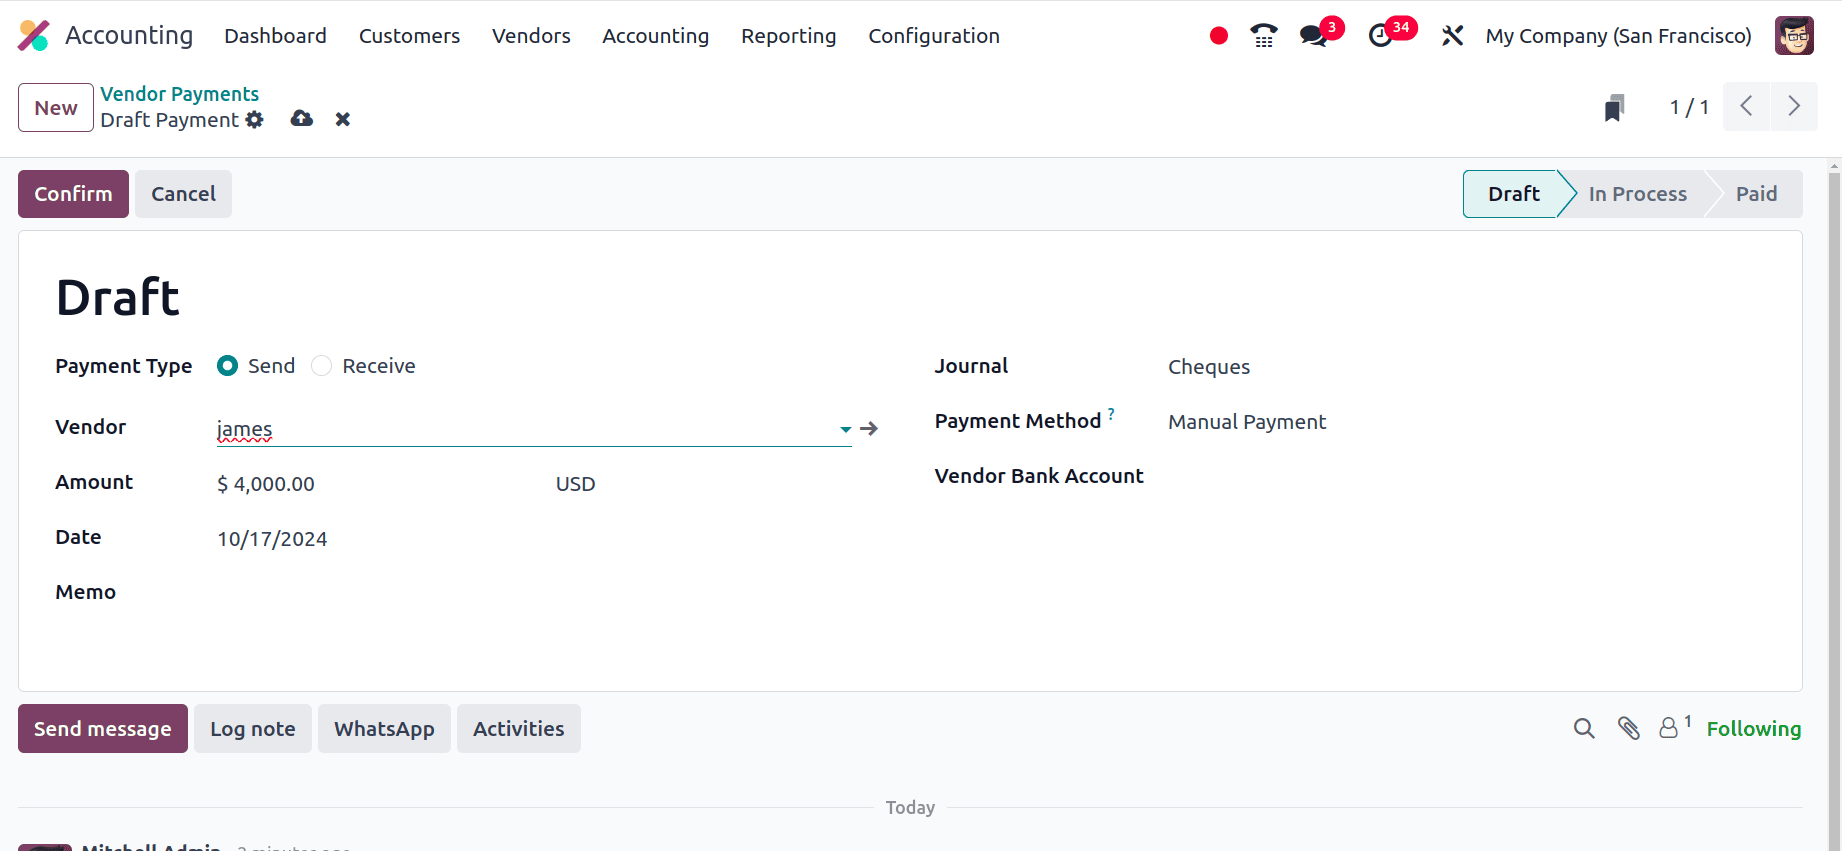
In the vendor payment form, set the name of the vendor to whom we have created the bill, set the amount as the amount in the bill, and the date for this vendor payment as the due date in the bill that we have provided, that is the due date in the bill and the date of the vendor payments are the same. Set the journal for this customer payments as the Cheques that we have already created, and click the confirm button. So, the payment will be moved from the draft state to the in-progress state. Then, click the validate button to validate the payment. The payment will be in the posted state. We can see a journal entry smart tab, and when we move to the journal entry, we will get the journal entry corresponding to the payment.
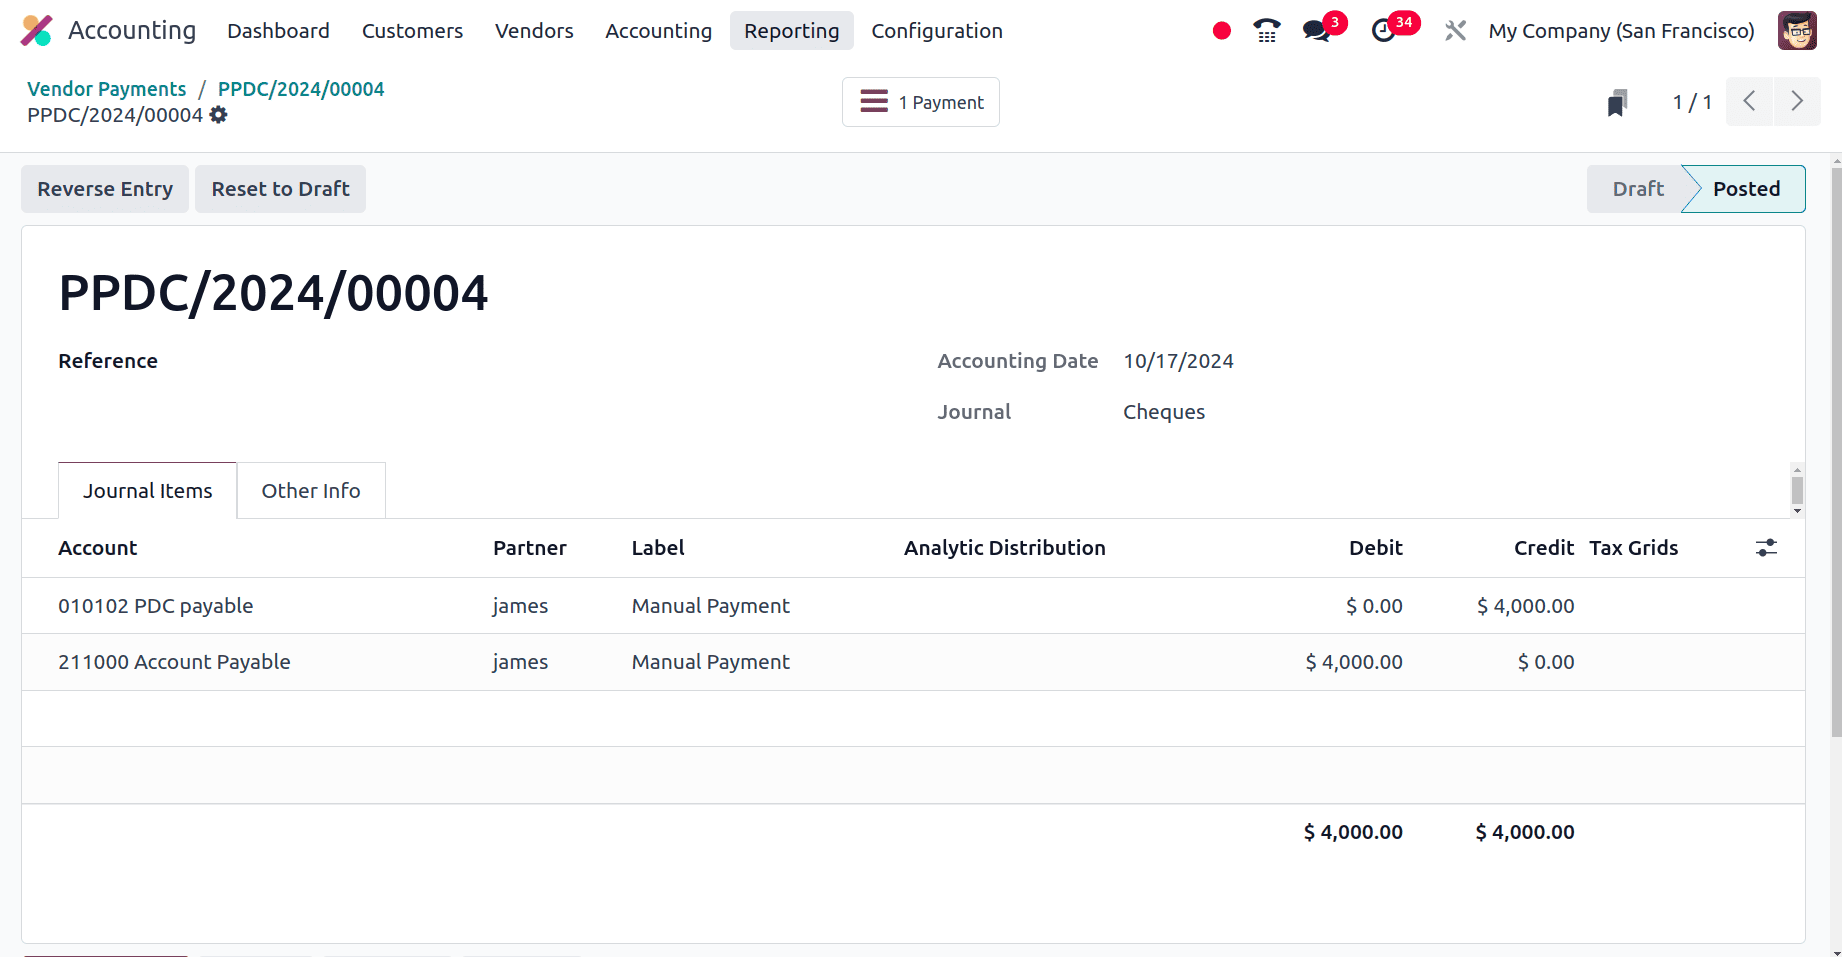
If we again move to the partner ledge, we can see there will be two entries, one for the bill and the other for the payment for the feature date with its debit amount and the credit amount.
When we move to bills, select the bill that we have created. At the bottom of the bill, the vendor's outstanding debits will show. We have the option to add vendor payments.
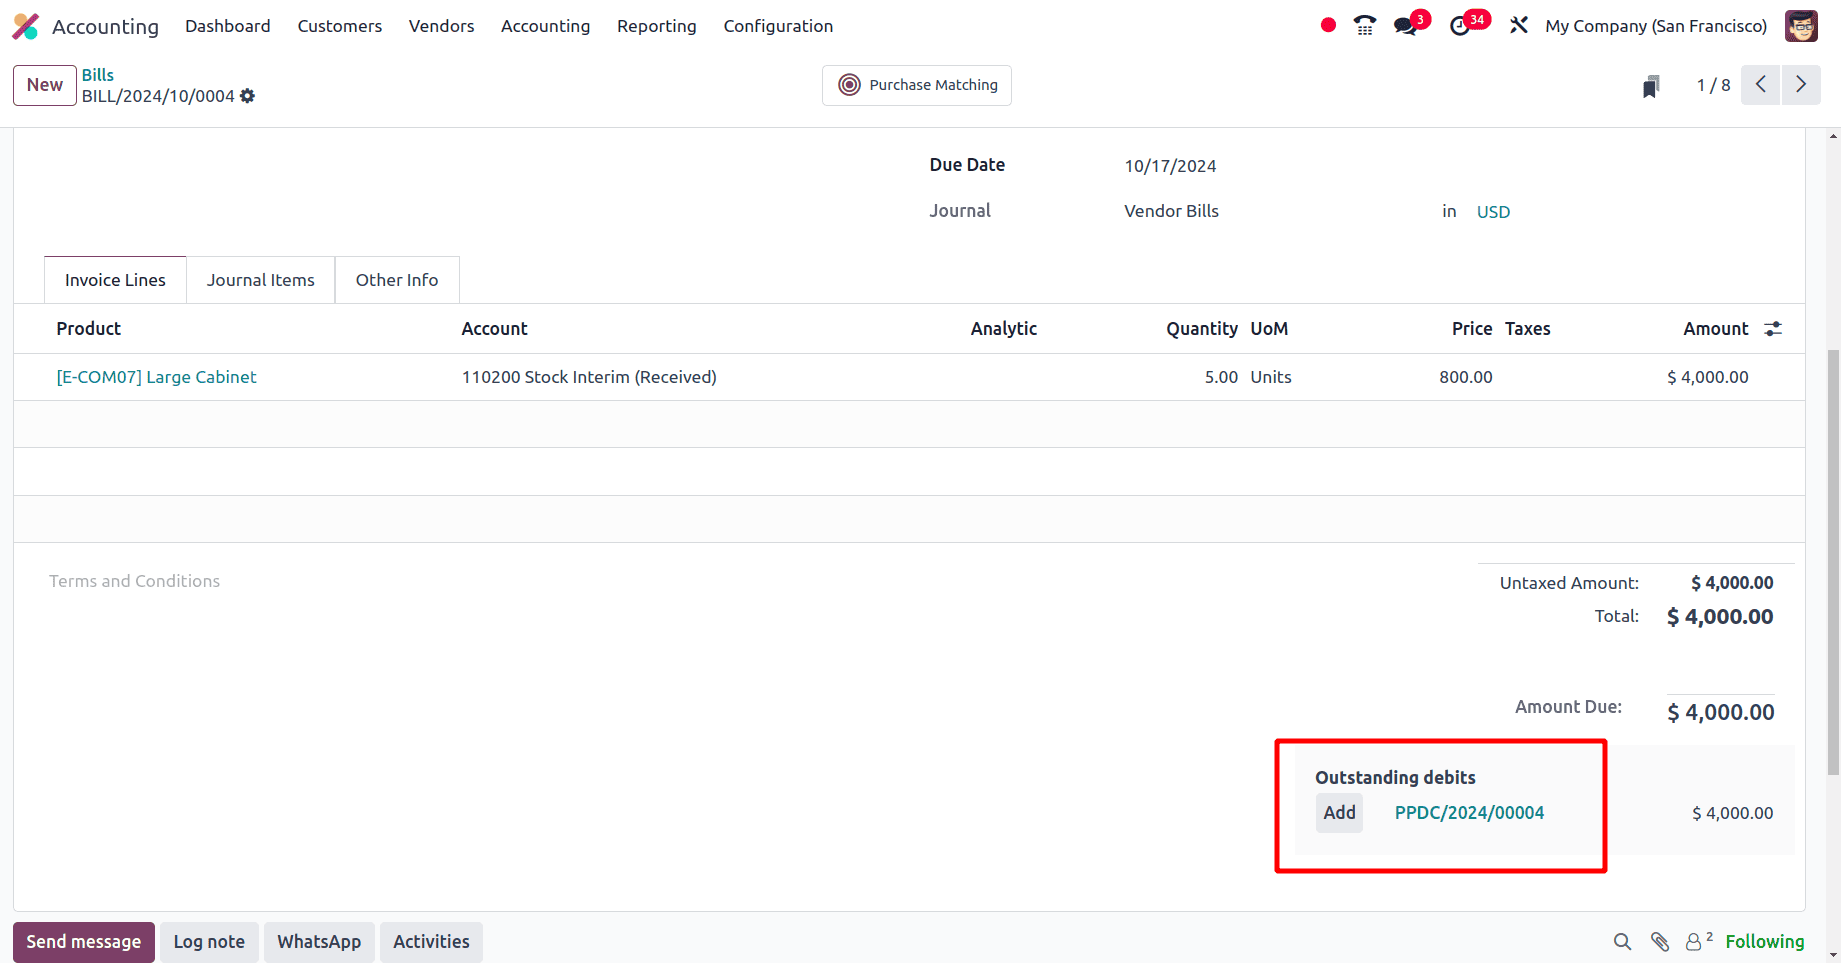
There, click the Add button to add the amount in the cheque to the bill. So once we add the cheque payments to the bill, the bill will be in the ‘In payment state’.
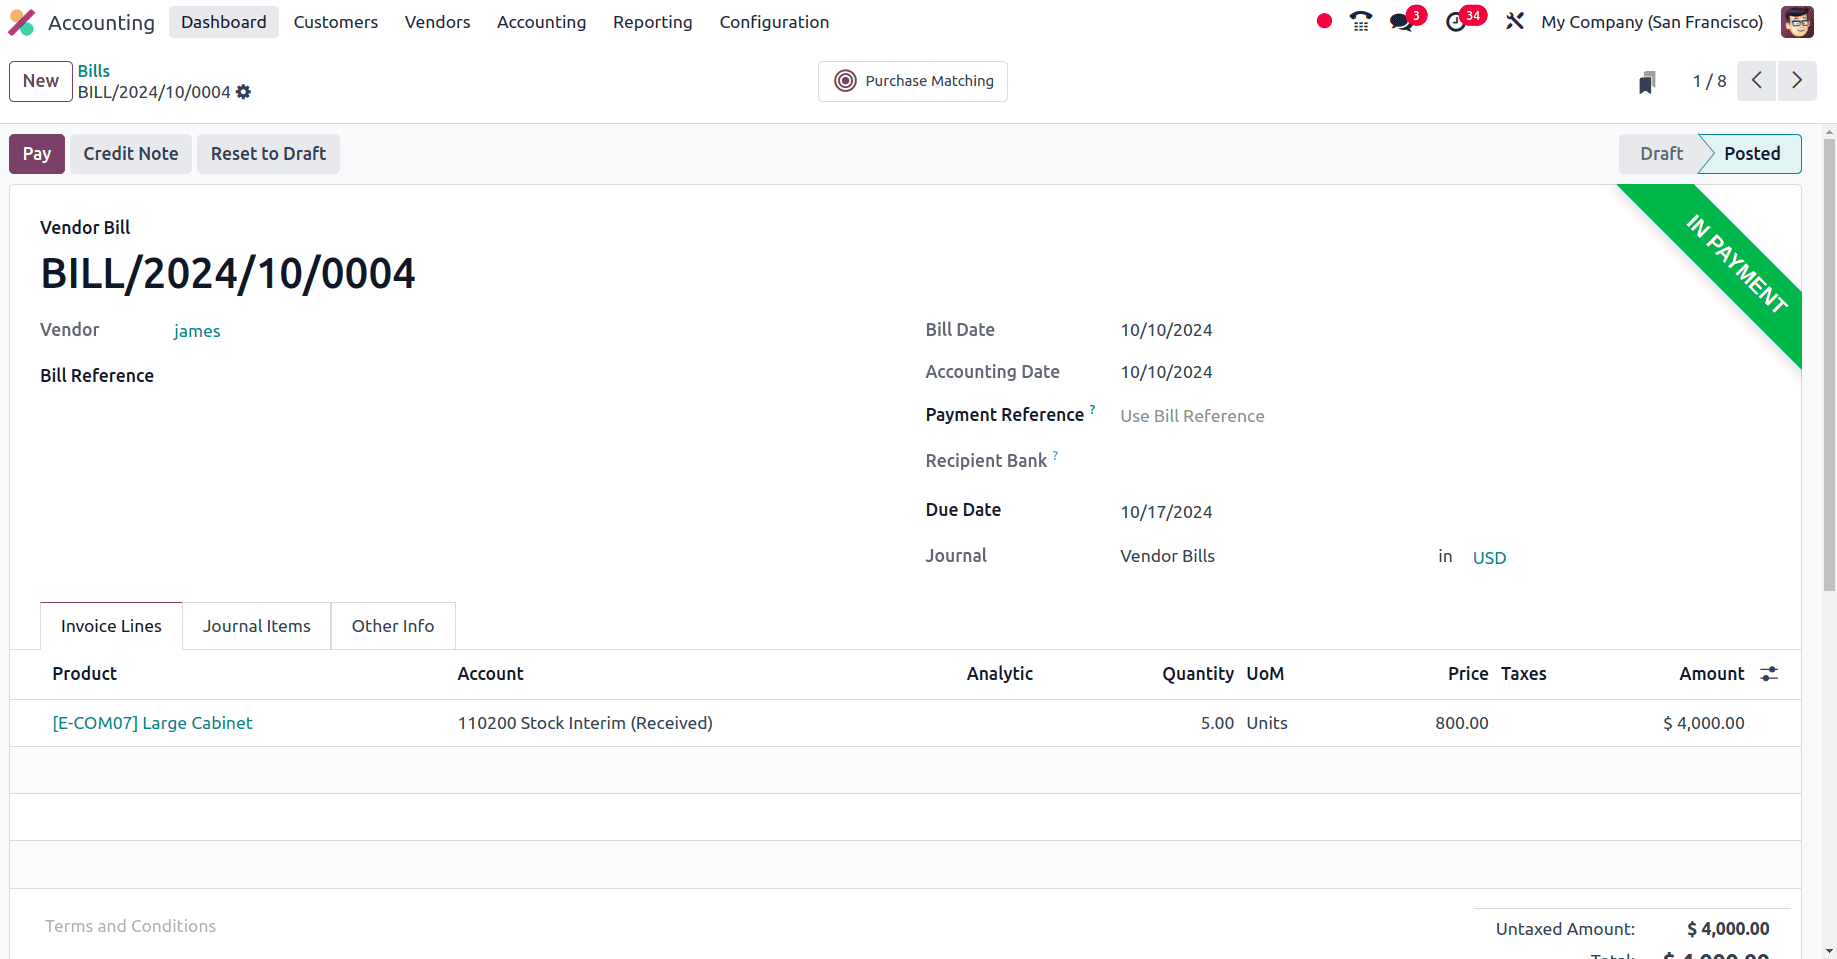
The next step is to reconcile the PDC with the bank statement. So move to the Dashboard of the Accounting module and create a new bank statement for the vendor, James.
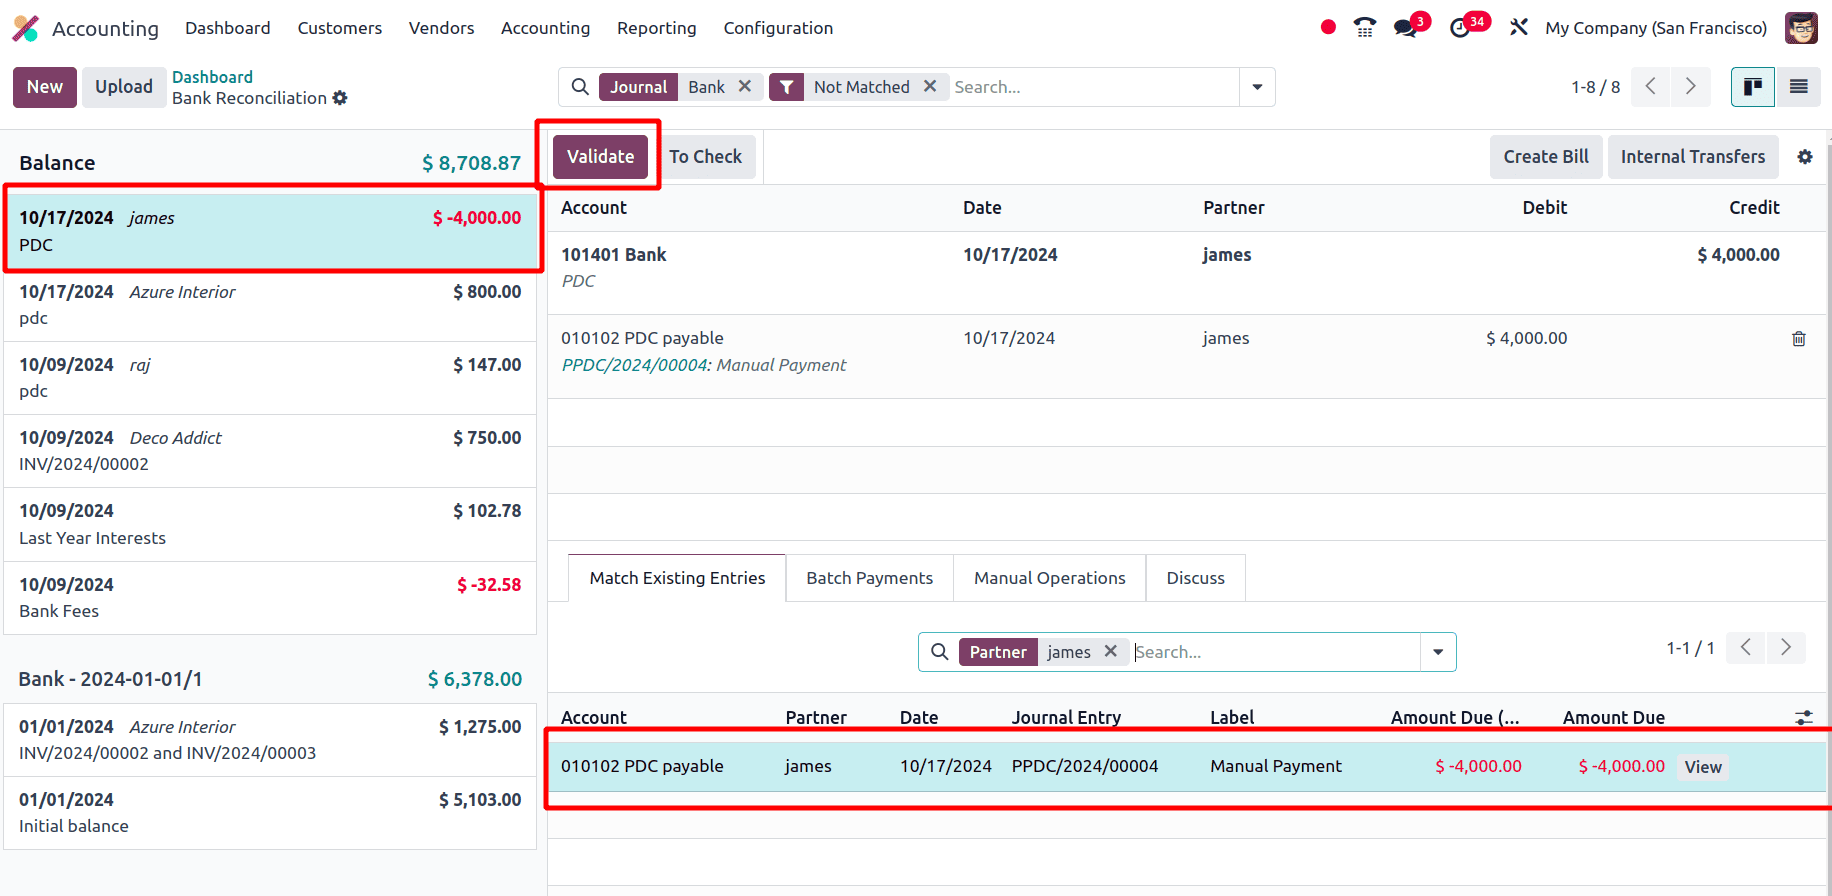
Click the validate button to validate the statement. Once the statement gets validated, move to the bill and check its status. That is, when the PDC statement is validated, the bill will be in the paid state.
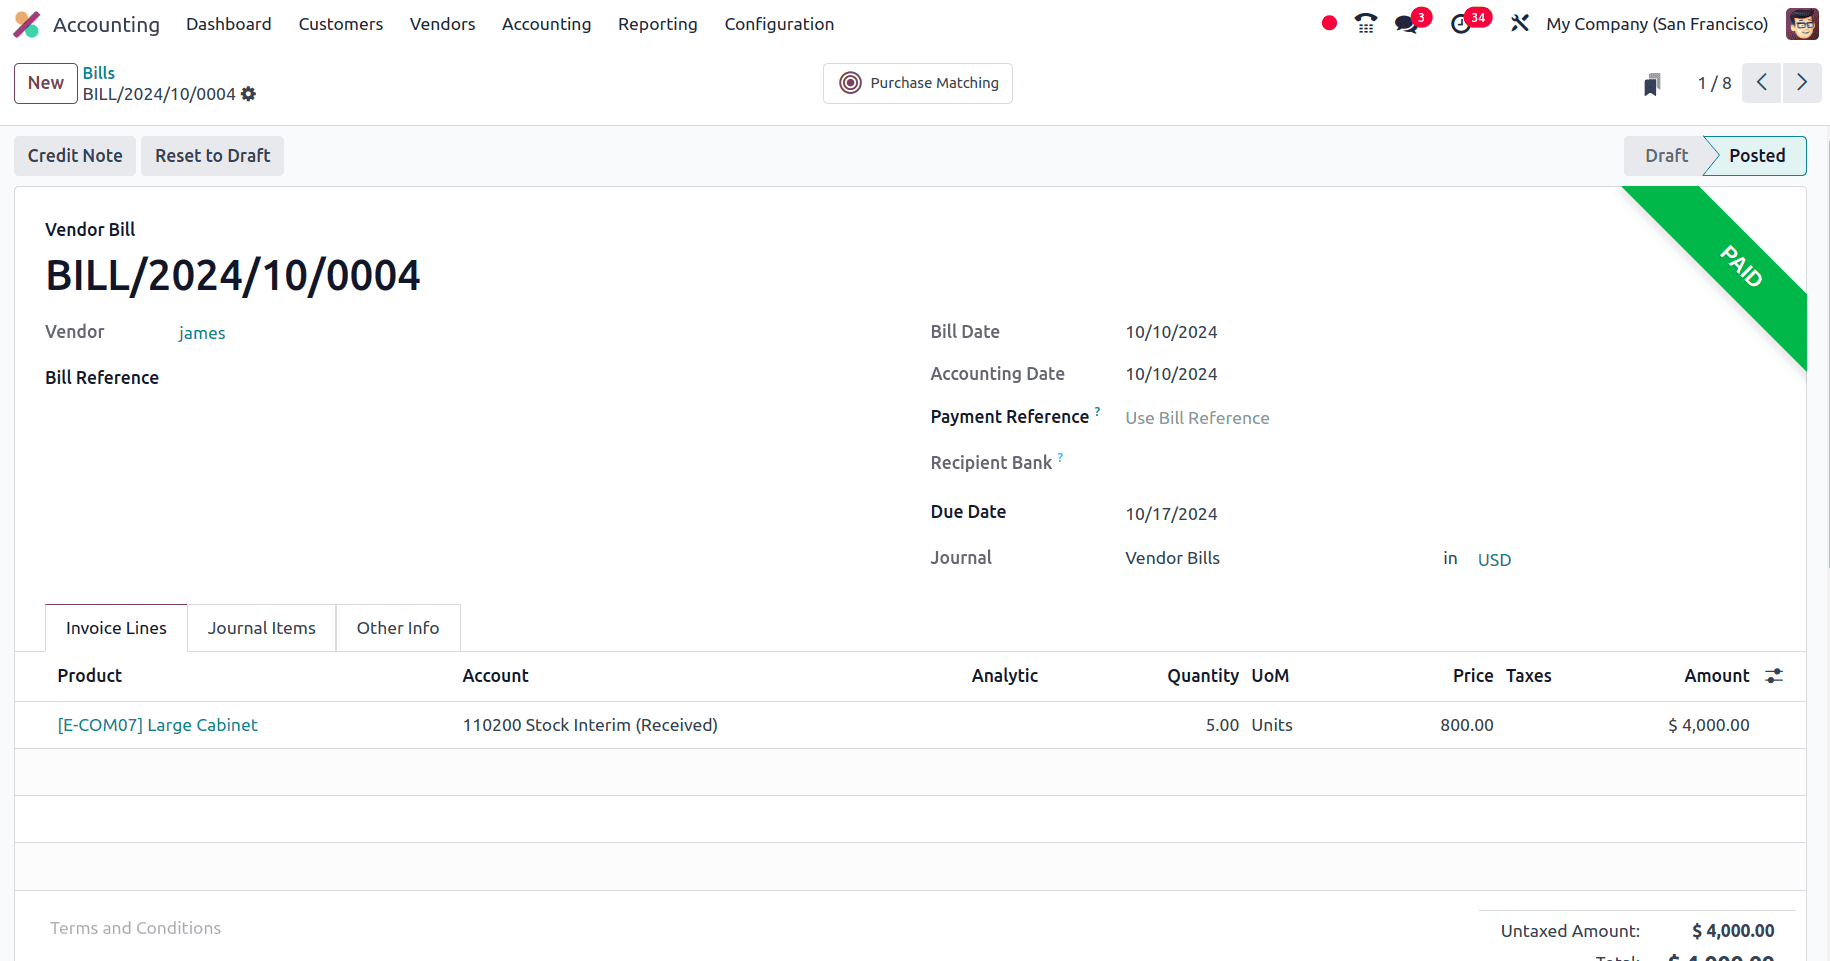
This is how we manage the post-dated cheques of the customer invoices in odoo 18. PDC assists you in better managing your cash flow by letting you plan payments for a later time. PDC adds an extra degree of protection because the cheque cannot be instantly cashed. By doing this, the possibility of fraudulent or unauthorized use is decreased.
To read more about How to Configure Invoicing Policies in Odoo 18, refer to our blog How to Configure Invoicing Policies in Odoo 18.