With the help of the Odoo 15 Helpdesk module, you can provide support to your customers by giving quick responses to their queries. As we all know, customer service management is an integral part of any kind of business. Because of this, a company requires a more satisfactory and easy-to-use platform than the older method of company-customer interaction to manage all queries on time. The Helpdesk module can help you to build a better relationship with your clients by providing an excellent system to perform customer support. Timely responses to customers’ queries will help your company to gain their interest in your products and services. In a highly organized manner, this module will help the helpdesk team to manage all issues reported by various customers.
The Help Desk module contains everything required for a company to provide better customer support in a single platform. The customer can report their issues via Email, phone call, LiveChat, and website forms. Based on the reported issue, Odoo will generate support tickets for the customer in the Helpdesk module. The company authority can assign these tickets to different helpdesk teams and configure SLA policies on the tickets to solve and close the ticket within a specified time period. According to the nature of the ticket, you can convert to new leads, return the product, refund the amount, send it to repair, generate coupons for customers, create orders for field service, or post forums on the company website with the help of the Helpdesk module.
In this blog, we will discuss how to manage helpdesk tickets using Odoo 15.
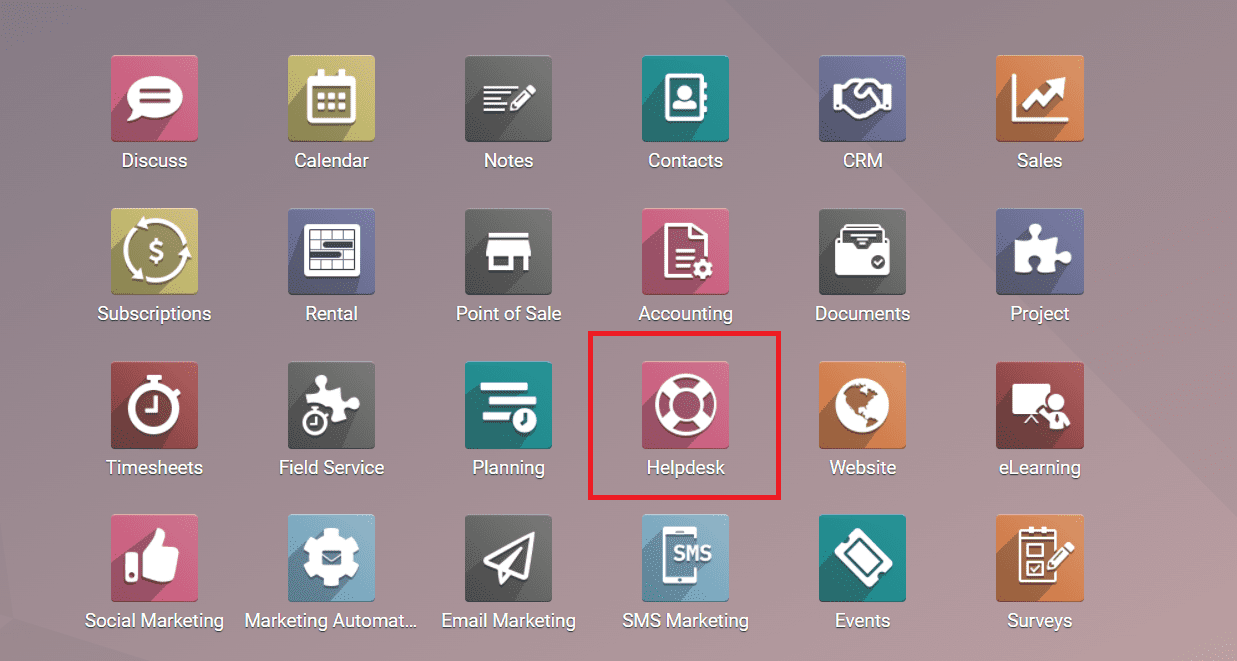
The user will get access to the Helpdesk module from the main dashboard of Odoo by clicking on the corresponding icon shown in the image below.
Odoo will lead you to the Helpdesk Overview page where you will get to see the details about almost all operations in this module.
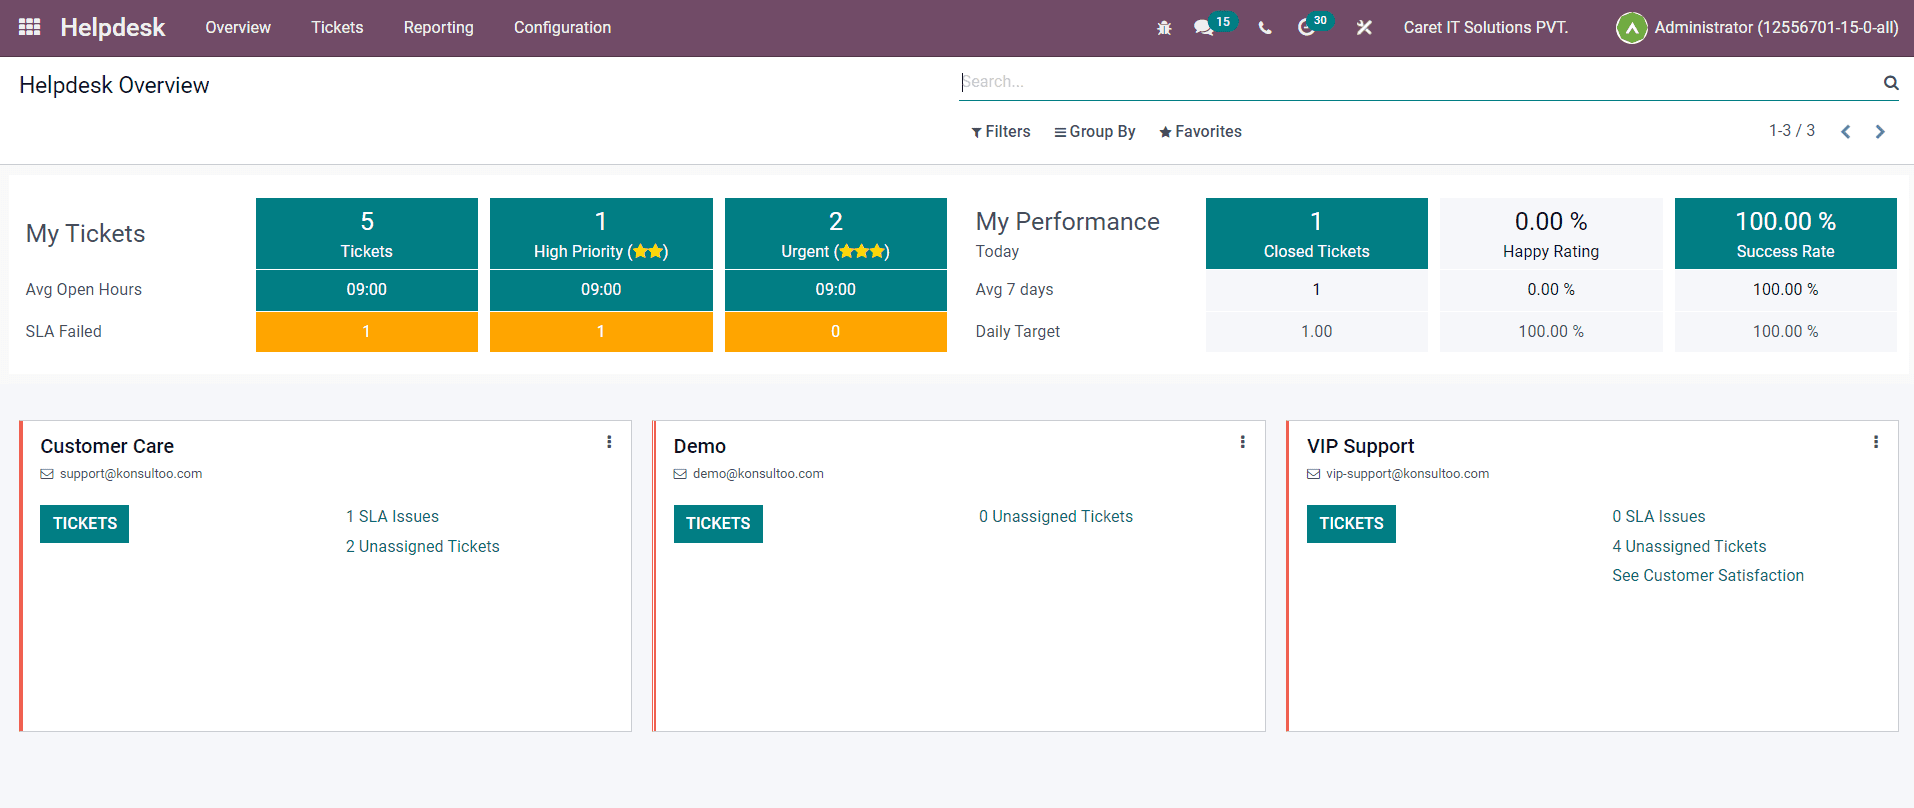
This window will display the details regarding the tickets assigned for the user and help desk teams. In the main menu bar of the module, you will get the Tickets menu. Under the Tickets menu, there are two sub-menus such as My Tickets and All Tickets.

The My Tickets option can be used to get the details of the assigned tickets of the user of the database. The platform contains List, Kanban, and Activity views and you can choose the view at your convenience. The list of tickets will show the Name, Helpdesk Team, Assigned to, Customer, Company, Next Activity, Priority, SLA Deadline, and Stage of each ticket.
The All Tickets platform will give you the list of all tickets assigned for various helpdesk teams in your organization.
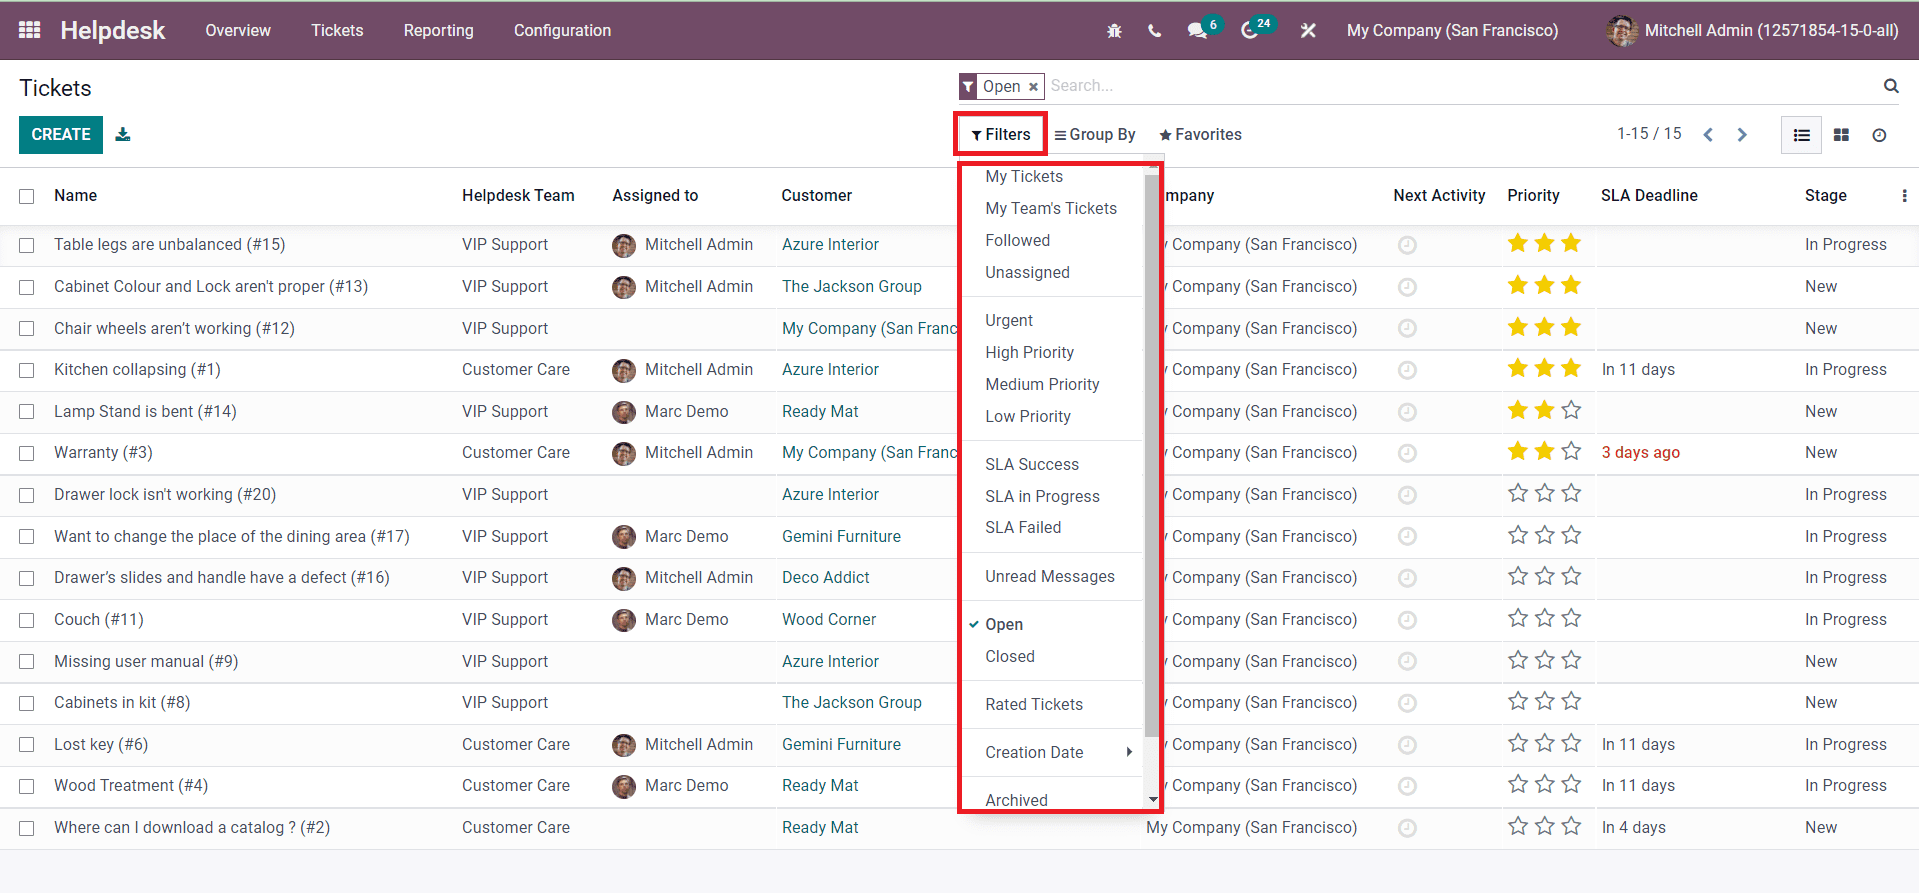
Using the default filters, it is easy to sort the tickets based on My Tickets, My Team’s Tickets, Followed, Unassigned, Urgent, High Priority, Medium Priority, Low Priority, SLA Success, SLA in Progress, SLA Failed, Unread Messages, Open, Closed, Rated Tickets, Creation Date, and Archived. You will get Custom Filters also for filtering tickets.
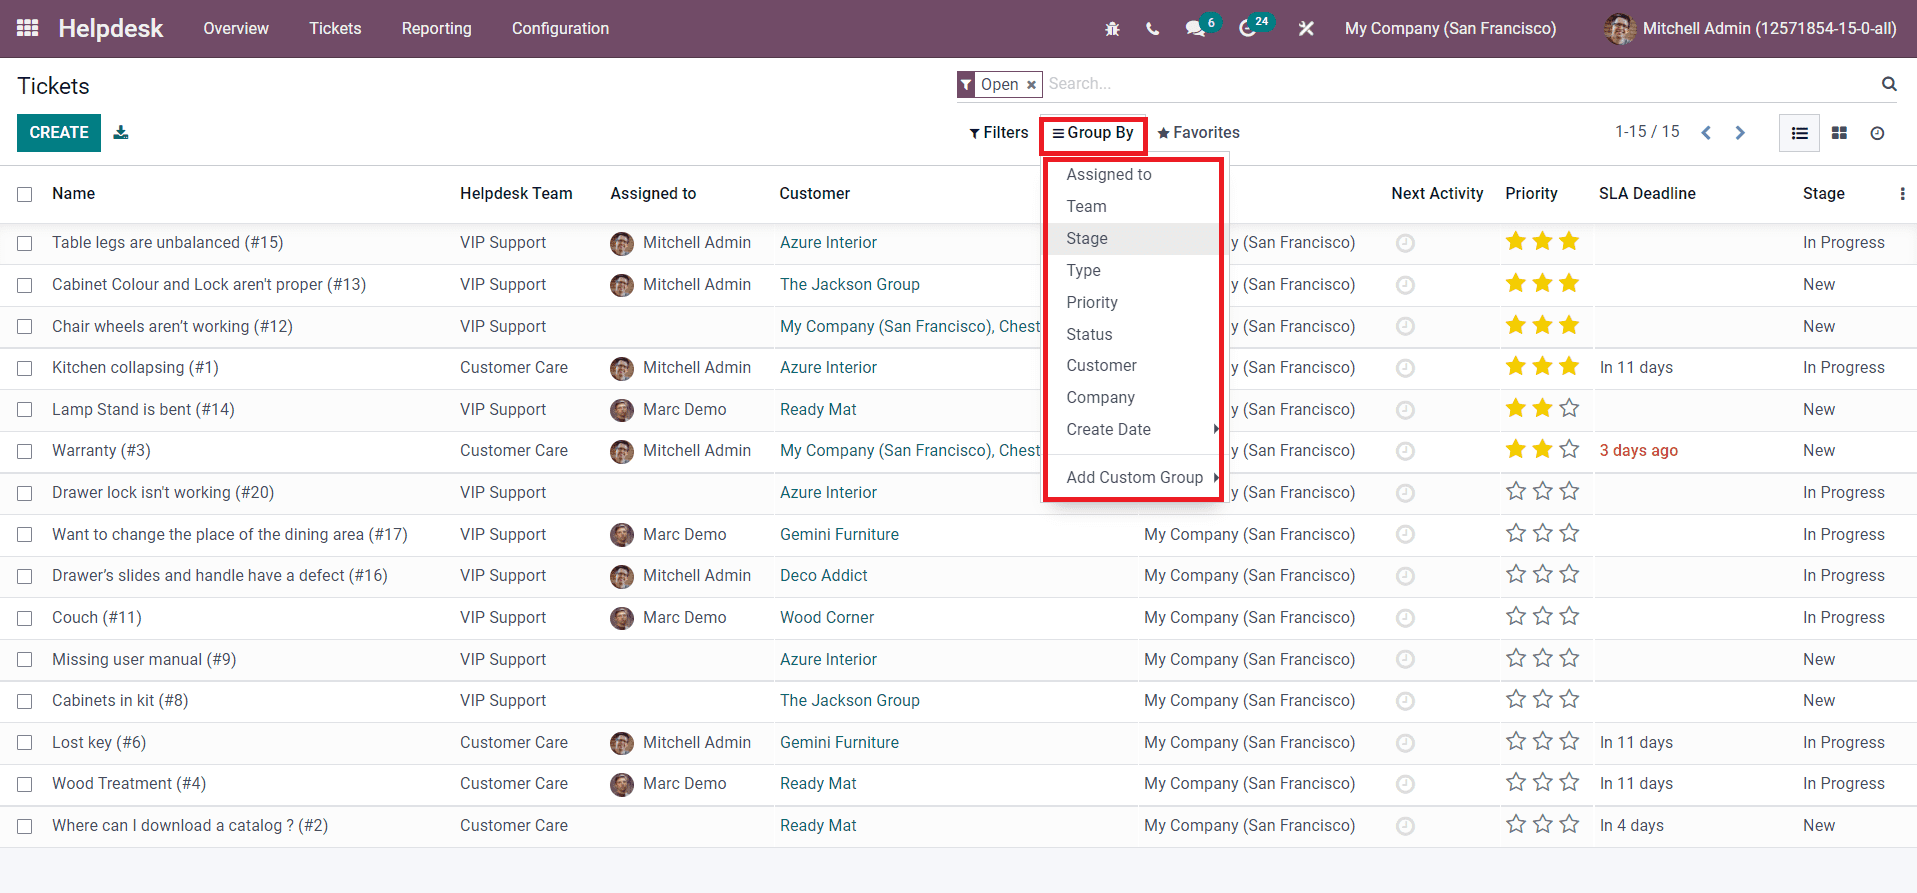
You can group the tickets according to the assigned employee, Team, Stage, Type, Priority, Status, Customer, Company, and Creation Date. The Add Custom Group option can be used to create a new grouping option for the tickets.
We already mentioned that a customer can submit their queries through various platforms and Odoo will automatically convert them to support tickets in the Helpdesk module. Apart from the automatic conversion of support tickets, it is also possible to create tickets manually in the Odoo Helpdesk module.
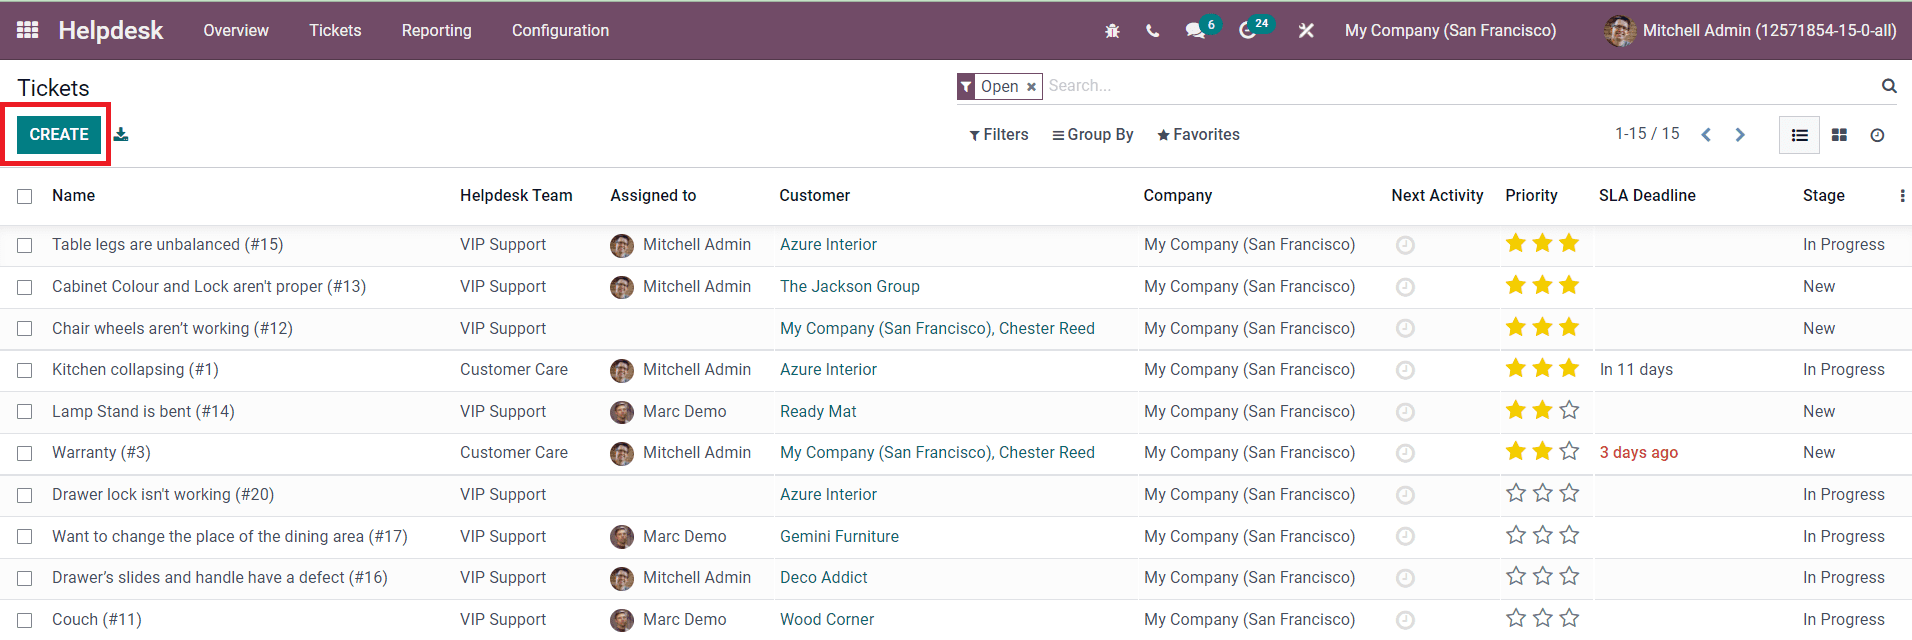
The Create button given on the top left corner of the Tickets platform can be used for this purpose. A new ticket creation window will appear after clicking on the Create button.
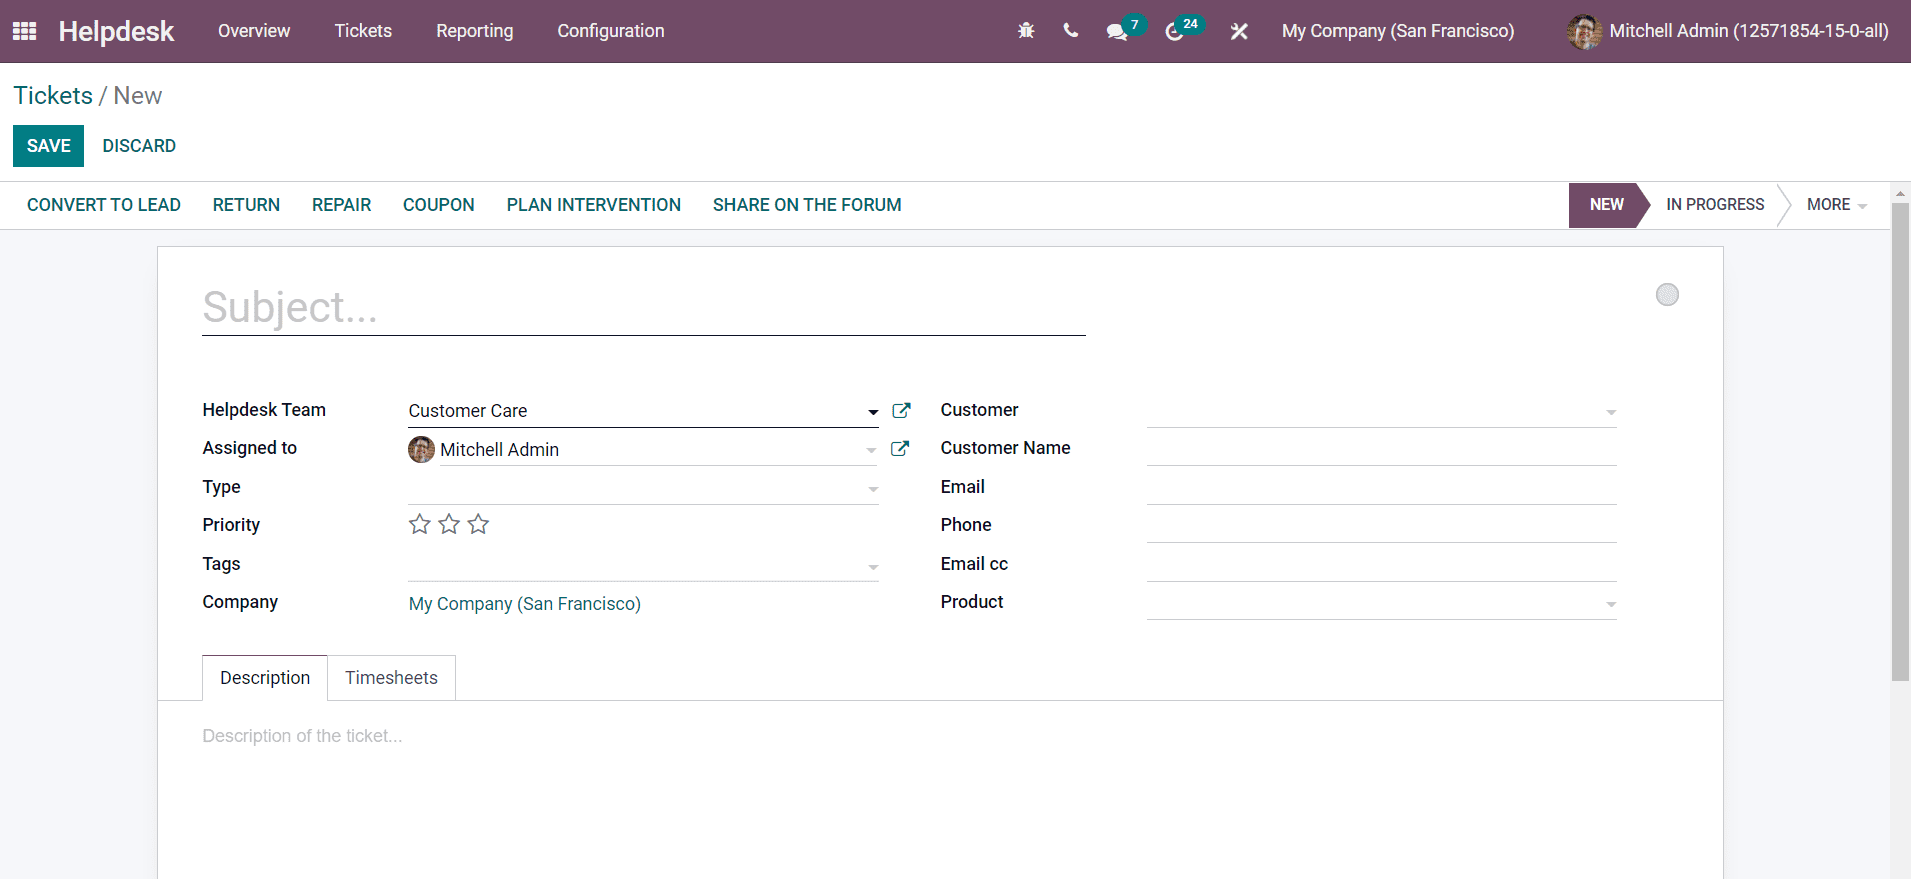
Specify the Subject of the ticket in the given field. You can configure a Helpdesk Team and assign employees in the correct fields. Additionally, add details regarding the Type of the ticket, Priority, Tags, Company, Customer, Customer Name, Email, Phone, Email cc, and Product.
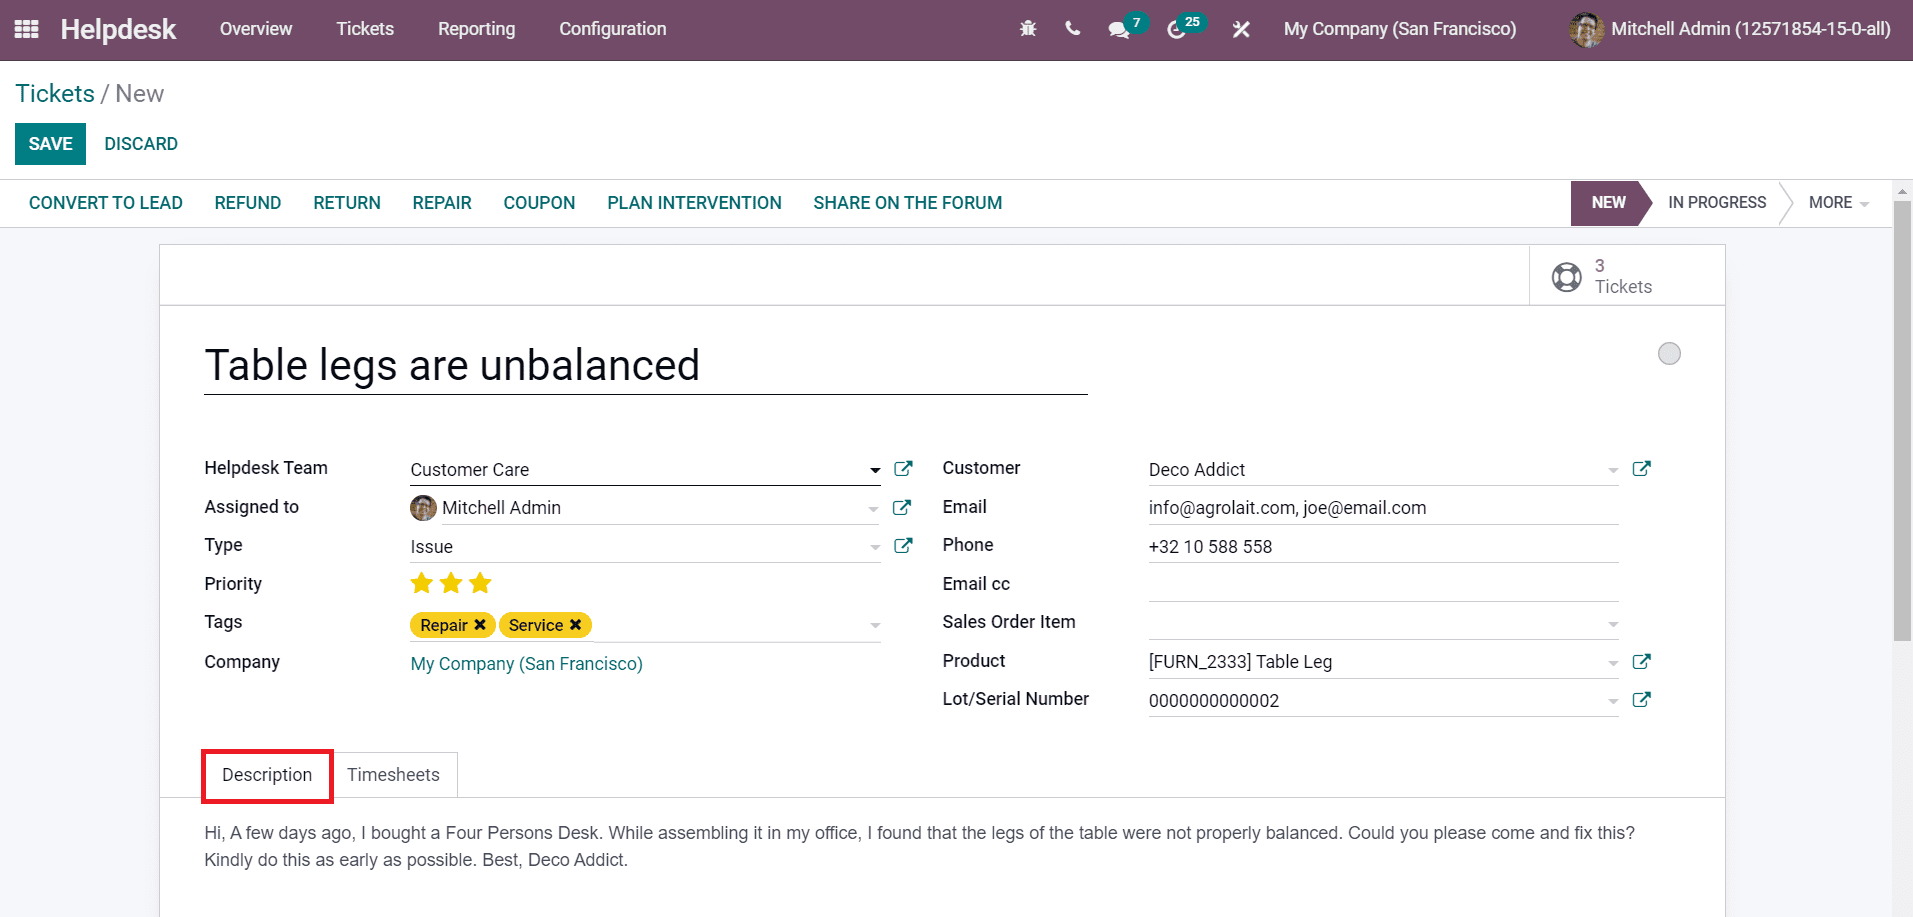
The Description field can be used to mention the queries from the mentioned customer. The Timesheet tab can be used to record the timesheets of employees who worked on this ticket to solve the issue reported by the customer. Using the Add a Line button, you can configure timesheets manually with the details of Date, Employee, Description, and Hours Spent.
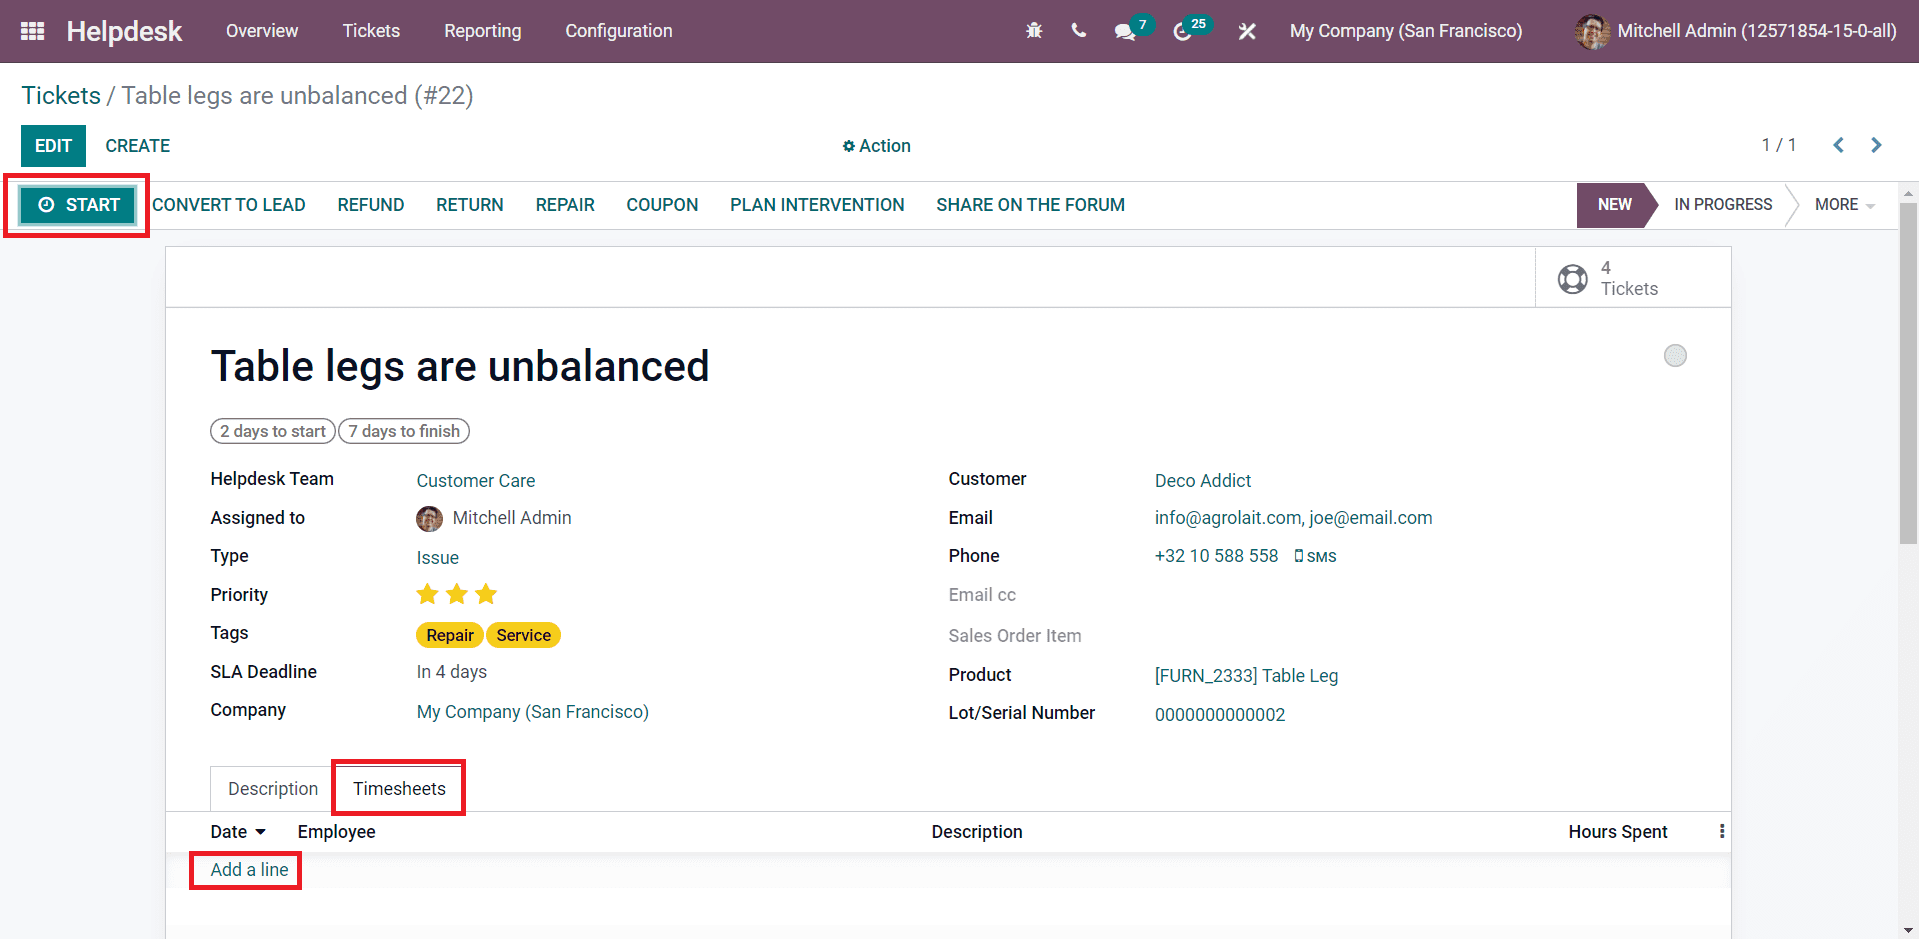
To record timesheets automatically, you will get a Start button after saving the ticket. This button will start to record the time spent on the ticket.
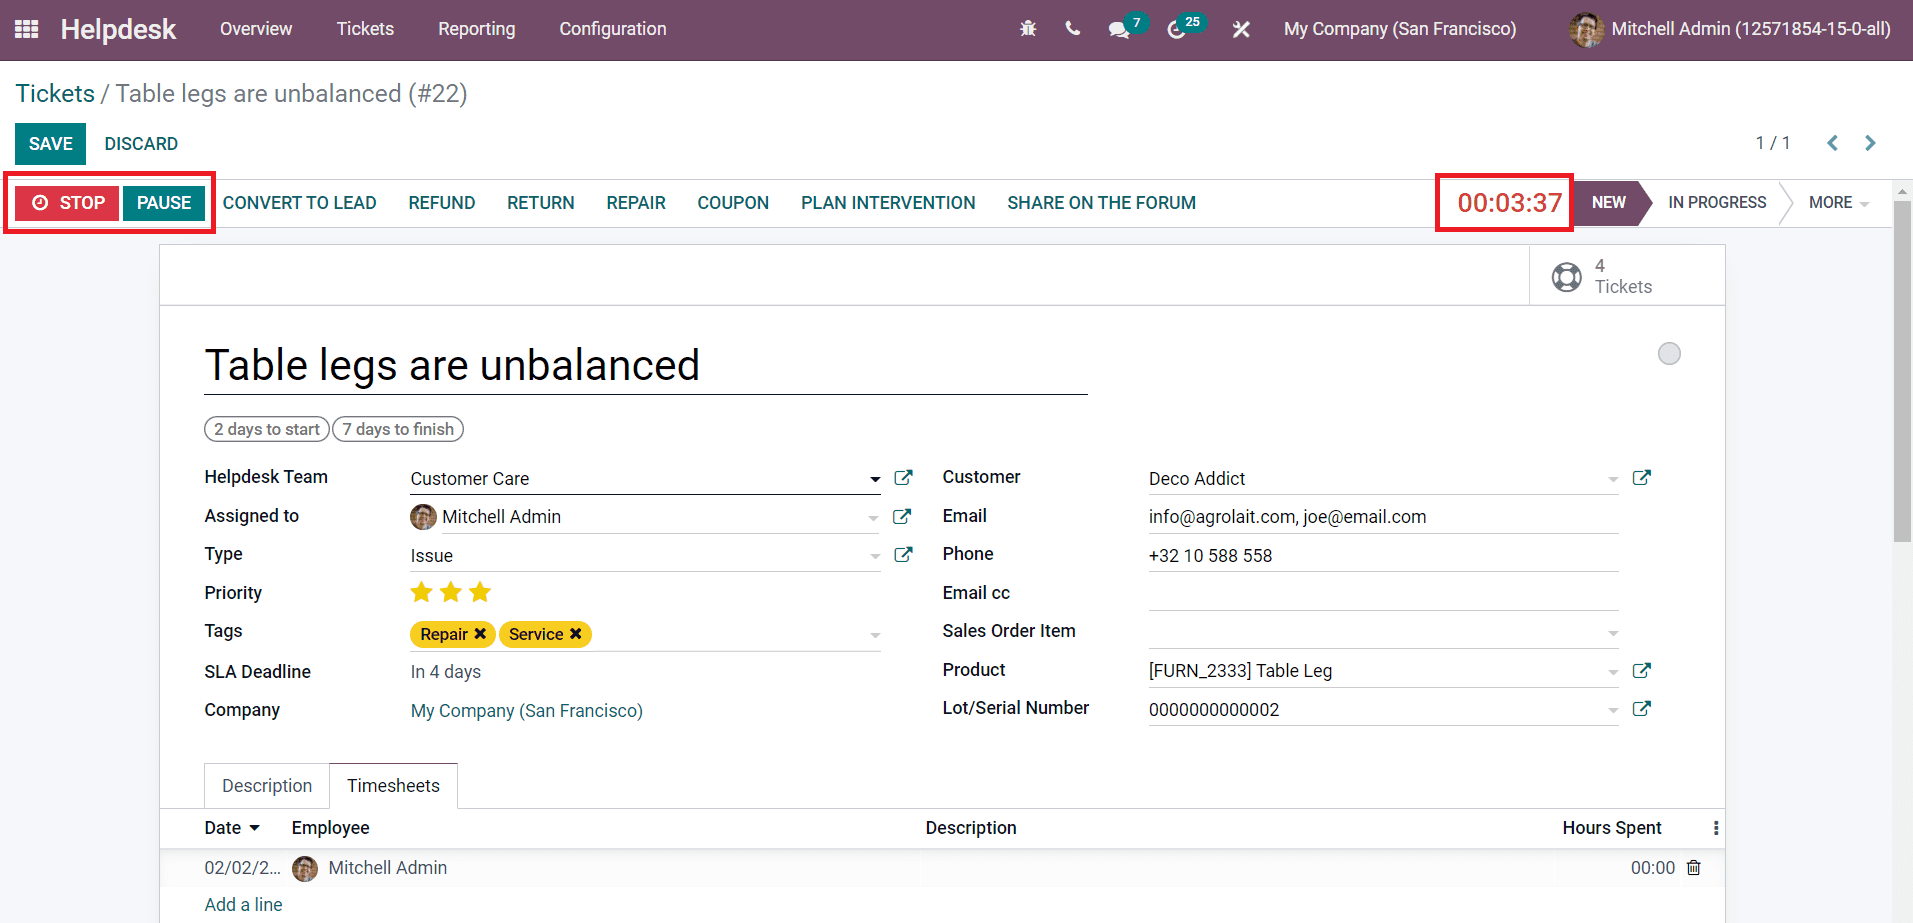
The Stop and Pause button can be found in the window as marked in the screenshot above. Odoo allows you to confirm the time spent after clicking the Stop button. The recorded time will be automatically added to the Timesheets tab as marked in the image below.
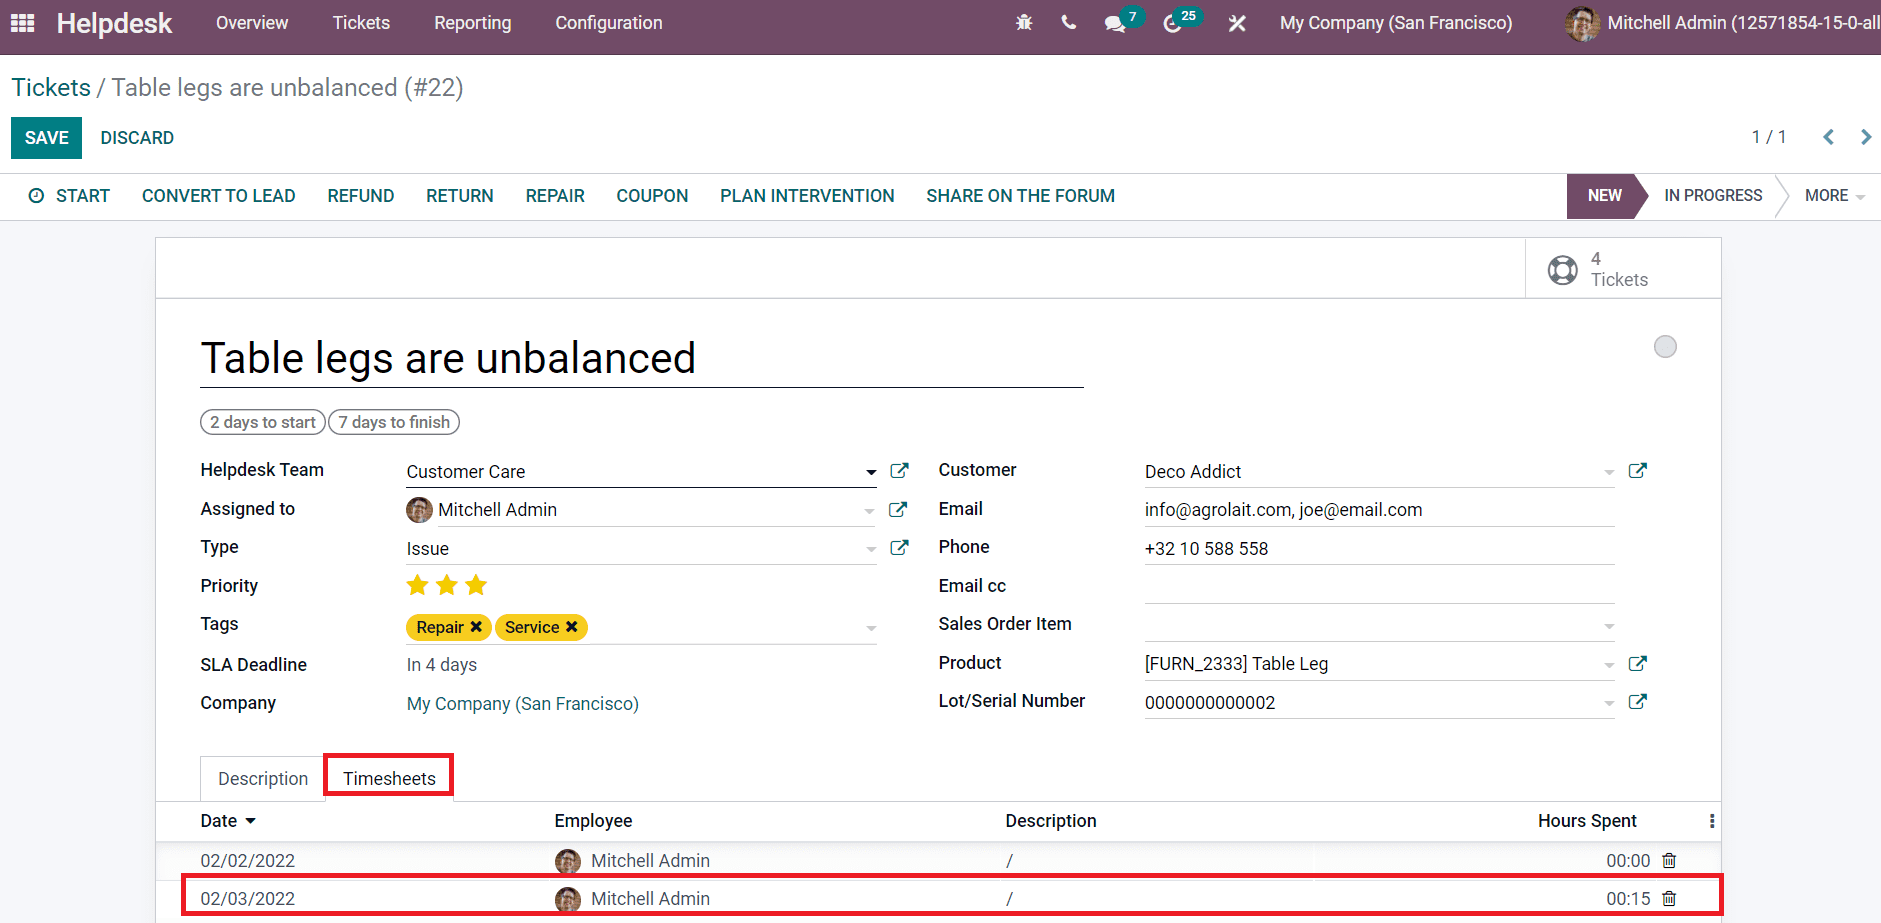
This is how we record tickets manually in the Helpdesk module. Now, the assigned employee can take necessary actions on the registered ticket using the advanced options given in the window such as Convert To Lead, Refund, Return, Coupon, Plan Intervention, and Share on the Forum. Let’s take a look into the usage of each of these options.
Convert to Lead
When a customer submits a ticket, Odoo allows you to create a new lead from the details of the customer. This can be done using the Convert to Lead option from the tickets platform as marked in the screenshot below.
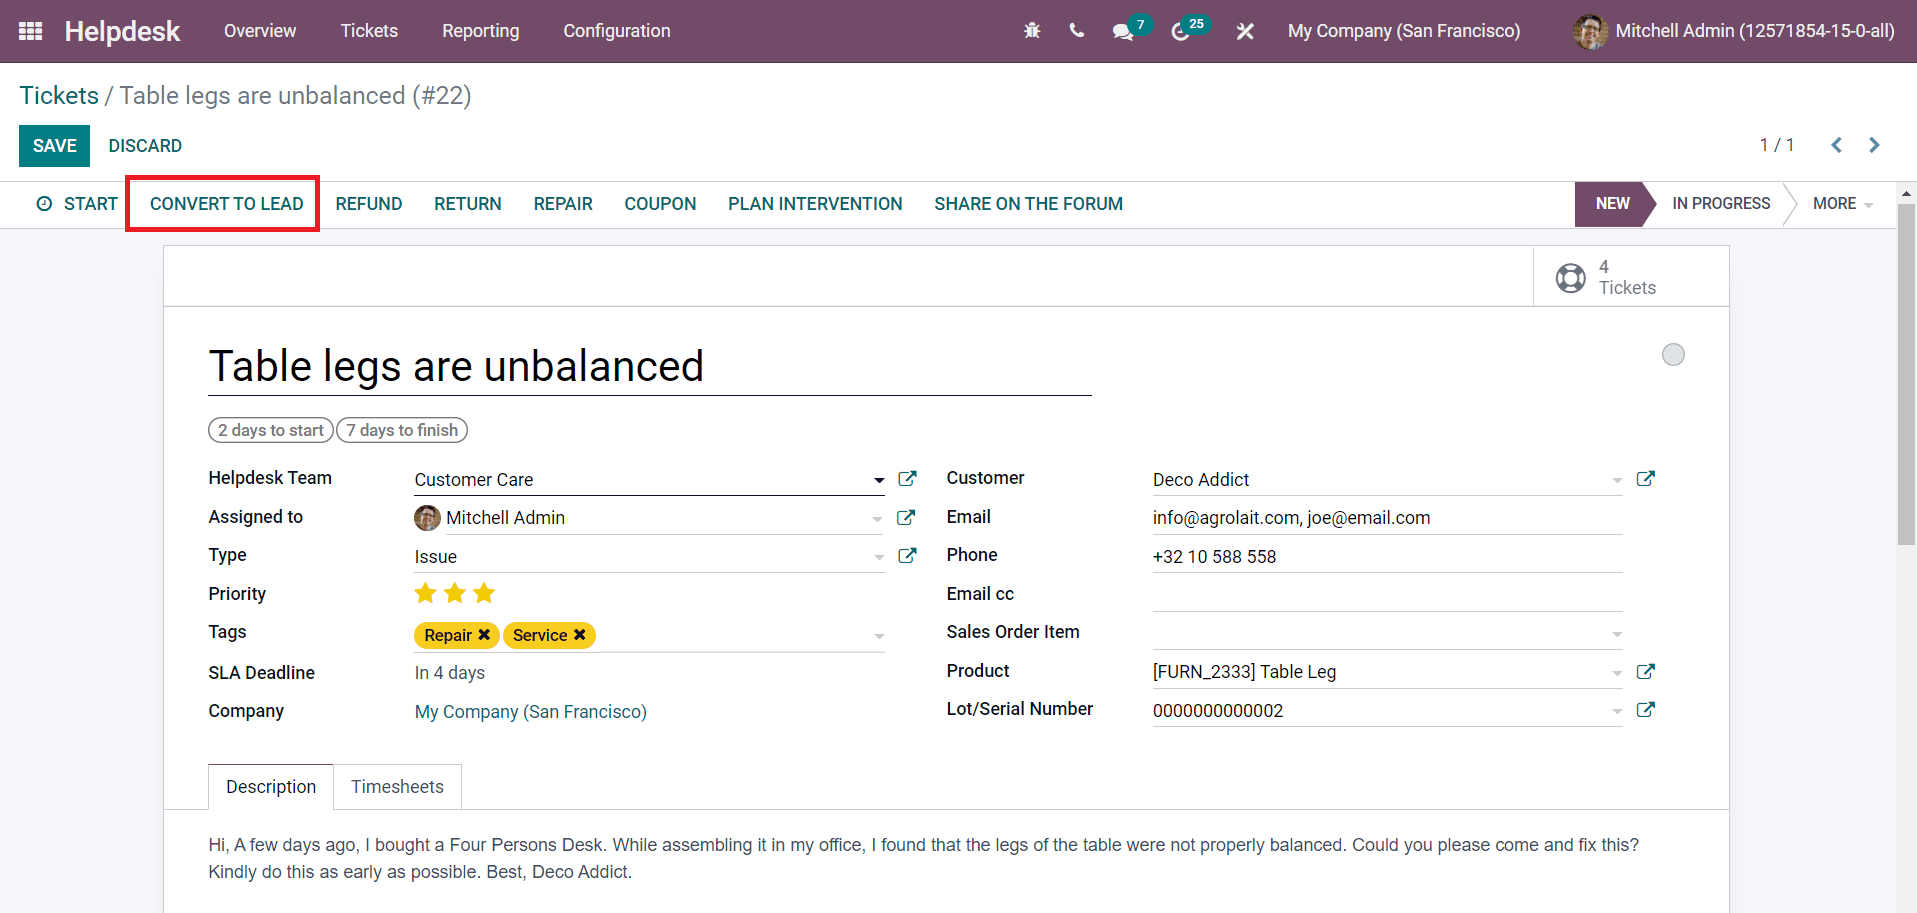
Clicking on this option will give you a new pop-up window which will help you to convert the ticket to a lead.
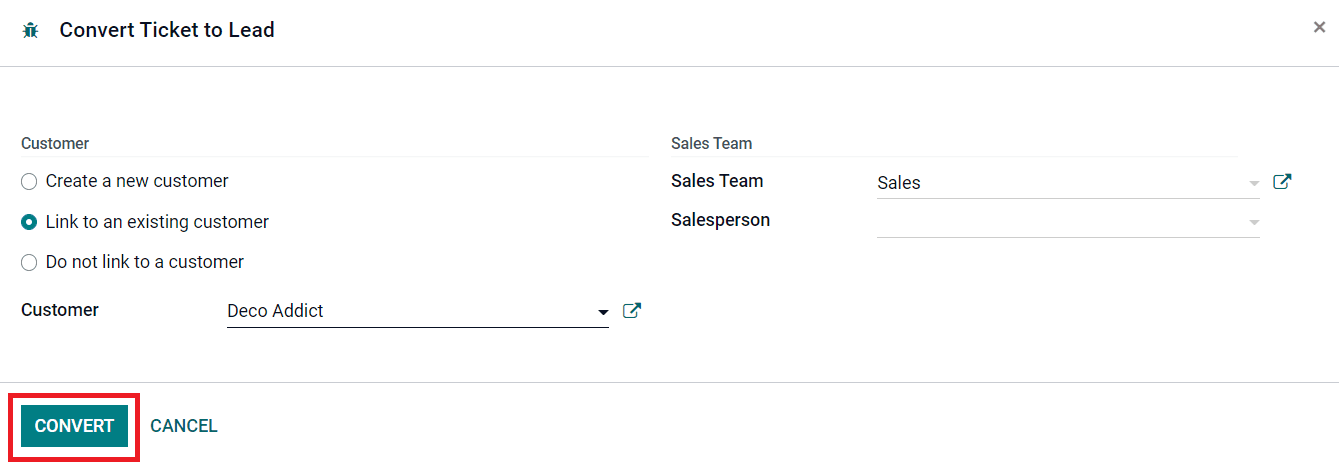
You can create a new customer record using the customer details or link to an existing customer by selecting the corresponding option from the Customer field. If you don’t want to link the customer details to an existing customer, you can select the ‘Do not link to a customer’ option. Assign a Sales Team and Salesperson for the lead and click on the Convert button.
Refund
If you want to refund the customer for the purchased product or service, you can use the Refund option.
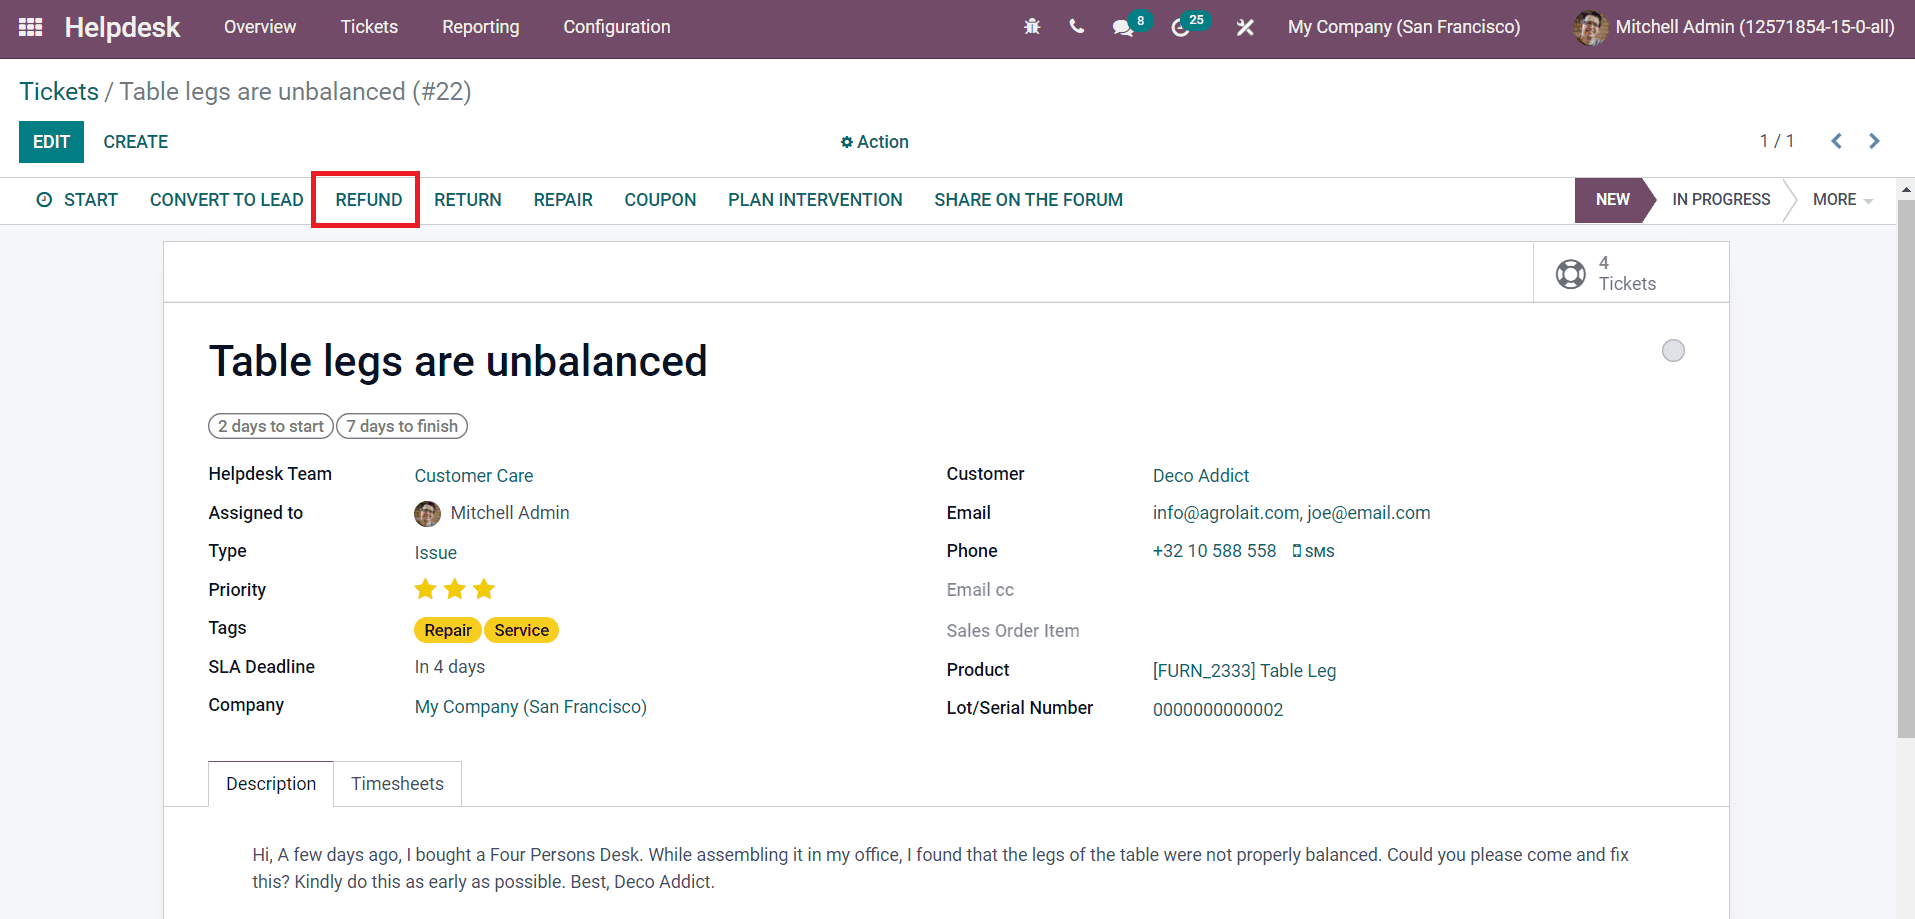
Click on the Refund option.
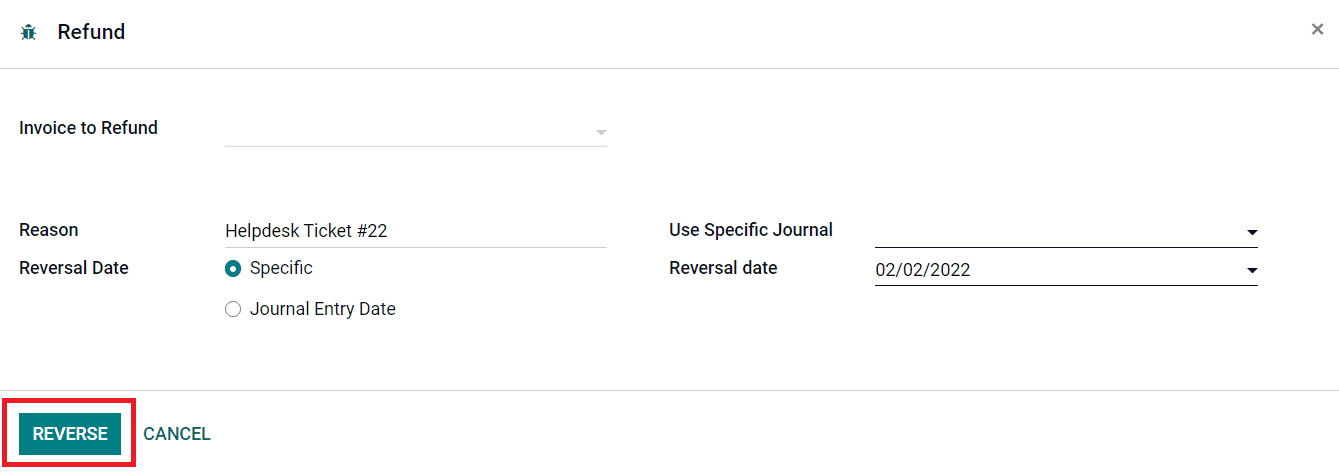
A pop-up window will appear to add the Invoice to Refund, Reason, Reversal Date, Journal, and Reversal Date. Using the Reverse button, Odoo will help you to generate a draft credit note to the customer.
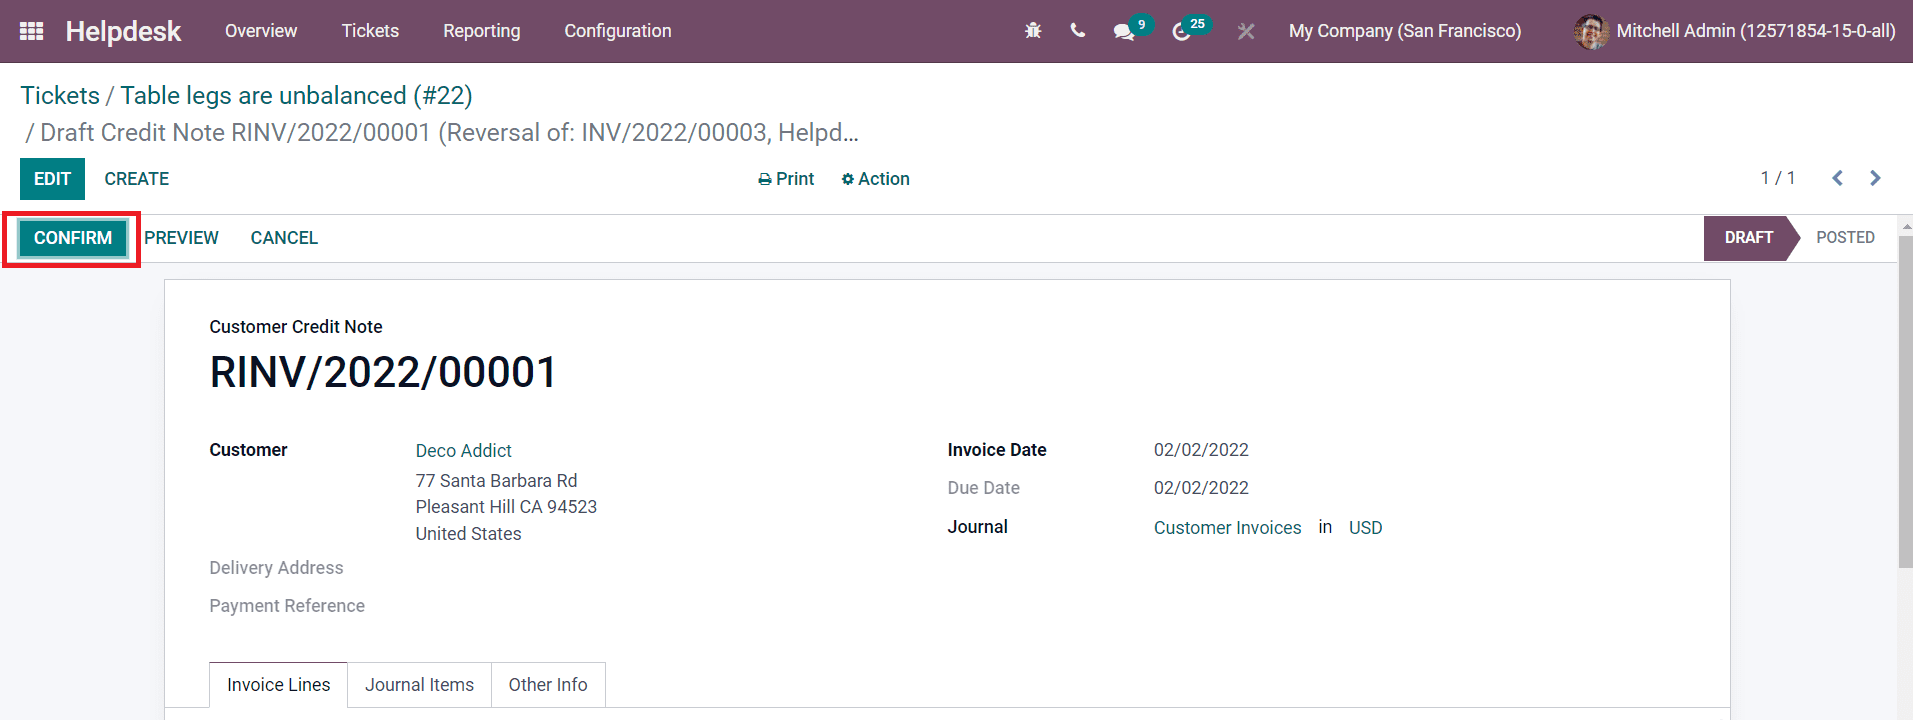
The Confirm button can be used to confirm the customer credit note. The user can complete the refund procedure by registering the payment.
Return
The customer can return a damaged product to the company under specific rules and regulations. The return of the product can be reported using the Return option in the window of the registered ticket.
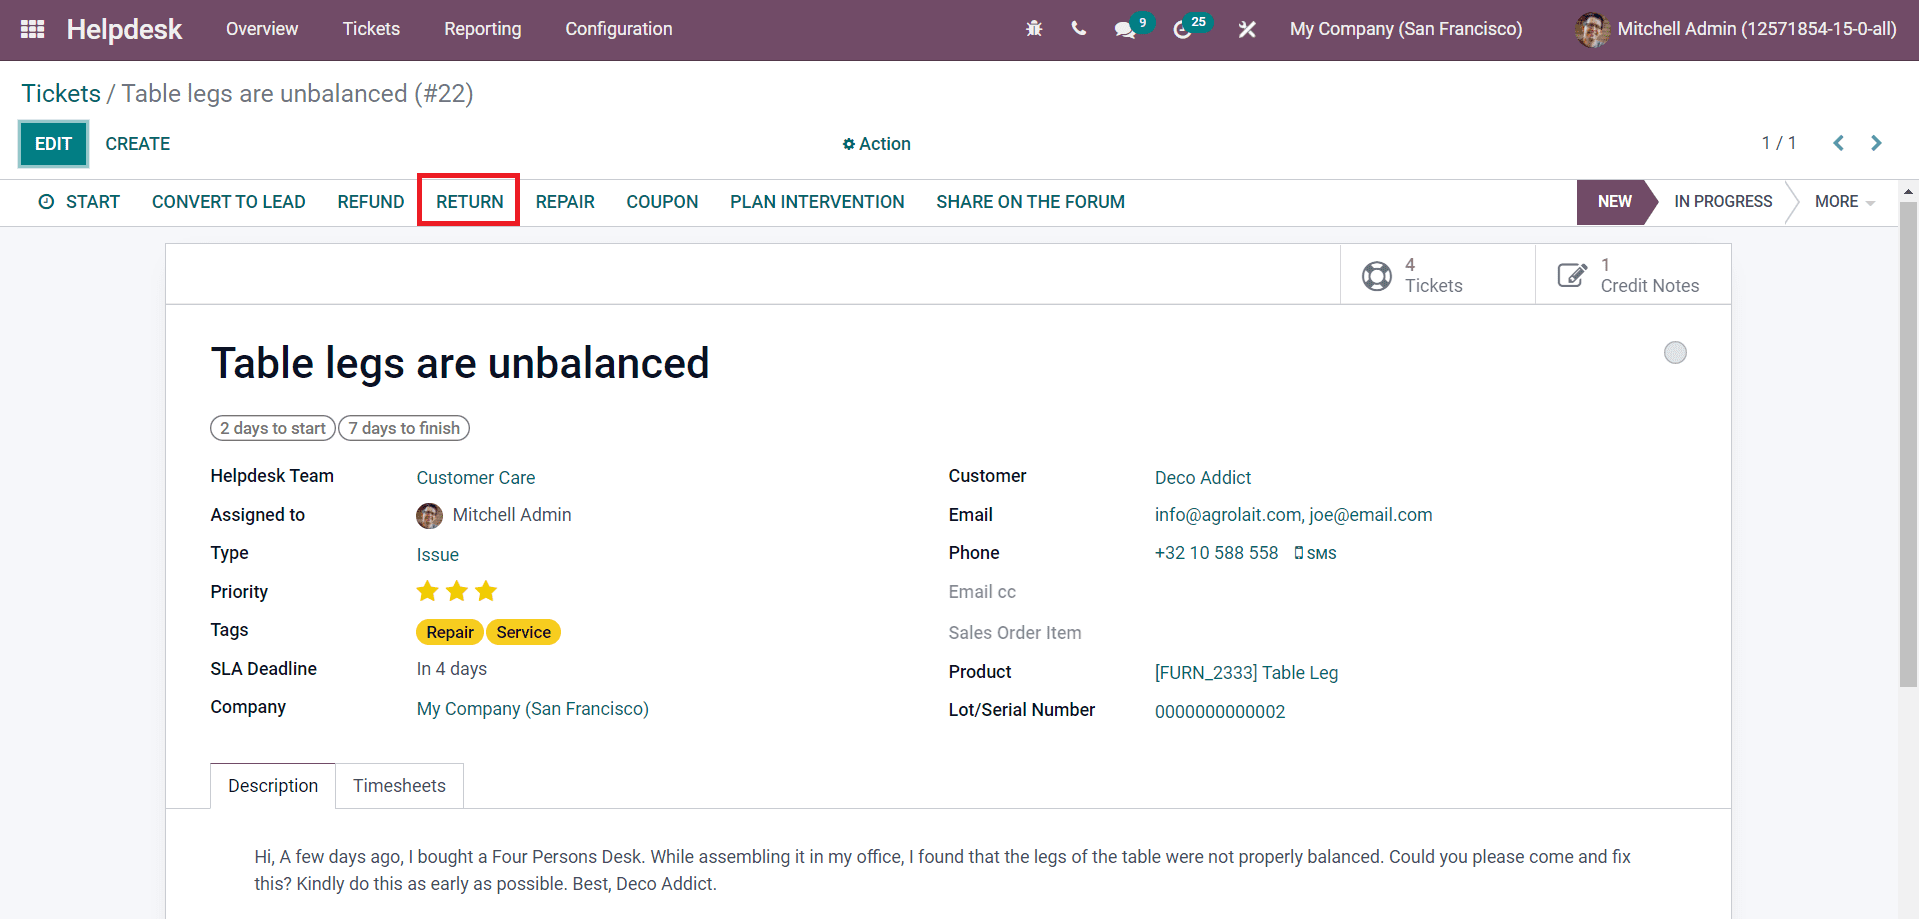
In the pop-up window that appears after clicking on the Return button, you can give details about the Delivery to Return, Product, and Return Location.
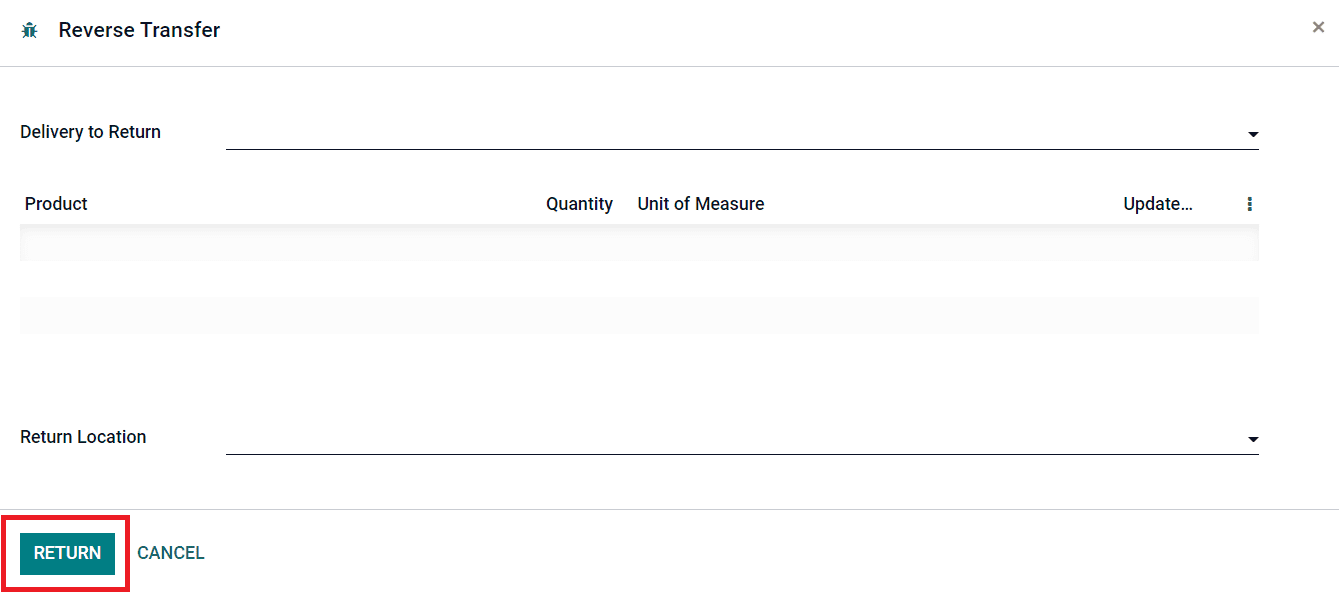
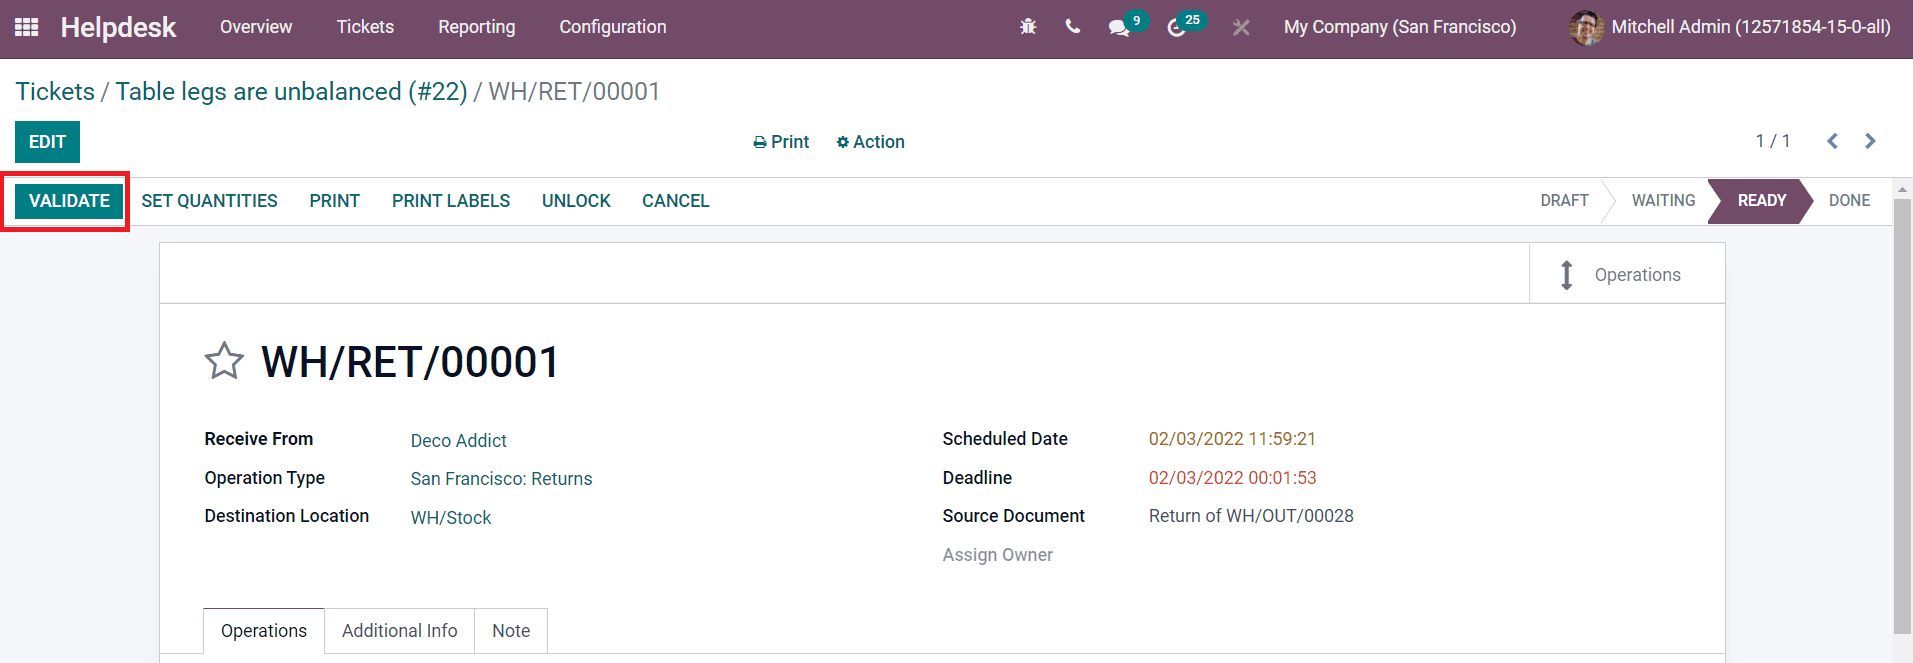
Clicking on the Return button will lead you to a new window where you can Validate the reverse transfer.
Repair
The product can be sent for repair by generating repair orders from the ticket if any kind of damage is reported.
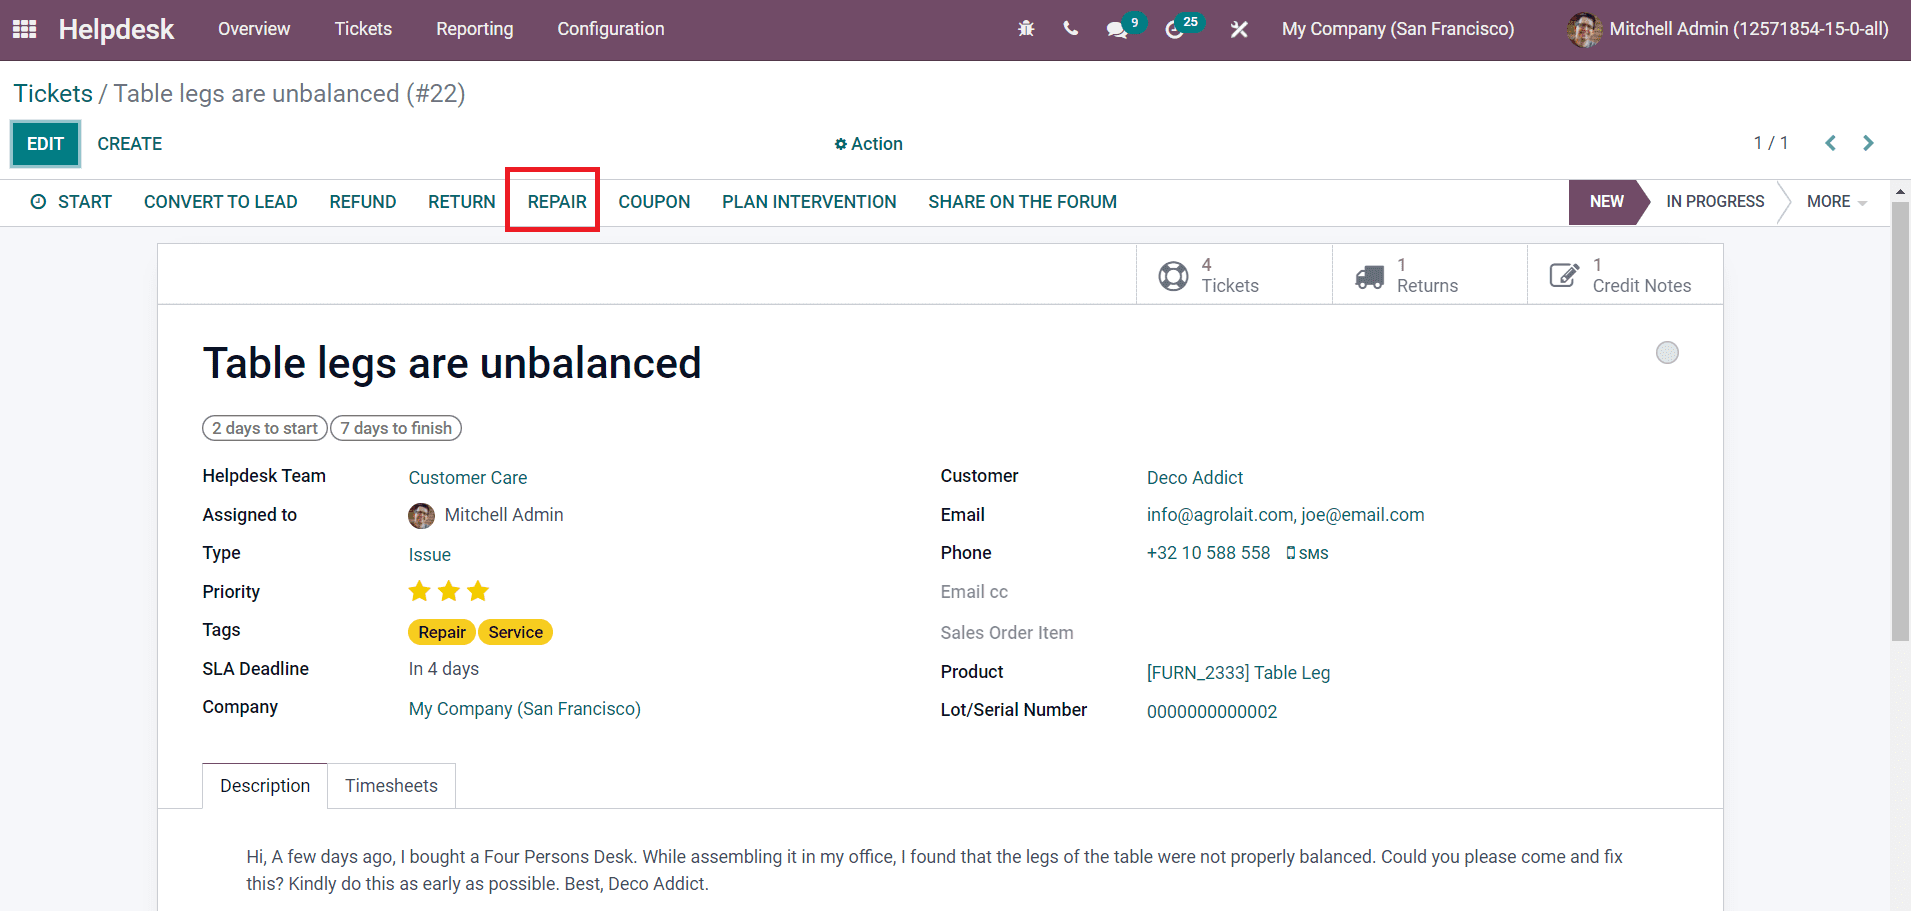
The Repair button will help you to generate a new quotation for repair for the product.
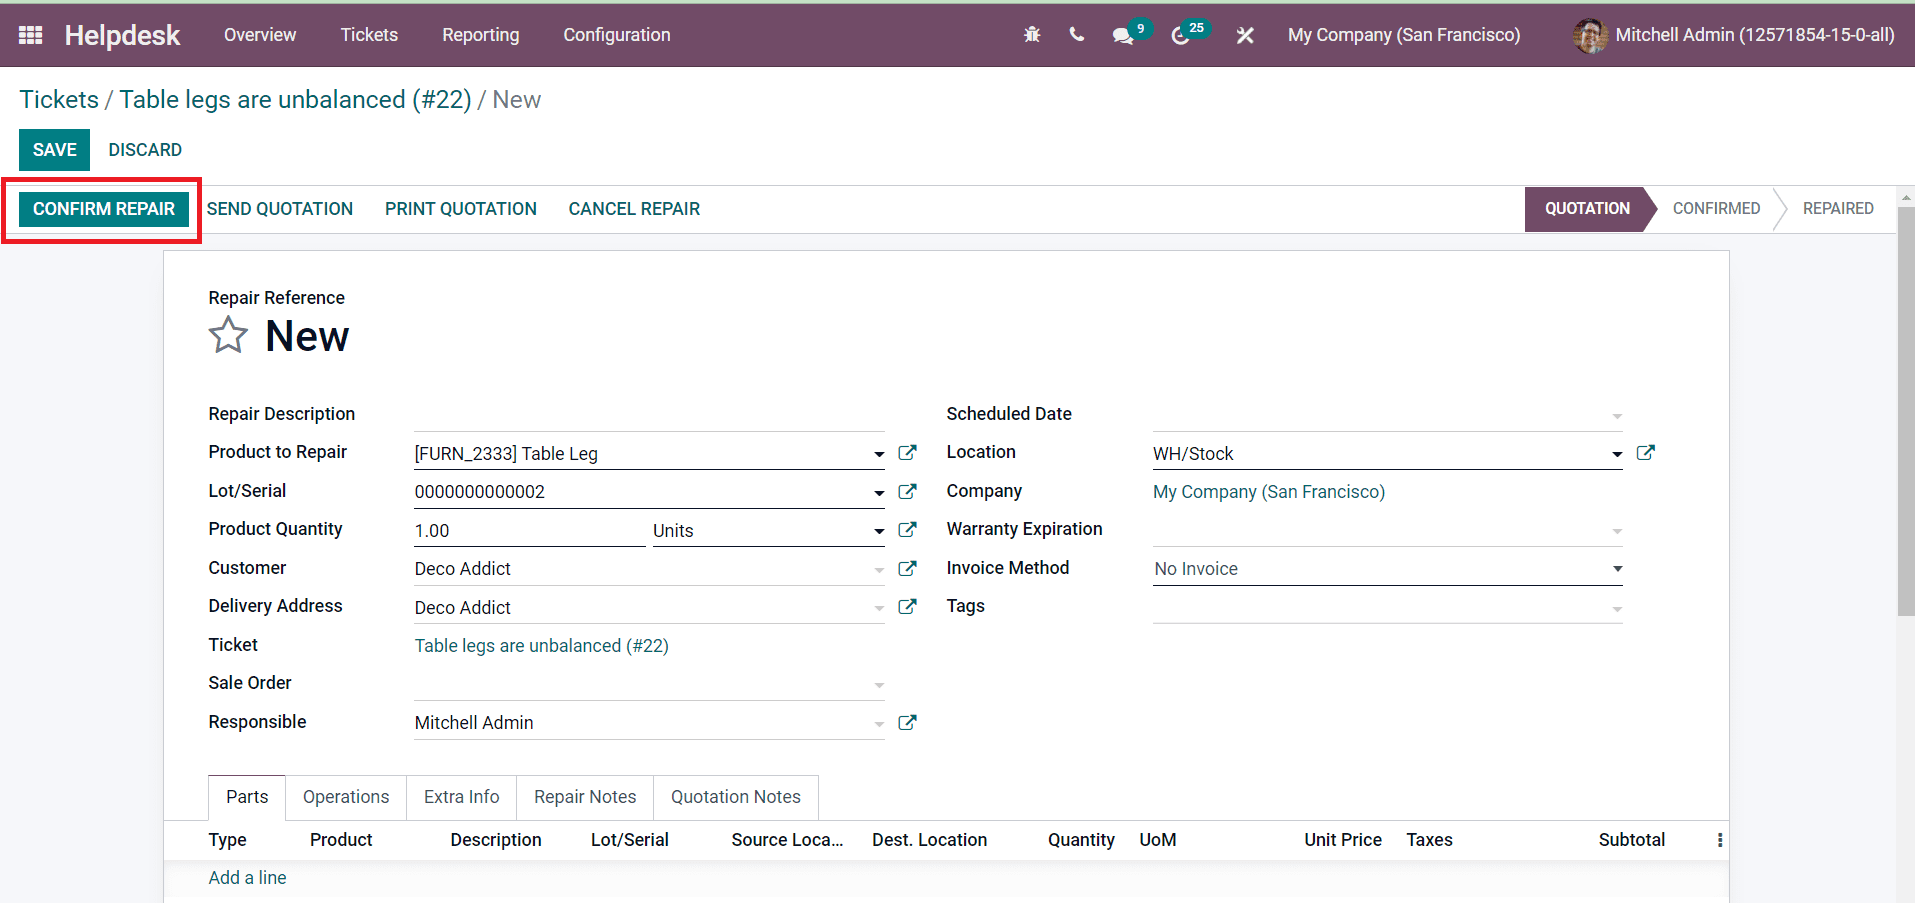
The details regarding the repair order can be seen in the window as shown in the image. Using the Confirm Repair button, you can confirm the repair order and start repairing.
Coupon
You can create coupons for your customers from tickets using the Coupon button.
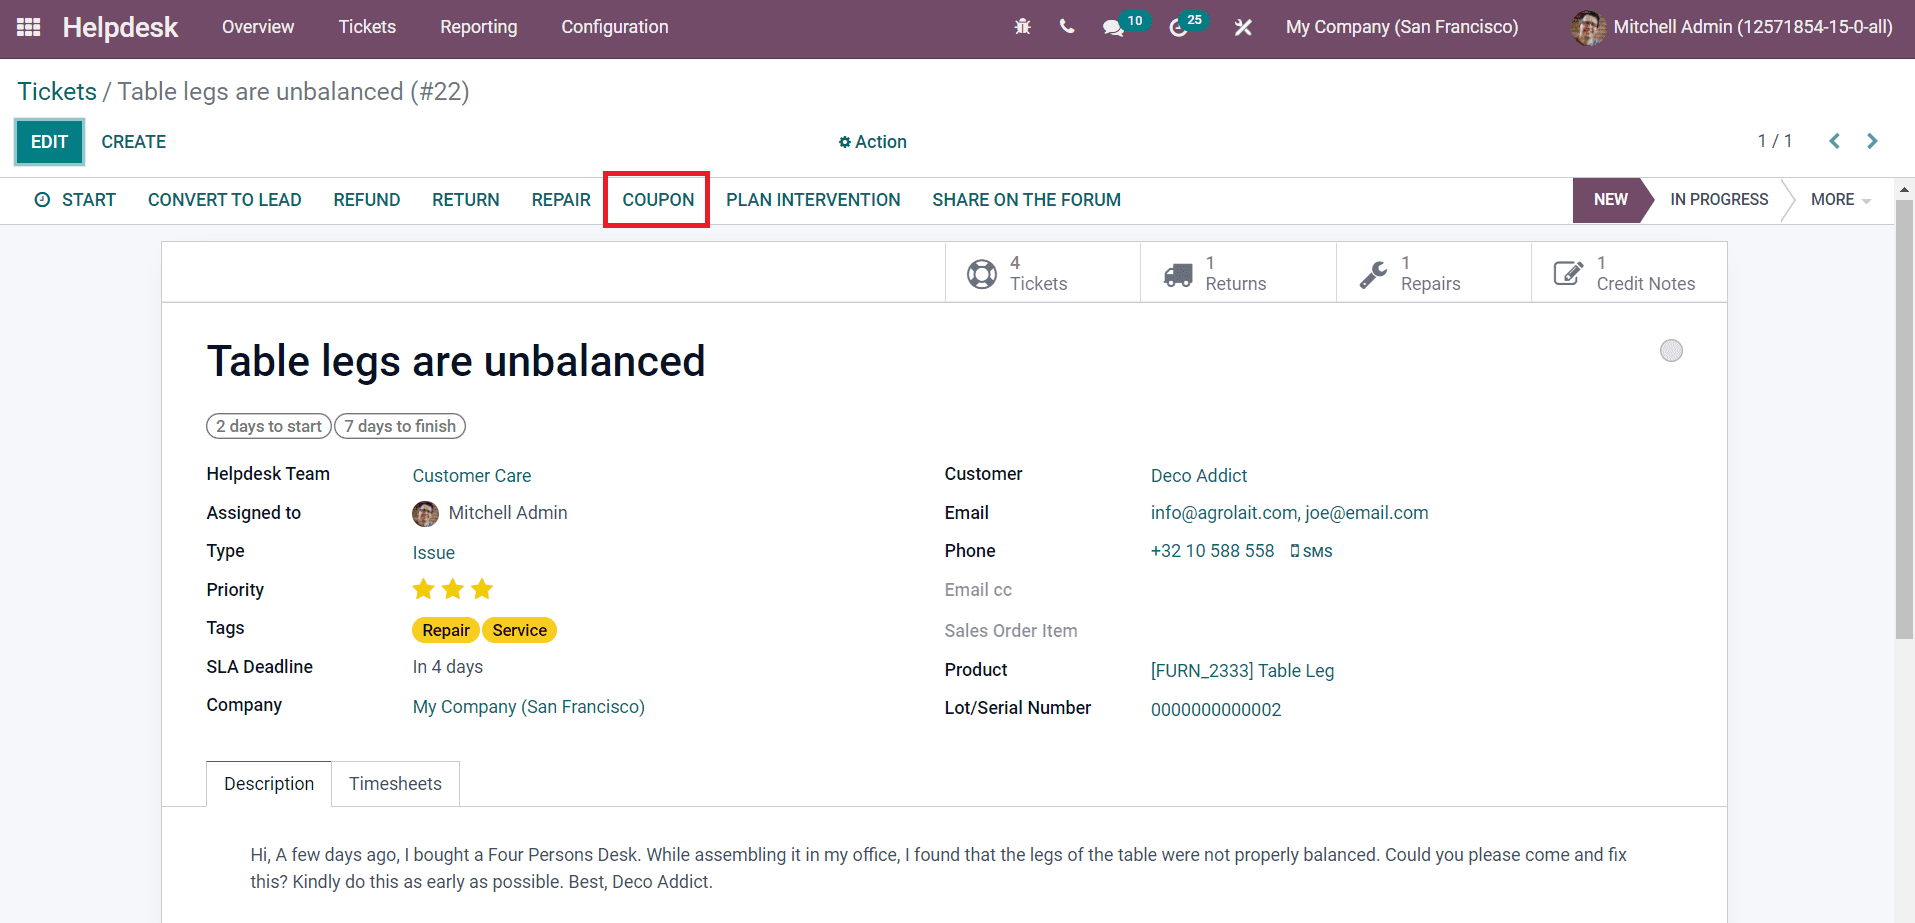
New coupons can be easily generated by mentioning the Coupon Program in the specified field in the new pop-up window that appears after clicking on the Coupon button.

Click the Generate button to get a new coupon.

You can send this coupon to the concerned customers using the Send By Email button.
Plan Intervention
If the ticket demands any kind of field service activity, you can use the Plan Intervention to create a new task.
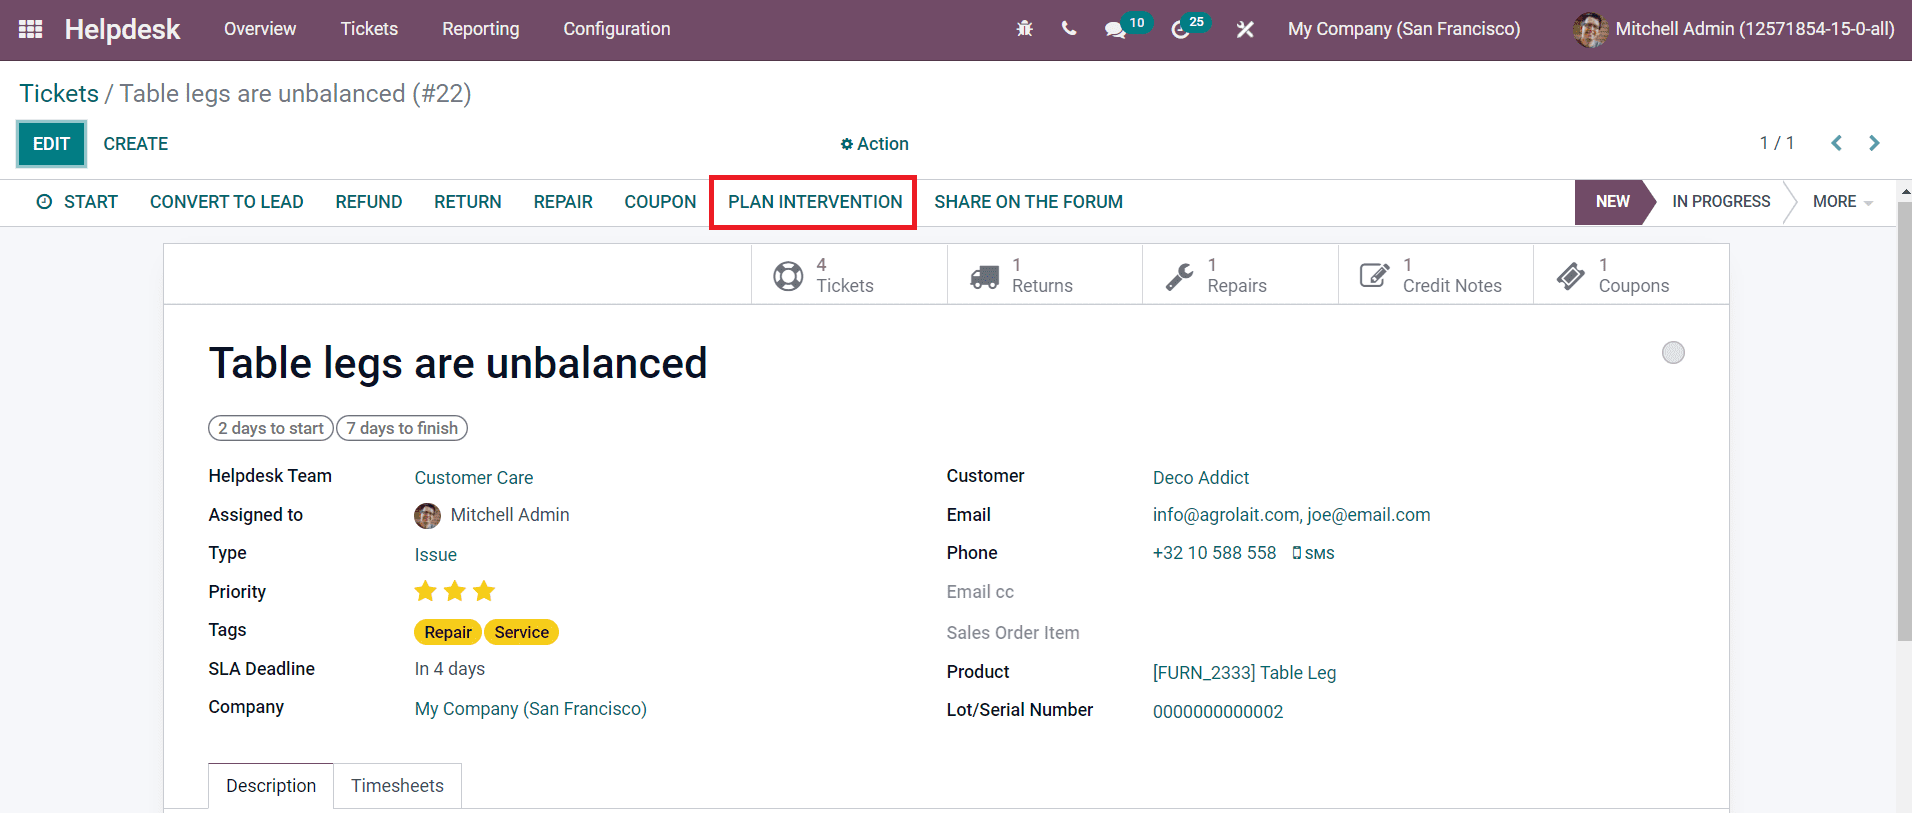
The pop-up window can be used to create a new field service task.

You will get the details about the Title, Project, Worksheet Template, and Customer in this window. Click on the Create Task option and a new task will be created for the field service operation for the customer.
Share on Forum
The queries from customers can be posted on the forum to collect responses from different audiences.
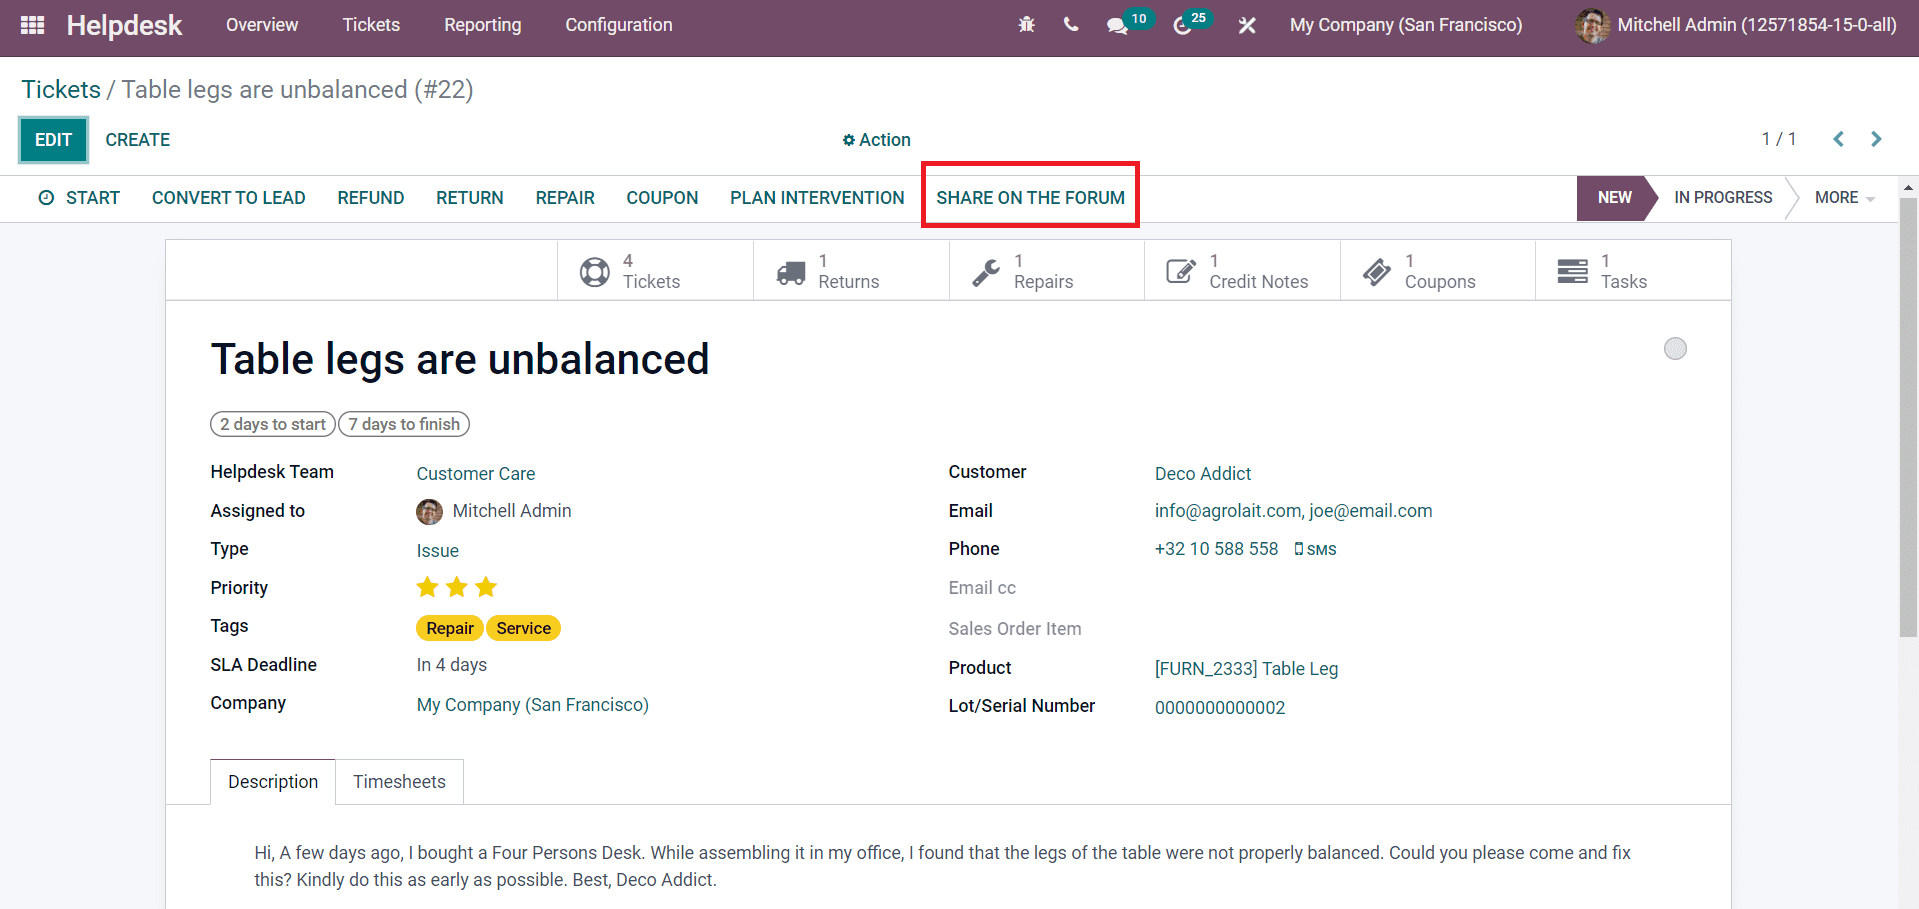
Click on the Share on the Forum option and the query will be published on the forum as shown below.
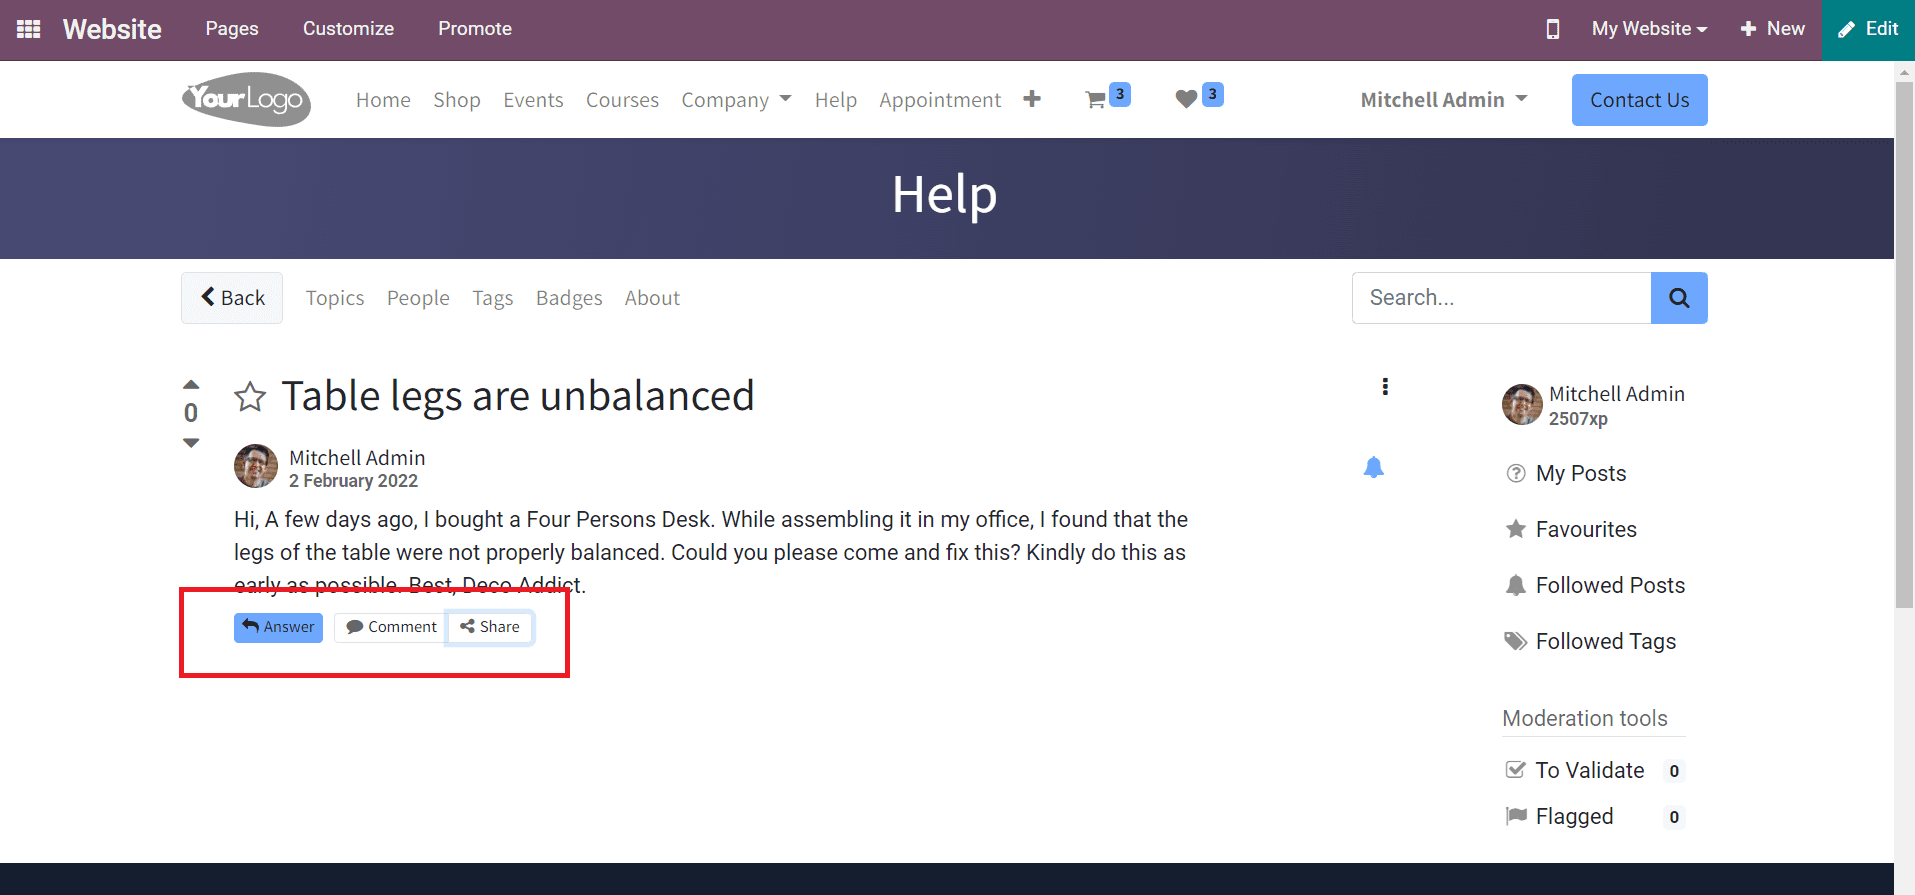
The forum visitors can answer, comment, and share the post from your company website.
The smart buttons for the actions taken on the ticket can be seen in the window as marked below.
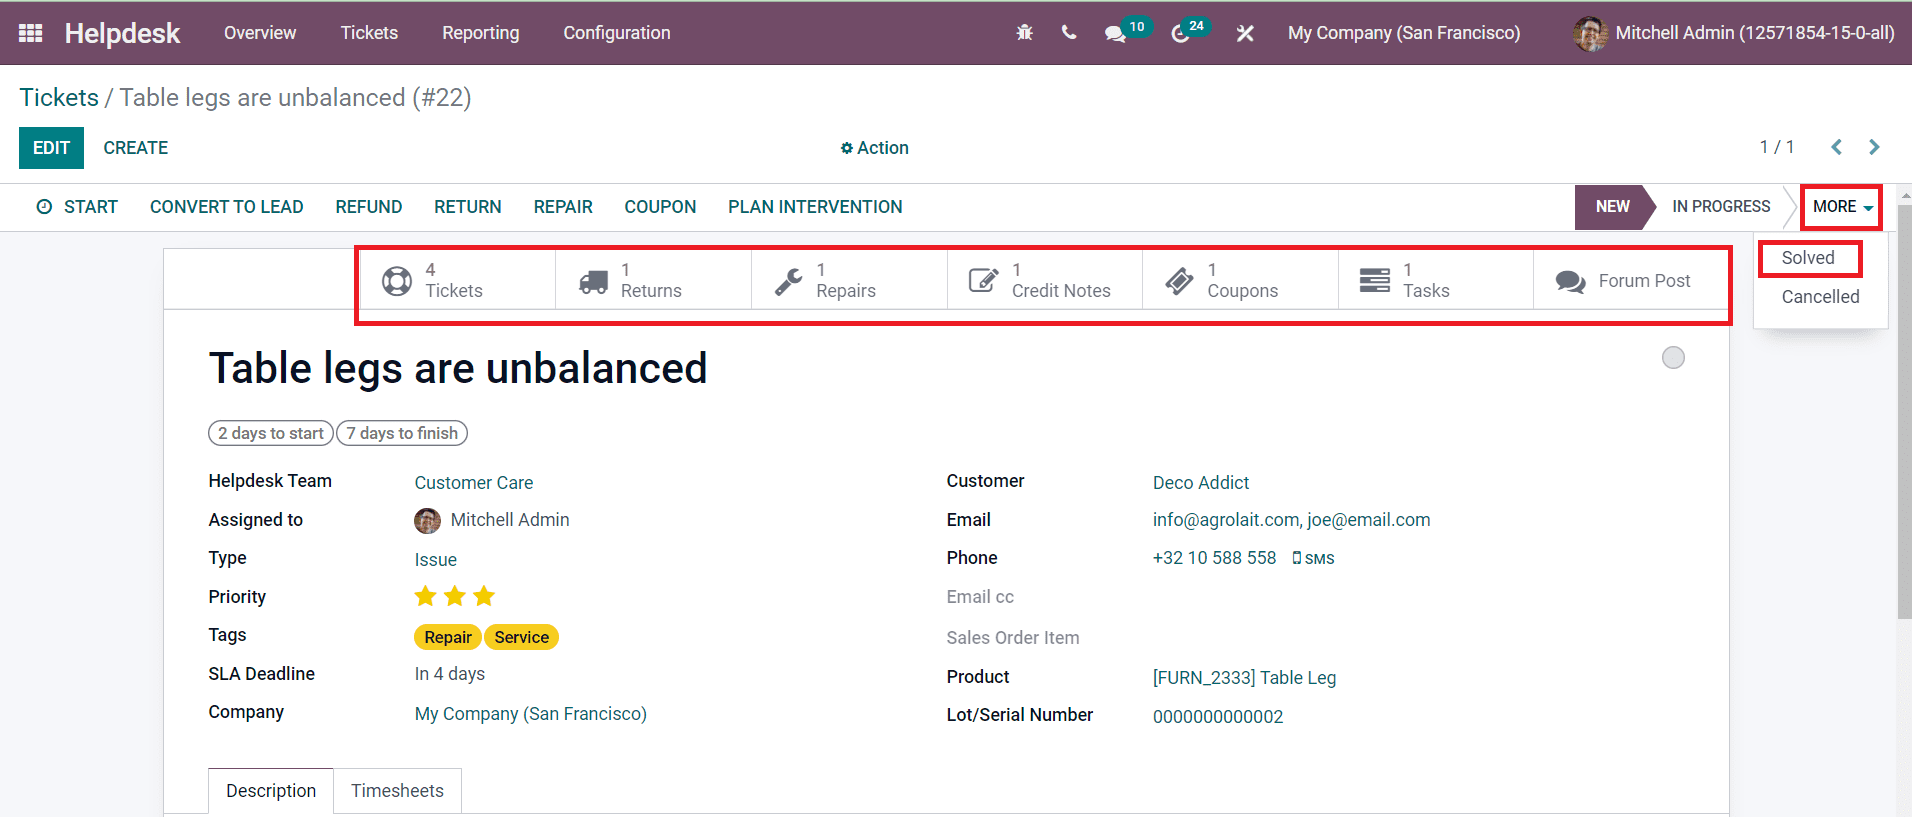 After solving the ticket, you can change the stage of the ticket to Solved. In conclusion, the management of helpdesk tickets can be effortlessly done with the help of the Helpdesk module in Odoo 15.