Tax restrictions prevent a firm from deducting certain costs from its taxable income. These charges are known as disallowed expenses. Understanding these costs is essential for correct tax reporting and compliance with tax rules since they are not regarded as allowable deductions. They can be mistaken for allowable ones and can include business entertainment, loan repayment, clothing, asset depreciation, fines, penalties, and donations to charities. These expenses, including personal benefits, are taxable and must be considered when determining if they qualify for a corporation tax deduction.
In the realm of business profit and loss calculations, certain expenses may fall under the disallowed category, making them ineligible for deduction from the fiscal results. However, the Odoo 17 Accounting management system offers a streamlined approach to handling disallowed expenses, allowing for real-time fiscal insights. This blog aims to guide you through the effective management of disallowed expenses using the advanced features of Odoo 17 Accounting.
Configuring Disallowed Expenses in Odoo
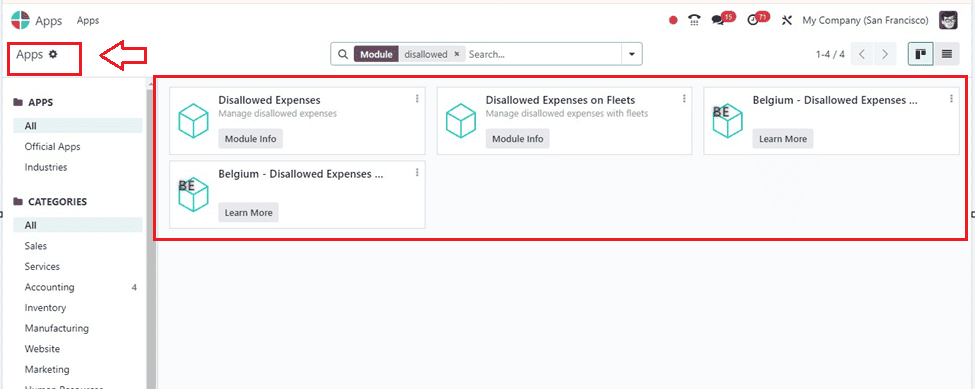
Before delving into disallowed expense management, ensure you have to install both the Accounting and Expense modules in your database. Once installed, use the AppStore search bar to locate modules related to Disallowed Expense management and proceed to install them. Upon completion of the installation process, navigate to the main dashboard and select the Accounting module.
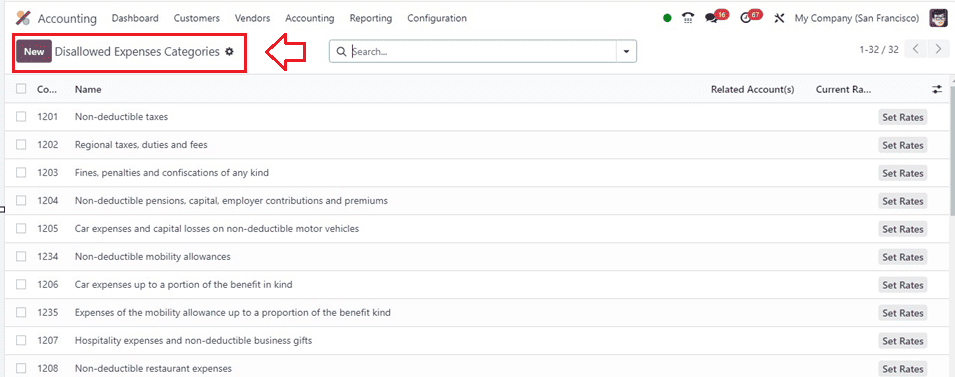
Access the ‘Configuration’ menu and choose the ‘Disallowed Expenses Categories’ button. This action will open a new window displaying pre-configured disallowed expense categories, with their Code, Name, Related Accounts, and Current Rate details, and the option to create new ones using the ‘New’ button.
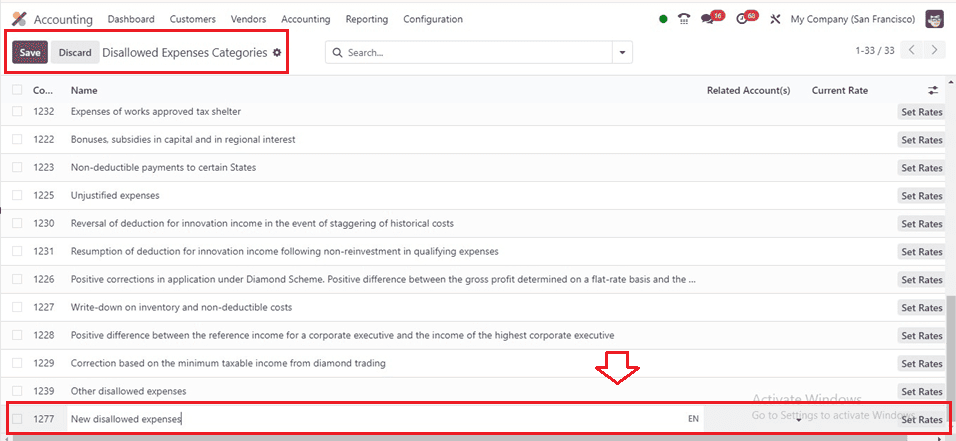
When you click the "New" option, a new line is added to the document where you may enter the prohibited spending category's Name, Related Account, and Current Rate. To further customize rates, use the Set Rates button, allowing you to add rates along with details such as Start Date, Disallowed %, and Company.
The Chart of Accounts platform allows the established categories to be connected to an expense account. Head to the Chart of Accounts, select a suitable expense account, and mention the Disallowed Expenses in the specified field. This establishes a connection, ensuring that disallowed expenses are calculated based on the assigned category when creating new expenses.
To set rates for disallowed expense categories, click on the Set Rates button. To modify any category details, click on them and navigate to the form view, where you can edit data and set rates.
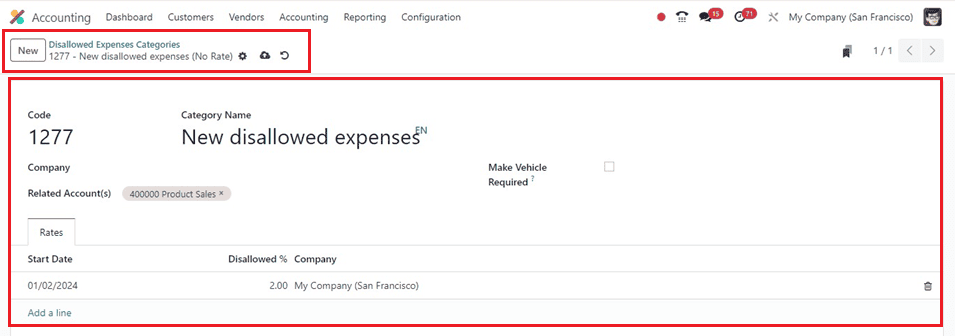
The specifics of the costs, including the Code, Category Name, Company, and Related Account, are shown in the form view. The car is required for the vendor bill booking process in the Car Category section. The Rates tab allows adding rates one by one, along with Start Date, Disallowed %, and Company details. This defines the percentage of the amount to be disallowed for expenses in this category. In the Chart of Accounts platform, a newly created disallowed category can be connected to an expenditure account. This allows for the mention of Disallowed Expenses in the specified field.
Create a Purchase Order
To illustrate, let's consider an example where an expense account linked to a disallowed category is used for a product.
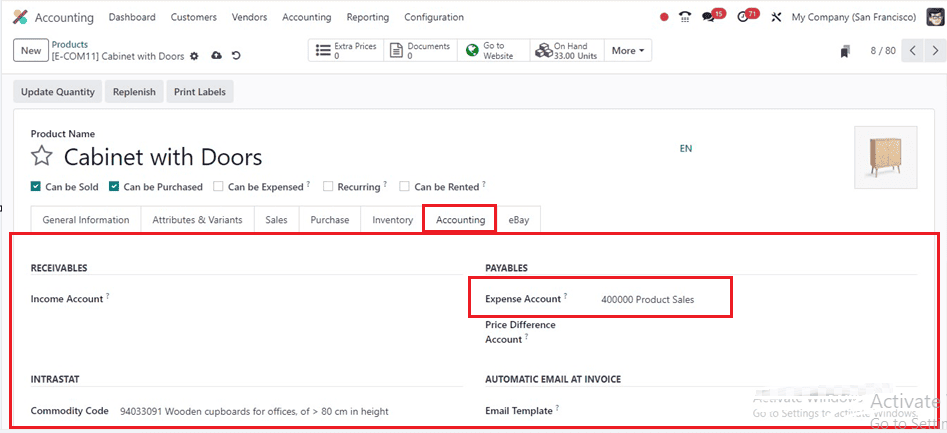
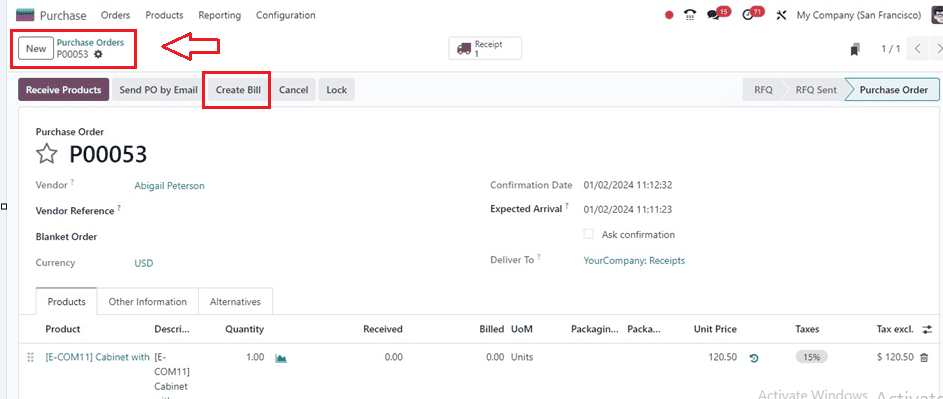
Then, create a purchase order from the Odoo Purchase Module using the ‘Purchase Orders’ window of the ‘Orders’ menu. Use the "Create Bill" button to create a bill following the creation of a purchase order verifying receipt of the merchandise.
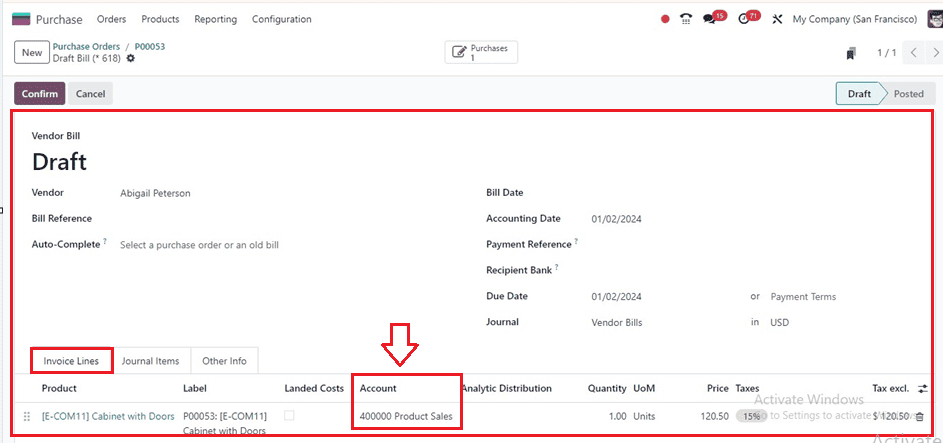
After verifying the bill, you can locate the impacted account under the Invoice Line and Journal Items tab, as shown below.
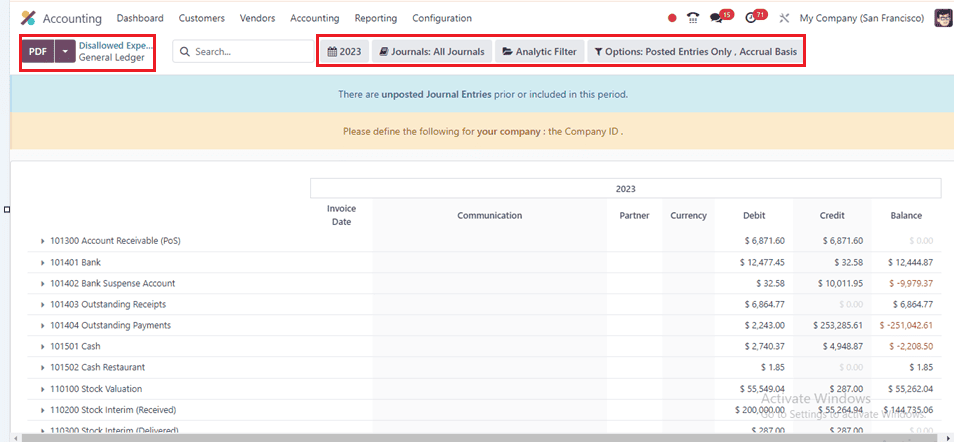
Now, go back to the Accounting module. The accounting module displays the disallowed expenses under the Reporting menu, allowing you to generate comprehensive reports with details on disallowed expense categories and associated accounts.

The generated report includes information on journal items, Date, Communication, Partner, Currency, Debit, and disallowed amounts. This report can be converted into PDF and XLSX formats, and further analysis of general ledgers related to reported disallowed expenses is possible using the General Ledger button. Additionally, the Annotate button allows for the addition of footnotes to the report.
In summary, this blog has provided step-by-step instructions on effectively managing disallowed expenses in Odoo 17 Accounting, covering the installation process and the configuration of disallowed categories within the system.