At the time of profit and loss calculation in any kind of business, there may be chances of finding certain expenses that belong to the category of disallowed. In such cases, we can not deduct these expenses from the fiscal result. On the other hand, it is possible to perform the deduction operation for the disallowed expenses in your bookkeeping result. Odoo 16 Accounting management system will simplify the process of disallowed expense management. You can set disallowed categories in the system, which will ultimately help you to get fiscal results in real time.
This blog will provide directions to effectively manage your disallowed expenses using the advanced Odoo 16 Accounting.
For that, you need to ensure that you have installed the Accounting module in your database. Along with the Accounting module, we need help from the Expense module. So, it is essential to install the Expense module into your system. After installing the Accounting and Expense modules, you can use the search bar of the AppStore to search for the modules related to Disallowed Expense management.
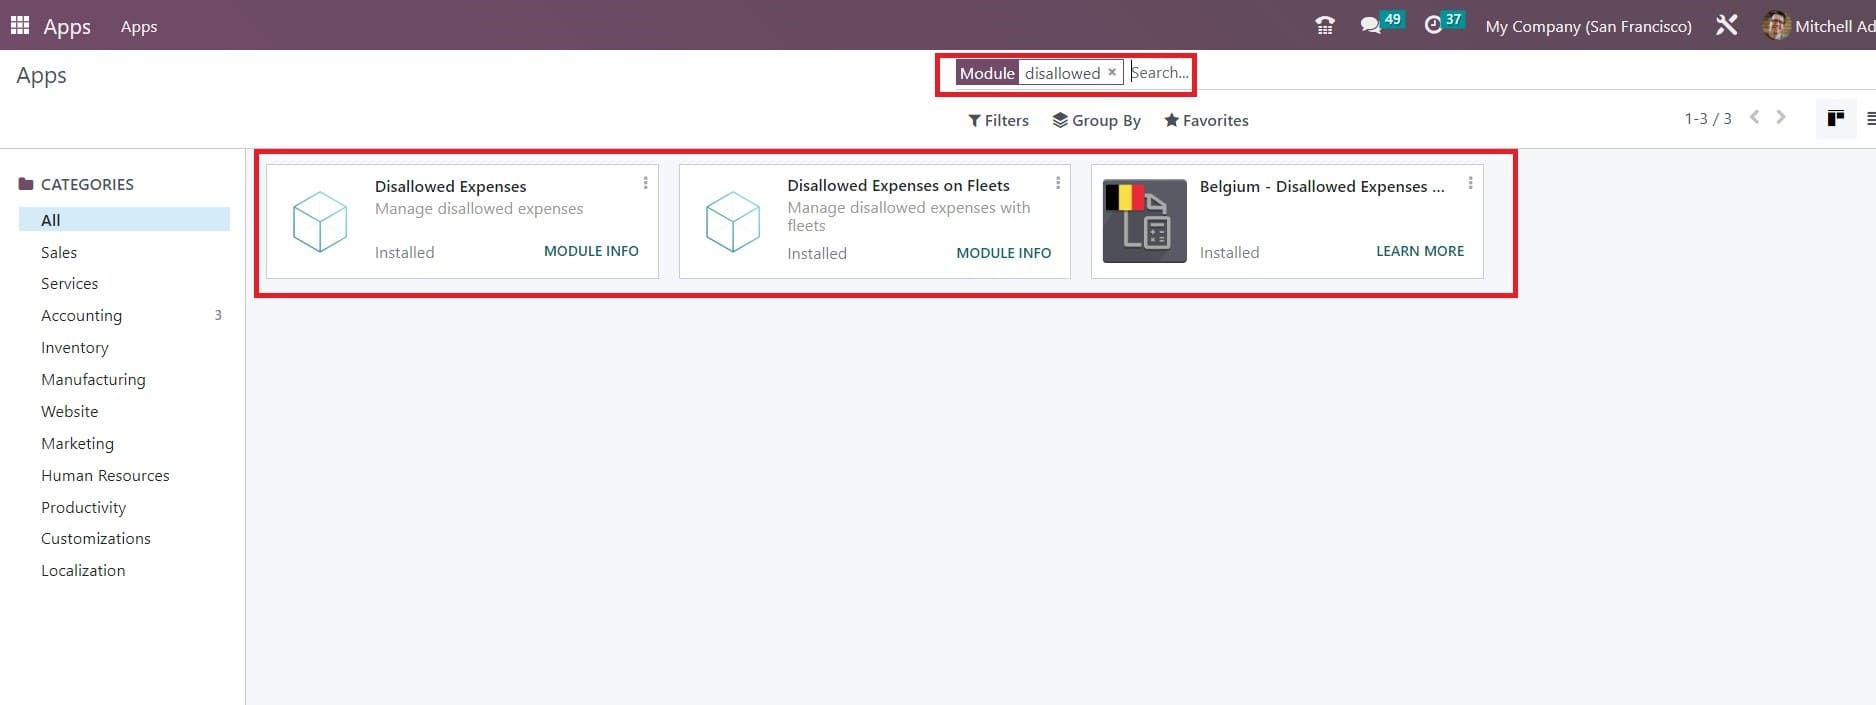
As you can see in the screenshot above, you will get suitable modules for the management of Disallowed Expenses. Now, install them. Once you complete the installation process, you can select the Accounting module from the main dashboard. Here, we are going to detail the process of creating new Disallowed Expenses Categories.
For this, you can go to the Configuration menu and select the Disallowed Expenses Categories button from the given list. This will open a new window as shown below. Configuring Disallowed Expenses Categories will help you to get fiscal results in real time.
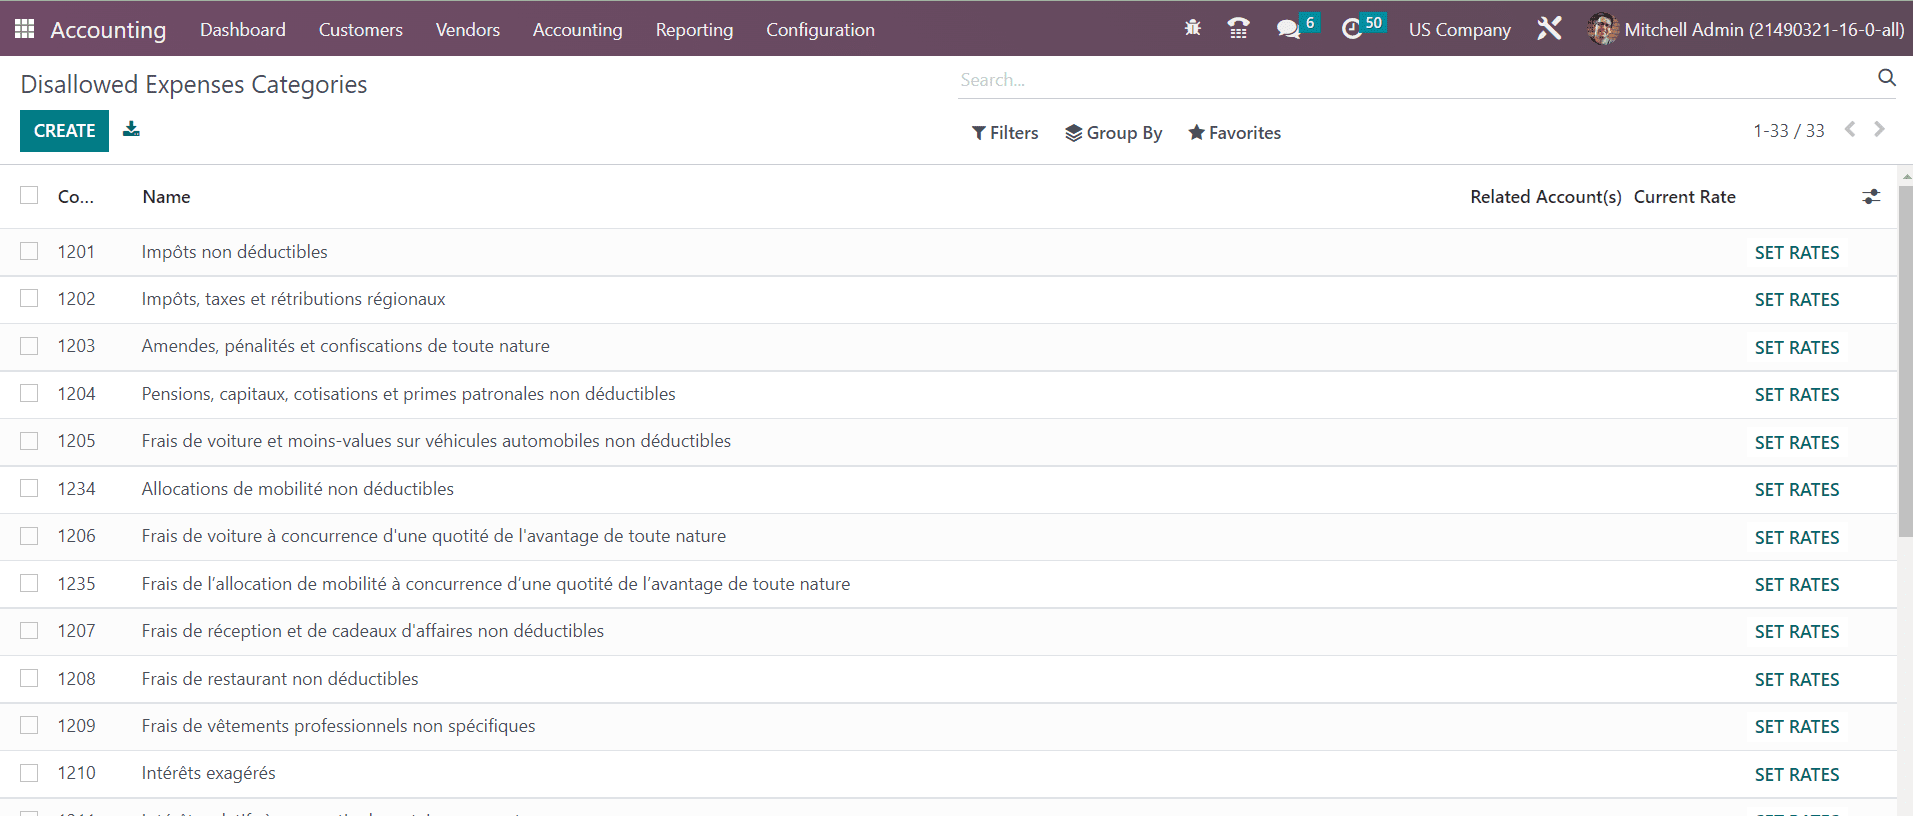
The window will show the list of some pre-configured disallowed expense categories. You are allowed to use the Create button to create a new Disallowed Expenses Category. As soon as you click on the Create button, you will get a new line under the existing list where you can mention the Name, Related Account, and Current Rate.
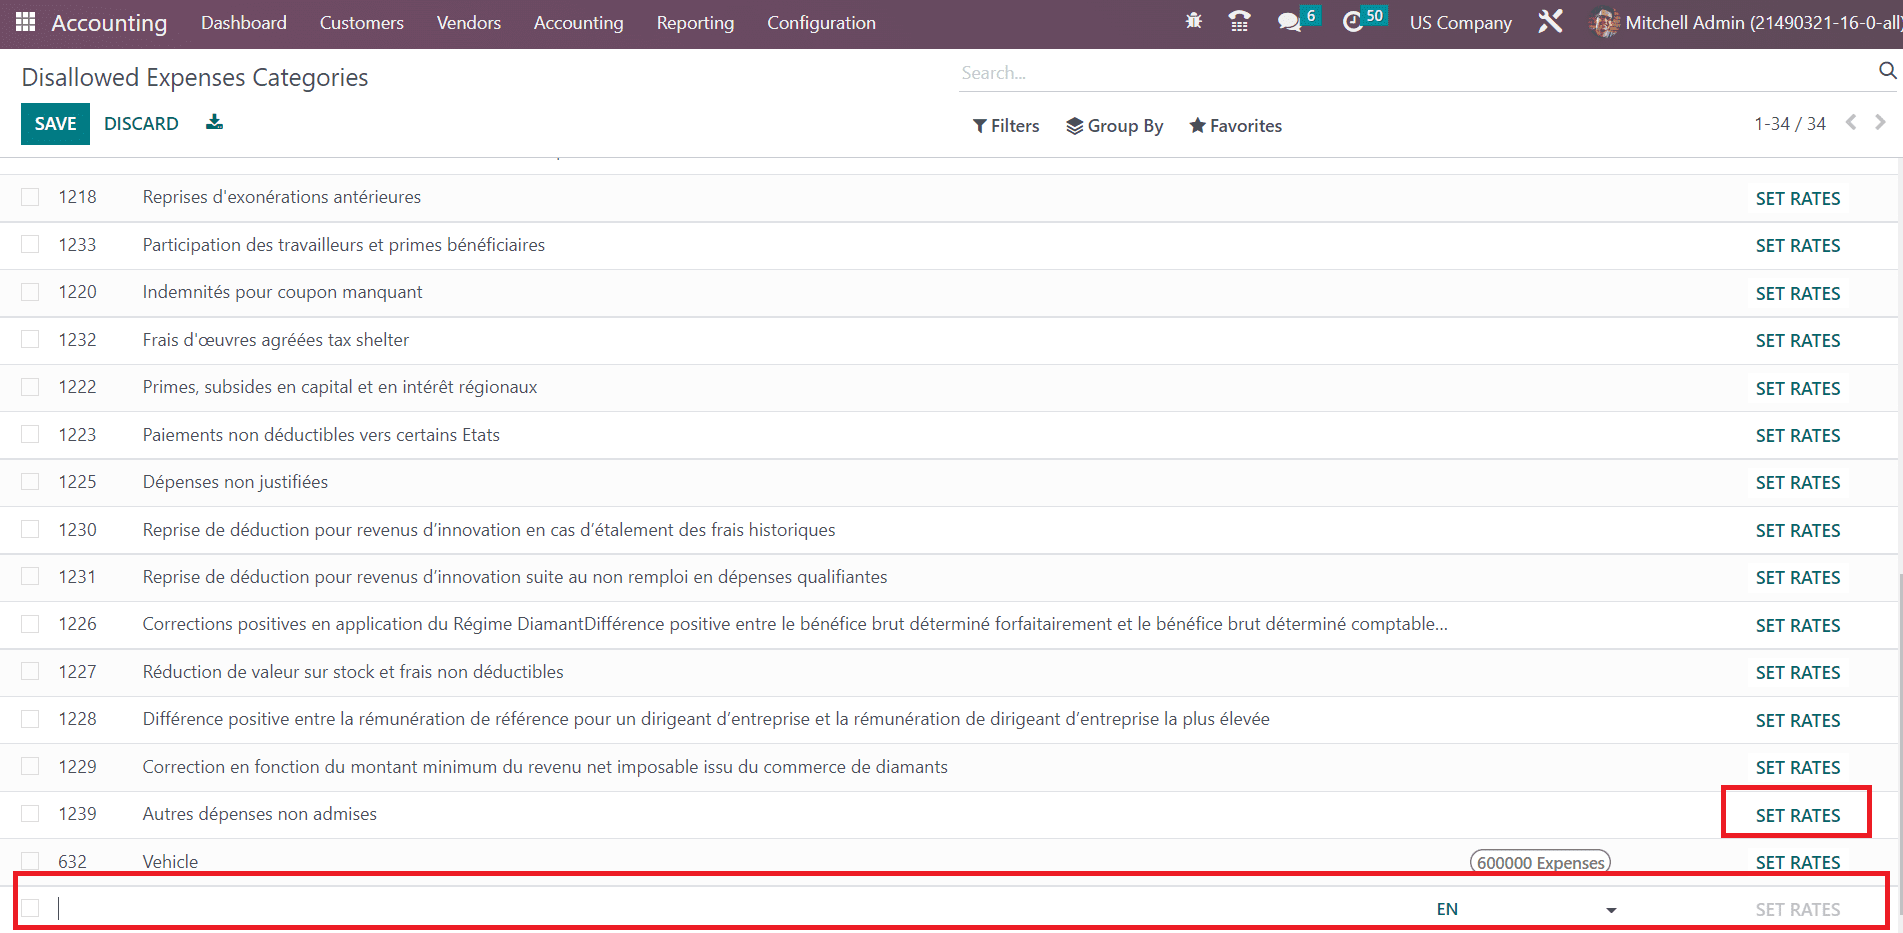
By clicking on the Set Rates button, you can set rates for the disallowed expense categories. If you want to change the details of any of the available categories, you can click on them. This will direct you to the form view of the respective category, where you can edit the available data and set rates.
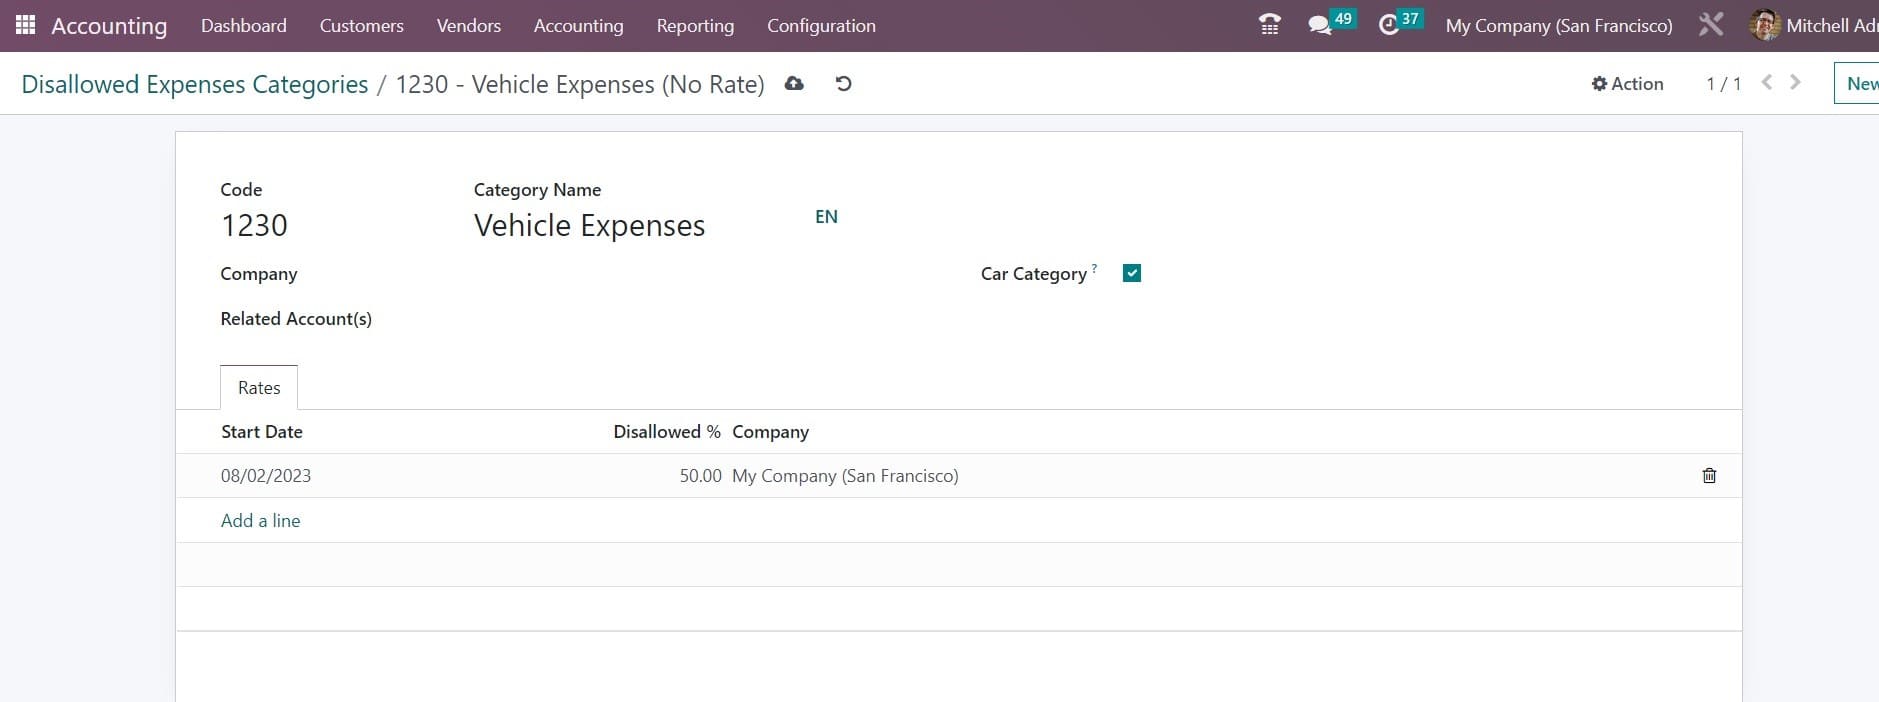
As you can see in the image above, the Code, Category Name, Company, and Related Account details of the expenses will be available in the form view. The Car Category field makes the vehicle mandatory while booking a vendor bill. The Rates tab can be used to add the rates one by one using the Add a Line button along with the details of the Start Date, Disallowed %, and Company. This will define how much percentage of the amount should be disallowed for the expenses that belong to this category.
After creating a new disallowed category, you can link the category with an expense account available in the Chart of Accounts platform. For this, go to the Chart of Accounts and select a suitable expense account. Here, you will get a specified field to mention the Disallowed Expenses as shown in the image below.
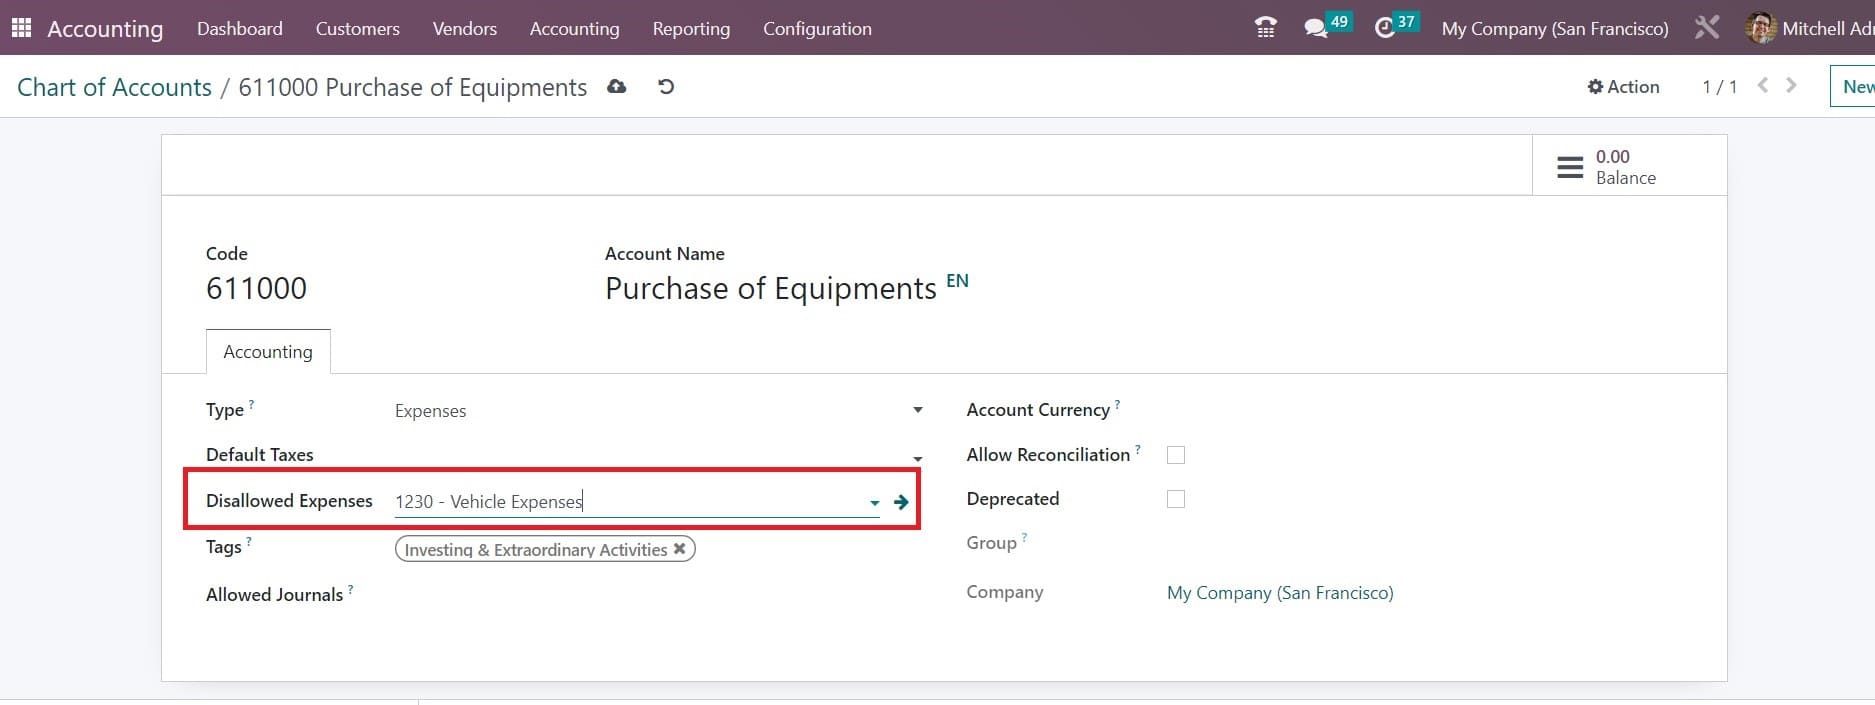
Now, the disallowed expense will be calculated according to the disallowed expense category mentioned in the expense account when a new expense is created with this account. Let’s check this with an example. We are going to mention this expense account on a product.
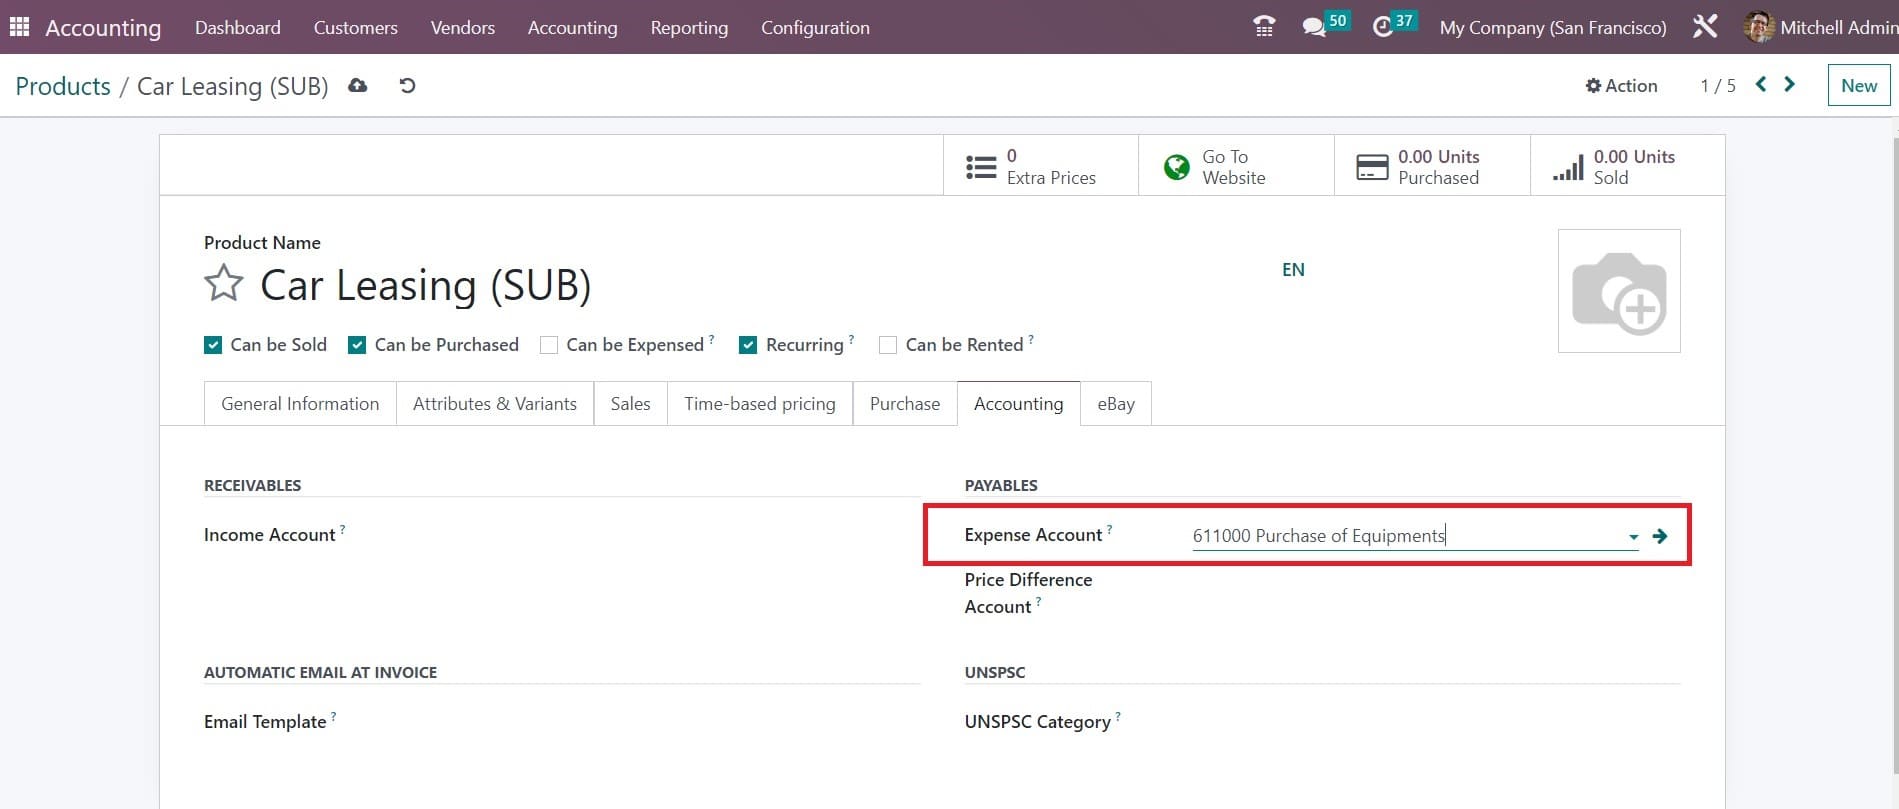
The expense account that we mentioned here is the one for which we set the disallowed category earlier. Now, we can create a purchase order for this product.
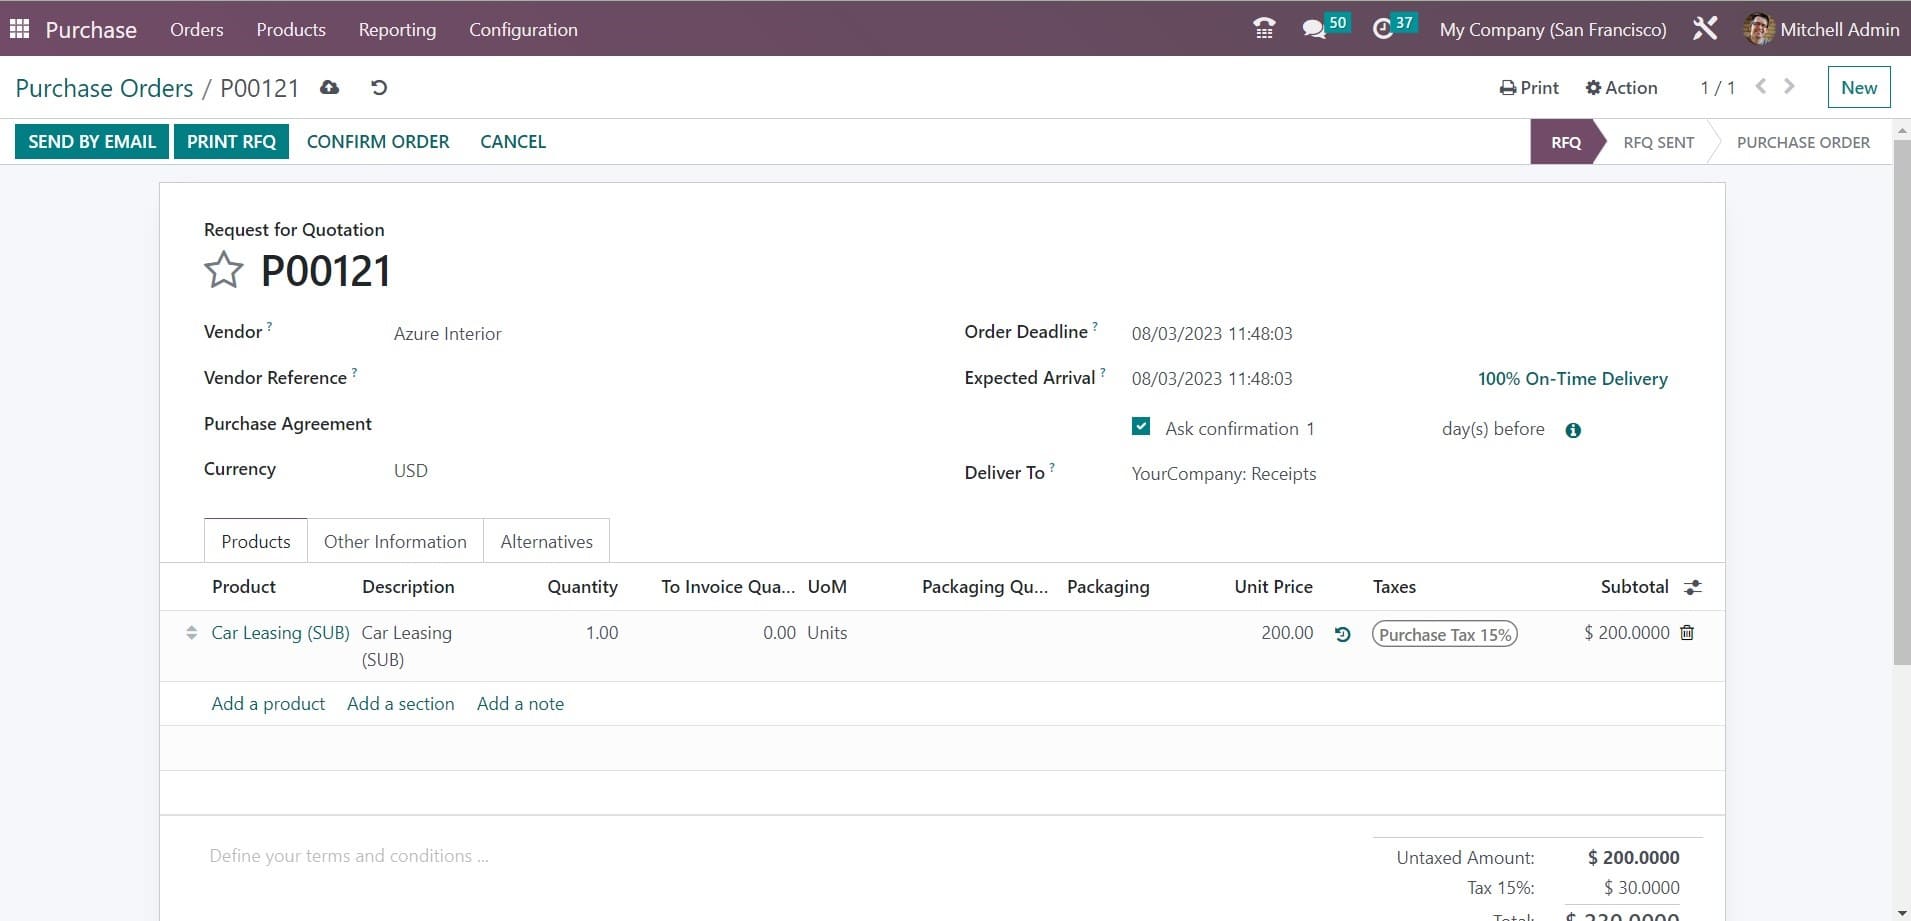
After creating the purchase order, you can confirm it and receive the product. Then, create a bill for the purchase order using the Create Bill button.
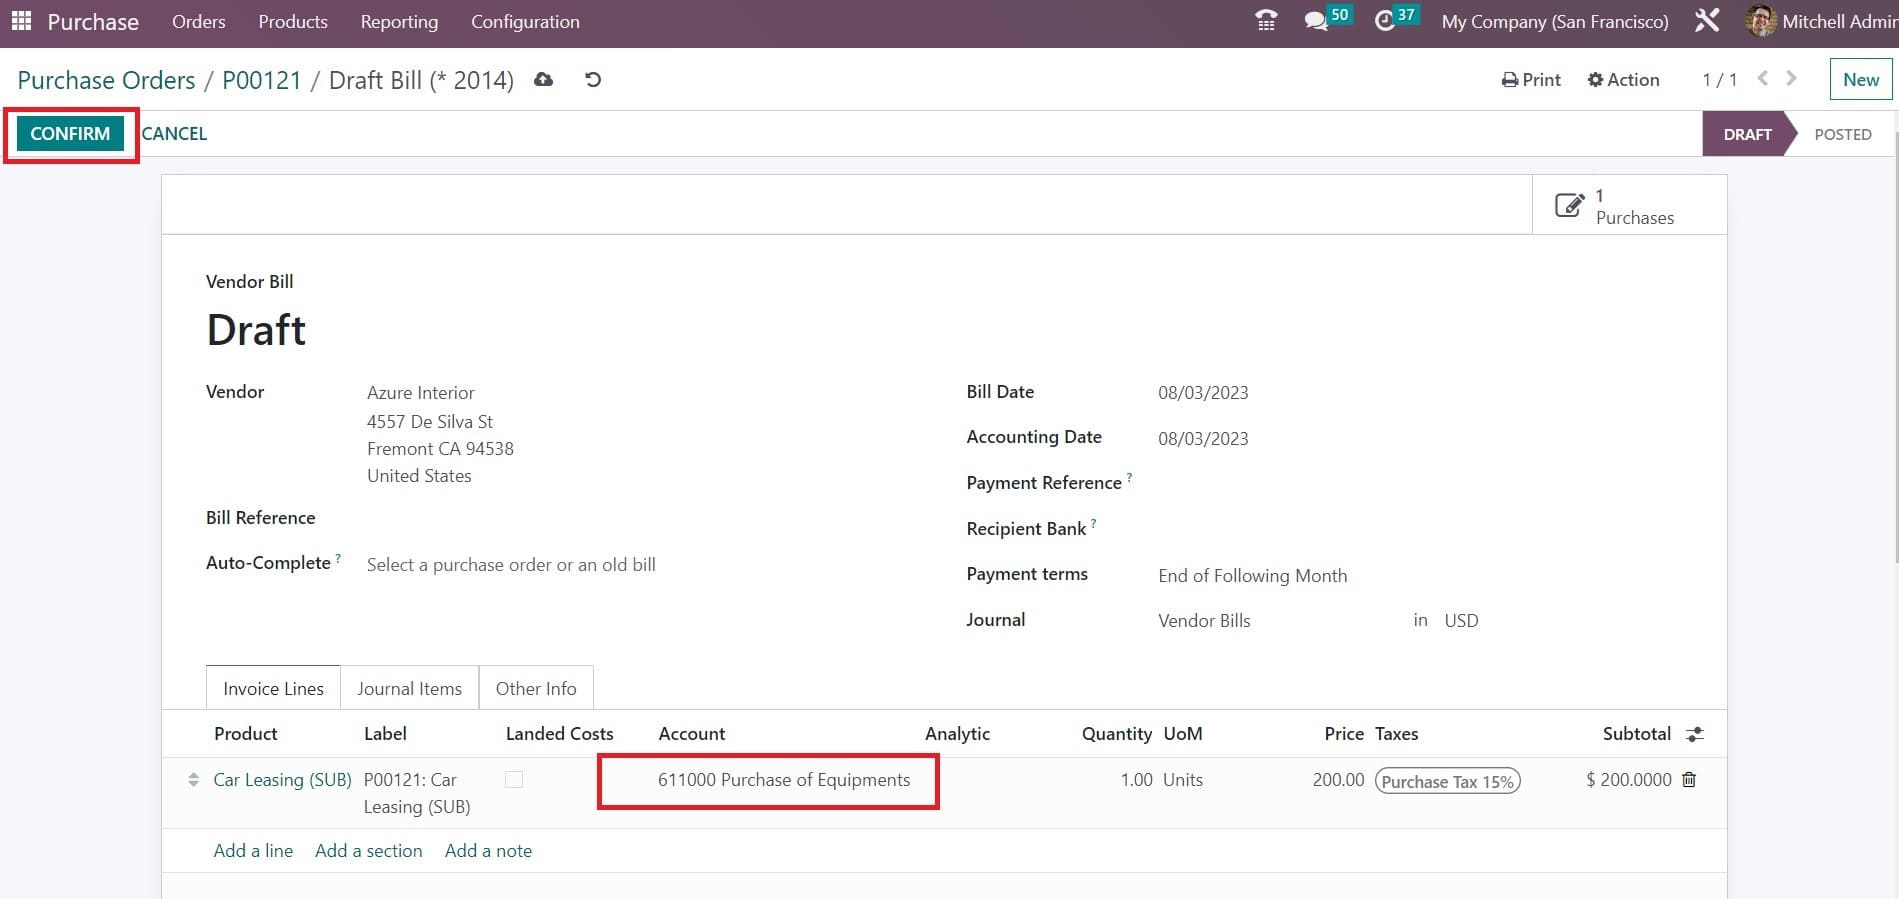
You can find the account affected under the Invoice Line and Journal Items tab. After confirming the bill, you can go back to the Accounting module.
Under the Reporting menu, you can find the Disallowed Expenses option under the Reporting menu to generate disallowed expenses reports. Here, you can find all the disallowed expense categories and expense accounts associated with the respective category.
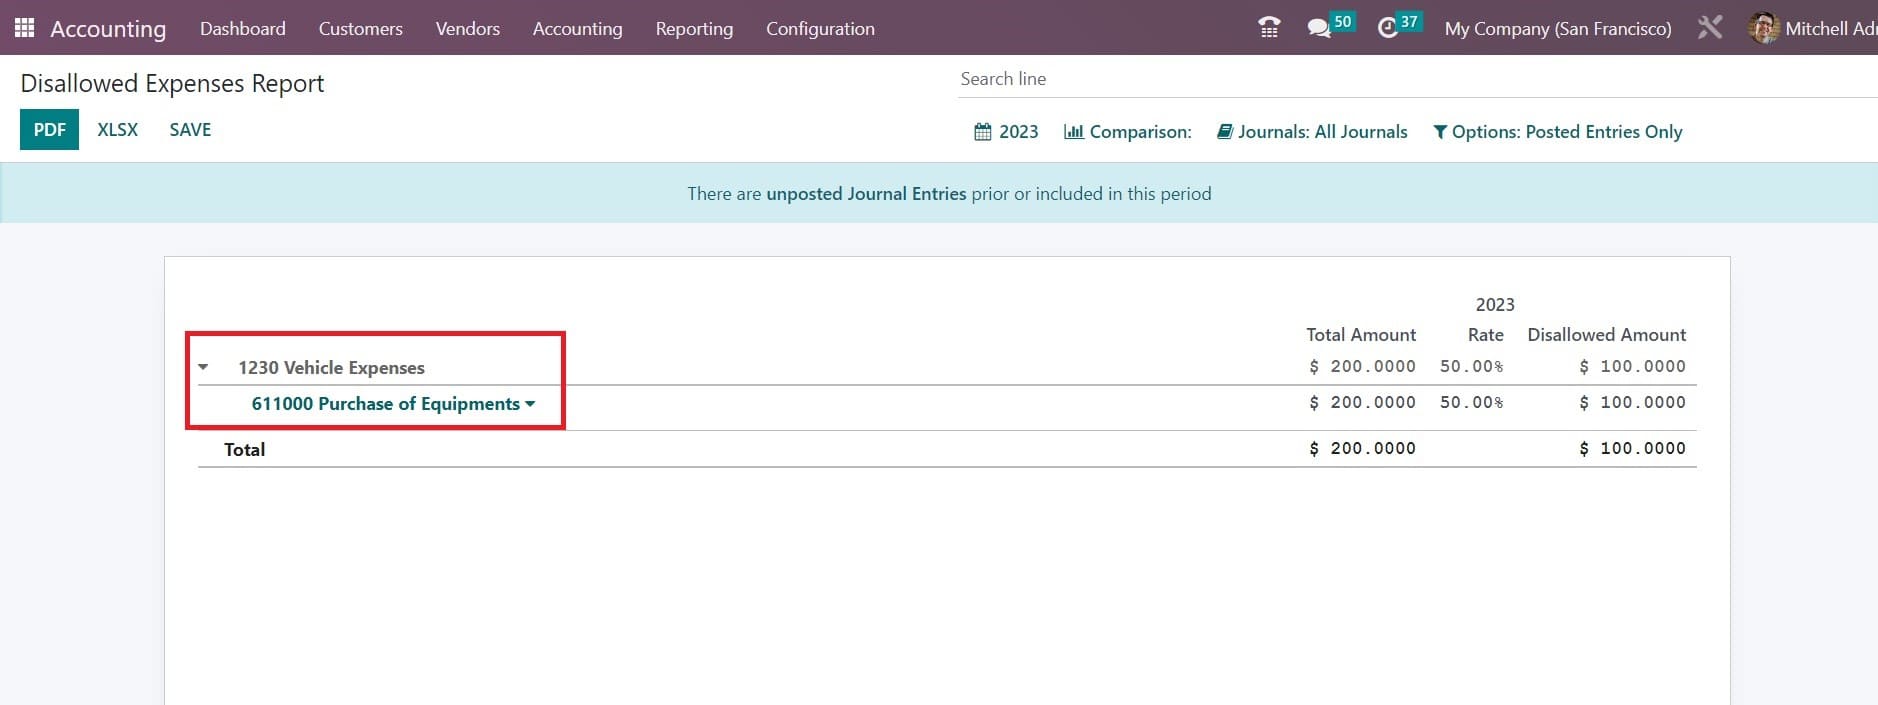
The report of the expense account we used for the product can be seen here. The total amount and disallowed amount will be shown separately. The disallowed amount will be automatically calculated based on the rate you specified in the corresponding disallowed expense category.
You can convert the report into PDF and XLSX formats using the respective buttons available on the screen. You can analyze the general ledgers related to the reported disallowed expenses by using the General Ledger button. The Annotate button can be used to add footnotes to the report.
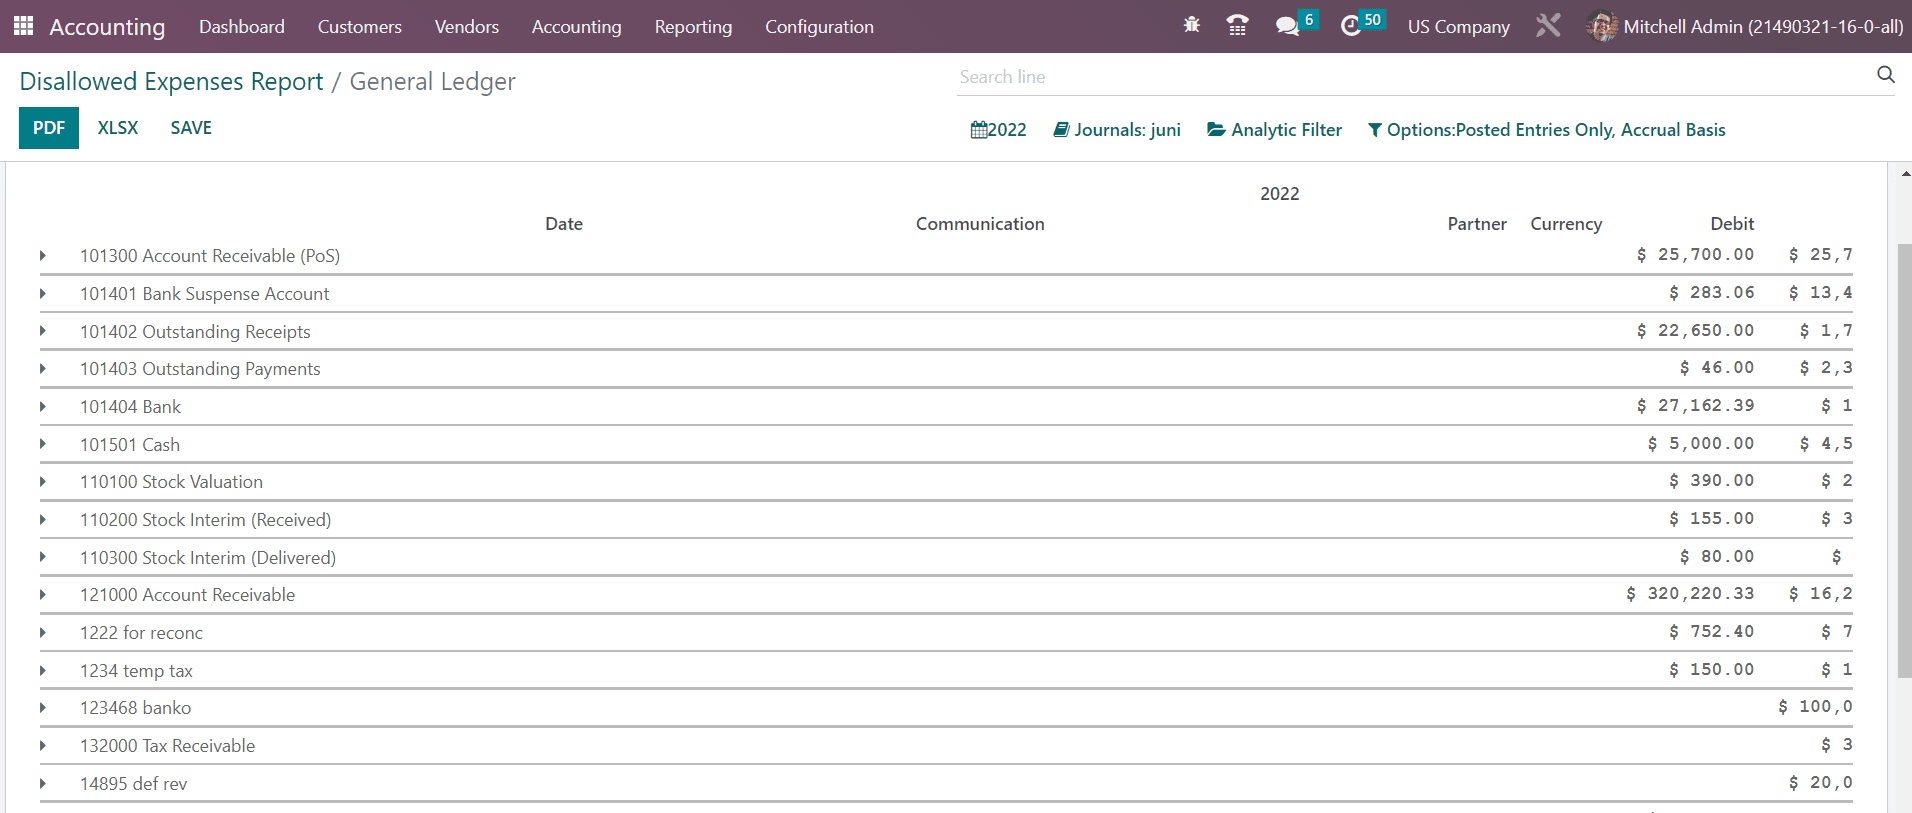
The report shows the journal items, Date, Communication, Partner, Currency, and Debit details of the general ledgers of the disallowed expenses of the selected time period. This blog has provided instructions to effectively manage disallowed expenses in the Odoo 16 Accounting. We have discussed the installation process of the Odoo 16 Accounting and the steps to set disallowed categories in the system.