A document produced for a seller by specifying the product or service information is a sales order. It is possible to secure your sales order by locking features, and any other parties will not be able to make any edits. After confirming an order, we can close it and secure the record for future preference of customer orders. Using ERP software, users can lock the sales order easily. The Odoo 16 Sales module is an effective way to lock the Sales order to a customer through confirmation.
This blog provides information to lock a confirmed sales order in the Odoo 16 Sales application.
Users need to develop a sales order for locking it after the confirmation. You can manage the products, shipping methods, quotations, customers, and more within the Sales application. Now, let's see the procedure to lock a confirmed sales order in Odoo 16.
Enable the Lock Confirmed Orders Feature in Odoo 16
Before locking a confirmed sales order, you must activate the Lock Confirmed Sales from the Odoo 16 Sales module. Click the Settings menu in Configuration and select the Lock Confirmed sales below the Quotations & Orders section described in the screenshot below.
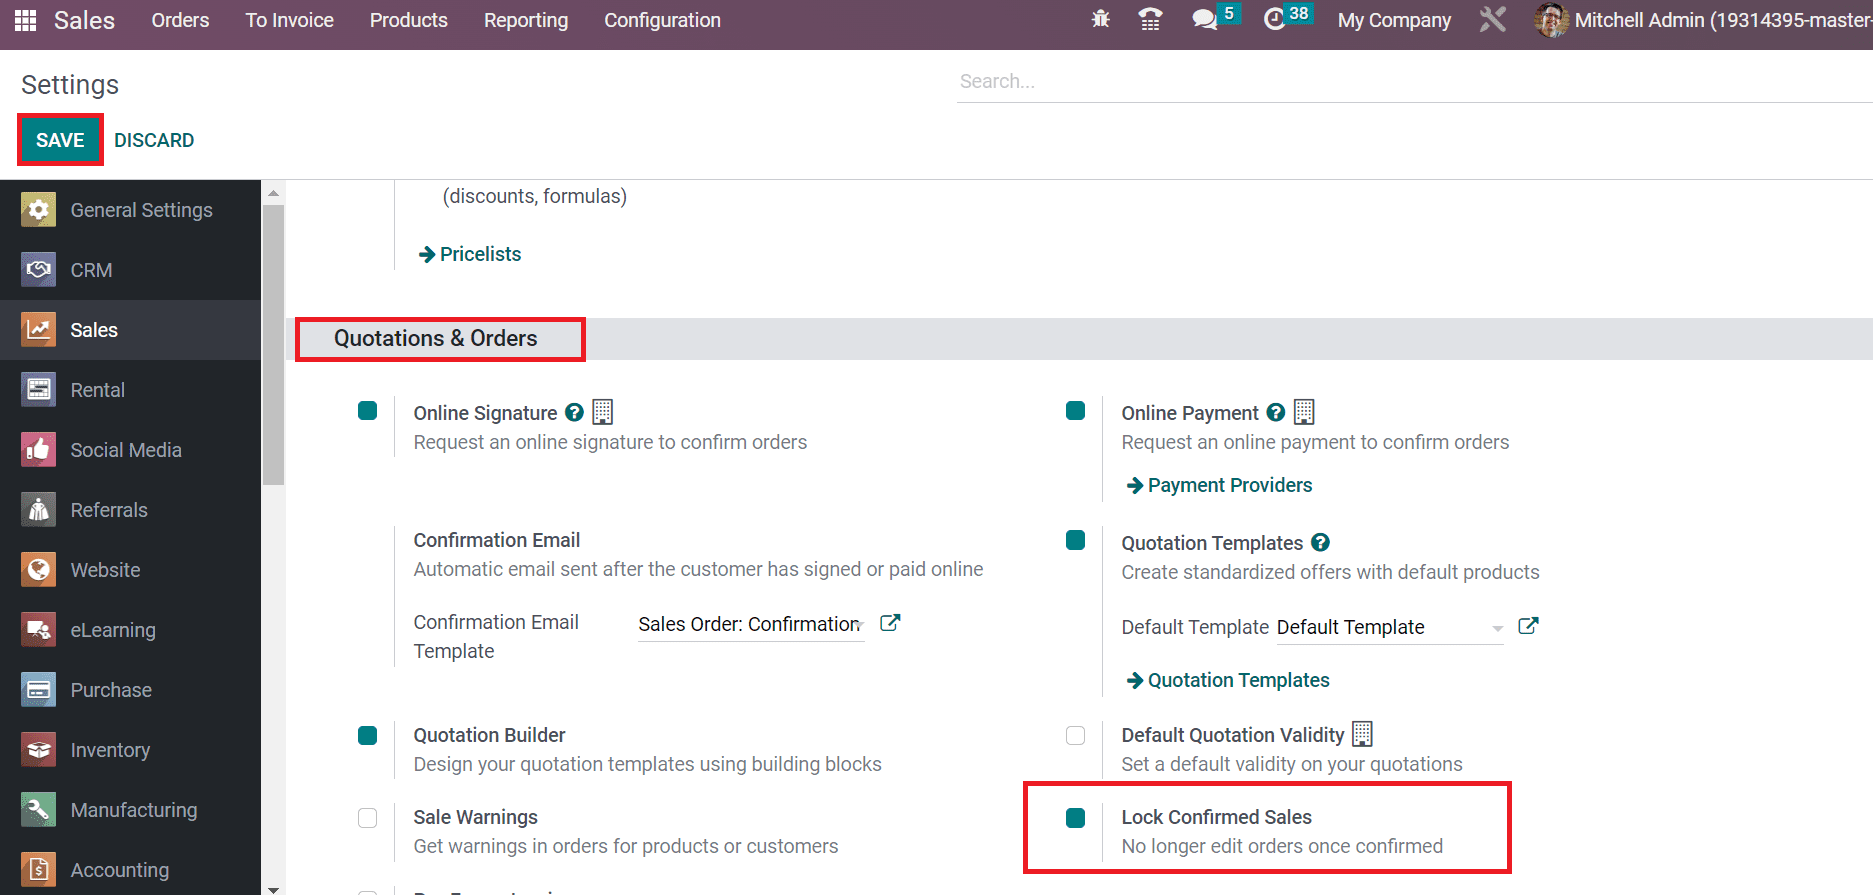
After activating the Lock Confirmed Sales option, it is impossible to edit the sales order once confirmed. Select the SAVE icon on the Settings page after choosing the specific option.
To Lock a Sales Order once Confirmed in the Odoo 16 Sales
We need to create a sales order to lock the customer's order record. To develop a sales order, click the Orders menu in the Orders tab of the Sales module. In the Sales Orders window, the user can see the order information, including Invoice Status, Number, Salesperson, Customer, etc., as displayed in the screenshot below.
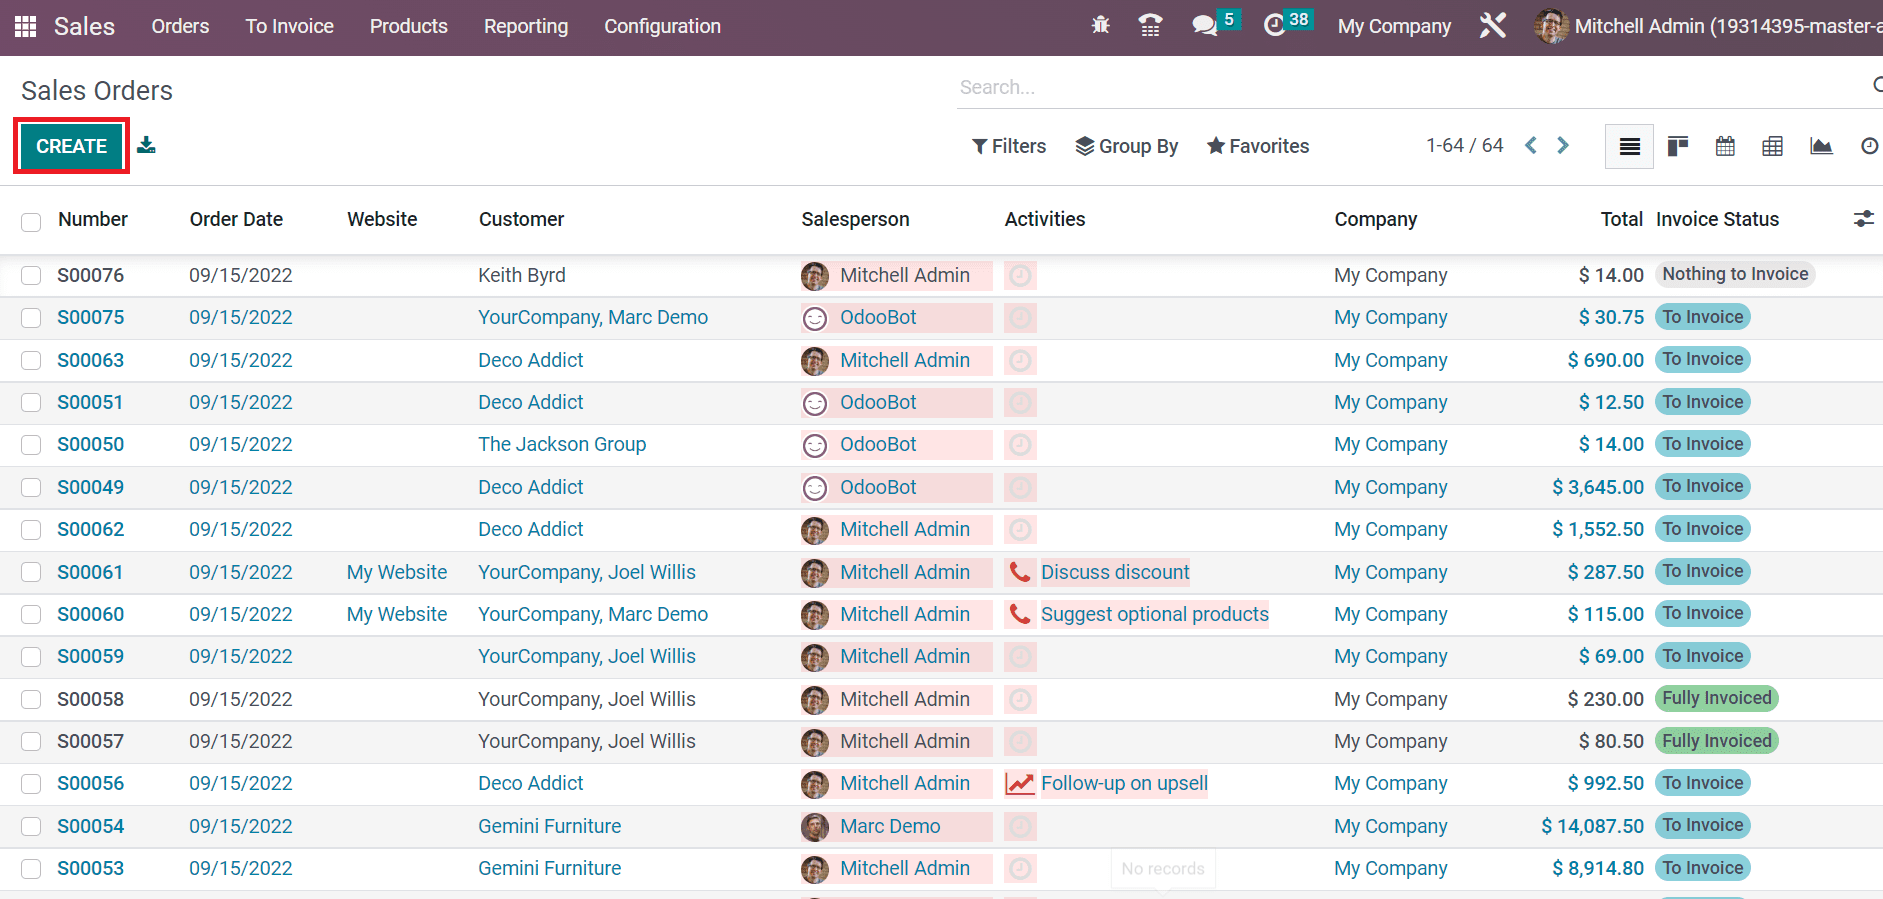
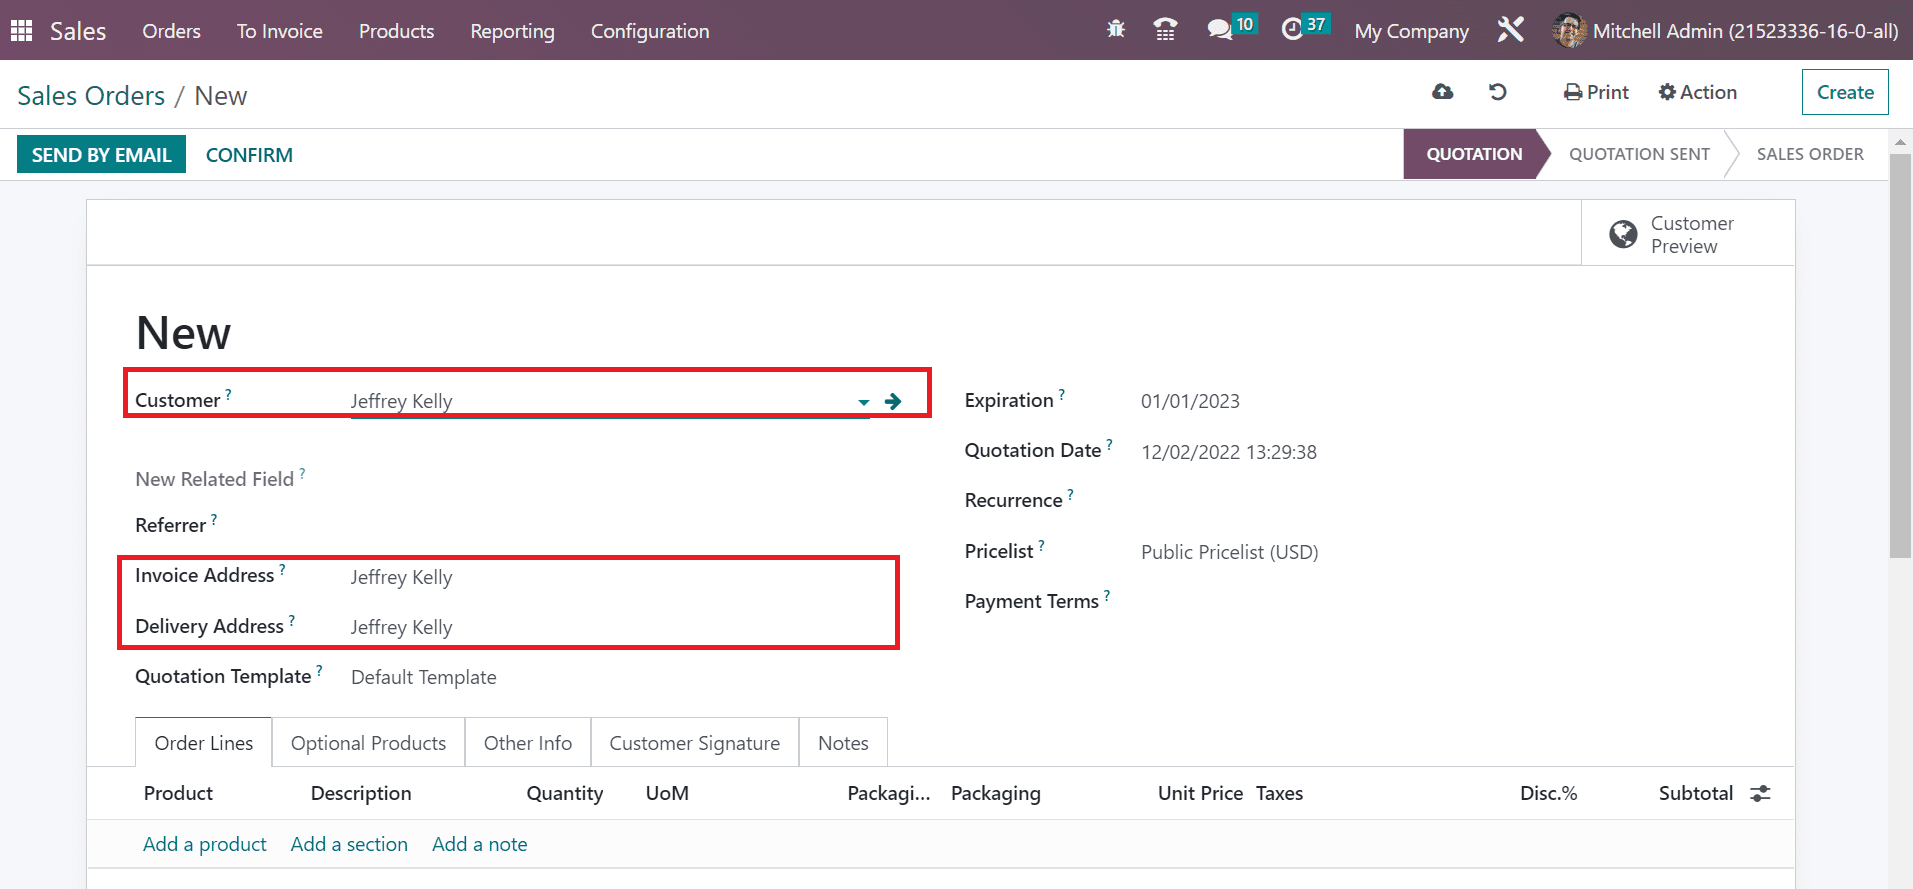
Choose the CREATE icon to generate a new sales order. Set the Customer as Jeffrey kelly in the new window. After picking up your customer, the invoice and delivery location of the respective customer is accessible automatically in the Invoice Address and Delivery Address field, as marked in the screenshot below.
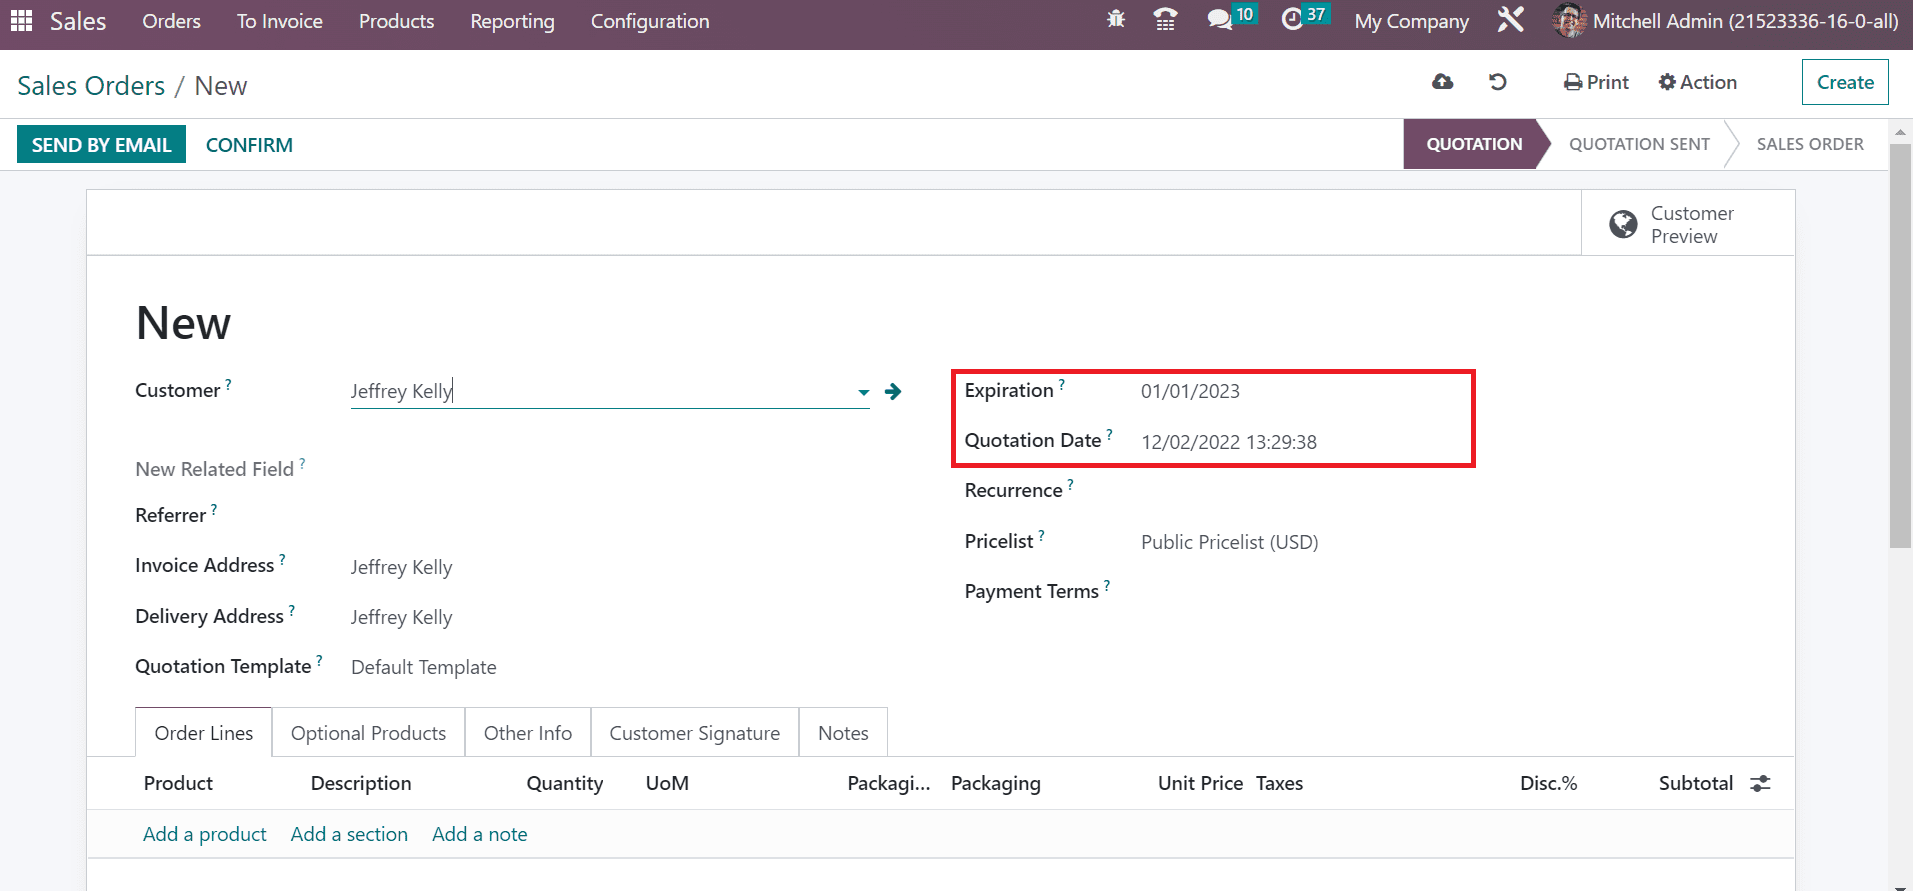
Later, add the expiry day for the sales order in the Expiration field. Also, you must set the Quotation Date regarding your Sales order as portrayed in the screenshot below.
We can set a default template in the Quotation Template field and pick your Pricelist. Afterward, specify the payment method details in the Payment Terms option, as marked in the screenshot below.
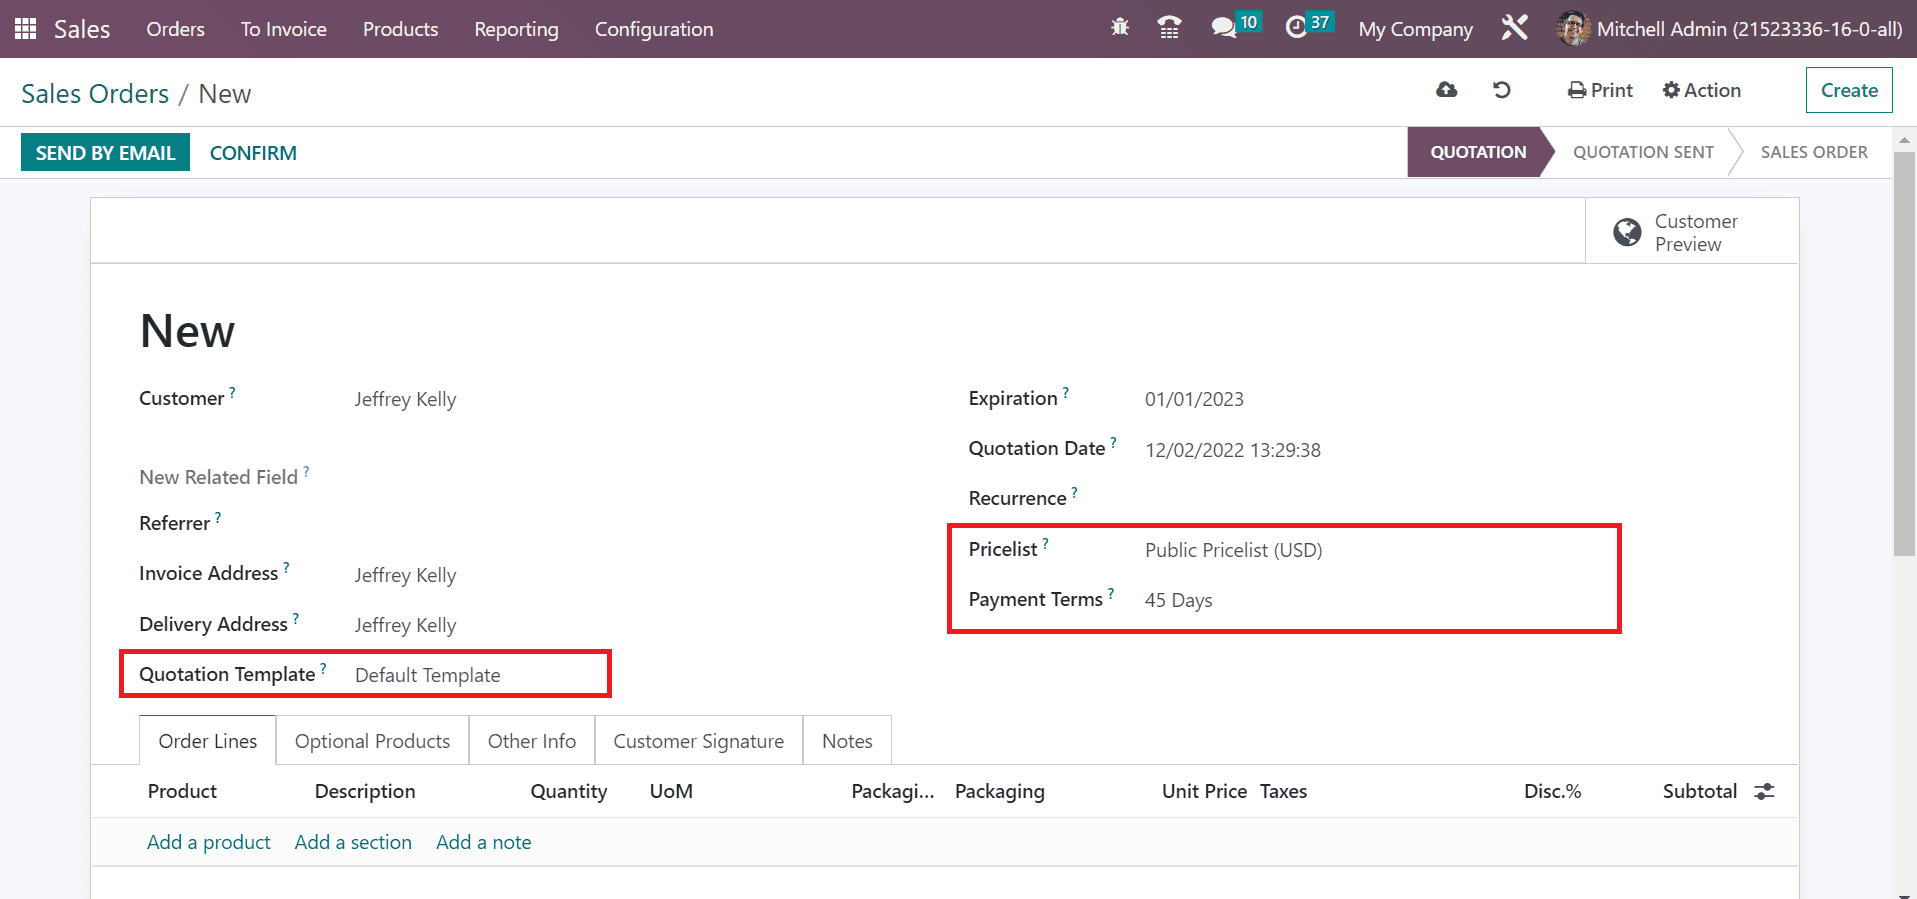
Choose your commodity below the Order Lines tab after selecting the Add a Product icon. We picked the product Bacon Burger inside the Order Lines tab, as illustrated in the screenshot below.
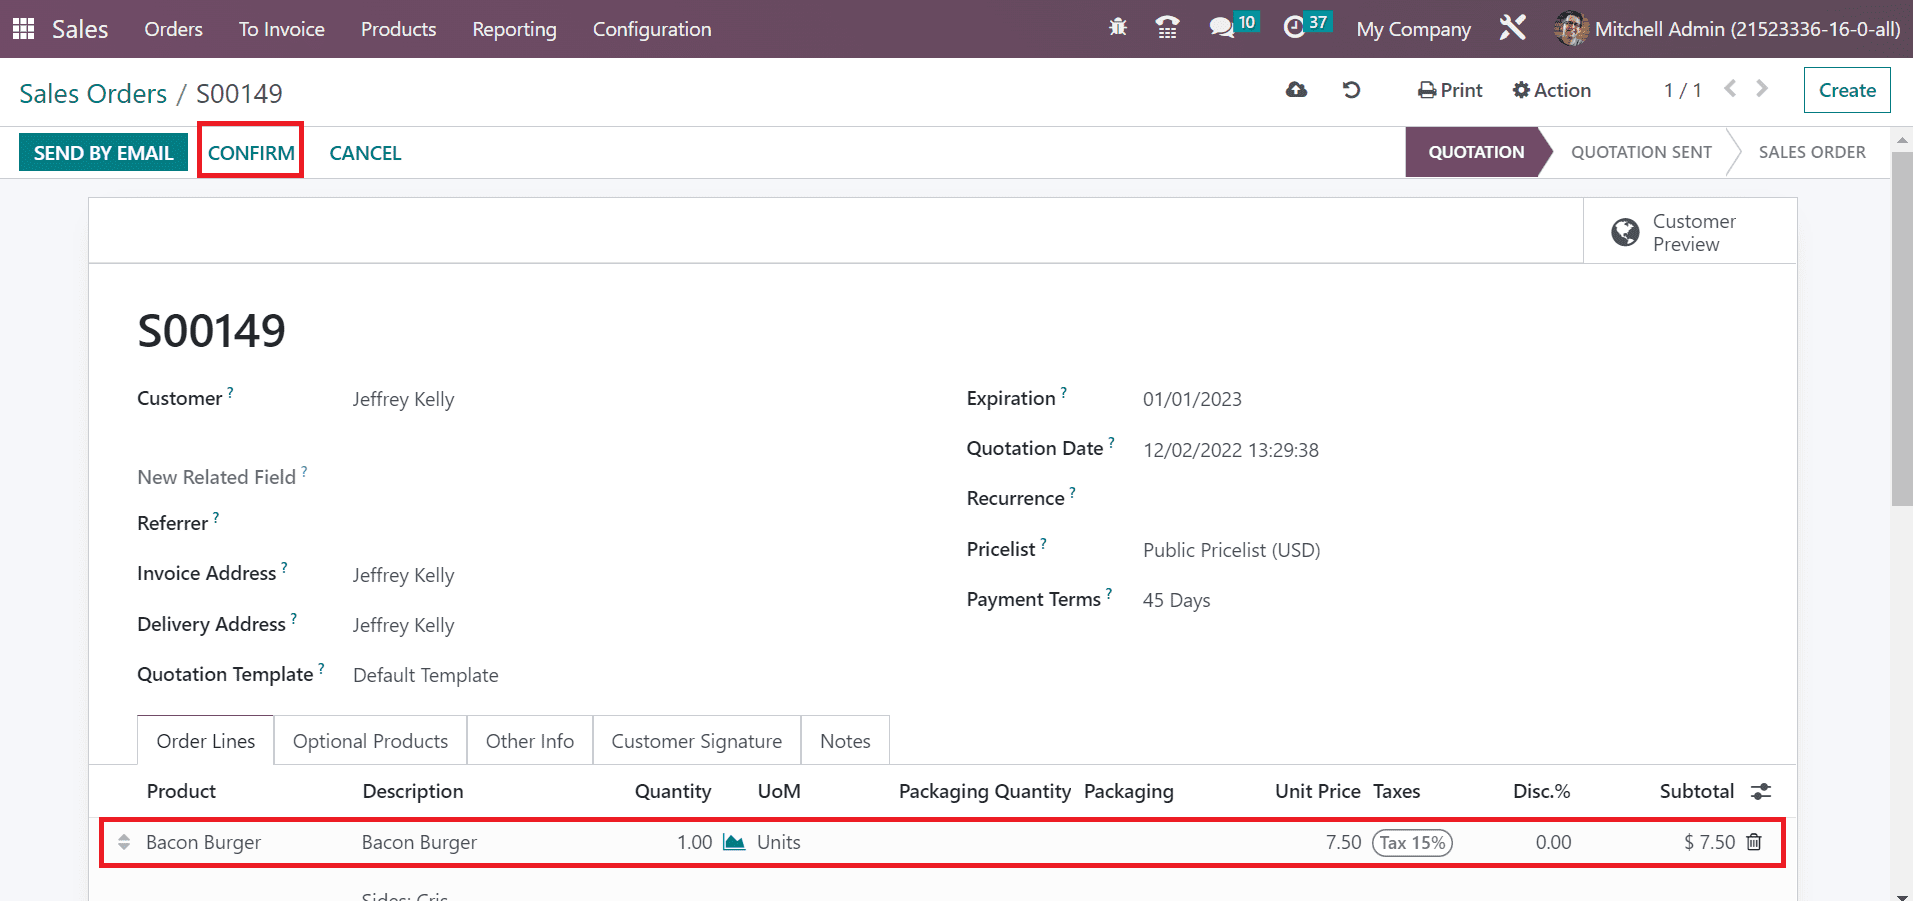
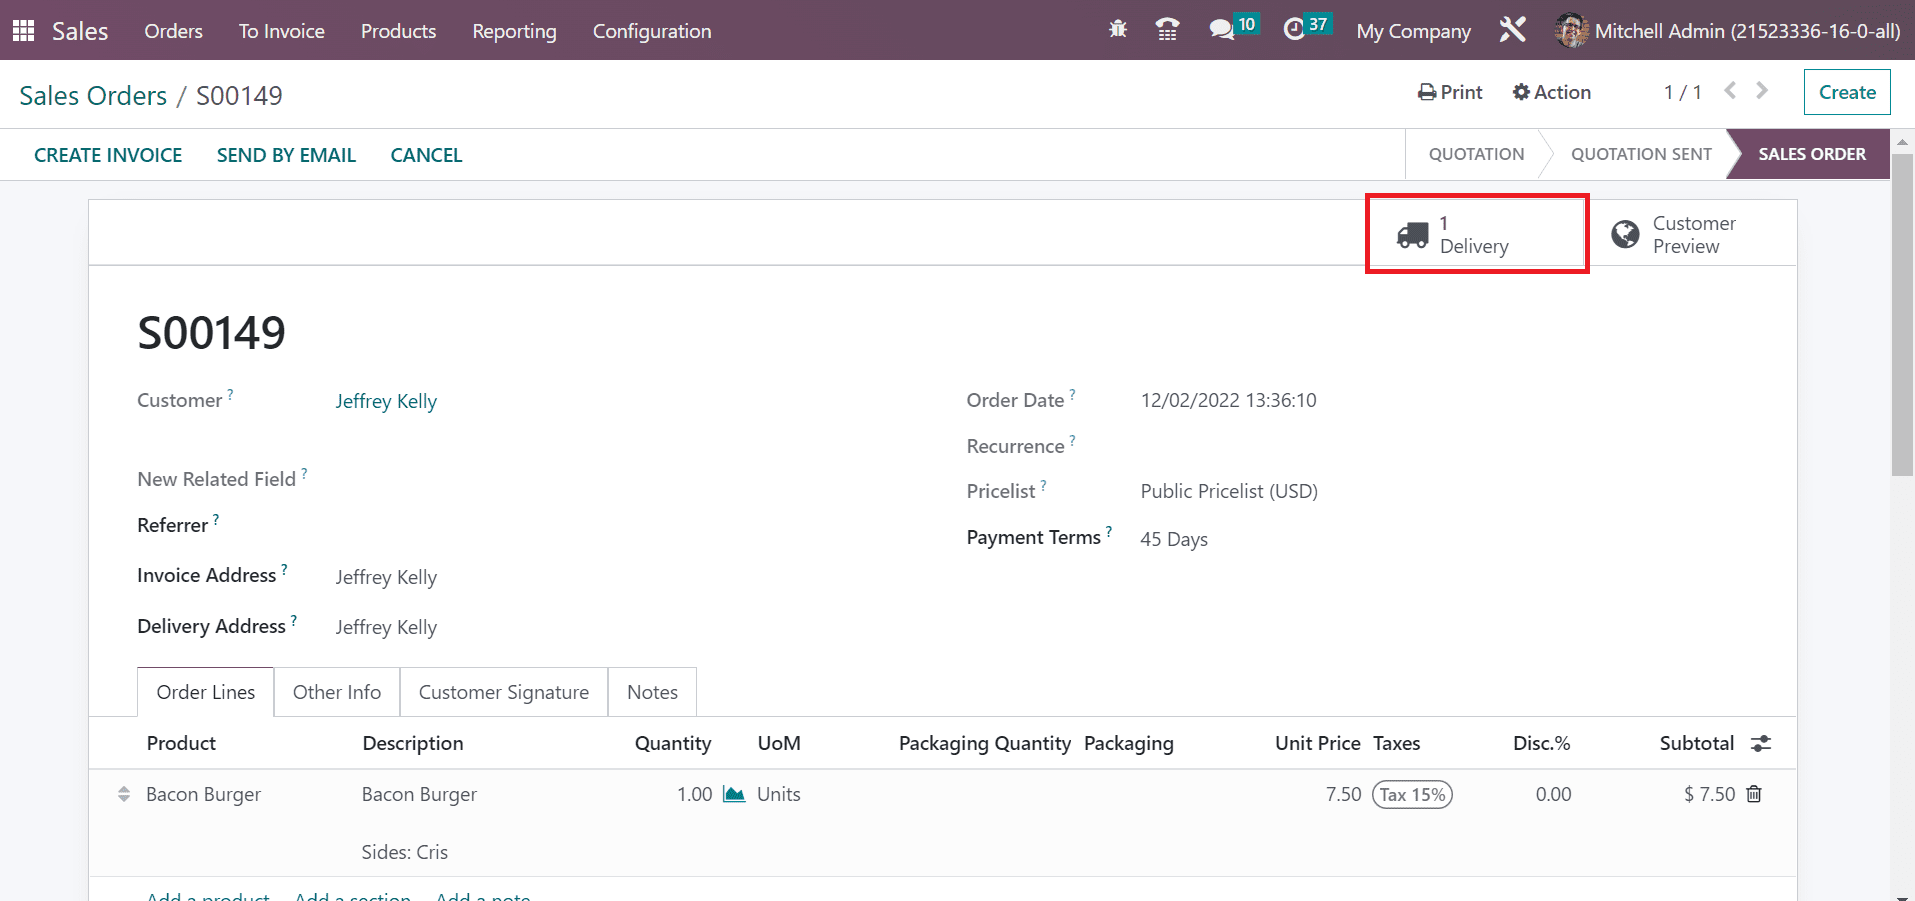
After saving the details, click the CONFIRM icon in the Sales Orders window. The stage changed into SALES ORDER, and one delivery was generated, as mentioned in the screenshot below.
We can lock the order by selecting the LOCK icon in the Sales Orders window to avoid unnecessary editing.
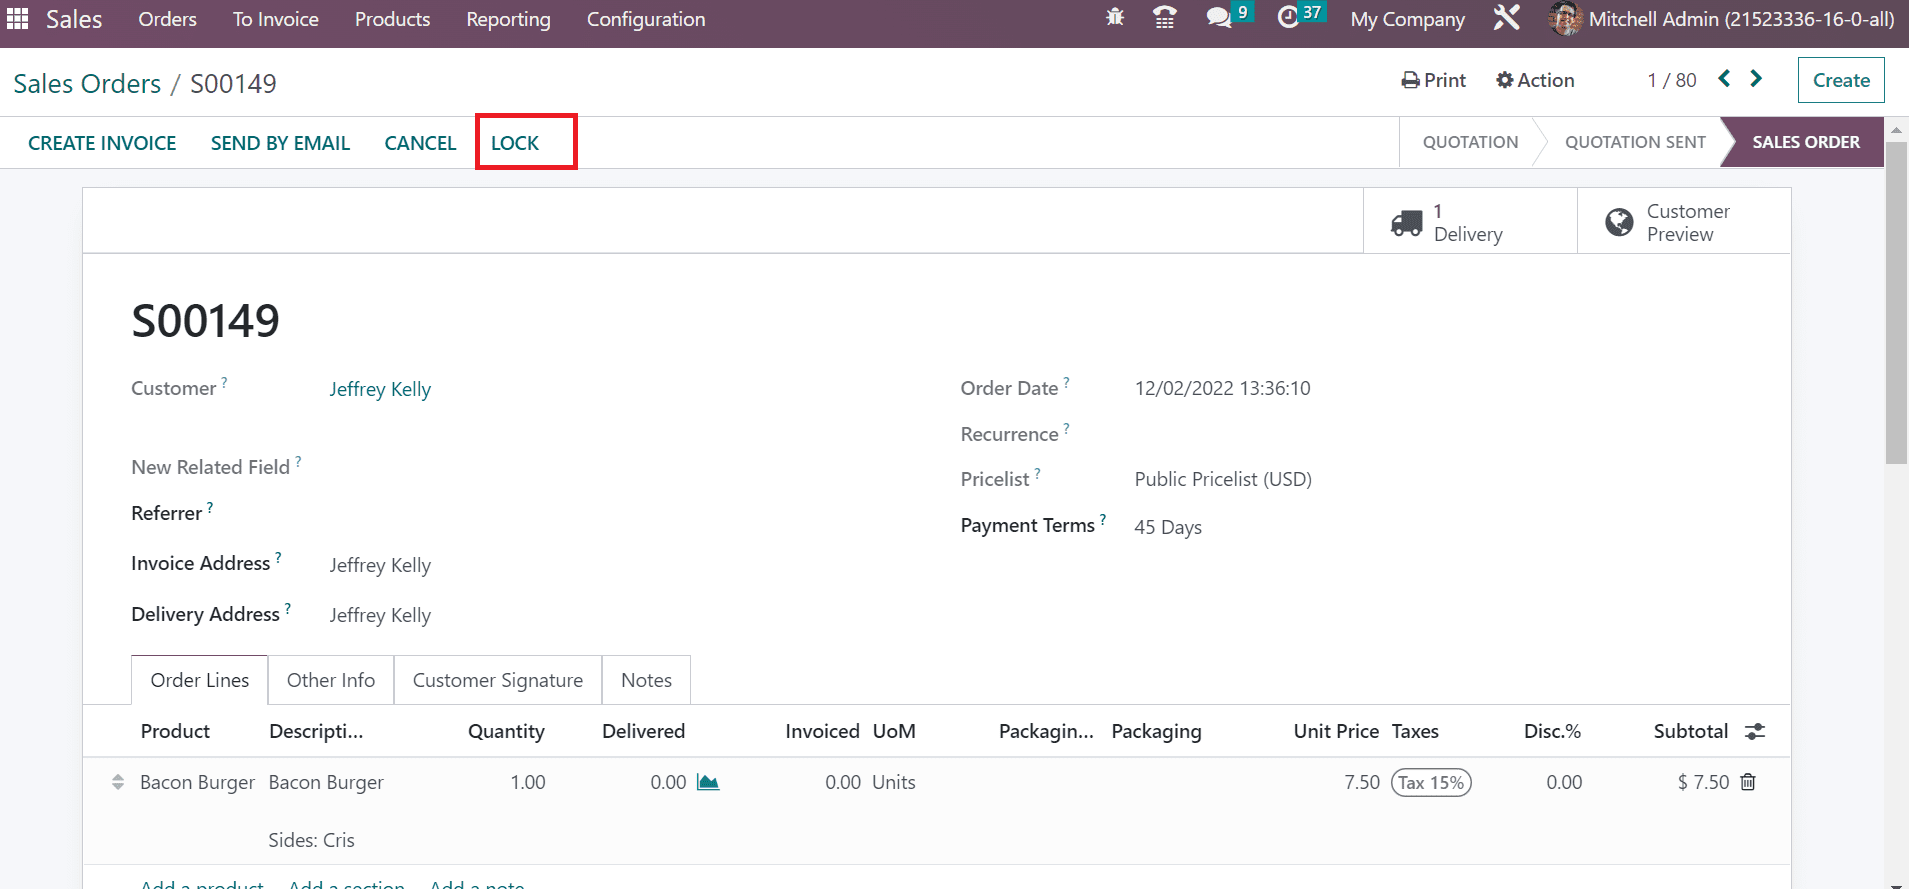
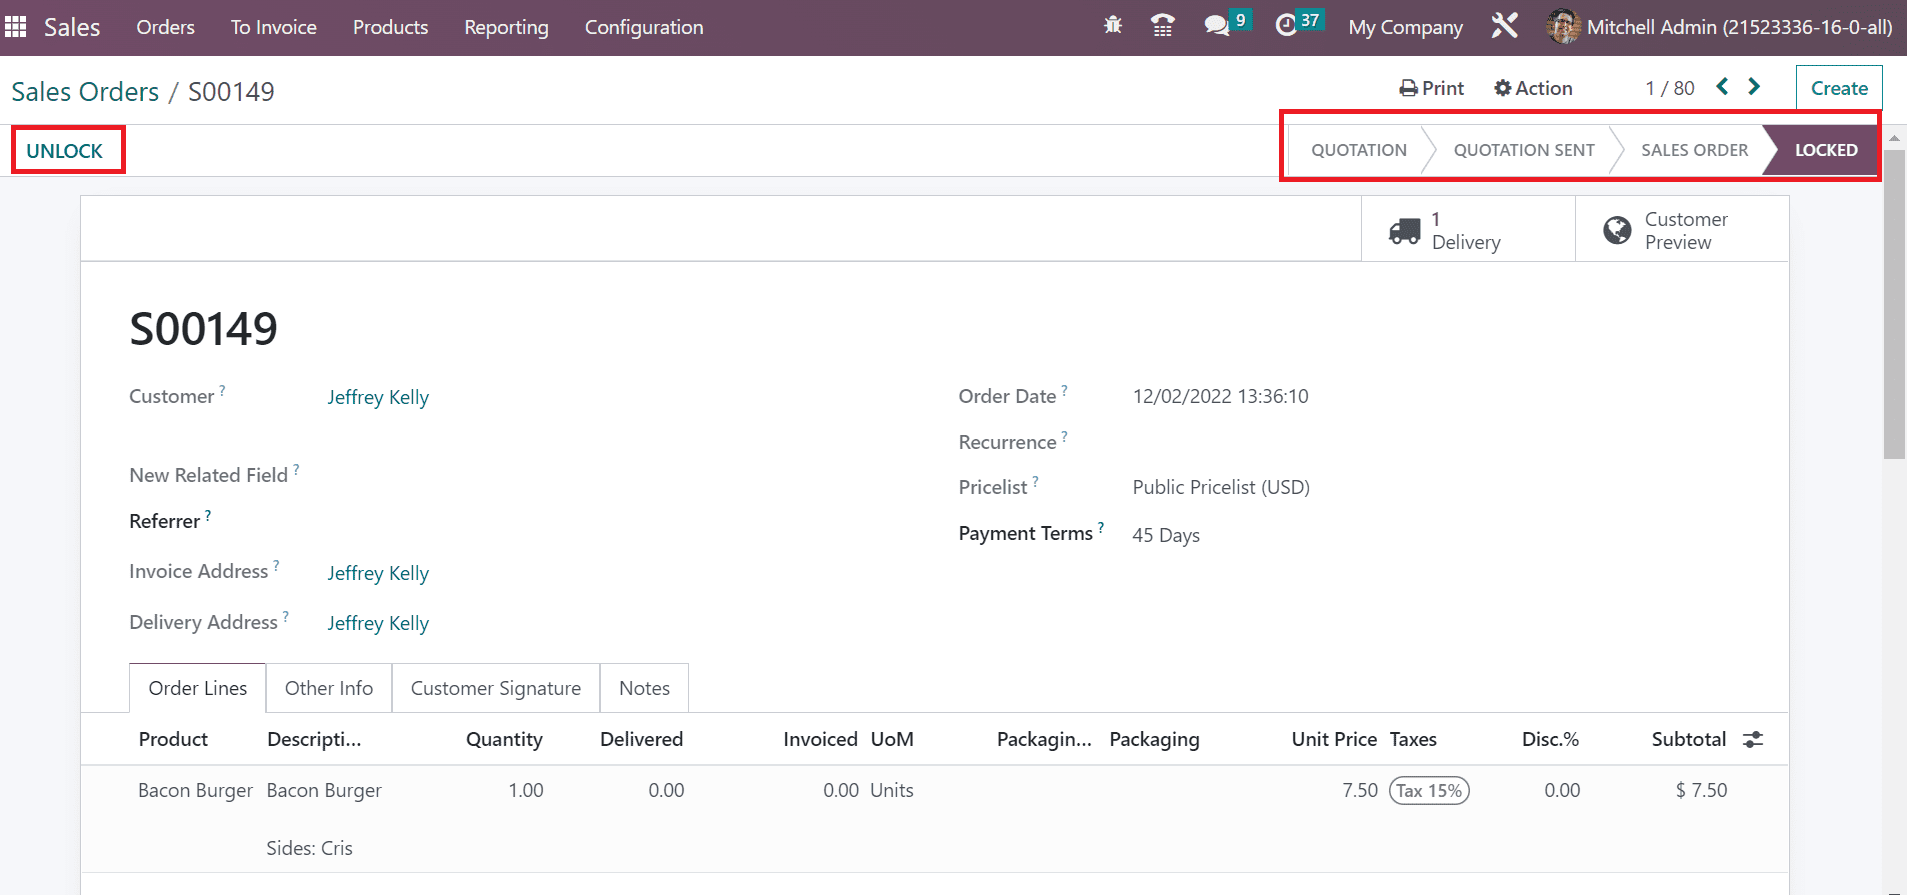
We cannot modify further when a sales order is locked. However, it is possible to invoice or deliver after the locking. The stage changes from SALES ORDER to LOCKED after activating the Lock feature. By choosing the UNLOCK icon, we can remove the locking of the Sales order as cited in the screenshot below.
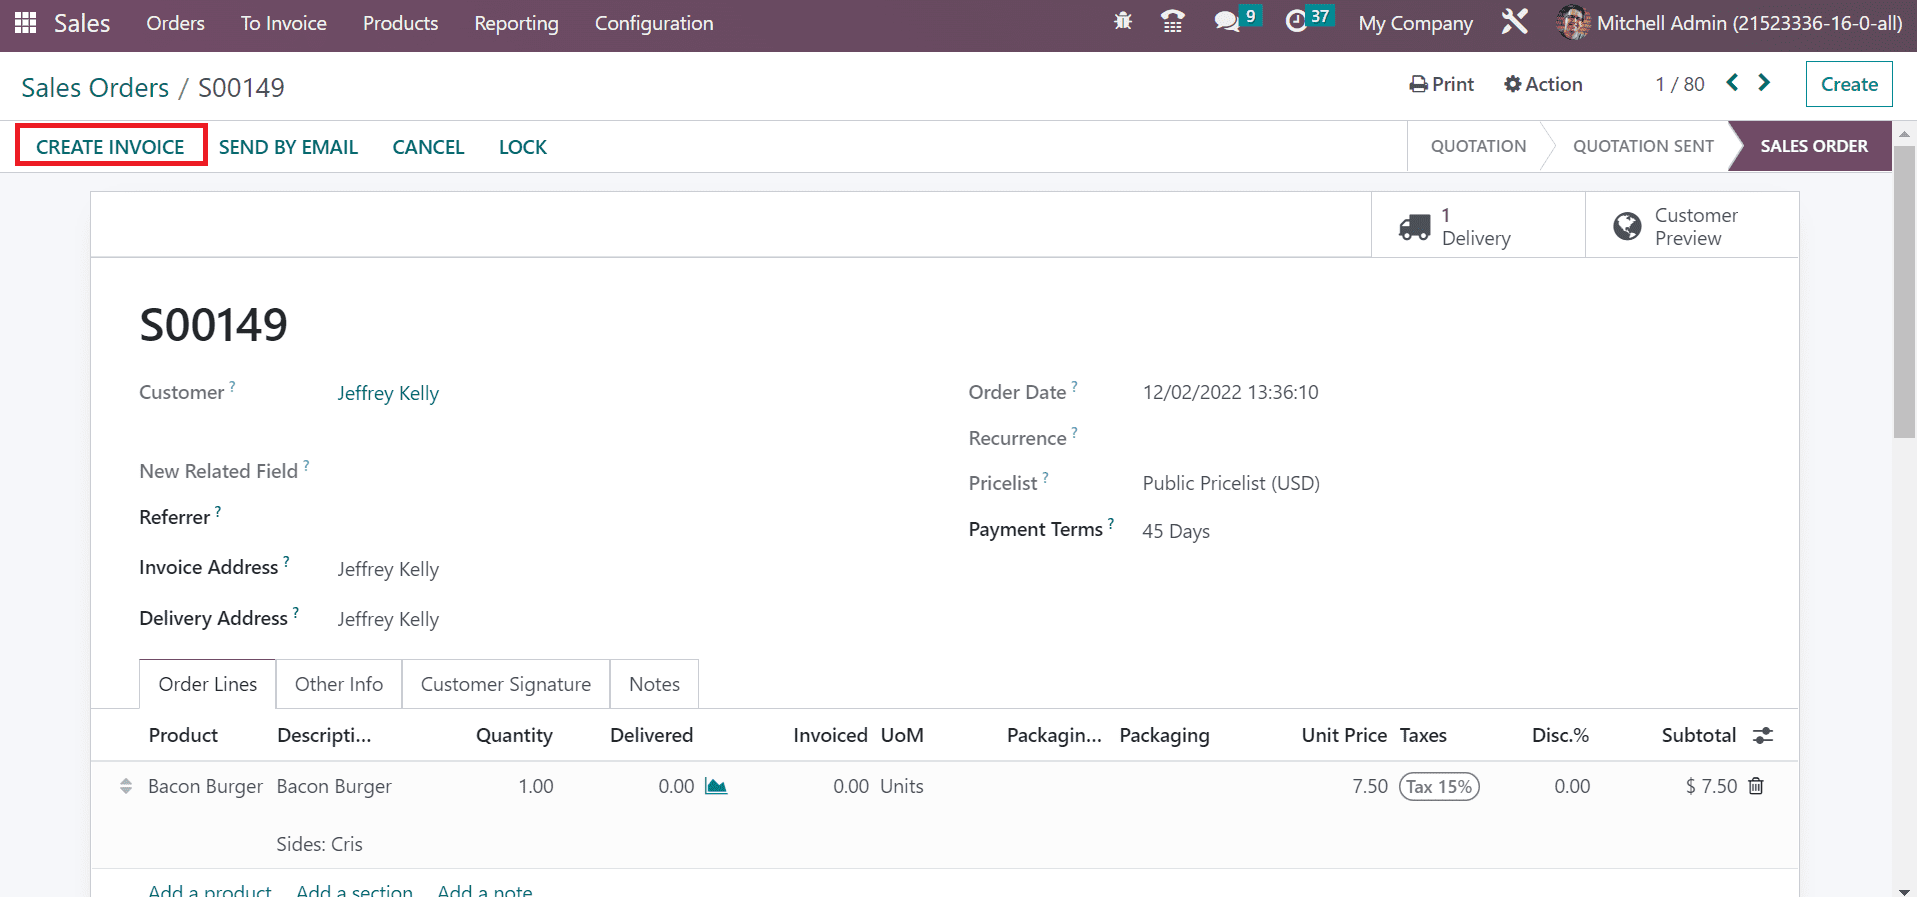
Next, we can continue with invoicing of sales orders for customers. Choose the CREATE INVOICE button in the Sales Orders window.
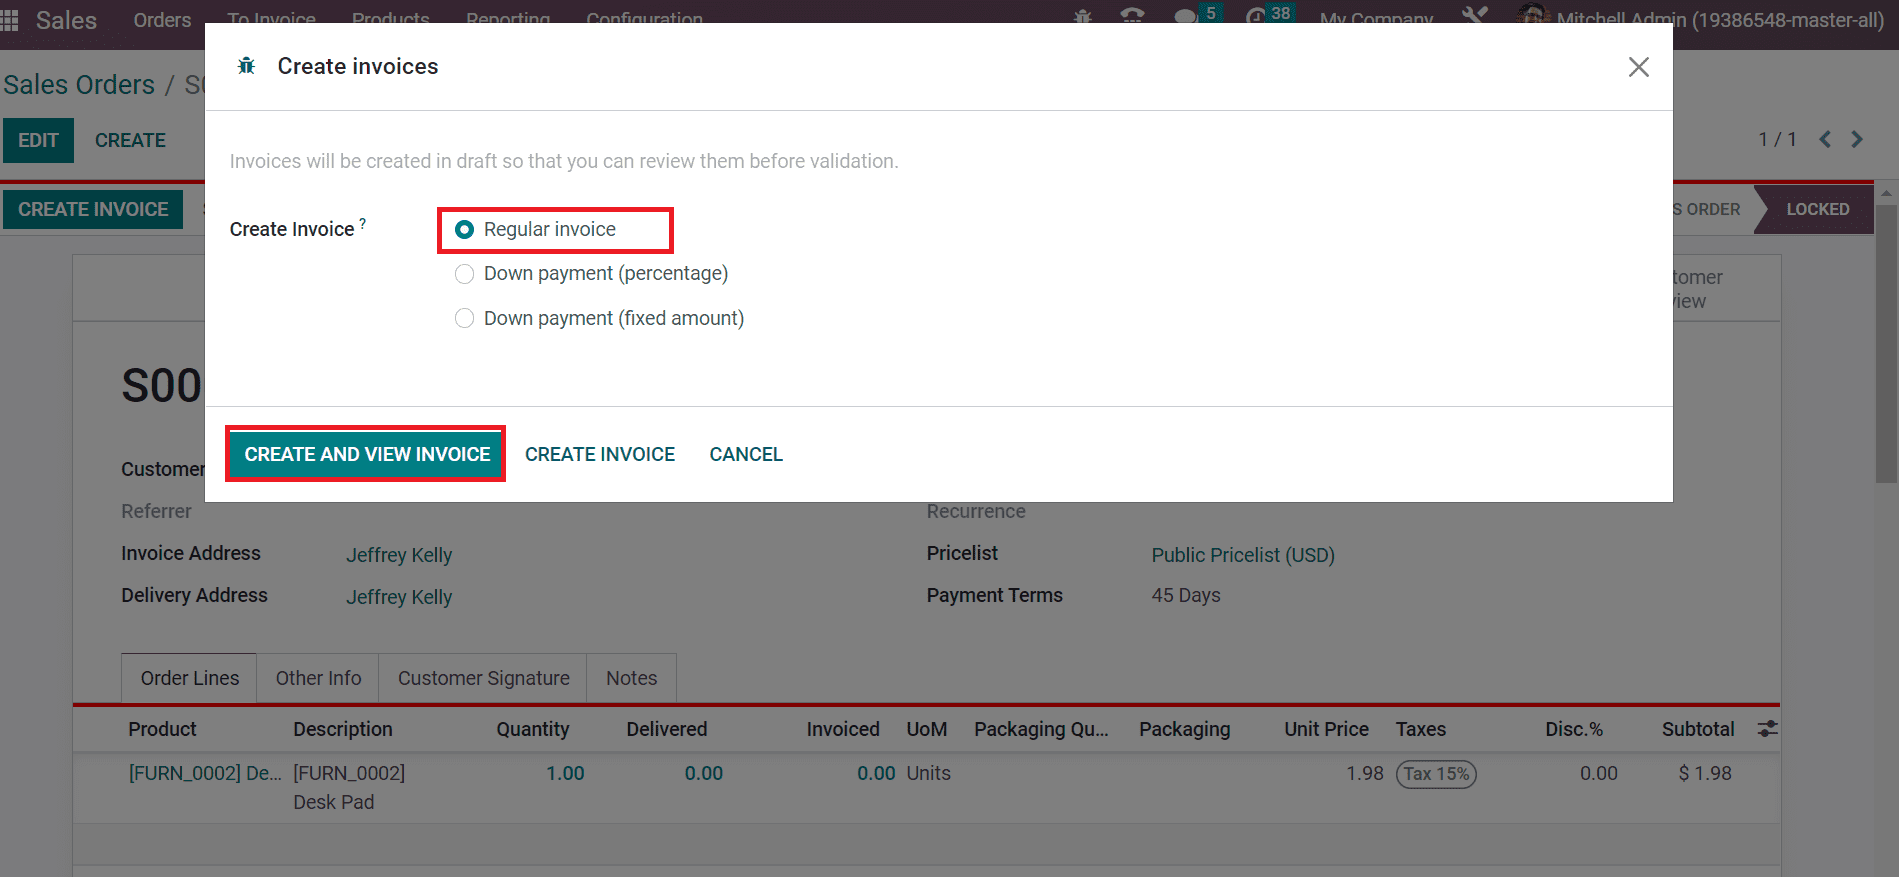
The invoice is created as per regular invoice, down payment through a fixed amount and percentage. In the Create Invoices window, select the Regular Invoice option in Create Invoice field and press the CREATE AND VIEW INVOICE button as indicated in the screenshot below.
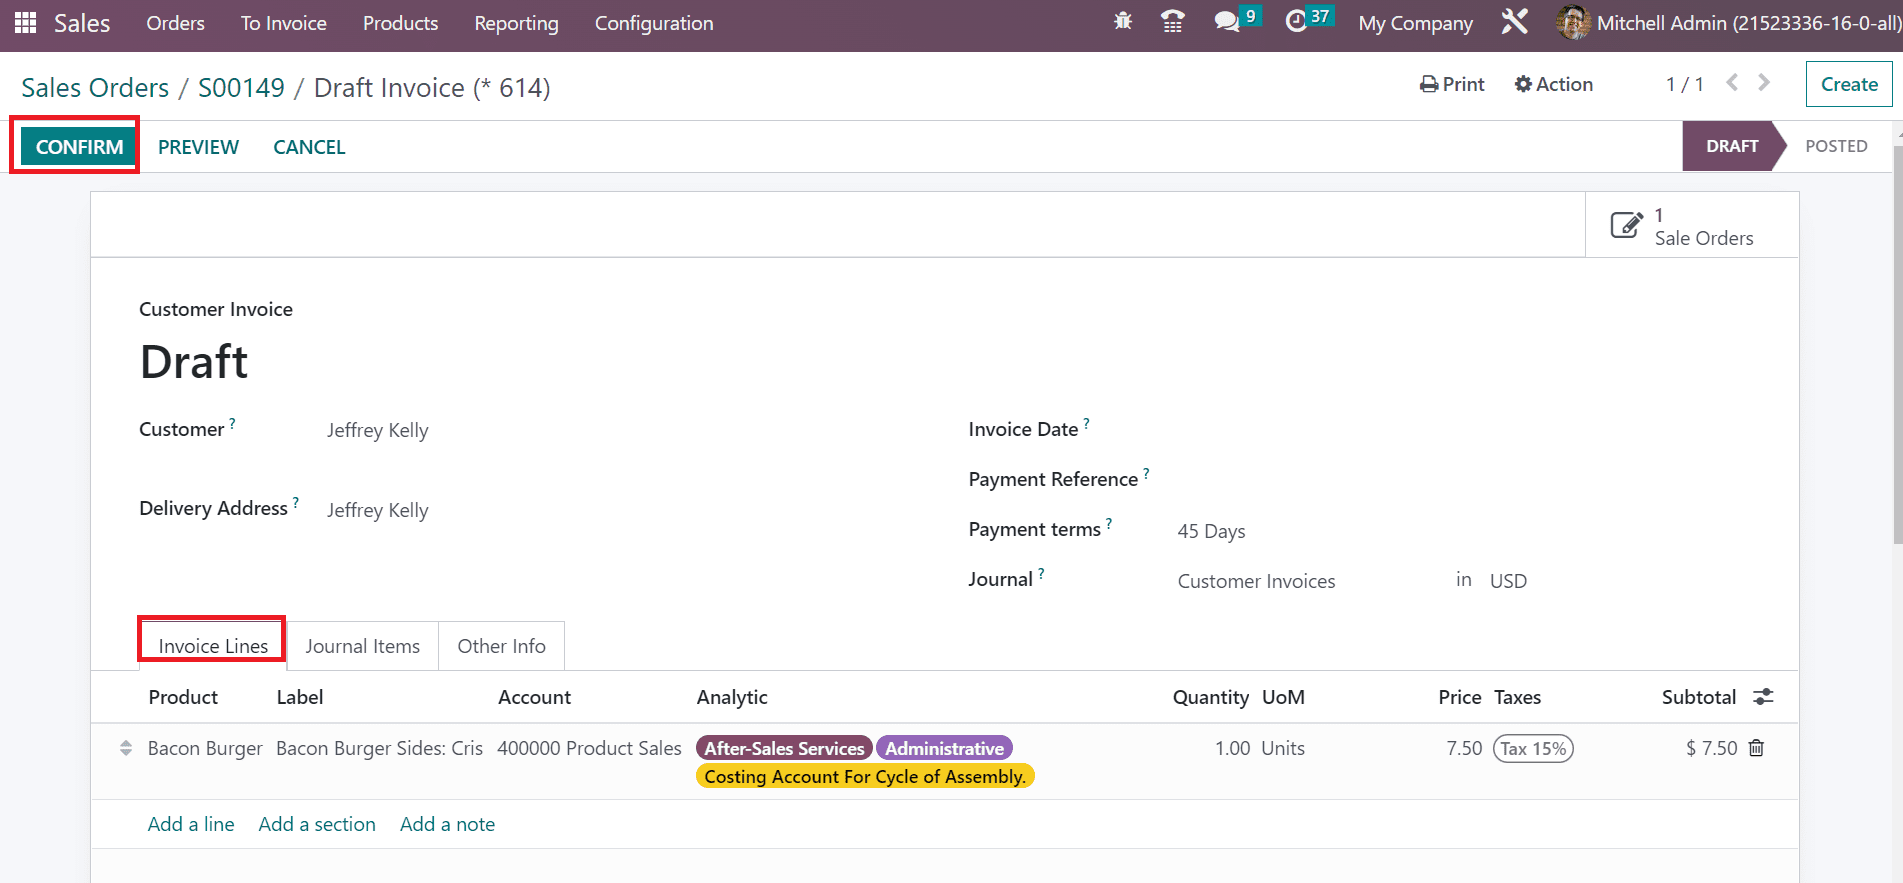
A Draft Invoice window opens to the user, generating one Sales Order. We can view the details of customer invoices such as Customer, Due Date, and Delivery Address. Below the Invoice Lines tab, data related to the product and the price are accessible. To validate the invoice, select the CONFIRM icon in the Draft Invoice window, as presented in the screenshot below.
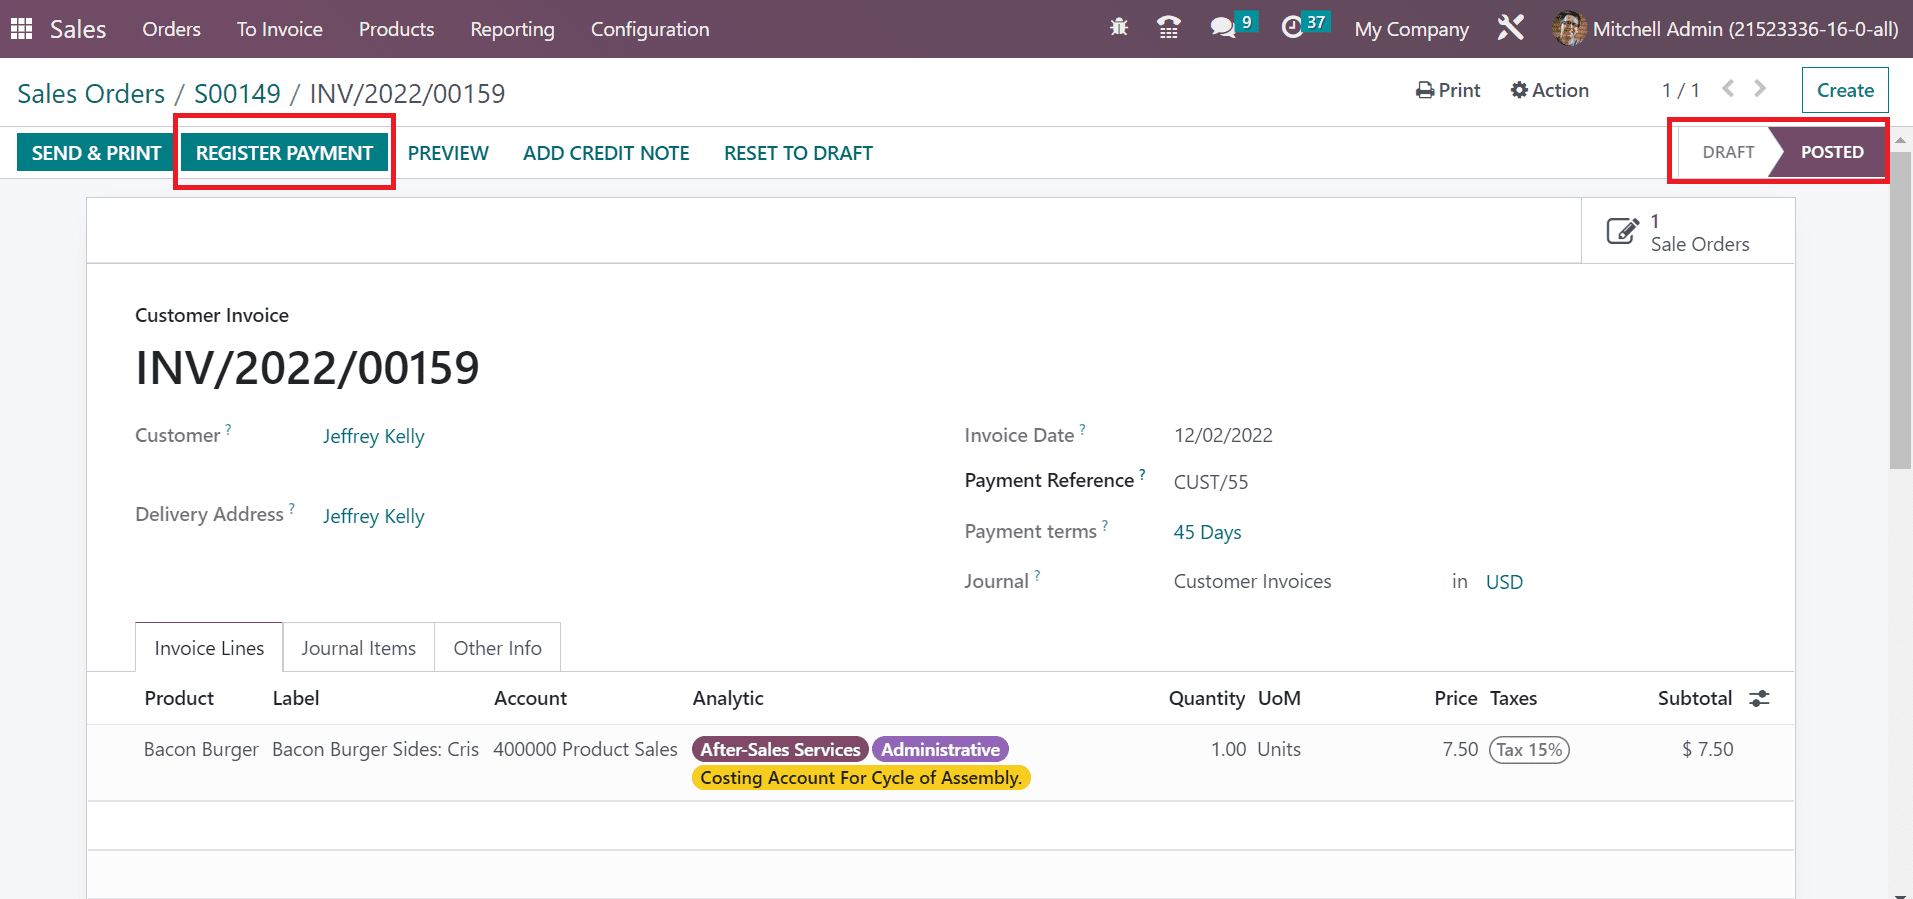
After confirmation, the stage changes from DRAFT to POSTED. Now, we can make payments for invoices by clicking on the REGISTER PAYMENT icon.
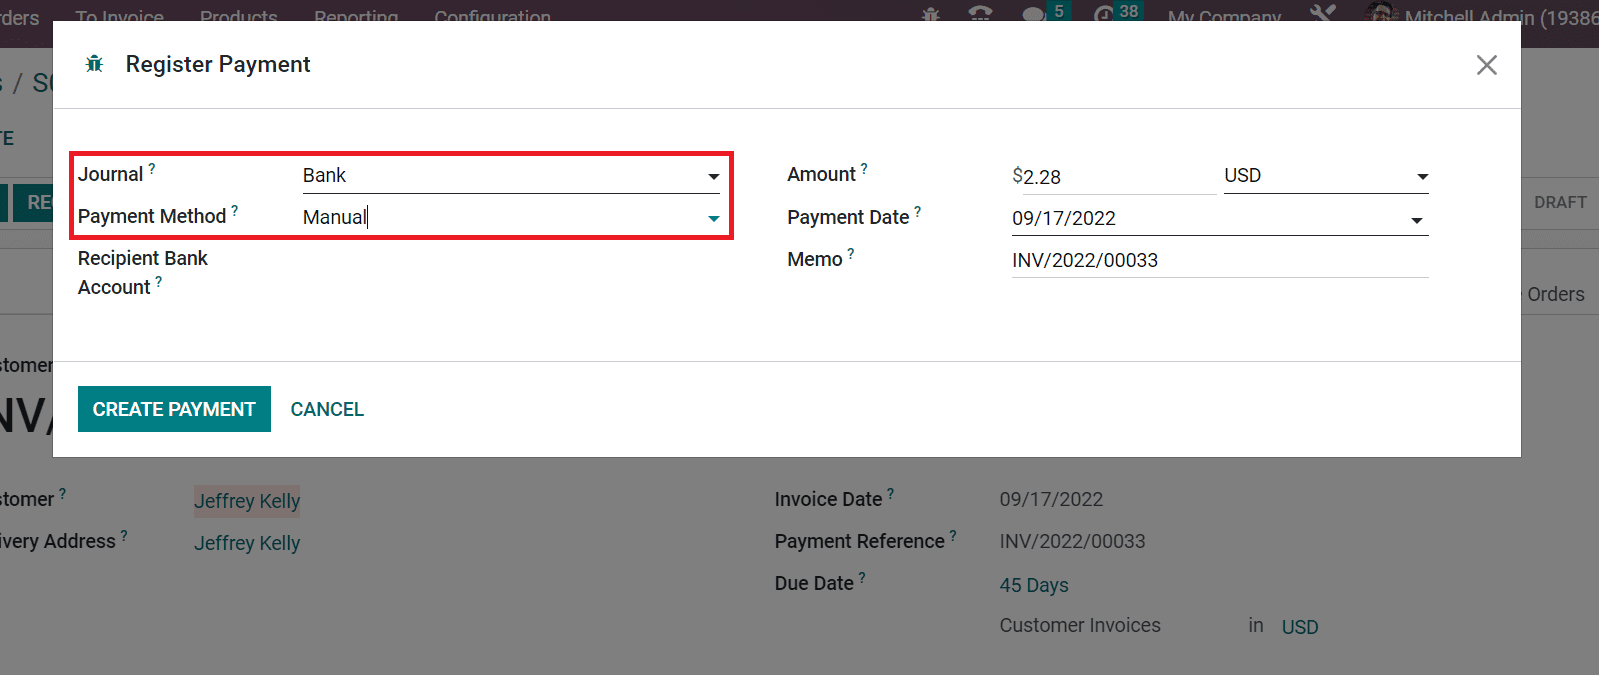
A Register Payment window appears before the user. Set your Journal as Bank and choose Payment Method as Manual. We can pay or get paid with any method other than odoo by selecting the Manual Payment method.
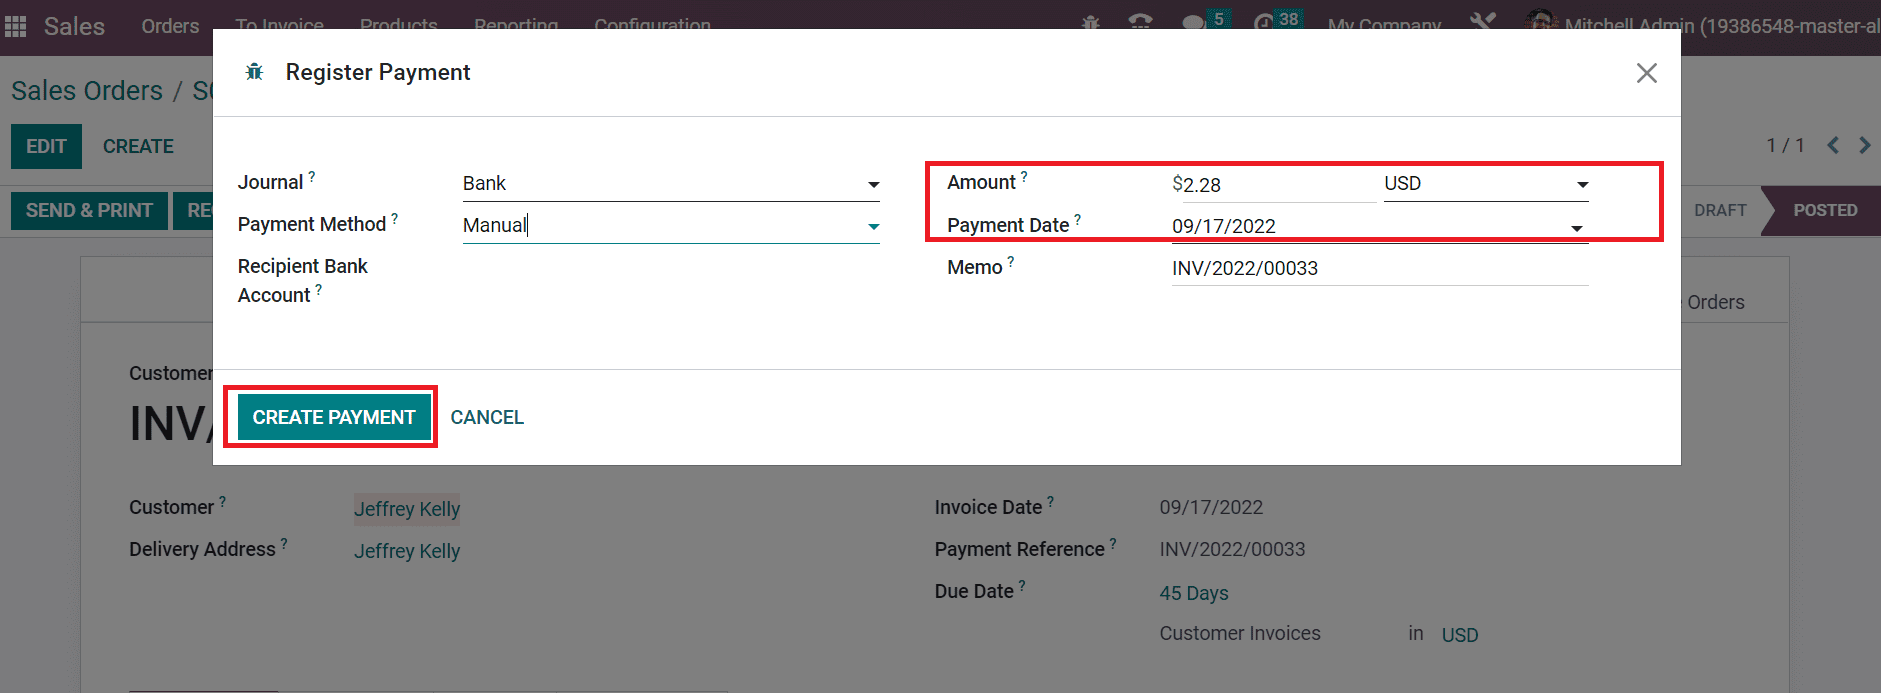
The Payment Date and total cost of the order are automatically shown in the Amount field. After making the necessary changes, select the CREATE PAYMENT button.
After completing the payment successfully, we can see an In Payment mark in the Invoice window.
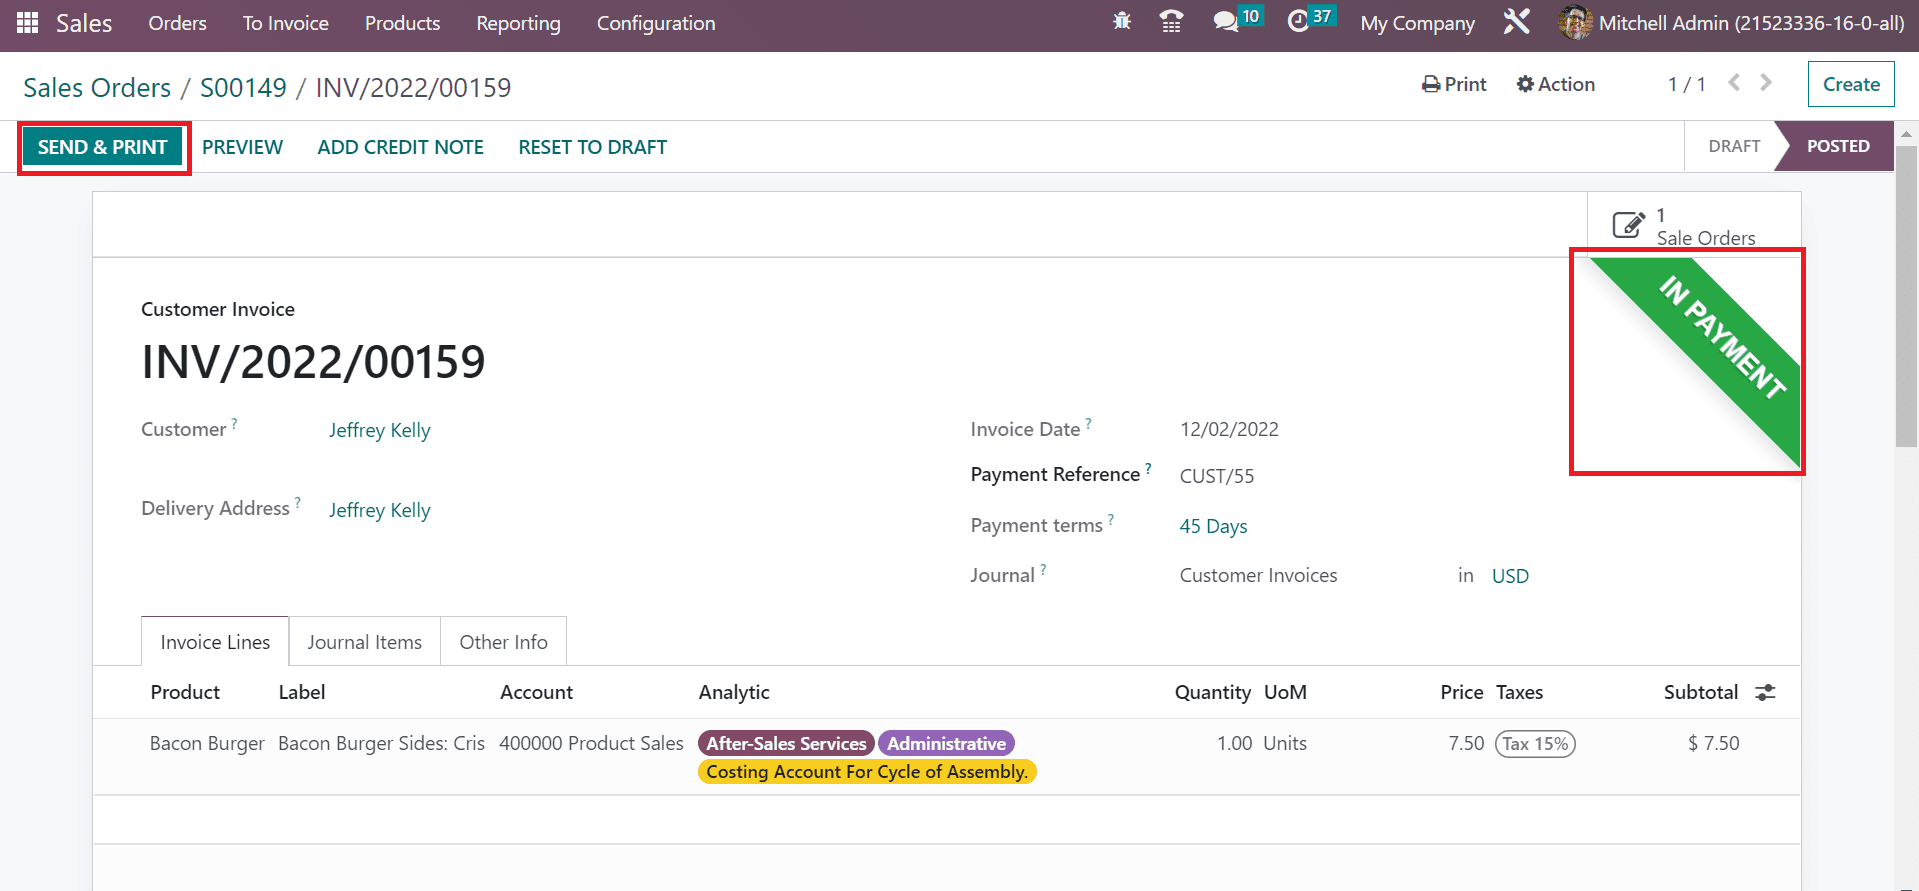
By selecting the SEND & PRINT button, we can print out the invoice document for a customer, as marked in the screenshot above. In the Sales Orders window, you can view that one invoice is created, as defined in the screenshot below.
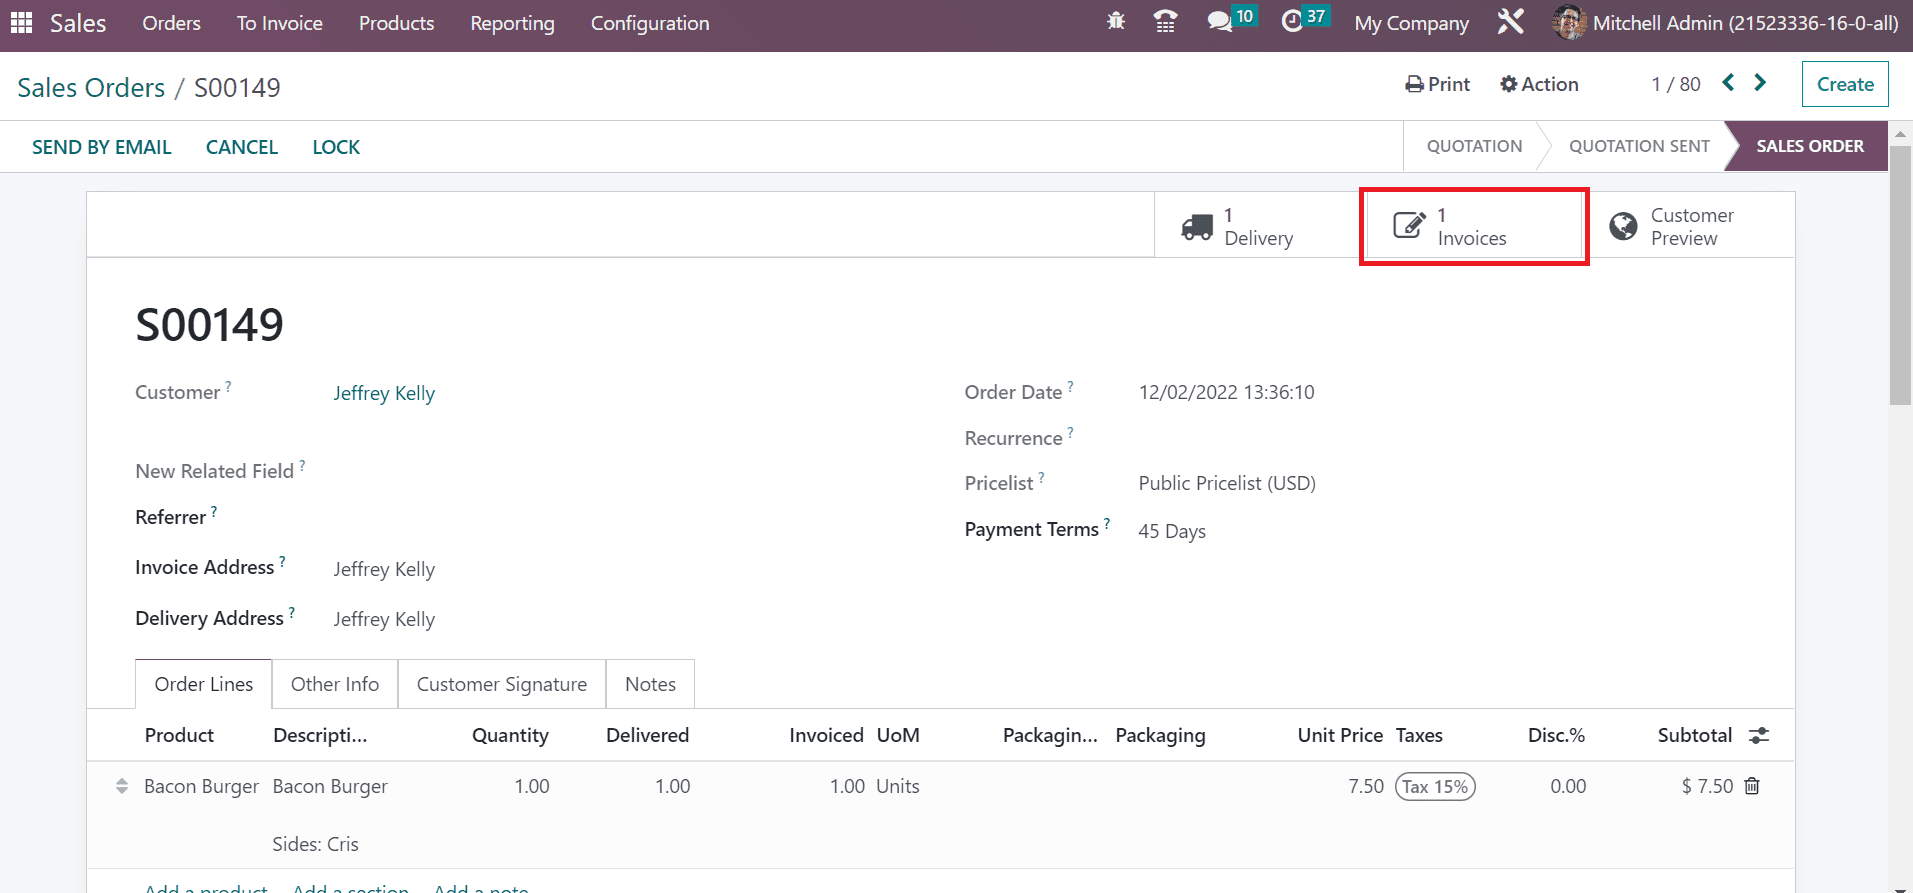
Hence, developing a Sales order and locking it within the Odoo 16 Sales module is easy.
Analyze Sales in a Company using Reporting feature in Odoo 16
Each year's sales growth count in a company assists in evaluating performance. By running ERP software, it is easy to analyze the sales performance of a firm. Choose the Sales menu in Reporting tab and click the Graph view as illustrated in the screenshot below.
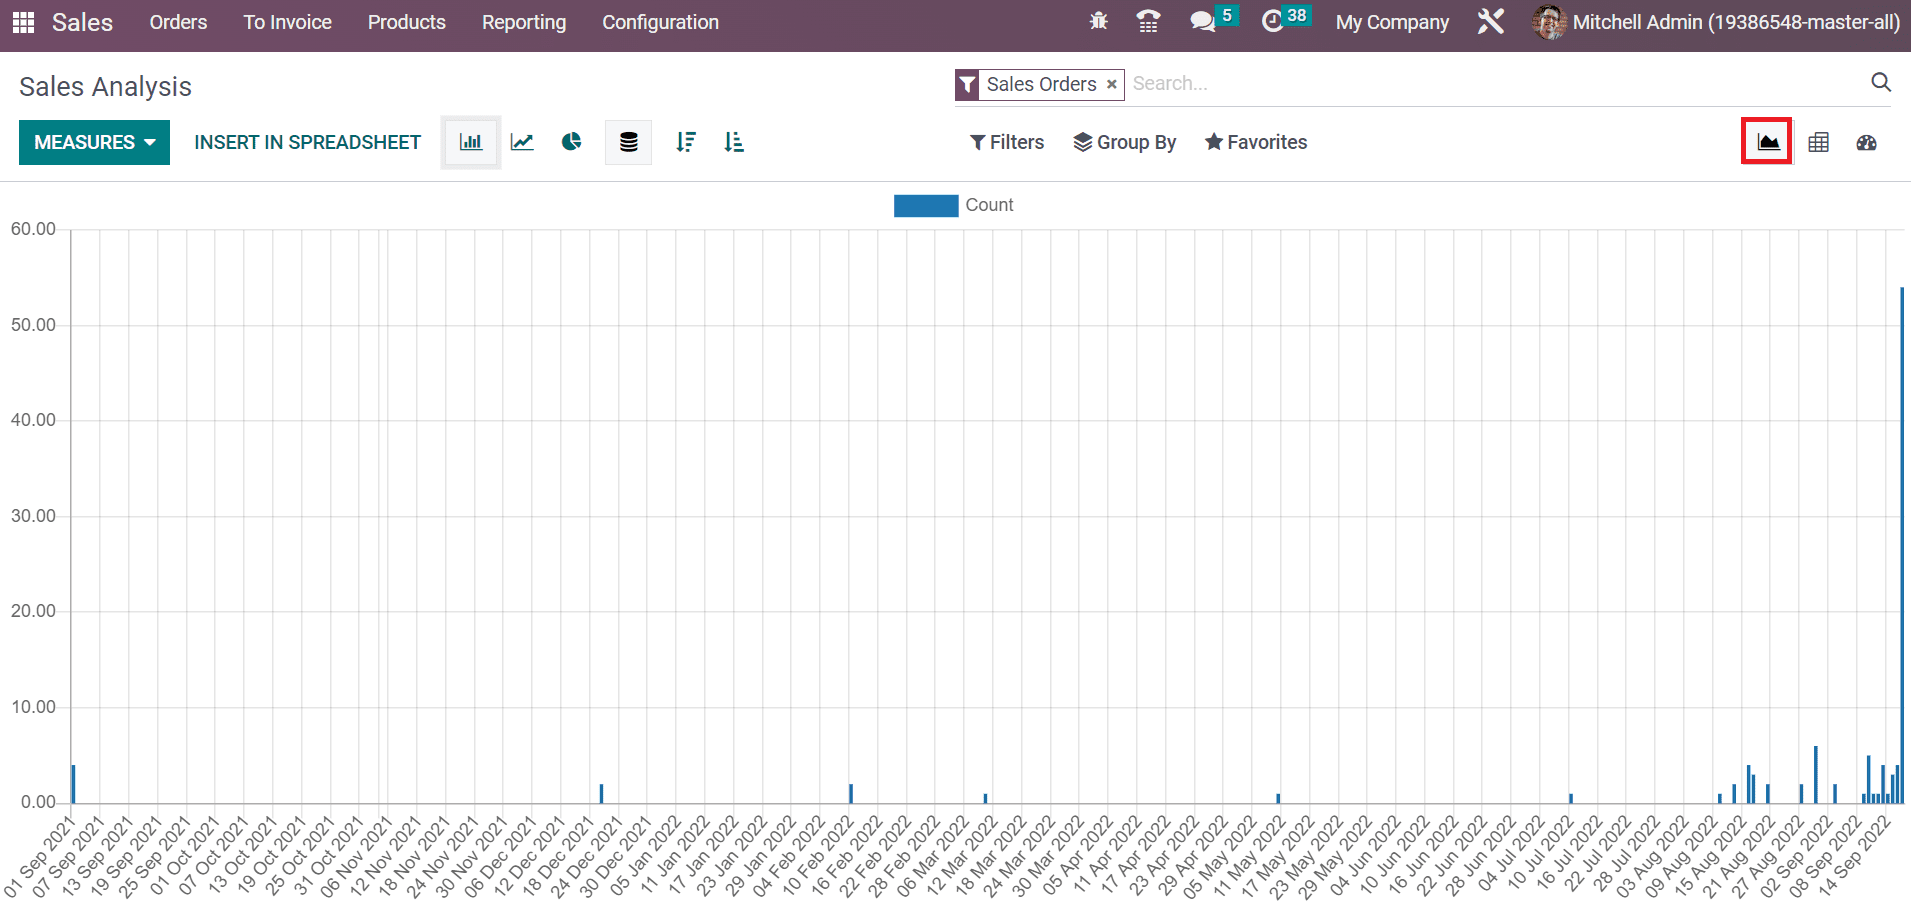
Here, we can view the year data on the X-axis, and Y-axis depicts the sales count in a company. By choosing the MEASURES icon, it is possible to apply various measures, including Margin, Total, Gross Weight, Volume, and more, into the graphical representation.
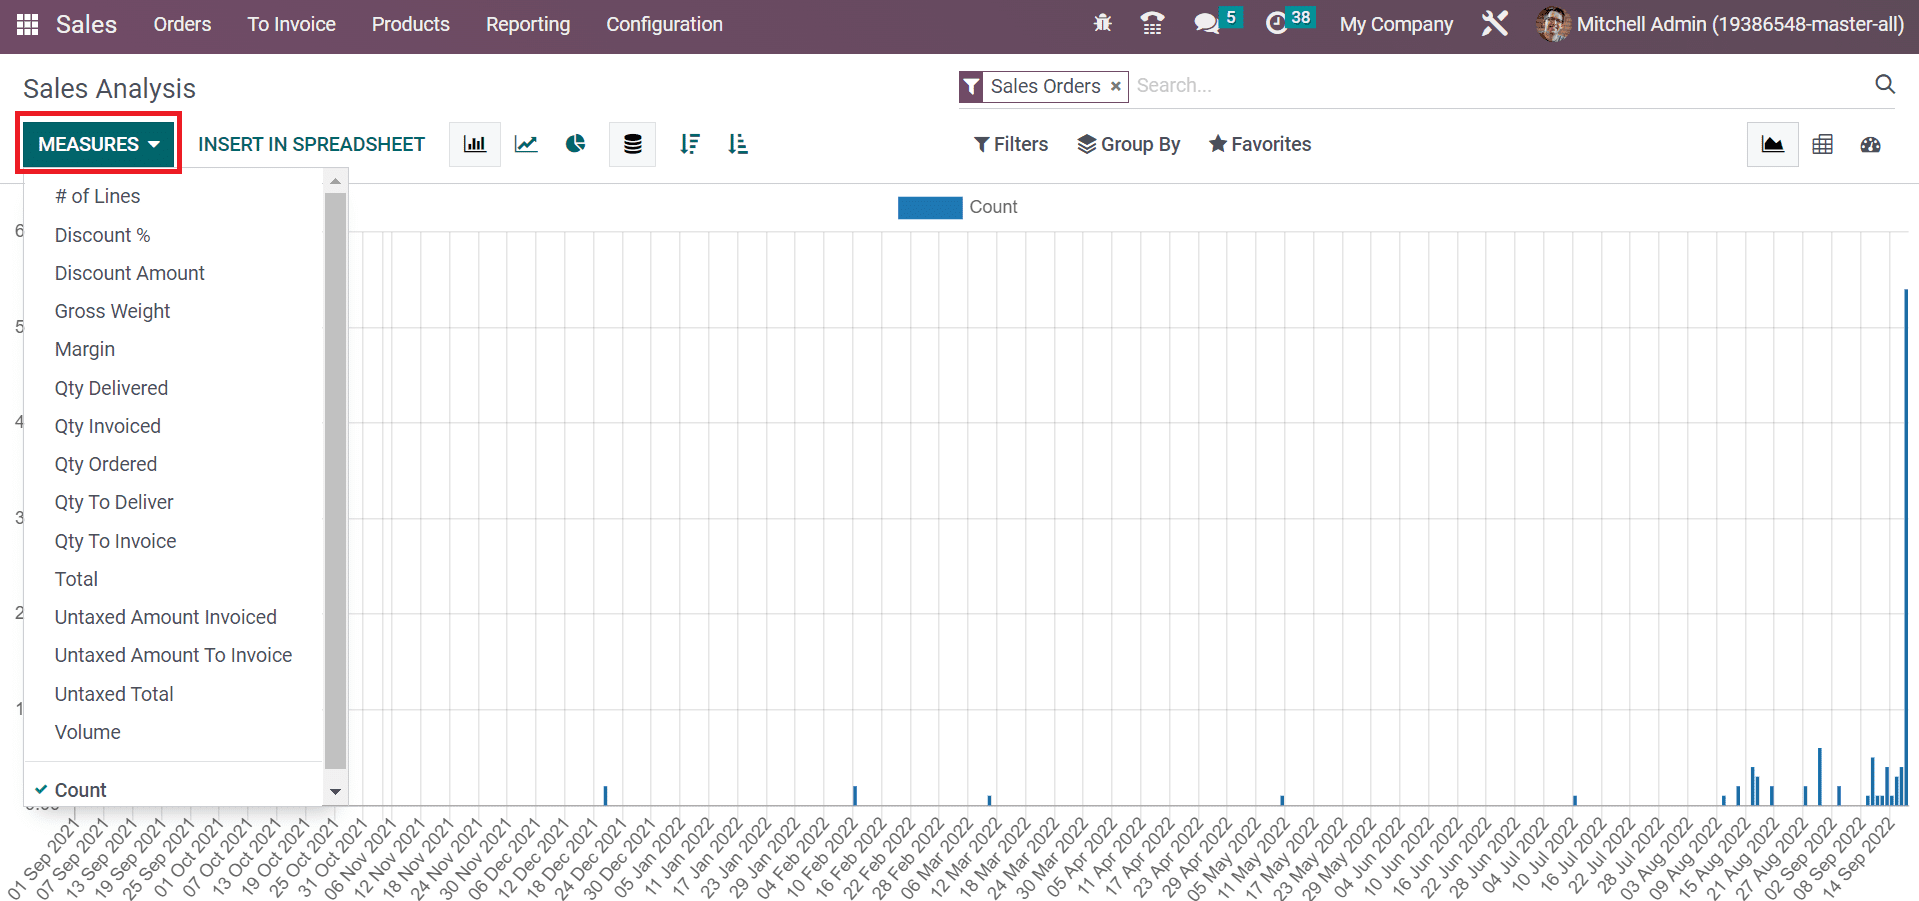
For example, click the Discount % option below the MEASURES icon to see the sales discount data on the graph. After selecting the Discount % option inside the MEASURES button, the respective discount result is viewable in the chart.
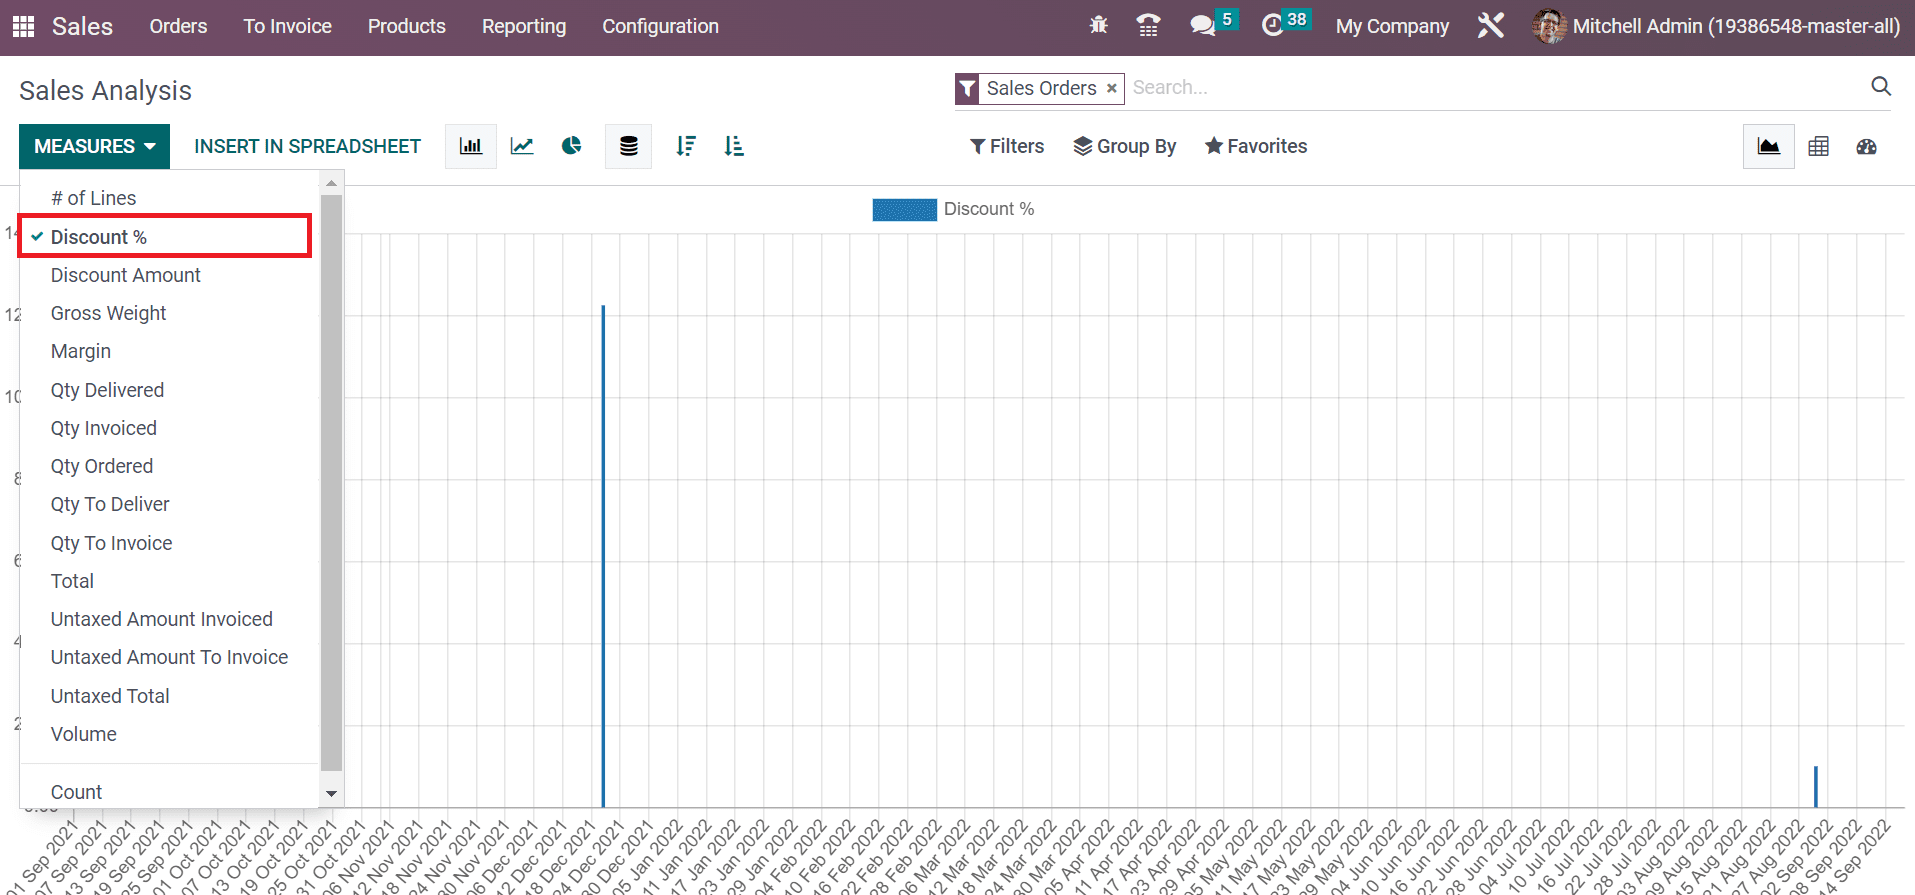
So, it is easy to evaluate the sales growth of an organization within the Reporting feature.
Odoo 16 Sales module enables you to lock an order after sales order confirmation. We can secure the sales order and invoice documents concerning the customers using Odoo ERP. The evaluation of sales orders in a particular year is also made possible easily.