Augmented Reality (AR) is a cutting-edge technology that blends the real world with digital elements, creating immersive experiences that can revolutionize various industries, from gaming to retail. If you’re developing a Flutter app and want to add AR capabilities, this guide will walk you through the integration process using a popular Flutter plugin.
Flutter, Google’s UI toolkit for building natively compiled applications, has gained massive popularity due to its versatility and ease of use. By integrating AR into your Flutter app, you can offer users interactive and engaging experiences that can set your app apart from the competition.
Getting Started with AR in Flutter
This tutorial will guide you through integrating AR into your Flutter application using the augmented_reality_plugin package. This package allows you to build AR applications for iOS and Android platforms, providing features such as live camera preview and object.
Set Up Your Flutter Project
First, create a new Flutter project or navigate to your existing project.
flutter create ar_flutter_example
cd ar_flutter_example
Open the pubspec.yaml file and add the ar_flutter_plugin and camera dependency:
dependencies:
  augmented_reality_plugin: ^4.0.1
  camera: ^0.10.6
Run the following command to get the package:
iOS Configuration
The augmented_reality_plugin requires iOS 10.0 or higher. Ensure your iOS project is set up correctly:
Open ios/Runner/Info.plist and add the following rows:
<key>NSCameraUsageDescription</key>
<string>Can I use the camera please?</string>
<key>NSMicrophoneUsageDescription</key>
<string>Can I use the mic please?</string>
Android Configuration
For Android, you need to adjust the minimum SDK version:
Open android/app/build.gradle and set the minSdkVersion to 24 or higher:
minSdkVersion 24
Note: Test your app on a real device, as the MediaRecorder class might not function correctly on emulators. Refer to the MediaRecorder documentation for more details.
Using the augmented_reality_plugin
Here’s a simple example of how to use the augmented_reality_plugin in your Flutter application:
Import the Package
import 'package:flutter/foundation.dart';
import 'package:flutter/material.dart';
import 'package:augmented_reality_plugin/augmented_reality_plugin.dart';
import 'package:camera/camera.dart';
Initialise Cameras
In your main.dart file, initialize the camera:
Future<void> main() async {
  WidgetsFlutterBinding.ensureInitialized();
  try {
    var allCameras = await availableCameras();
  } on CameraException catch (errorMessage) {
    if (kDebugMode) {
      print('Error: ${errorMessage.description}');
    }
  }
  runApp(const MyApp());
}
Create an Augmented Reality View
Replace your Scaffold with the AugmentedRealityPlugin widget in your main view:
class MyApp extends StatelessWidget {
  const MyApp({super.key});
  @override
  Widget build(BuildContext context) {
    return MaterialApp(
      title: 'Augmented Reality App',
      theme: ThemeData(
        primarySwatch: Colors.blue,
      ),
      home: const AugmentedRealityView(),
    );
  }
}
class AugmentedRealityView extends StatefulWidget {
  const AugmentedRealityView({super.key});
  @override
  _AugmentedRealityViewState createState() => _AugmentedRealityViewState();
}
class _AugmentedRealityViewState extends State<AugmentedRealityView> {
  @override
  Widget build(BuildContext context) {
    return Scaffold(
      appBar: AppBar(
        title: const Text('Augmented Reality View'),
      ),
      body: AugmentedRealityPlugin(
        'https://www.freepnglogos.com/uploads/furniture-png/furniture-png-transparent-furniture-images-pluspng-15.png',
      ),
    );
  }
The complete code is given below:
import 'package:flutter/foundation.dart';
import 'package:flutter/material.dart';
import 'package:augmented_reality_plugin/augmented_reality_plugin.dart';
import 'package:camera/camera.dart';
Future<void> main() async {
  WidgetsFlutterBinding.ensureInitialized();
  try {
    var allCameras = await availableCameras();
  } on CameraException catch (errorMessage) {
    if (kDebugMode) {
      print('Error: ${errorMessage.description}');
    }
  }
  runApp(const MyApp());
}
class MyApp extends StatelessWidget {
  const MyApp({super.key});
  @override
  Widget build(BuildContext context) {
    return MaterialApp(
      title: 'Augmented Reality App',
      theme: ThemeData(
        primarySwatch: Colors.blue,
      ),
      home: const AugmentedRealityView(),
    );
  }
}
class AugmentedRealityView extends StatefulWidget {
  const AugmentedRealityView({super.key});
  @override
  _AugmentedRealityViewState createState() => _AugmentedRealityViewState();
}
class _AugmentedRealityViewState extends State<AugmentedRealityView> {
  @override
  Widget build(BuildContext context) {
    return Scaffold(
      appBar: AppBar(
        title: const Text('Augmented Reality View'),
      ),
      body: AugmentedRealityPlugin(
        'https://www.freepnglogos.com/uploads/furniture-png/furniture-png-transparent-furniture-images-pluspng-15.png',
      ),
    );
  }
}
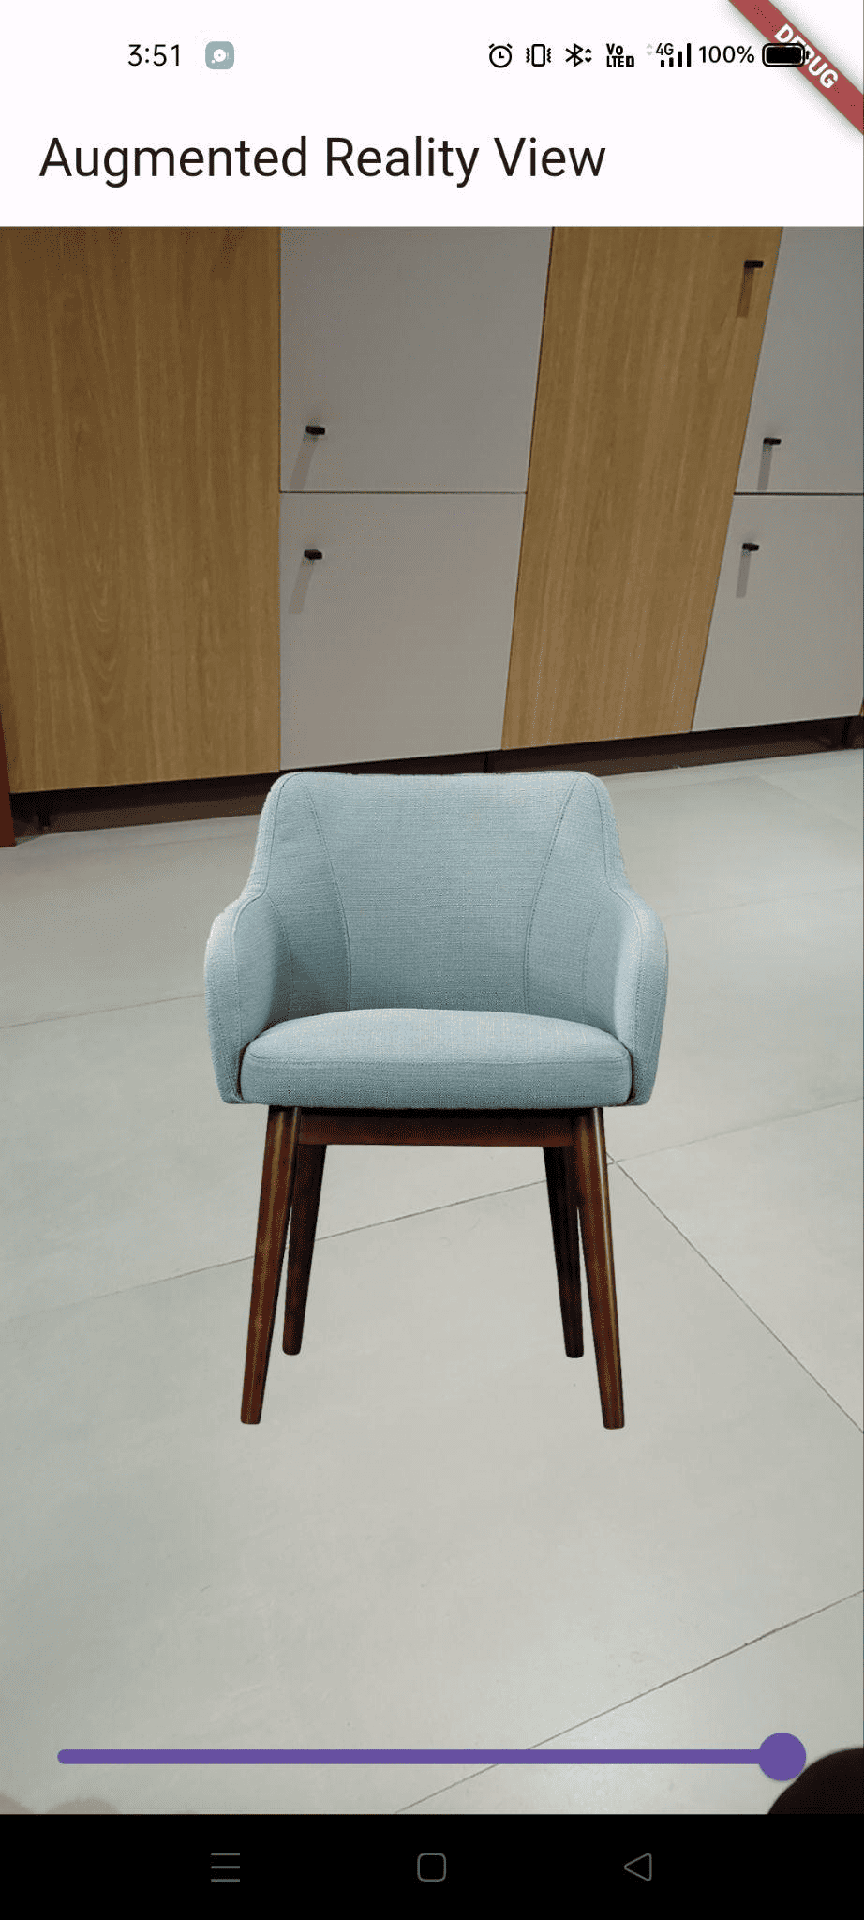
The output is given below:

Integrating AR with Flutter unlocks new possibilities for immersive, cross-platform applications. With ARCore and ARKit, developers can easily create engaging, interactive experiences for both Android and iOS. As AR technology advances, combining it with Flutter empowers developers to craft innovative, future-ready apps that transform user experiences across industries.
To read more about How to Share a File, Link, & Text Using Flutter, refer to our blog How to Share a File, Link, & Text Using Flutter.