Due to the advancement of ERP technology, online timesheets are becoming more and more common for businesses to track departmental operations. A great example of a digital timesheet that helps users with challenging chores like figuring out working hours, monitoring payroll, and gauging employee productivity is the Odoo Timesheet. It is supported by additional dependable features as part of the Odoo system, enabling managers to simply keep track of the workflow of their teams and stay up to date on their progress. For businesses wishing to simplify timesheet administration, using a digital timesheet is a wise move.
Odoo Timesheet is a time-saving tool that allows users to create default projects and recurring tasks, log actions, and assign tasks. It also provides work-hour validation, productivity statistics, and offline tracking for remote working. Odoo Timesheet integrates with other Odoo functionalities, making project management easier and more organized. It is compatible with all recent versions of Odoo but only with Enterprise packages. Its billing and payment management features enable the creation of analytical reports in various document formats.
Time Off Configuration
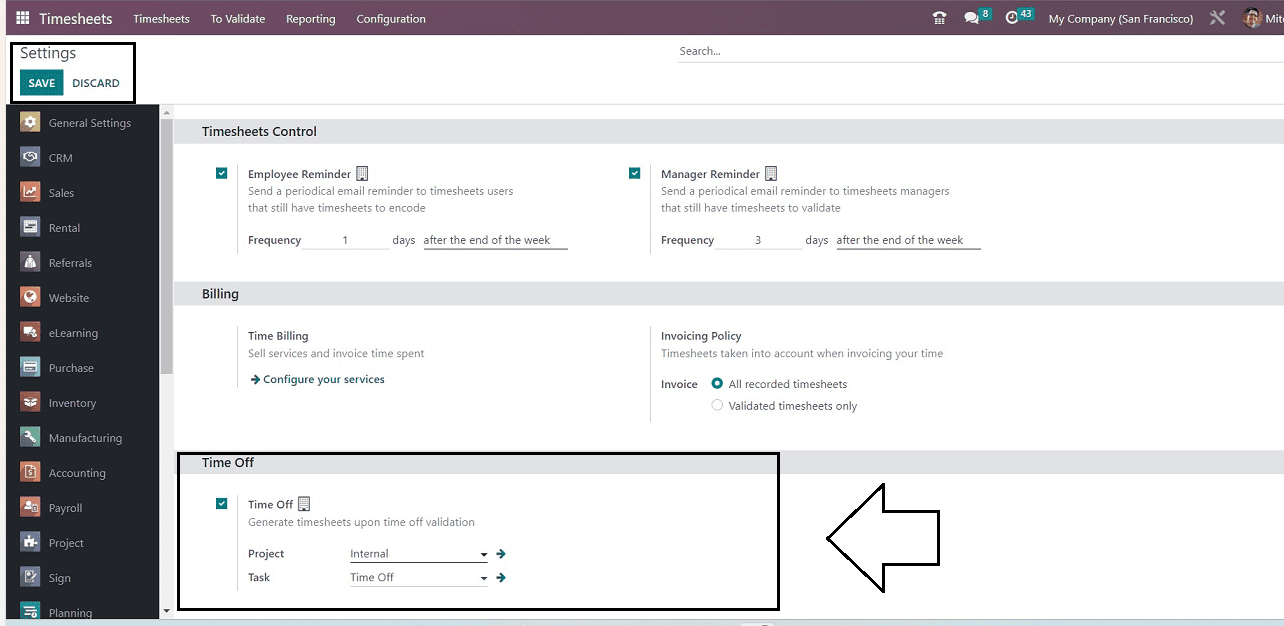
When the employee has asked for a leave of absence, and the request has been approved (or denied, depending on the configuration selected), the time is automatically allotted on Timesheets under the relevant project and task
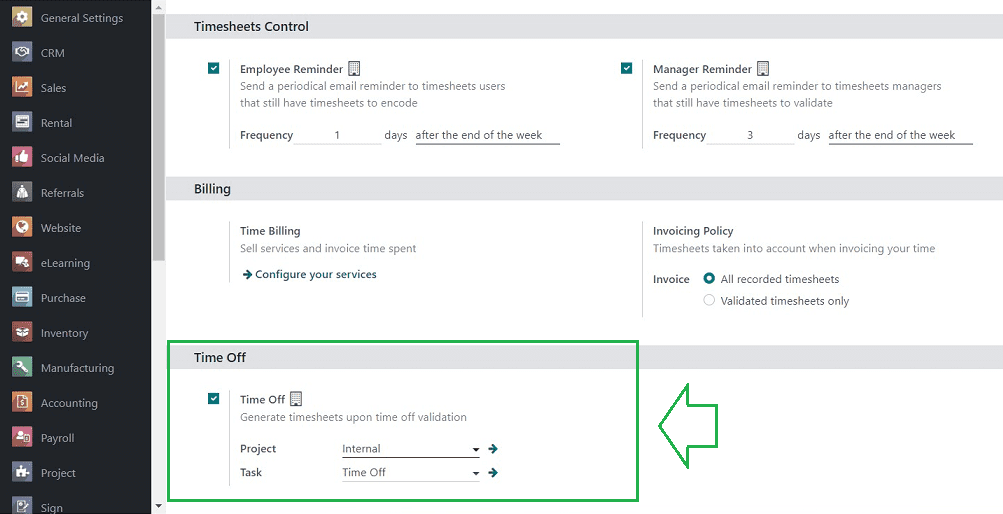
After the time off function has been enabled, the project will generate a timesheet. You can choose the corresponding “Project” and a “Task” for the timesheet generation from the "TimeOff" tab located in the "Configuration" window, as shown below.
Timesheet Validations
A timesheet used by companies to determine salaries and assess employee performance must have all of the working hours for each employee validated by the management. By showing information about working hours, employee names, and assigned tasks, the Odoo 16 Timesheet module enables users to validate Timesheets based on “Last Week” and “Last Month” inside the “To Validate “ menu of the Timesheet Module.
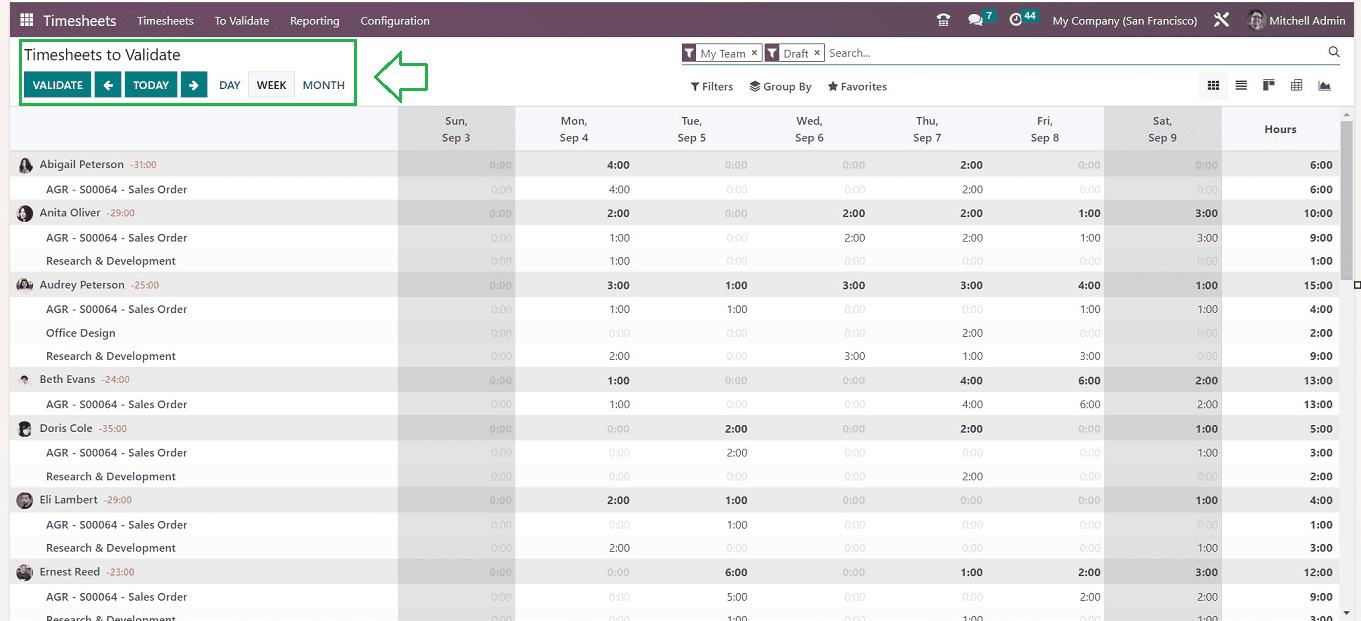
The number of hours spent on tasks is listed under the date, and the number of hours worked in the most recent week or month is presented on the right side of the timesheet window. Using the "Filters" function, it is possible to retrieve data from My Timesheets, My Team, My Project, Billable, Non-Billable, Billed on Timesheets, etc.
Create Timesheets after Time off Validation
Odoo automates the timesheeting of tasks and projects in response to time-off requests, improving timesheet validation control by reducing blunders and queries asked after hours but not timesheeted by the employee.
To check this functionality, turn on developer mode, navigate to Timesheet Module, and choose or modify the “Project” and “Task” default settings to enter time off into Odoo Timesheets, as illustrated below.
Selecting TimeOff Types
Categories, including Personal leave, Volunteer work, Vacation, Sick time, Training, Meetings, etc., are examples of time off types. When an employee or a user requires time off, they can choose a category for the time off and plan their time off under it. After choosing a Project and Task inside the Timesheet Module, go to the Odoo 16 TimeOff Module to select an appropriate Time Off Type.
You can select a Timeoff Type from the “Configuration” menu. The “Time Off Types” dashboard will show all the previously created time-off types as per their "Display Name" and "Approval." To filter required details and to build new custom filters, use the "Filter," "Group By," and "Favourites" options. To establish a brand-new Time-Off Type, click the "NEW" button, which will take us to its form view.
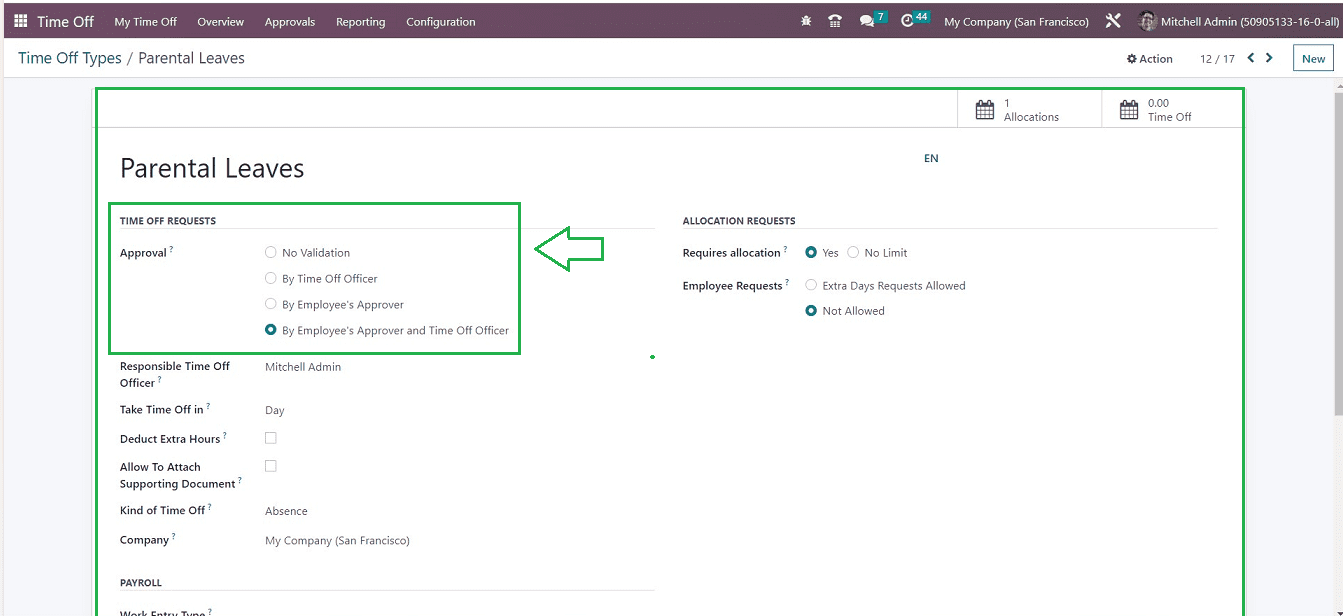
I have selected an existing Time Off Type, opened its configuration form, and decided whether you want the requests to be verified or not by choosing the options available in the “Approval” field.
You can specify the criteria for approval. By selecting the "No Validation" option, you can avoid approving time off requests. Otherwise, you can select the "Approval" mode, which includes "By Employee Approver" and "By Time Off Officer." By choosing the "By Employee's Approver and Time Off Officer" option, it turns out that two permissions are needed to validate the request.
The time is automatically allotted on Timesheets, under the relevant project and task, when the employee requests his time off, and the request is validated depending on the configuration selected.
Requesting a New Time Off
The “My TimeOff” menu can be used to request or create new leave requests.

Just open a new TimeOff Configuration form by clicking the “NEW” button, and you can fill out the New Time Off Type on this form's page.
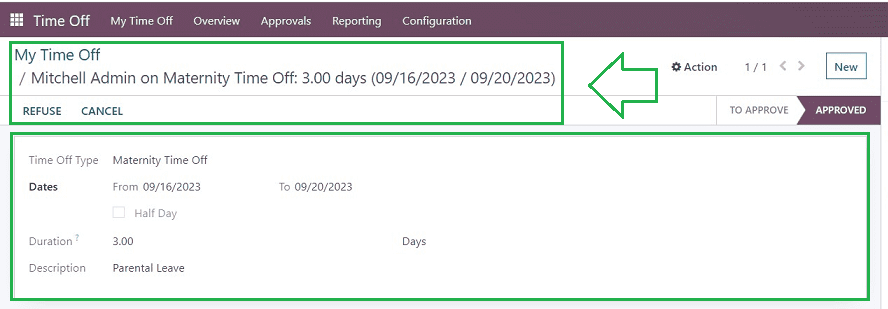
From the “Time Off Type” field, select the appropriate "Time Off Type" from the drop-down menu. In the appropriate area, you can select the "Dates" for your trip; the "Duration" of your vacation will then display based on the days you select. Any description of the leave can be edited in the "Description" area. Pressing the "Save" button sends the request to the relevant management for approval. The dashboard calendar itself has a request management and viewing feature.
Since validation is not necessary, the needed time off is immediately shown in Timesheets. If validation is required, time is automatically allotted when the necessary validation is completed by the person who is in charge of it.
To read more about configuring timesheet in Odoo 16 timesheet app, refer to our blog How to Configure Timesheet in Odoo 16 Timesheet App