Google Drive is a cloud-based service that allows users to store and sync files. By using this, users can share files, sync data between devices, and store files in the cloud. Along with a web interface, Google Drive also offers desktop and mobile apps with offline capabilities for Windows, macOS, Android, and iOS devices.
Here, we go over how to retrieve client credentials and enable the Google Drive API.
1 . Create a new Project in the google cloud platform
If you have a cloud account, log in
If not, follow the steps below
> https://console.cloud.google.com/getting-started?pli=1
You can access the Cloud platform's home page by clicking this link
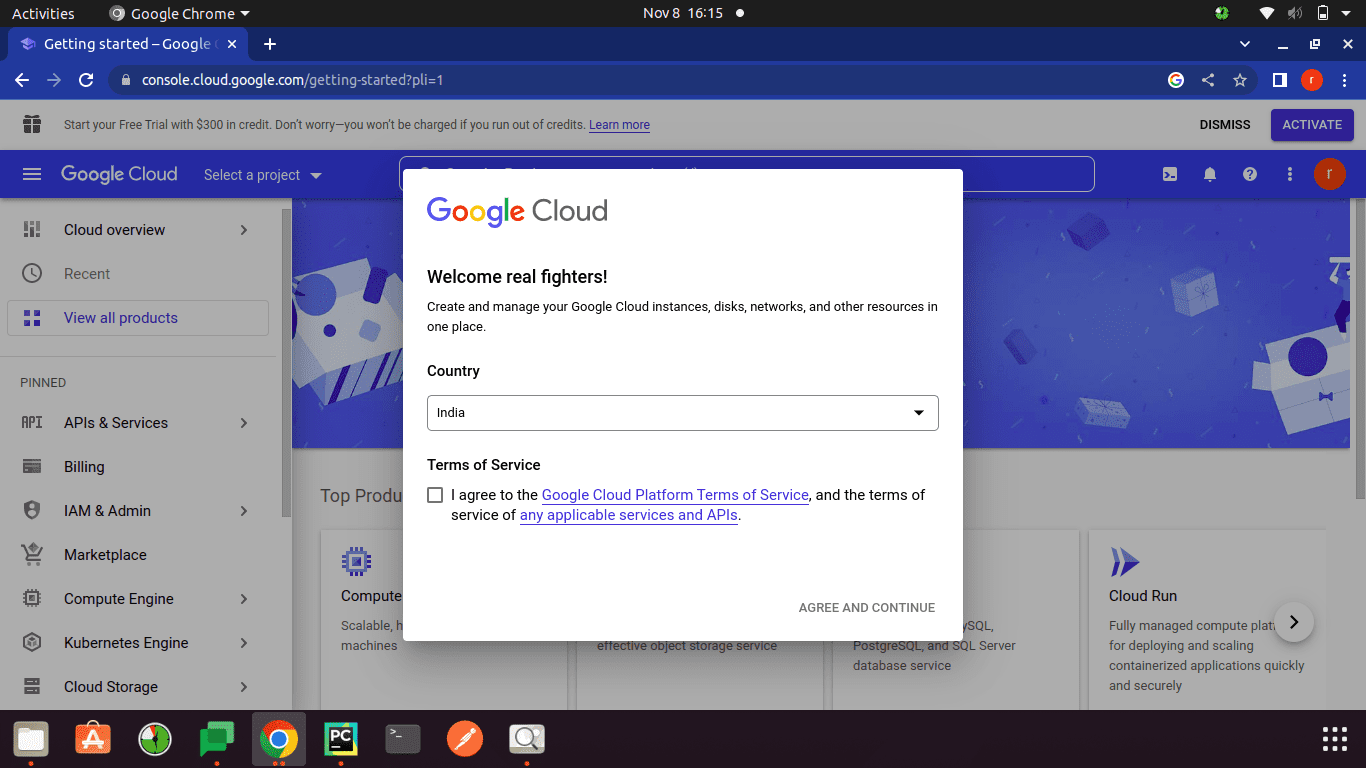
Choose your nation from the list, review the Terms of Service, and then press the ‘Agree and Continue’ button. The system might request human verification
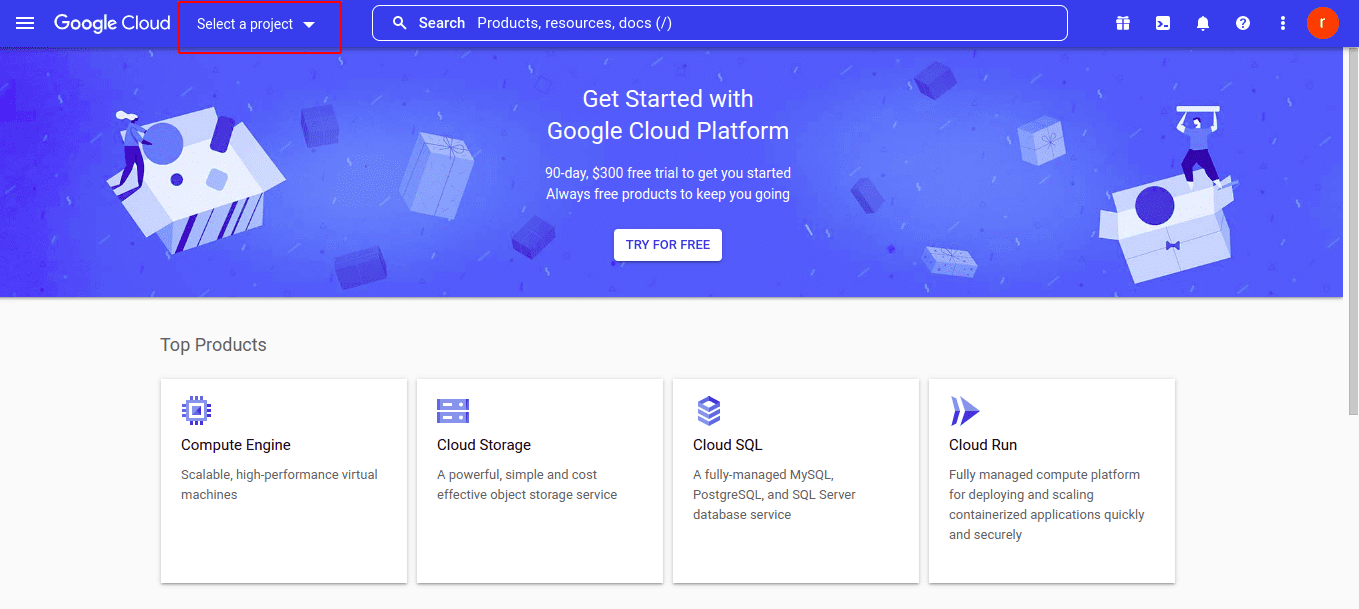
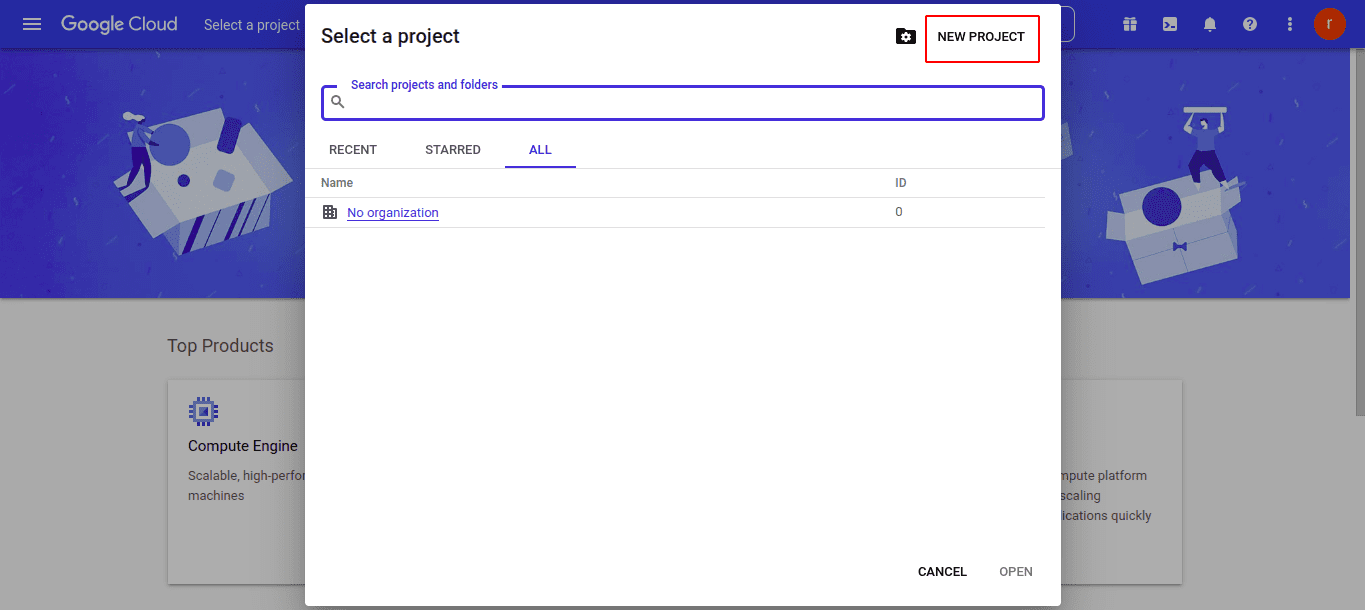
Now click the ‘Start Project’ button. We can see a popup that displays all of the created projects.
To start a new project, Click on "New Project."
Finally, give your project a name and click "create." It can take a few seconds to set up.
Now the project is created.
2. Create OAuth consent screen
After the creation of the project we need to ‘Create OAuth consent screen’. The OAuth consent screen is a prompt that tells users who's requesting access to their data and what kind of data users are allowing your app to access.
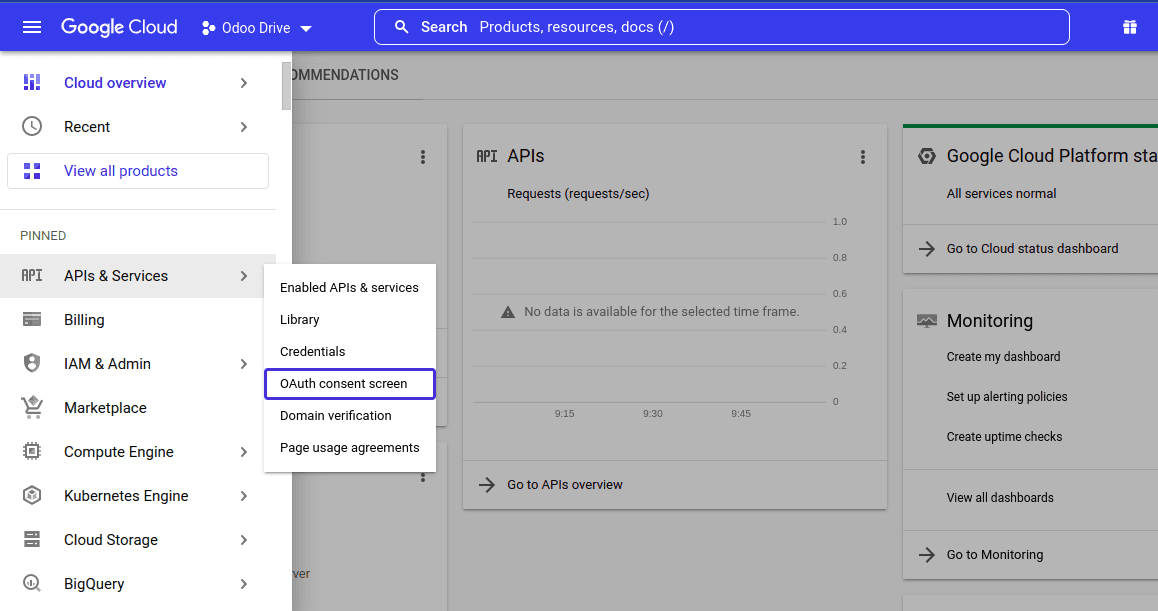
To create an OAuth consent screen, click the OAuth consent screen in the sidebar's section under APIs & Services.
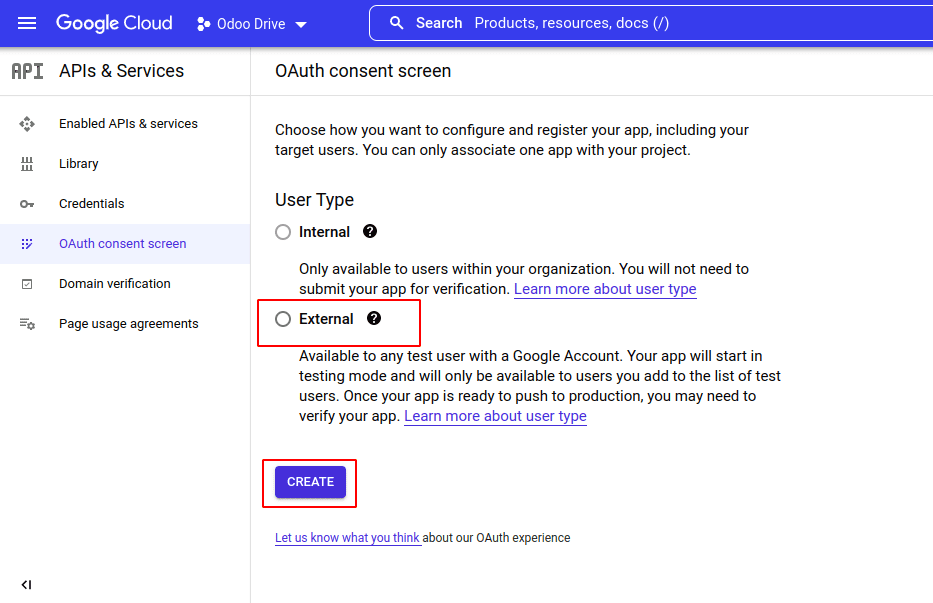
In this screen we can see two types of users
1 . Internal
If we are Google workplace users, then only this User type is available.
It is Only available to users within your organization.
2 . External
Using this user type anyone can access this project by API
After selecting ‘External’ click on create button, that will redirect to a page like this,
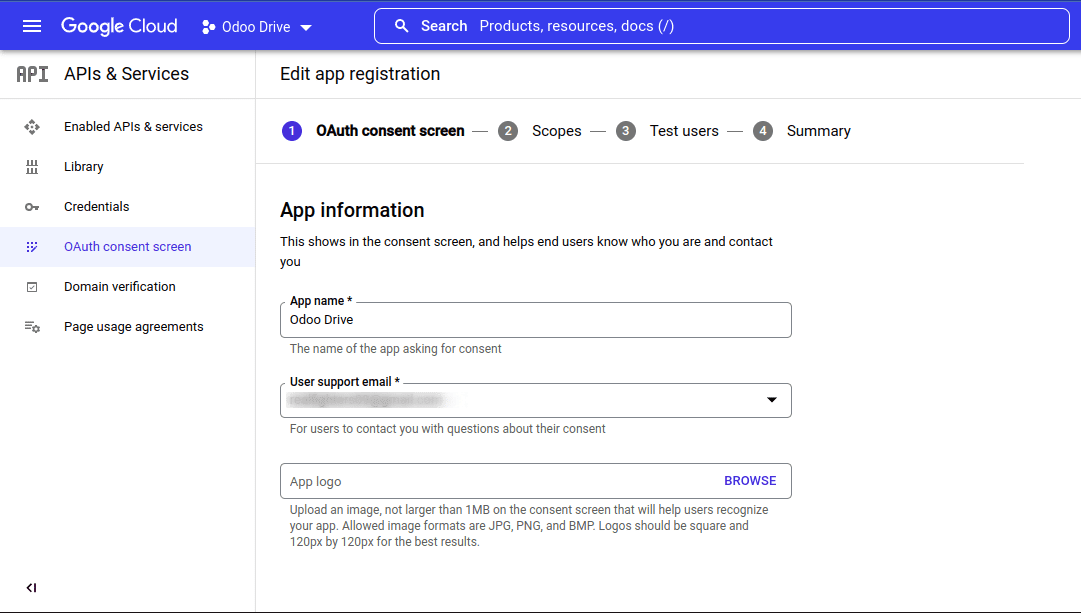

In this window, we need to provide app information. In the app name field, we can add a descriptive name for our app. Provide a user contact email, at the end of the form view we need to specify a ‘Developer Contact Email’ also. Then click on save and continue.
Under scops, no need to specify anything. You can just move on by clicking the save and continue button, and also, in optional info, we can leave it blank.
Now we can see the summary of the created OAuth consent screen. After the creation of the OAuth consent screen, we need to publish the app. Click on the publish app button. Now the setup is completed.
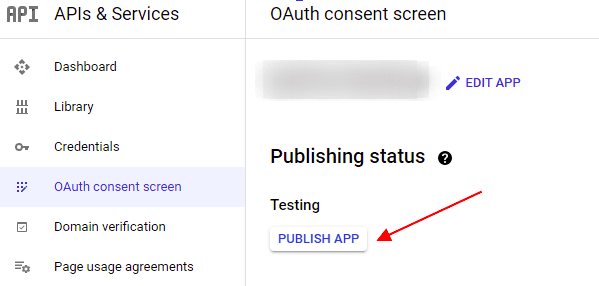
3 . Enable Drive API
After creating the OAuth consent screen, we need to enable Drive API. For that, open the API Library and search for the drive, and select the service shown below. Then click on the enable button.
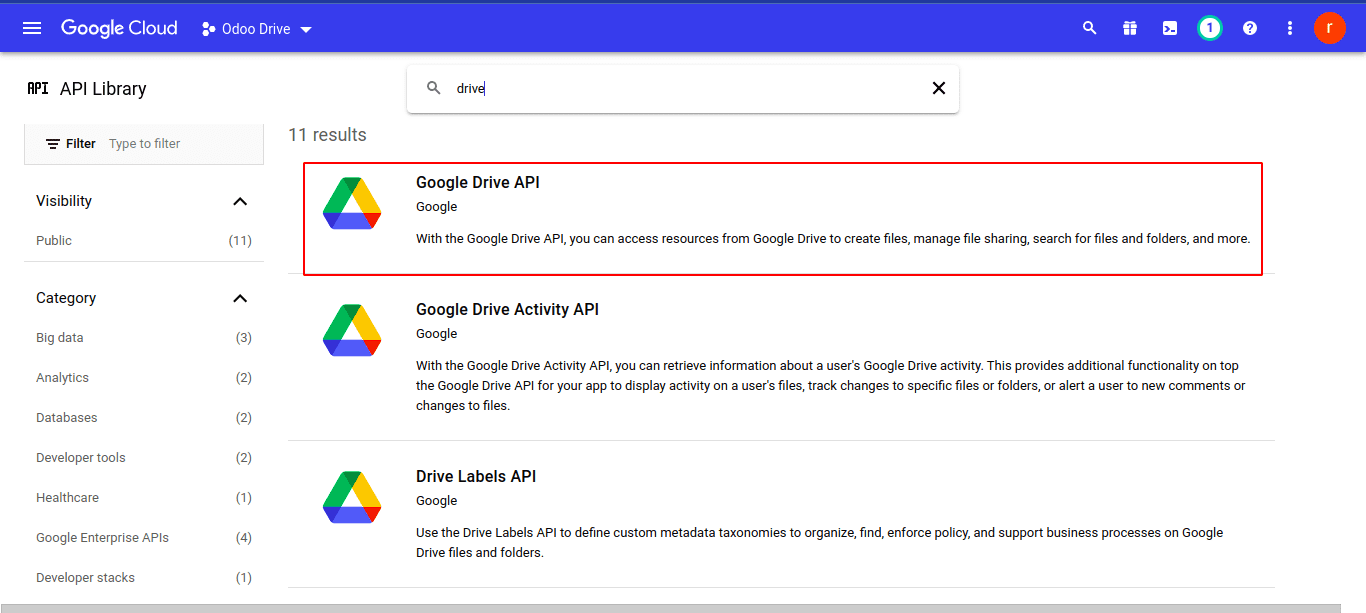
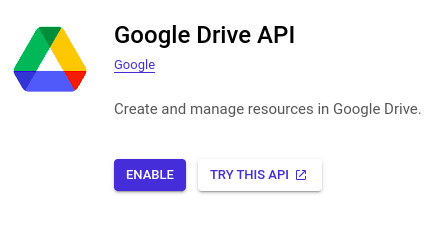
It takes some time.
3. Create OAuth client ID
After enabling Drive API, we can move to our APIs & Services section. In the window shown below, we can see the menu ‘Credentials’. After clicking on it we can see a button ‘Create credentials’ and select OAuth client ID.
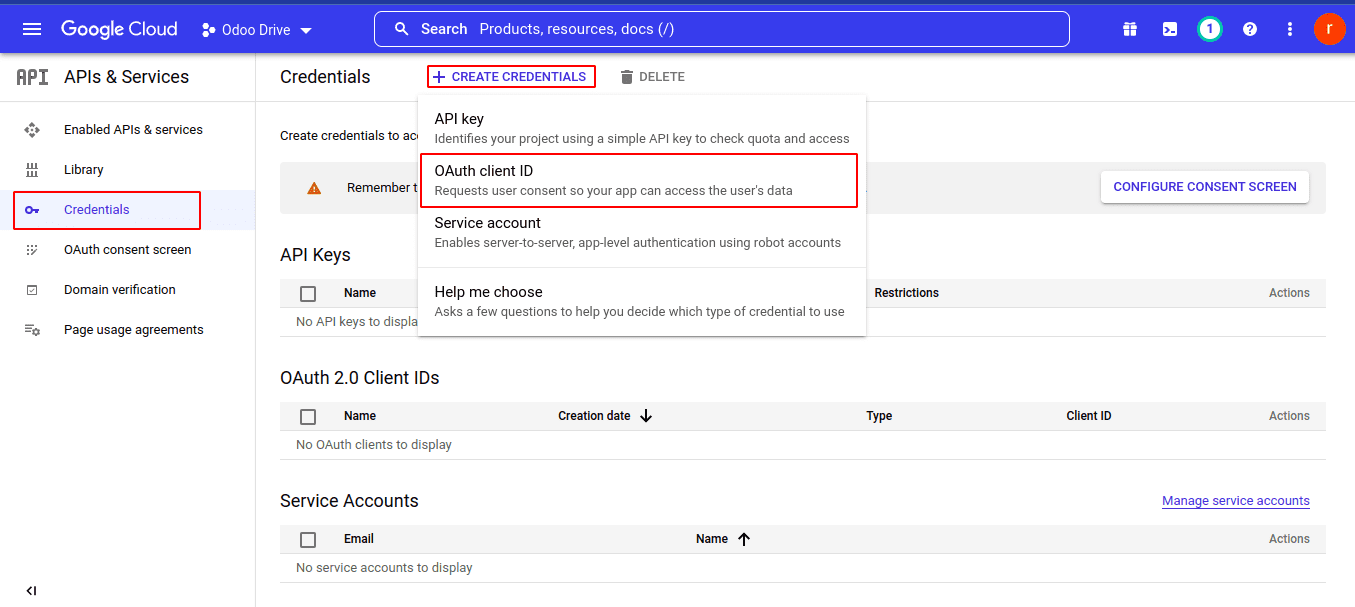
After choosing the OAuth client ID, we need to add some more information about our project. First, select the application type as Desktop and set a name for Client ID, and click on the CREATE button. It may take some time to take effect.
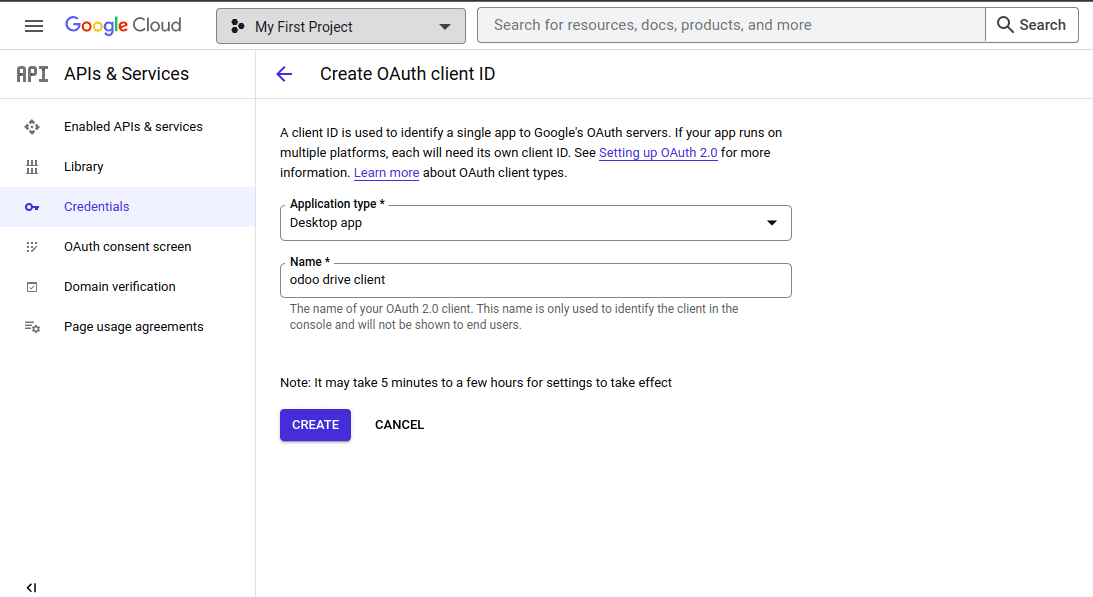
After creating the OAuth Client ID a pop will display like this.
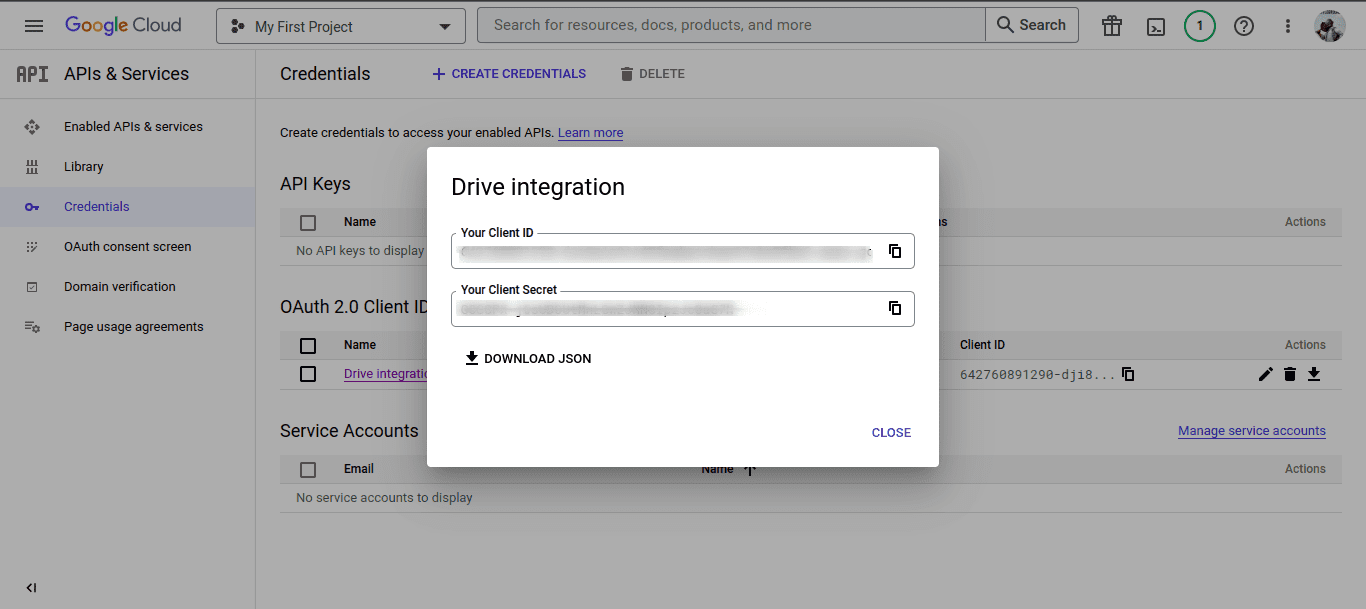
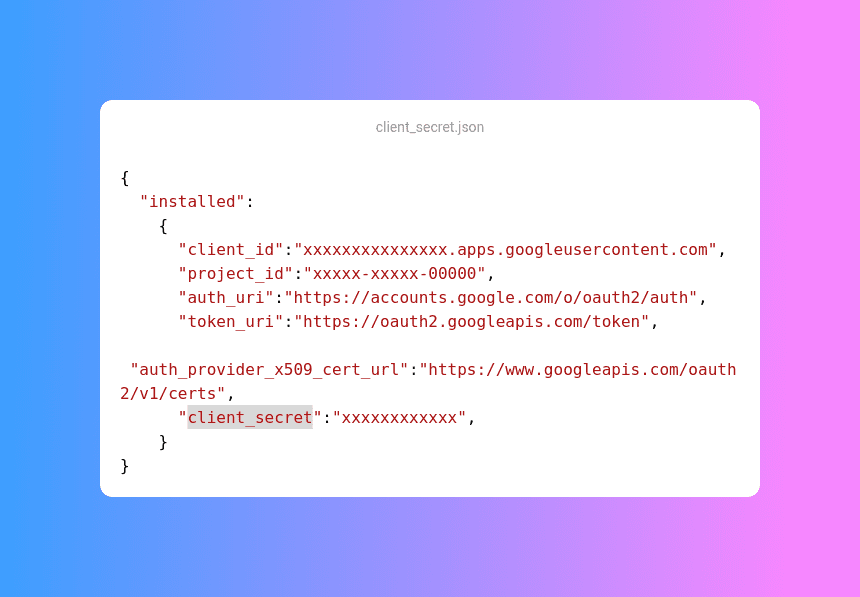
Now, we can see our Client ID and also the client's secret. Under that field, there is an option to download a secret file as a JSON. Just click that button. The file will download soon.
The file looks like this,
This approach can also be used to enable various Google API services, such as calendar and contact. If in any case the JSON file is lost we can download it again from the credential window.