Customer relationship management (CRM) is an inevitable aspect of any business. It helps organizations manage sales leads and interactions with customers, which improves customer satisfaction. Odoo CRM is an effective customer management tool that is suitable for any kind of business firm, whether it is small, medium, or large. It's an open-source software management system with a variety of features that help businesses manage their sales, customer interactions, and other aspects of their operations more effectively.
The CRM module's most recent update in Odoo 16 has unique features. Effective enterprise resource planning (ERP) can undoubtedly help businesses grow significantly by popularizing their brand and reestablishing productive relationships with their clients. You can improve your business with Odoo 16 and manage everything from one location. Odoo 16 is a powerful ERP platform that streamlines customer relationship management and business operations.
With Odoo 16, you can automate your client interaction processes. You can organize your jobs into a pipeline, maintain control over them, and close the sale with the appropriate upgrades. Odoo CRM maintains the efficiency of your business operations and offers quick customer service. It ensures positive reviews for your business and generates more leads and customers. To support company expansion and promotion in a single building that runs your operations, let's get the idea of managing the customer pipeline using the Odoo Pipeline Module.
You can start by clicking the CRM module in Odoo.
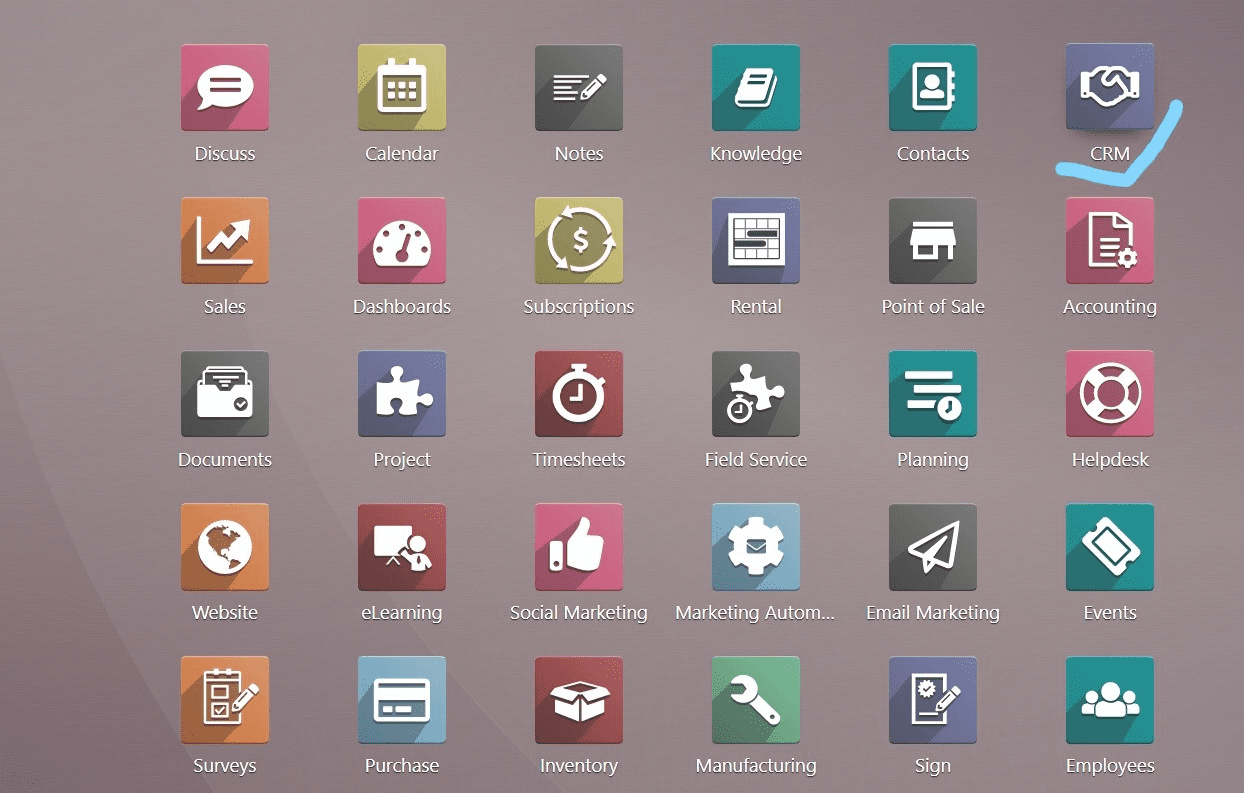
Step 1: After entering into the CRM Module, you will see the Pipeline window as shown below
which shows already-existing sales leads, quotes, etc. If you want to create a new pipeline, then click on "New.” To create new sales leads, click on the “Generate Lead” option.
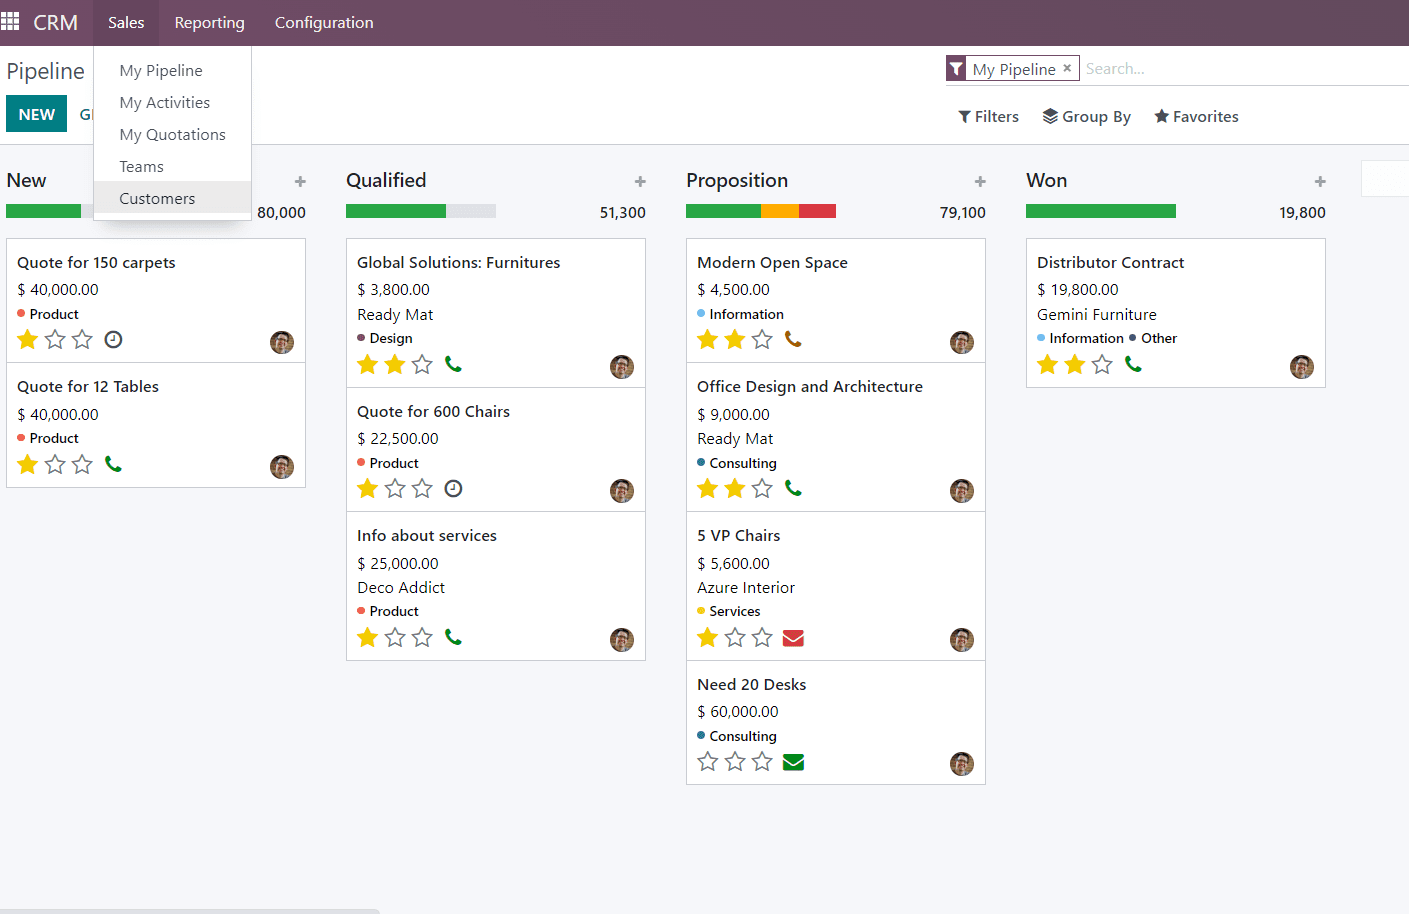
Step 2: For creating new customer details, you can select “Customer” from the drop-down submenu in the ‘Sales’ menu.
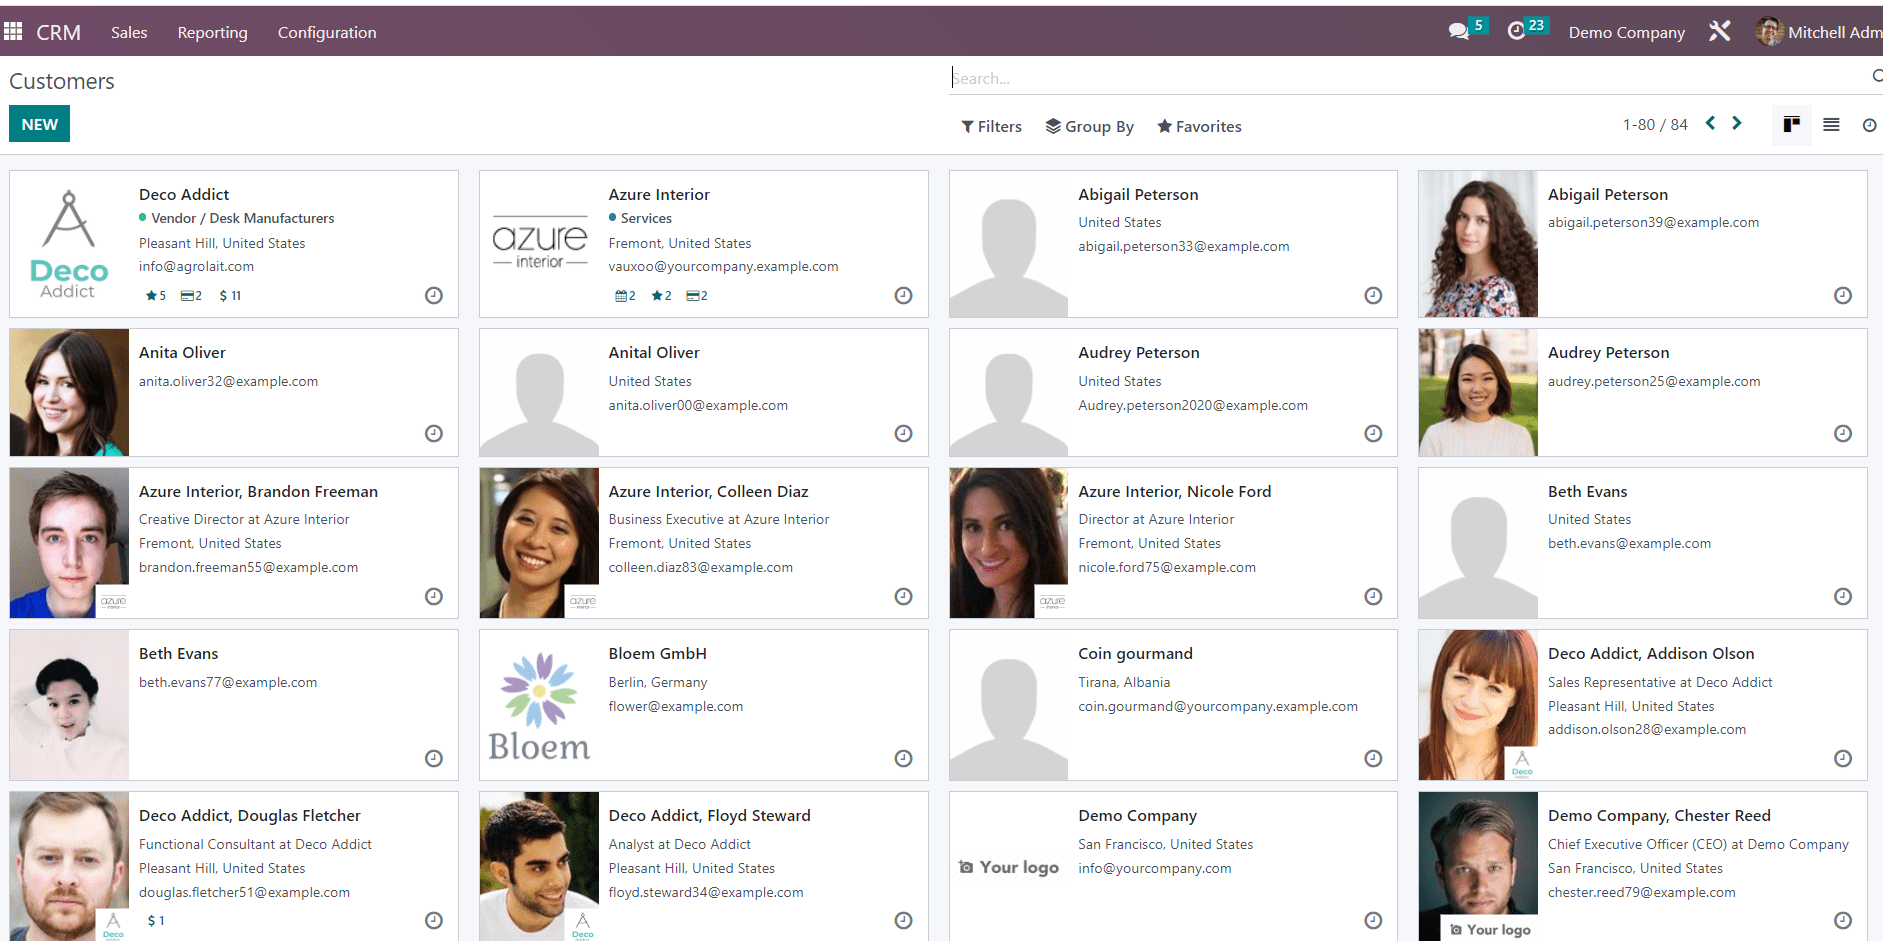
Step 3: After selecting the ’ Customer’ section from the drop-down menu, you can see the already-existing customer details, including purchase details, interactions, etc. To create new customer details, in the upper left corner of the page, click the "New" button.
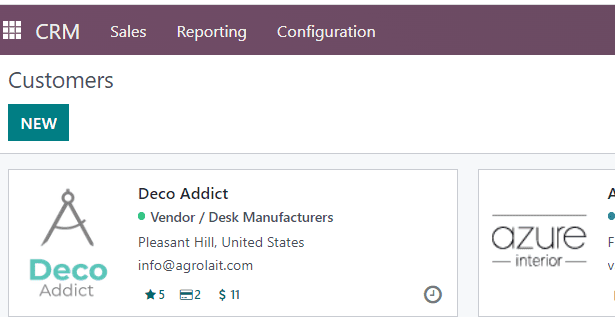
It will lead to the next page like this.
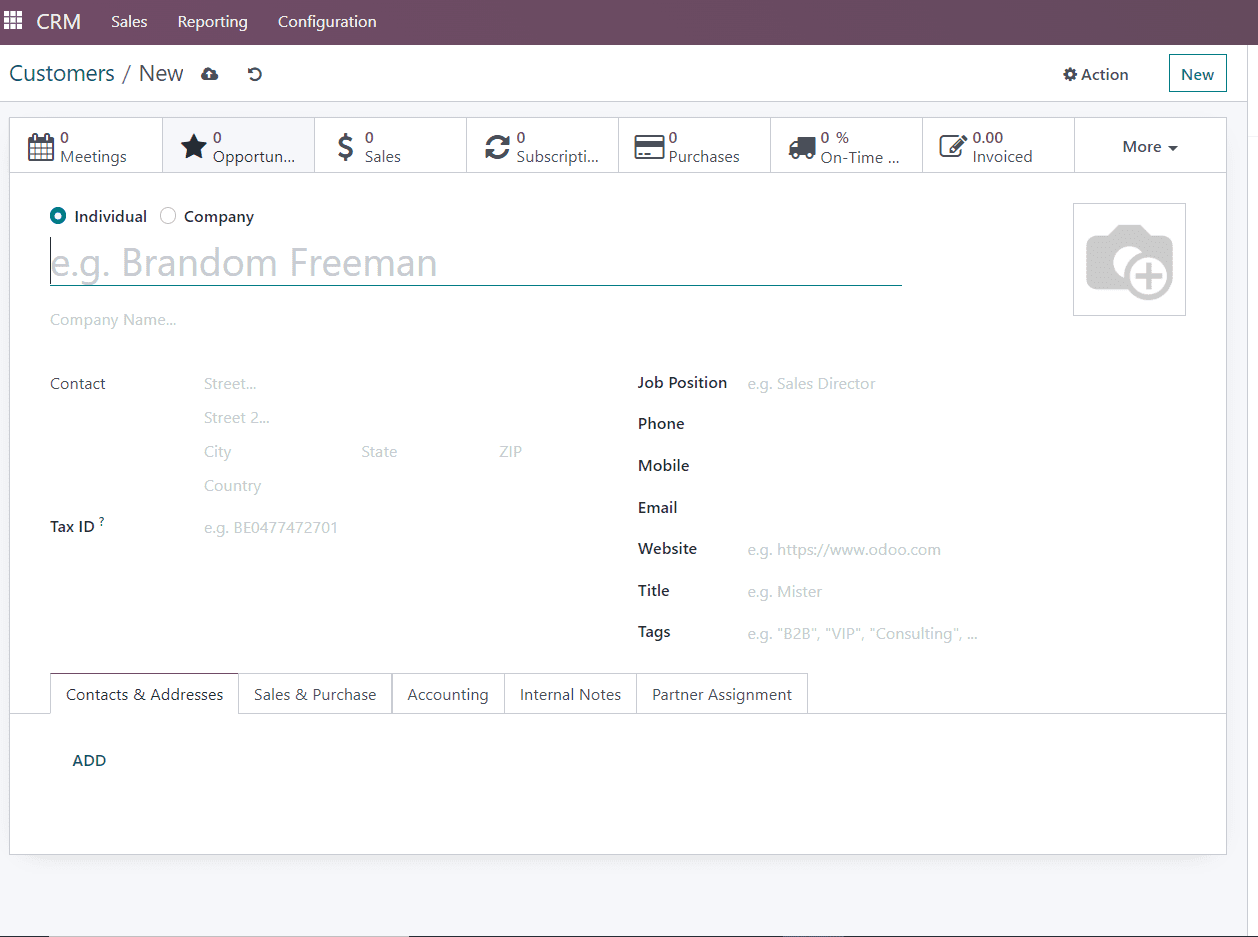
If you open this page, it consists of another five sections, such as
1. Contacts & Addresses
2. Sales & Purchases
3. Accounting
4. Internal Notes
5. Partner assignment
where you must enter the customer's information, such as name, company name, contact information, job position, phone number, mailing address, and so on. I am giving the customer's company details as "Deco Addict."
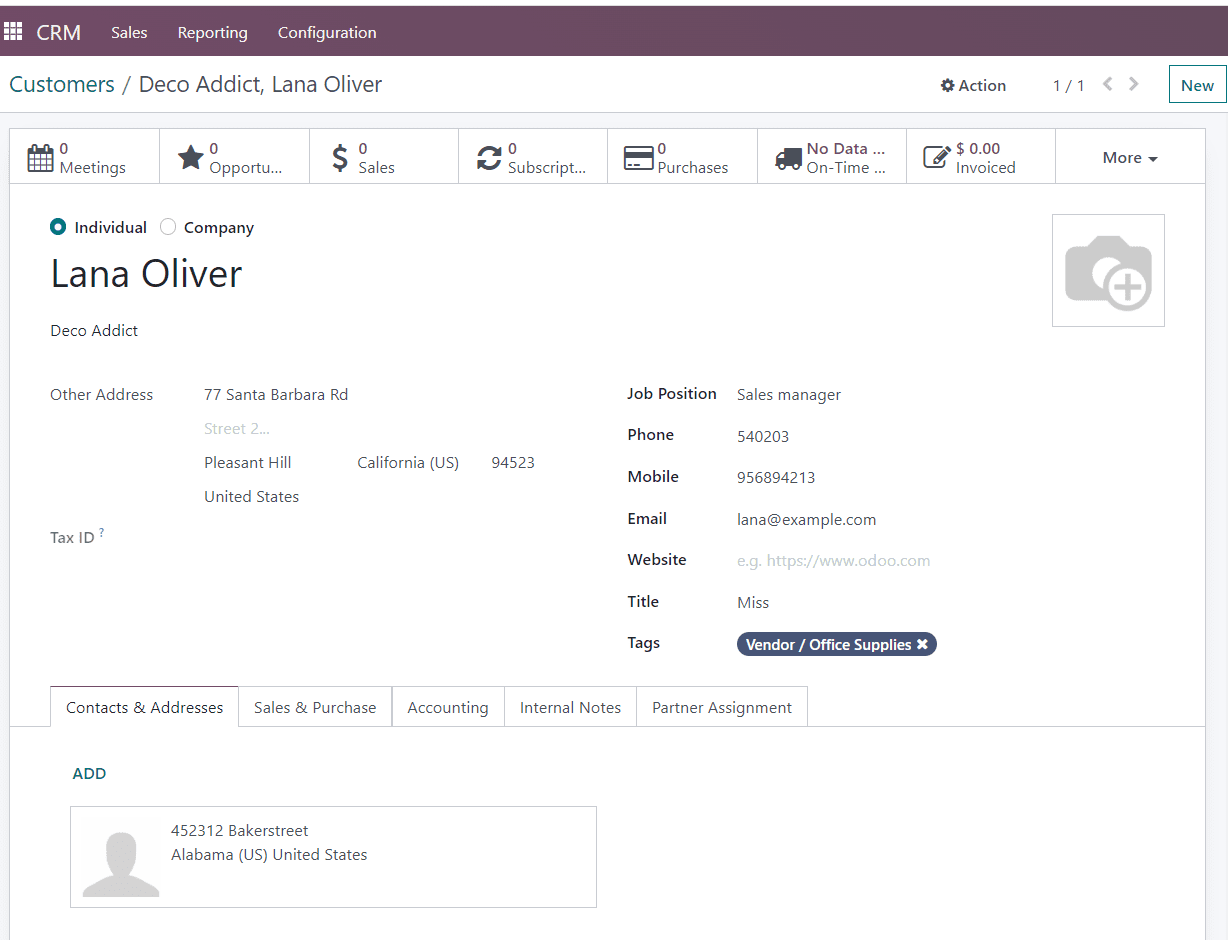
Step 4: You have to add the customer details in the form view. We can select the type of customer by selecting the options “Individual” and "Company" and filling in the customer name as per the requirement, or we can select the customer name from the drop-down menu. The address should be filled in. If we are providing for an existing customer, then the corresponding address will be generated automatically. Fill in the rest of the information, such as contact information, email addresses, etc., as shown in the below screenshot.
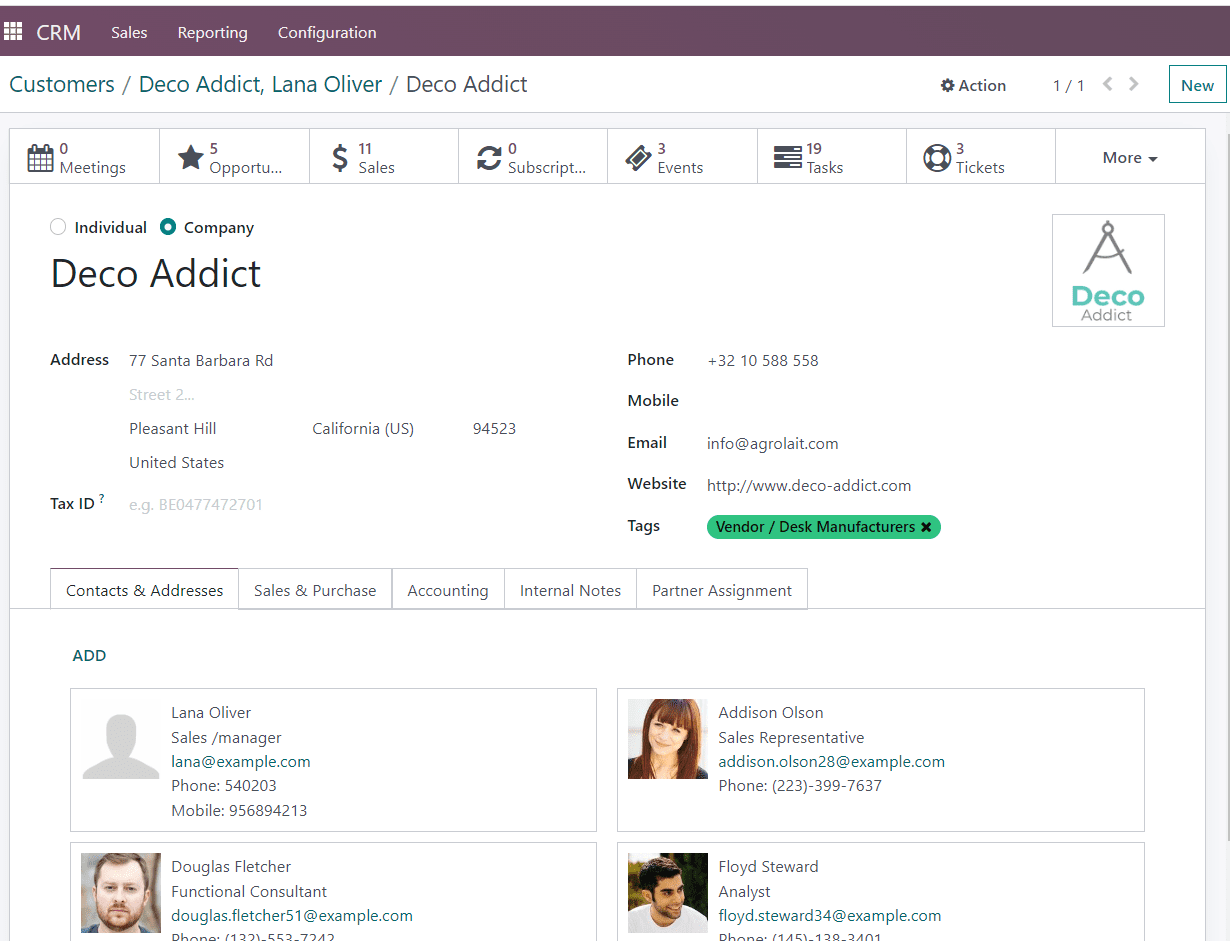
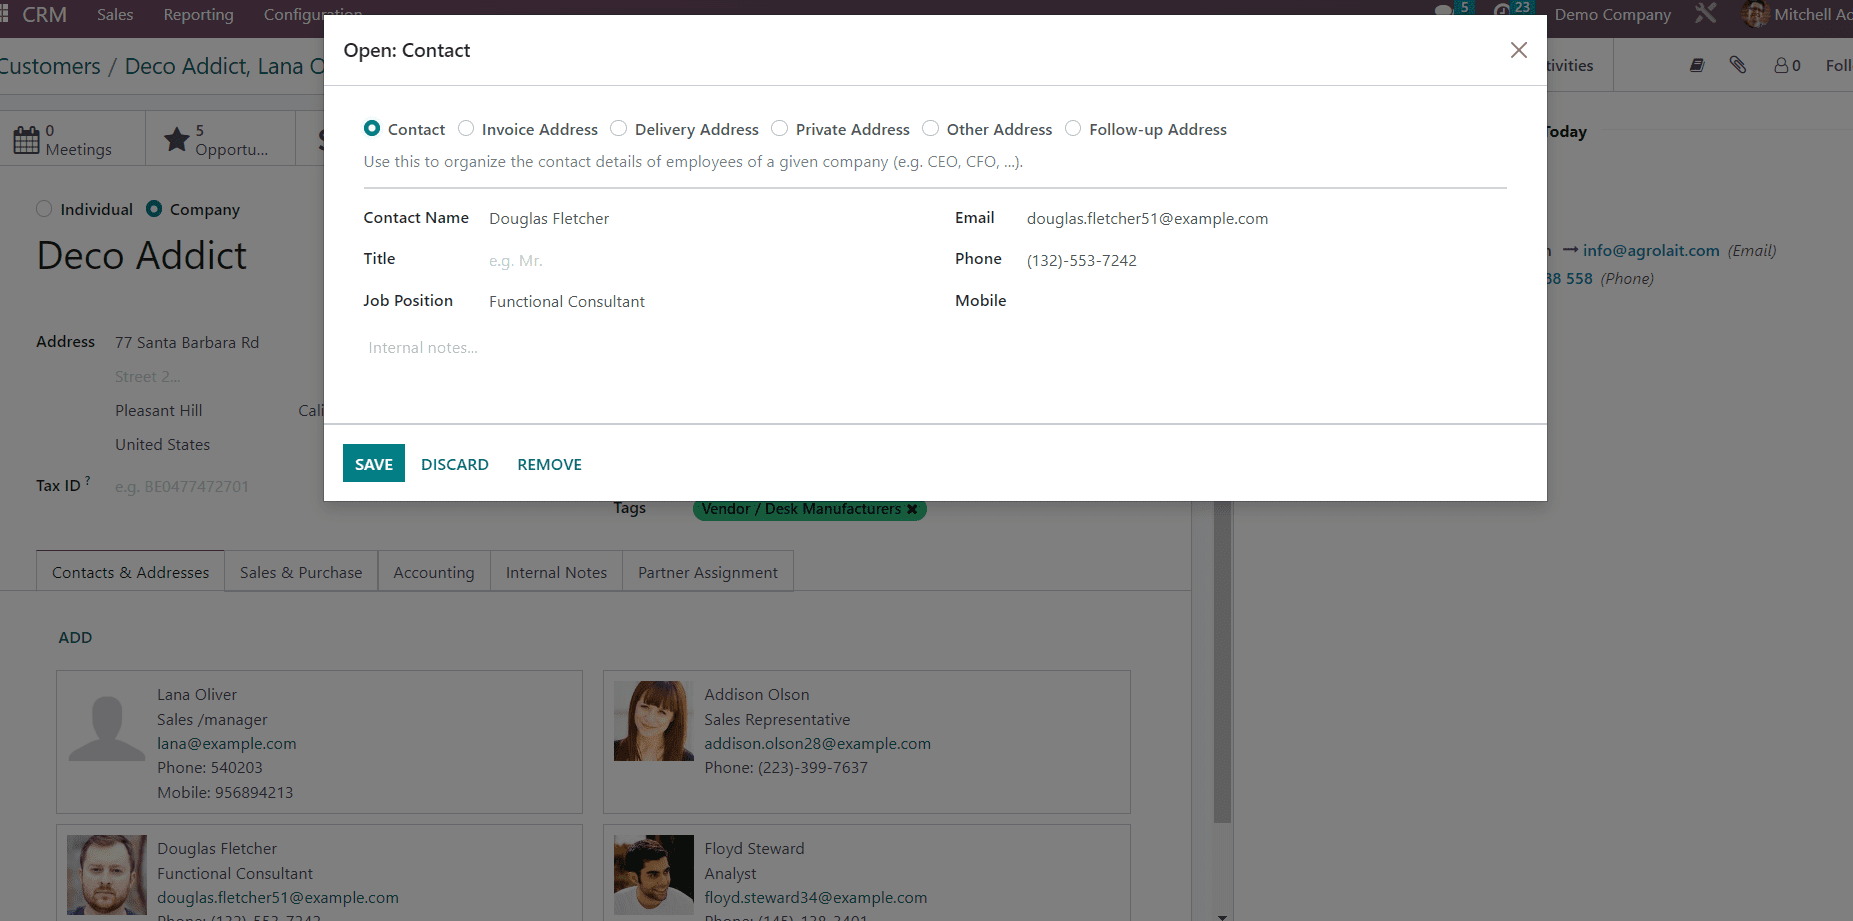
When entering new customer information, the address form will appear, as shown in the screenshot below.
Step 5: In the sales and purchases section, you have to give the payment details, delivery method, point of sale, fiscal information, etc.
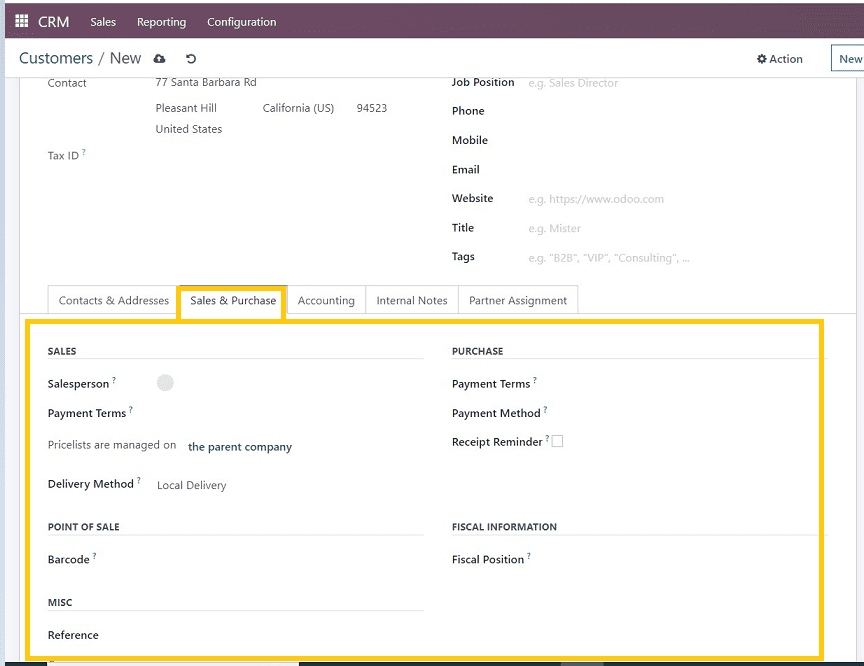
In the above form, we have to fill in the details such as,
Salesperson: The name of the internal user in charge of this contact.
Payment Terms: Payment terms such as immediate payment, every 30th of the following month, or the 15th of the month, etc., as per terms and conditions, can also be selected from the drop-down list.
Delivery method: Whether it's a local delivery, online delivery, postal, etc.,
Point of sale: Barcode details, reference, etc.,
Purchase: Payment terms, Payment methods, etc.,
Fiscal Information: Fiscal Position, which helps to determine the taxes/accounts for the customers
Step 6: In the accounting section, you have to give the bank details for the payment and delivery functions, or, if you are using the company account, select it from the existing company account. I've chosen the account of the "Deco Addict" company, as shown in the below screenshot.
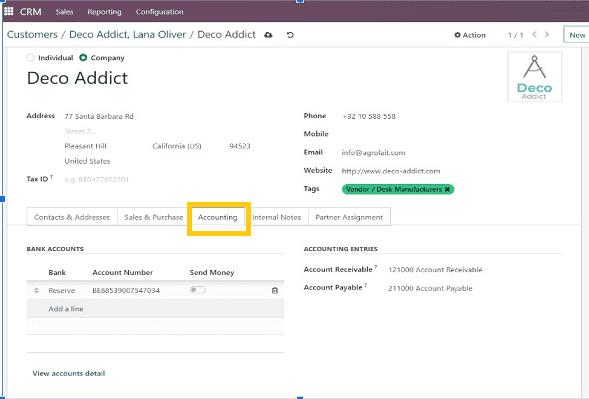
The accounting details will be automatically updated in this section, and we can also add another account by clicking the “Add a line” dropdown, as shown in the screenshot.
Step 7: Internal notes and partner assignment section: you can add any notes regarding sales, sales, and delivery, as well as the geolocation of your address.
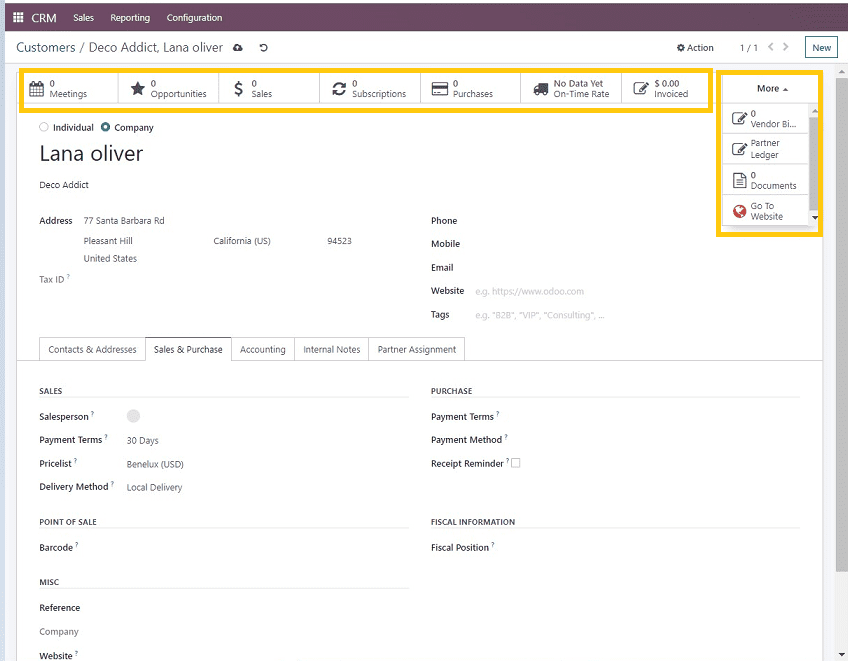
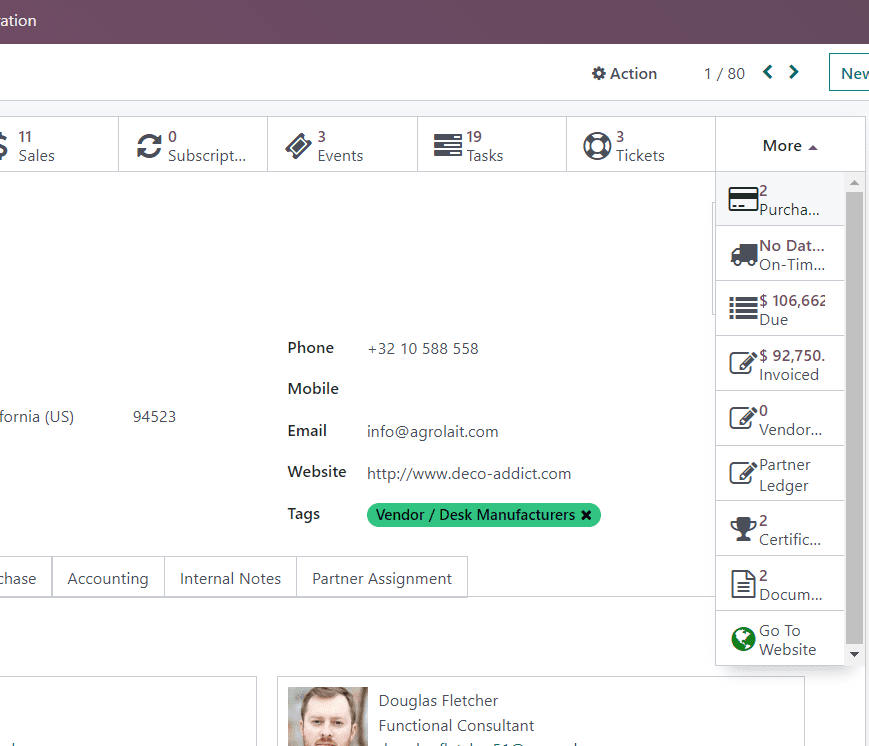
Step 8: After providing the details, you can check the details and save them. It is also possible to add a meeting with the customer or company using the “Meetings” button and check on-time delivery details, subscriptions, purchase details, etc. Also, the user can see the partner ledger from the “More” menu. The process is depicted in the below screenshots.
For demonstration, here I am adding a new meeting with the company regarding business.
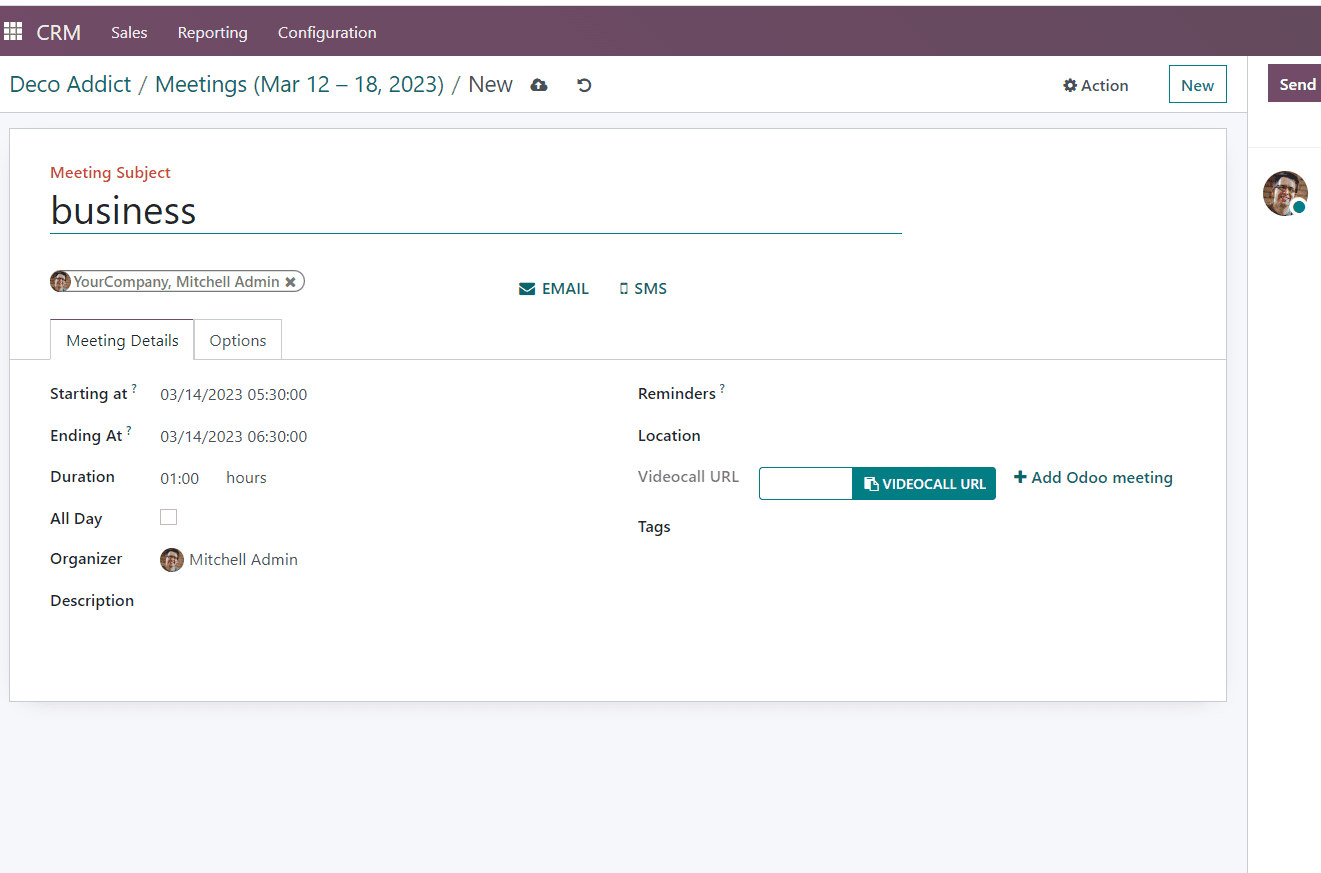
Users can organize their meetings very easily using the meeting platform shown in the above screenshot. we can add the meeting subject, starting time, ending time, set reminders, duration of the meetings, video call links, etc.,
Step 9: The next step is confirming and checking the delivery management. In the right corner of the window, you can see the vendor bills, documents, partner ledger, etc., from the "More" dropdown menu.
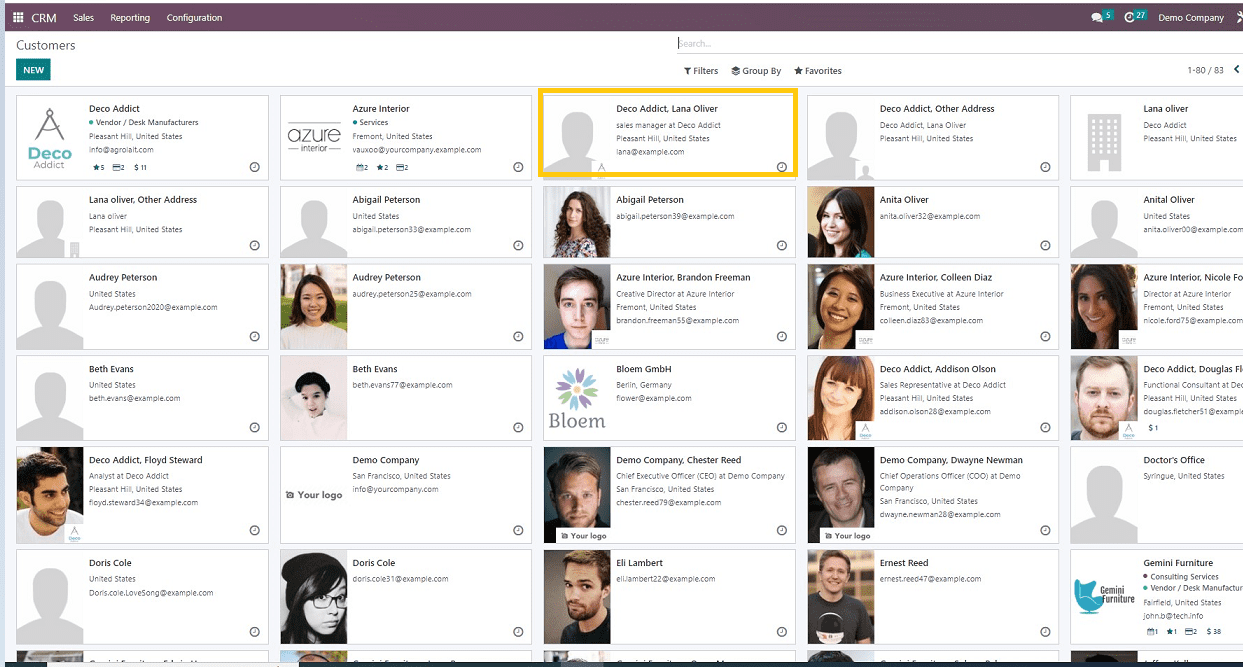
Step 10: After completing the details, come back to the sales customer page, where you will see the new sales customer details created. You can update the details related to the sales, deliveries, company meetings, and everything else related to the particular customer here.
In this blog, we have discussed the process of entering new sales customer information into the Odoo 16 CRM application. Users can begin other functions, such as creating pipelines and new sales orders, after entering the customer's information. And also, the users can get the full history of all the transactions, invoices, order details, etc., regarding each customer.
Have a look at the following blog to explore more about Detailed Overview of the Odoo 16 CRM Dashboard. Detailed Overview of the Odoo 16 CRM Dashboard