In this blog let us see how we can create a new custom module in Odoo 12.
The things covered in the blog are,
a) Creating a new model
b) Creating different views mainly form and tree
c) New Menu etc
So the structure of the module should be as in the above image.
1. Inside the model's folder, we will place all the python file.
2. In the security folder, we will place the files related to the security.
3. In the views folder, we will place all the XML files which will define the view that we see in the front end, Other than this folder we can see two files, they are __manifest__.py and __init__.py.
So let's start with the manifest file.
__manifest__.py
So, first of all, let us look at the manifest file and see what its use is.
Below added is a sample manifest file,
In the above image you can see a sample manifest file, here is the place where we define the details such as the name of the module, its version, category, author name etc.
* Name – Name of the module to be displayed.
* Author – The name of the one who created the module.
* Version – version of the released module, is it v12, v11, v10,v9, or v8.
* Summary – Summary for the module.
* company – The company which developed module.
* maintainer – The one who maintains the module.
* website – the website address of the company.
* Category – Category of the module, whether it is sales, purchase, the point of sale etc.
* depends – Suppose if our module depends on any other modules, we have to mention that name in the depends. As we are going to create a new module and as it is not depending on any other modules, just add depends as the base.
* data – In the data section, we have to specify all the .xml files here. In our case, we have to mention the view.xml here.
So this is a brief idea about the manifest file, so our manifest file is ready now,
# -*- coding: utf-8 -*-
{
	'name': 'School',
	'version': '12.0.1.0.0',
	'summary': 'Record Student Information',
	'category': 'Tools',
	'author': 'Niyas Raphy',
	'maintainer': 'Cybrosys Techno Solutions',
	'company': 'Cybrosys Techno Solutions',
	'website': 'https://www.cybrosys.com',
	'depends': ['base'],
	'data': [
	],
	'images': [],
	'license': 'AGPL-3',
	'installable': True,
	'application': False,
	'auto_install': False,
}
Now let us look at the use of the __init__.py
__init__.py
In the __init__.py file we have to import all the python files that we are going to use.
Suppose as described above we have a python file called student.py inside the folder models. The first thing we have to do is, import the models folder in the __init__.py file.

So the _init__.py file will be like this,
# -*- coding: utf-8 -*-
from. import models
As we have imported the models folder in the outer init file, now we have to import the python file student.py in the init file inside the models folder.
So now the __init__.py file inside the models folder will be like this,
# -*- coding: utf-8 -*-
from. import student
So let us move to the student.py file that we have imported now.
Here in this file, we will define the models and fields to store the data into the database.
So let our model be student.student, this will create a table in the database and we have to define the fields to accept the values.
There will be different types of fields, they are Character, Integer, Float, Many2one, Many2many, Boolean etc.
So in our student record, we need to record the values such as Name, Age, Class, Parent Name, Photo Name, Gender etc.
See the student.py
Now,
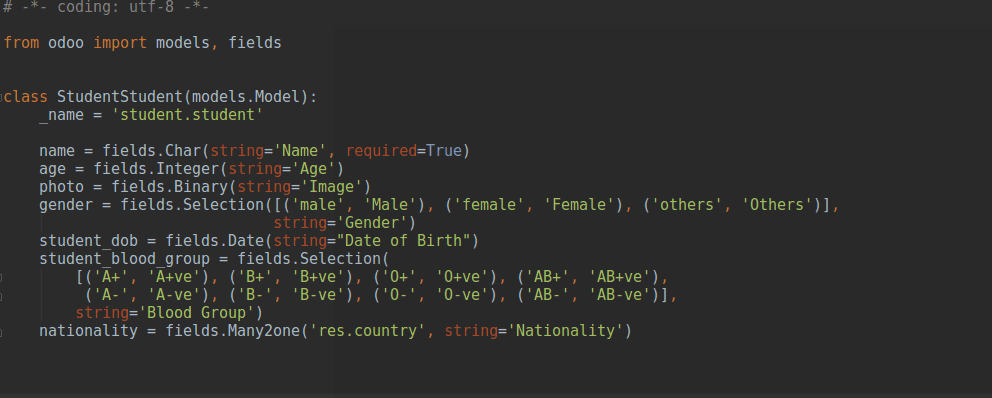
In the above image, you can see we have defined 5-6 fields in the model.
The name given to the table is student.student. And the fields in the model name, age, photo, gender, student_dob, student_blood_group, and nationality.
Each field's type is different from one another, For storing the name we can use the field type character.
So this is the student.py
# -*- coding: utf-8 -*-

from odoo import models, fields

class StudentStudent(models.Model):
	_name = 'student.student'

	name = fields.Char(string='Name', required=True)
	age = fields.Integer(string='Age')
	photo = fields.Binary(string='Image')
	gender = fields.Selection([('male', 'Male'), ('female', 'Female'), ('others', 'Others')], string='Gender')
	student_dob = fields.Date(string="Date of Birth")
	student_blood_group = fields.Selection(
    	[('A+', 'A+ve'), ('B+', 'B+ve'), ('O+', 'O+ve'), ('AB+', 'AB+ve'),
     	('A-', 'A-ve'), ('B-', 'B-ve'), ('O-', 'O-ve'), ('AB-', 'AB-ve')],
    	string='Blood Group')
	nationality = fields.Many2one('res.country', string='Nationality')
Now we have created the fields. Next, we have to define the view so that it can be seen in the Odoo user interface.
We have created a file inside the folder views, the file is student_view.xml, inside this file, we will define the menu and the view.
So let us look at how to create an XML file and the menu first
<?xml version="1.0" encoding="UTF-8"?>
<odoo>
	<data>
    	<menuitem id="school_menu"
              	name="School"/>
    	<menuitem id="school_student_menu" parent="school_menu" name="Student"/>
	</data>
</odoo>
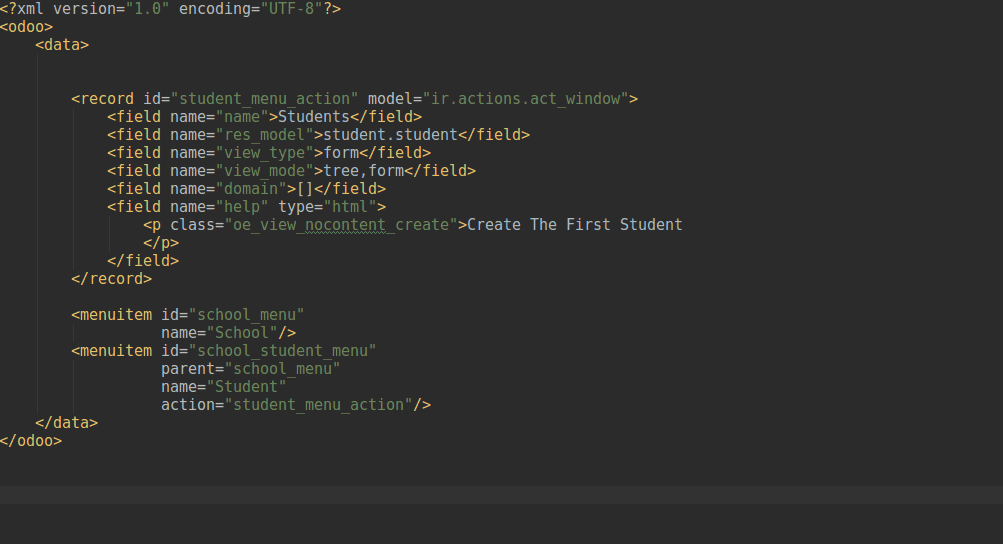
In the above code you can see in the student_view.xml file we have defined two menus, one menu is the main menu named School and under that menu, we have created another menu named Student.

So now on clicking the menu, some action has to take place. So let us look at how the action can be defined. After defining the action it should be given to the menu.
<record id="student_menu_action" model="ir.actions.act_window">
        	<field name="name">Students</field>
        	<field name="res_model">student.student</field>
        	<field name="view_type">form</field>
        	<field name="view_mode">tree,form</field>
        	<field name="domain">[]</field>
        	<field name="help" type="html">
            	<p class="oe_view_nocontent_create">Create The First Student
            	</p>
        	</field>
</record>
Now we have defined the action for the menu, if you look at the above code, you can see that in the res_model we have given the name of the table we have created in the student.py file, that means on clicking the menu the action is going to this model.
In the view mode, we have specified the views as tree and form. We have got many other views like kanban, pivot, calendar, etc. But here we are using only tree and form.
Now let us link the above-created action to the menu students.
 <menuitem id="school_student_menu"
              	parent="school_menu"
              	name="Student"
              	action="student_menu_action"/>
Now our student_view.xml will be like this,
Now let us stop defining the view here and add this view to the manifest file that we have created earlier.
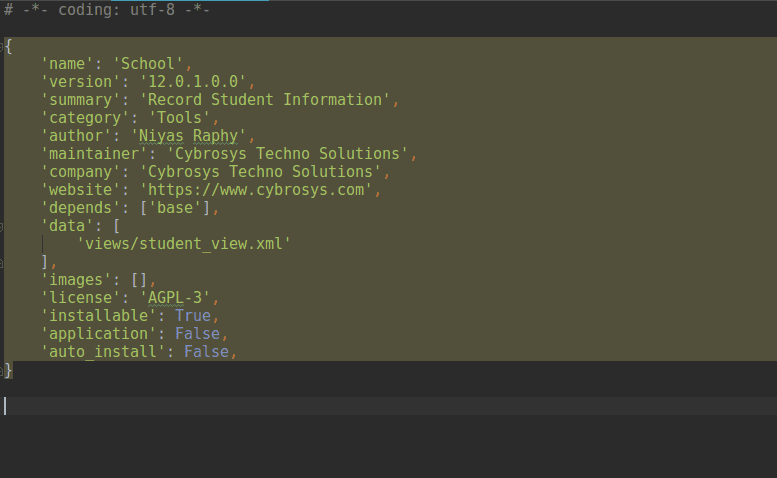
Inside the manifest file, you can see a tag data in that you have to add this file
 'data': [
    	'views/student_view.xml'
	],
As the student_view.xml is inside the views folder when specifying the path it will be like the above.
So now the manifest file will be like this,
So now we are ready to install the module. However, there is something more to define in the views, still, We will take a look at what we will see and what we will get if this module is installed now.
So rewinding the things, we have a folder named school, inside that we have four folders models, static, views, security and two files, ie, init file and manifest file.
From the init file we have imported the models folder and then from the init file inside the models folder we have imported the student.py file and defined the necessary model to record the student data.
In the views folder, we have defined the student_view.xml in which we have to create menu and actions.
This created student_view.xml file is specified in the data section of the manifest file.
We will come to the static and security folder later.
Now just restart your odoo service and activate the developer mode and click on the Apps -> Update Apps List -> Update.
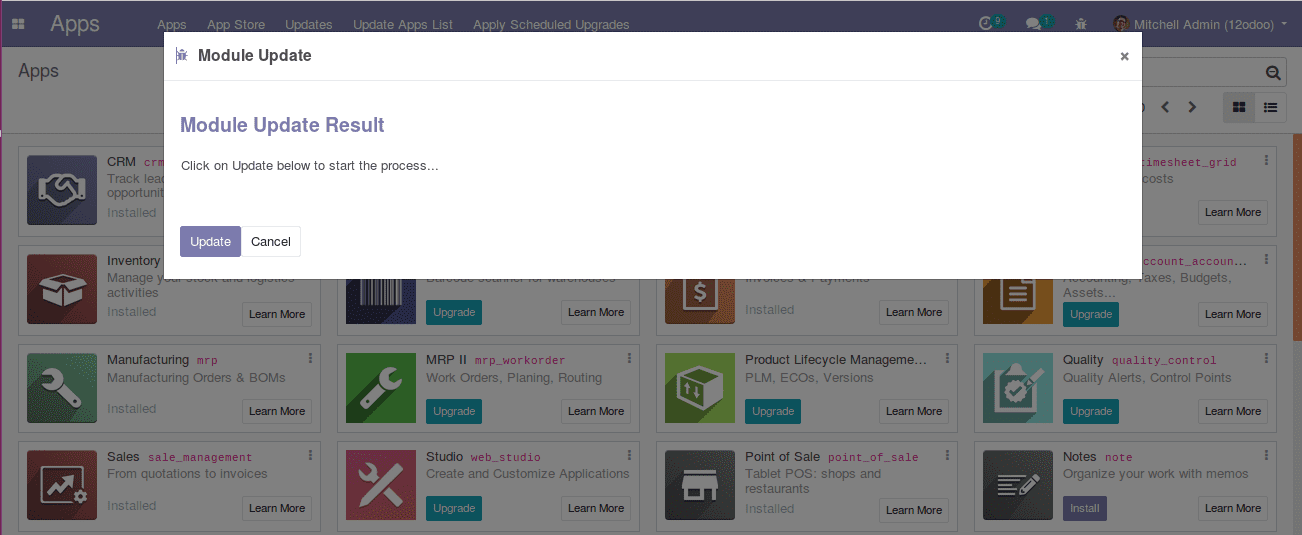
Once you click the Update button, search for the module that we have created now, either you can search using the folder name, which is called the technical name of the module, in our case the technical name of the module we have created is school and the name of the module is the name we have given inside the manifest file which is also School.
So let us search for the name school.
Now you can see the module you have created over there. Now I will come to the use case of the static folder. Inside the static folder create another folder named description and inside that folder place an image with extension .png and name with an icon.
So what you have to do is put a picture named icon.png inside the description folder.
This image will be the icon for your module, after placing the icon image in the desired folder, come back to the odoo screen and again click on the Update Apps List -> Update and search for the module school.
Now you can see the given image as the icon for the module. Now click on the three-dot and click the module info so that we can see the details we have given in the manifest file.
On clicking the Module info,
Now we can Install the module by clicking the Install button and see what happens.
After a few seconds loading the module will get installed, if it successfully installed it will redirect to home screen else it will show up an error message.
For it installed successfully, to ensure it, come back to apps menu and search our module and see its status.
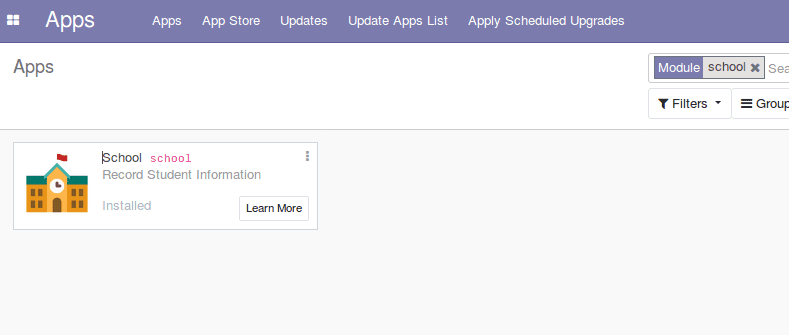
Now in the module, you can see a label ‘Installed’, that means it is successfully installed.
But the problem is that if you search for the menu school or student you will not find it now. The Menus we have created in the code (student_view.xml) are School and Students, both will not visible now.
Is it a bug? no, we have to give some access rights then only it will get visible, for that what we have to do is that this what we have the security folder is for.
Inside the security folder, we have a file named ir.model.access.csv Inside this file we have to give the security for the model we have created inside the student.py file.
Our model name is student.student.
So let us look at how the security file will be,
In the ir.model.access.csv file, we have added two lines like this,

This will give permission for the users to read, create and write to the model student.student.
Once we created this file, we have to specify this file in the manifest file in the data section,
'data': [
    	'security/ir.model.access.csv',
    	'views/student_view.xml'
	],
Now the manifest file will be like this,
As we have made changes in the python file as well as the XML file we can restart the service if the changes are done in the XML files the restarting of the service is not needed.
Here as we have changed the manifest file, we can restart the service.
Then Come to the Apps menu and search the school module and Upgrade it.
Once upgrade it the new changes will get added to the database.
Once you successfully upgrade it, you can see the menu named School.
Click on the School menu, you can see a submenu named Student.
Here you can create your first student record.
Defining the form view and tree view will be discussed in this next blog