Odoo, the powerful open-source ERP platform, offers a plethora of customization options for its users. Among these, creating custom pages is a remarkable feature that allows website owners to tailor their sites according to specific business needs. In this blog post, we will explore the process of crafting custom pages in Odoo 16 using XML code.
Custom pages play a pivotal role in enhancing the user experience and meeting unique business requirements. These pages are built using XML code, a markup language that facilitates the creation of dynamic and interactive content. By leveraging XML code, Odoo users can design pages that seamlessly integrate with the existing website layout.
To start creating custom pages, let's understand the essential elements of the XML code structure. The <record> tag serves as the building block for defining custom pages in Odoo. Within this tag, attributes like name, type, url, website_indexed, is_published, and arch are crucial for defining the page's characteristics.
Let's dive into the process of crafting a basic custom page using XML code. Consider the following example:
<?xml version="1.0" encoding="utf-8"?>
<odoo>
   <record id="my_page" model="website.page">
       <field name="name">My Page</field>
       <field name="type">qweb</field>
       <field name="url">/my-page</field>
       <field name="website_indexed" eval="False"/>
       <field name="is_published">True</field>
       <field name="key">odoo_menu.my_page</field>
       <field name="arch" type="xml">
           <t name="my page" t-name="my_page">
               <t t-call="website.layout">
                   <div class="container">
                       <h1>Hello, Odoo 16!</h1>
                       <p>Welcome to my custom page in Odoo 16. This is just a
                           demo page.
                       </p>
                   </div>
               </t>
           </t>
       </field>
   </record>
</odoo>
In this example, we define a custom page called "My Page" with a URL "/my-page". The page content is wrapped inside a <div> with a heading and a paragraph.
To make the custom page accessible to website visitors, it needs to be linked to a menu item. We achieve this by creating a new menu item and associating it with the custom page:
<record id="menu_my_page" model="website.menu">
   <field name="name">My Page</field>
   <field name="url">/my-page</field>
   <field name="page_id" ref="odoo_menu.my_page"/>
   <field name="parent_id" ref="website.main_menu"/>
   <field name="sequence" type="int">60</field>
</record>
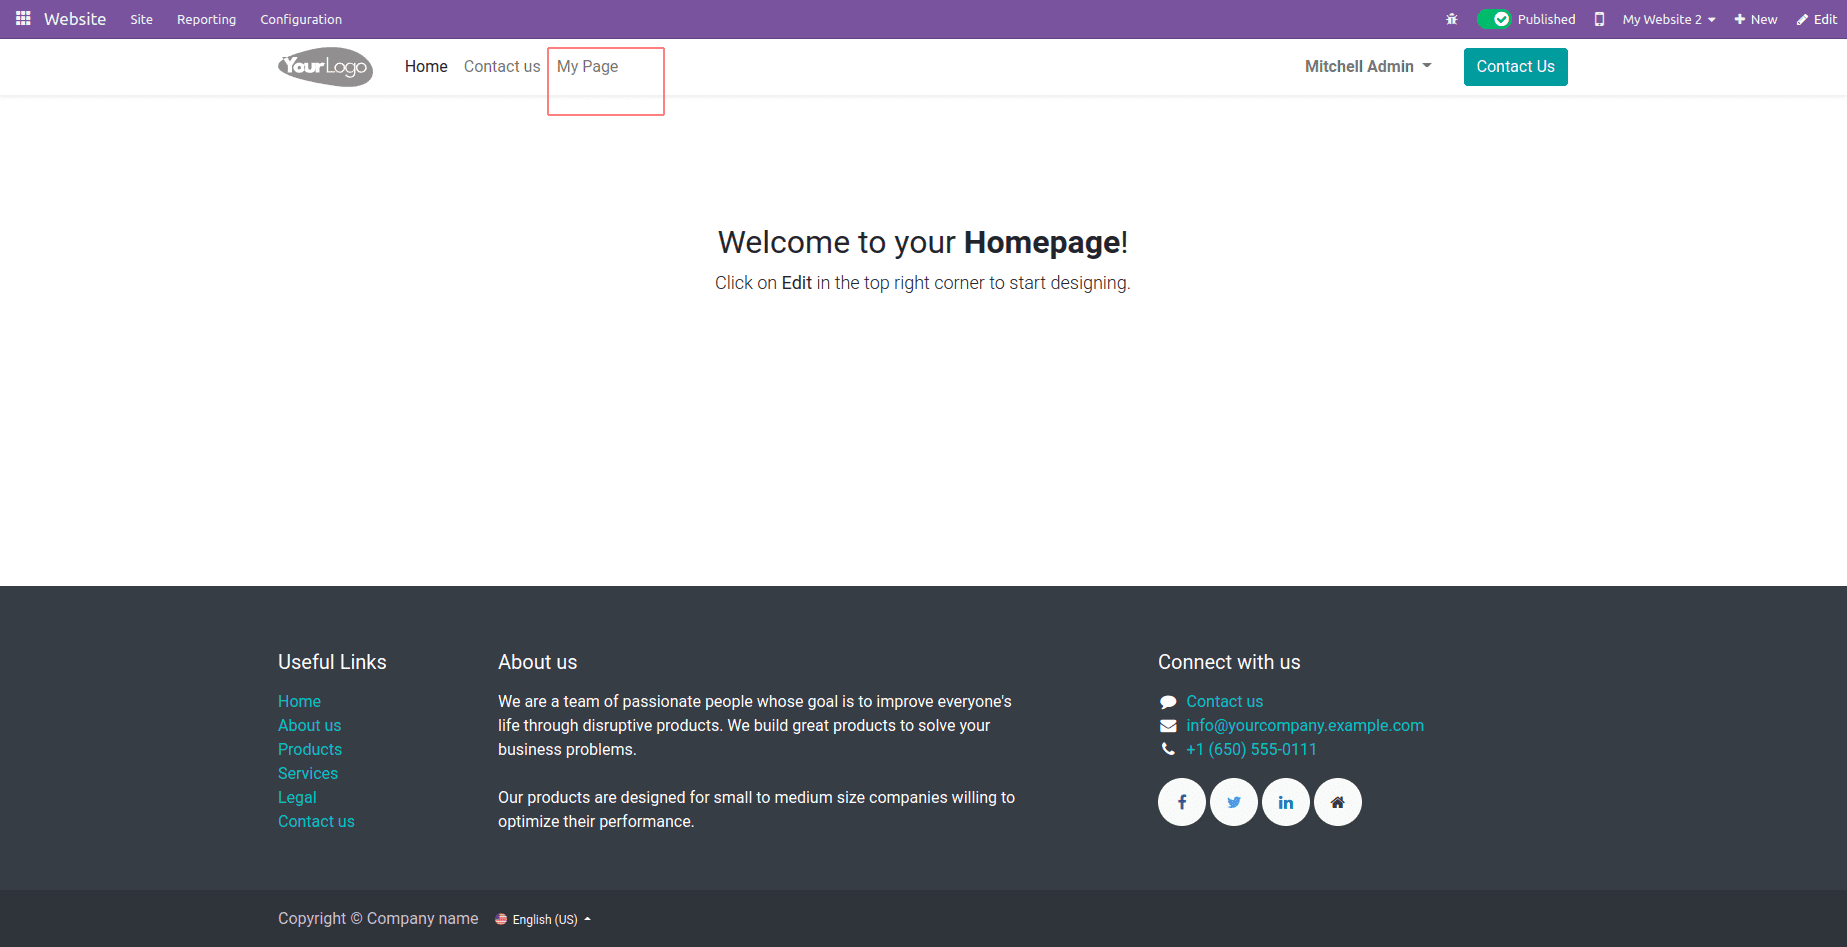
The above code creates a menu item labeled "My Page" and links it to the previously defined custom page.
So, the created menu will look like the image given below:

By clicking on this menu, you will be redirected to the page that we created, as shown in the image below.

To take custom page creation further, Odoo 16 offers advanced features and customizations. Explore the use of QWeb templates for building more complex and dynamic pages. Additionally, learn how to inherit from existing templates to maintain consistency across the website.
When crafting custom pages in Odoo 16, adhering to best practices is crucial. Use meaningful names for elements, keep the code organized, and follow Odoo's coding guidelines to ensure maintainability and scalability.
Creating custom pages in Odoo 16 using XML code empowers website owners to personalize their online presence and cater to specific business needs. Armed with a deeper understanding of the XML code structure and advanced features, Odoo users can confidently craft unique and engaging custom pages.
Now, let's see how to create a mega menu in Odoo.
In Odoo 16, creating a mega menu can significantly enhance the user experience and improve navigation on your website. A mega menu is a type of dropdown menu that displays multiple options, giving visitors quick access to various sections or pages.
Before diving into the technical aspects, it's essential to understand the basic structure of a mega menu in Odoo. The mega menu is defined within a "website.menu" record and comprises various HTML elements and classes to achieve the desired layout and design.
<?xml version="1.0" encoding="utf-8"?>
<odoo>
   <record id="menu_events" model="website.menu">
       <field name="name">Event Management</field>
       <field name="url">/events</field>
       <field name="parent_id" ref="website.main_menu"/>
       <field name="sequence" type="int">20</field>
       <field name="is_mega_menu">True</field>
       <field name="mega_menu_content" type="html">
           <section class="event-section">
               <div class="container">
                   <div class="row py-4">
                       <div class="col-lg-12">
                           <h3 class="mb-3">Upcoming Events</h3>
                           <ul class="list-unstyled">
                               <li>
                                   <a href="#" class="text-dark d-flex align-items-center text-decoration-none">
                                       <span class="fa fa-caret-right mr-2"></span>
                                       <span>Event 1</span>
                                   </a>
                               </li>
                               <li>
                                   <a href="#" class="text-dark d-flex align-items-center text-decoration-none">
                                       <span class="fa fa-caret-right mr-2"></span>
                                       <span>Event 2</span>
                                   </a>
                               </li>
                           </ul>
                       </div>
                   </div>
               </div>
           </section>
       </field>
   </record>
</odoo>
This XML code defines a simple mega menu with an "Upcoming Events" section containing two event links. You can further customize and expand the mega menu as needed by adding more rows, columns, and elements to suit your requirements.
Now, we can explain through code
*<record id="menu_events" model="website.menu">: This creates a new record of the "website.menu" model with the identifier "menu_events."
*<field name="name">Event Management</field>: This sets the display name of the mega menu to "Event Management.
*<field name="url">/events</field>: This sets the URL that the mega menu item links to. In this case, it links to "/events."
*<field name="parent_id" ref="website.main_menu"/>: This specifies that the mega menu item is a child of the menu item with the identifier "website.main_menu." It means the mega menu will be displayed under the main menu.
*<field name="is_mega_menu">True</field>: This field is set to "True," indicating that this is a mega menu.
*<field name="mega_menu_content" type="html">: This field contains the HTML content that defines the structure and elements of the mega menu.
*<section class="event-section">: This creates a section with the CSS class "event-section" to style the mega menu content.
And the created mega menu, as shown in the given image below, will look like this.

Mega menus offer an excellent way to organize and present a vast amount of information on your website, making it easier for users to find what they need quickly. Experiment with different layouts, styles, and content to create a mega menu that best suits your website's needs.