Image attachment functionality is crucial for modern Flutter applications, enabling users to seamlessly share and interact with visual content. Whether it's uploading images from the device's gallery, capturing new photos, or previewing images before sending, integrating robust image attachment features enhances user engagement and app versatility.
In this blog post, we'll explore how to implement and optimize image attachment capabilities in Flutter.
Firstly, you need to grant read permissions for image in your Flutter application's AndroidManifest.xml file (your_app_path/android/app/src/main/AndroidManifest.xml), as shown below:
<uses-permission android:name="android.permission.READ_MEDIA_IMAGES"/>
Now, let's add an attachment icon to the body of your Flutter page. To achieve this, import the image_picker package into your Dart file as follows:
import 'package:image_picker/image_picker.dart';
In the terminal, run the following command to install the percent_indicator package:
flutter pub add image_picker
Below is the code that includes an attachment icon:
import 'package:flutter/material.dart';
class ImagePage extends StatefulWidget {
  const ImagePage({super.key, required this.title});
  final String title;
  @override
  State<ImagePage> createState() => _ImagePageState();
}
class _ImagePageState extends State<ImagePage> {
  @override
  void dispose() {
    super.dispose();
  }
  @override
  Widget build(BuildContext context) {
    return Scaffold(
      appBar: AppBar(
        backgroundColor: Theme.of(context).colorScheme.inversePrimary,
        title: Text(widget.title),
      ),
      body: Center(
        child: Column(
          mainAxisAlignment: MainAxisAlignment.center,
          children: <Widget>[
            const Text(
              'Upload Image:',
              style: TextStyle(fontWeight: FontWeight.bold, fontSize: 22),
            ),
            SizedBox(
              height: 10,
            ),
            IconButton(
              icon: Icon(Icons.attach_file),
              onPressed: () async {},
            ),
          ],
        ),
      ),
    );
  }
}
The output of the code is given below:

Let's add the following code to Icons.attach_file onPressed function.
            XFile? file = await uploadFile(context);
                if (file != null) {
                  setState(() {
                    pickedFile = file;
                    fileName = file.name;
                    filePath = file.path;
                    checkfile = true;
                    setFileName();
                  });
                }
inside the onPressed callback, await uploadFile(context) waits for the user to select an image. The selected file, file name, and path are updated in pickedFile, fileName, and filePath respectively. It sets checkfile to true, indicating that a file has been selected.
The uploadFile function is given below:
 Future<XFile?> uploadFile(BuildContext context) async {
    final picker = ImagePicker();
    final XFile? pickedFile =
    await picker.pickImage(source: ImageSource.gallery);
    if (pickedFile != null) {
      return pickedFile;
    } else {
      ScaffoldMessenger.of(context).showSnackBar(
        SnackBar(content: Text('No image selected')),
      );
      return null;
    }
  }
Here final picker = ImagePicker(); creates an instance of the ImagePicker class.
final XFile? pickedFile = await picker.pickImage(source: ImageSource.gallery); uses the ImagePicker instance to permit the person to pick out a photo from the gallery. The characteristic pickImage is asynchronous and returns a destiny, which resolves to an XFile if a photo is selected or null if no image is selected.
void setFileName() {
    setState(() {
      _fileNameController.text = fileName;
    });
  }
The complete code is given below:
import 'package:flutter/cupertino.dart';
import 'package:flutter/material.dart';
import 'dart:async';
import 'package:image_picker/image_picker.dart';
class ImagePage extends StatefulWidget {
  const ImagePage({super.key, required this.title});
  final String title;
  @override
  State<ImagePage> createState() => _ImagePageState();
}
class _ImagePageState extends State<ImagePage> {
  XFile? pickedFile;
  String fileName = '';
  String filePath = '';
  bool checkfile = false;
  TextEditingController _fileNameController = TextEditingController();
  @override
  void dispose() {
    _fileNameController.dispose();
    super.dispose();
  }
  void setFileName() {
    setState(() {
      _fileNameController.text = fileName;
    });
  }
  Future<XFile?> uploadFile(BuildContext context) async {
    final picker = ImagePicker();
    final XFile? pickedFile =
    await picker.pickImage(source: ImageSource.gallery);
    if (pickedFile != null) {
      return pickedFile;
    } else {
      ScaffoldMessenger.of(context).showSnackBar(
        SnackBar(content: Text('No image selected')),
      );
      return null;
    }
  }
  @override
  Widget build(BuildContext context) {
    return Scaffold(
      appBar: AppBar(
        backgroundColor: Theme.of(context).colorScheme.inversePrimary,
        title: Text(widget.title),
      ),
      body: Center(
        child: Column(
          mainAxisAlignment: MainAxisAlignment.center,
          children: <Widget>[
            const Text(
              'Upload Image:',
              style: TextStyle(fontWeight: FontWeight.bold, fontSize: 22),
            ),
            SizedBox(
              height: 10,
            ),
            IconButton(
              icon: Icon(Icons.attach_file),
              onPressed: () async {
                XFile? file = await uploadFile(context);
                if (file != null) {
                  setState(() {
                    pickedFile = file;
                    fileName = file.name;
                    filePath = file.path;
                    checkfile = true;
                    setFileName();
                  });
                }
              },
            ),
            TextField(
              controller: _fileNameController,
              decoration: InputDecoration(
                border: InputBorder.none,
                labelStyle: TextStyle(color: Colors.grey[350]),
                contentPadding: EdgeInsets.symmetric(
                    horizontal: 65.0),
              ),
              readOnly: true,
              onChanged: (newValue) {
                setState(() {
                  fileName = newValue;
                });
              },
            ),
          ],
        ),
      ),
    );
  }
}
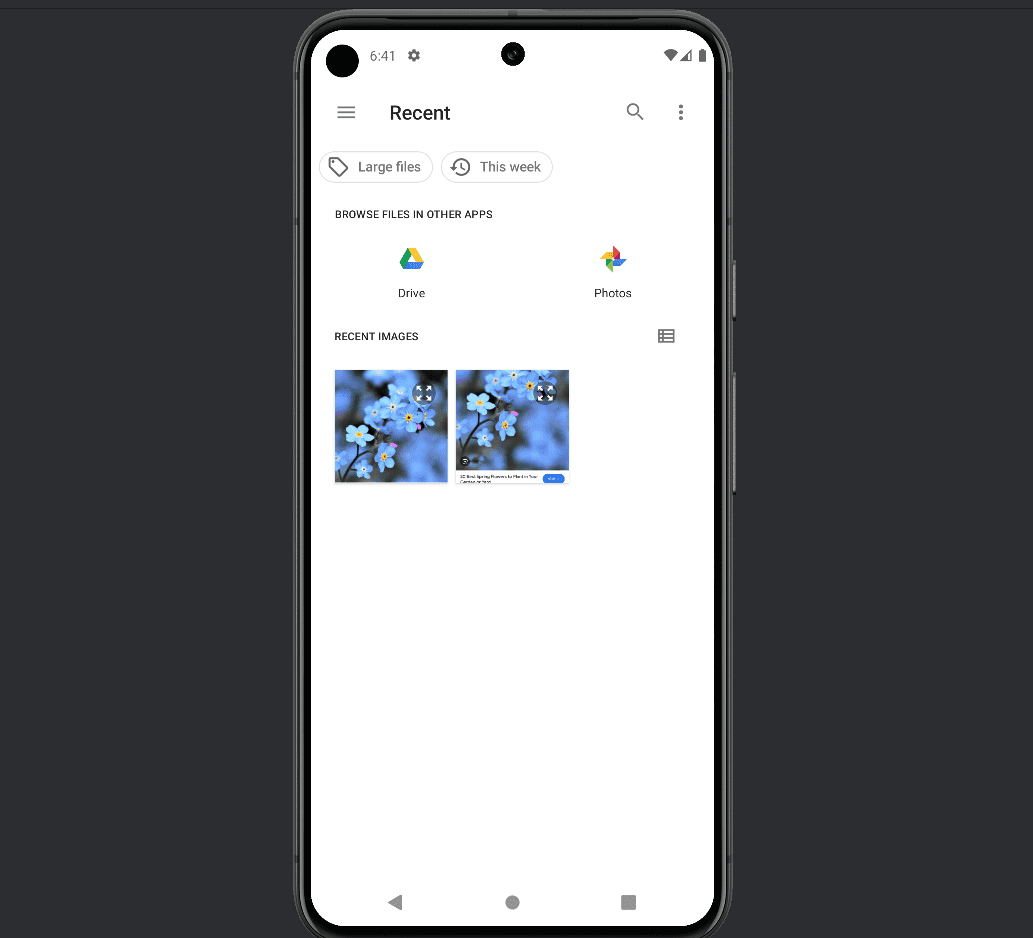
When clicking on the attach icon, you can choose an image as shown below:
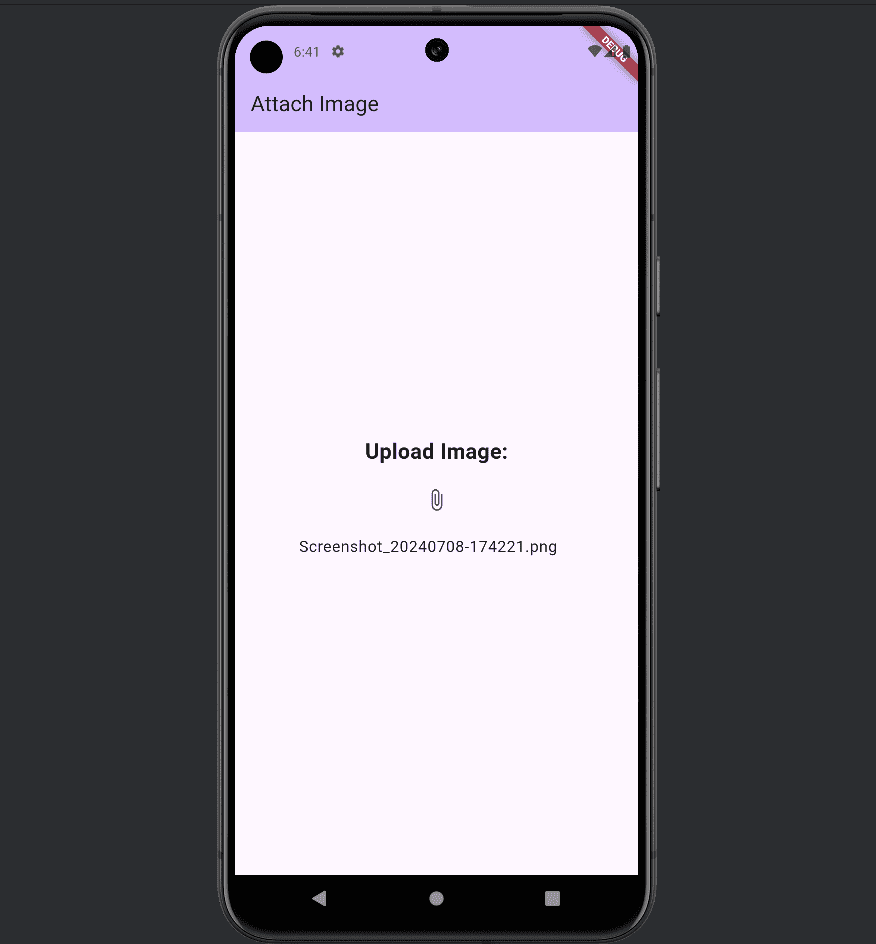
After choosing, you get the result as below:
Integrating image attachment capability for your Flutter application enhances user interaction and enriches the overall experience. With Flutter's powerful and flexible equipment, enforcing features like choosing snapshots from the gallery or shooting new snapshots is easy and green. By following the steps outlined in this publication, you may create a continuing and intuitive photograph attachment system.
To read more about How to Create Various Animated Toggles in Flutter, refer to our blog How to Create Various Animated Toggles in Flutter.