Odoo Time-Off Module is an effective solution to manage your employee leave management worries. Users can exclusively manage the employee leaves and approve or reject the leave requests, while the employees can create, request or send their leave requests through emails using this software platform. Allocations, dashboards, public holidays, activity kinds, and other features may all be configured with the aid of Odoo 16's time Off module. For employees of US companies, configuring Time Off kinds is sufficient.
Time Off Types and Adding a New One
Time off types are represented by categories such as volunteer duties, personal leave, vacation time, or sick time. Users can designate a time off category and schedule time off against it when they need to take time off.
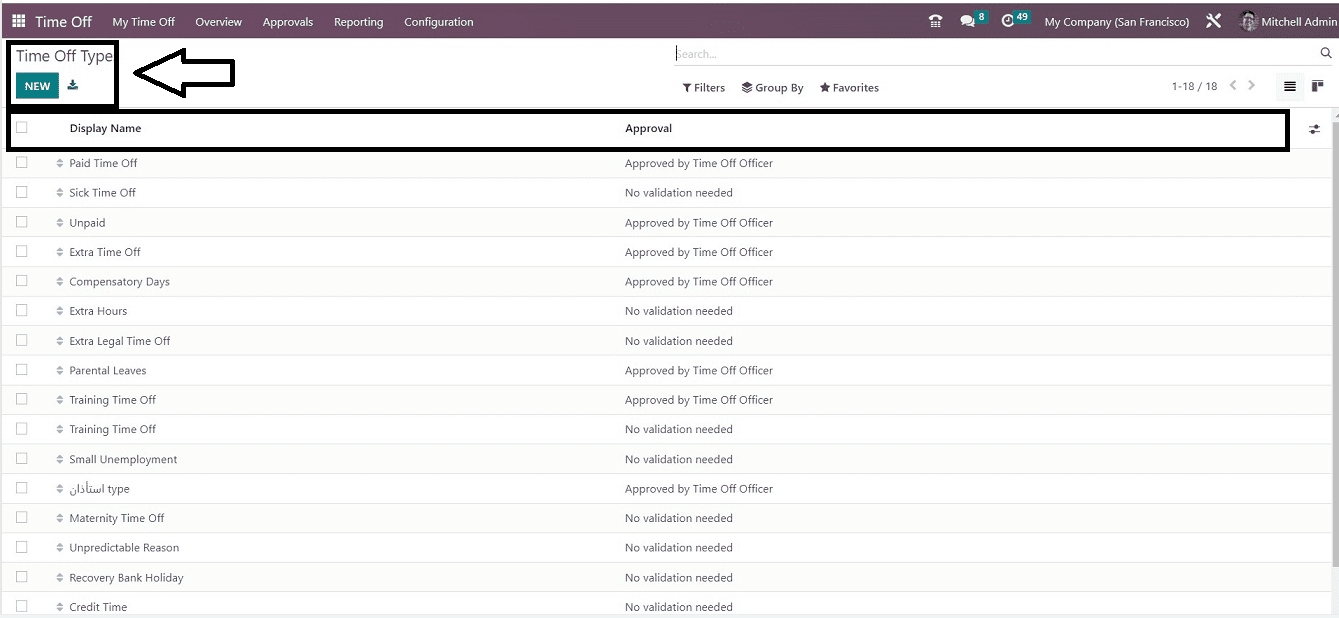
In Odoo 16 Time-Off module, Time Off Types is represented by the user-defined types of time off. Setting the type of time off for personal leave, vacation, or sick time using the Time Off platform is simple. Every employee's absence from a company is documented and recorded in the software. After selecting the” Time Off Types” option from the “Configuration” section, the user can create a new Time Off Type.

All previously generated time-Off types are listed on the"Time Off Types" menu site under "Display Name" and"Approval." you can change this dashboard list view into a Kanbannview by clicking the respective icon on the upper right corner of the page.“Filter,” “Group By,” and “Favorites” options are provided to filter desireddetails and to create new custom filters.
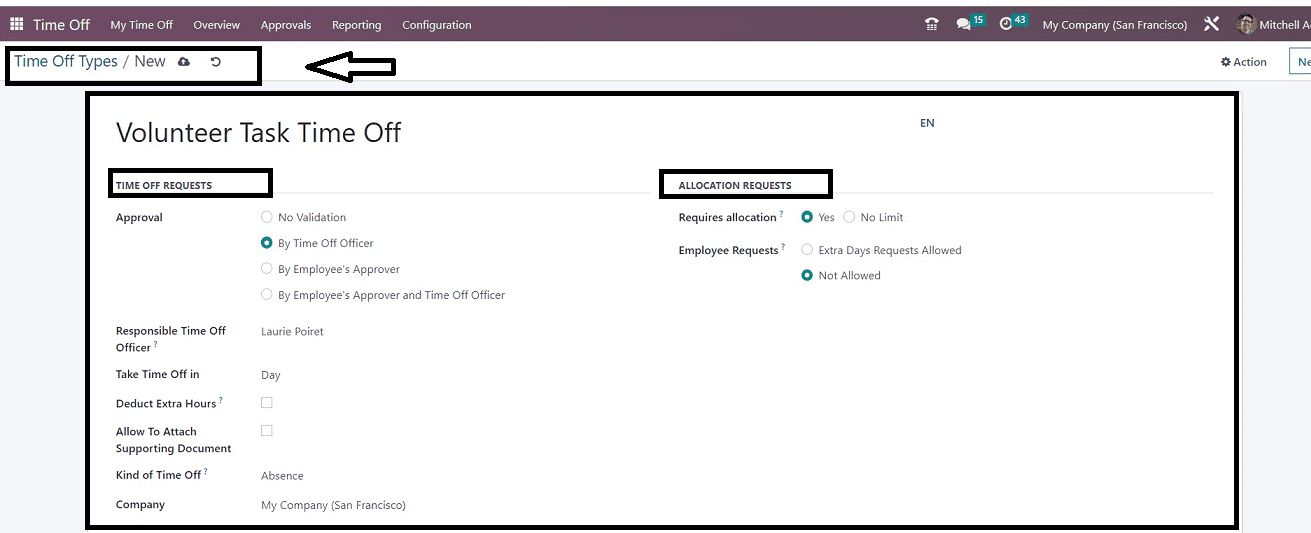
Click the “NEW” button to create a brand new Time-Off Typethat will lead us to a configuration form, as shown below.

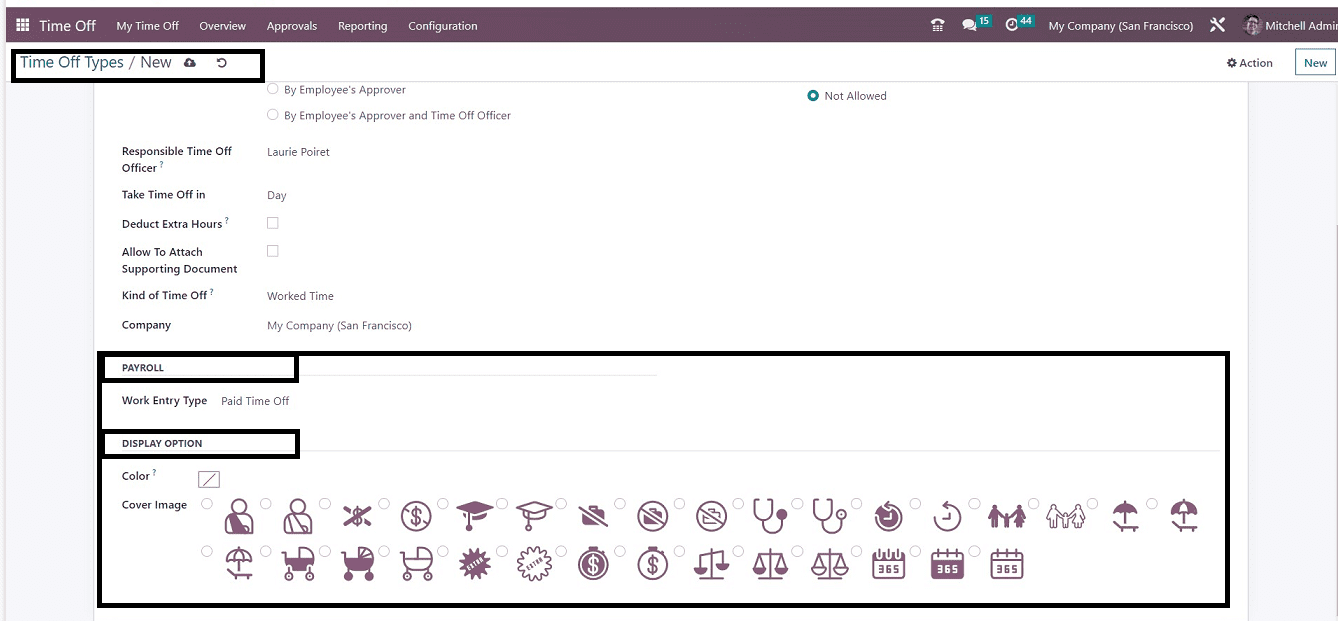
The form is long because it has several sections, so you can scroll down to see the entire detail. In the following section, we can go into depth about configuring new Time Off Types. The form contains three tab sections such as “TIME OFF REQUESTS,” “ALLOCATION REQUESTS,” “PAYROLL,” and “DISPLAY OPTION.”
TIME OFF REQUEST Section: In the form provided, enter a name for your new Time Off Type in the first empty area.
* You can specify the criteria for approval under the “TIME OFF REQUESTS” Section. Selecting the “No Validation” option will allow you to get rid of time off approvals. If not, you can select “By Employee Approver” or “By Time Off Officer” as the “Approval” method. It is indicated that the request needs two approvals to be confirmed by choosing the By Employee's Approver and Time Off Officer option.
* You will receive a new field titled "Responsible Time Off Officer," where you can choose the officer/responsible person who will be informed to approve time off requests or allocations.
* You can choose the length of the time off as a day, half day, or hours in the “Take Time Off” area.
* Once time off of this kind is allowed, extra hours from the attendance will be subtracted by turning on the “Deduct Extra Hours” option.
* By turning on the “Allow To Attach Supporting Document” field, you can attach any files or documents of supporting materials.
* The “Kind of Time Off “in the provided field might be either the absence or worked time. Also, select your company name from the dropdown list given on the “Company” line.
ALLOCATION REQUESTS Section
You will find the “Requires Allocation” option under the ”ALLOCATION REQUESTS tab.
* The Time Off requests must have a valid allocation, according to the “Yes” checkbox selection.
* If time off requests are permitted without previous allocation, the setting might be “No Limit.” You will be given a new field named “Employee Requests” if you choose the Yes option, where the user can request an allocation for himself or not.

PAYROLL Section: You can fill the “Work Entry Type” field by selecting from the list of options provided under the dropdown menu, which includes Paid Time Off, Attendance, Generic Time Off, Compensatory Time Off, Unpaid, Sick Time Off, etc.
DISPLAY OPTION Section: you can select a display color by choosing it from the “Color” field and also select a display image from the “Cover Image” section, as you can see from the above screenshot. After finishing the procedure, don't skip to save your information.
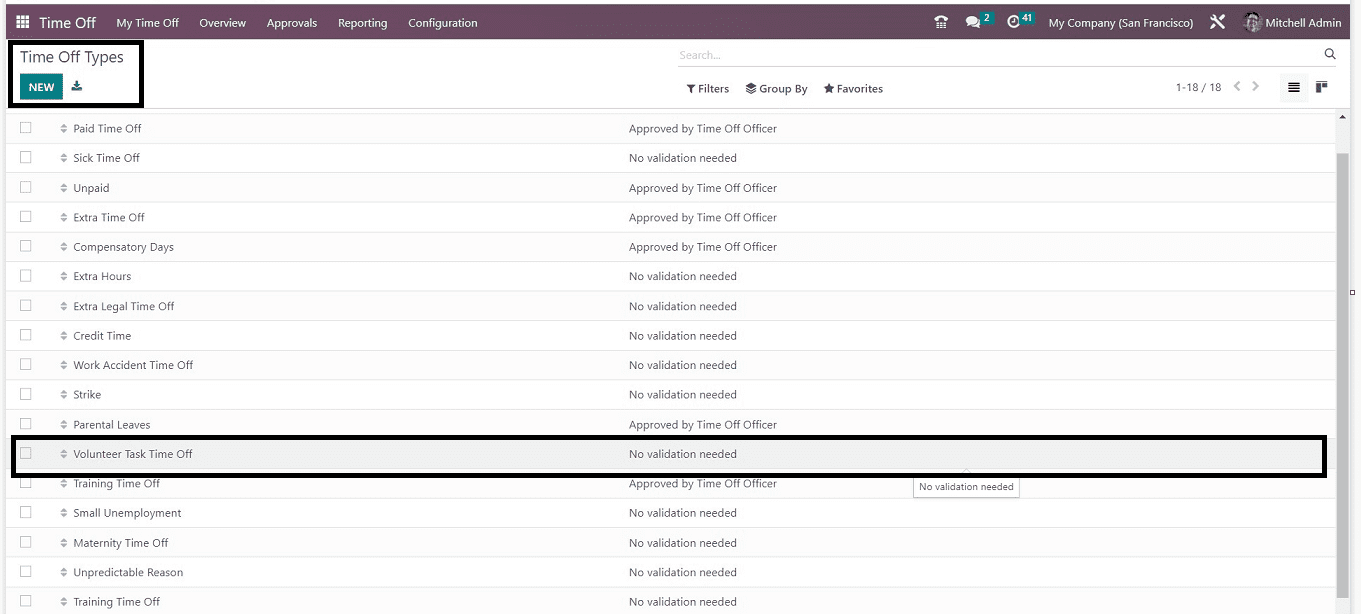
Now our newly created Time Off Type is added to the dashboard and ready to be used, as shown in the screenshot below.

We have discussed the creation of a new Time Off Type in this blog session so that users can easily categorize their leave categorize and assign them to the employees.