Payroll management is an integral part of business management. Considering the importance of Payroll management, Odoo has a separate module for managing payroll activities. Payrolls are complete salaries that employees receive from the company. Multiple factors constitute an employee's salary, including total work time, base pay, overtime, bonus, and awards. The Payroll module of Odoo is an advanced HR tool that the companies can use to manage the Payroll activities under them effortlessly.
This blog will give you a detailed overview of creating and managing employee contracts with the Odoo 15 Payroll module.
The Odoo Payroll management module is a highly advanced application that can help you manage all of the Payroll management activities with the support of the advanced features and tools of the module, making the procedures more efficient and effortless to handle. The Modules dashboard is shown in the image given below
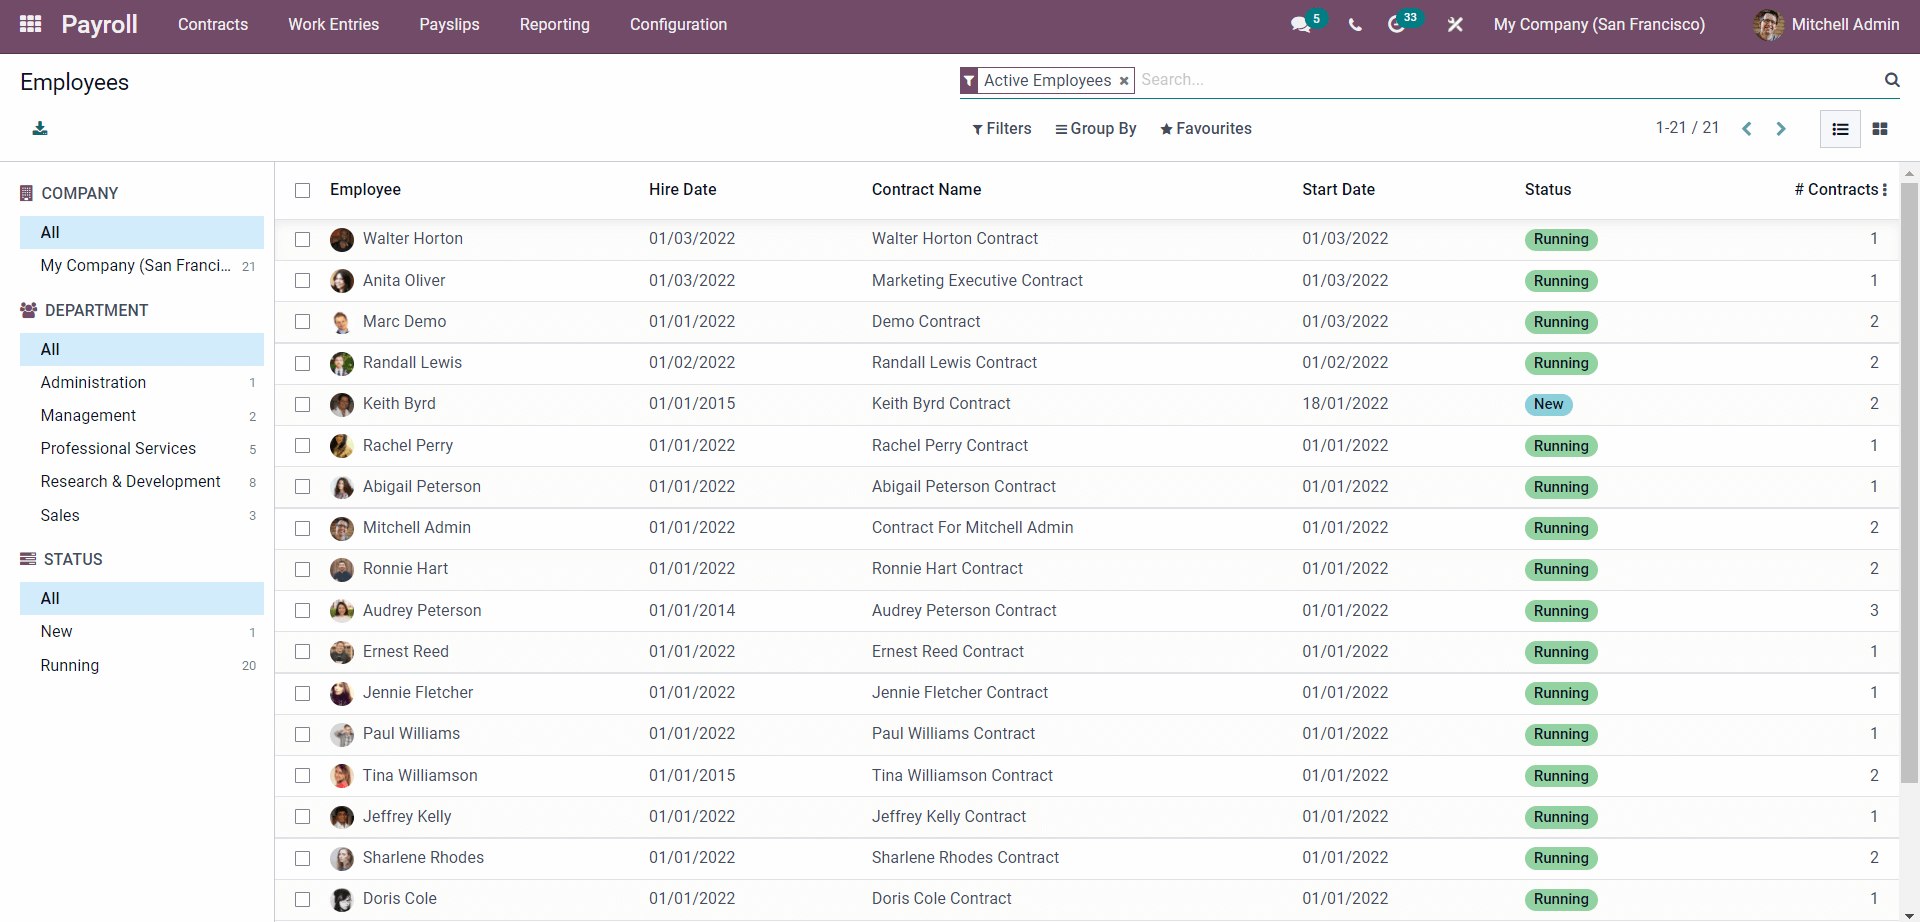
Payroll is integrated with the Employee module of Odoo. All employees concerning their contract status, their hiring date, and start date will be listed on the module's dashboard. You can use the filters as shown to the left side of the module's dashboard, as in the image shown below. In the module, click on the advanced
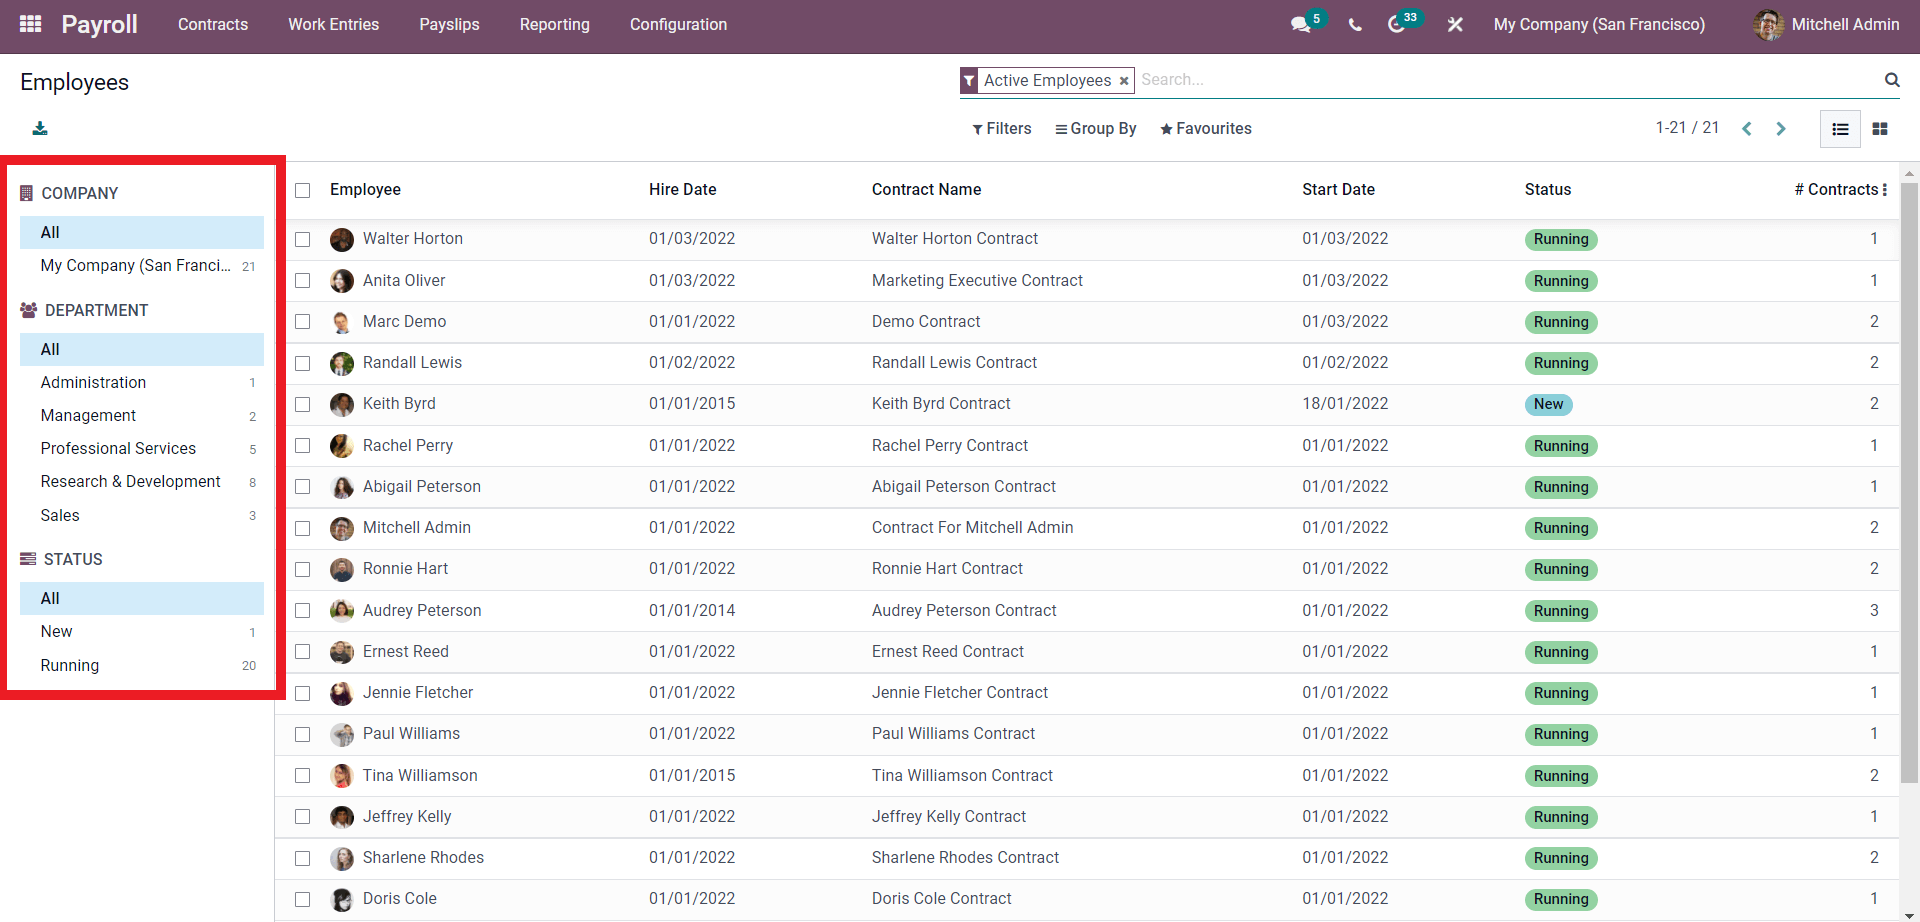
You can use the filtering options shown above to filter the long employee list to access them quickly and more efficiently. You can filter the employees by Company, department, or Status. Click on any of the employees for viewing their contract history, as shown below.
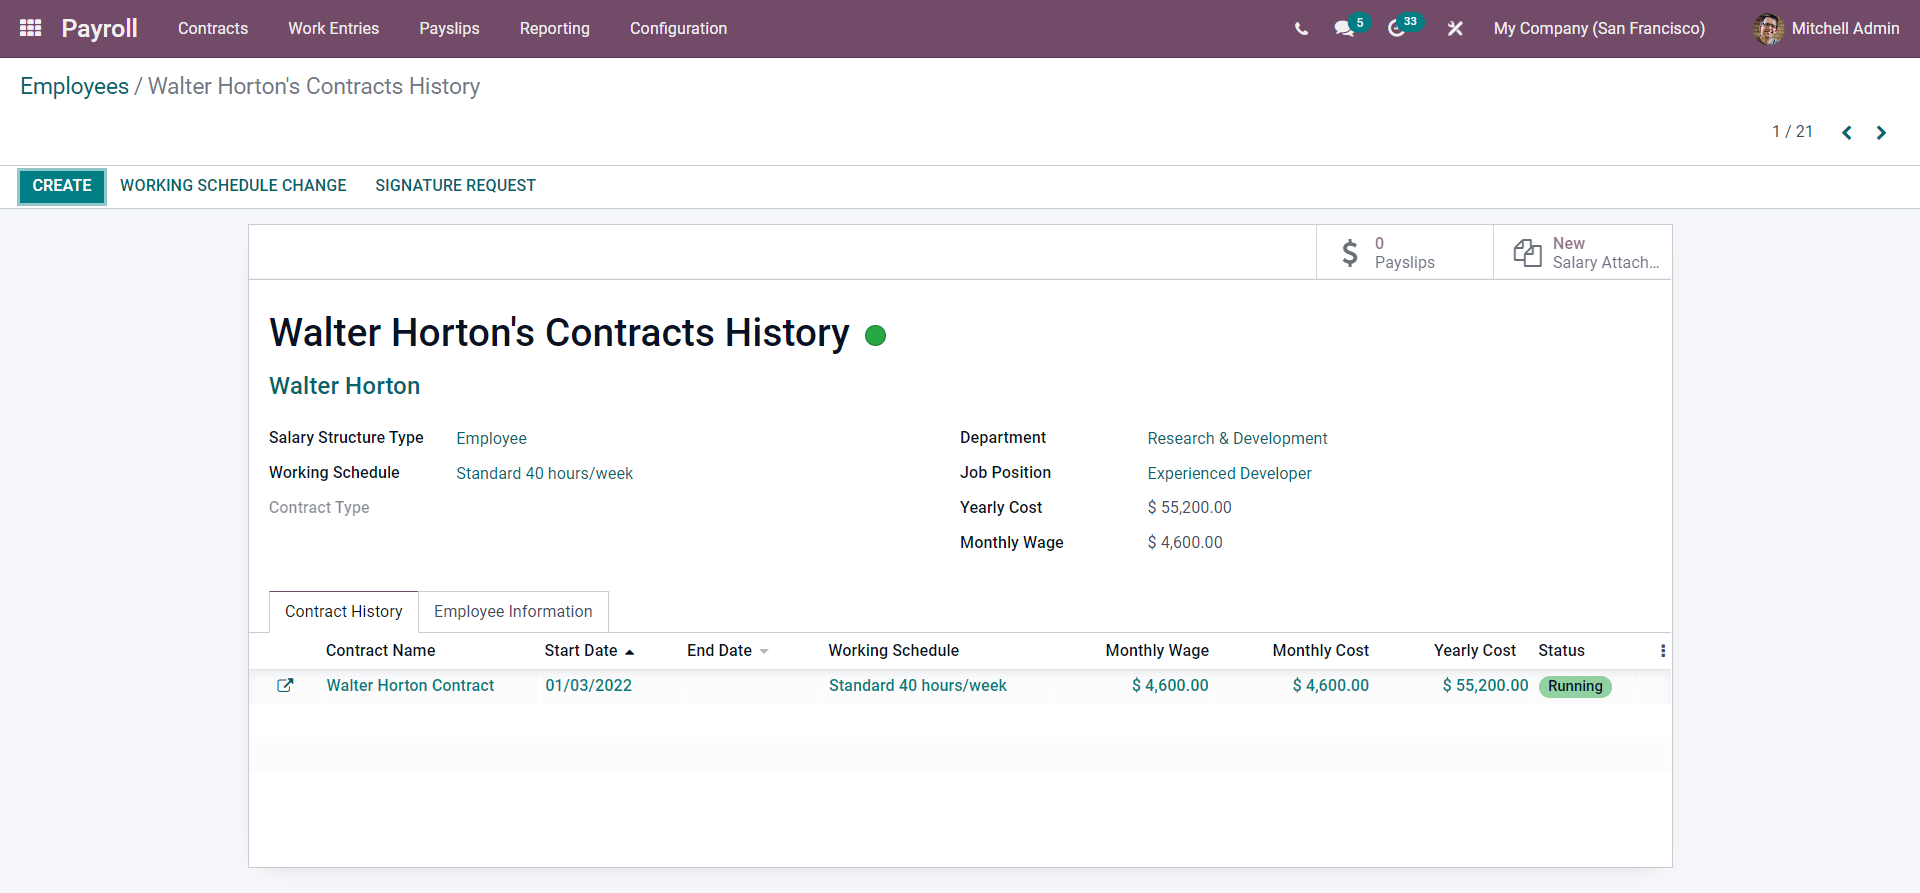
The contract history of the Employee information and other info on the employee will be displayed on this page. The salary structure type and working schedule type will be displayed on this page. The department, the job position, the yearly cost, and the Employee's monthly wage will be displayed here. Under the Contract History tab of the page. You can view the Employee contract. Click on the external button highlighted below to go to the employee contract page.
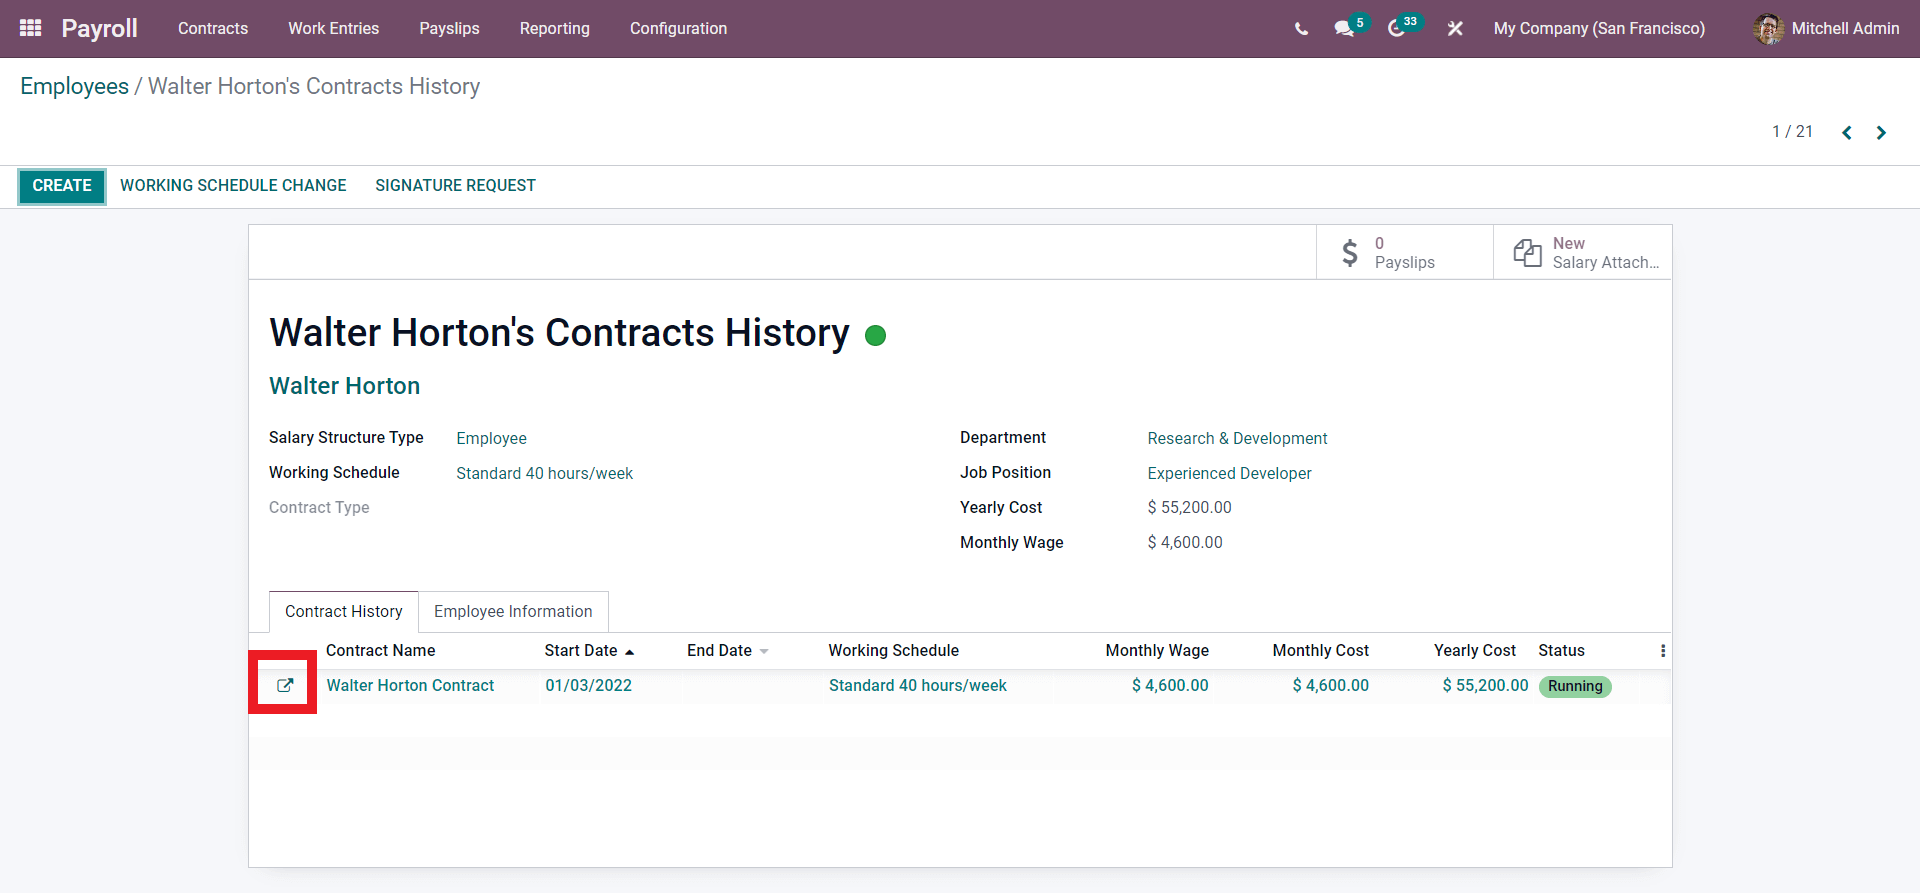
The external link will act as the pathway to the contract page for advanced configuration on the contract.
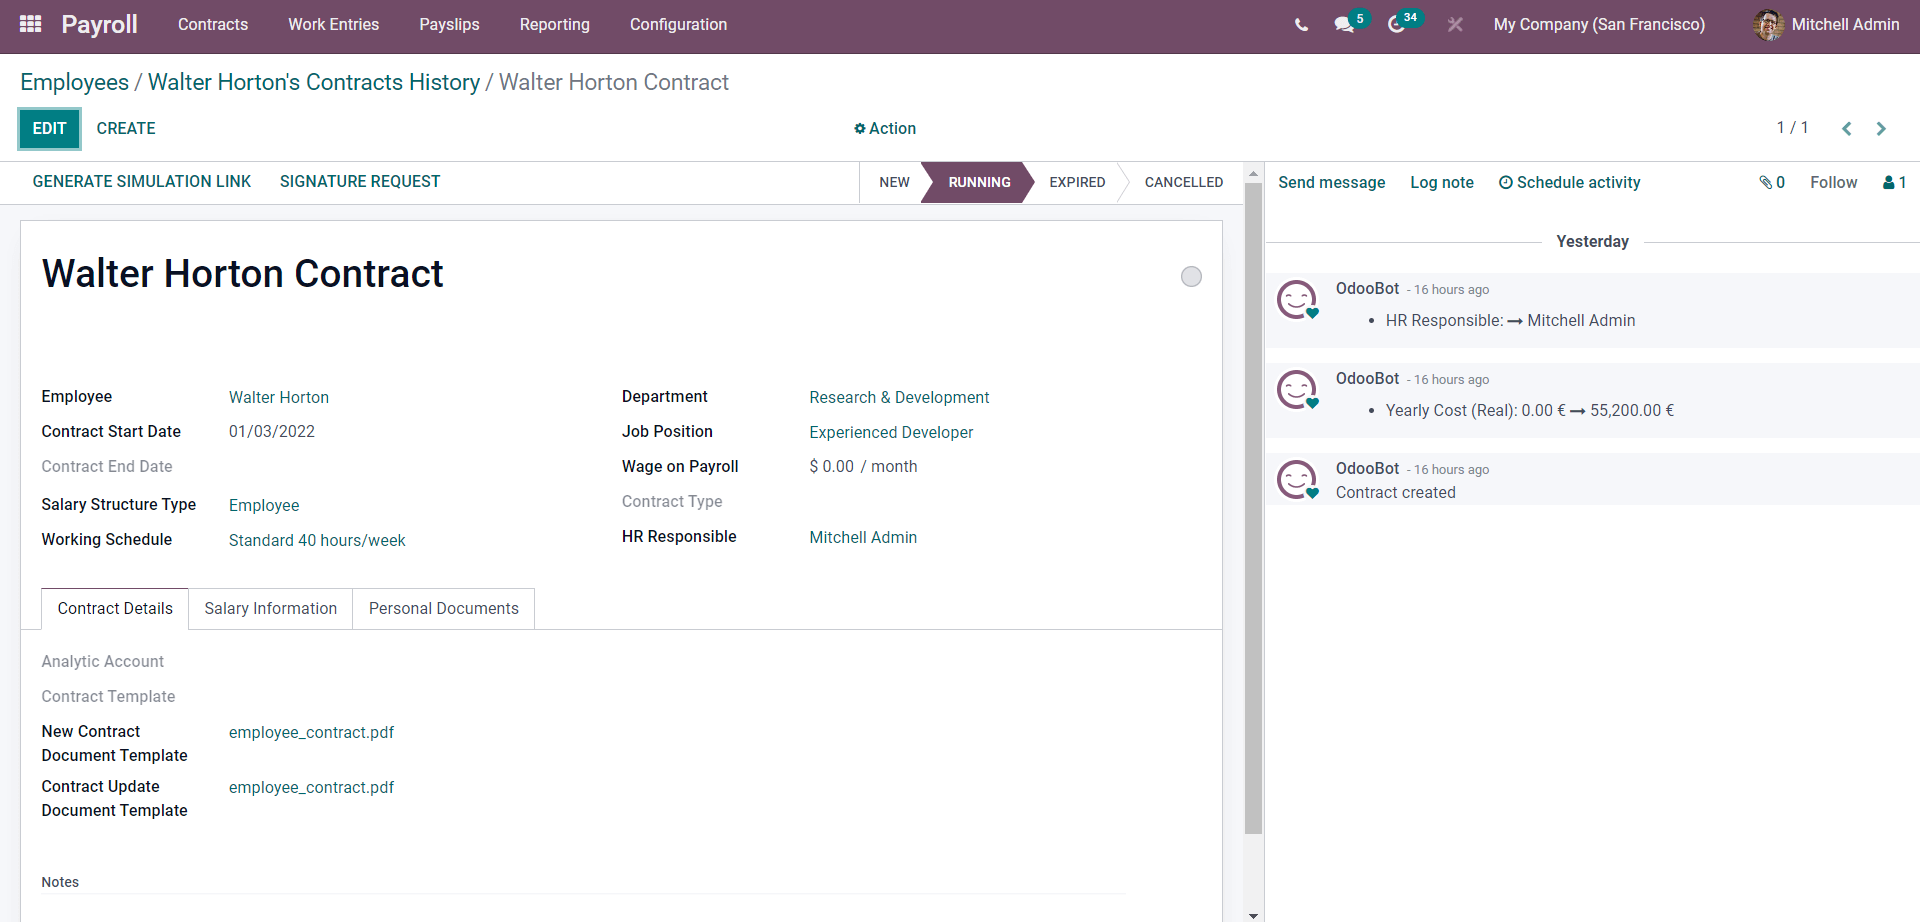
You can press the Edit button for configuring the already created employee contract.Creating employee contractsYou can instantly create employee contracts from the payroll module. The CREATE button can let you create a new contract.
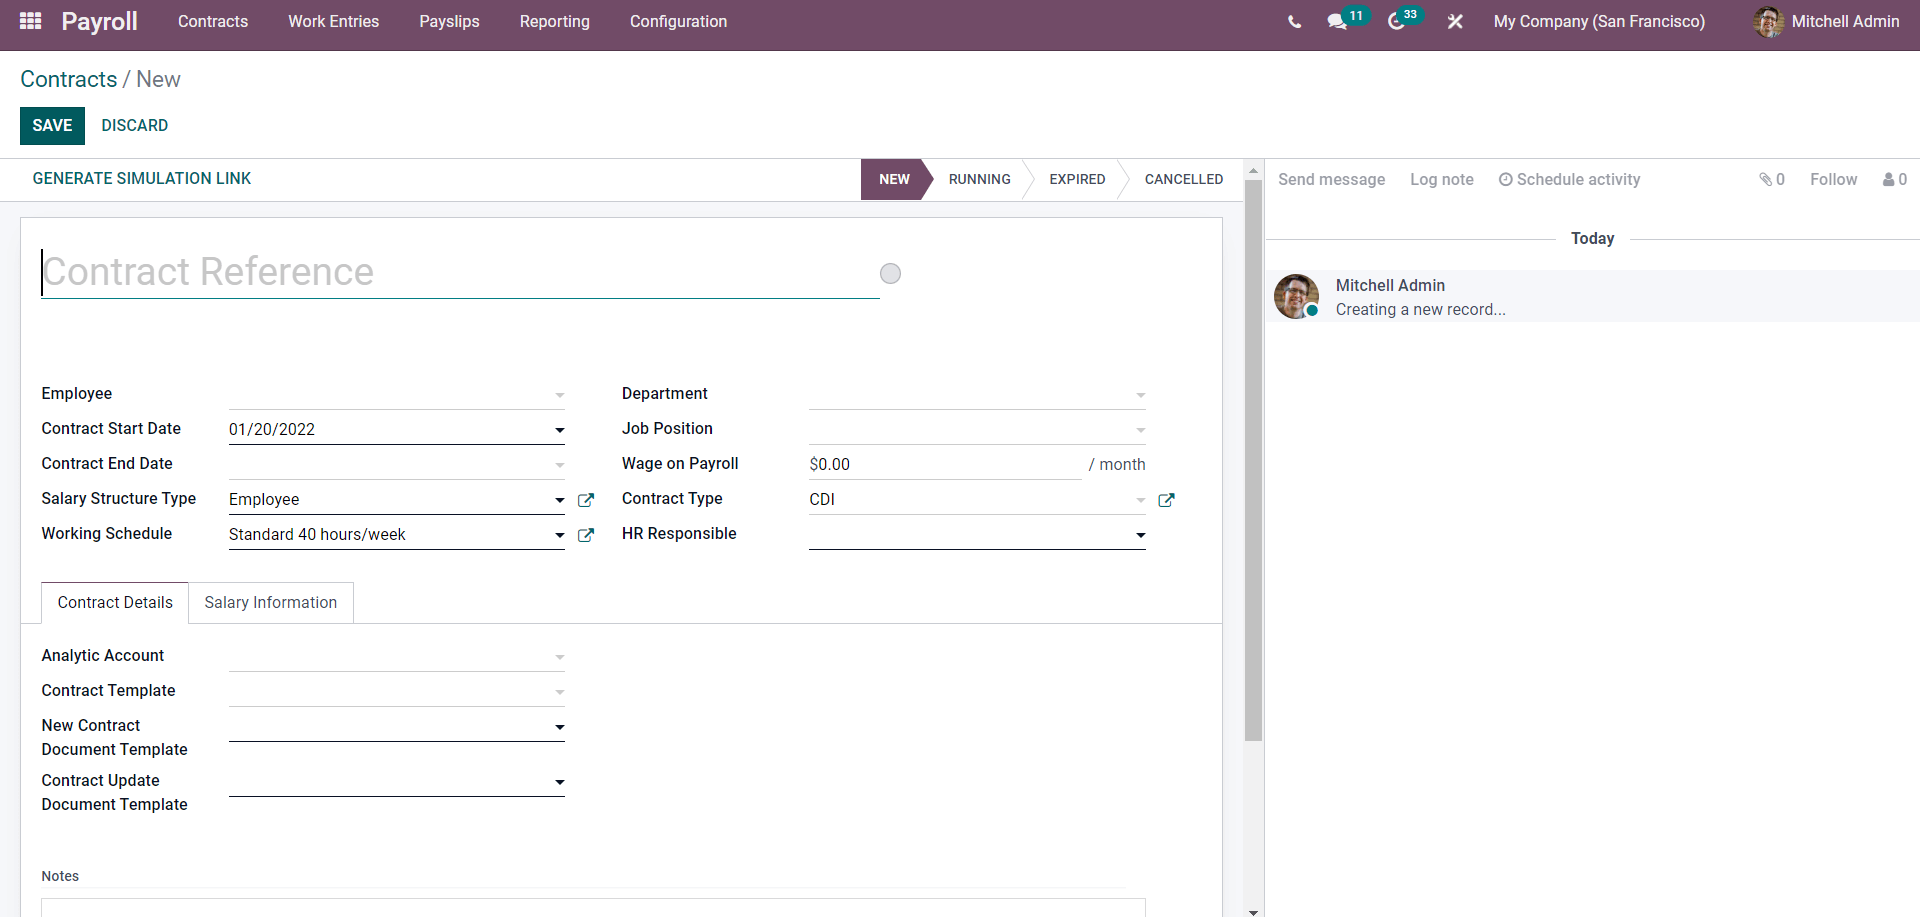
Contract configurations can begin by typing in the Contract reference name. The next step is choosing the Employee from the Employee field, as highlighted in the image below.
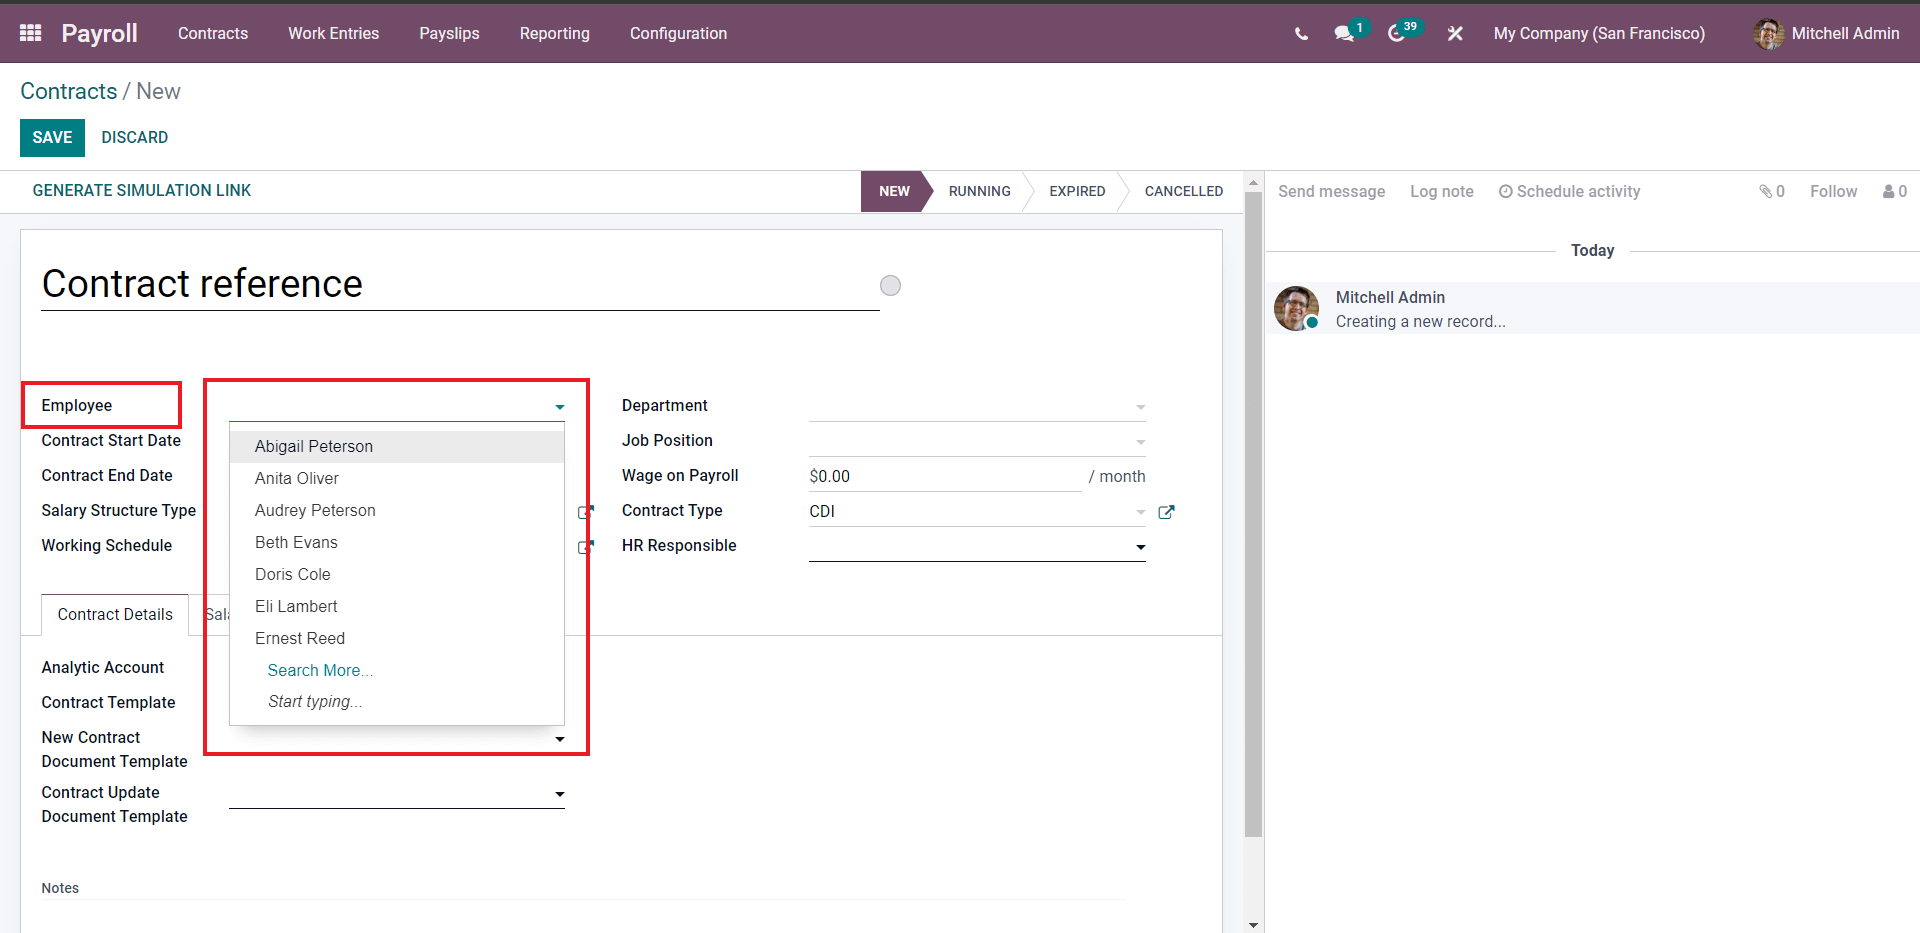
Select the employee from the list to apply the contract to. Click on Search more to have a complete list of employees.
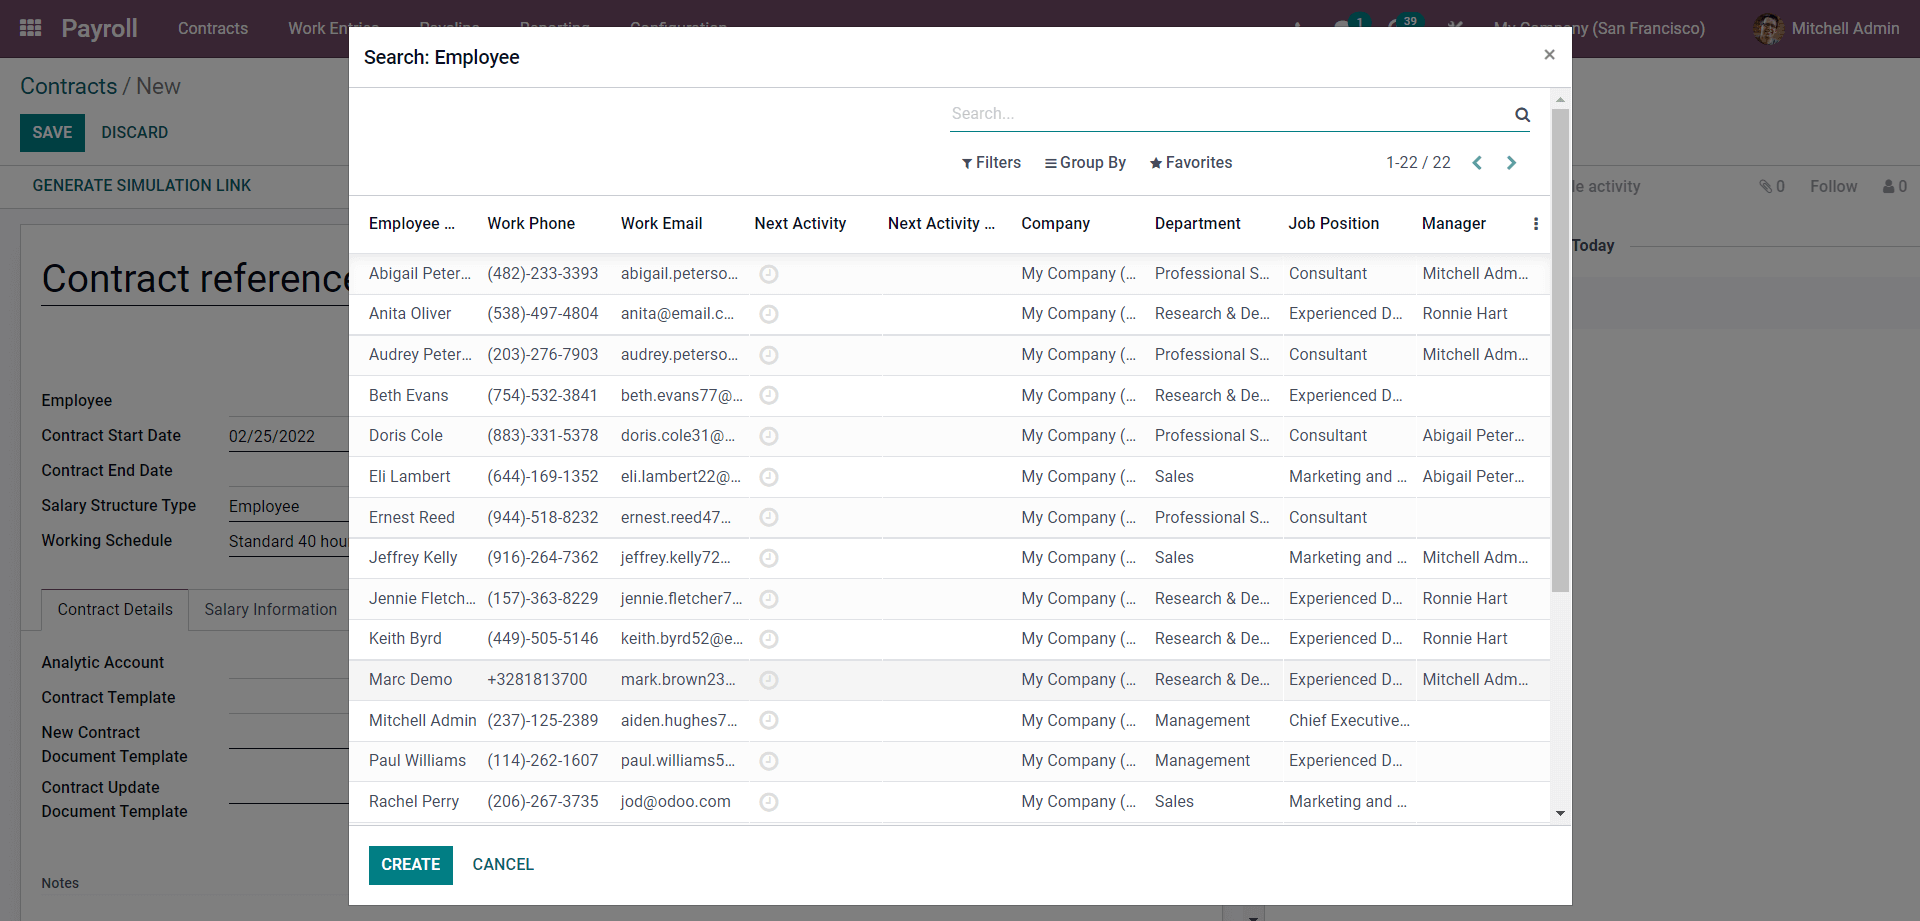
Select from the list or if you have to create a new meplyee click on CREATE.
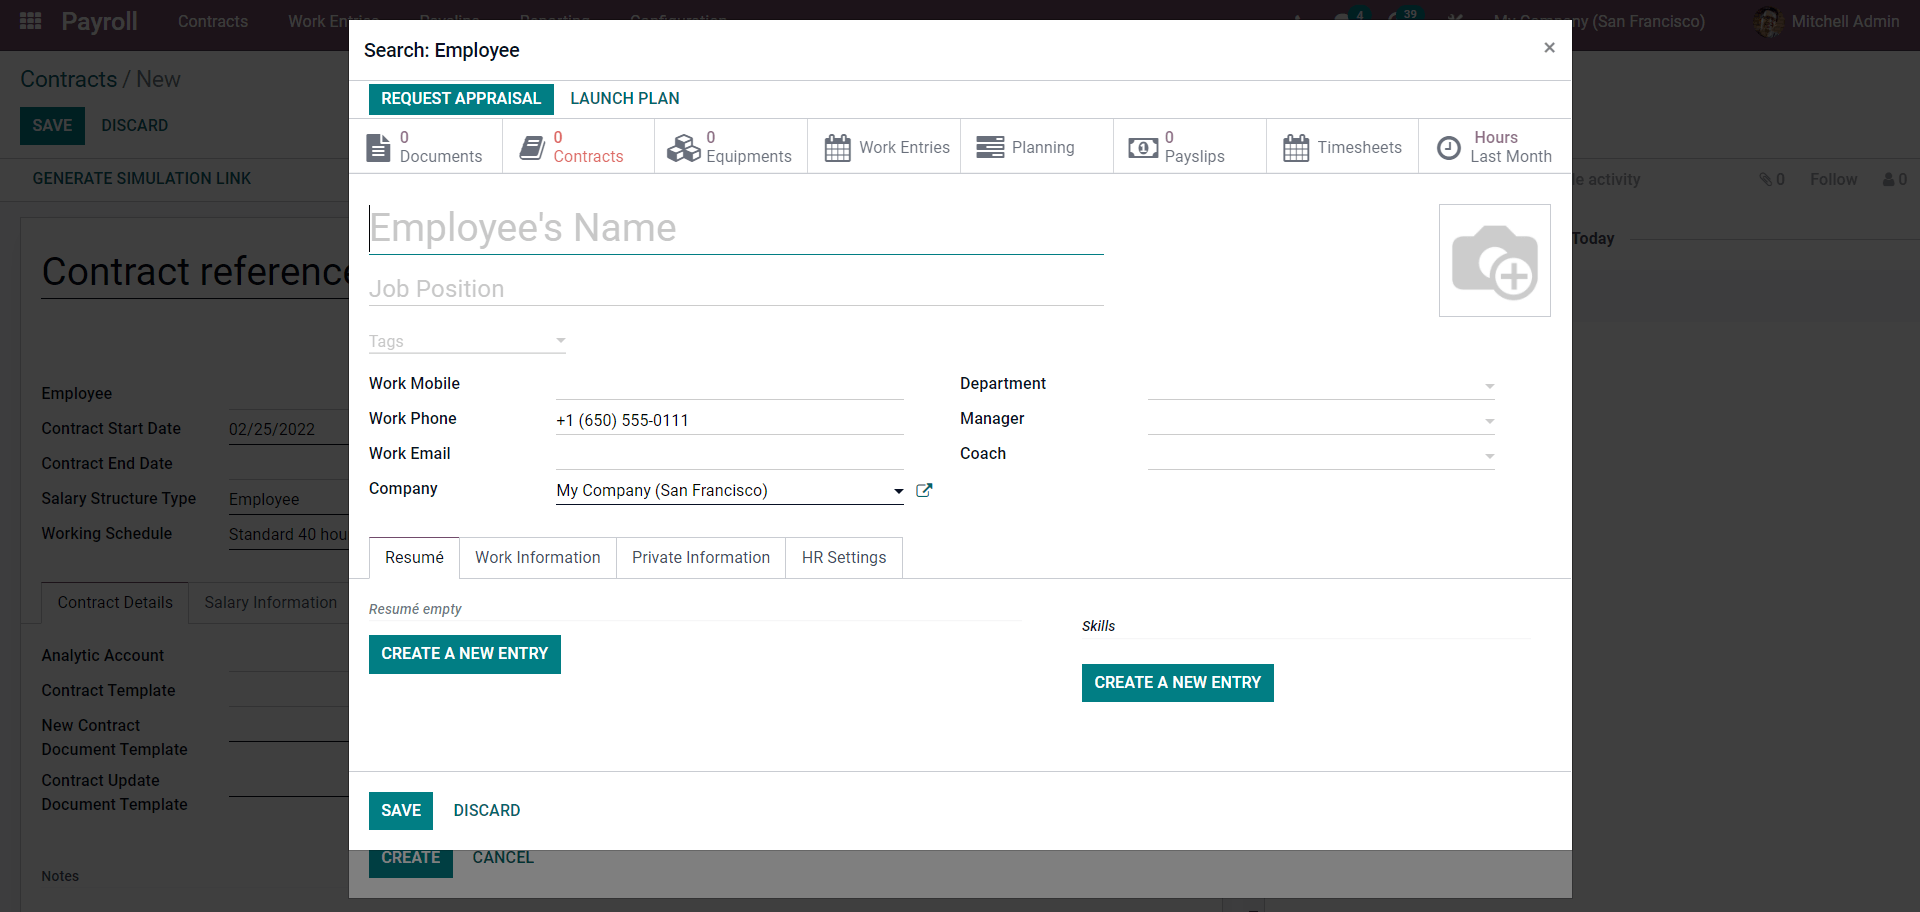
To know more about employee creation and management follow the link given below
Employee Profile Creation and Management with Odoo 15 Employee Module
After choosing the employee, all of the details on the employee will be auto-filled in the contract as shown below.
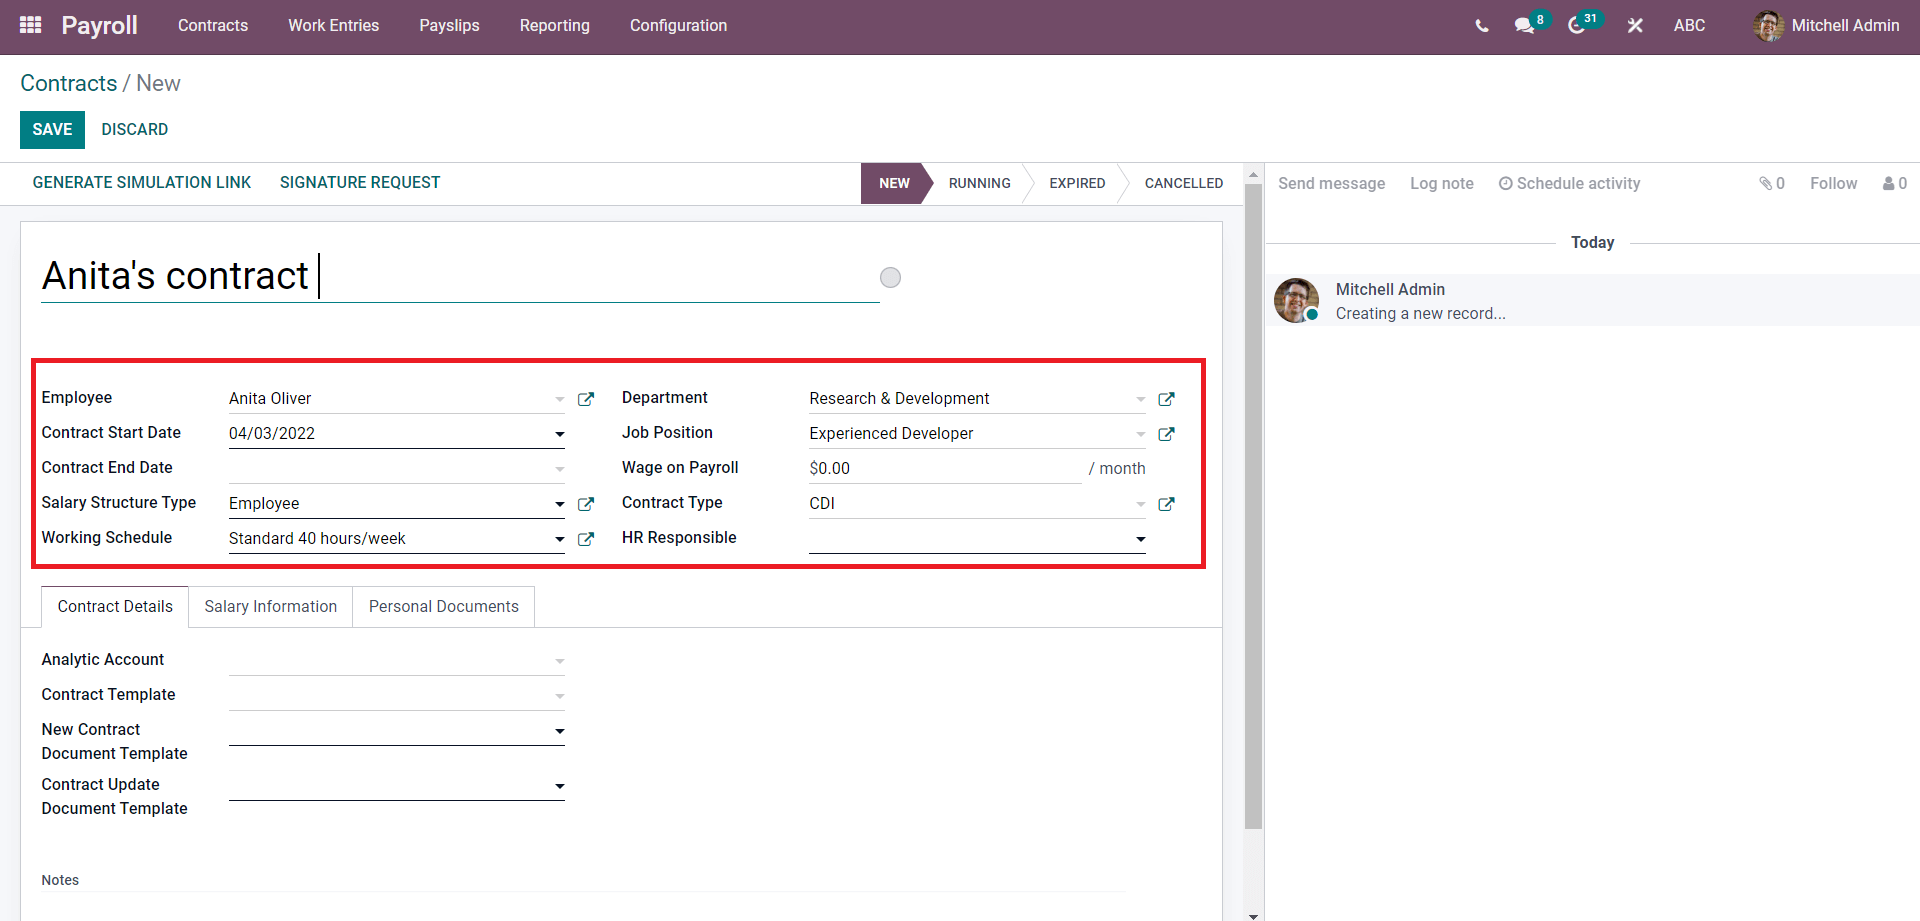
Here the contract is for Anita Oliver, and you can see that all of her information is automatically updated on their respective fields. Here you can note that only the contract Start date of the employee is given, and the end date is not given. To configure the start and the ending dates of the contracts, click on the concerning fields, and from the dropdown date field, you can choose the date. In the image given below, the end date of Anita has been updated.
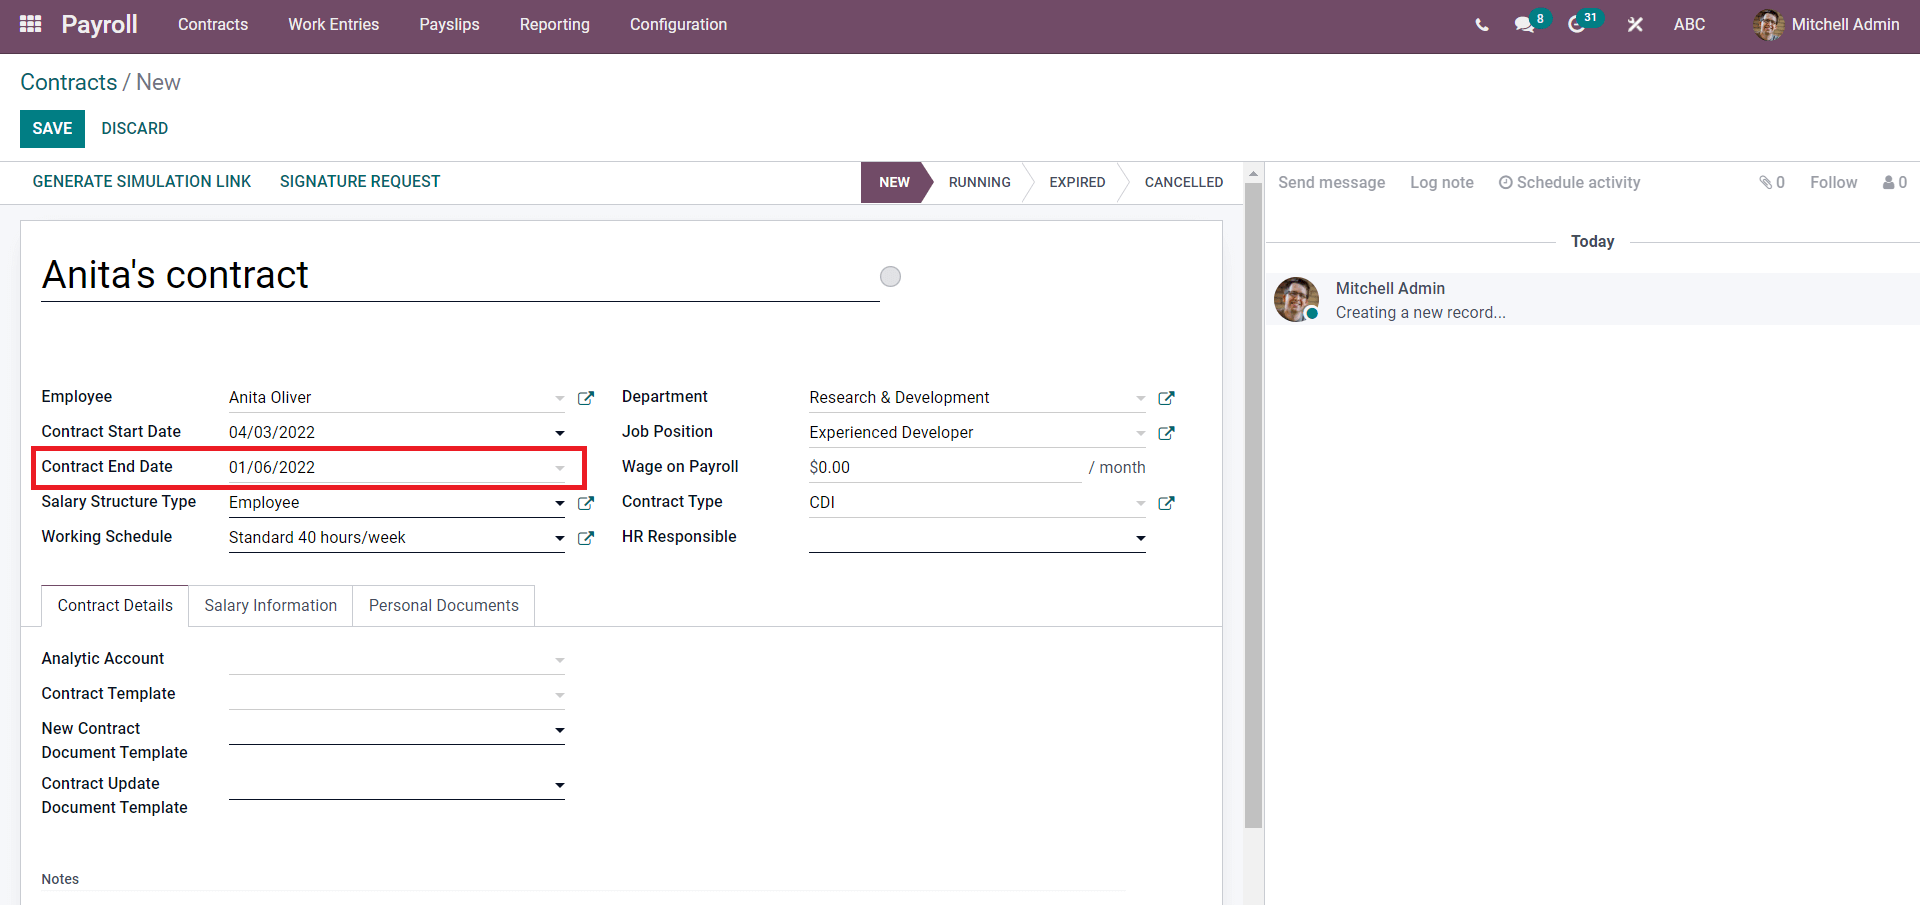
Similarly, you can change the employee contract dated according to your company's policies.
The next step is to choose the salary type from the Salary structure type field. Salary structure type helps you define the employee's complete salary structure at a single click based on their jobs position in the company. Click on the concerning field, and a list of salary structures will appear as highlighted in the image below.
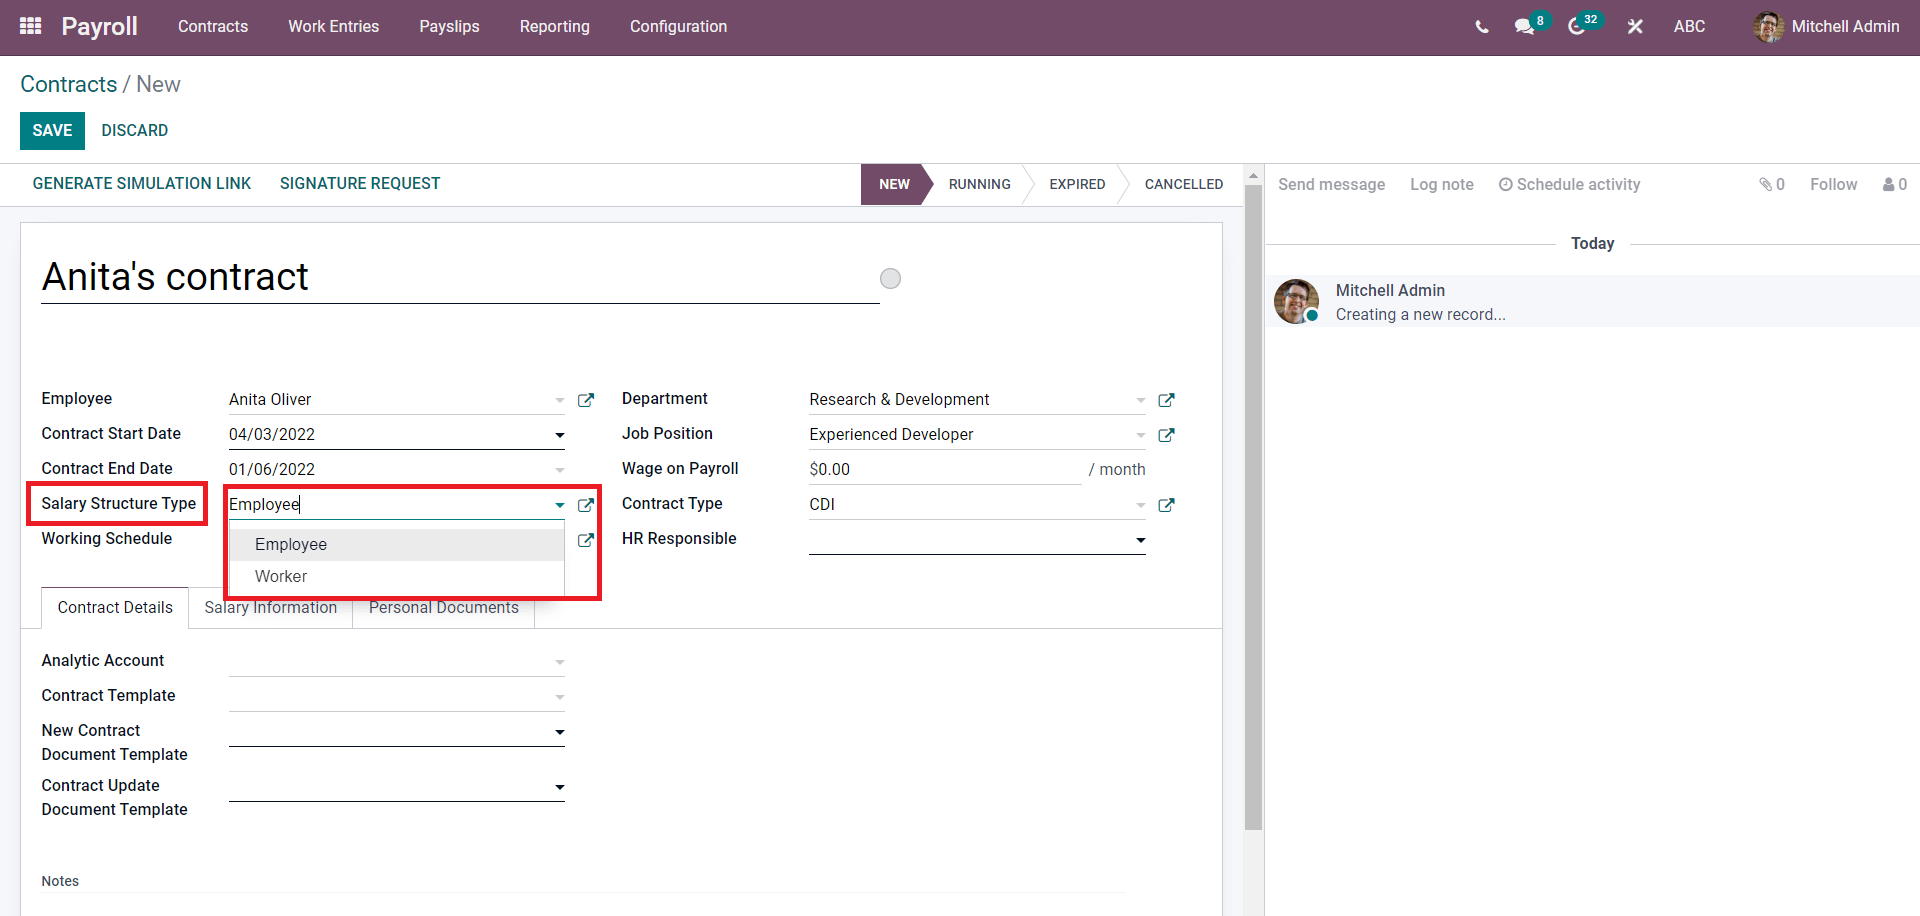
You can choose from the options to apply it to the new employee contract.
Configuring salary structure types from the Employee contract
The next step is to enter the Salary structure. There are two default salary structures available in Odoo, Employee and Worker, as shown below.
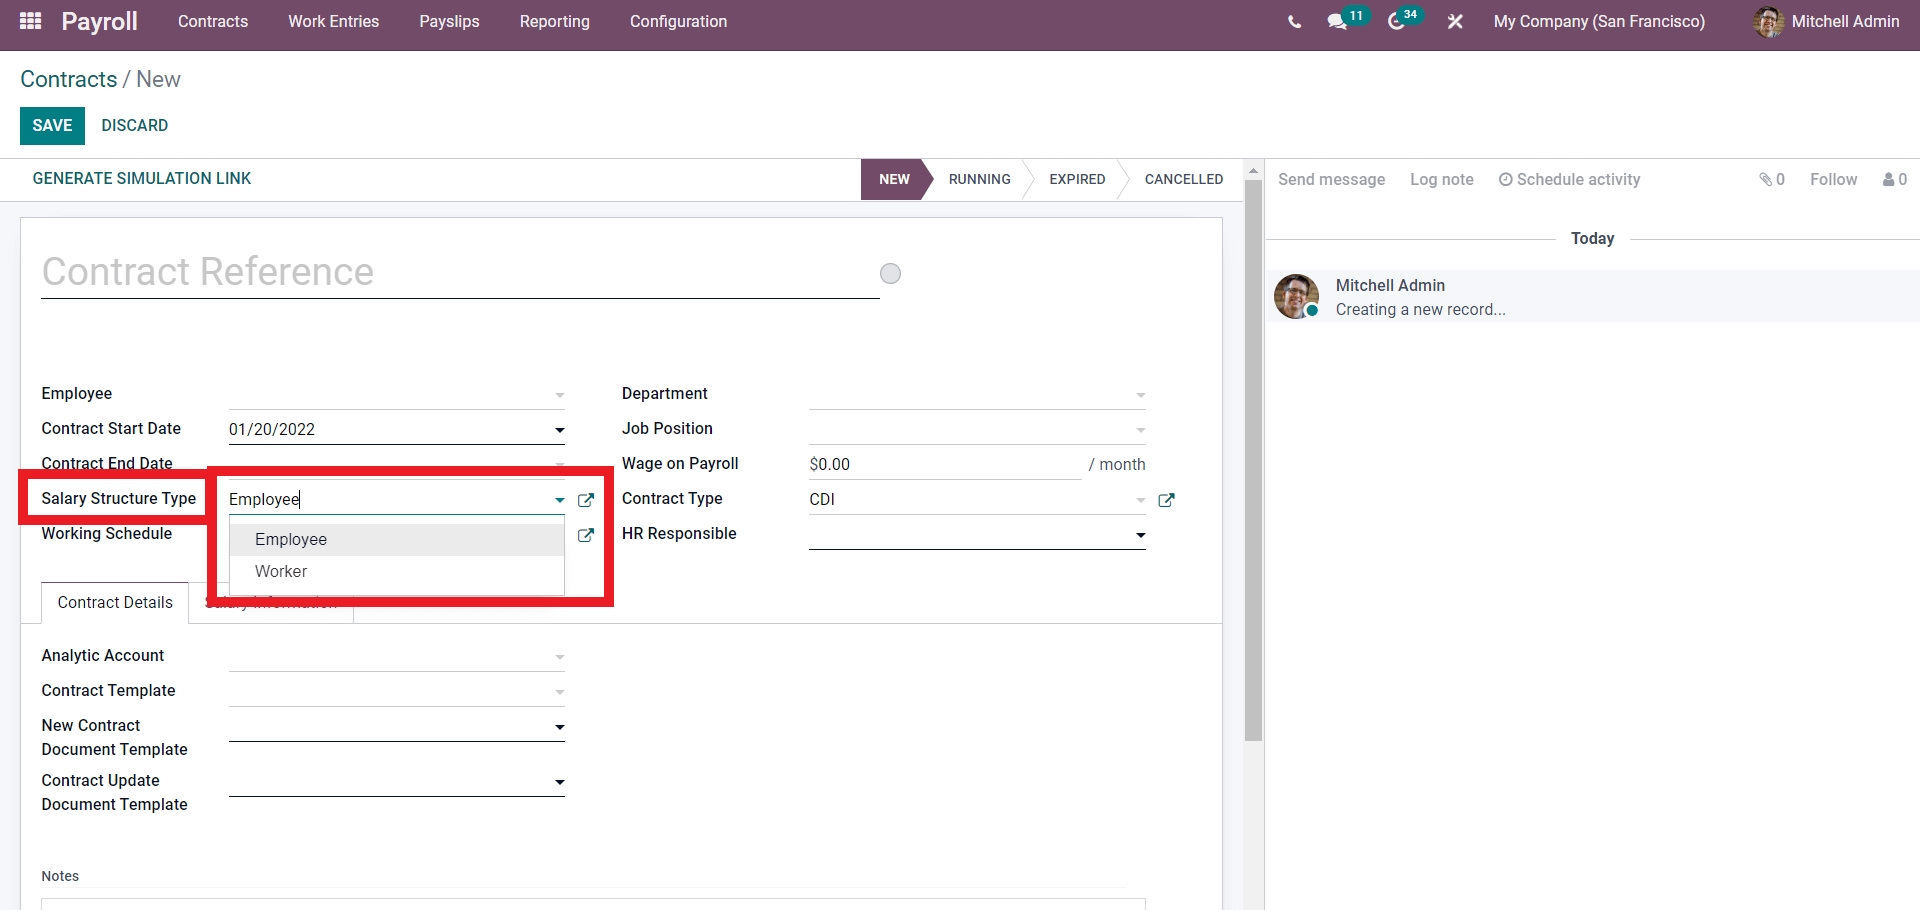
From the two options, choose one. To know more about the salary structure, click on the external link button next to the Selected salary structure, as shown in the image given below.
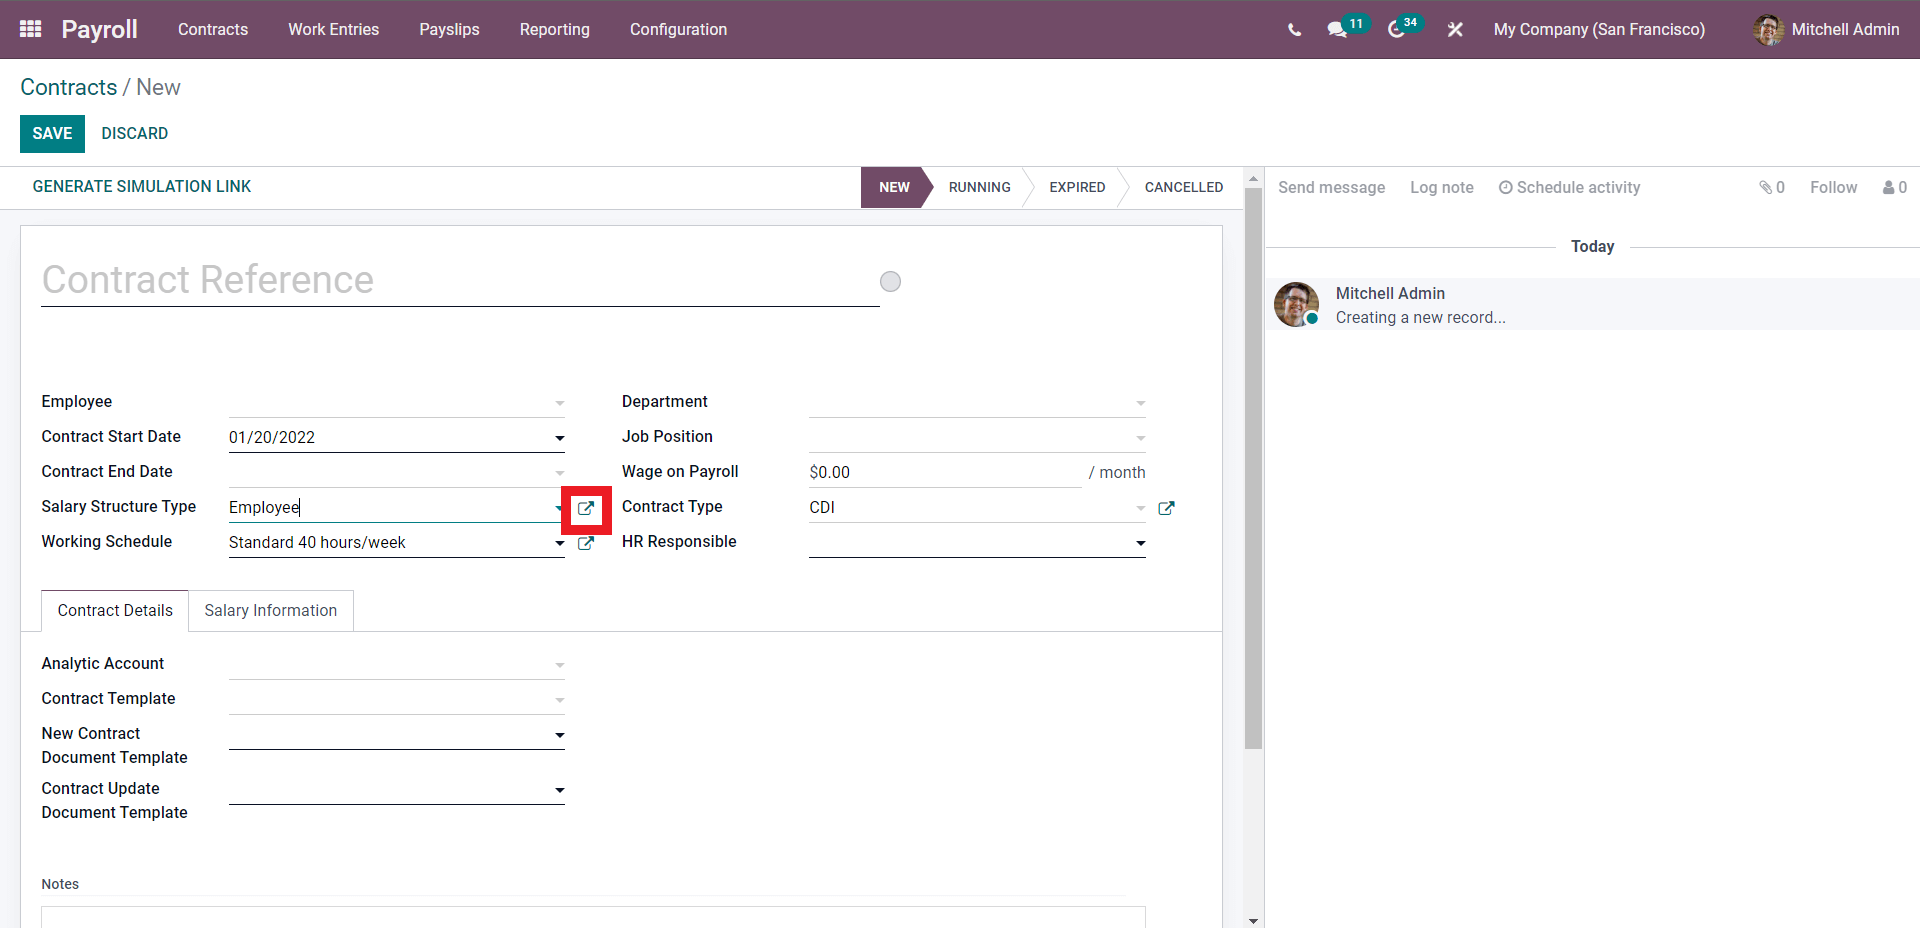
Click on the External link as highlighted above, and a page on the Salary structure type will open up as shown below.
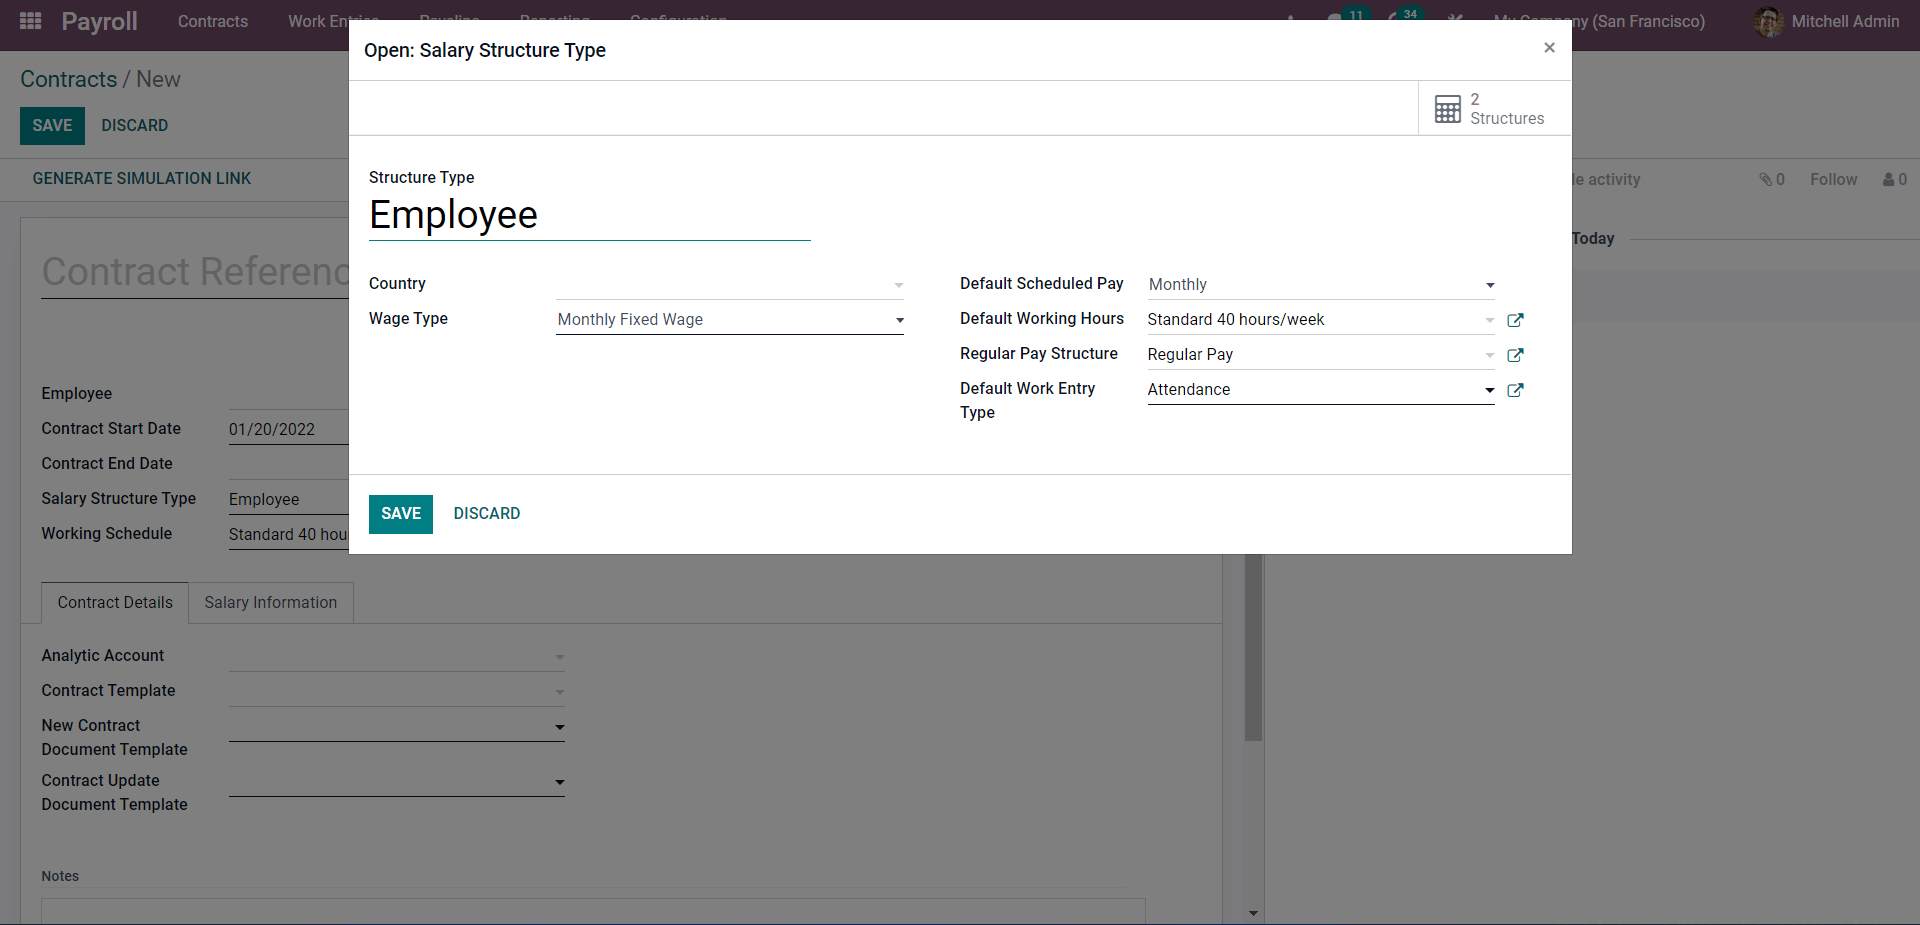
The salary structure can be customized from here. You can change the default setting according to the nature of the contract. From the page, click on the external links next to the fields for more locations and features on the fields, as shown below.
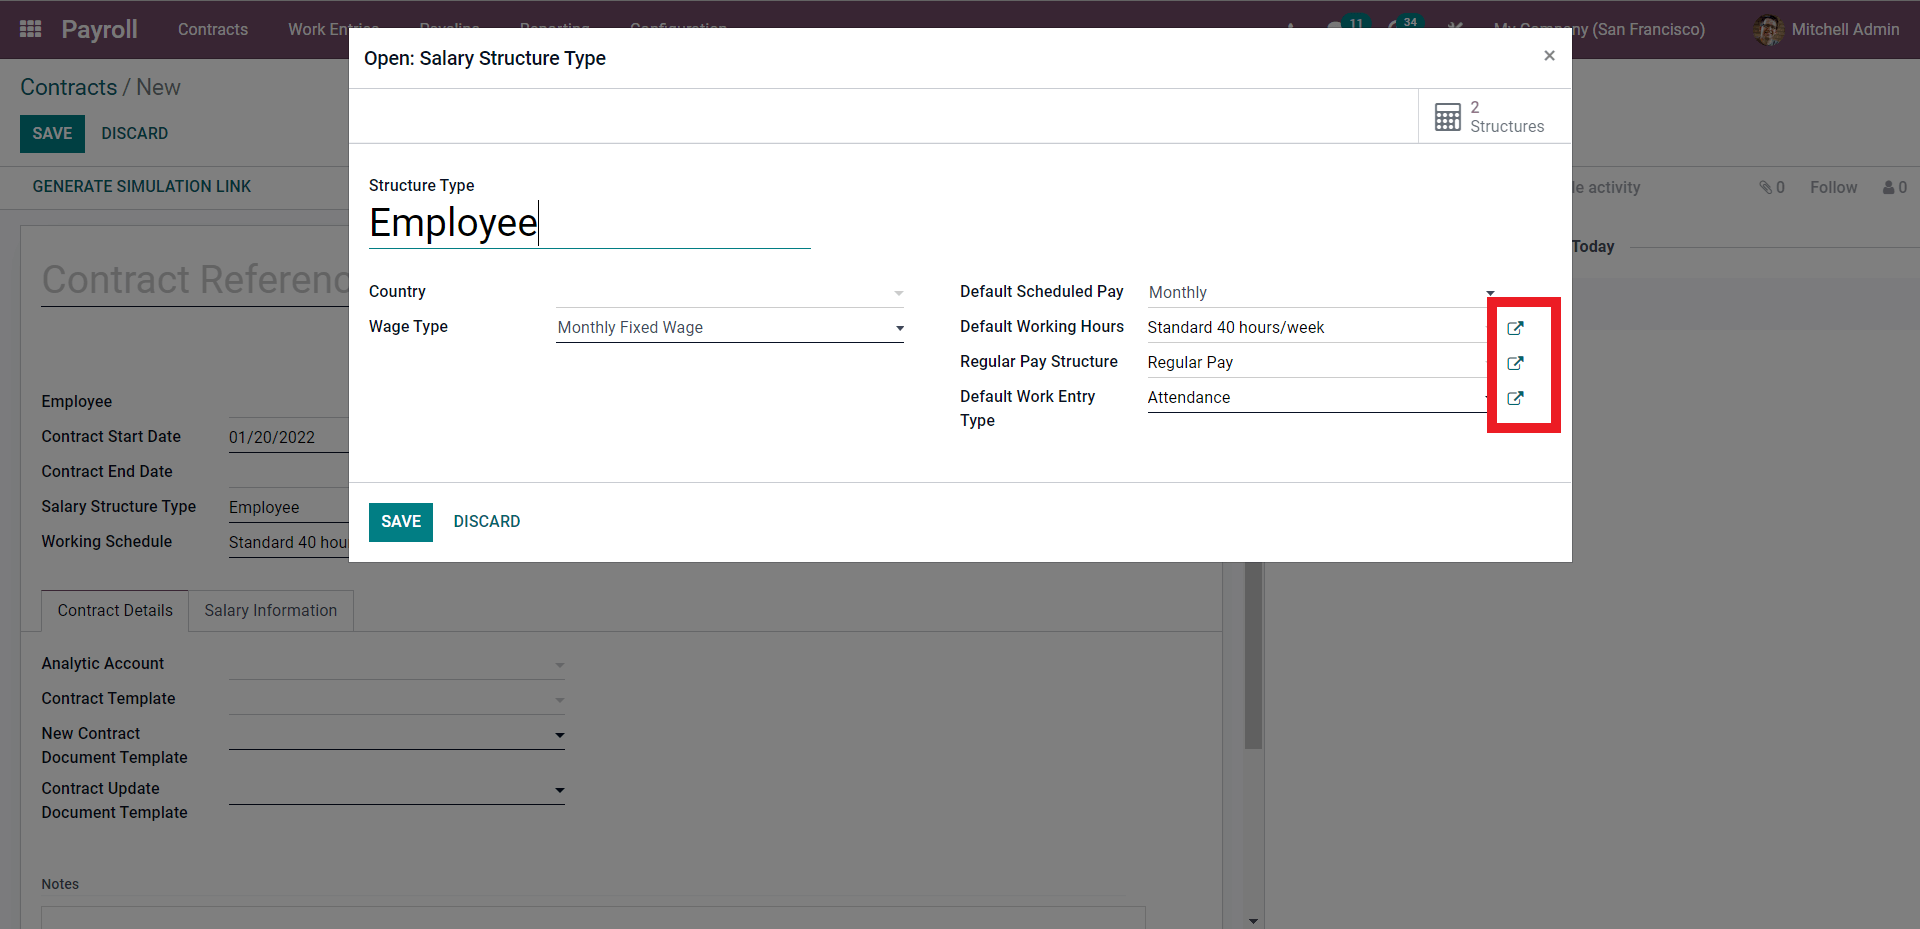
Click on the External links for advanced configuration options. After the Salary structure type configurations, click on the SAVE button. If you want to create a new salary structure, then type in the name of the new salary structure in the Salary structure type field and a Create and Edit button will open up as shown below.
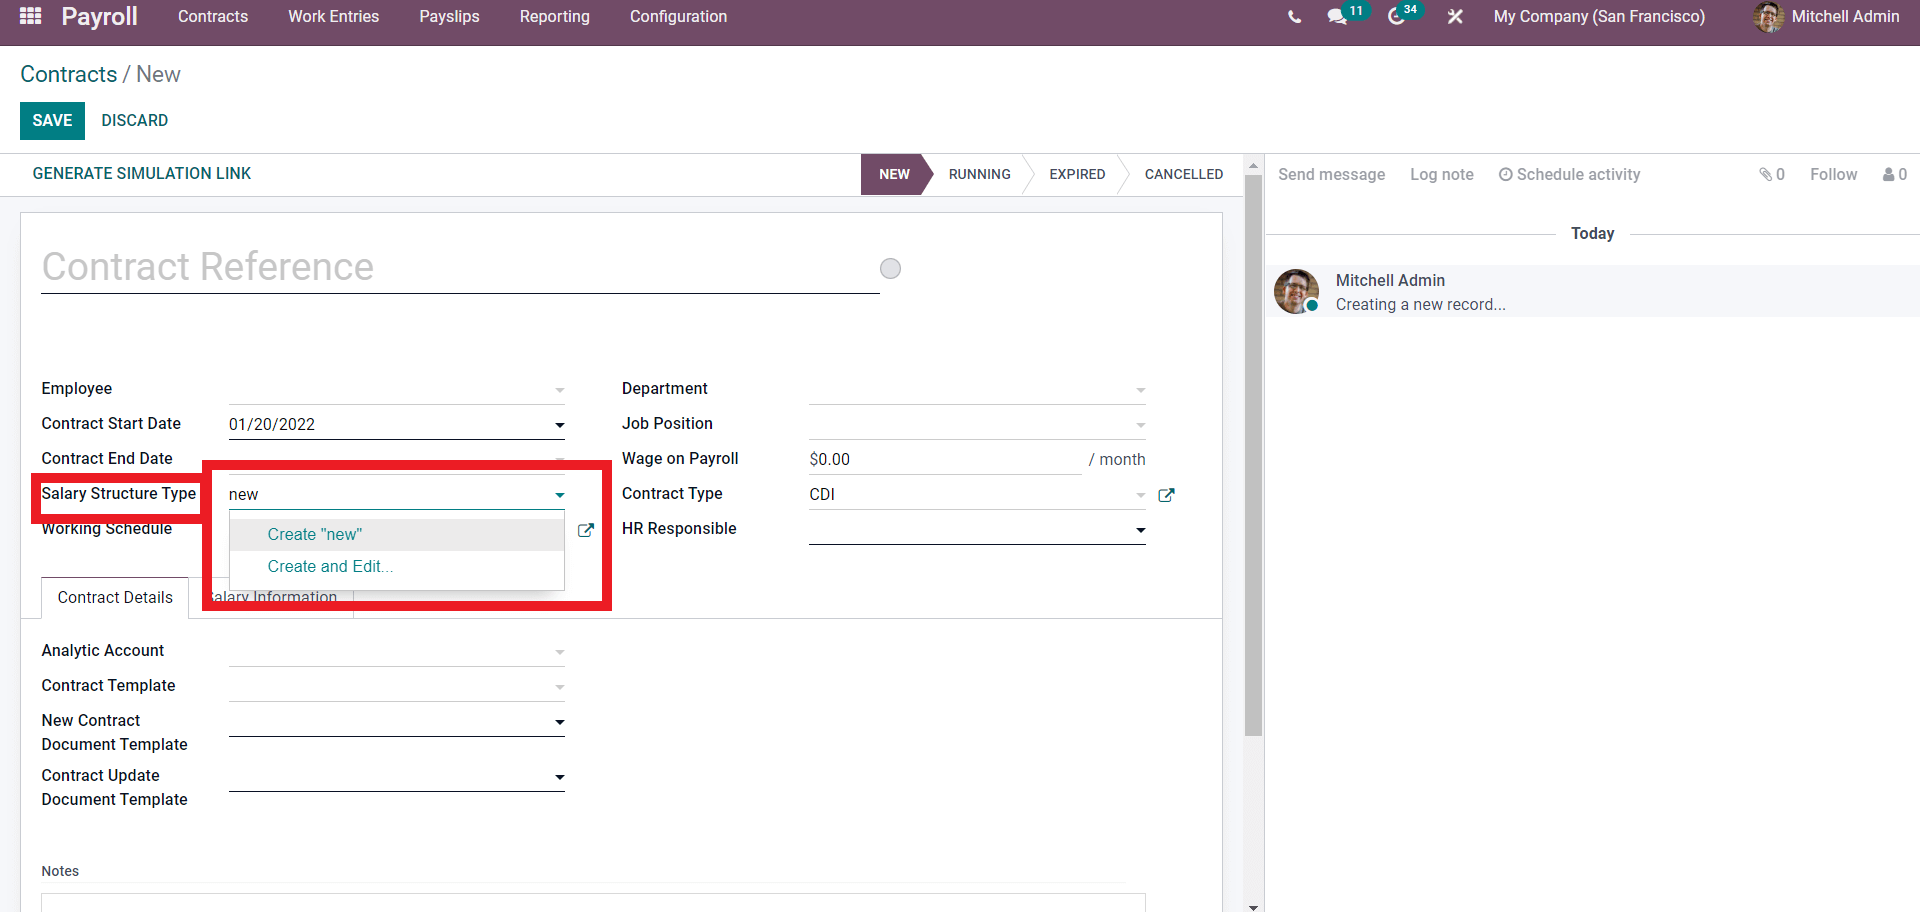
Click on the Create and Edit button.
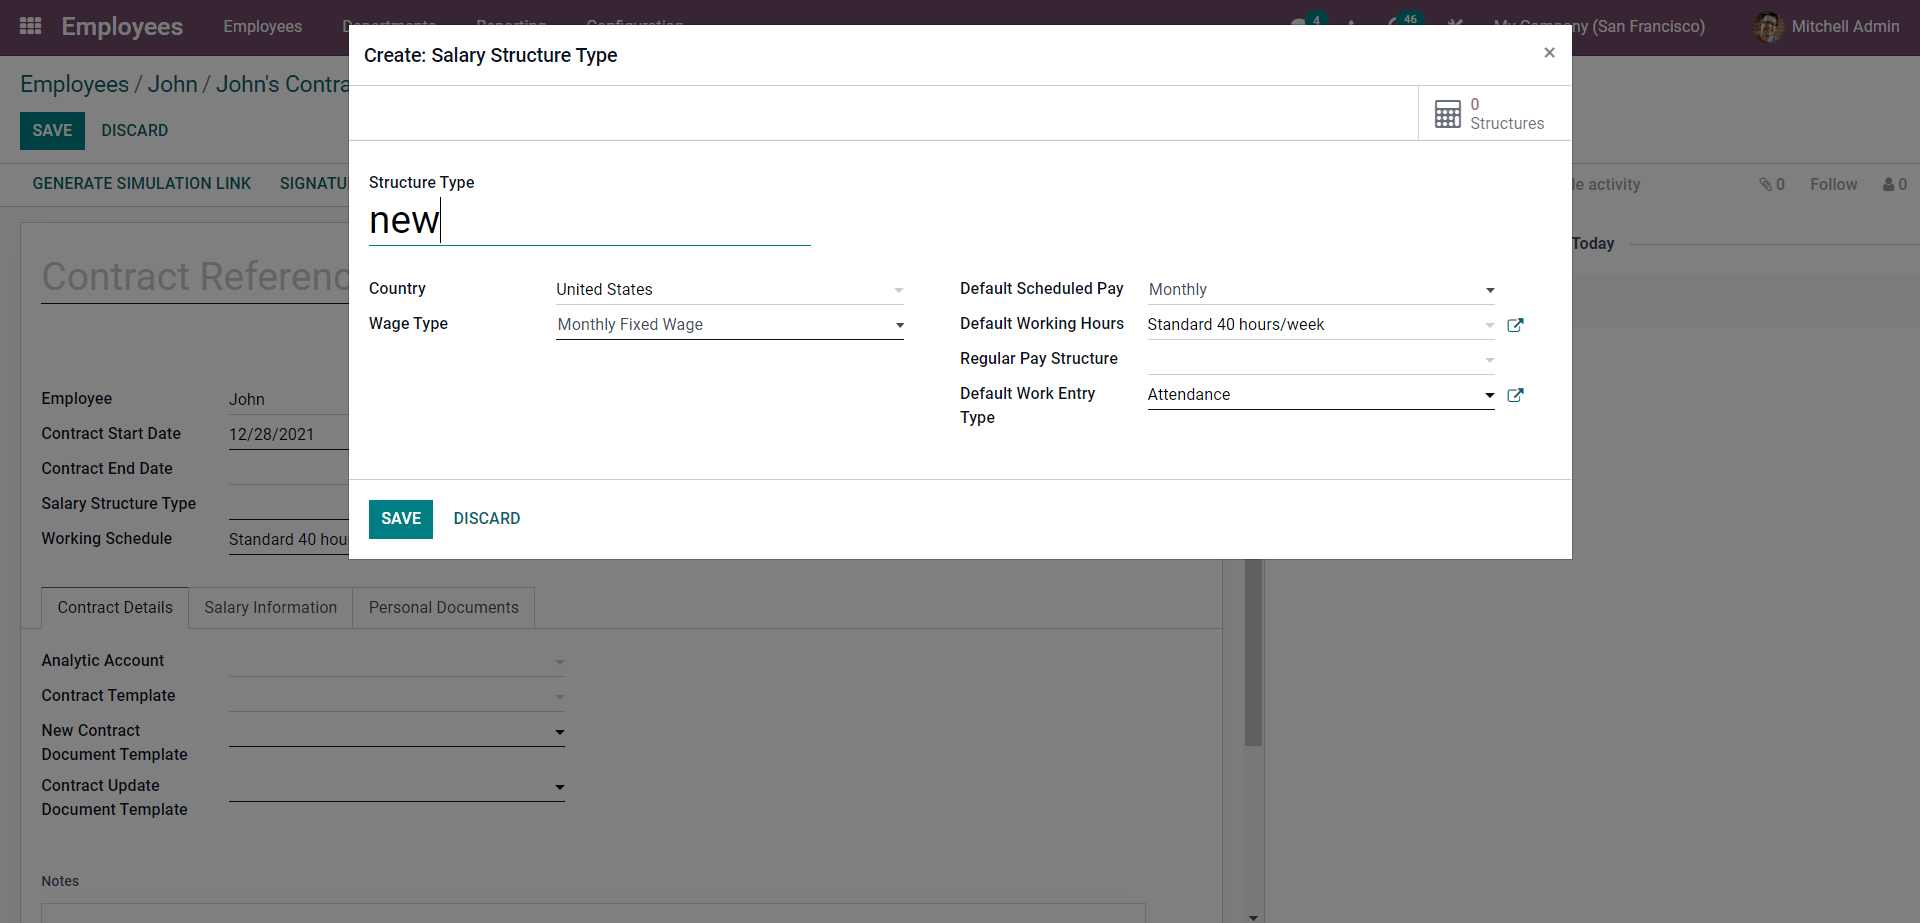
Create the Salary structure from here. Click on the SAVE button post configurations. You can configure and create new Salary structure types from the Configuration tab of the Payroll module. From the drop-down menu under the Configuration tab, click on Structure Types to view your company's various salary structure types, as shown below.

All of the created and configured Salary structures will be displayed on this page. Here there are currently two Structure types, Employee and Worker. Click CREATE to create the new structure.
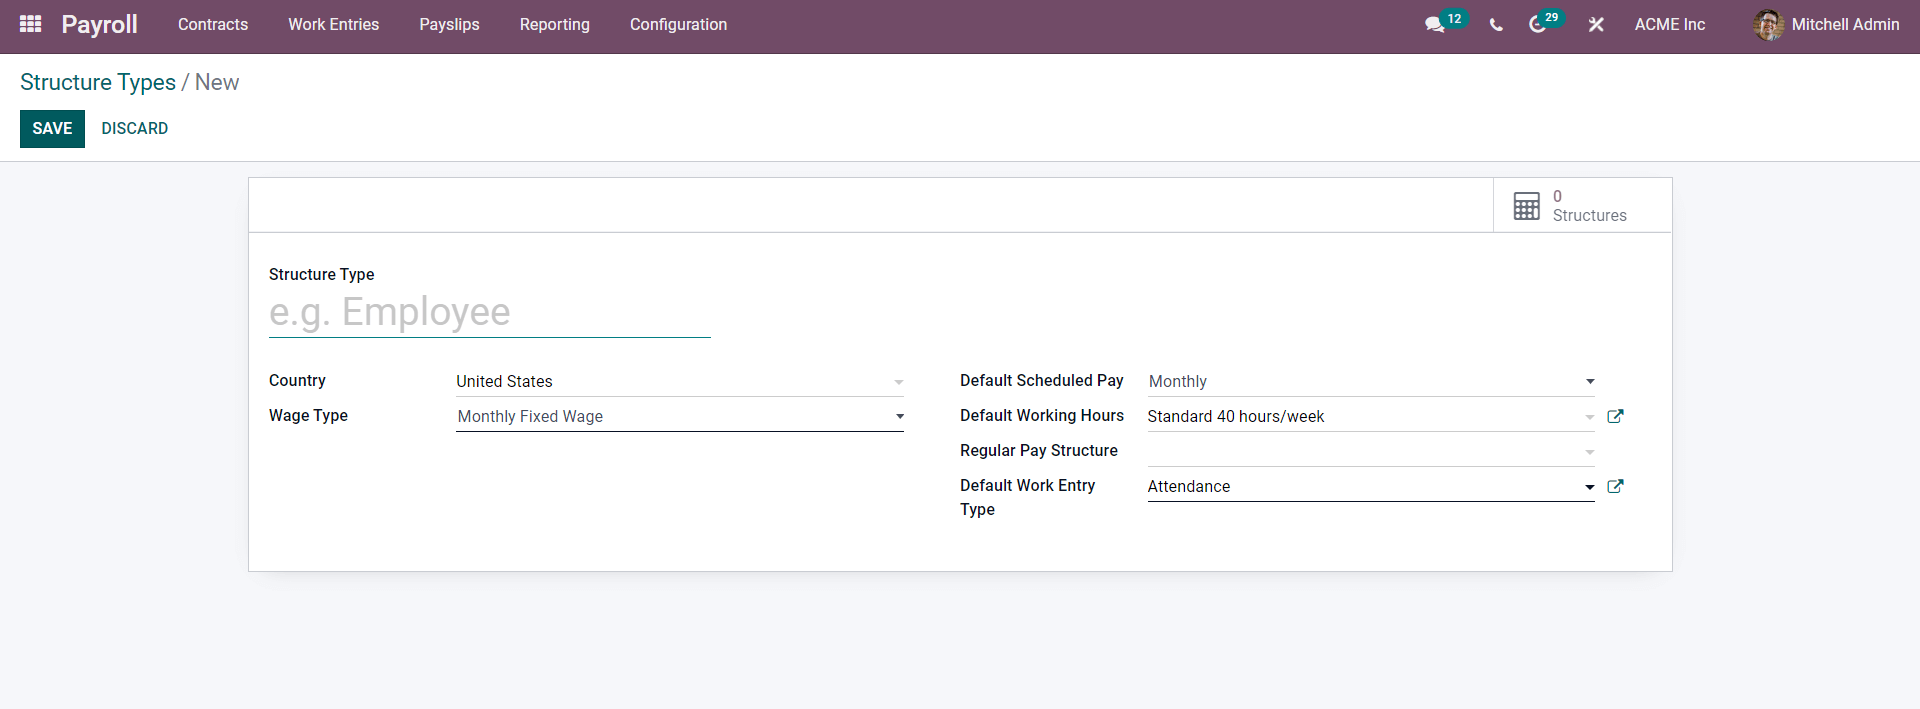
The new structure type can be configured from here. You can manage the salary structure types easily from the Salary structure page. The filtering and grouping options will allow you to filter and sort the Salary structure for easy management.
If you want to know more about salary structure management, follow the link below.
Salary Structure and Rules Configuration in Odoo Payroll Module
After setting the Salary structure type, you can configure the Wage on Payroll concerning the salary structure type. You can add the Working schedule from the Working Schedule field as shown below.
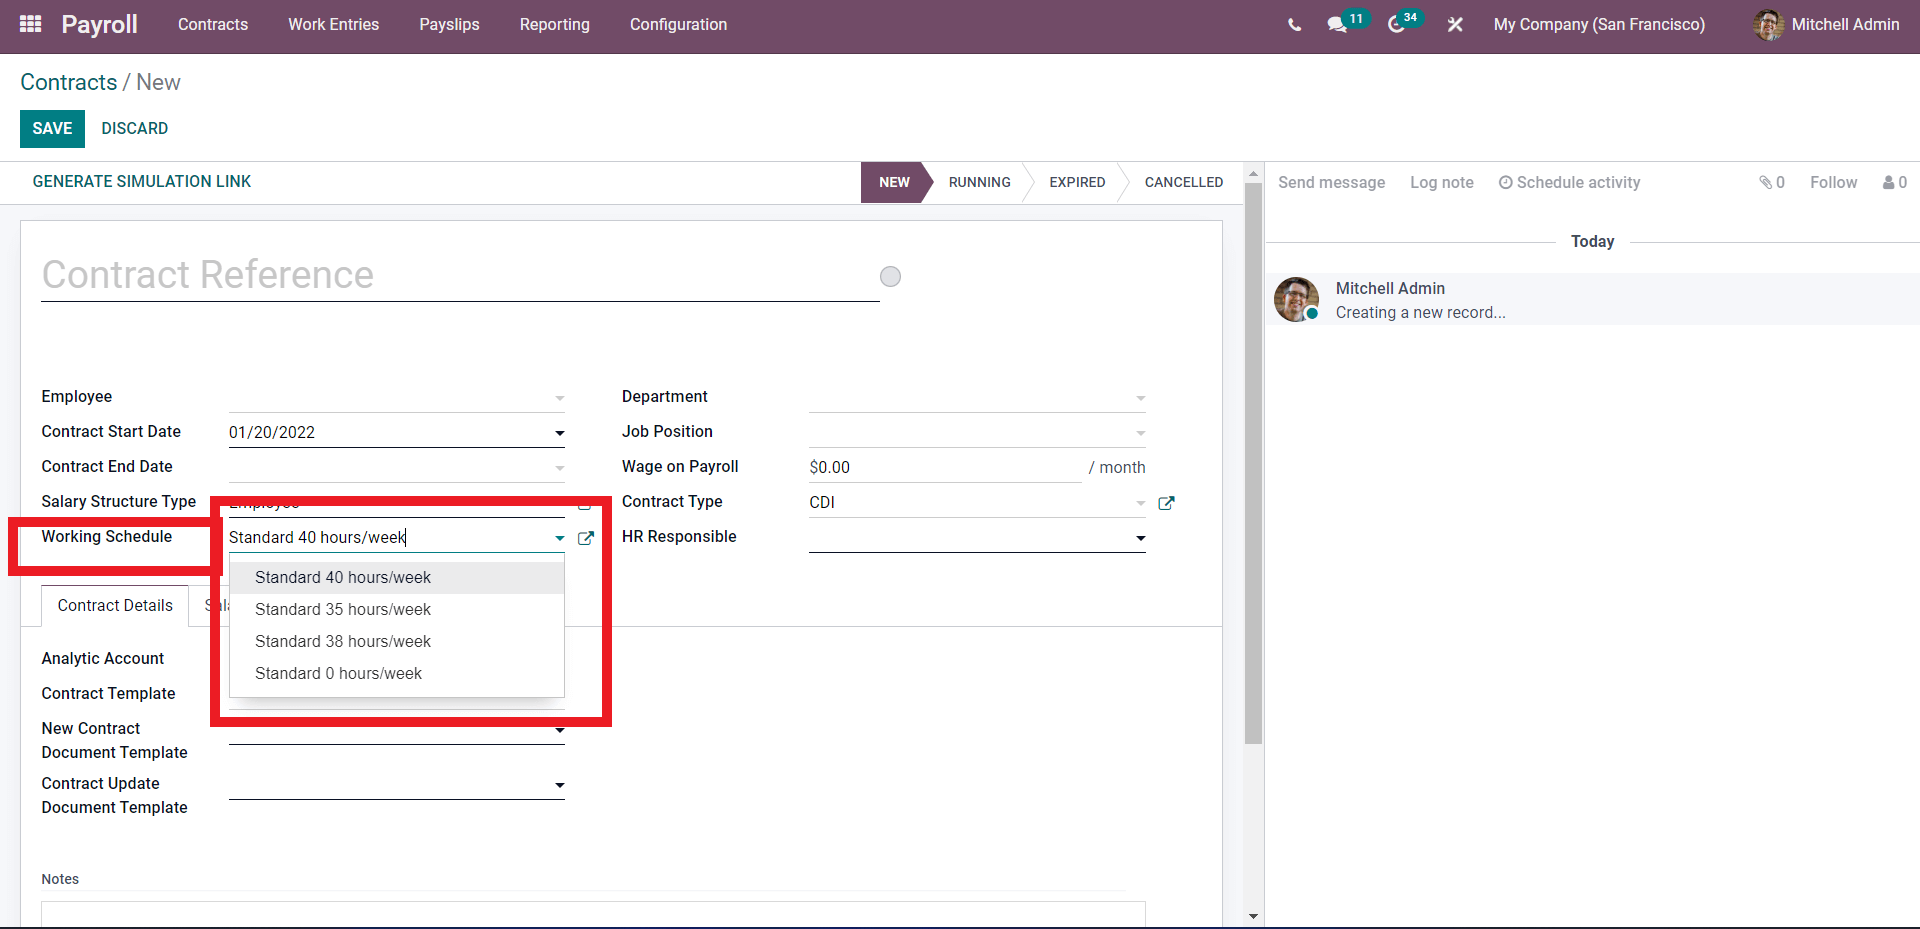
From the list, choose the Working schedule. The external link next to the working schedule will let you configure the selected working schedule, and a page for configurations will open up, as shown below.
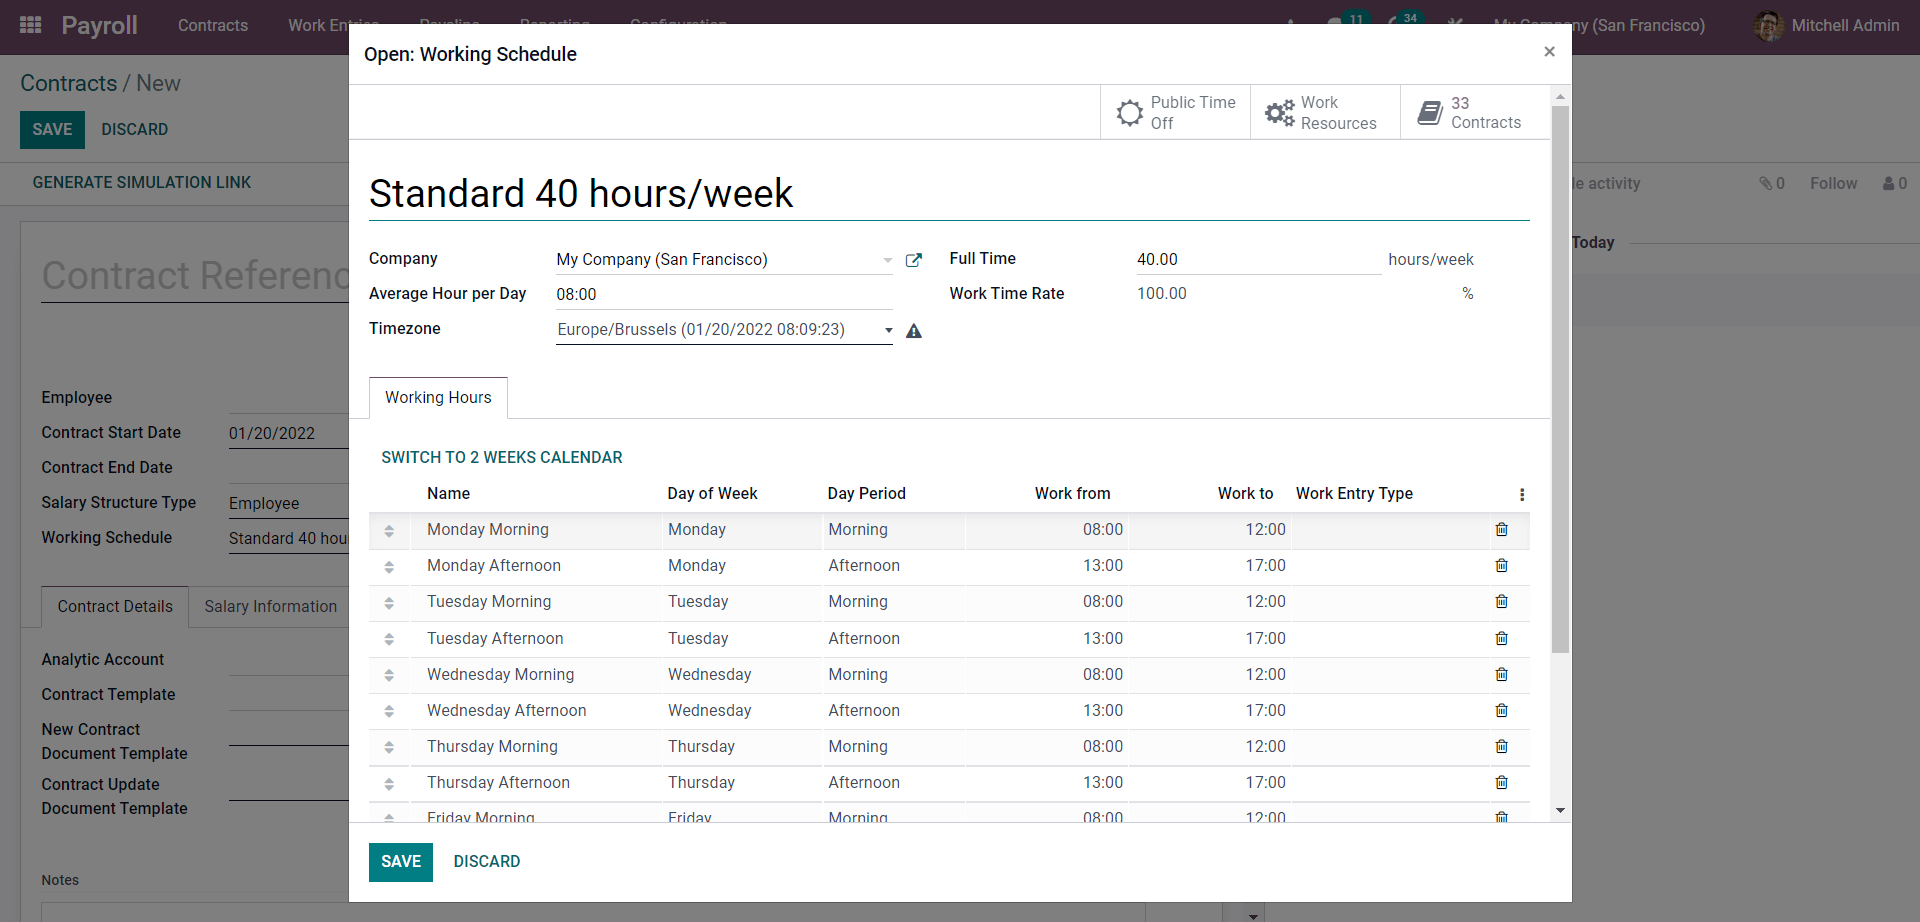
You can change the Schedules from this page. Under the working hours section of the page, the working hours or the schedule will be listed down with respect to their schedule time. Click on the SAVE button to save the configurations on the Working Schedule.
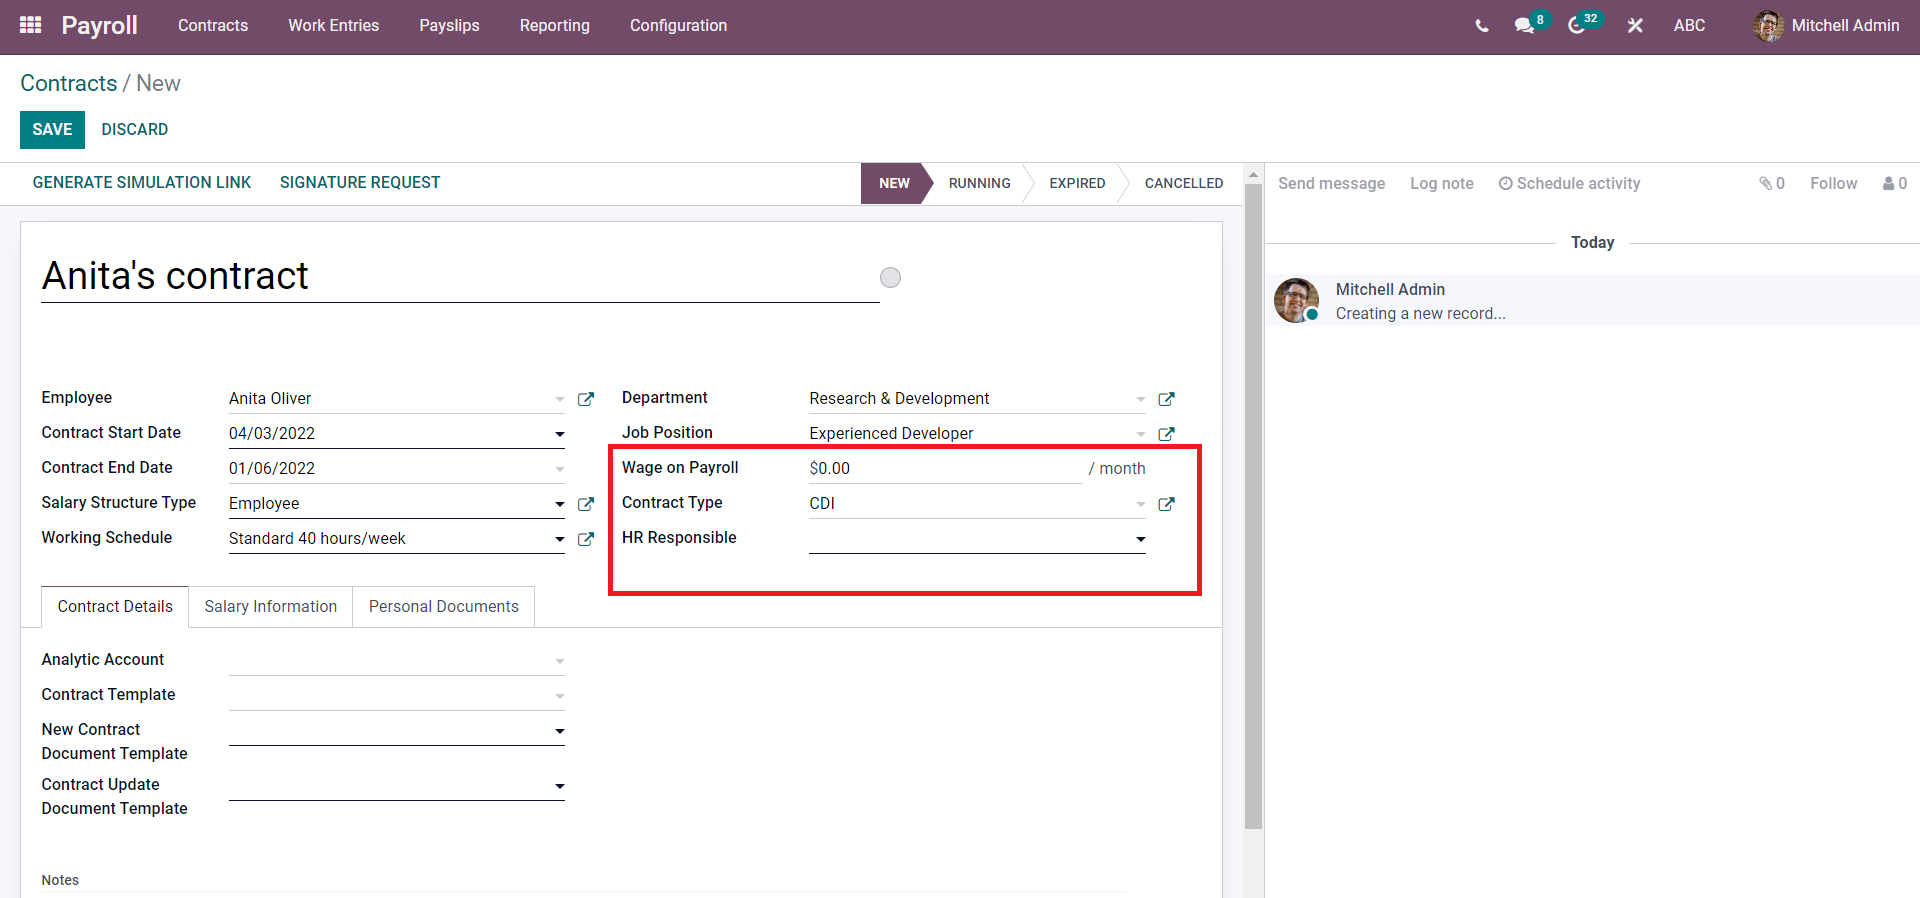
After choosing the structure type and the working hours, you can configure the Wage, contract type, and the HR responsible for their respective fields highlighted in the image given below.
You can configure the employee's contract details from the Contract details filed as given below.
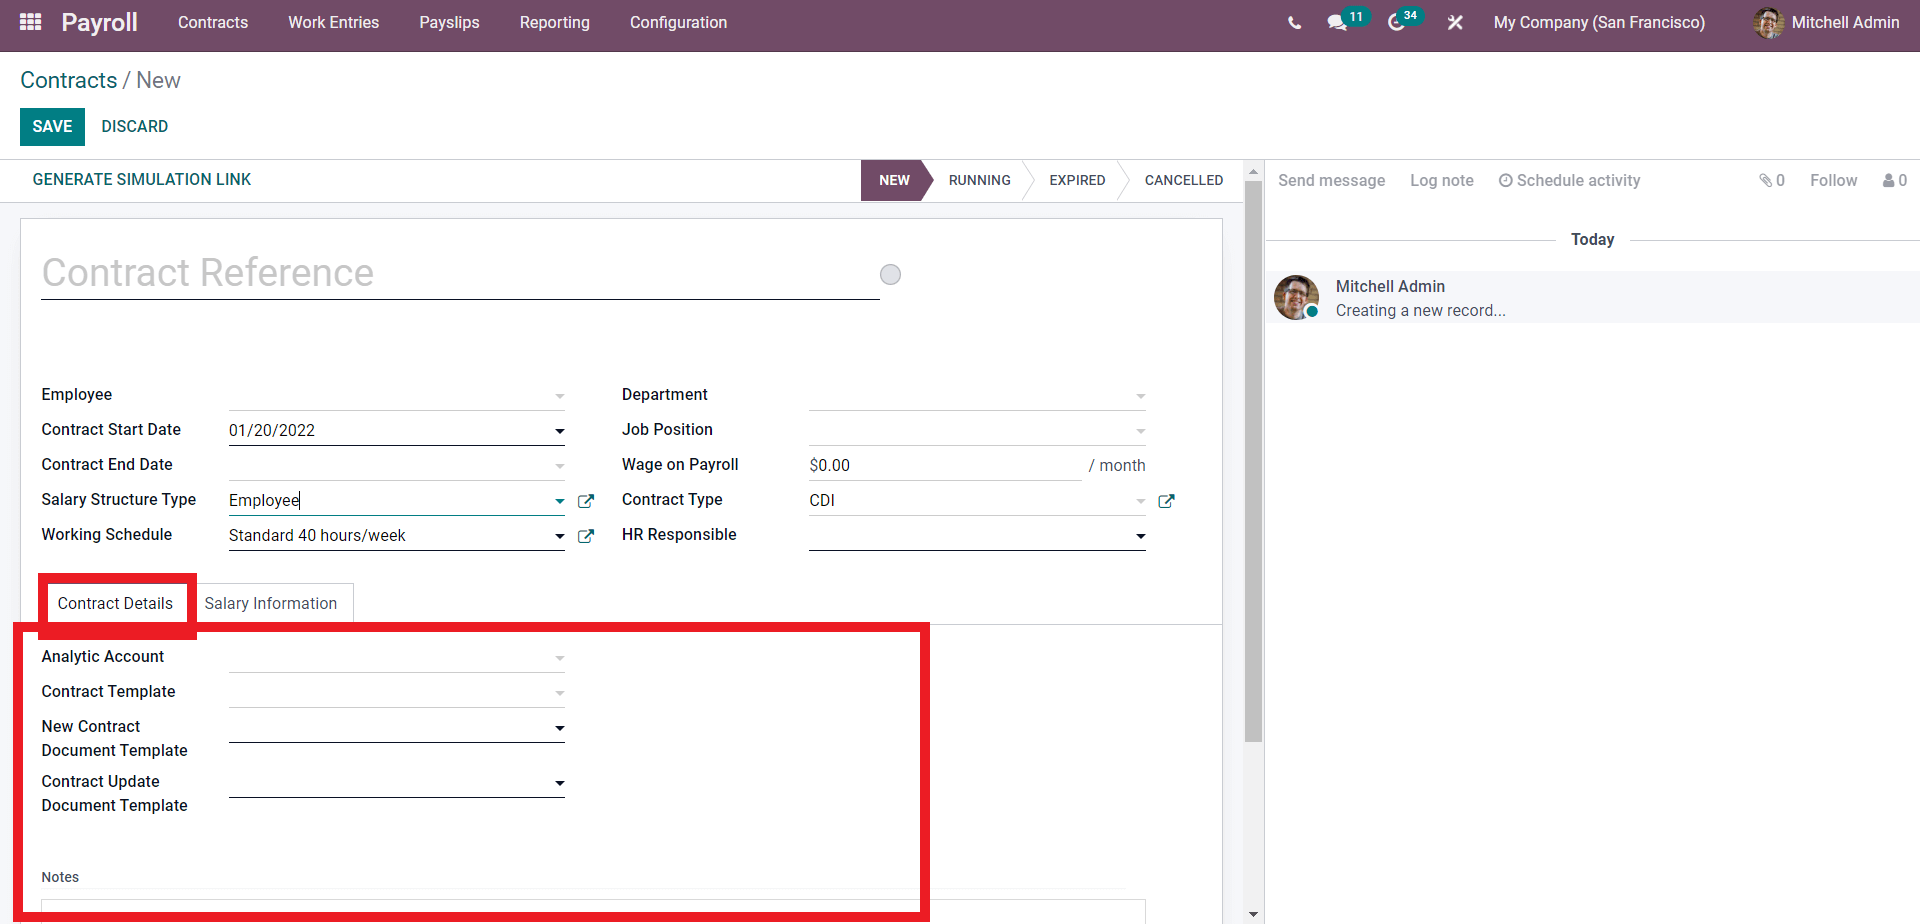
You can add an analytic account on the Contract form here. Click on the Analytic account filed to add the account. Analytical Accounts are a great way to track and organize the accounts within the Odoo environment efficiently.
Odoo allows you to set a Template for the Contract. The Contract Template field will allow you to add the Templates to the contracts.
After the configurations on the Contract details, you can move to the Salary information tab for configurations on the employee salary.
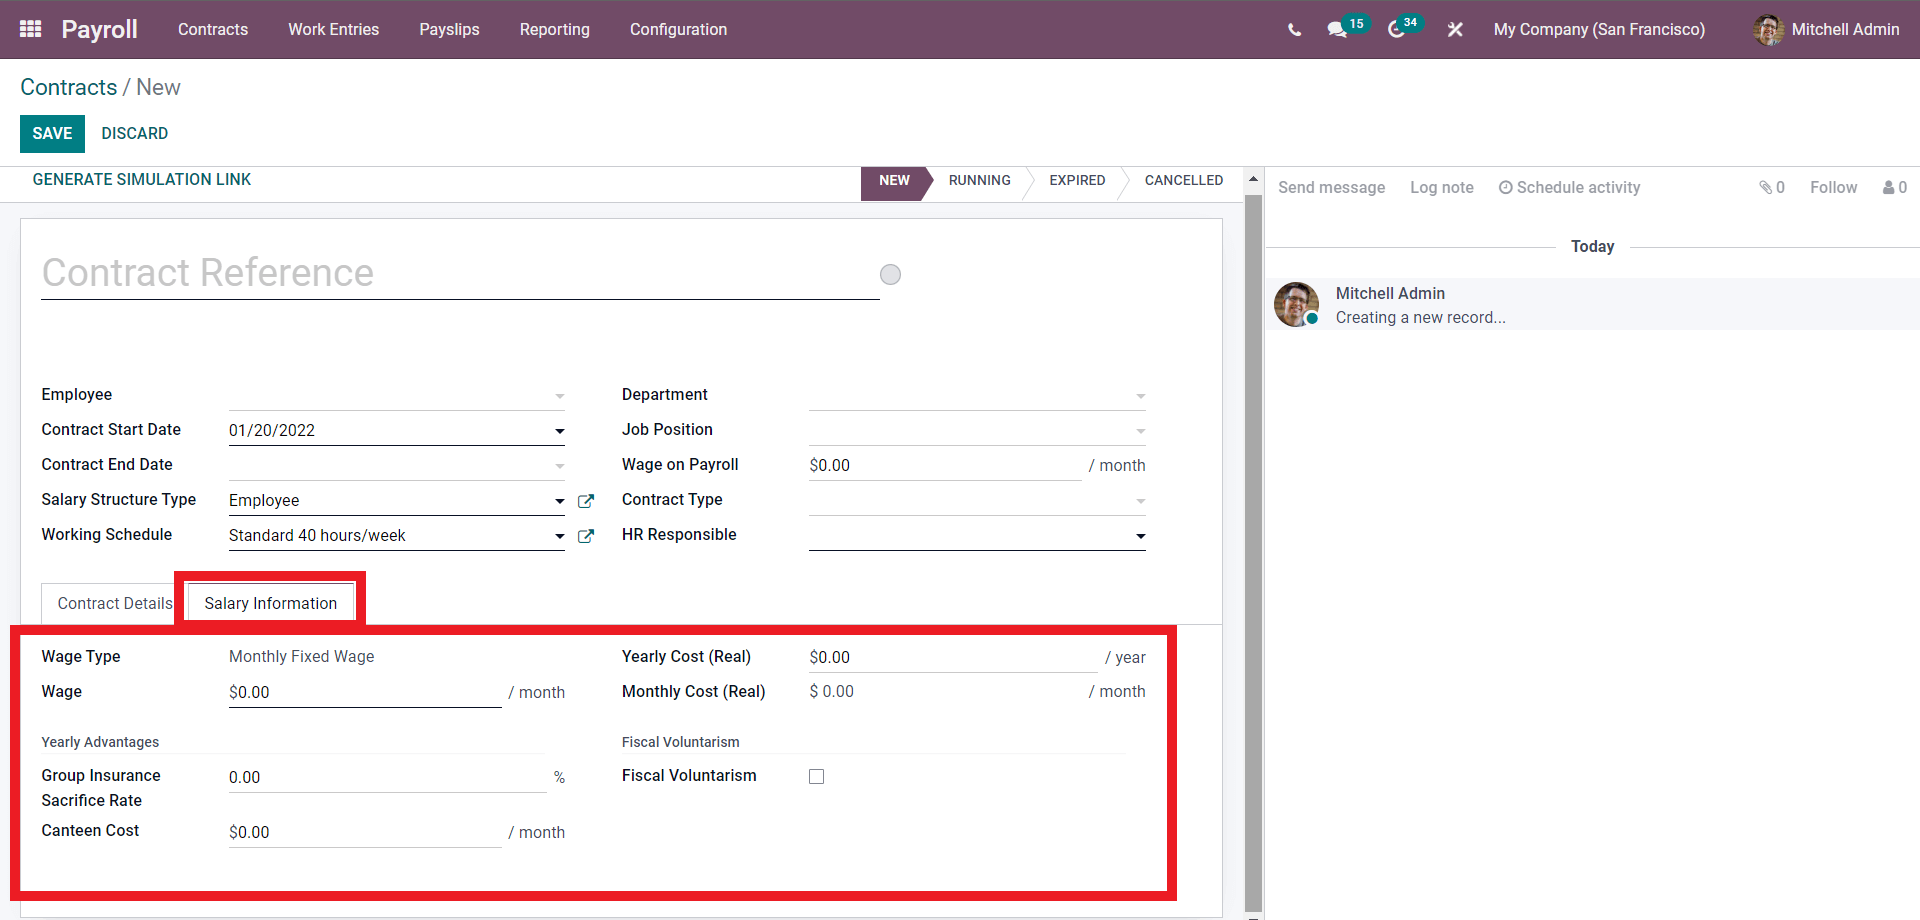
The wage type is set to Monthly Fixed Wage. You can configure the Wage from the Wage field, the Yearly cost, and the Monthly cost.
Under the Yearly Advantages section, you can enter the Insurance details in the Group insurance sacrifice field in percentage. The Canteen cost field will allow you to add the canteen cost per month to the particular employee, and you can choose whether to opt for Fiscal Voluntarism or not. Fiscal Voluntarism is the voluntary increase with a holding tax rate. A new field on Fiscal Voluntary rate will open up if you activate it, as shown below.
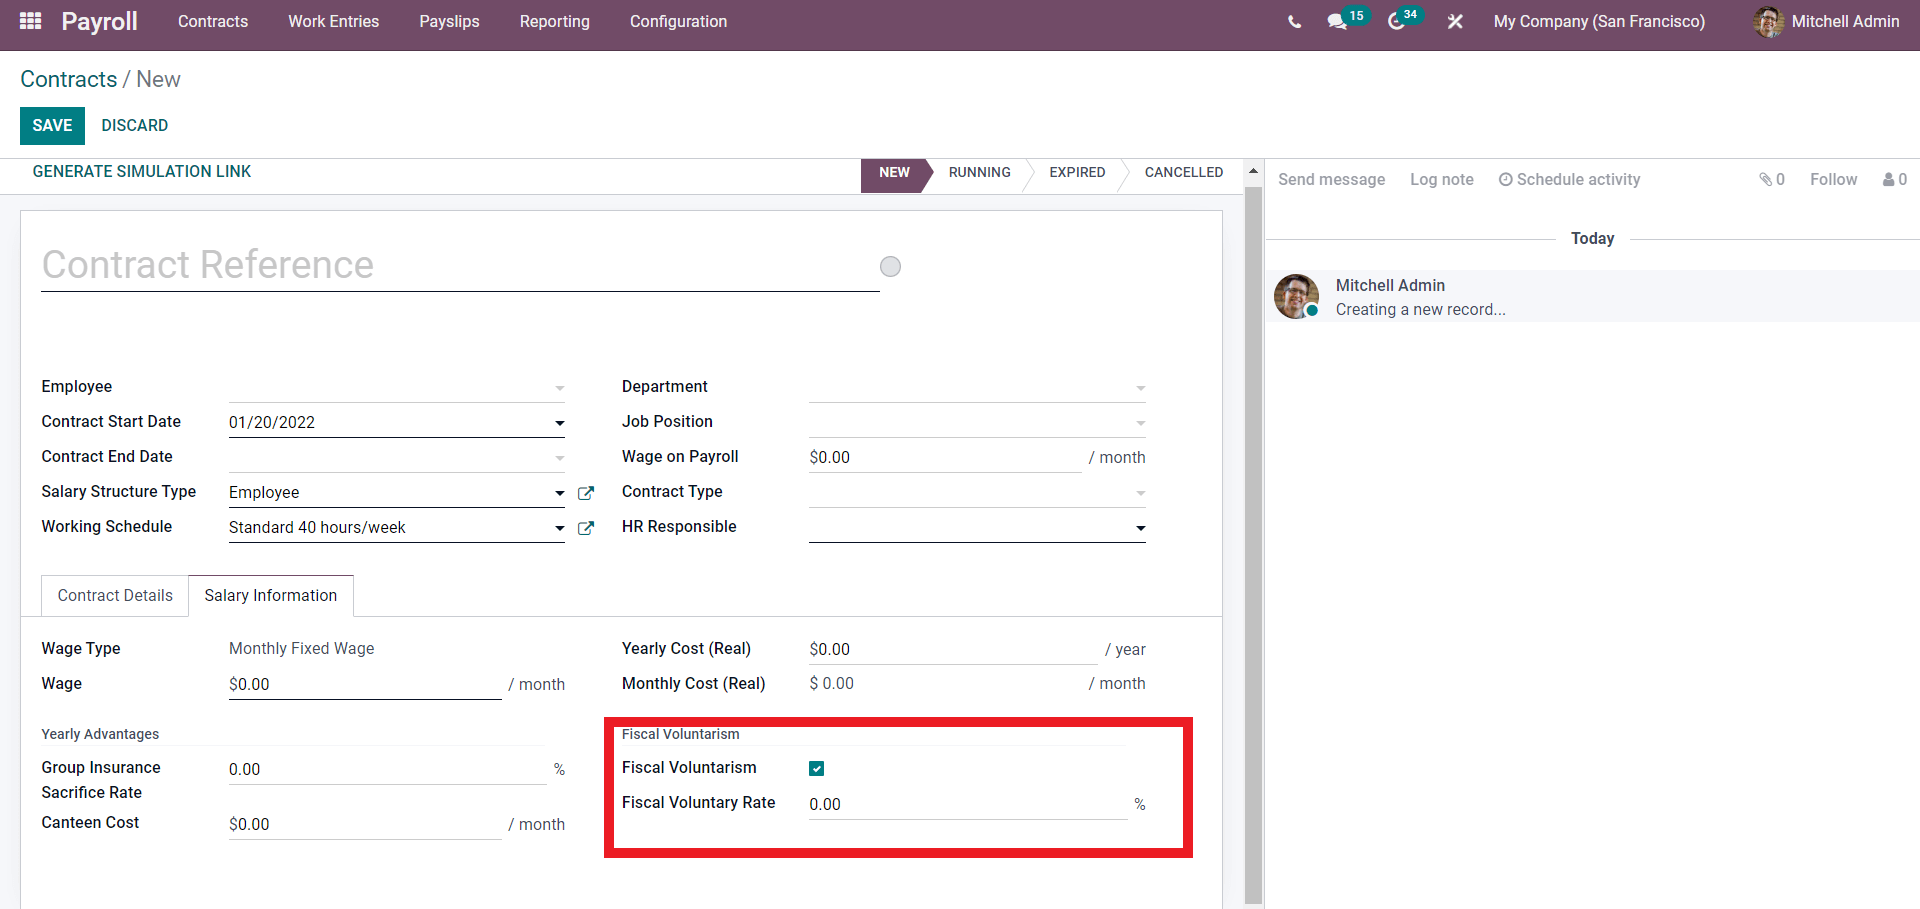
The voluntary fiscal Rate can be entered in percentage in this field. Click on the SAVE button post configurations. The contract will be saved under the selected employee and displayed on the contracts page. After the configurations on the contract, you can click on the GENERATE SIMULATION LINK button to send the contract to the employee. This marks the final step of the contract configurations process. Created contracts will be displayed on the Contracts page for easy management.
This is how you can create and manage employee contracts from the Odoo 15 payroll module.