The Odoo CRM is an open-source customer relationship management software highly proficient for acquiring and retaining customers efficiently. The Odoo CRM is very effective for actively keeping track of your customers and potential customers, and it can even handle customer data. The advanced user interface of the module makes the platform very convenient and user-friendly. The latest and innovative features included in the system help you to connect the whole team from any type of device. The module is highly competent in professionally receiving customer emails and data.
Moreover, the system effectively simplifies and streamlines your repetitive tasks. As a result, you will get more quality time to concentrate on your leads.
By implementing the Odoo CRM module, you can minimize business complications and intricacies to a minimal level. You can reduce clunky business processes and human efforts. You will also be able to maximize efficiency. You can easily organize your sales activities, pursue and monitor your leads, and effectively win opportunities. In addition, it is the only software that fosters accurate and up-to-date forecasts and reports.
The Odoo CRM module is designed in a way to handle opportunities and leads.
All these leads and opportunities are organized with a specifically designed pipeline. In addition, the system has the power to manage daily activities by scheduling meetings and activities. The Odoo CRM is a centralized system to keep all data regarding lead management.
This blog discusses how we can effortlessly create a stage or pipeline in Odoo 16 CRM.
When you Sign in to the Odoo system, you will be able to view all the installed modules in the home dashboard window of your database. If the CRM module is not installed in your database, you can install the module from the Odoo Apps store. Once successfully installed, you will be able to see the CRM module icon on your database, as shown in the image below.
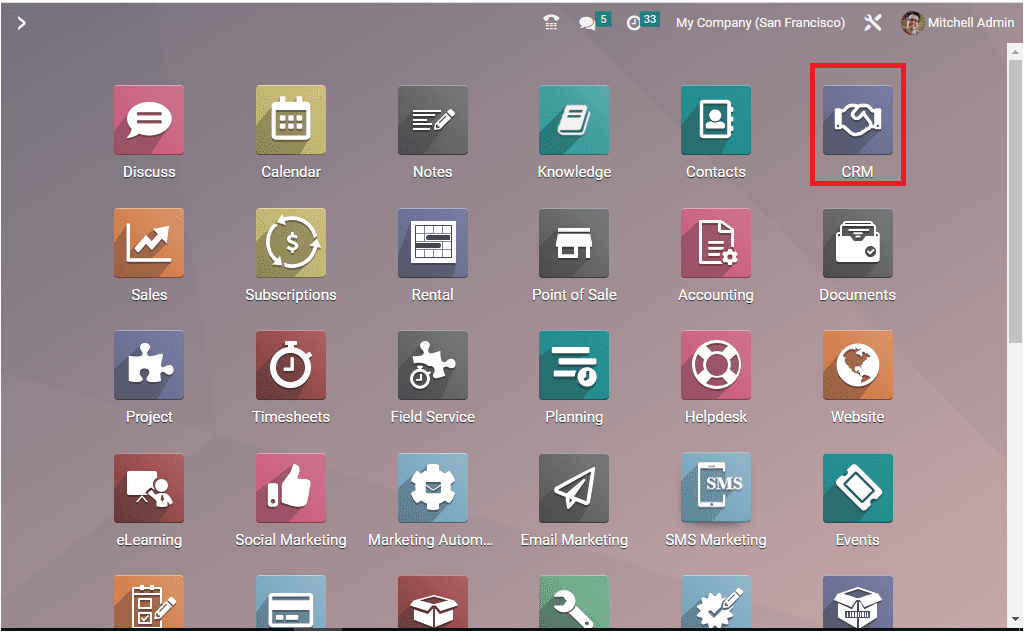
A single click on the CRM menu icon is enough to open up the module.
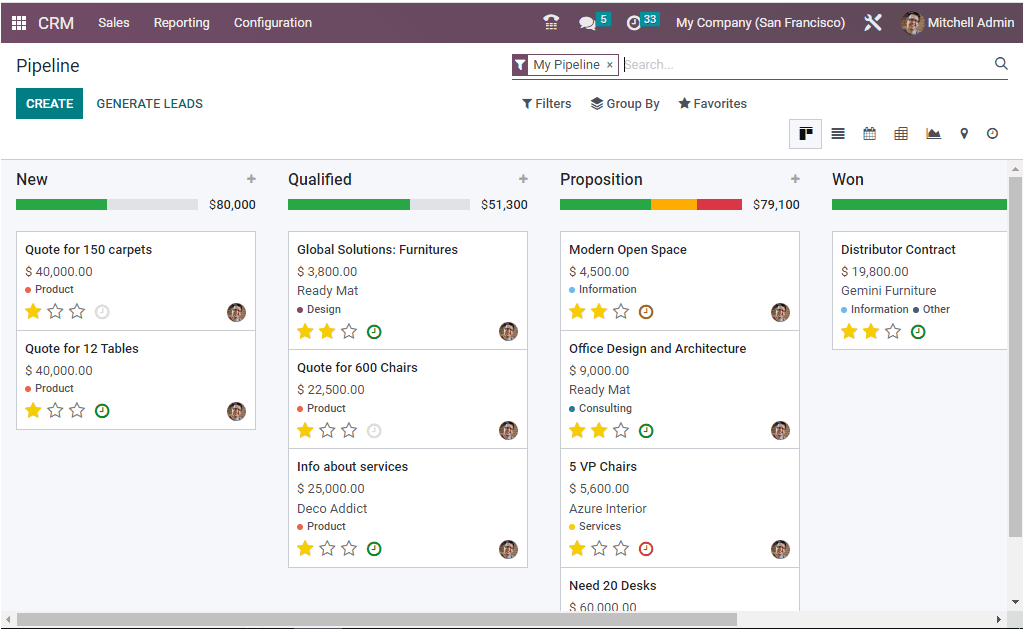
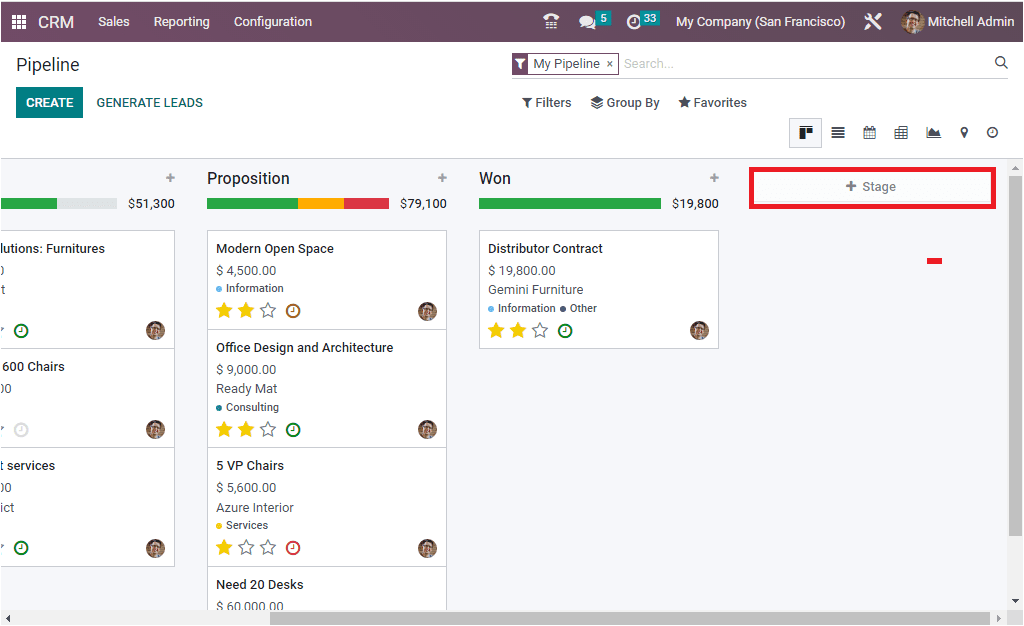
Here in the window, you can see an advanced opportunity pipeline. The opportunity pipeline is designed with different stages such as New, Qualified, Preposition, Won, etc. The stages in the CRM pipeline are absolutely customer-centric. The opportunity pipeline can be customized based on the needs and requirements of users and organizations. The system allows you to create your own stages. When you scroll the window to the right, you will be able to see the ‘+ Stage’ option, as highlighted in the given screenshot.
The moment you click on the +Stage icon, the system will depict a new stage where you can add the stage details.
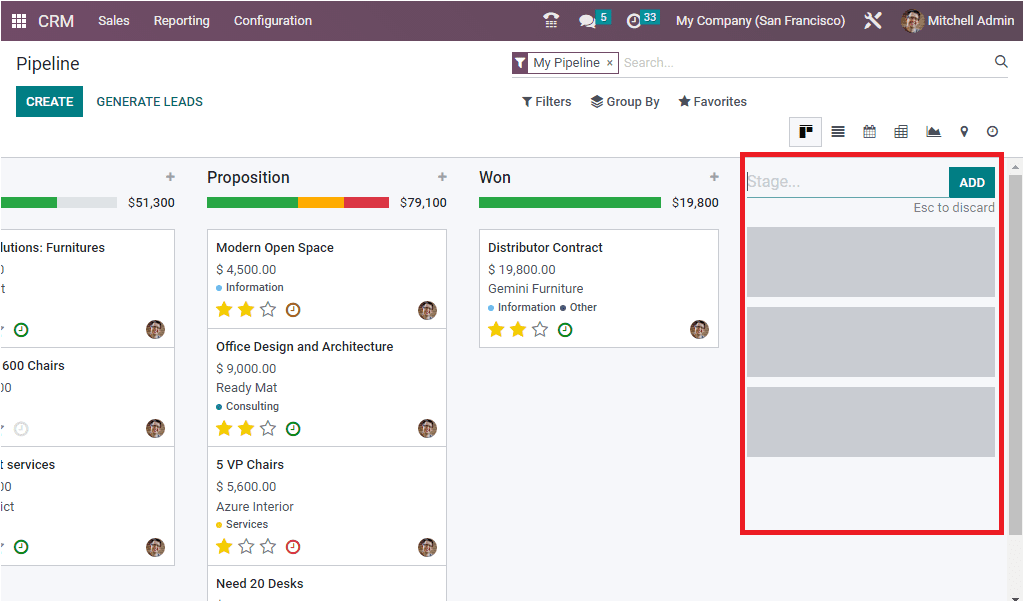
Here you can give the stage name in the provided space. Let us create a new stage for keeping Lost opportunities. So we can just give ‘Lost’ as the stage name. Then click on the ADD button. Now we will be able to view that the new stage ‘Lost’ has been created as given in the image below.
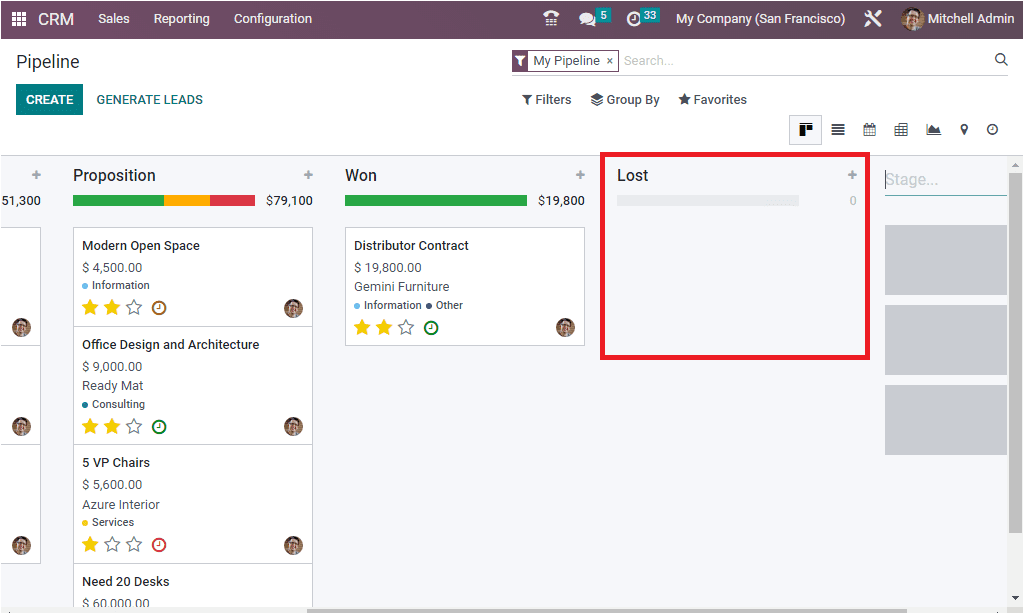
Now the new stage has been added to the pipeline. Likewise, you can include many stages based on your requirements. Now when you look on the top right side of the window, you will be able to see two icons. These two icons are highlighted in the given screenshot.
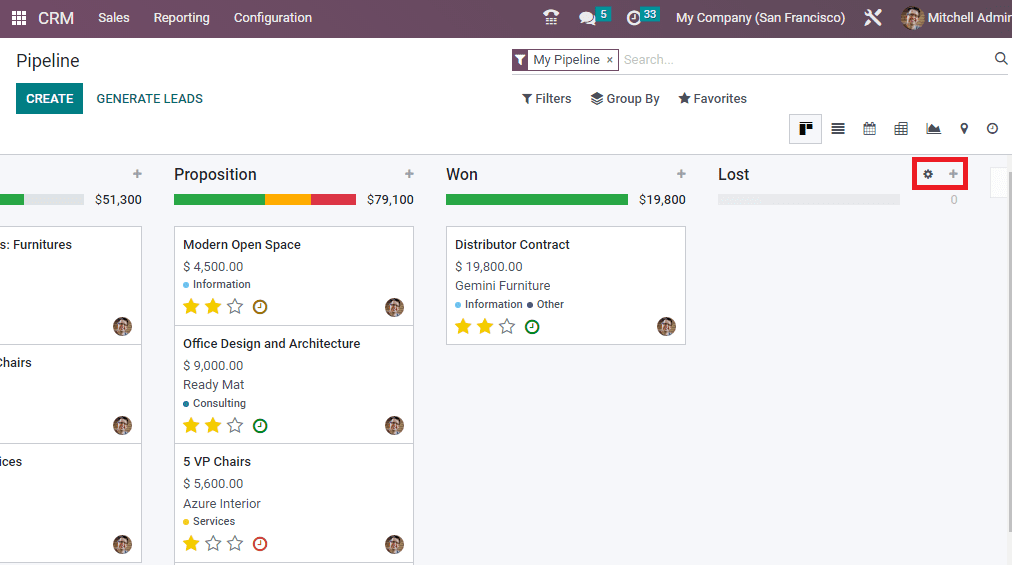
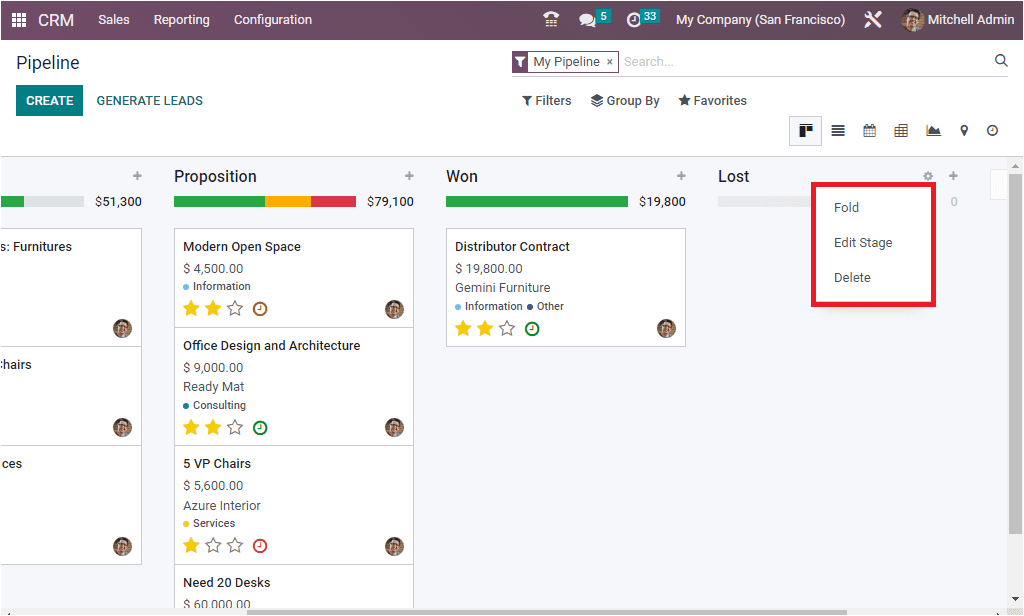
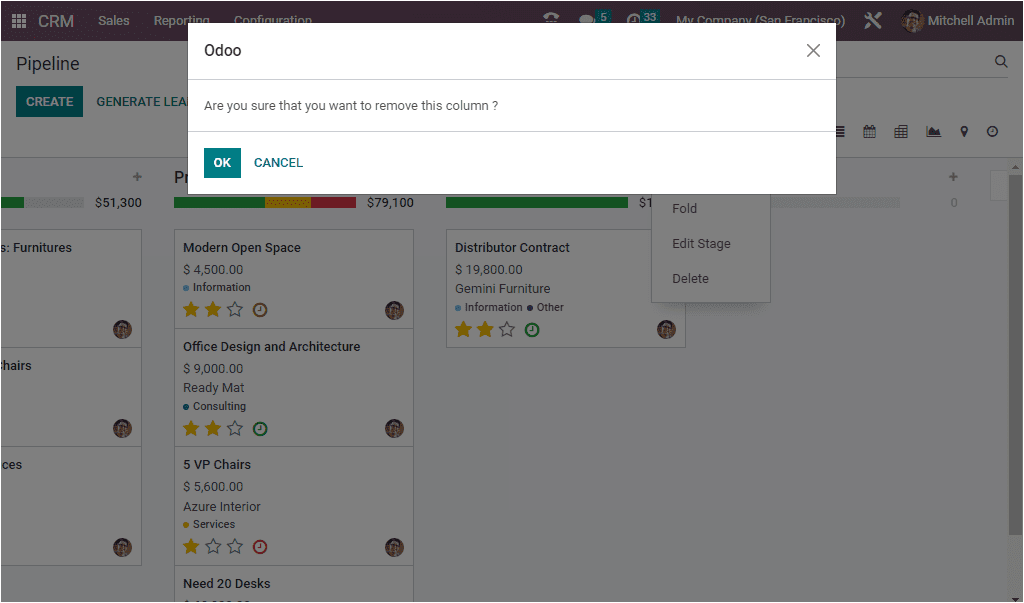
The first icon you can see is the settings option of that particular stage. When you click on this icon, you will get a dropdown menu where you can view the Fold, Edit Stage, and Delete options, as showcased in the screenshot
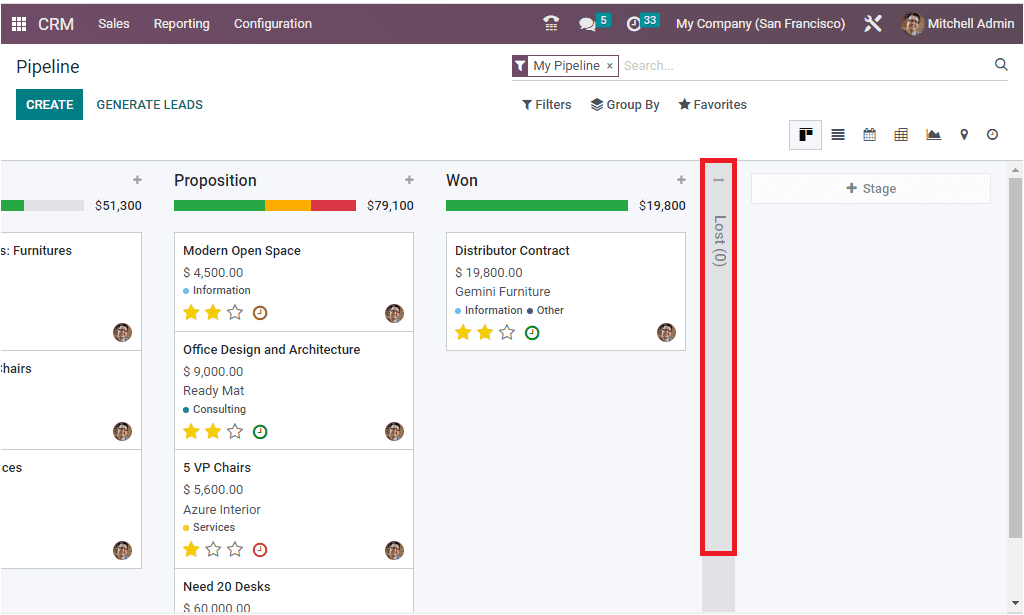
The Fold menu allows you to fold the stage in the Kanban view. This option is very beneficial for keeping the stage folded when the stage doesn’t contain any data or if there are a large number of stages to manage, etc.
The next option available in Settings is the ‘Edit Stag.’ With the help of this option, you can make the required edits at that particular stage. When you click on this icon, the system displays a popup window as picturized below.
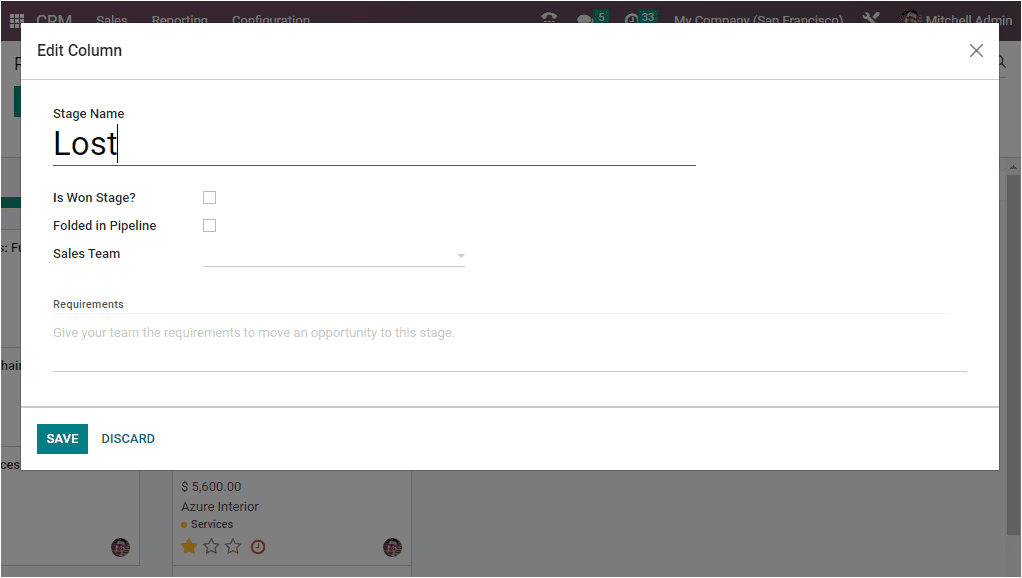
In case you want to change the name of the Stage, you can make use of this option. In addition, if this stage is a won stage, you can mark it in the check box. Similarly, if you check the box near the option ‘Folded in Pipeline’, the stage will be folded in the kanban view when there are no records to display. Moreover, if you want to assign this stage for a particular team in order to hide it from other teams, you can mention the sales team in the provided space. Finally, you have an option to mention the internal requirements of this stage. If you enter the details, the details will become visible as a tooltip over the stage's name. This field is very useful for conveying to your team the requirements to move an opportunity to this stage. The final option available in the stage Settings is the ‘Delete’ option. This option is very useful for deleting the stage. When you select the Delete option, the system will automatically depict a small pop-up window asking you permission that you want to remove this particular stage.
Now the + icon is the Quick Add option that will allow you to quickly add an opportunity to that particular stage. So let us click on this icon. As soon as you click on this button, the system will showcase you a dropdown menu for quickly adding the details of an opportunity. This option is also available in all stages so that you can easily add an opportunity to any stage.
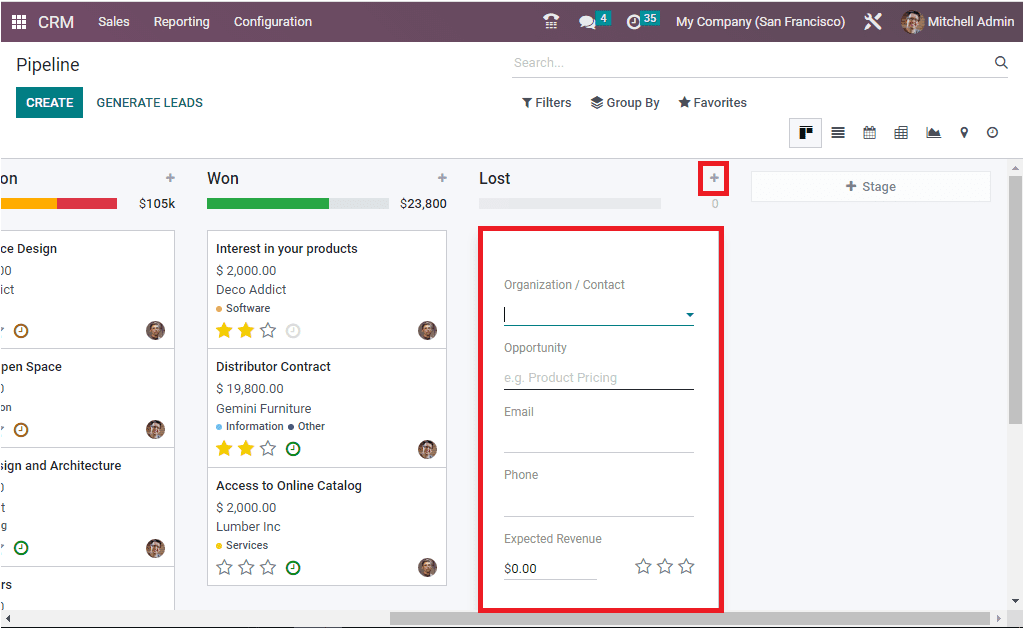
Here you can provide the Organization or Contact details using the dropdown menu. The opportunity name can be added. Further, you can allocate the Email ID, Phone number, then specify the Expected Revenue and also can mark the priority by selecting the star. The three Stars represent medium, high, and very high priority respectively. Below you can see the ADD, EDIT and Delete buttons that can be used for performing the respective actions.
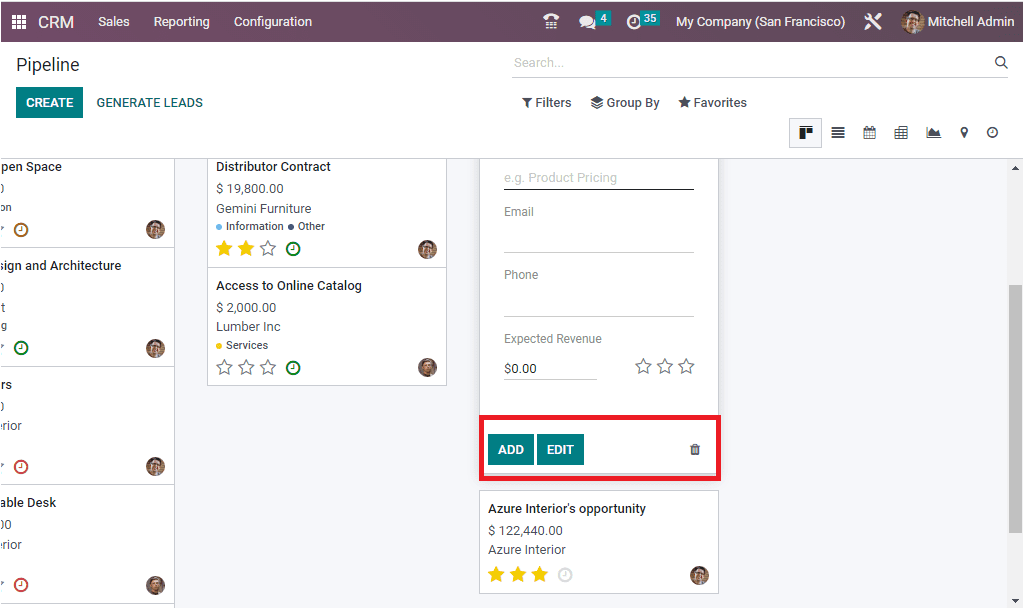
When you click on the ADD button, the newly created opportunity will be saved in the respective stage. Here the opportunity is saved in the Lost stage, as shown in the image below.
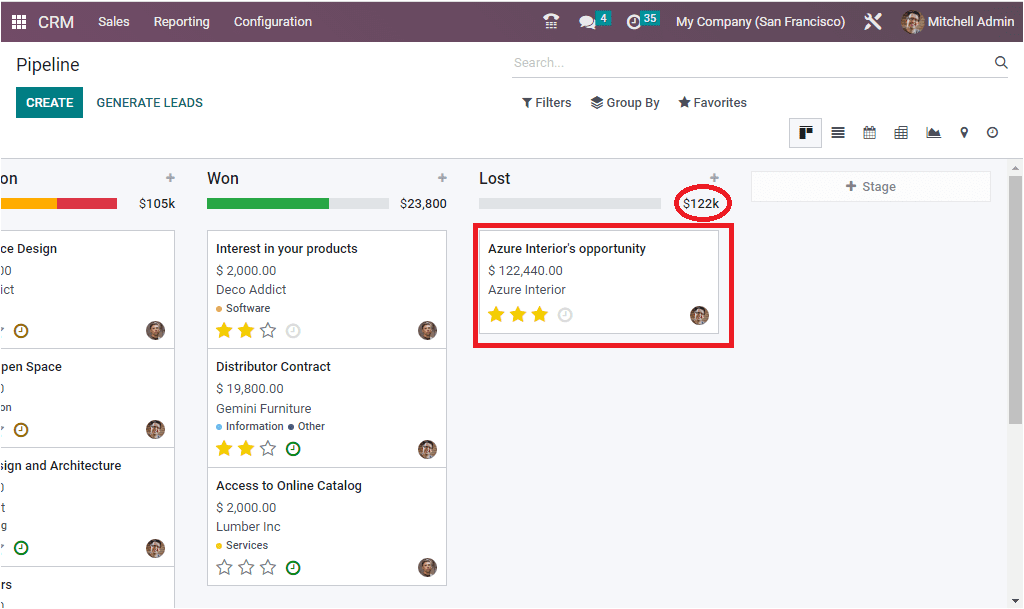
If you want to view the details of the opportunity, you can click on the respective data. For example, if we click on the Azure Interior’s opportunity in the Lost stage, the system will depict the details as shown below.
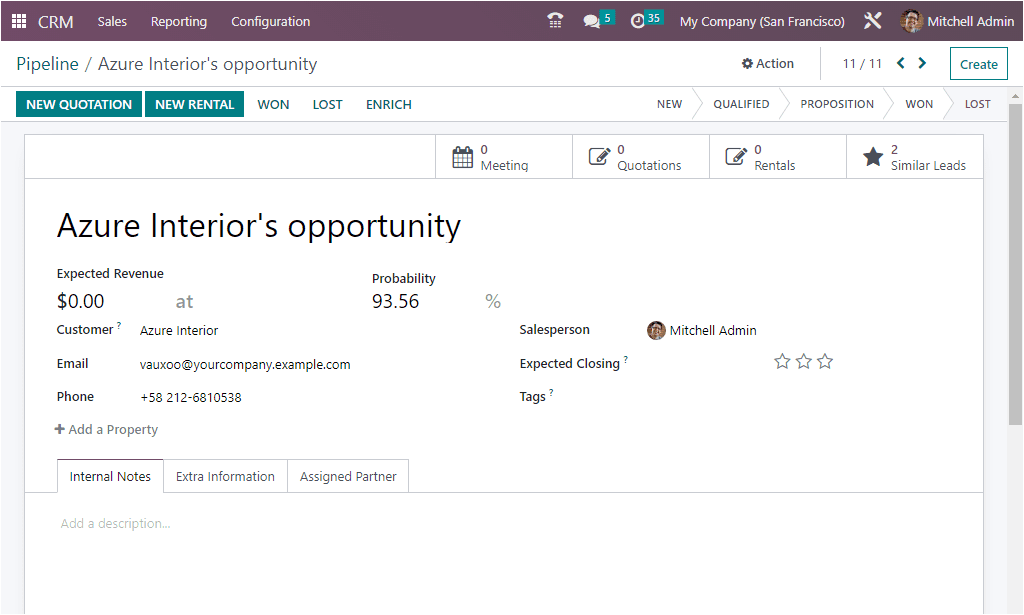
The window will depict all the information regarding the opportunity. Here you can view the name, Probability, Probability Percentage, Customer name, Email, Phone Number, associated Salesperson, and many other details. These all are important aspects of the pipeline stages.
Apart from all these options, the different activities associated with opportunity can be easily identified by viewing the different color formats. Just below the stage name, you can view different types of colors, as highlighted below.
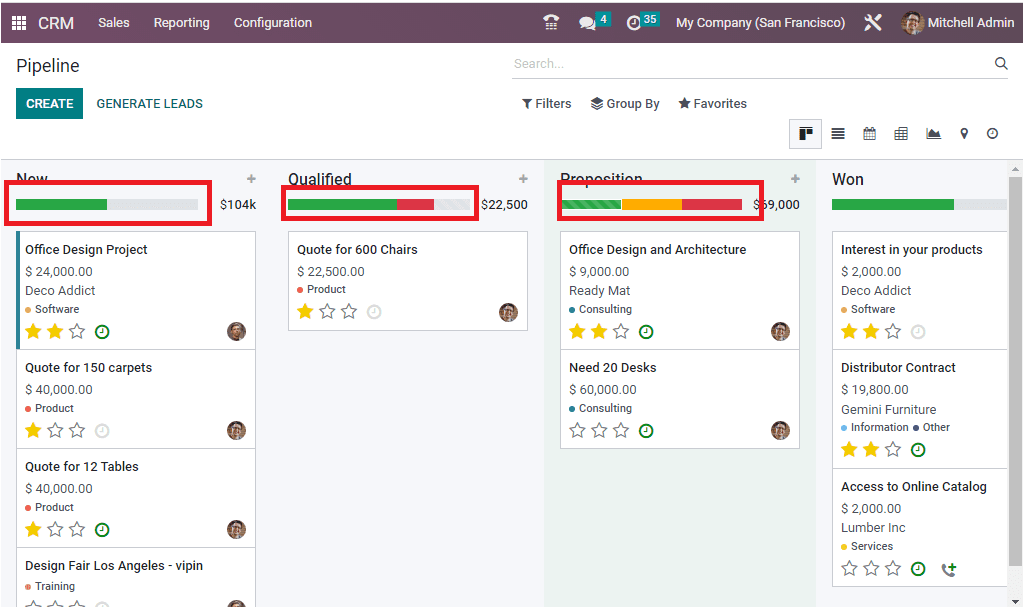
Each of these colors represents different activities scheduled for each opportunity. When we consider the Proposition stage, we can view three colors, green, orange, and red. When you click on the Green color, the system will list the opportunities which are already planned for an activity.
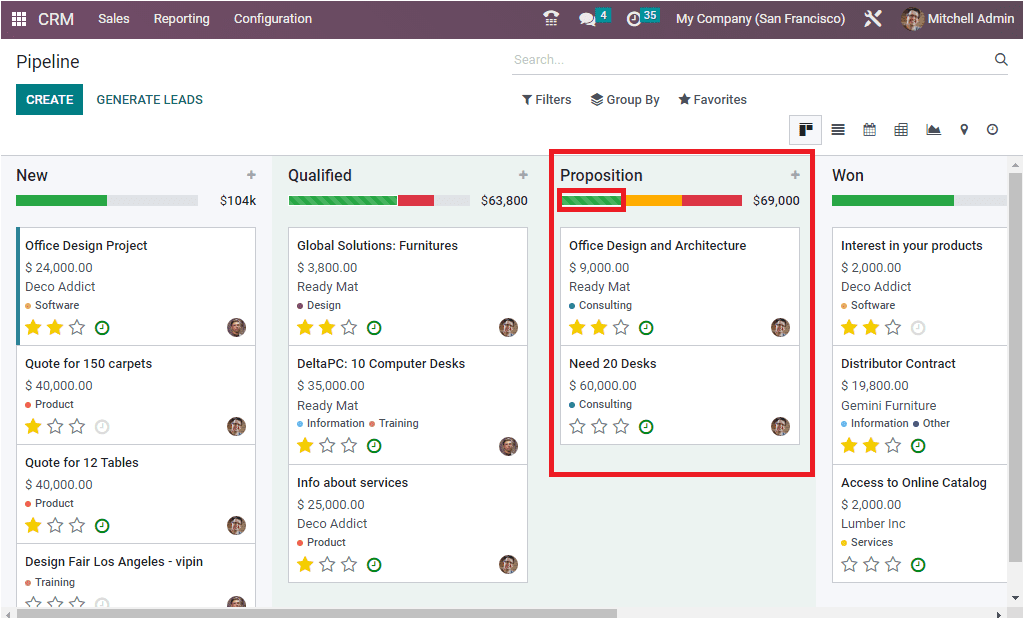
If you click on the Orange shade, the activities planned for today will be displayed.
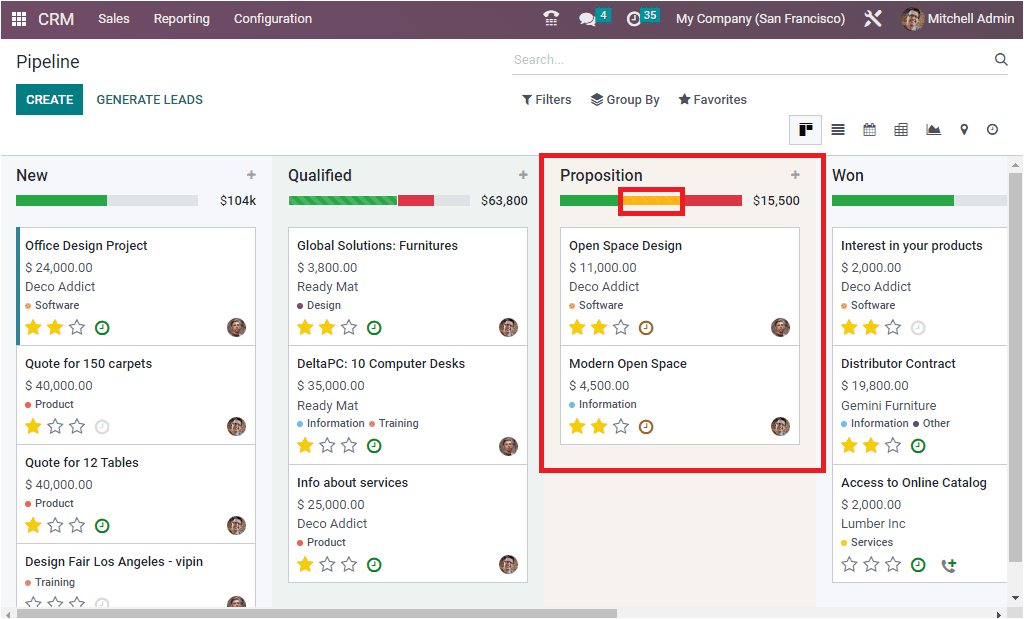
The Red indicates Overdue activities.
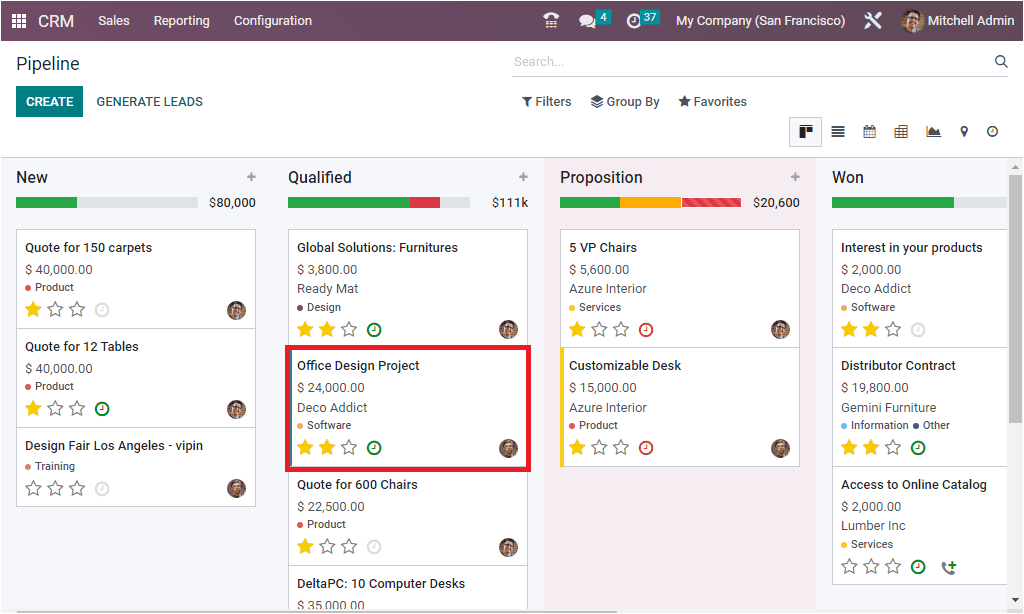
In addition, the Pipeline window allows you to change the position of the opportunities. For that, you only want to do is simply drag and drop the opportunities. For example, if you want to change the Office Design Project opportunity from the New to the Qualified stage, you can drag it from the New stage and drop it in the Qualified stage, as changed in the screenshot below.
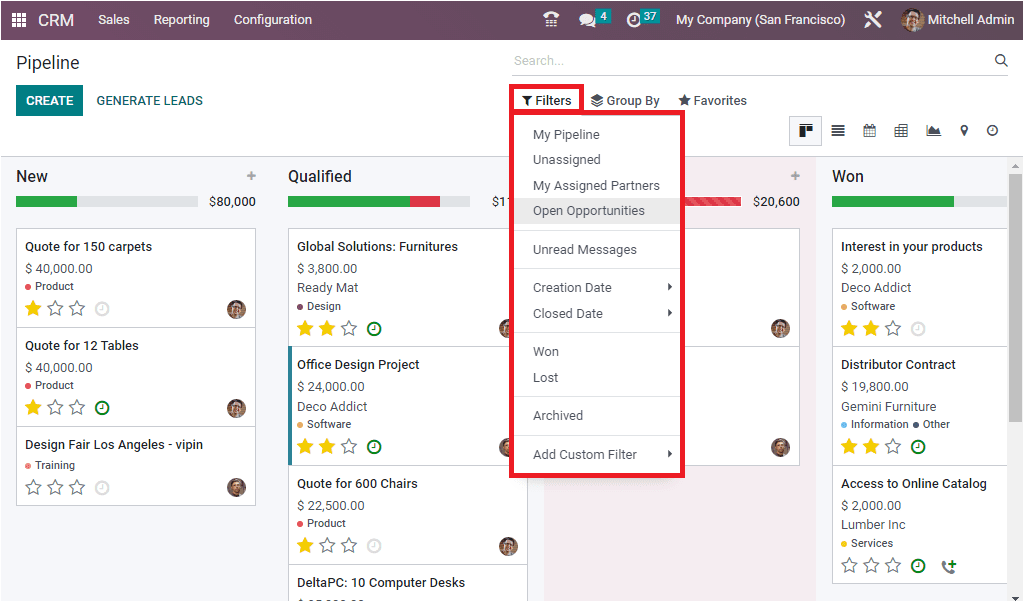
Apart from all these options, the pipeline window allows you to filter the pipeline using various default and customizable options. The Default Filters included in the list are My Pipeline, Unassigned, My Assigned Partners, Open Opportunities, Unread Messages, Creation Date, Closed Date, Won, Lost, and Archived.
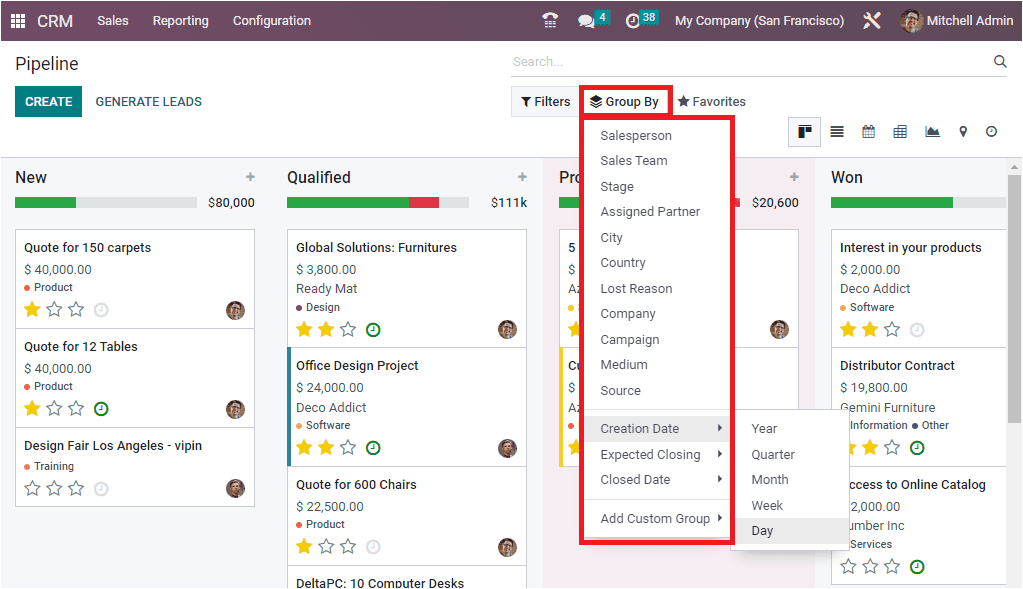
In addition, you are able to group the pipeline using various default and customizable grouping options. The default grouping options defied in the tab are Salesperson, Sales Team, Stage, Assigned Partner, City, Country, Lost Reason, Company, Campaign, Medium, Source, Creation Date ( Year, Quarter, Month, Week, Day), Expected Closing (Year, Quarter, Month, Week, Day), and Closed Date (Year, Quarter, Month, Week, Day).
This way, we can create a stage or pipeline in the Odoo 16 CRM module.