Odoo's Point of Sale (POS) module provides an efficient interface for handling sales transactions. Nevertheless, there are scenarios where enhancing POS functionality by adding custom screens becomes imperative. This blog aims to walk you through the process of creating a custom screen in Odoo 17 POS.
Creating a Custom Screen
To create a custom screen, we will need to create a new module that will contain the necessary JavaScript and XML files. The JavaScript file will define the behavior of the custom screen, while the XML file will define the screen's layout.
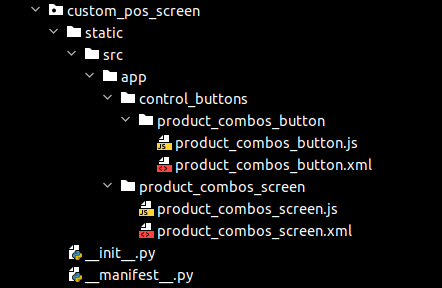
In this example, we're creating a module named custom_pos_screen to display a screen for product combo history. There is a control button to display this screen, so let's create the directories as follows:

And add the files in the manifest as follows,
'assets': {
        'point_of_sale._assets_pos': [
            'custom_pos_screen/static/src/app/**/*',
    },
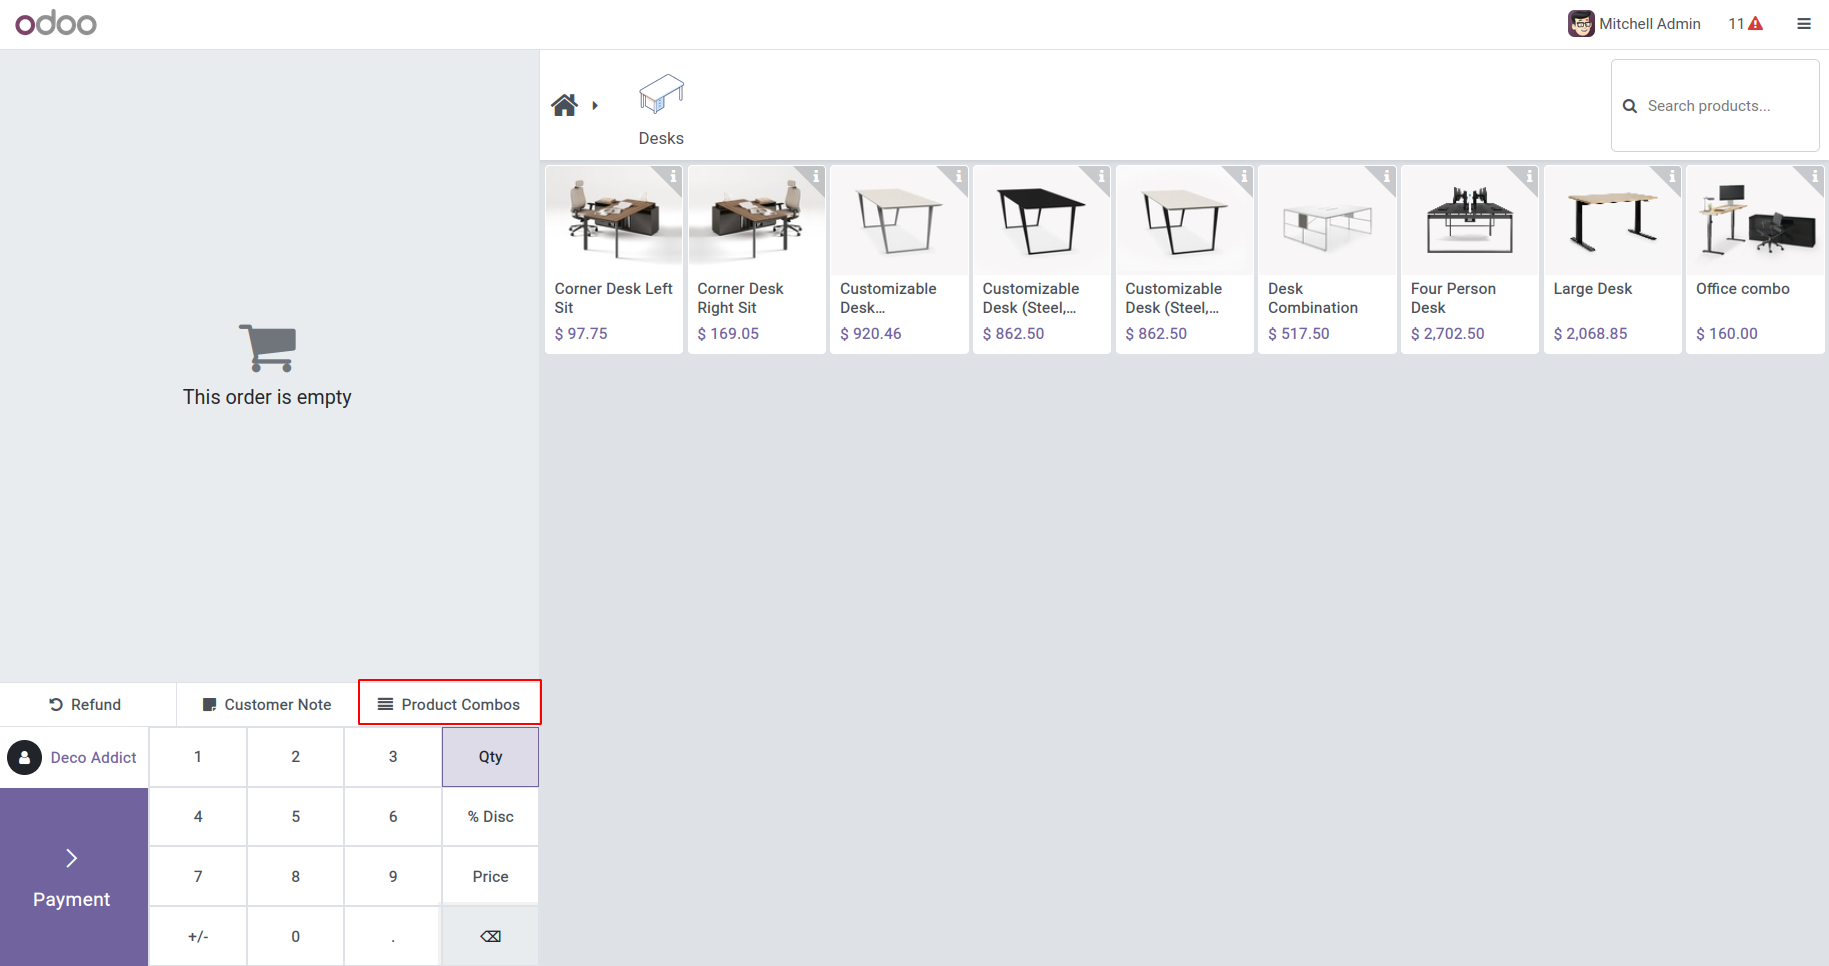
To create the control button named "Product Combos," generate a template as follows in the file product_combos_button.xml:
<?xml version="1.0" encoding="UTF-8"?>
<templates id="template" xml:space="preserve">
    <t t-name="custom_pos_screen.ProductCombosButton" owl="1">
        <button class="control-button btn btn-light rounded-0 fw-bolder" t-on-click="() => this.click()">
            <i class="fa fa-align-justify me-1" role="img" aria-label="Product Combos" title="Product Combos" />
            Product Combos
        </button>
    </t>
</templates>
Then, create the JavaScript file for the control button in product_combos_button.js.
/** @odoo-module */
import { Component } from "@odoo/owl";
import { ProductScreen } from "@point_of_sale/app/screens/product_screen/product_screen";
import { usePos } from "@point_of_sale/app/store/pos_hook";
export class ProductCombosButton extends Component {
    static template = "custom_pos_screen.ProductCombosButton";
    setup() {
        this.pos = usePos();
    }
    async click() {
        this.pos.showScreen("ProductCombosScreen");
    }
}
ProductScreen.addControlButton({
    component: ProductCombosButton,
    condition: function () {
        return true;
    },
});
In this JavaScript code, a new Odoo POS component, ProductCombosButton, is crafted to serve as a control button for displaying a custom screen named ProductCombosScreen. This component is defined by extending the base Component class, and its template is set to "custom_pos_screen.ProductCombosButton." The setup method initializes the component, accessing the Point of Sale store through the usePos hook. The click method, triggered by a button click, instructs the Point of Sale to show the ProductCombosScreen. Finally, the component is added to the control buttons of the ProductScreen.
Output will be as follows.

Upon clicking the button, our aim is to display the product combo screen. Therefore, let's proceed by creating the JavaScript file for the custom screen in the file named product_combos_screen.js:
/** @odoo-module */
import { registry } from "@web/core/registry";
import { usePos } from "@point_of_sale/app/store/pos_hook";
import { Component } from "@odoo/owl";
export class ProductCombosScreen extends Component {
    static template = "custom_pos_screen.ProductCombosScreen";
    setup() {
        super.setup(...arguments);
        this.pos = usePos();
    }
    getComboList() {
        var comboList = [];
        Object.values(this.pos.db.combo_by_id).forEach(function(combo) {
            comboList.push({
                id: combo.id,
                name: combo.name,
                base_price: combo.base_price,
                combo_line_ids: combo.combo_line_ids,
            });
        });
        return comboList
    }
}
registry.category("pos_screens").add("ProductCombosScreen", ProductCombosScreen);
In this file, we've defined a function to retrieve the list of combo products, set the template as ProductCombosScreen, and added this screen to the pos_screens registry.
Now, define the template by adding the following code to the XML file:
<?xml version="1.0" encoding="UTF-8"?>
<templates id="template" xml:space="preserve">
	<t t-name="custom_pos_screen.ProductCombosScreen" owl="1">
        <div class="combo-screen screen h-100 bg-100">
			<div class="controls d-flex align-items-center justify-content-between mt-1 mt-md-0 p-2 bg-400">
				<div class="buttons d-flex gap-2">
					<button class="discard btn btn-lg btn-light" t-on-click="() => this.pos.showScreen('ProductScreen')">
						<span class="search-icon">
							<i class="fa fa-angle-double-left"/>
						</span>
							Back
					</button>
				</div>
			</div>
			<div class="orders overflow-y-auto flex-grow-1">
				<div class="header-row d-flex text-bg-700 fw-bolder">
					<div class="col wide p-2">Combo Name</div>
					<div class="col wide p-2">Price</div>
					<div class="col wide p-2">No of products</div>
				</div>
				<t t-set="comboList" t-value="getComboList()"/>
				<t t-foreach="comboList" t-as="combo" t-key="combo.id">
					<div class="order-row">
						<div class="col wide p-2 ">
							<div>
								<t t-esc="combo.name"/>
							</div>
						</div>
						<div class="col wide p-2">
							<div>
								<t t-esc="combo.base_price"/>
							</div>
						</div>
						<div class="col wide p-2">
							<div>
								<t t-esc="combo.combo_line_ids.length"/>
							</div>
						</div>
					</div>
				</t>
			</div>
		</div>
	</t>
</templates>
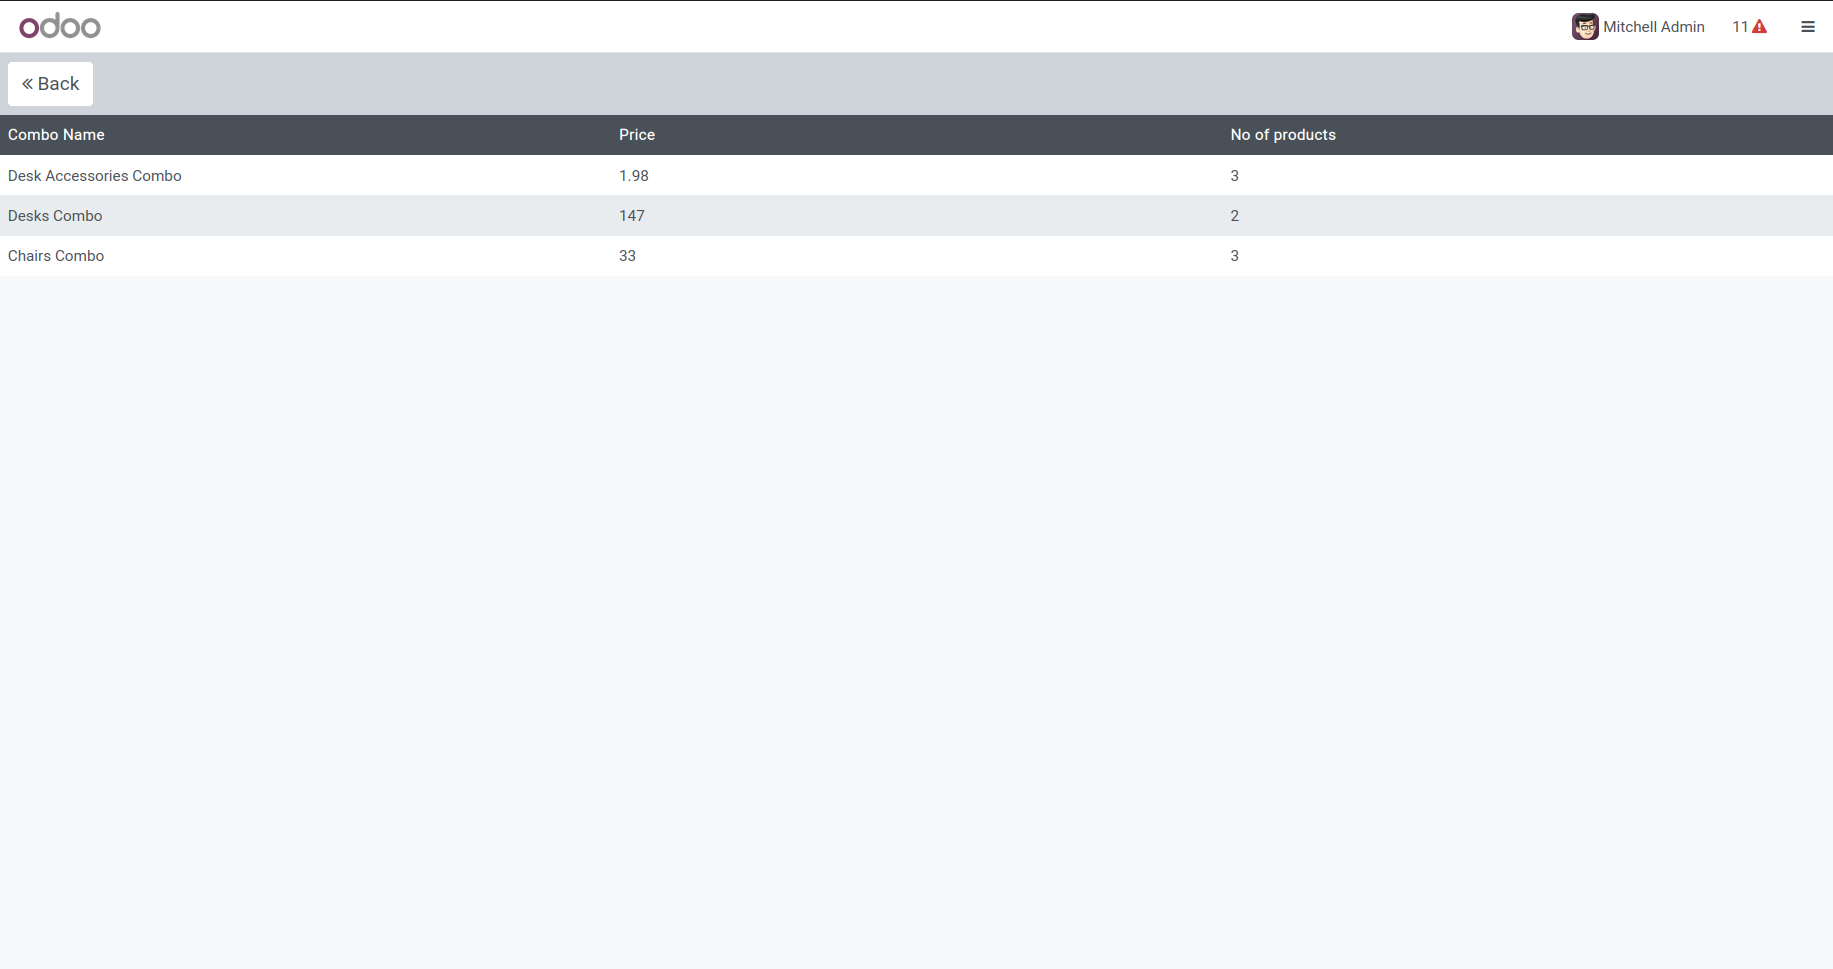
In this context, a back button is provided to return to the Product Screen, and the combo products are listed by looping through the combo list.
Now, on clicking the Product Combos button, we can see the combo screen as follows:

This concludes the process of creating a custom screen in Odoo 17 POS. The provided example demonstrates the fundamental steps involved in extending the POS interface with custom screens. Additional functionalities can be incorporated based on specific business requirements and user needs.