Pricelist management is a vital part of business, and owners can change the prices based on market instances. Several vital factors assist in pricing: quality, production cost, brand, etc. Most industries formulate reductions and discounts for products during specific seasons/festivals to attract customers easily. Odoo ERP ensures users create Pricelists for products and assist in surviving your business in the market. For the manufacturing and services of products, Odoo 15 Sales module is an essential solution. Users can maintain Quotations, Products, Sales Teams, Pricelists, and other aspects within the Odoo 15 Sales module.
This blog enables you to create a computed Pricelist in the Odoo 15 Sales module.
Users can allocate various pricing strategies for a product with the help of the Odoo 15 Sales module. We can manage price computation according to Formula, Fixed Price, and Discount using the Odoo 15 Sales module. Let's see how to create a computed Pricelist in the Odoo platform.
To develop a Computed Pricelist in Odoo 15
Users need to install the Sales module from Odoo Apps to activate your system's computed Pricelist feature. Choose the Settings inside the Configuration feature of the Odoo 15 Sales module. We can view the Pricing section in the Setting window, and the Pricelists option enables you to set different prices per product, as depicted in the screenshot below.
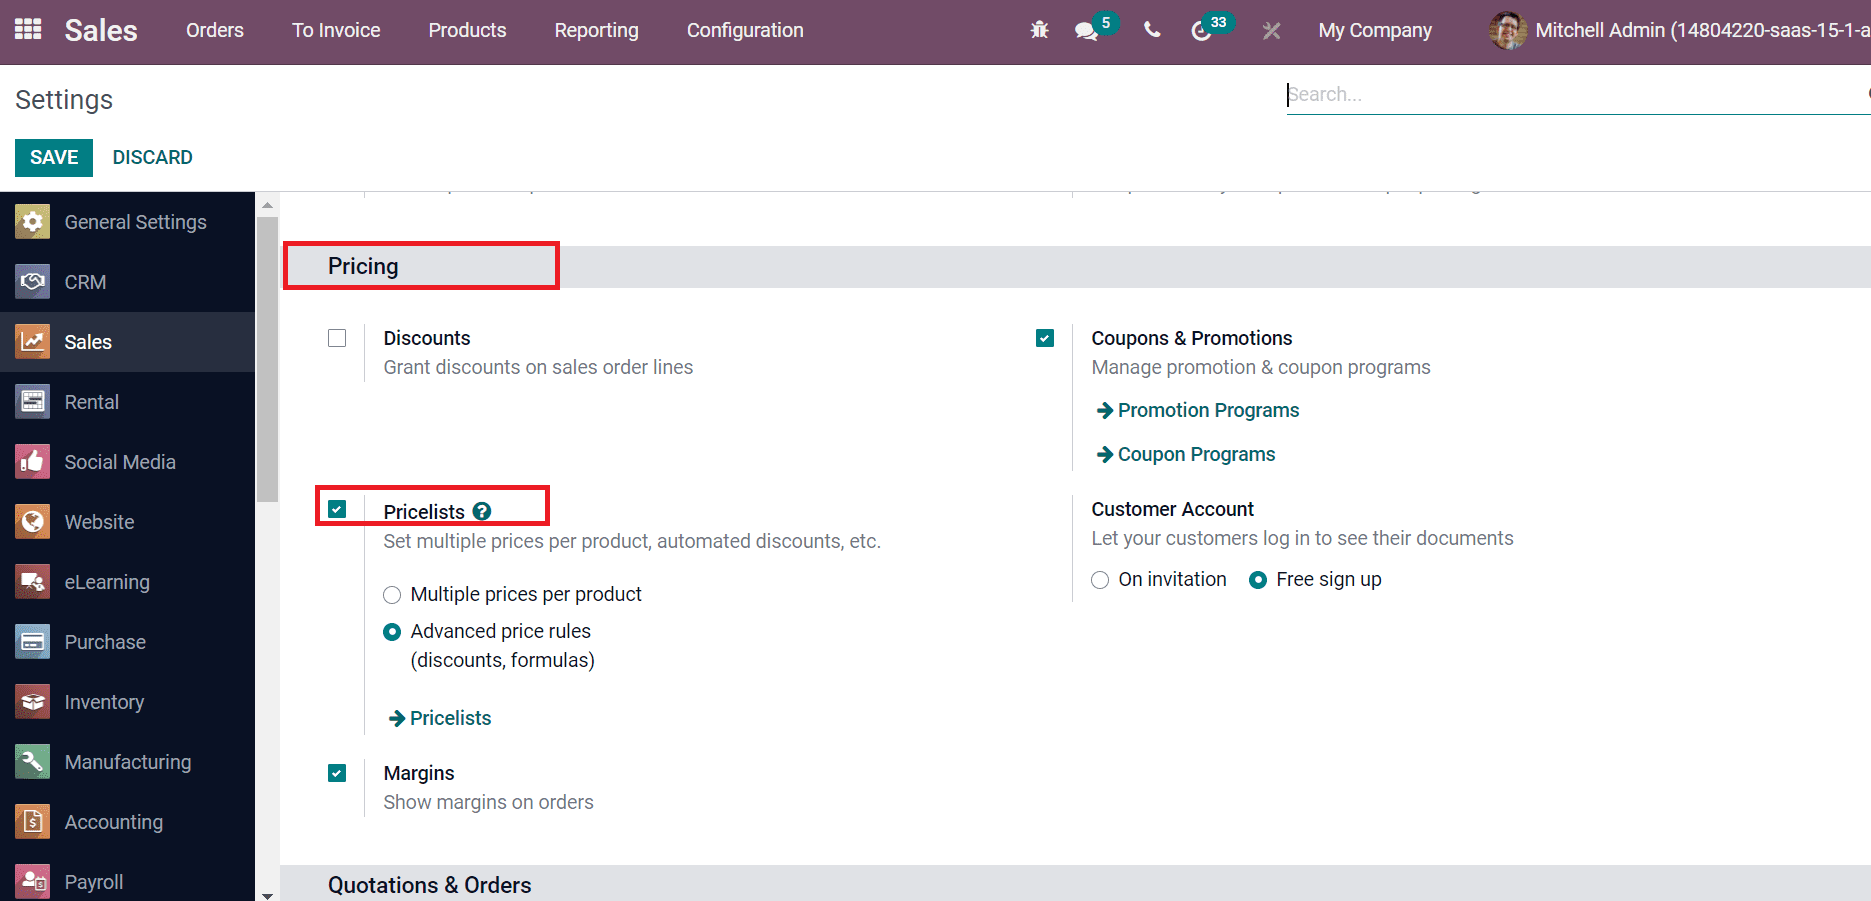
The Pricelists are classified into Multiple prices per product and Advanced price rules. Users can access Pricelists with fixed prices for each product by enabling Multiple prices per product. On the other side, Advanced price rules ensure distinct price rules for discounts or formulas. Here, you can enable Advanced price rules to generate a computed Pricelist for a product and click on the Save icon.
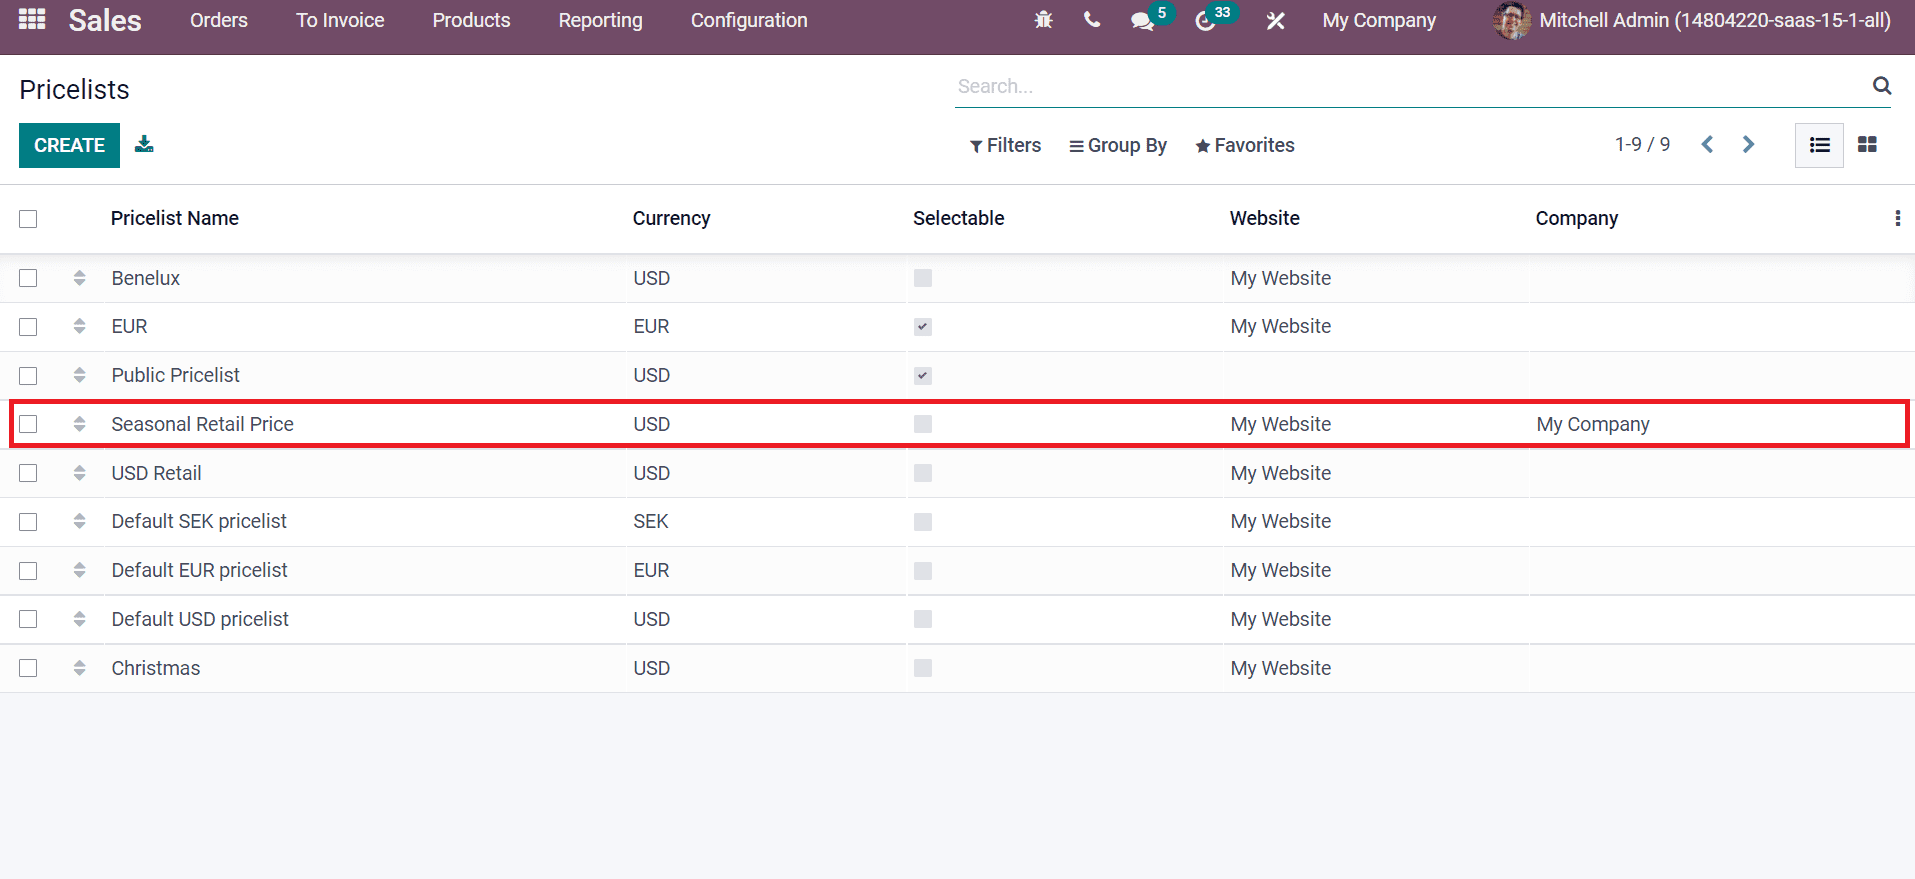
Now let's create a new Pricelist to check out the computation price in Odoo 15 Sales module. Select the Pricelists menu in the Products tab, and you can view the list of all created Pricelists. The details such as Pricelist Name, Company, Website, Currency and other aspects are viewable here. Click on Create icon to generate a new Pricelist, and let's develop a new Pricelist named 'Seasonal Retail Price'. Add the name Seasonal Retail Price, and select the Currency, Company, as displayed in the screenshot below.
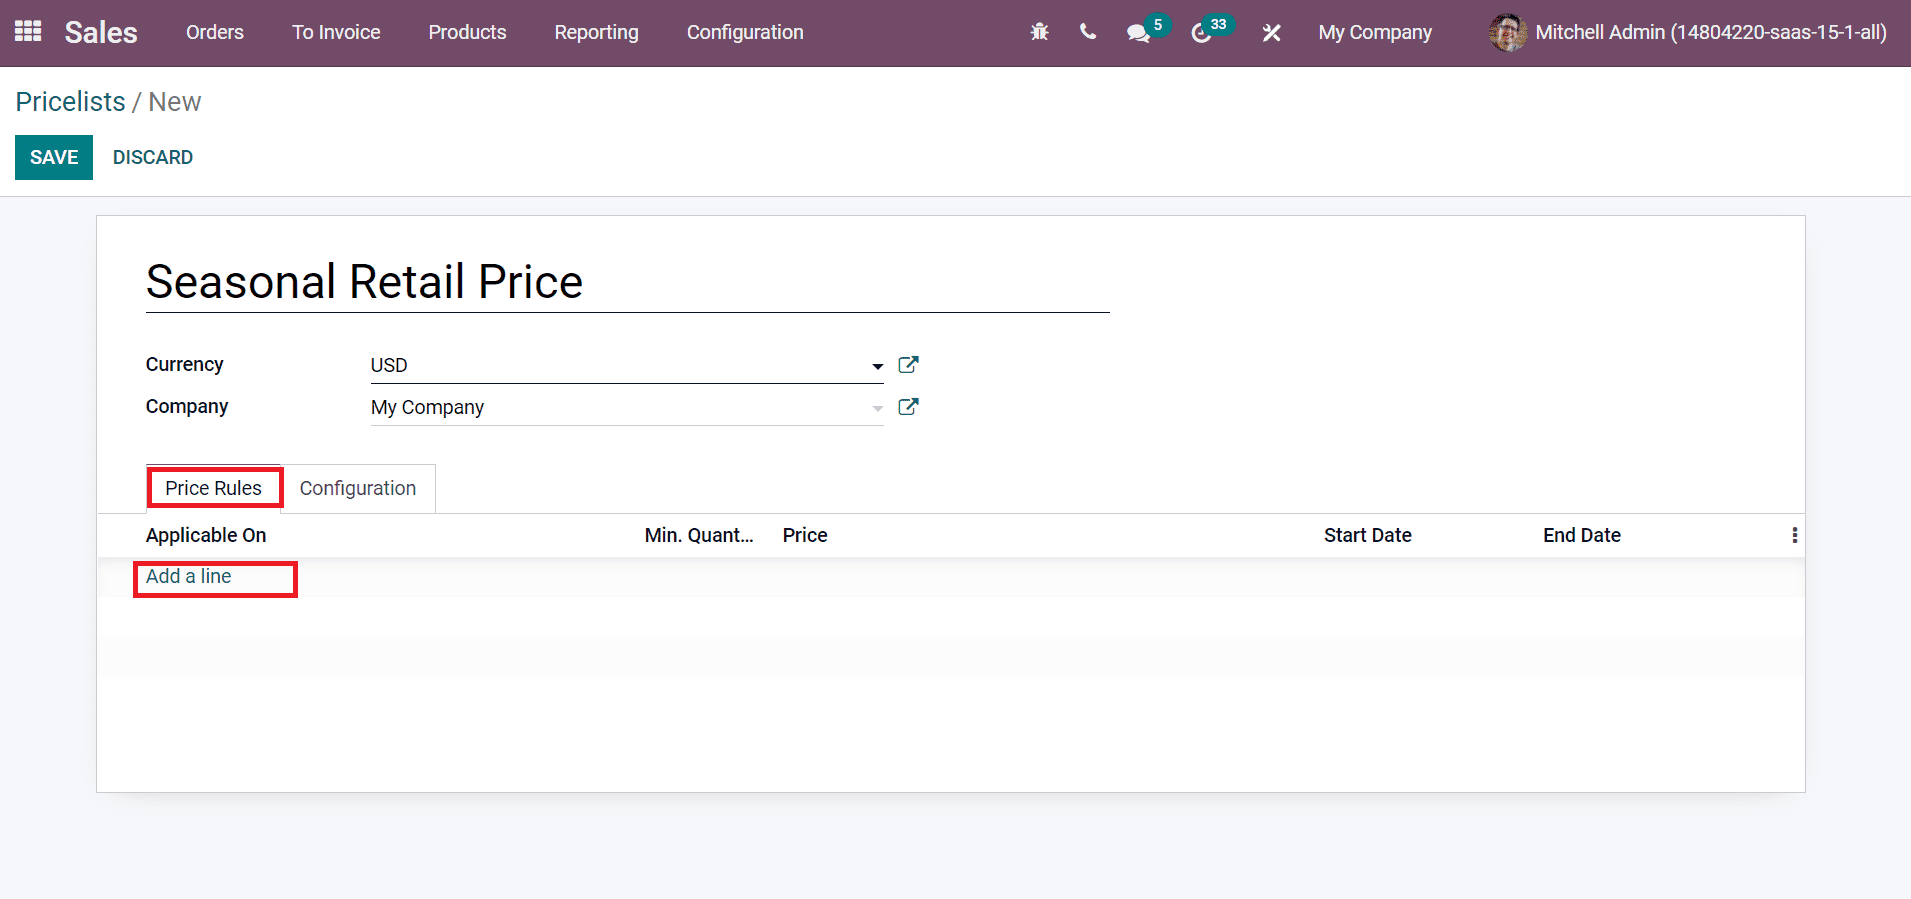
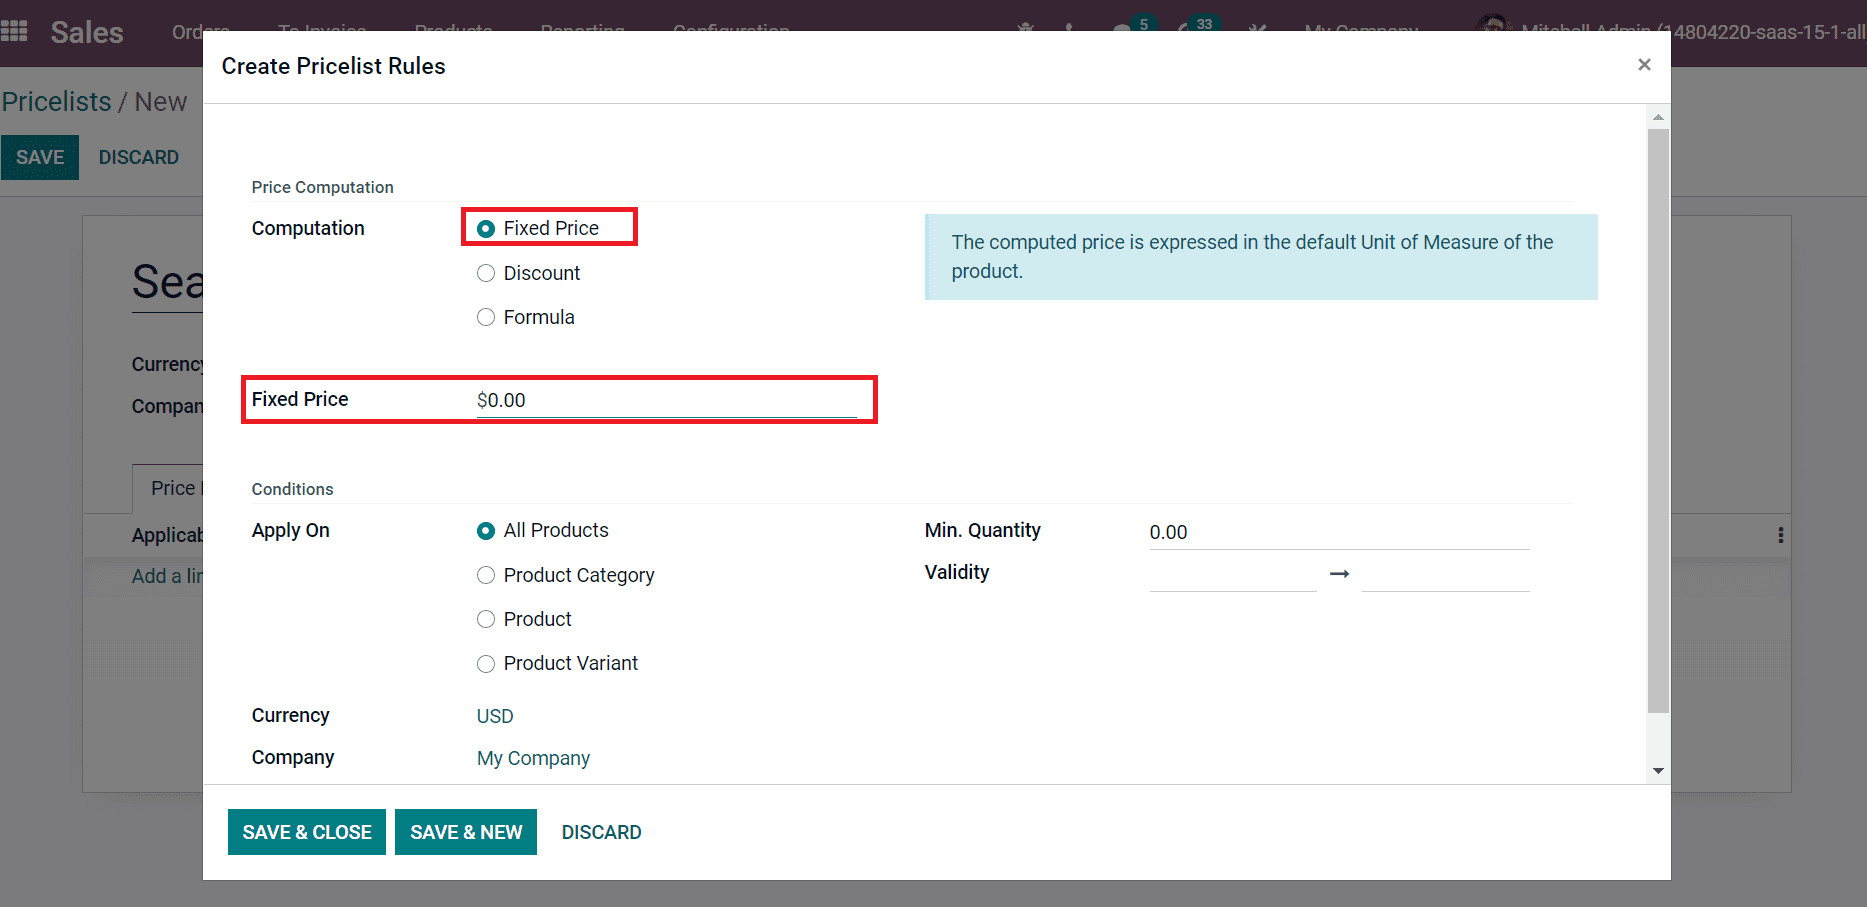
We can develop a new price rule by clicking on Add a line option inside the Price Rules tab. A new pop-up window opens before you after selecting the Add a line option. Here, users can see the Price Computation and Conditions for a specific rule. Computation is divided into three types: fixed price, Discount, and Formula. By enabling the Fixed price, the computed price is visible in the default unit of measure of a specific product, and you can add a rate in the Fixed Price field, as displayed in the screenshot below.
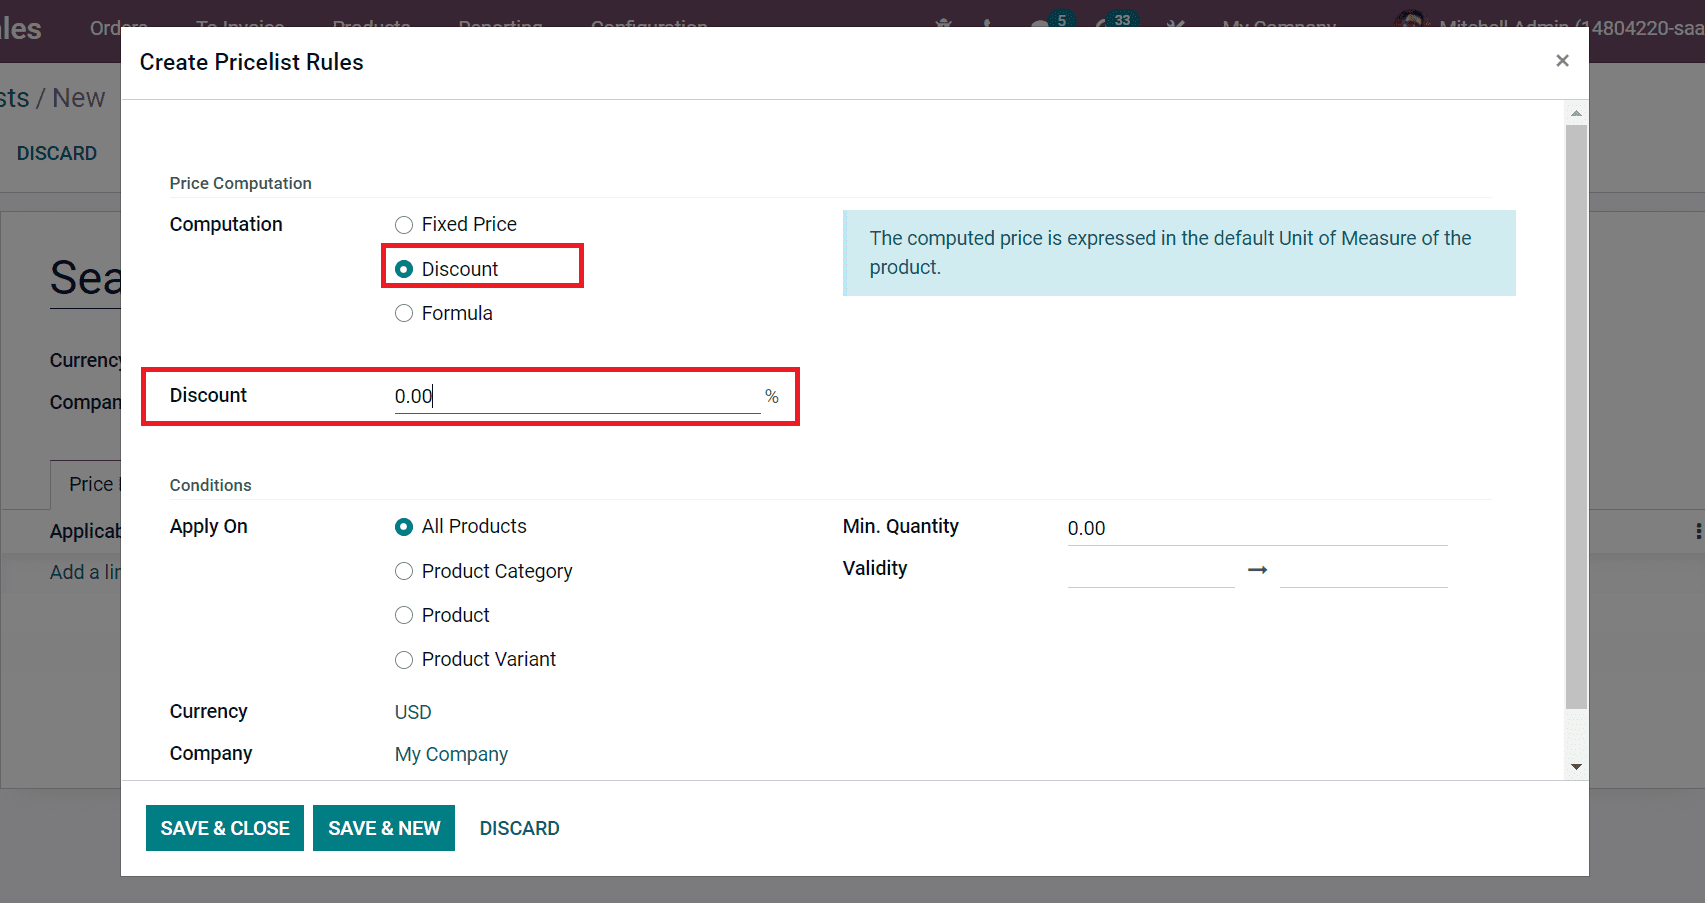
After activating the Discount option, a new Discount field appears below the Computation. Here, you can add a discount percentage of the product and apply a mark-up by setting a negative discount, as portrayed in the screenshot below.
By selecting the Formula option, we can see various sub-field below the Computation. You can add computation price based on Sales Price, Other Pricelist and Cost. Later, apply the price Discount and Extra Fee. Add the Rounding Method for Computation, and it is used before the surcharge and after the Discount. For example, you should set a rounding of 20 if you have prices end in 19.99. Specify the lowest amount of margin above the base price inside the Margin field as depicted in the screenshot below.
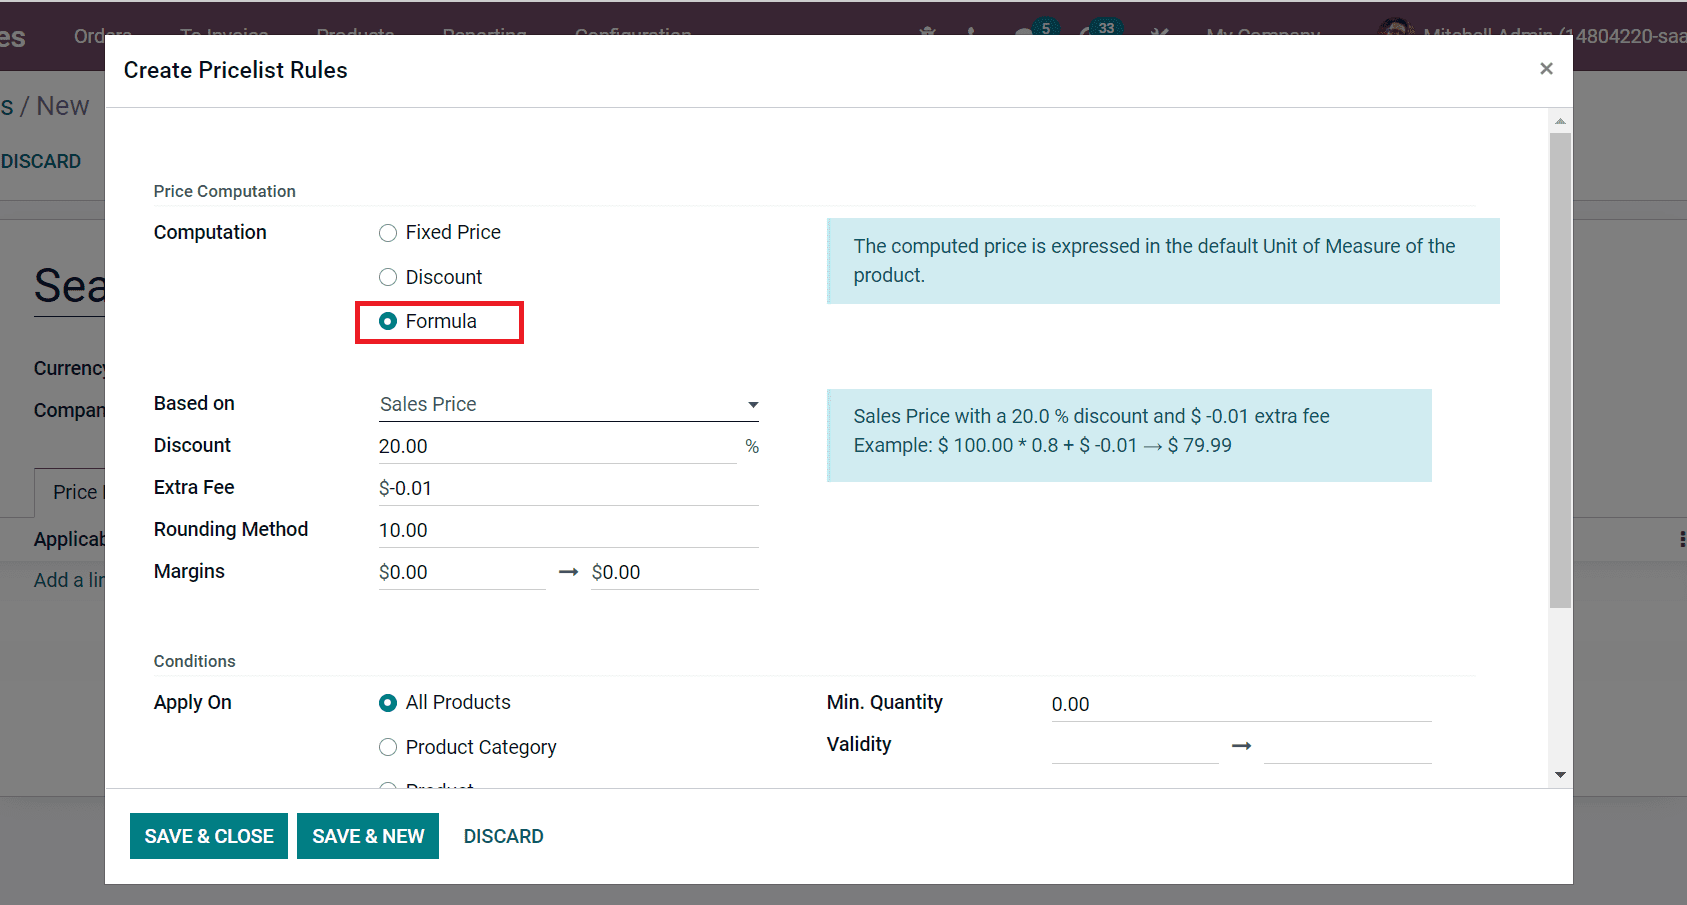
The Other Pricelist field is visible after choosing the Other Pricleist option from the Based on section. We can also apply conditions for creating Pricelist Rules for each material. Users can apply conditions based on All Products, Product Variant, Product Categories and Products. The Currency and Company are automatically viewable on the screens. Later, set the Min. Quality means minimum quality in the product default unit of measure, and enter the start date for pricelist validation inside the Validity field as shown in the screenshot.
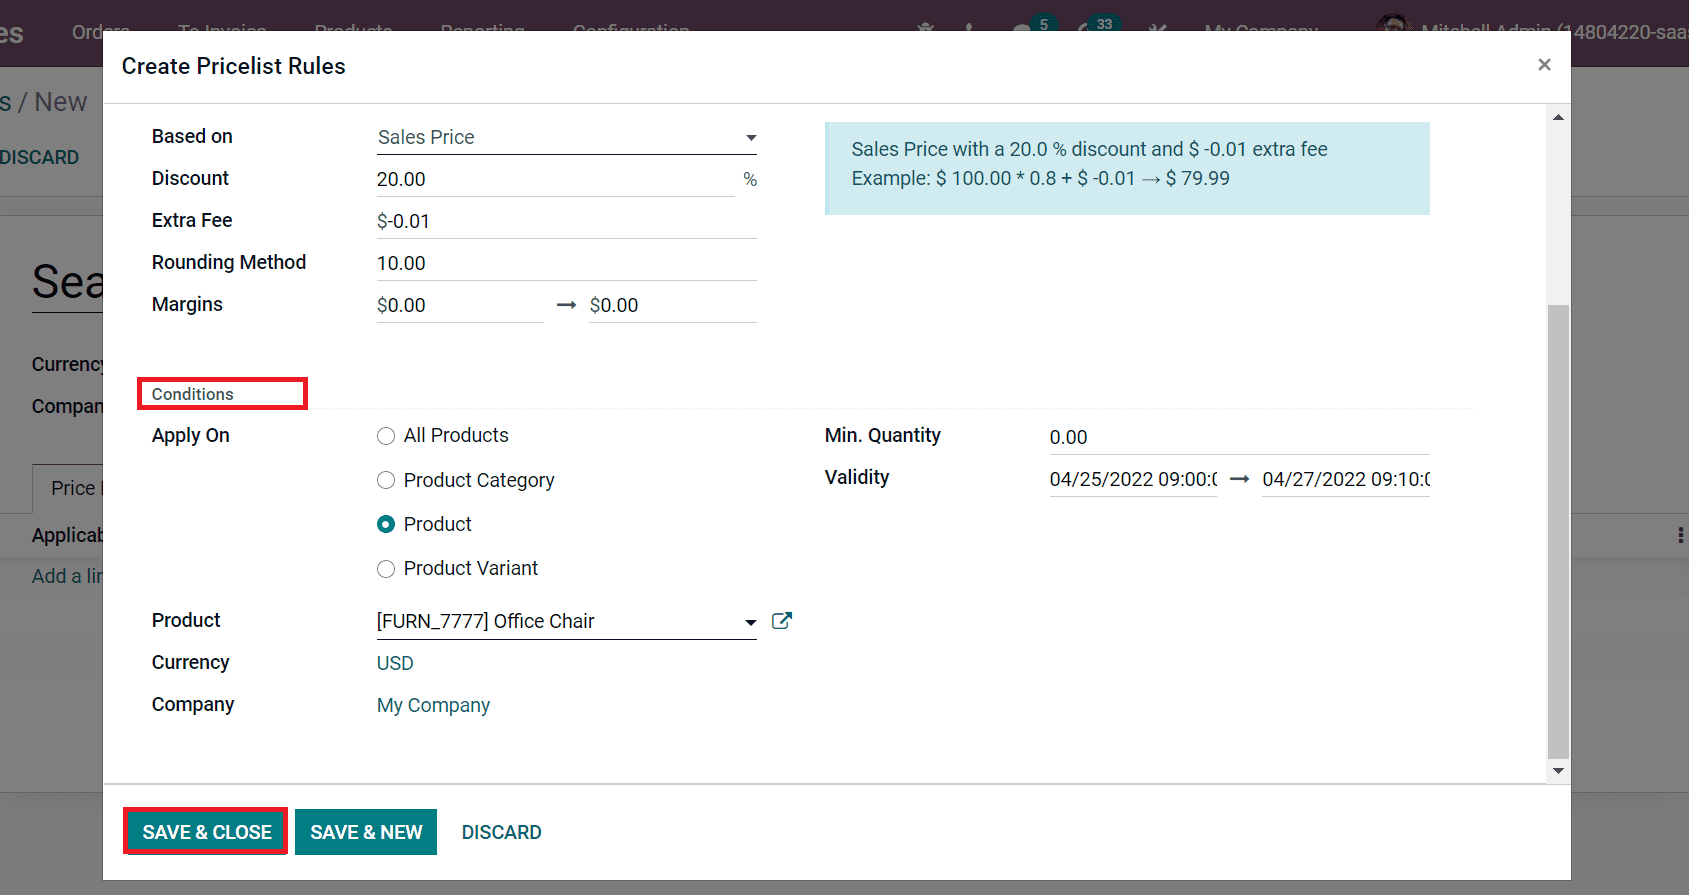
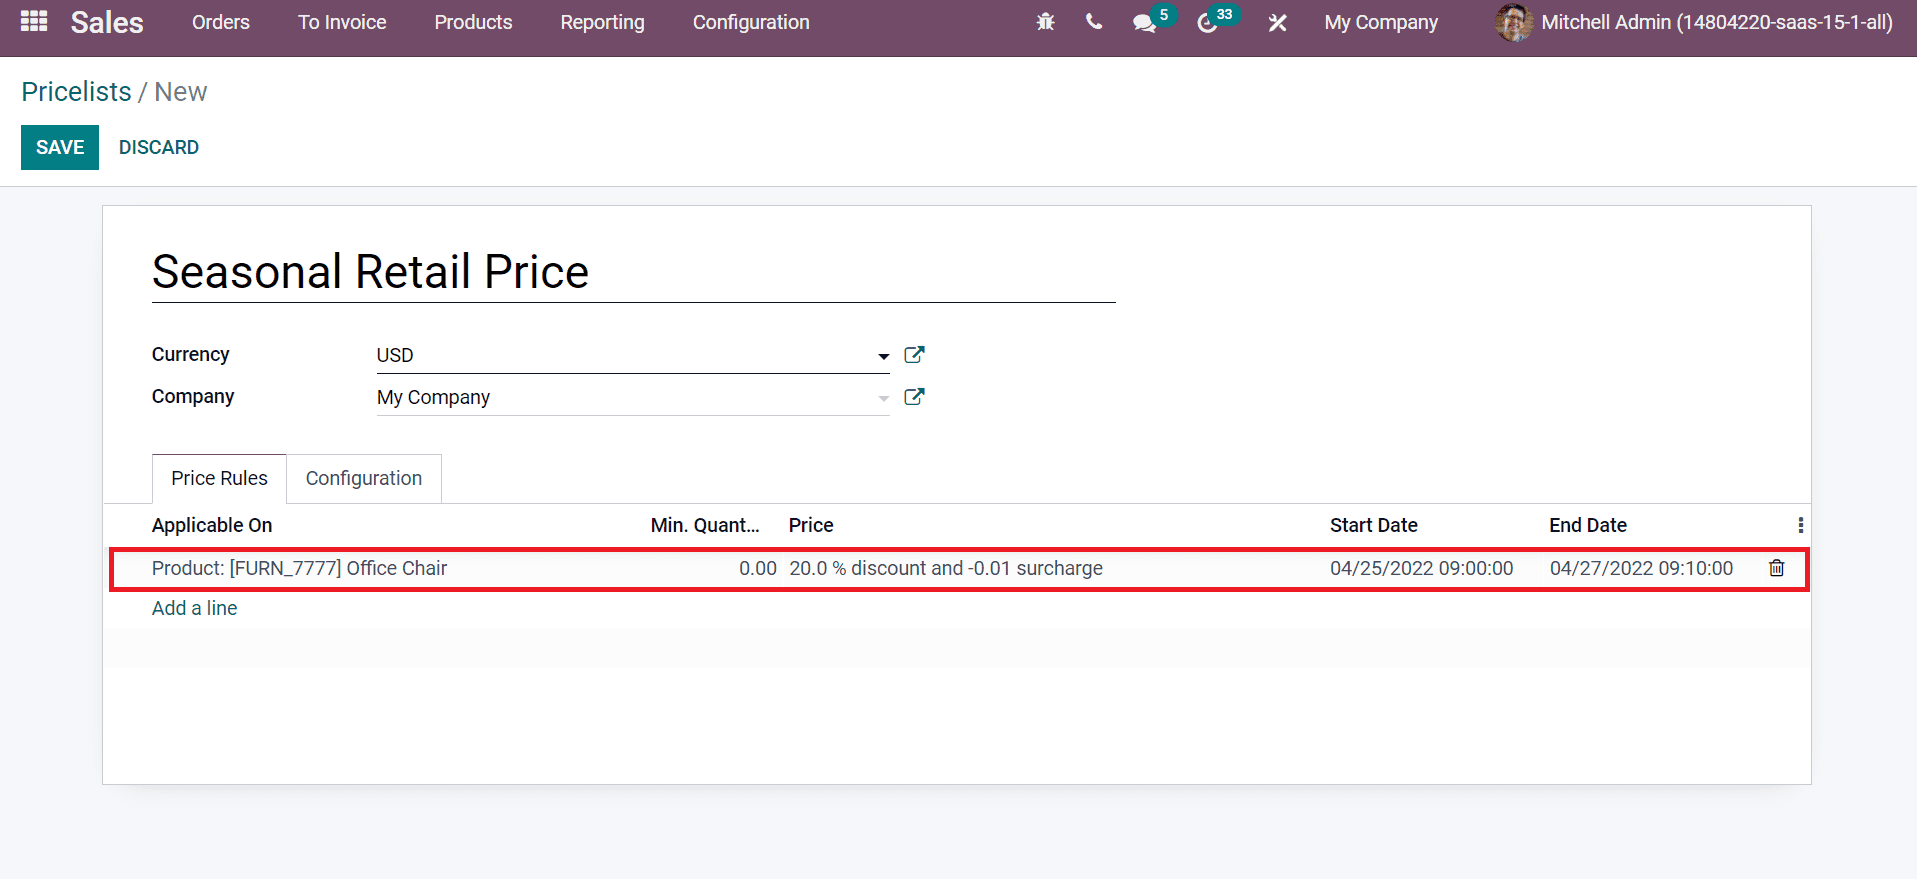
After adding all details, click on the Save and Close icon, as shown in the screenshot above. We can view the created pricelist rule below the Price Rules tab.
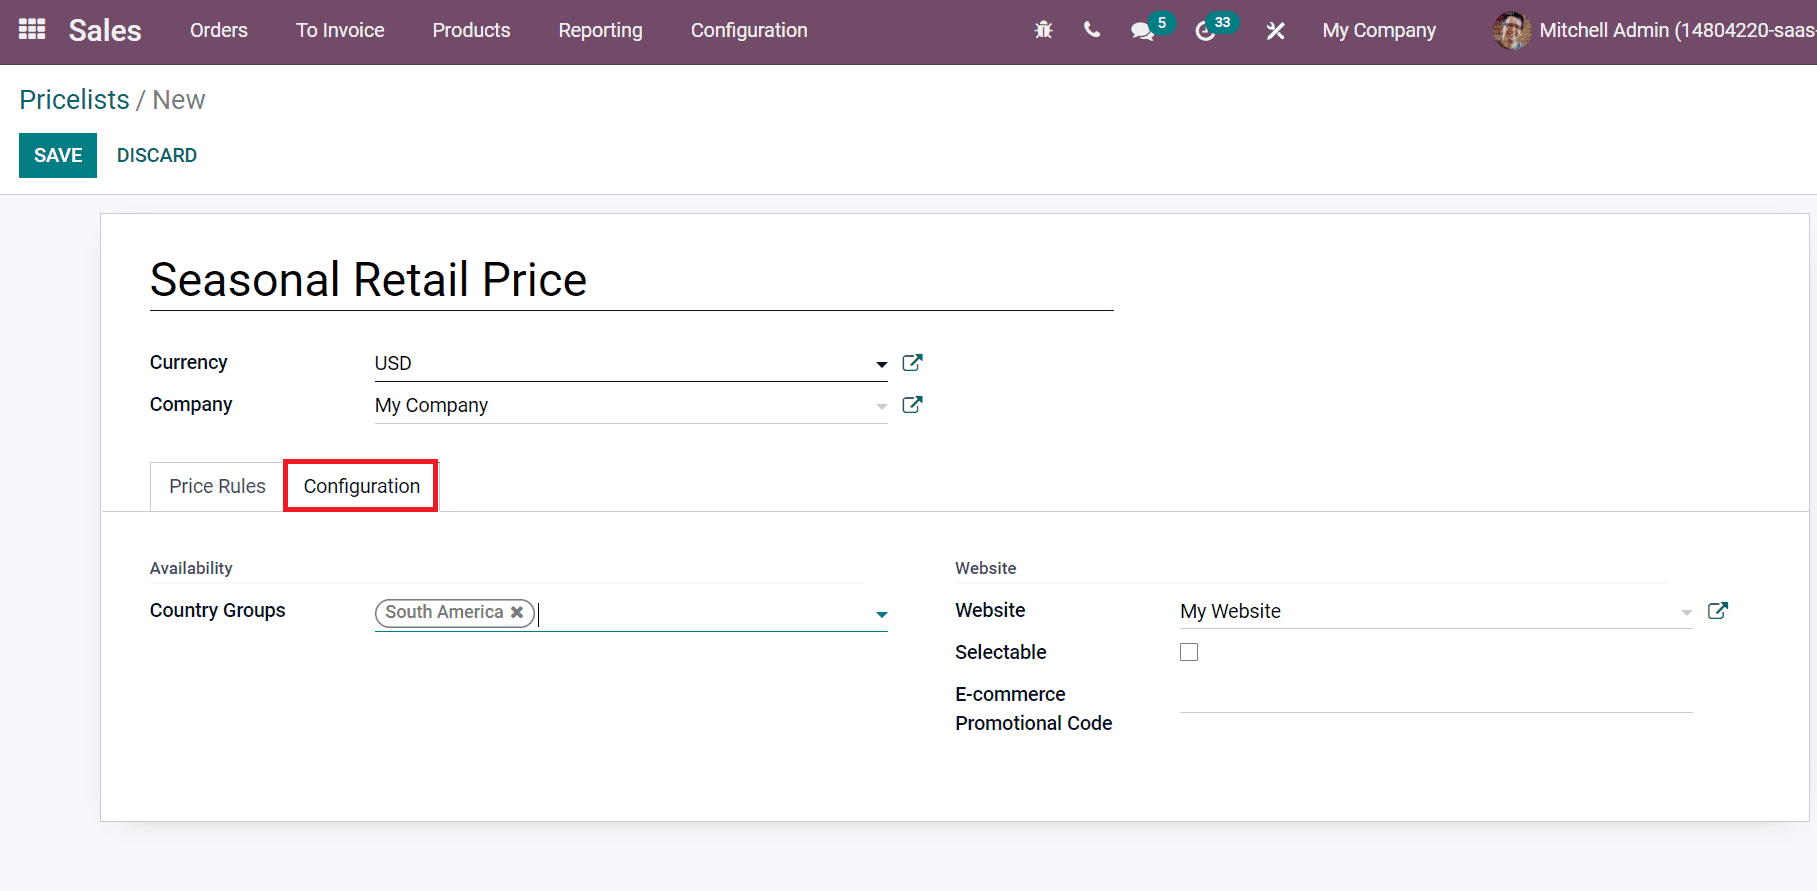
Inside the Configuration tab, we can add Availability and Website features. Here, choose your Country Group below the Availability section and add the Website details as denoted in the screenshot below.
Click on the SAVE icon after adding the Seasonal Retail Price details in the Pricelists window, and your created Pricelist is viewable along with other ones.
How to Assign a Pricelist for a Customer in Odoo 15?
We can allocate a separate Pricelist for a customer from the Odoo 15 Contacts module. Choose your customer in the Contacts window, as displayed in the screenshot below.
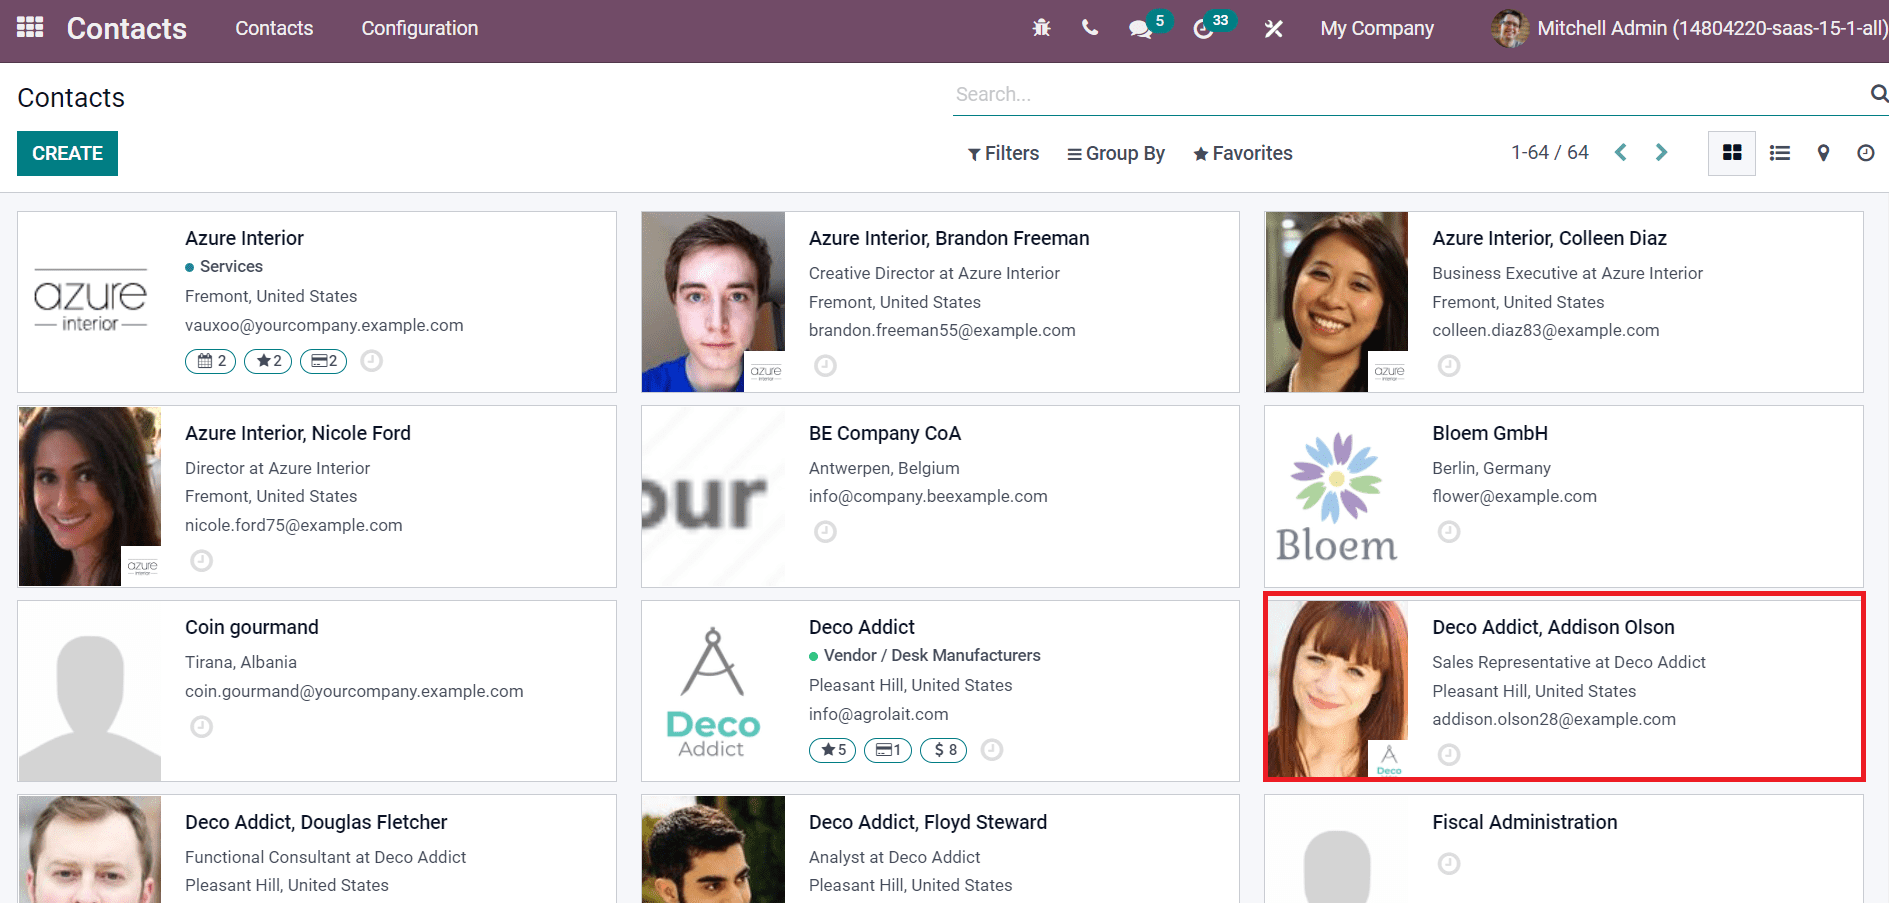
Here, we select the customer Addison Olson, and on the new page, you can see the Sales and Purchase tab. Inside this tab, you can see that the parent company manages pricelists. By clicking on the Parent Company icon, you will redirect to the company details page. Users can view the Pricelist option inside the Sales & Purchases tab. We can choose the created pricelist' Seasonal Retail Price' from here, as denoted in the screenshot below.
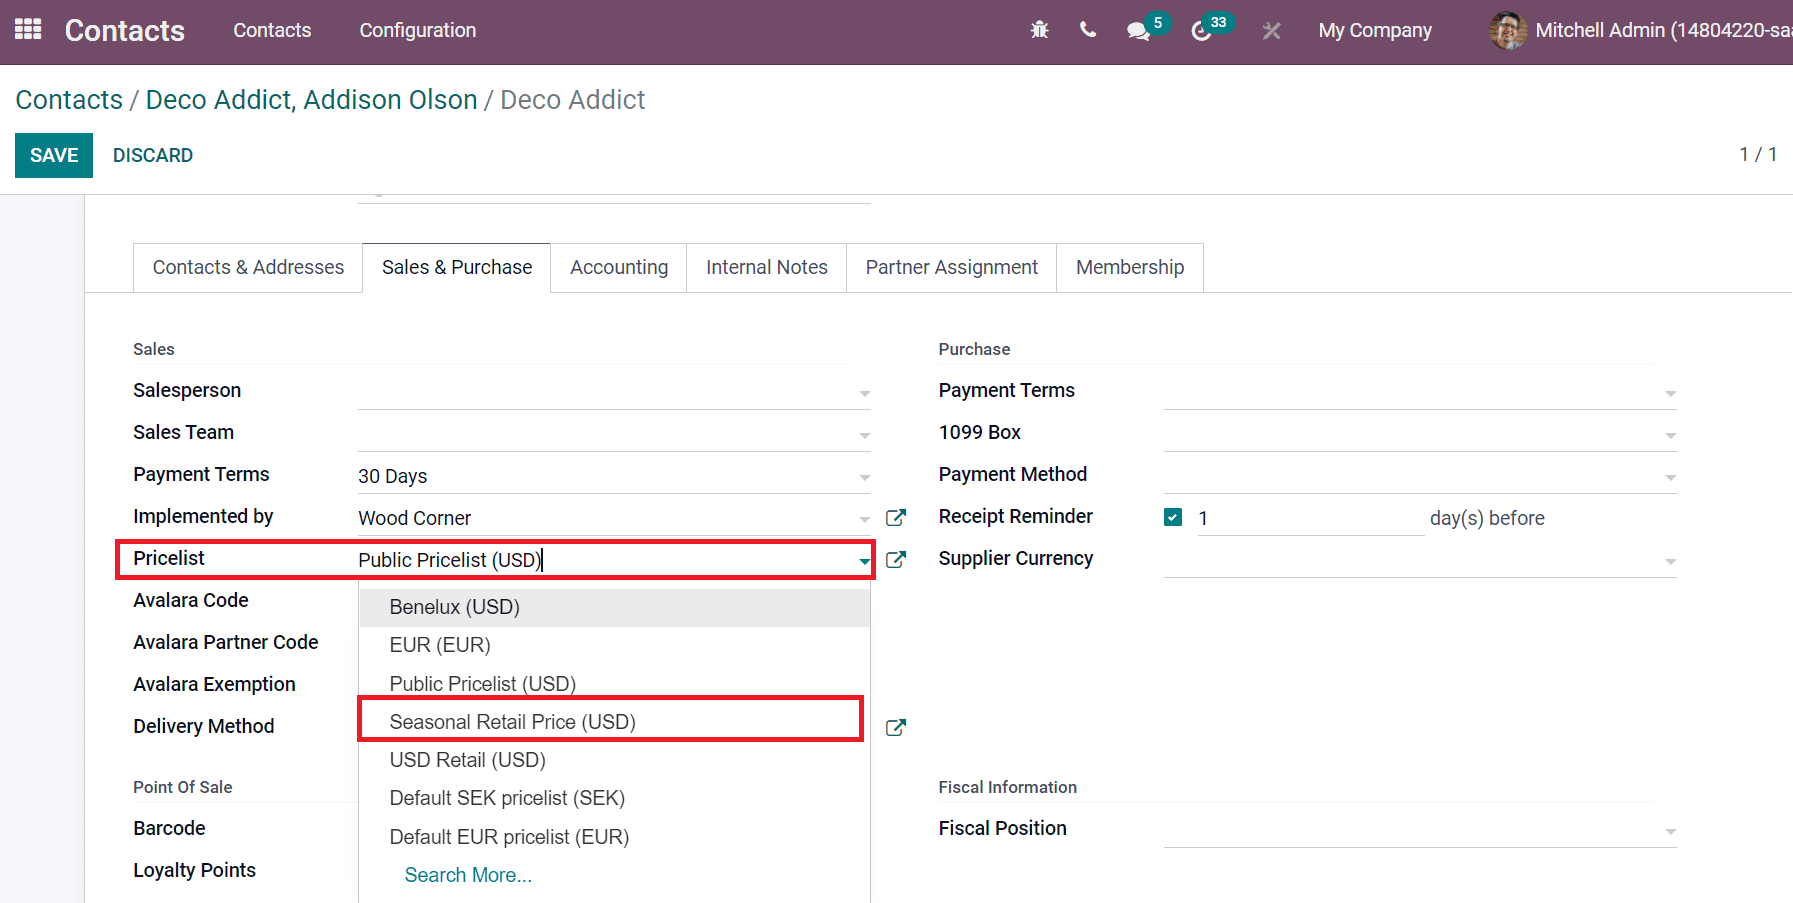
After selecting your Pricelist, click on the Save icon in the Contacts window. Now, the Pricelist is based on the Seasonal Retail Price for a customer. In this way, we can allocate the necessary Pricelist for each customer.
The price computation for a specific product in a company is managed easily with the help of the Odoo database. We can set various conditions to develop a pricelist rule for each commodity. Apart from these, it is easy to allocate a specific Pricelist for a custom product using Odoo 15 Contacts module. In this way, all sales procedures for a company's products/services become easy with the assistance of the Odoo 15 Sales module.