Businesses can charge clients for goods or services at regular intervals, like weekly, monthly, or annually, or on a customized time frame, by using the subscription billing payment model. Companies frequently choose subscription billing because of its versatility, adaptability, and simplicity of use. It provides granular usage insights, such as tiers, incentives, and overage thresholds, allowing businesses to grow and adapt. Automated subscription payments enhance customer satisfaction and retention. Setting realistic expectations and communicating clearly are essential for clients to see the value of their subscriptions. Businesses may detect patterns and problem areas by tracking subscription payment, which lowers churn and generates possibilities for re-engagement. Predictable cash flow allows businesses to forecast revenue and understand their reserves. By automating processes and lowering unsuccessful payments, time-efficient subscription billing saves time for both clients and companies.
The blog will give you insight into a new feature for consolidating various subscription billing available inside the Odoo 17 Sales Module. Creating a single invoice for every client subscription that is scheduled for billing on the same day is the functionality of the Consolidation of the Subscription Billing.
Configuring the Consolidate Subscriptions Billing
Consolidated billing consolidates multiple customer subscriptions into a single invoice, typically generated at the end of each subscription cycle to collect payment from customers. To activate the functionality, go to the “Settings” window from the “Configuration” menu and activate the “Consolidate subscriptions billing” option from the “Invoicing” tab as shown below.

Saving the functionality using the “save” button will activate the functionality inside your Odoo 17 Sales Platform. Then, we can check the functionality by creating multiple subscription orders for a customer.
Creating Multiple Subscription Orders for a Customer
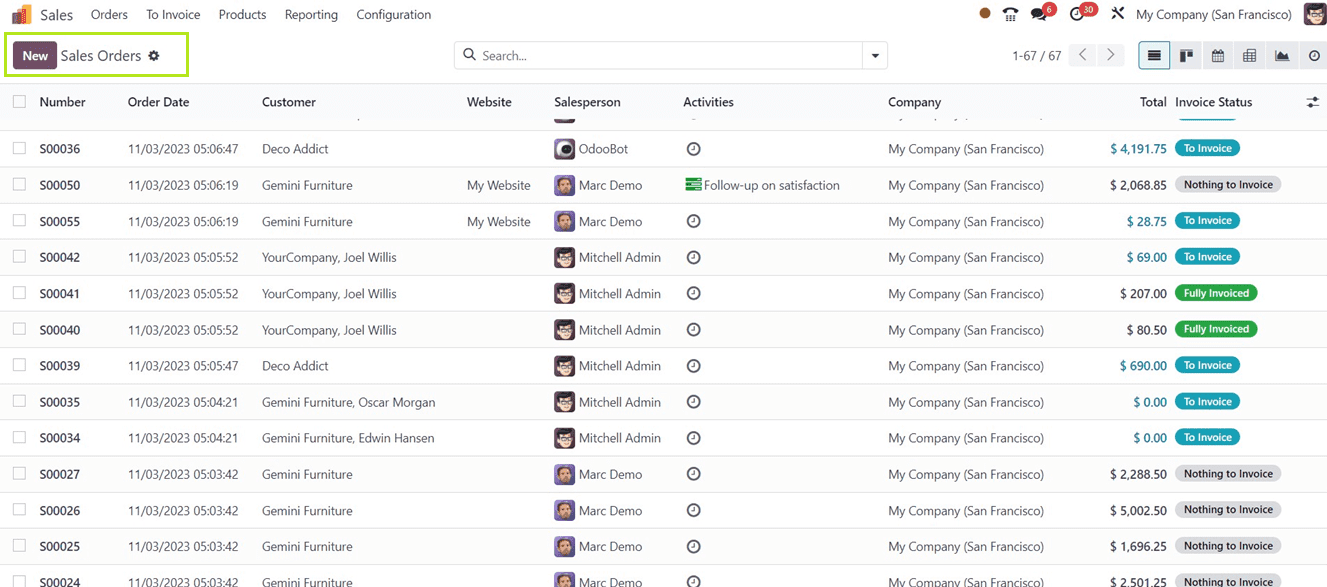
First of all, we have to select any subscription orders from the Sales Orders dashboard of the Sales Module or we can create new Subscription Orders or Quotaions.
Just go to the “Orders” window of the “Orders” menu to create a new Sales order. Here, we are going to create two sales orders for a single customer.
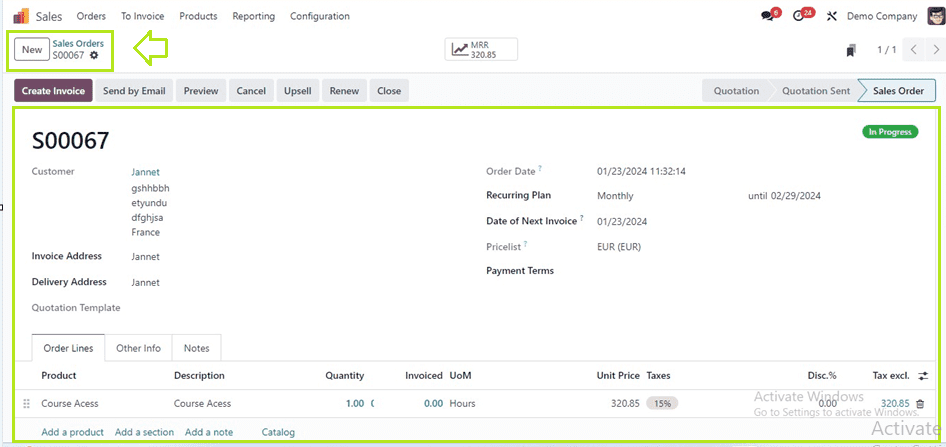
Sales Order 1
Here, We can create a Sales quotation for the customer “Jannet” with a product named “Access to: Basics of Furniture Creation” and confirm the order using the “Confirm” button.
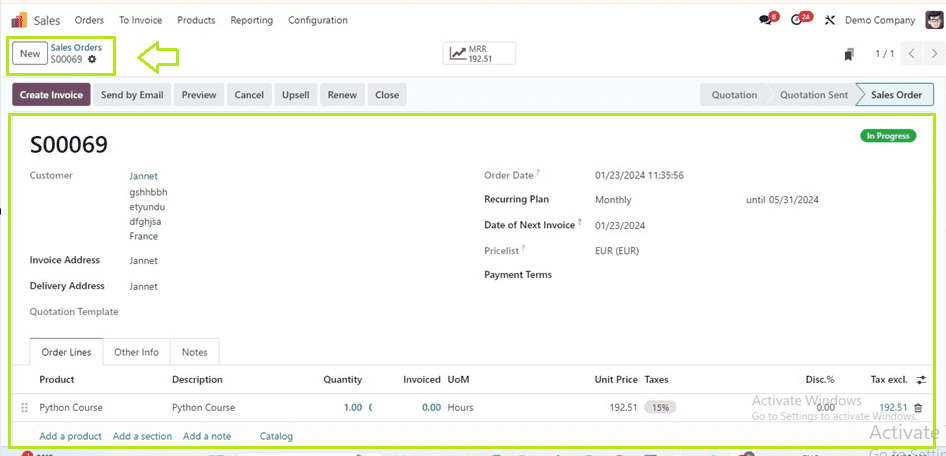
Sales Quotation 2
Now, we can create another quotation with a different subscription product for the same customer. Select the customer name, fill in the essential form data, and choose the products for the quotation.
Consolidated Invoicing for Multiple Subscriptions
After completing all the form details and confirming the orders, we can invoice these two orders in a single invoice. So, go to the “Sales Orders” dashboard and select the orders of the customer, as shown below.
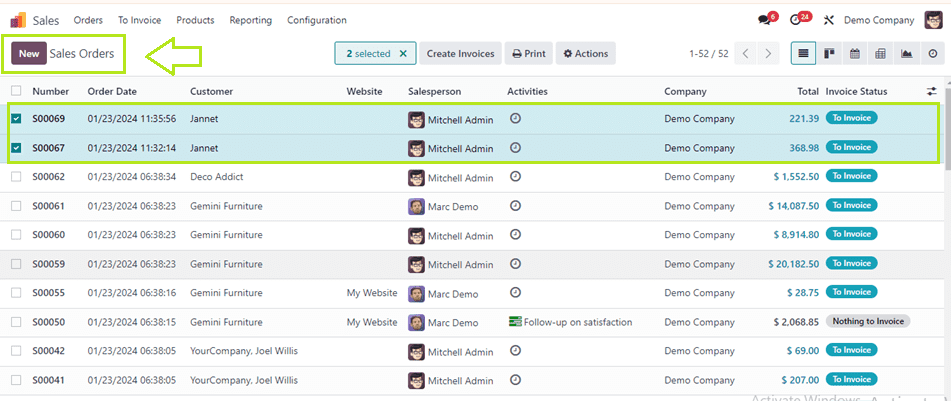
Then, you can use the “Create Invoice” button provided at the top of the window to create invoices. This will open a wizard, as shown below.
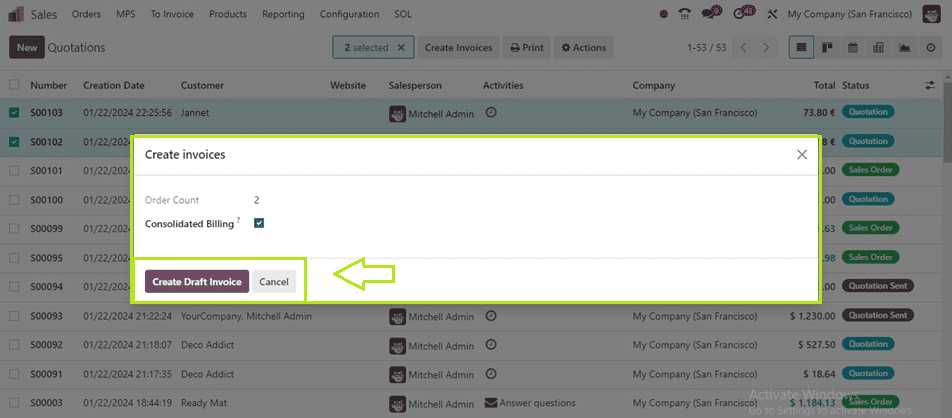
Inside the displayed window, you can see the number of orders inside the “Order Count” field. If you want to make consolidated invoices for the two orders, then choose or enable the “Consolidated Billing” button and press the “Create Draft Invoice” button.
Our invoice draft will be created immediately, and we will be directed to the invoice draft window.
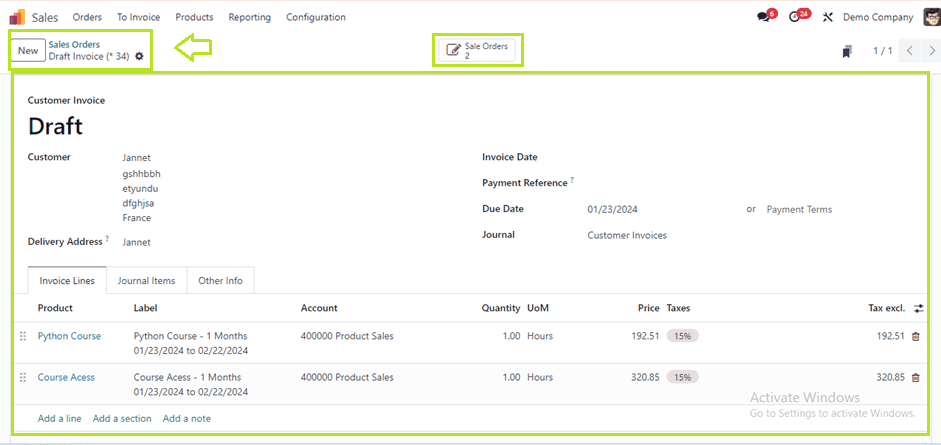
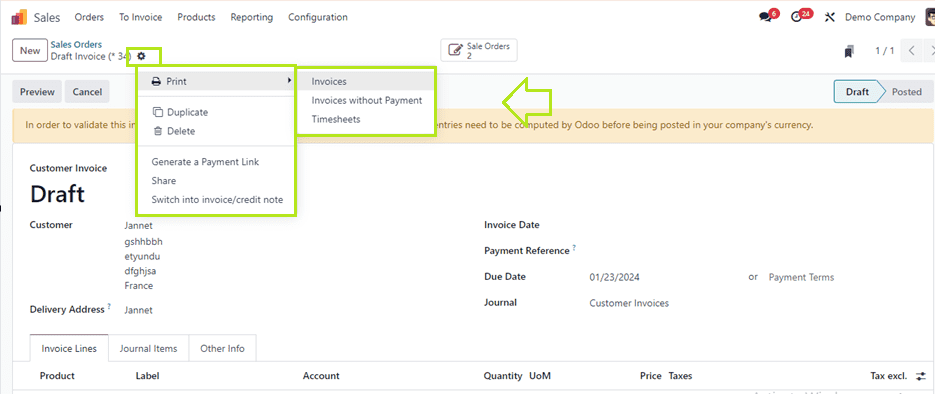
Inside the Draft Invoice Window, you can see the billing of the two orders inside the “Invoice Lines” tab section. The “Action” menu can be used to Print invoices, Delete, Duplicate, Share, Sent Payment Links to the Customer, Debit Notes, and many more, as depicted below.
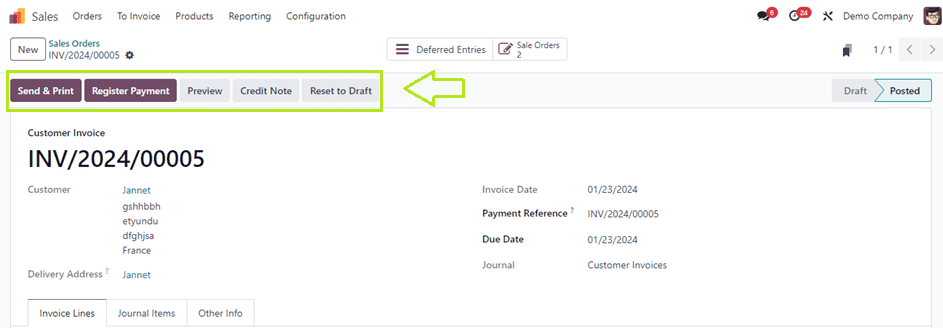
The “Sale Orders” smart button will lead you to the detailed dashboard of the generated invoices. You can manage the invoices, create dashboards, and make articles using the action menu provided inside the dashboard window.

Coming back to the draft invoice window, we can confirm the invoice draft using the “Confirm” button and proceed with the payment process. You will get a “Register Payment” button after confirming the invoice.
Deciding to create payments using the “Create Payments” button, we will get another pop-up window where we can view or alter the Payment Journal, Payment Method, Payment Date, Memo, etc.
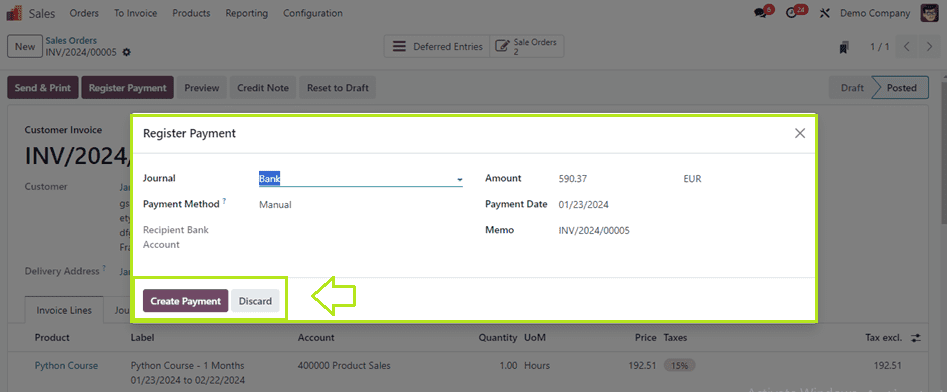
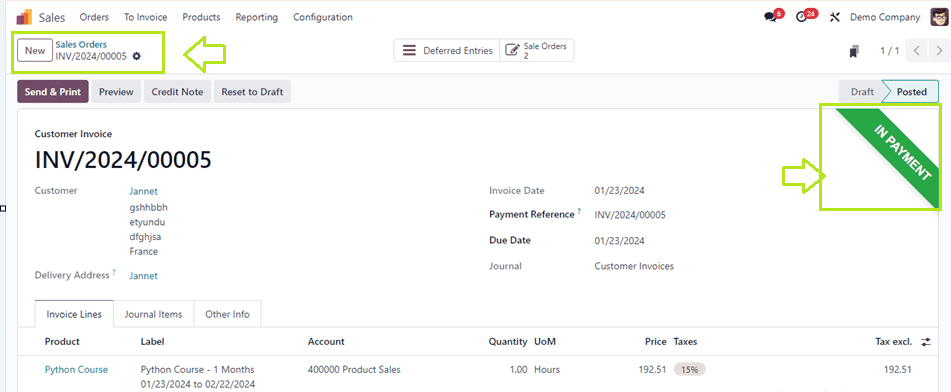
After confirming the payment using the “Create Payment” button, the payment will be processed, and we can see the “IN PAYMENT” ribbon inside the form view.
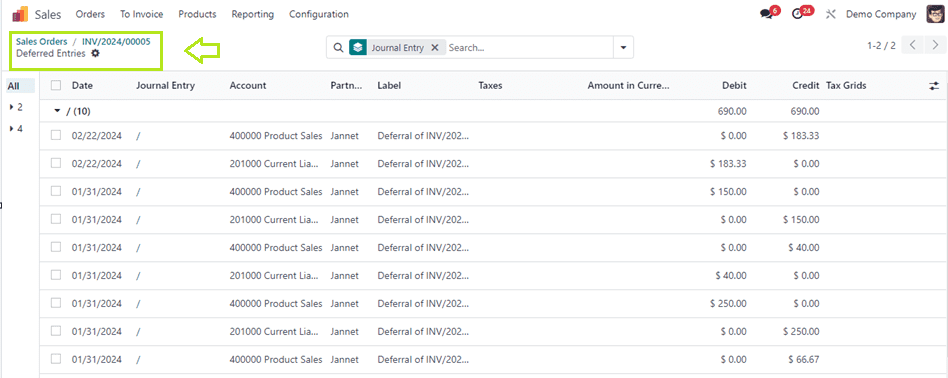
The 'Deferred Entries' smart button allows users to view a detailed dashboard of deferred journal entries, ensuring accurate recognition of the process of postponing revenue or sales-related transactions to a later date, especially in scenarios like service contracts or installment payments, as shown below.
In the Odoo 17 Sales Module, this is how we create consolidated payment invoices. This new feature allows for the creation of consolidated payment invoices within the Odoo 17 Sales Module and simplifies handling multiple order billings and invoicing subscriptions within a single invoice, allowing administrative users or companies to reconcile unpaid bills with other invoices of a particular customer.