E-commerce platforms help businesses expand their markets, boost revenues, and enhance brand awareness. They involve planning, data collection, design, assembly, coding, testing, and maintenance. The Odoo Website Module is an ERP platform that allows users to create, develop, and maintain websites without coding knowledge. The platform offers features for businesses of all sizes, including attribute and variant setup, multi-sites, and a B2B store. It also provides automated tax rates, a real-time dashboard, customer portals, a built-in search bar, a wishlist, a checkout procedure, payment acquirers, a shipping cost calculator, and shipping partners. It also allows customers to add desired products to their wishlist, expedites shipping, and tracks orders.
Configuring the Shop-Checkout Process Settings
Odoo boasts a user-friendly interface, facilitating seamless shopping experiences through the Odoo Website Module. Installation of the website module from the Odoo platform enables users to initiate shopping directly from the homepage. Configuration of website requirements, e-commerce, and shopping site settings can be performed via the Configuration menu within the Website platform.
The Shop-Checkout configuration options allow users to personalize the checkout and shopping cart processes. This includes configuring add-to-cart functionality, sign-in/up procedures, and other checkout-related features to tailor the online shopping interface according to specific preferences.
Within the Shop-Checkout settings category, various options are available, including.
* Add to Cart: Users have the choice of three scenarios upon clicking the add to cart button.
* Buy-New: Upon selection, this option immediately adds the product to the cart and redirects to the checkout page for payment processing.
* Digital Content: Users can include download links and post the checkout process.
* Re-order from Portal: Through the customer portal, clients can initiate new orders based on items from prior sales orders.
* Sign in/up at Checkout: This option permits customers to check out either as guests or signed-in users. Guests may later choose to sign up to track their orders if enabled.
* Extra Step during Checkout: During checkout, this feature will incorporate a customizable form rather than the address details as an extra step.
* Assignment: Assign the particular order to the designated online team and website.
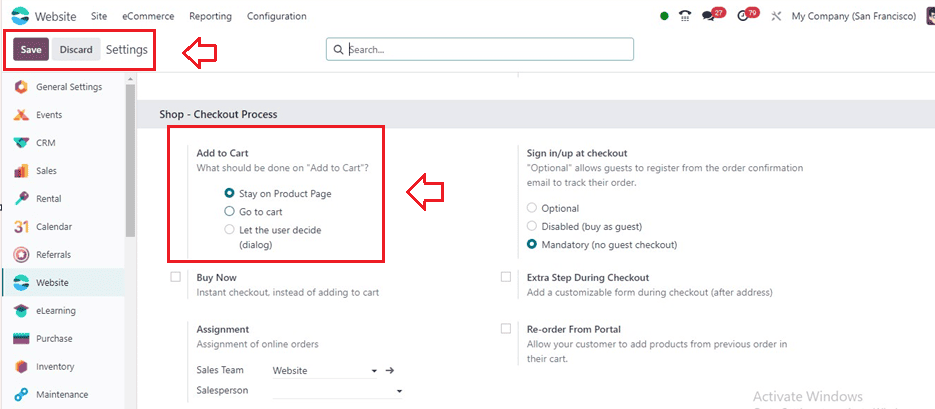
Add to Cart
The "Add to Cart" functionality within the Shop-Checkout settings category offers users a range of options to tailor their shopping experience.
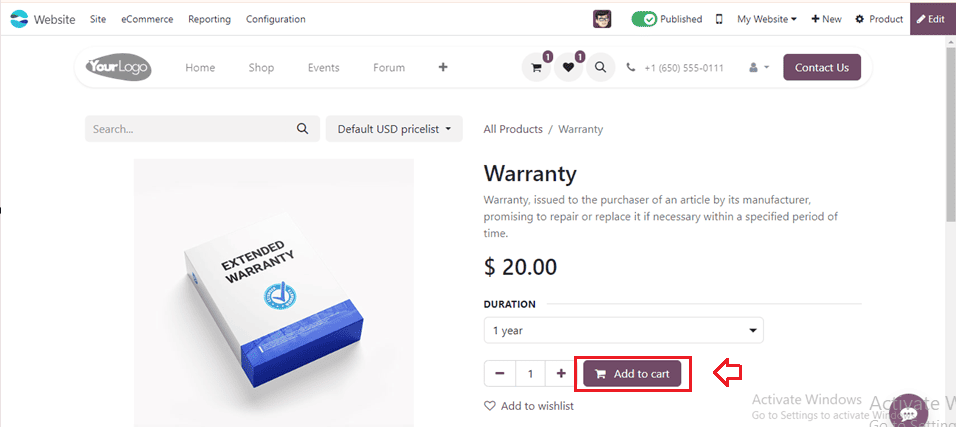
To illustrate these scenarios, let's consider the purchase of a "Customizable Desk" product as an example. Upon selecting the product from the website's homepage, users are presented with the aforementioned options. If they choose to stay on the product page, they can continue browsing or add more items seamlessly. Conversely, opting to go directly to the cart allows for a swift checkout process. Finally, letting the user decide grants them control over their shopping journey.
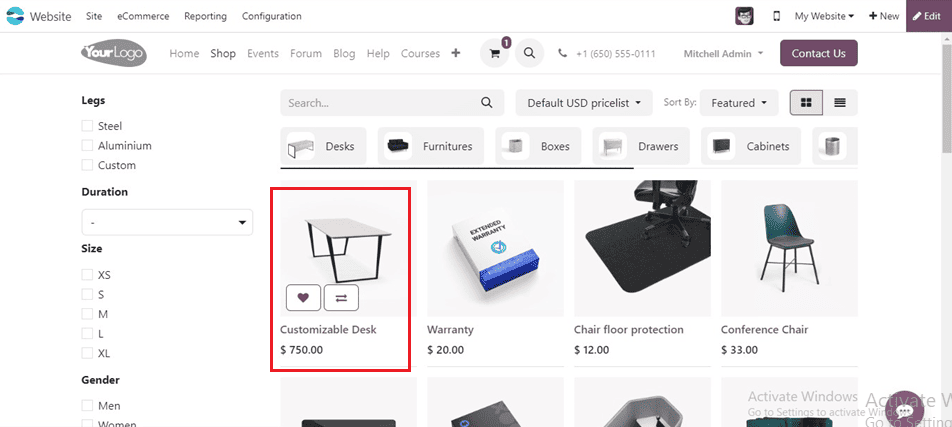
Here's a detailed exploration of each option:
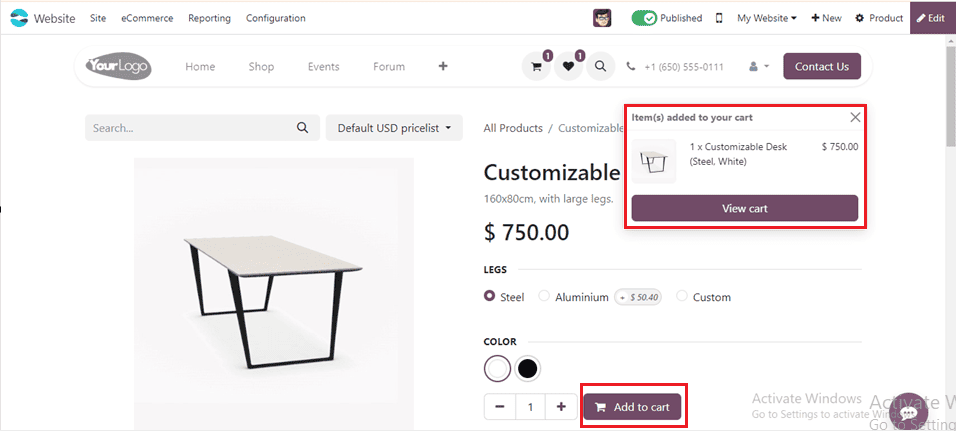
Stay on the Product Page
* If this is selected, buyers will remain on the product page even after selecting "Add to Cart." Their shopping cart will be subtly updated with the selected item.
* Customers can continue browsing and add more items to their cart without being redirected away from the product page.
Go to Cart
To enable this functionality, change the Add to Cart option inside the configuration Settings window, as shown below.
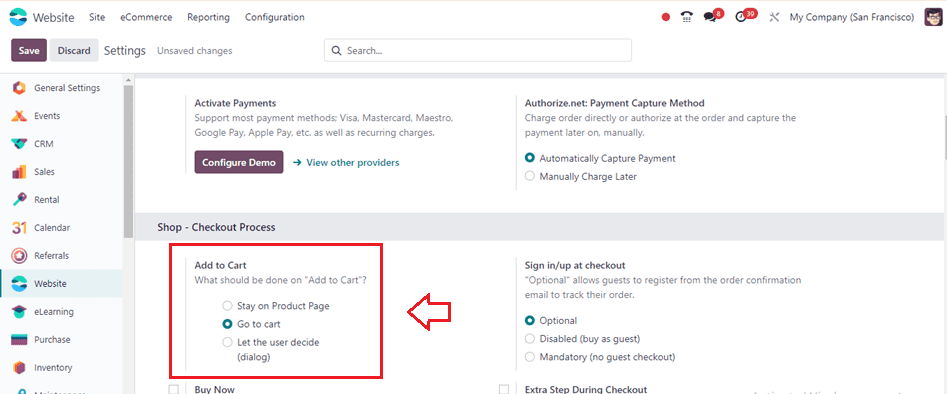
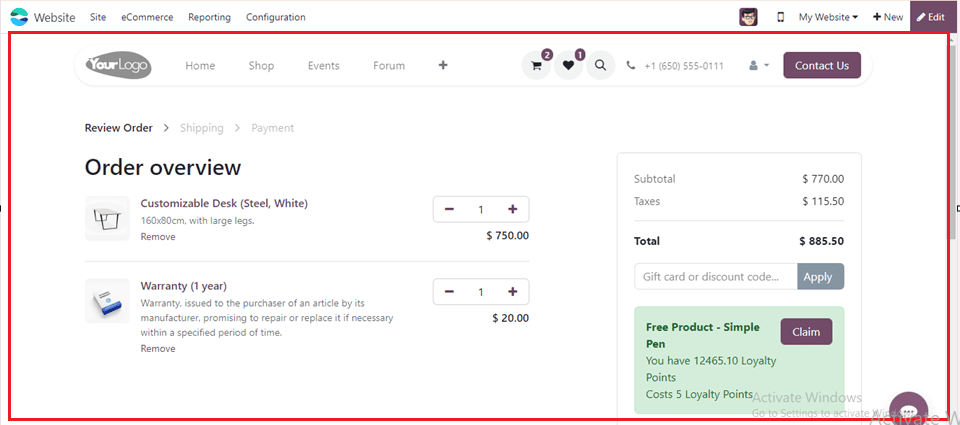
Choosing this setting directs customers straight to their shopping cart upon clicking "Add to Cart."
It provides a clear path for customers to review their selections and proceed to checkout promptly.
Let the User Decide
Change the Add to Cart option to Let the User Decide inside the Settings window as shown below and proceed to shop for a product.

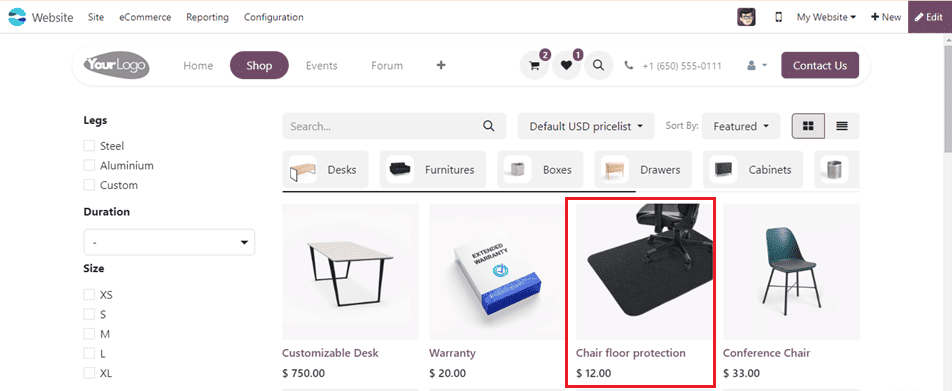
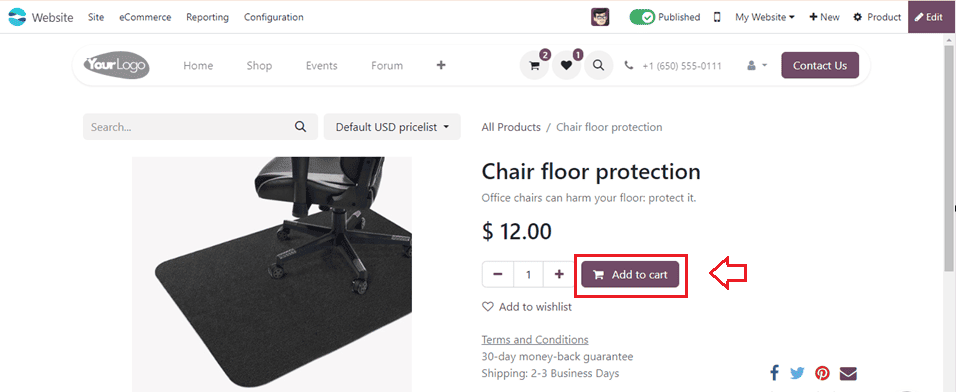
Here, I am choosing another product named “Chair Floor Protection.”
Enabling this option prompts a dialogue box to appear after clicking "Add to Cart."
Here, users can decide whether to stay on the product page or proceed to checkout by choosing the option from a dialogue box, as shown below.
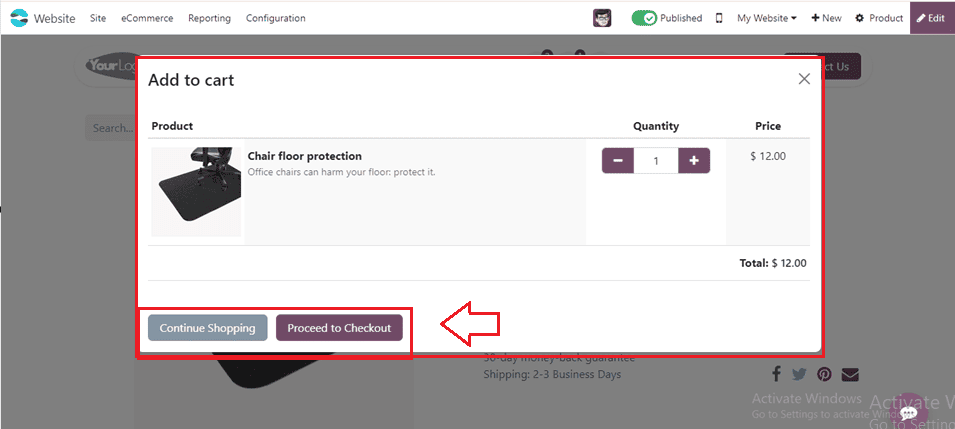
This empowers customers with the flexibility to choose their preferred action, enhancing their overall shopping experience.
Sign in/up at Checkout
Businesses may decide whether to ask consumers to sign in or create an account during the checkout process by adjusting the "Sign in/up at Checkout" settings in the Odoo website module. This feature makes transactions go more smoothly, improves the user experience, and aids in the development of customer relationships, order management, and shopping experience personalization for companies.
The ‘Sign in/up at checkout’ option can also be enabled from the ‘Shop-Checkout Process’ tab section of the Settings window. This feature provides three options, including Optional, Disabled, and Mandatory, as illustrated in the screenshot below.
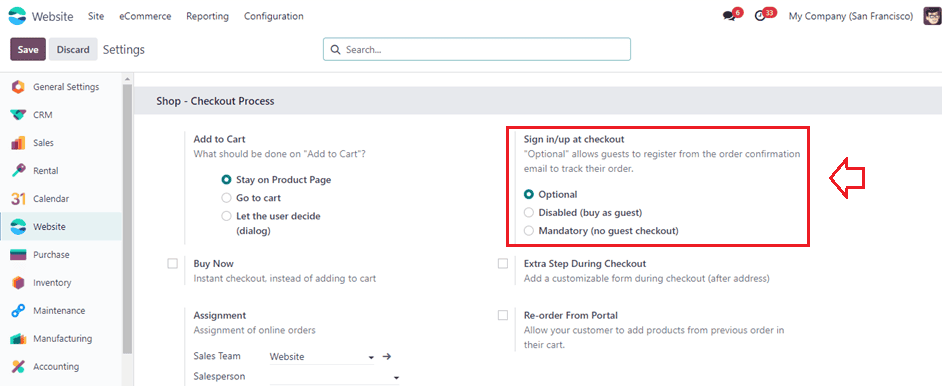
* Optional: Activating this option allows customers to register their credentials on the website's order confirmation page to continue with the shopping session, but it's not mandatory.
* Disabled: Users can make purchases without creating an account, simplifying the checkout process for casual shoppers.
* Mandatory: Online users must log in with their credentials to place orders, ensuring authentication and accountability.
Buy Now
Enabling the "Buy Now" option also expedites the checkout process by sending customers directly to the checkout page without requiring them to add anything to their shopping cart first. This is ideal for customers seeking a quick transaction.
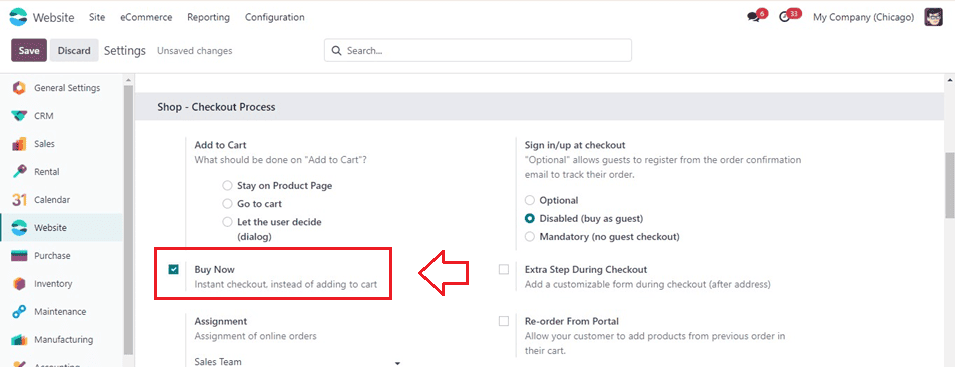
After activating the option from the settings window, save the changes, and we can check the feature from the website shopping session, as shown below.
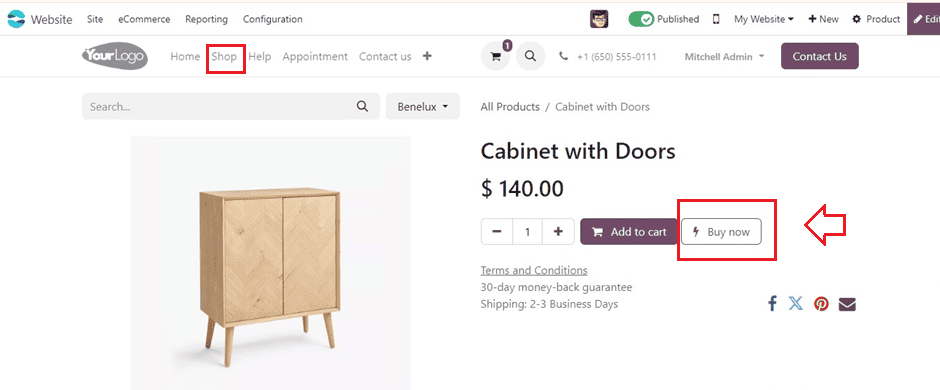
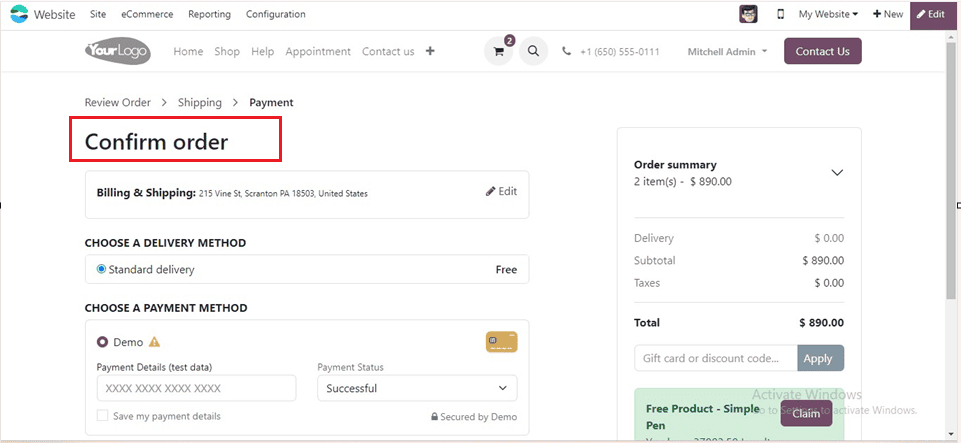
Pressing the Buy Now button will direct you to the Confirm Order page, as shown below.
Re-order From Portal
The "Re-order From Portal" feature allows users to replicate previous orders quickly, saving time and effort. Customers may easily add things to their shopping carts for repeat purchases by using pertinent information from previous orders.
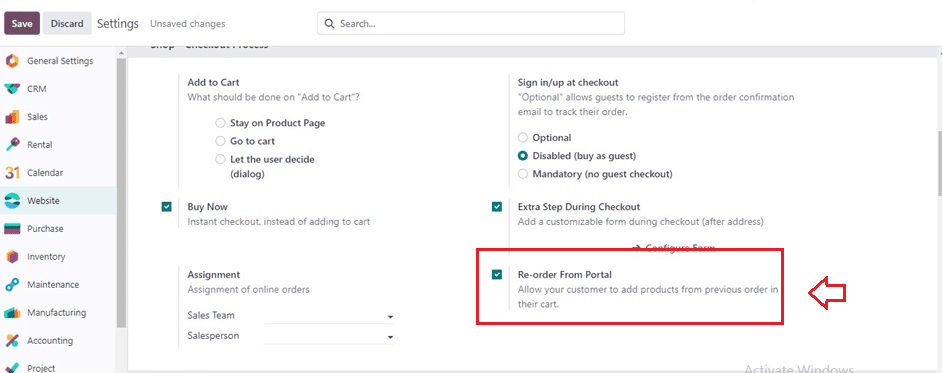
After saving the feature, we can quickly order a product from the website shopping session to check the functionality.
Extra Step During Checkout
Users can also incorporate an "Extra Step During Checkout," where a customizable form can be added after the address section. This feature enables businesses to gather additional information from customers, enhancing the checkout process's efficiency and customization.
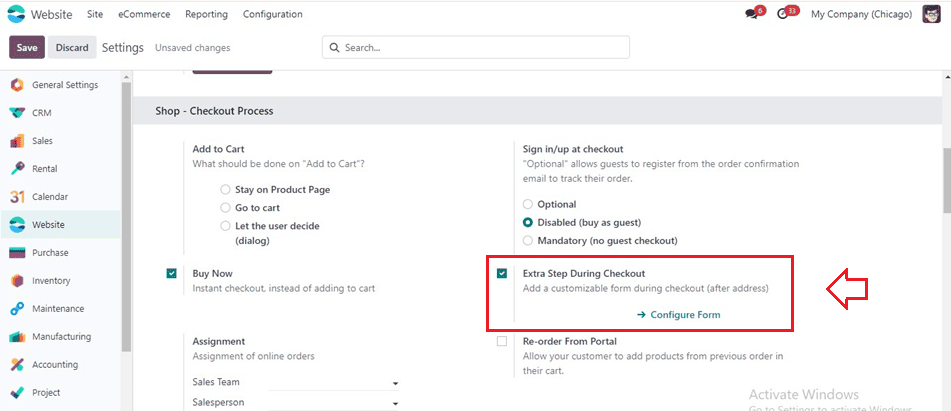
Activating the option will display a ‘Configure Form’ link that can be used to design the extra step form view. This link will lead you to the form editing window inside the website interface, as illustrated in the screenshot below.
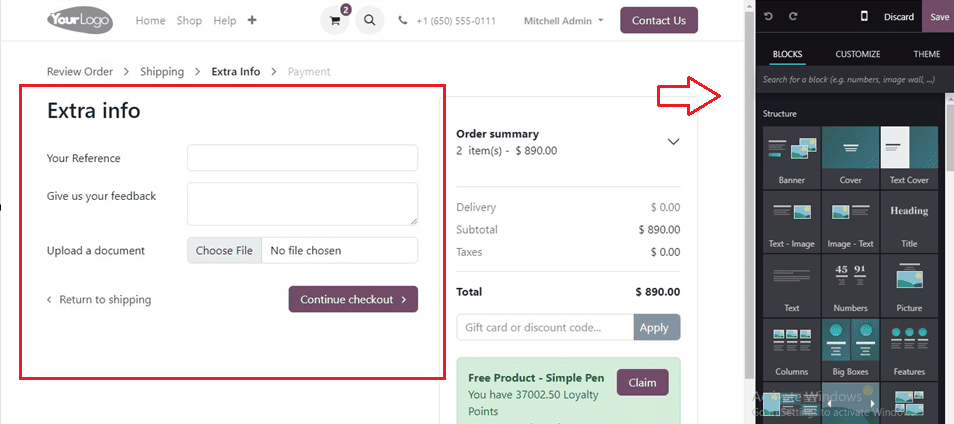
Using the website editing tools, we can customize the form view with the required form fields and buttons after choosing the product and reviewing the order.
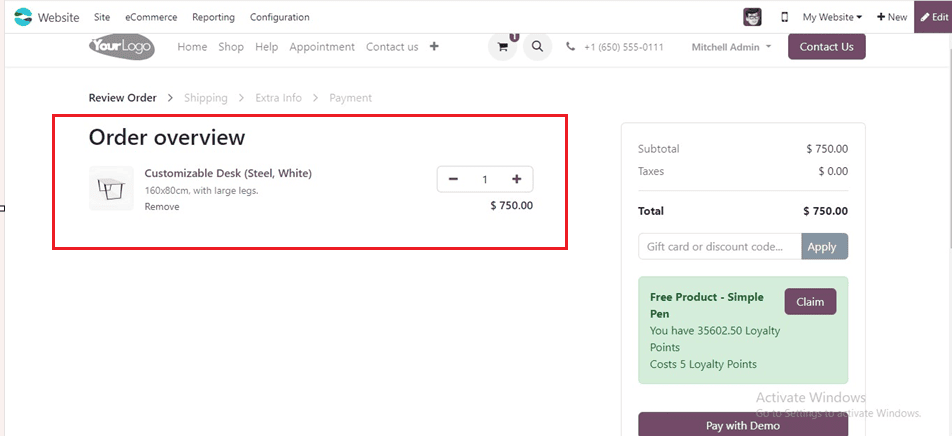
After reviewing the order, we can proceed with the checkout using the Checkout button. This will display the Extra Info page, as shown below.
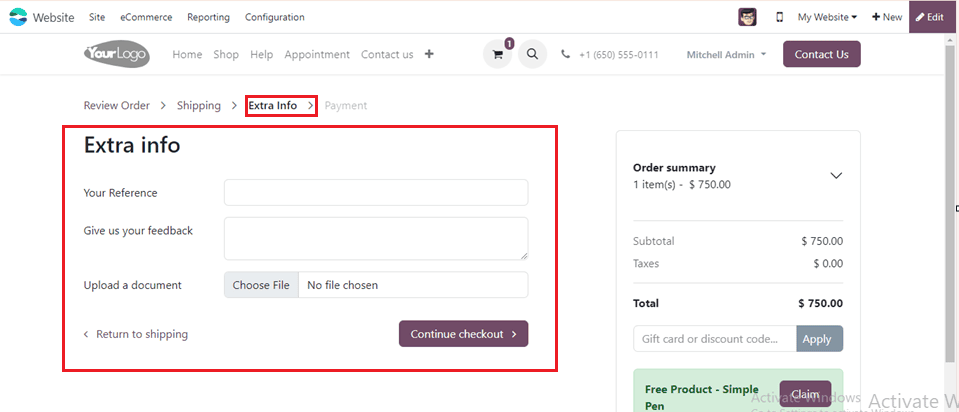
Once the additional data has been entered into the form fields, we may click the Continue Checkout button and carry out the regular payment procedures.
Assignment
Finally, the "Assignment" option empowers admin users to designate the responsible sales team and salesperson for online orders, ensuring seamless order management. Provide the Sales Team and Sales Person name in the designated fields placed inside the Shop - Checkout Process tab section as depicted in the screenshot below.
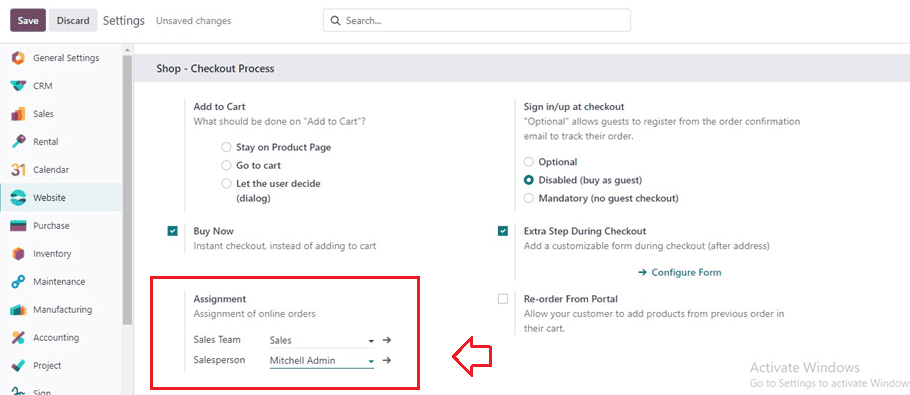
This feature helps users to understand the sales team and salesperson responsible for a particular website order.
In summary, the Shop & Checkout process settings in the Odoo 17 Website Module offer a comprehensive array of customization options to enhance the online shopping experience for both businesses and customers. From streamlining the checkout process to collecting valuable customer data, these settings enable users to tailor their websites to meet specific requirements and preferences.
To read more about How to Configure Guest Check-in & Check-out Options in Odoo 17 Website, refer to our blog How to Configure Guest Check-in & Check-out Options in Odoo 17 Website