Odoo offers an advanced platform for users to efficiently run an eCommerce business. With the help of this platform, a company can promote products and services on their eCommerce site effortlessly. Using the adequate tools available in the Odoo Website Building system, you can create a unique eCommerce page for your online business with custom features and menus. It is possible to design your eCommerce page and customize the view per your requirements seamlessly in Odoo 15. When it comes to the creation and management of an eCommerce page of a company, the most important step which needs to be done with utmost supervision is the configuration of products. In the Odoo ERP system, the user can configure new products for the eCommerce site with the help of the Website module
In this blog, we will be looking at the configuration of products for the eCommerce page with the help of the Odoo Website module.
The eCommerce module in Odoo works integrated with the Website module. So, you can easily manage all eCommerce-related activities from the Website module itself. Make sure that you have installed the eCommerce module from the Odoo AppStore in order to operate the module from the Website module. In Odoo, you can configure products for your eCommerce site from the backend as well as the frontend. We are going to discuss both of these methods in this blog so that you will be able to understand how Odoo simplifies the product configuration for users.
The product configuration from the backend can be done with the help of the Product menu given in the main menu bar of the Website module. The method is similar to that of the product configuration in the Sales, Purchase, Inventory, and Rental modules. You can use the Create button to create a new record of a product. As you can see in the image below, you will get a product configuration window where you can define the name of the product and additional information in the General Information, Attributes & Variants, Sales, Purchase, Inventory, Accounting, and eBay tabs.
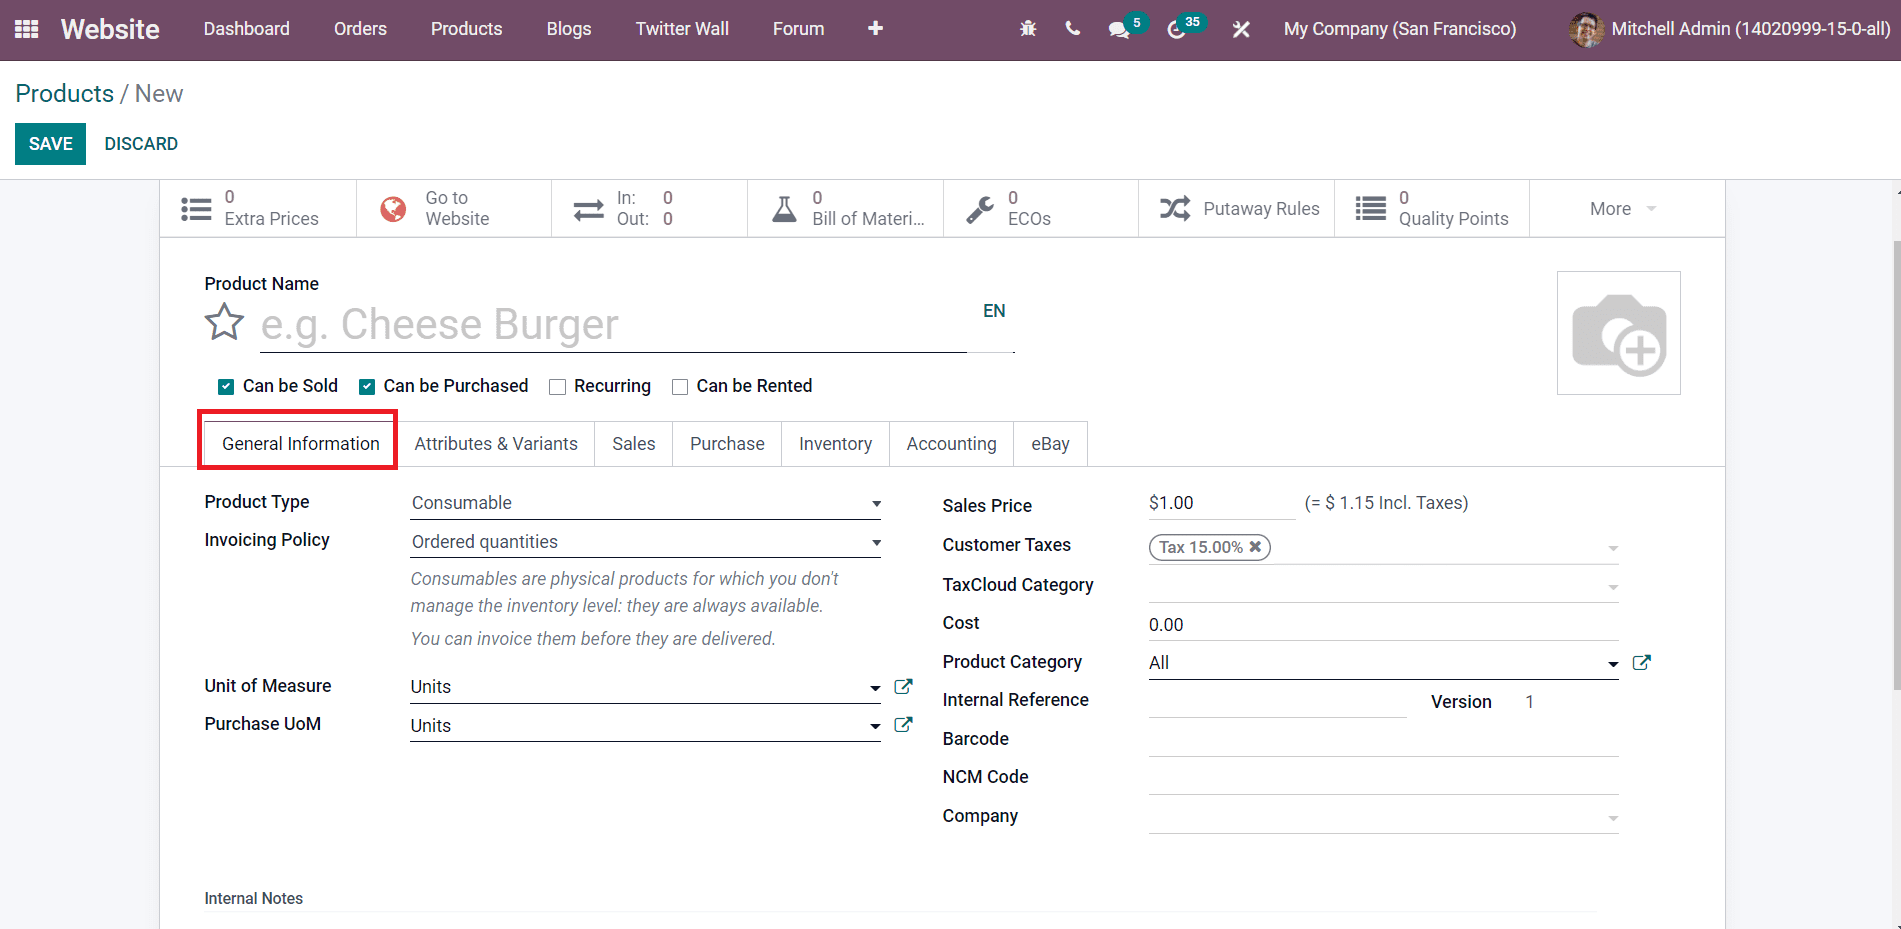
In order to enhance the view on the eCommerce page, you are allowed to add images of the product in the specified field. Mention the type of product you are configuring for your eCommerce page in the Product Type field. The Invoicing Policy can be set on ordered quantity or delivered quantity. In the corresponding fields, you can specify the UoM, Purchase UoM, Sales Price, Customer Taxes, TaxCloud Category, Cost, Product Category, Internal Reference, Barcode, NCM Code, and Company.
Sometimes a product may contain various attributes and variants. You can specify those variants and attributes in the respective field as marked in the image below.

Providing different variants of a product will be helpful for customers to select the suitable one that will also improve your online sales.
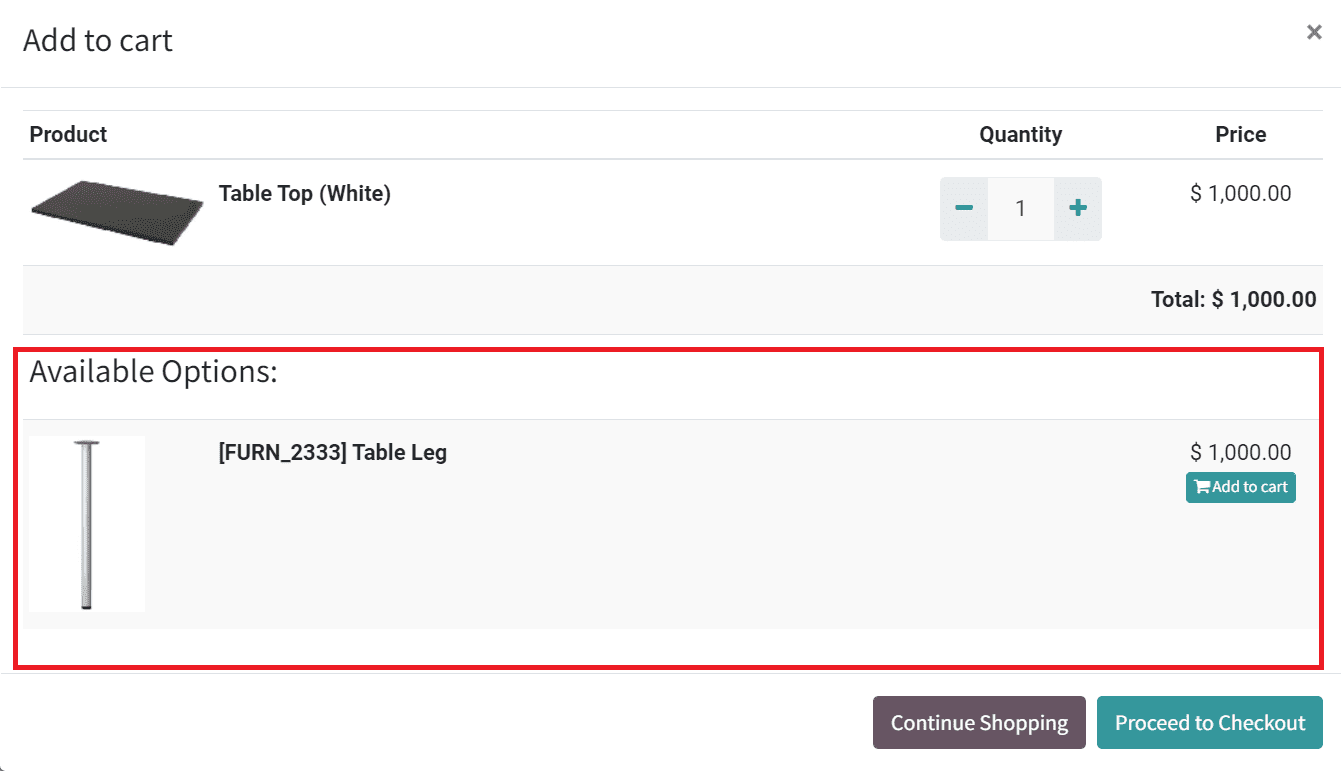
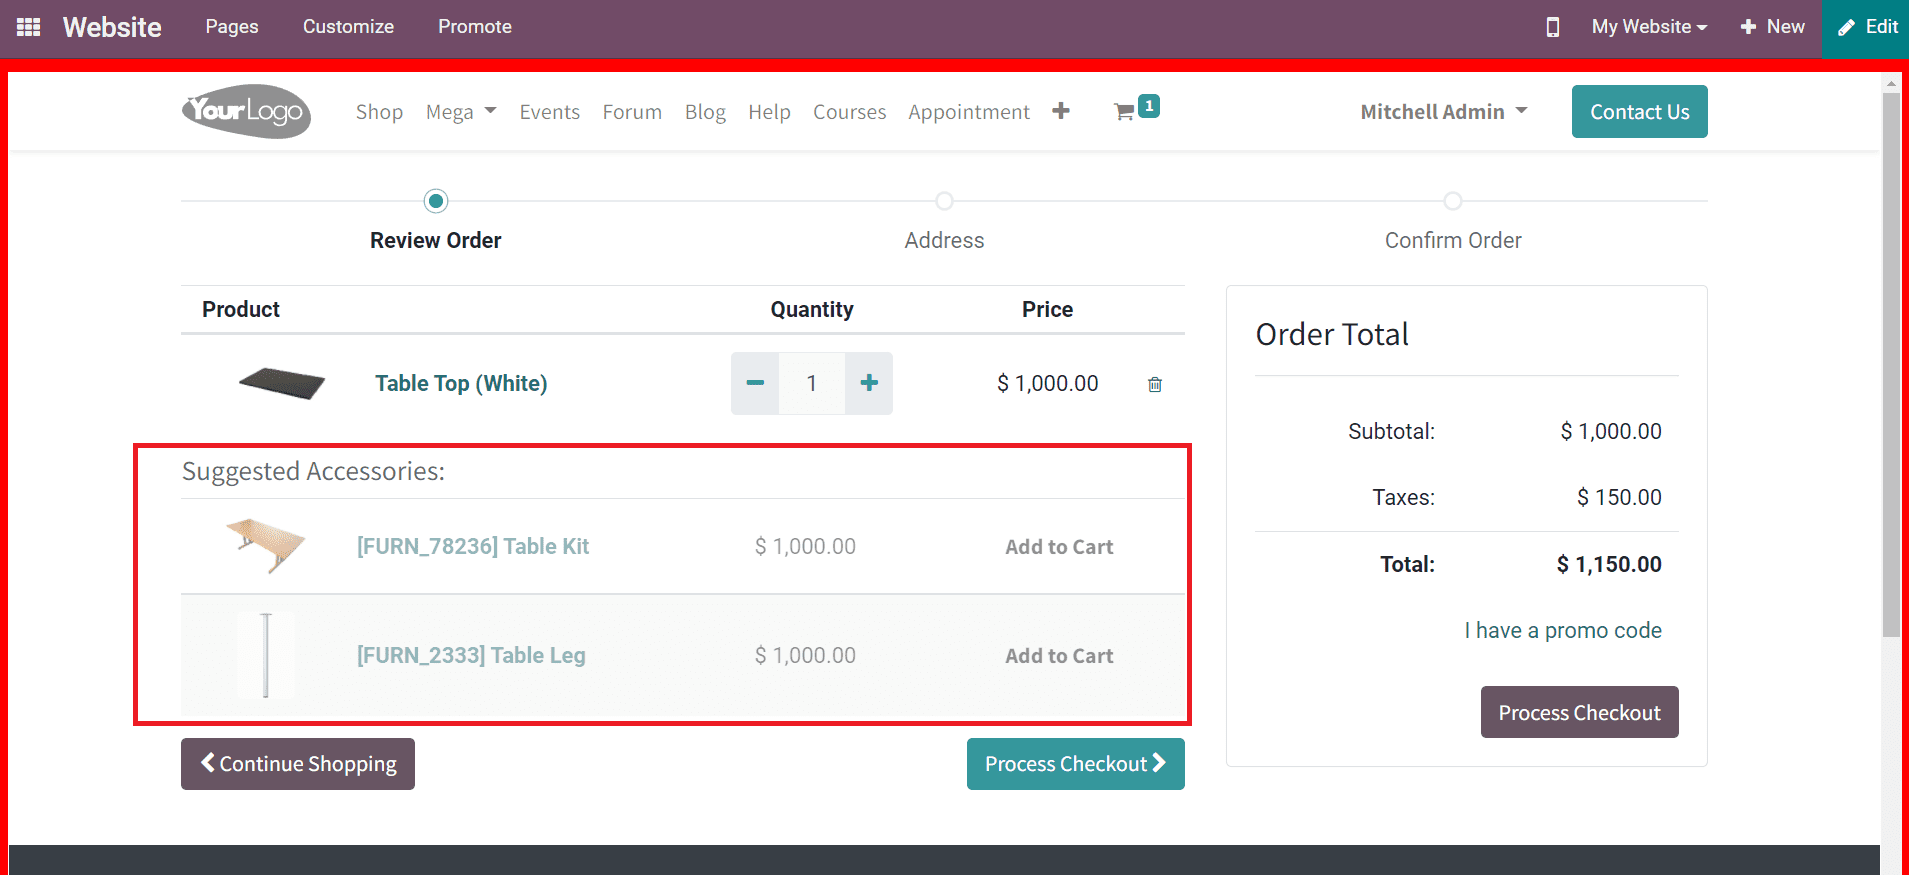
The Sales tab includes important fields to define that help to improve online sales. Upselling and Cross-Selling methods will help the company attract customers' attention to the products on your website. You can provide Optional Products to customers that compliment the main product while adding a product to their cart. Similarly, Accessory Products can be used to increase cross-selling. This strategy will give suggested accessories to customers before completing the payment process.
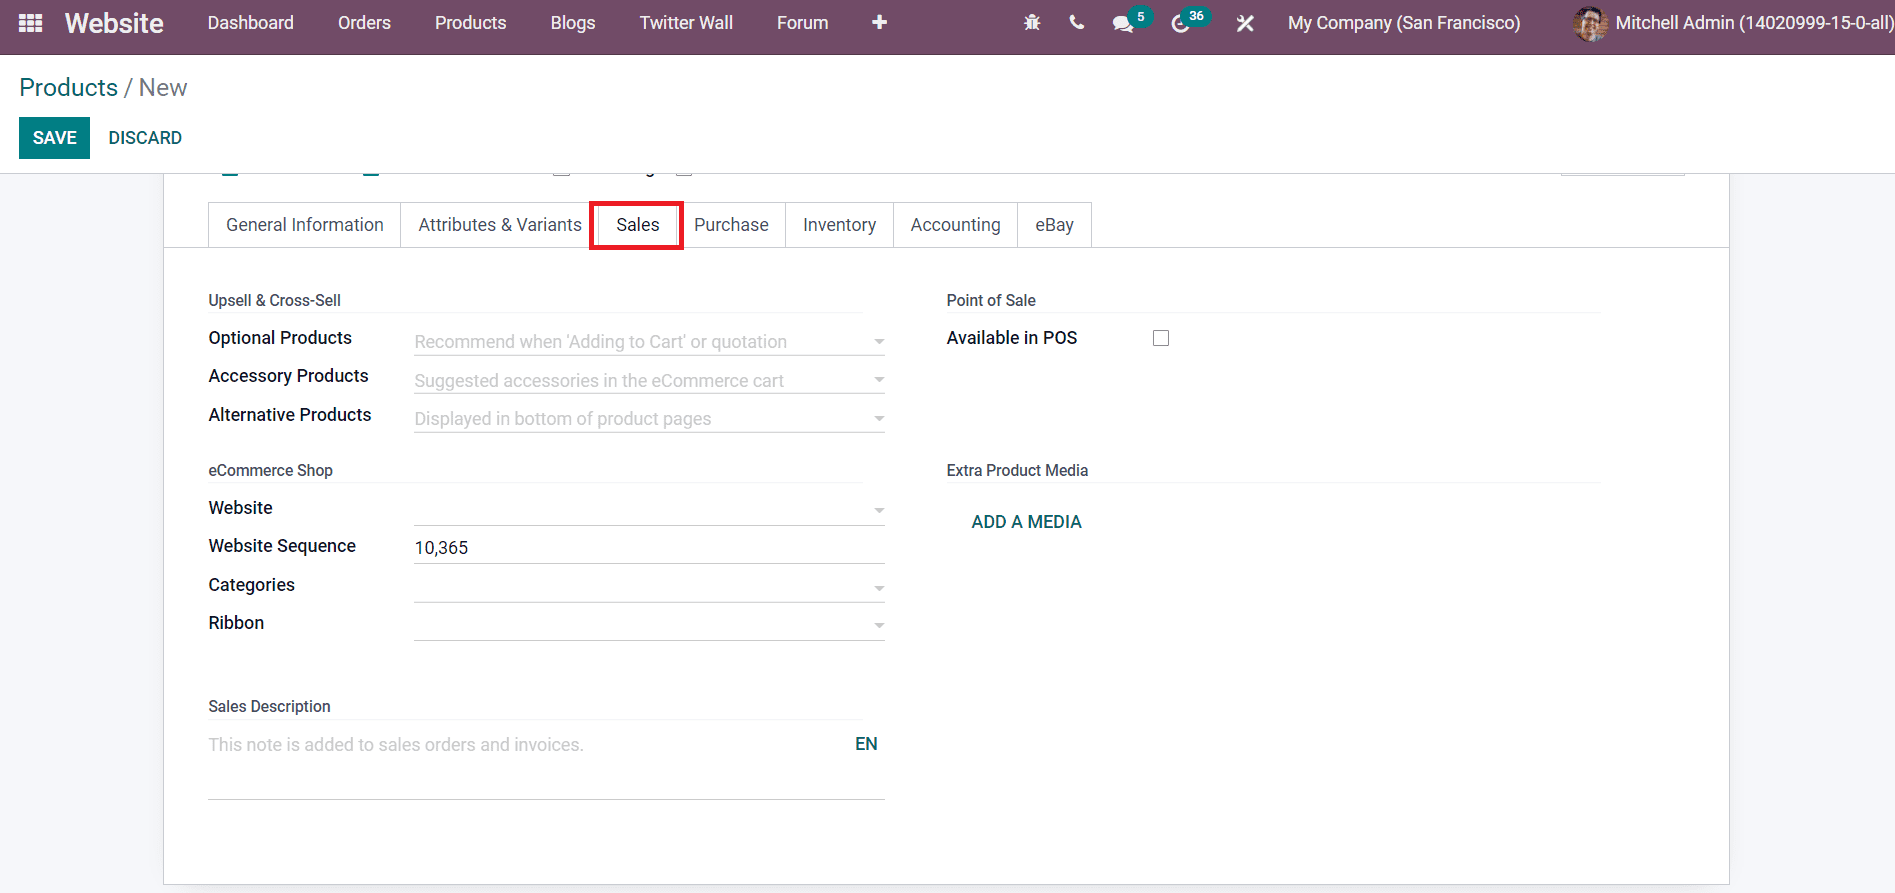
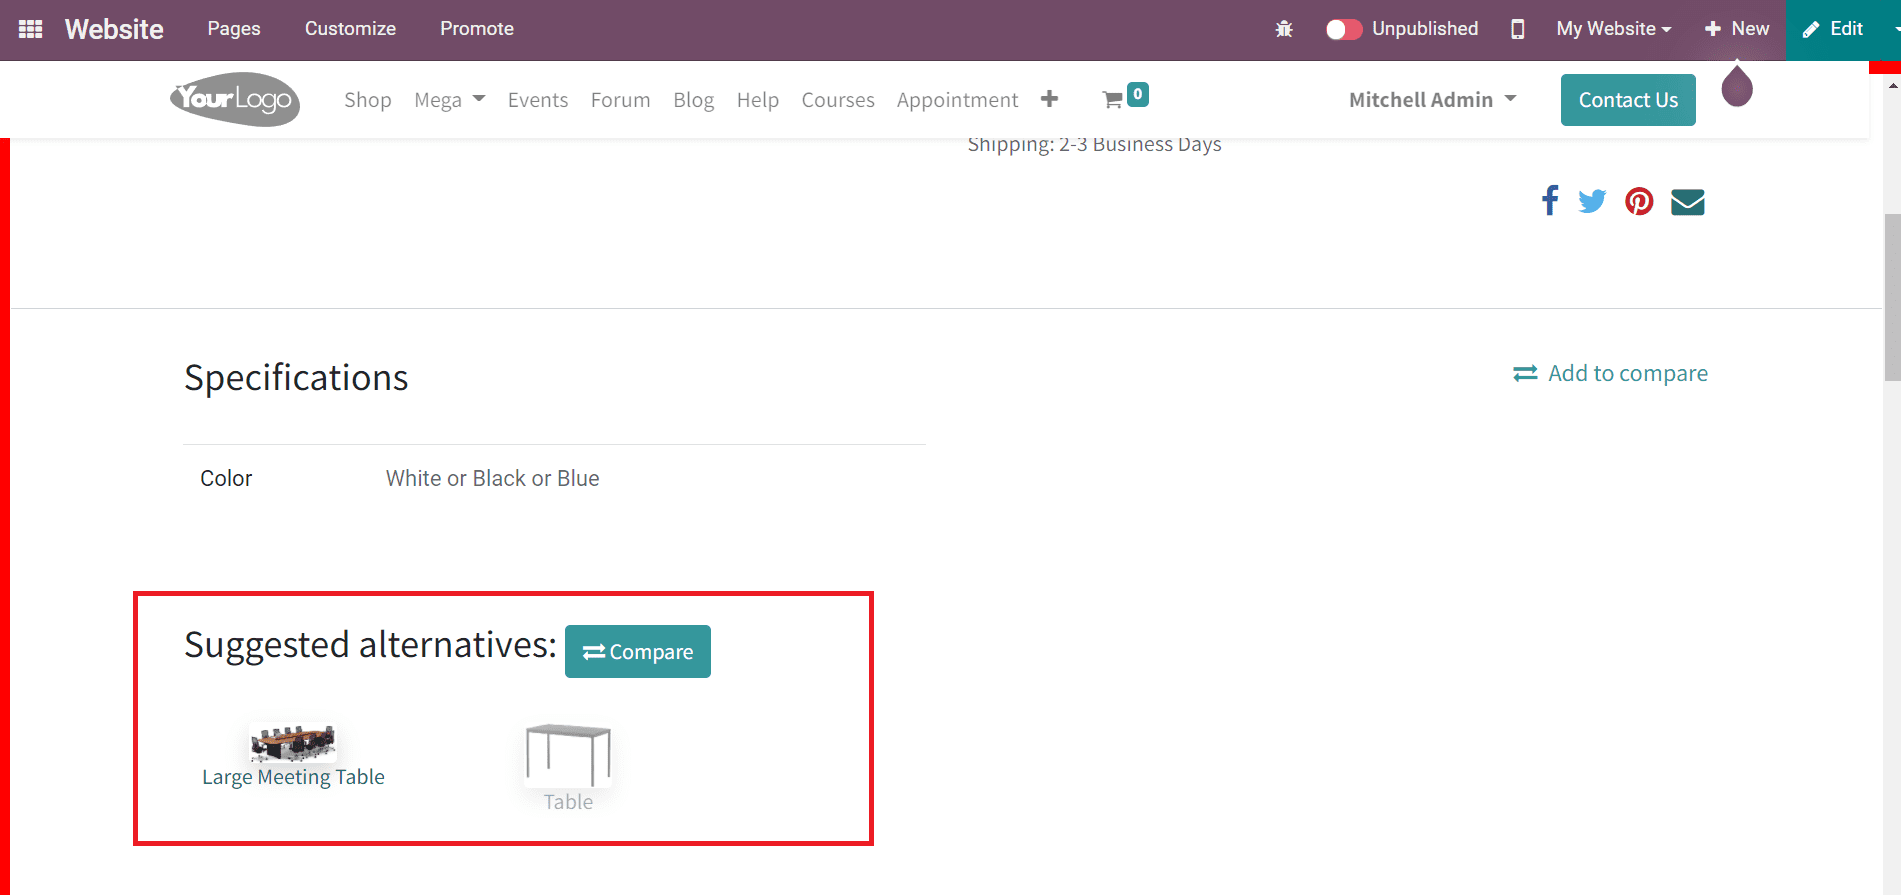
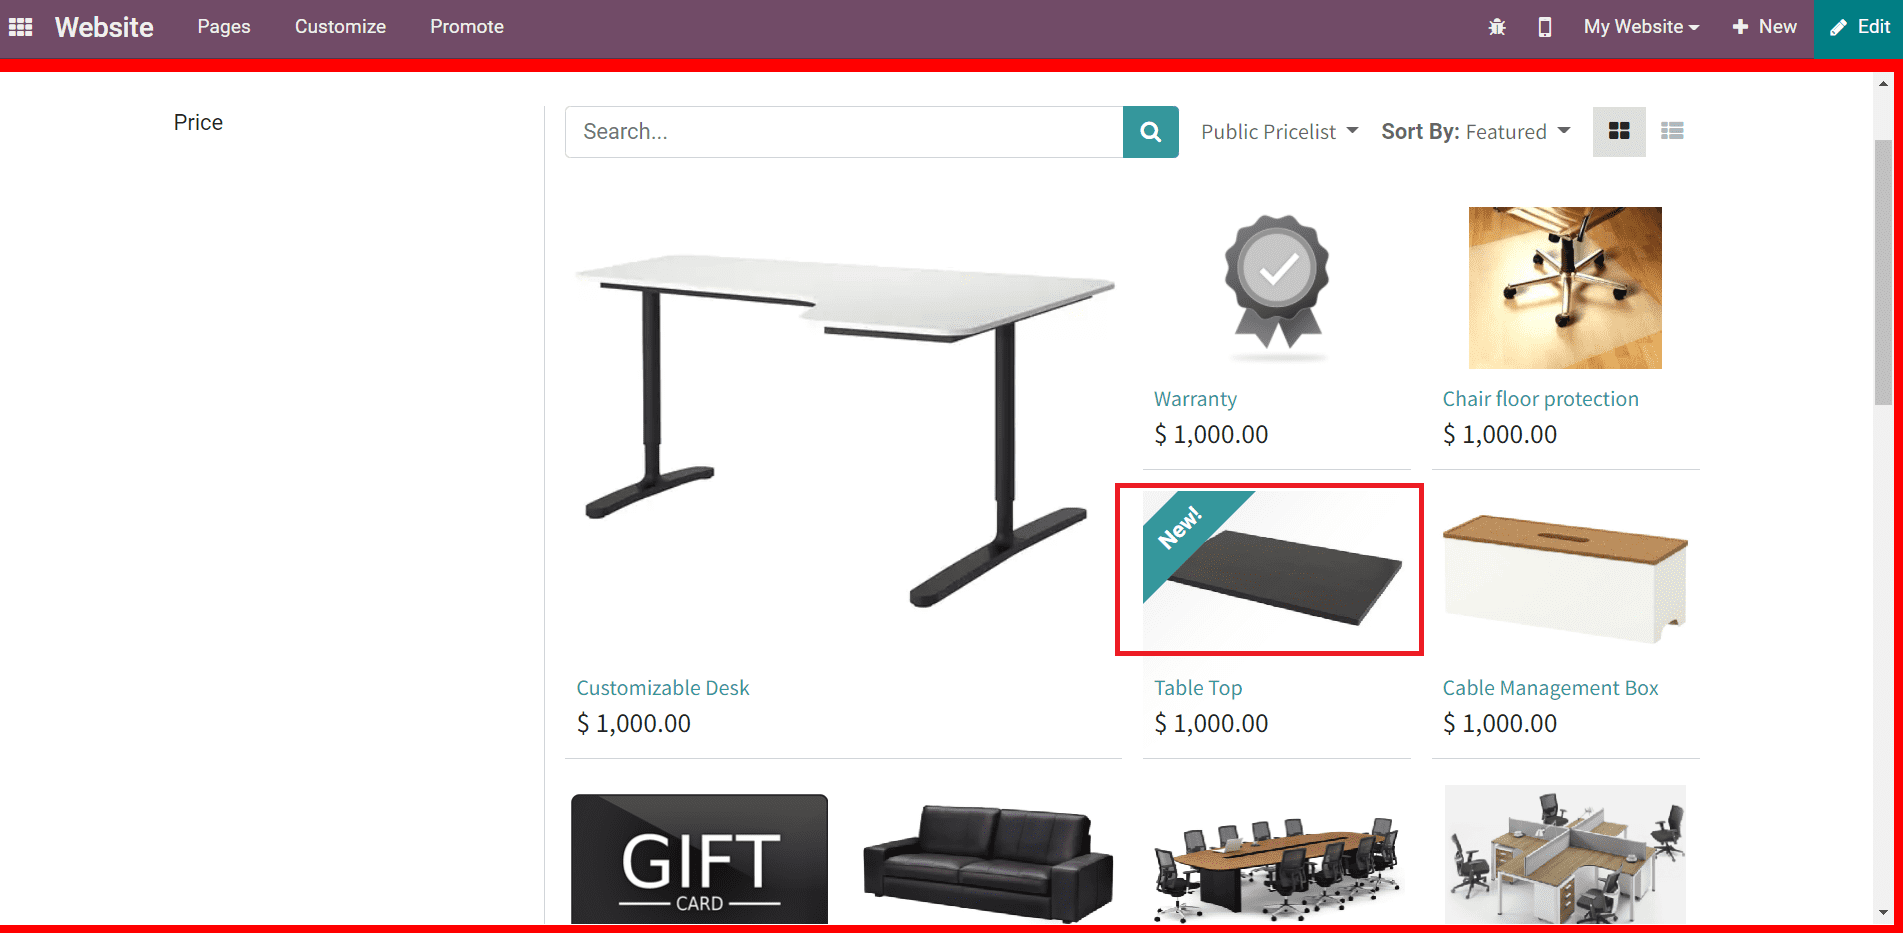
Alternative Products are used as an upselling strategy that suggests alternative products to the customers on the product page. Additionally, mention the Website on which you want to publish the product, Website Sequence, Categories to which this product can be added, and Ribbons. You can inform customers regarding the status of the product using Ribbons like New, Limited Stock, Out of Stock, etc. If you want to make this product available in PoS, activate the PoS field. A description of the product can be added in the Sales Description tab.
Now, let’s move on to the Purchase tab. As you can see in the image below, the list of vendors of this particular product can be specified using the Add a Line button along with the details of Subcontracted, Currency, Quantity, Unity of Measures, Price, and Delivery Lead Time.
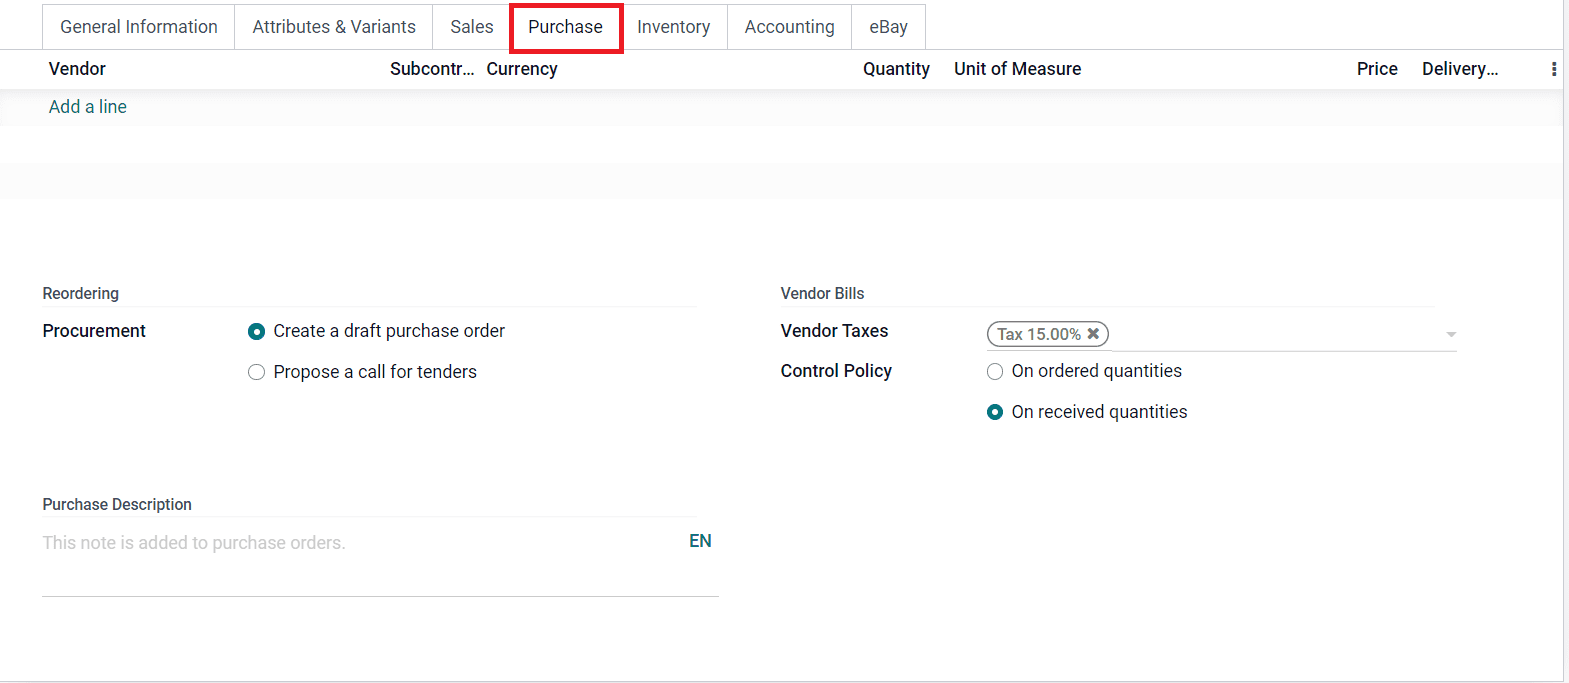
Additionally, define the Reordering, Vendor Taxes, Control Policy, and Purchase Description in the specified spaces.
The details regarding the inventory management of the product can be included in the Inventory tab.
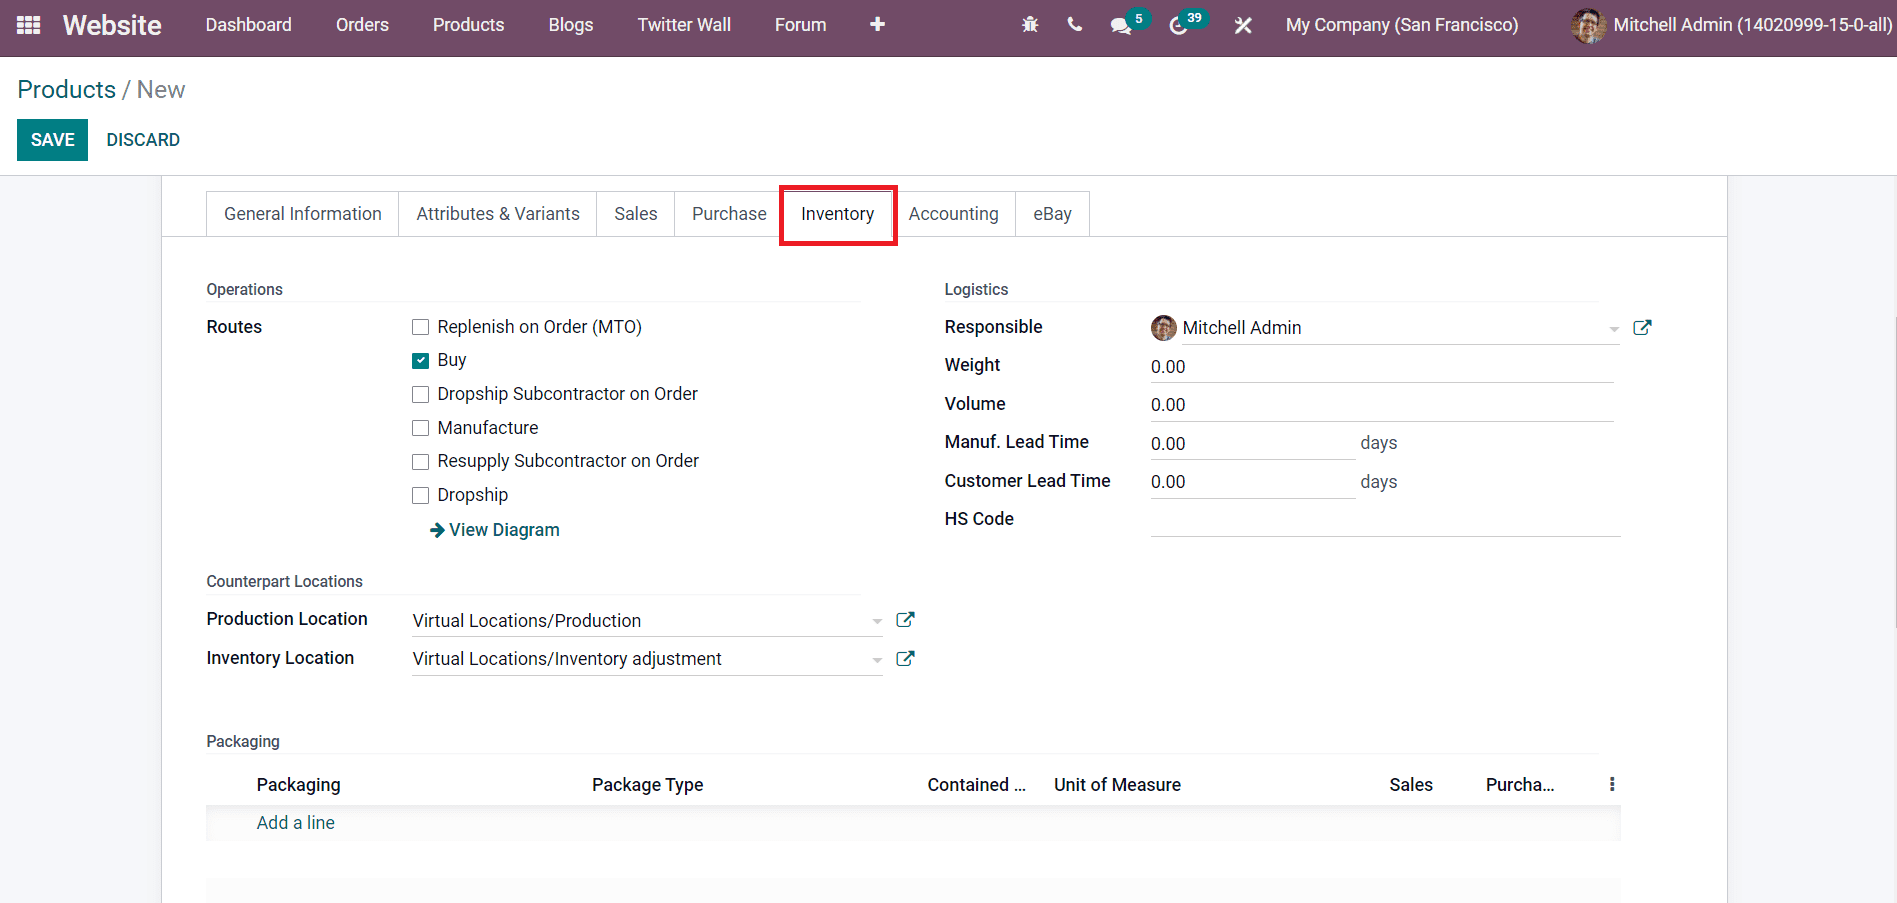
You can set the Routes of Operations, Counterparts Locations, and Logistics of the product in this field. The Packaging of the product can be specified using the Add a Line button.
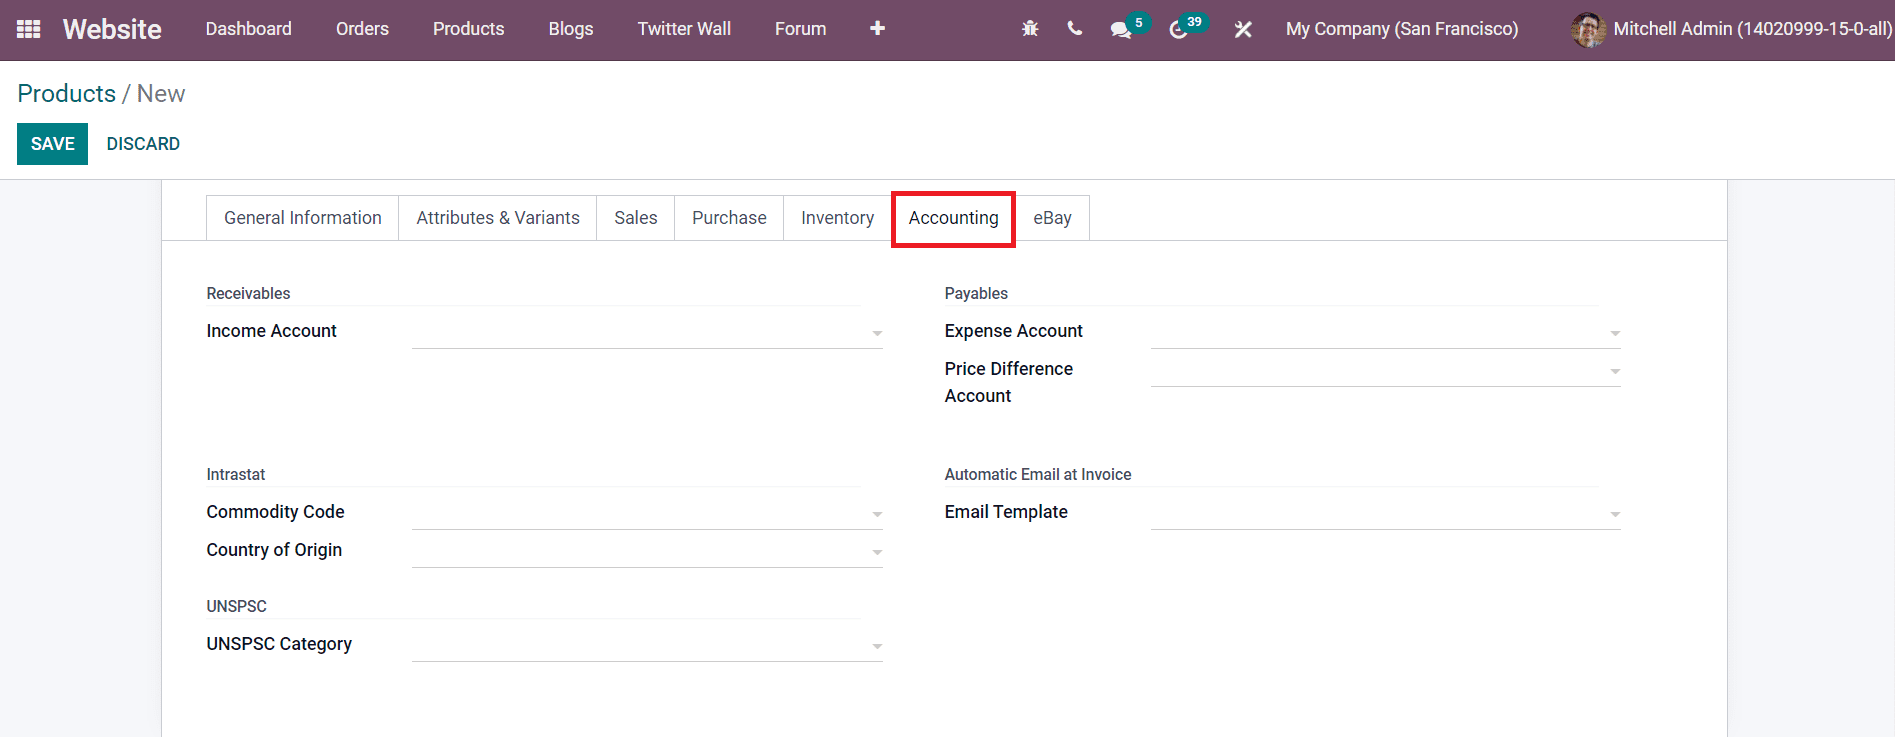
In the Accounting tab, the Income Account, Commodity Code, Country of Origin, UNSPSC Category, Expense Account, Price Difference Account, and Email Template can be added in the corresponding fields.
If you want to sell this product on eBay, you are allowed to activate the Sell on eBay field from the eBay tab. The eBay Status can be seen in this tab. Add Title, Subtitle, Item Condition, Category, Store Category, Payment Policy, Return Policy, and Shipping Policy in the specified fields.
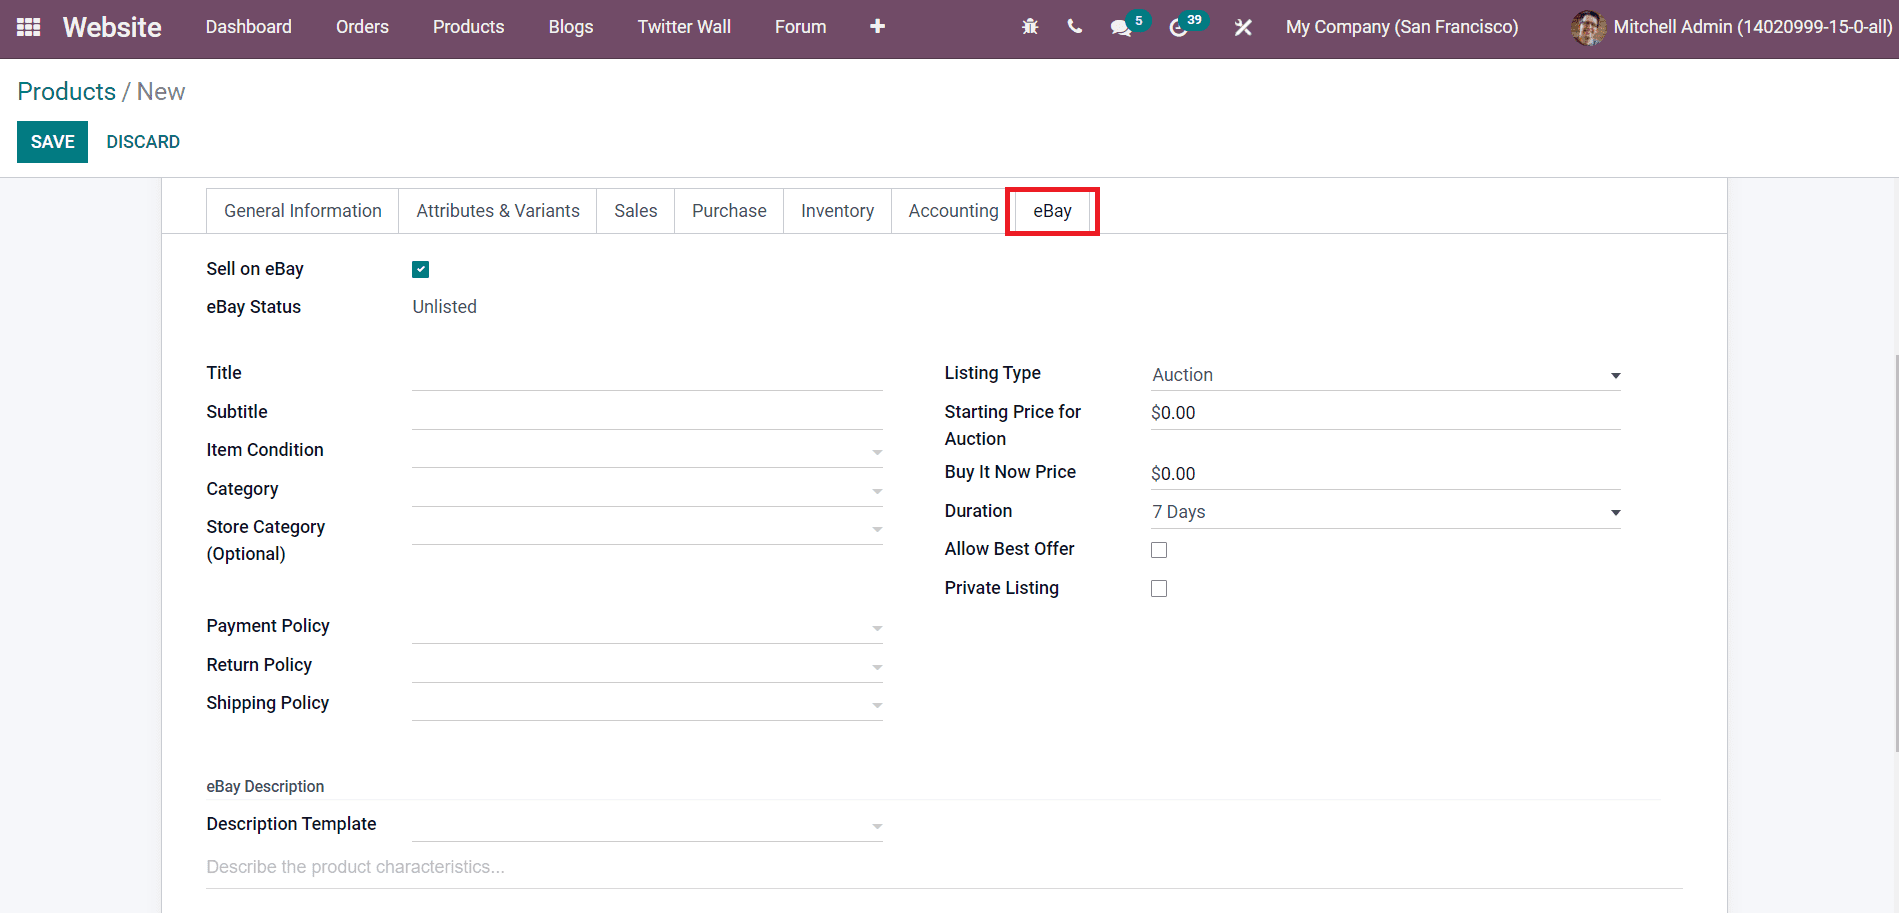
You can also define the Listing Type, Starting Price, Buy it Now Price, Duration, and eBay Description. If you want to add a template for the description, you can add it in the Description Template field. By activating the Allow Best Offer and Private Listing fields, Odoo will allow you to provide best offers and private listing options on eBay.
After completing all the specified fields in the Product Configuration window, you can publish this product on your company website.
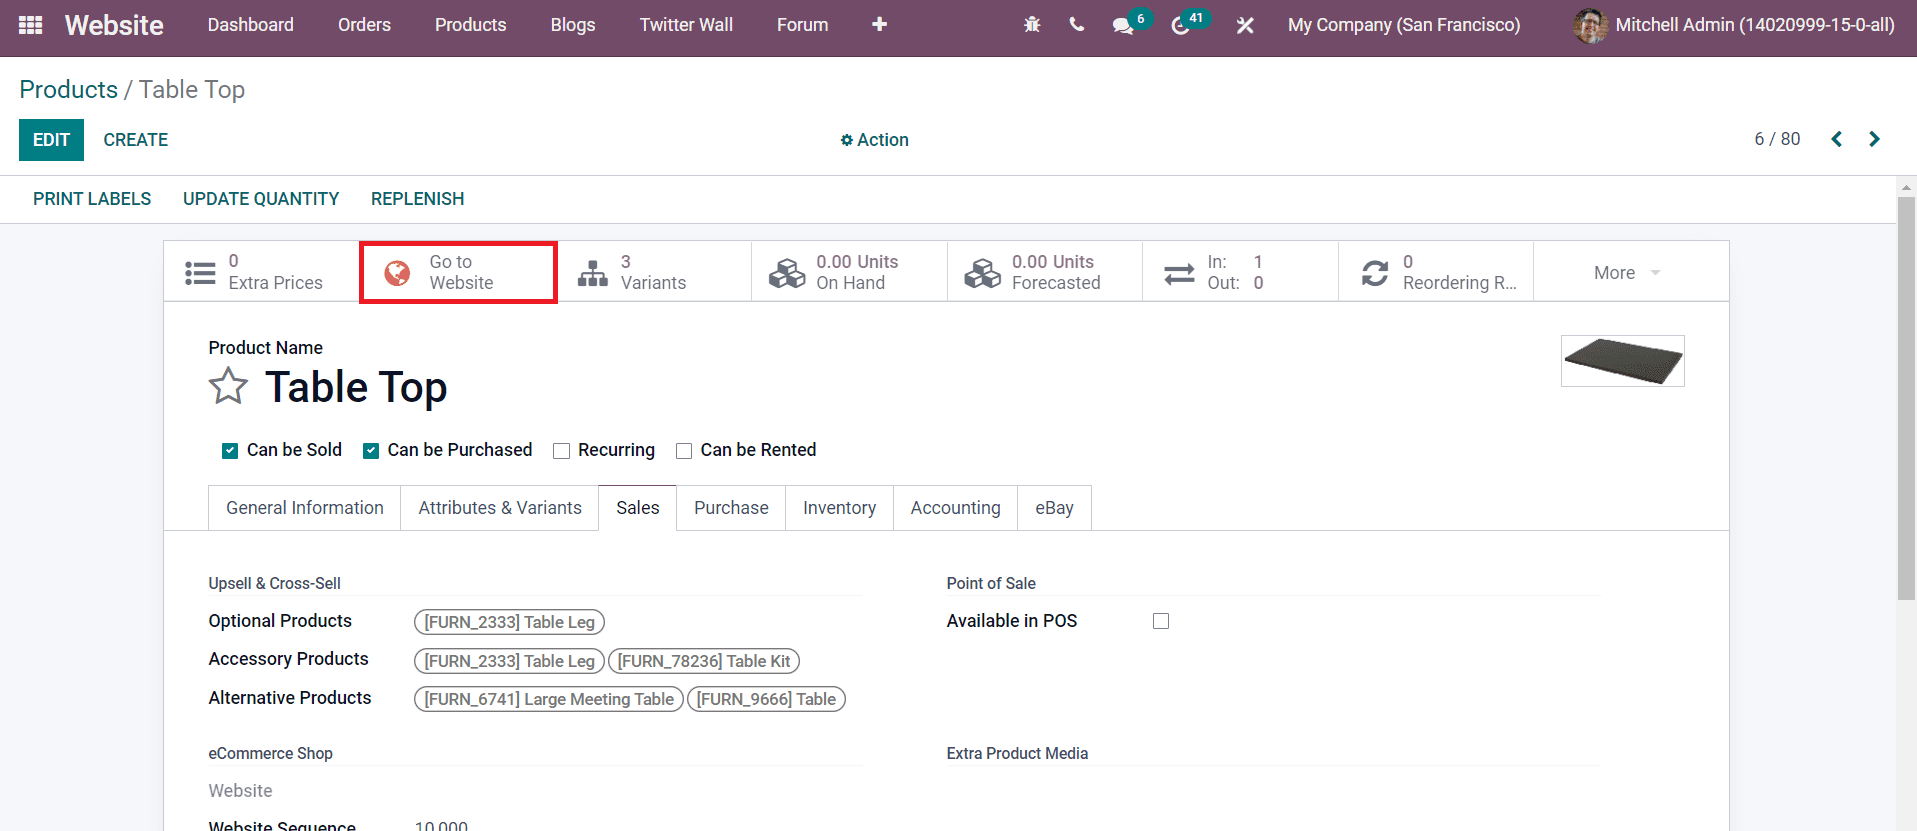
Click on the Go To Website button as marked in the screenshot above.
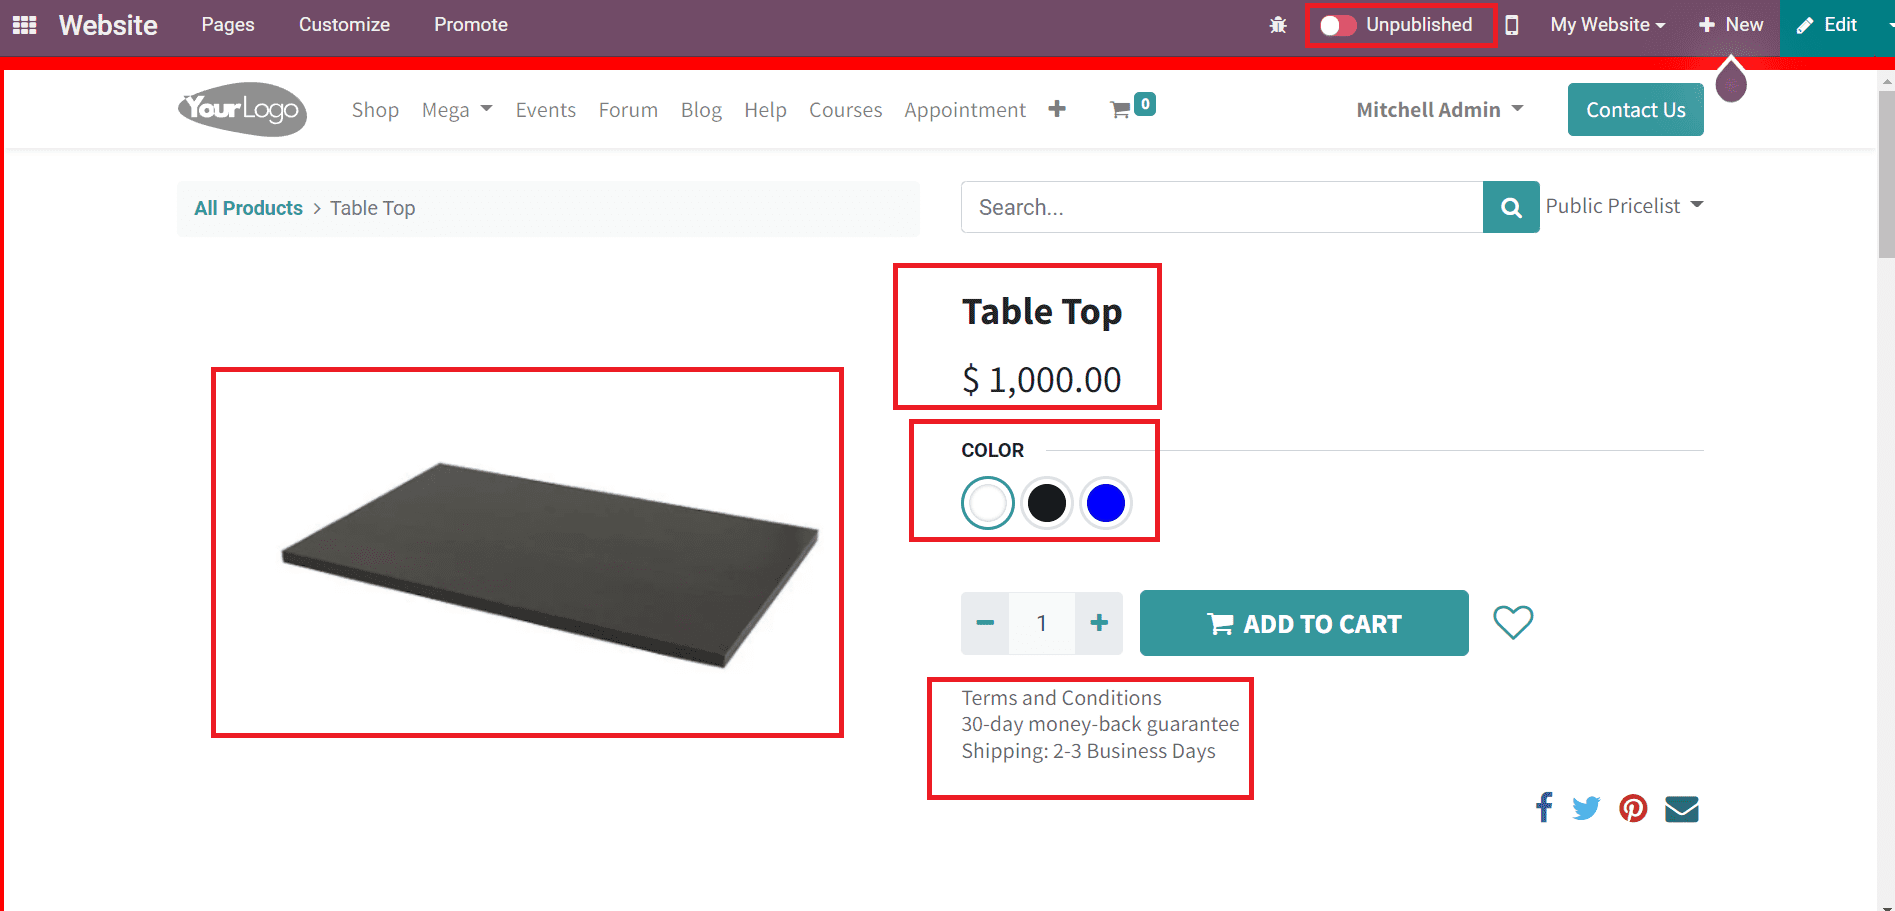
You will be able to see the name of the Product along with its image on your website. The status of the product is now ‘Unpublished’. You can change it to ‘Published’ by clicking on the same button. The attributes and variants of the product that we mentioned in the backend can be seen here as marked in the image above. When you scroll down, you will get the list of Alternative Products that we configured in the backend.
You will also be able to see the ribbon that we added in the backend on the product from the Shop page.
While adding the product to your cart, you will get the list of Optional Products on your eCommerce page as shown below.
The list of Accessory Products can be found when the customer proceeds to checkout.
This is how we configure a product for an eCommerce page in the backend using the Odoo Website module. Now, we will look at the configuration of products on the eCommerce site from the front end.
In order to configure a new product on your eCommerce site, you can use the New button available on the top right corner of the screen as shown in the image below.
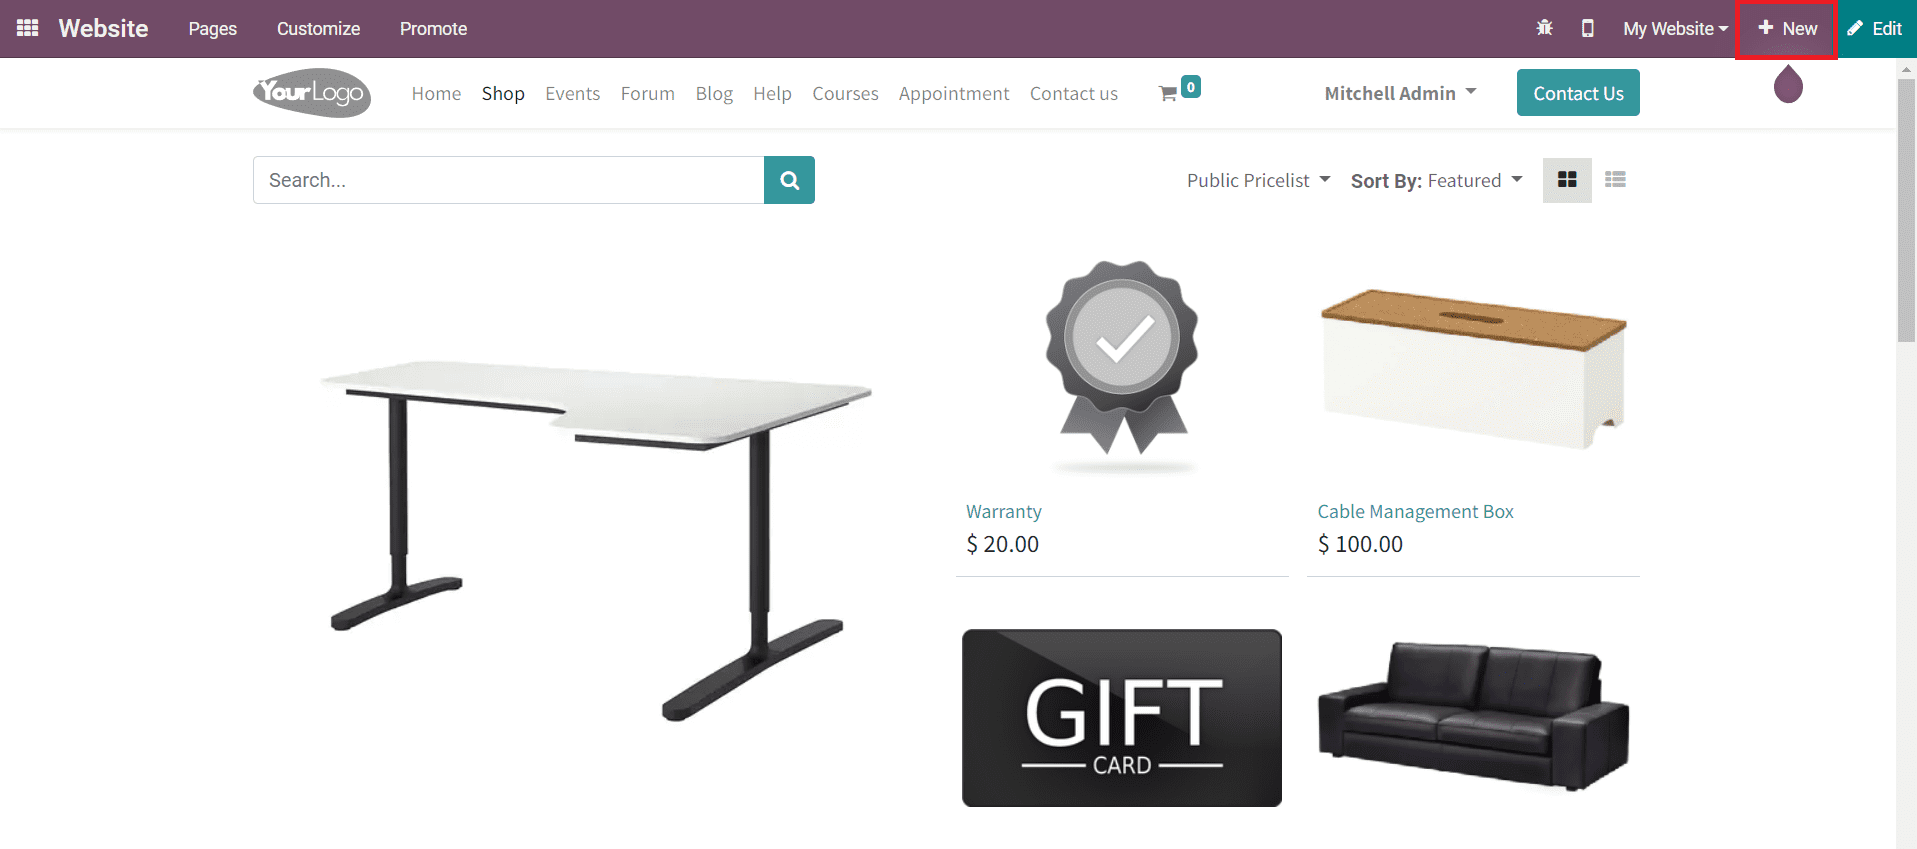
This button includes advanced options to publish various types of content on your website.
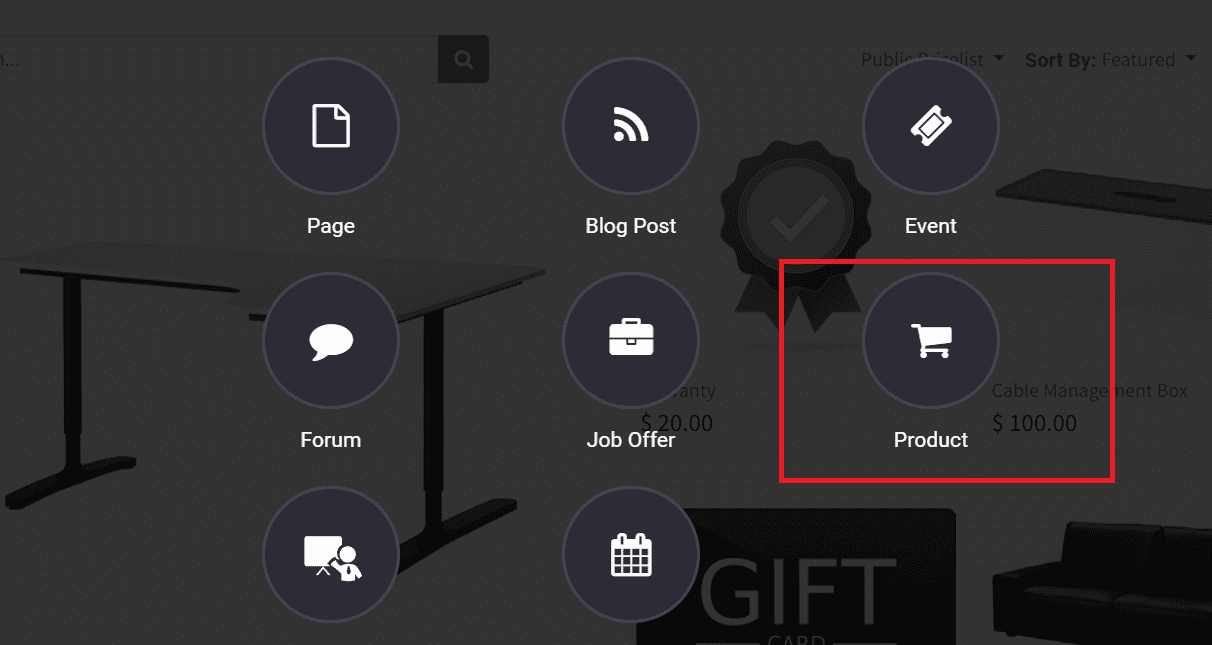
You can create a new Page, Blog Post, Event, Forum, Job Offer, Product, Course, and Appointment Form for your website with the help of this button. In order to configure a new product on the eCommerce site, you need to select the Product option from the given list. As soon as you click the Product option, a pop up will appear on your screen.

You can simply mention the name of the product in the above shown pop up window and click the Create button in order to continue the product configuration process. Now, the user will get a draft view of the product on your Shop page that has not been published yet.
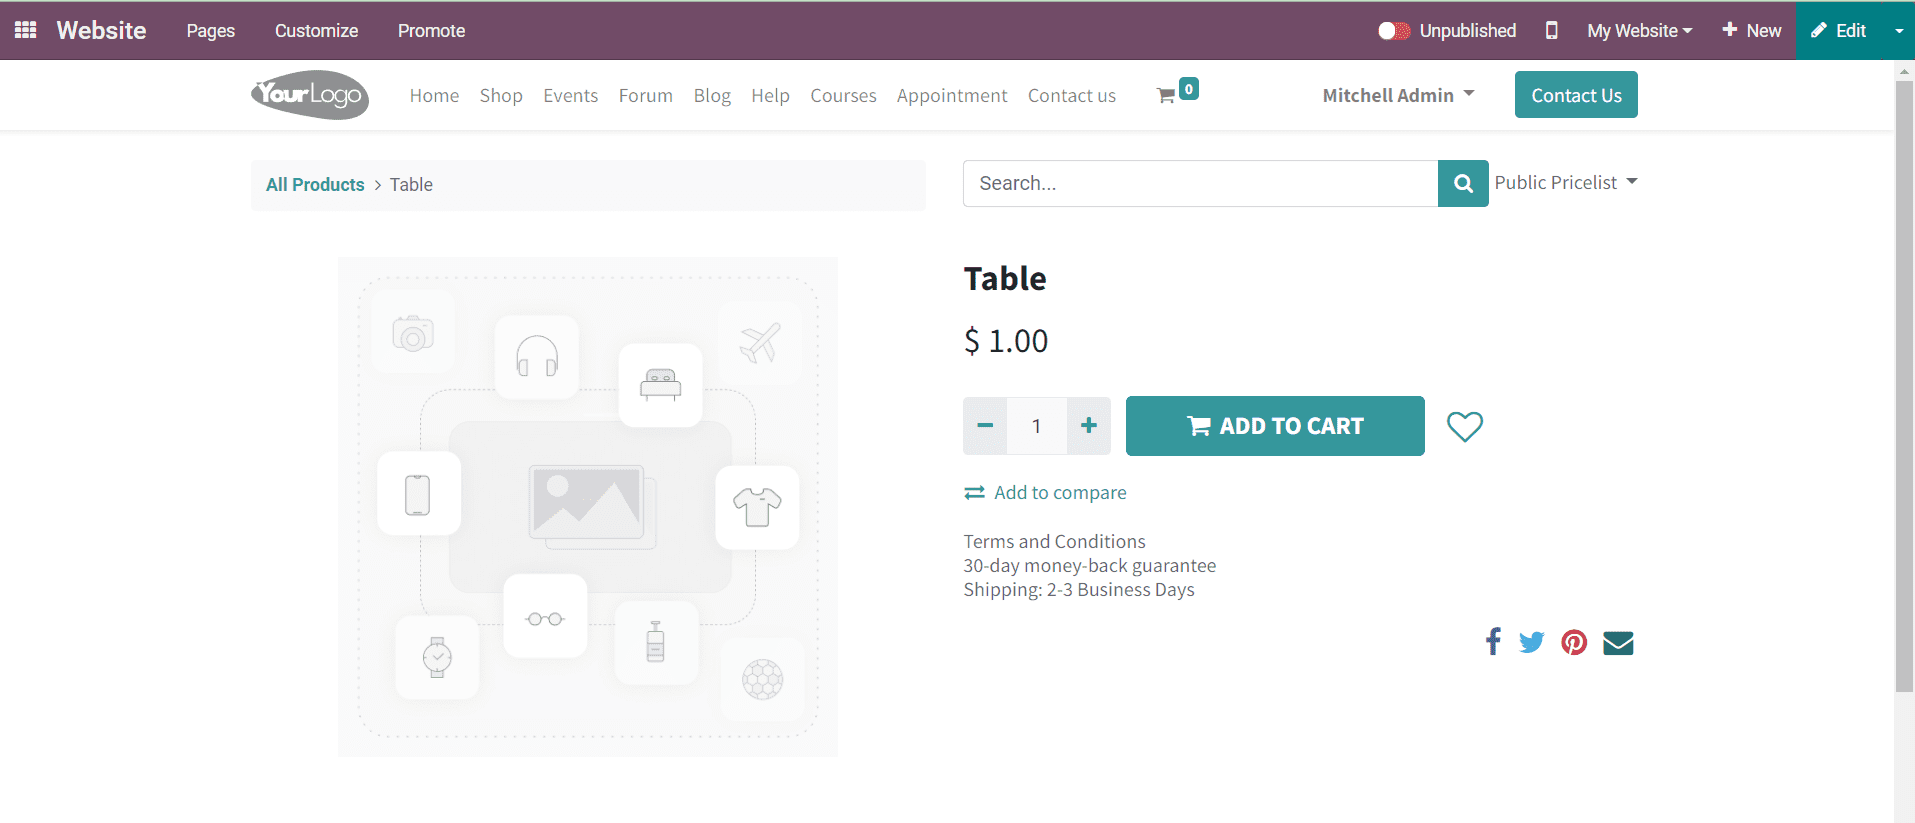
Odoo offers an efficient Website Builder System for users to design each page on the website as per users’ requirements. It is possible to customize each page based on your preferences. Here, the Edit button will assist you to enhance the view of the product on the website and add necessary features to highlight the product.
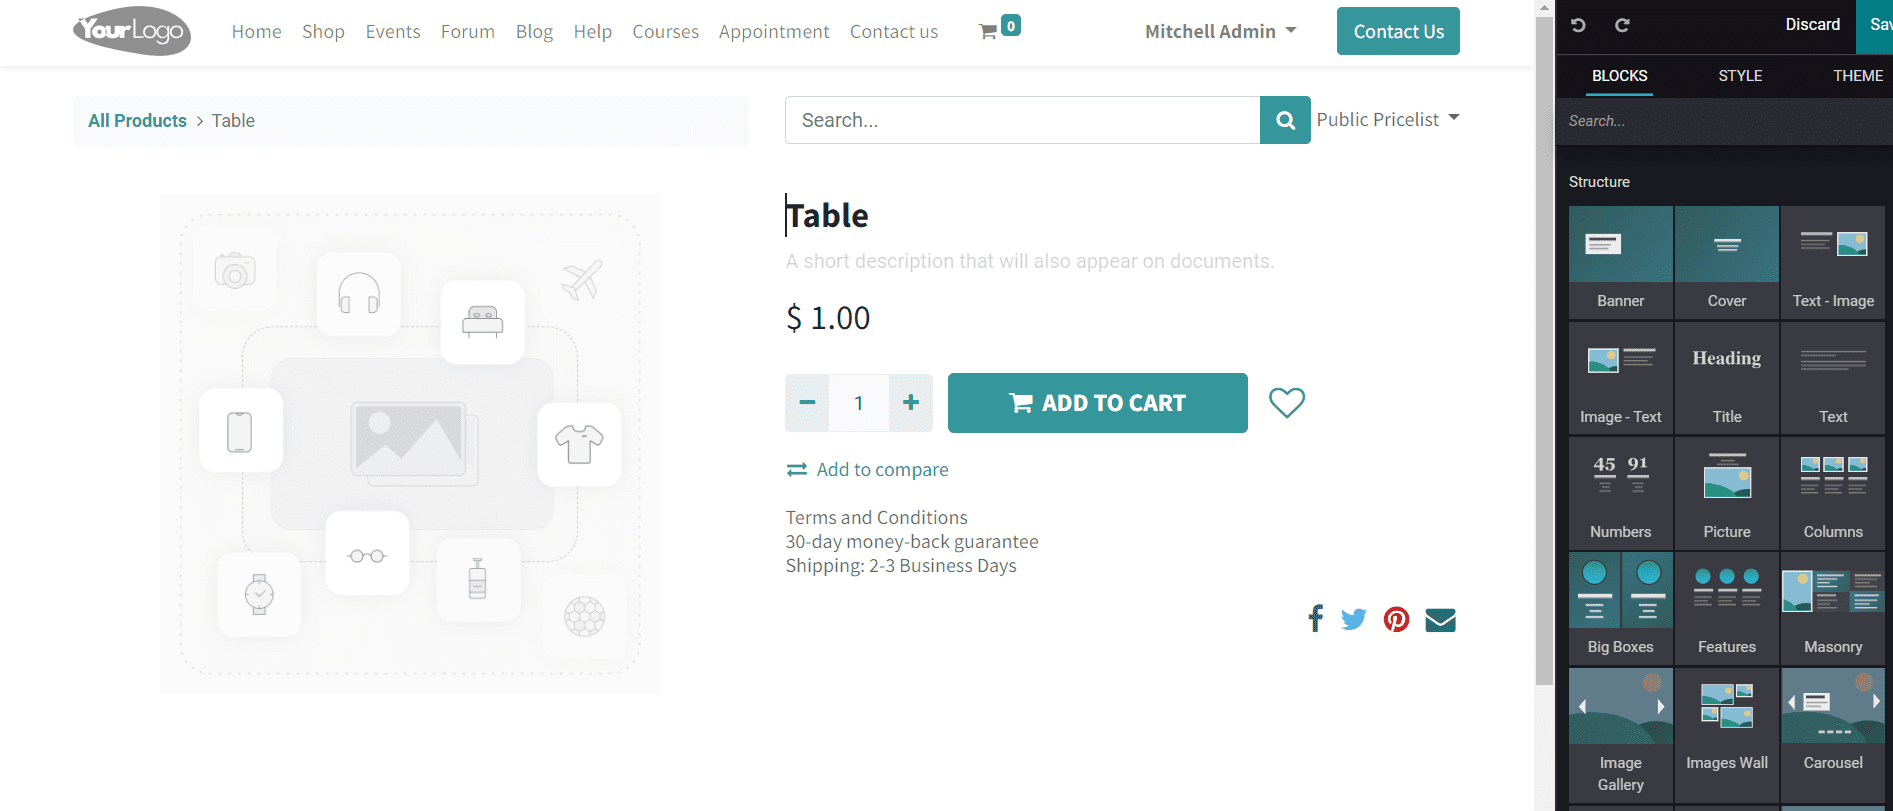
If you want to change the name of the product, you can do it with the help of editing tools. Additionally, you can add a small description about the product, price, and terms and conditions. If you want to add more features to the product page, you can use suitable snippets from the editing panel. Now, double clicking on the field given to configure images of the product will give a pop up where you can upload attractive images of the product.
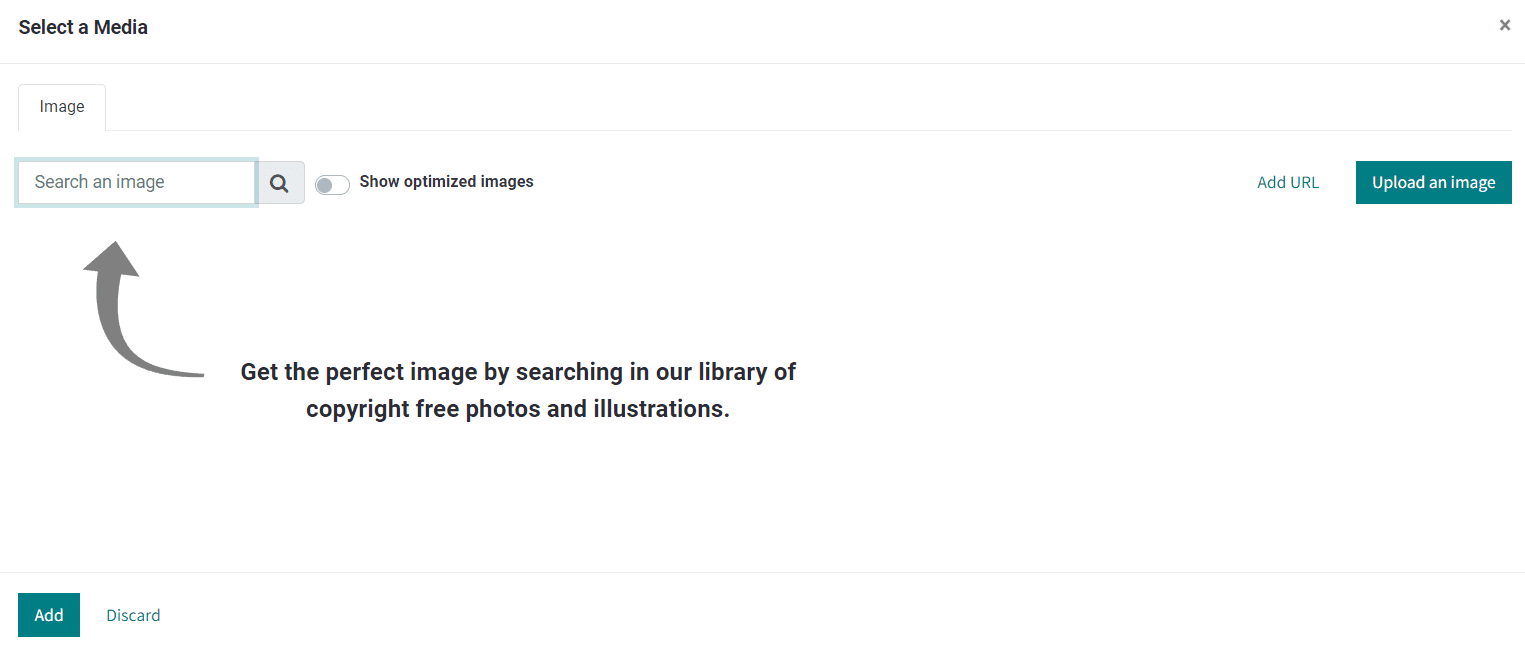
After adding an image and completing the editing process, you can click on the Save button.
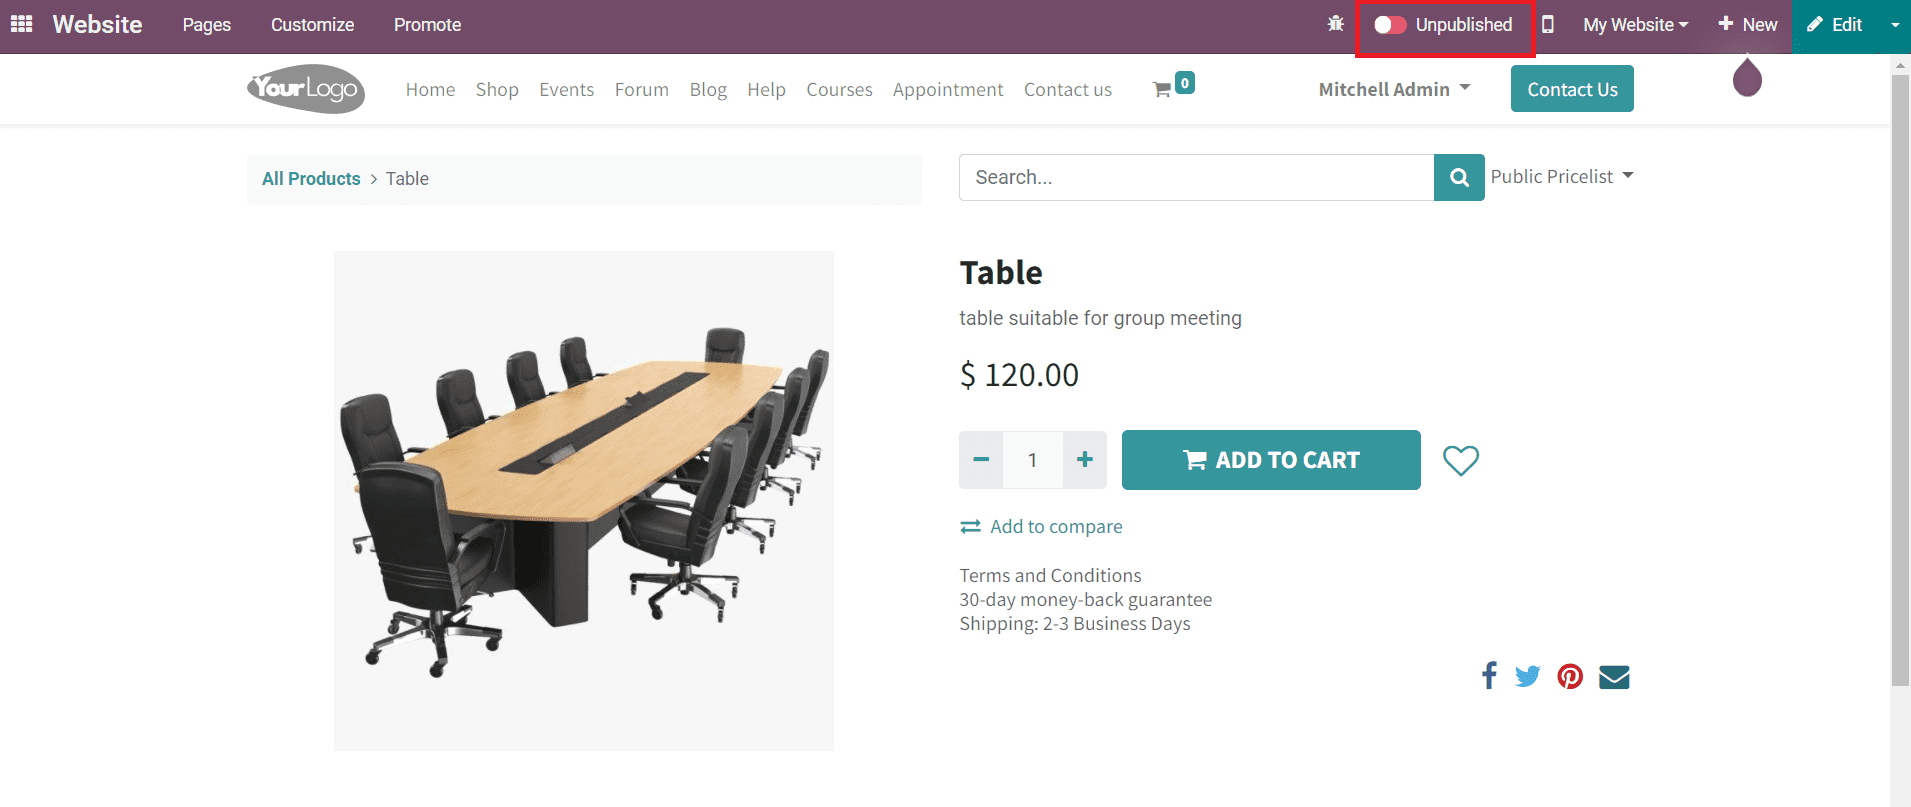
Now, change the status to Published in order to publish this product on your eCommerce site. If you want to add more information regarding this product such as Attributes, Variants, Shipping Policies, Packaging Methods, Accounting, and many other Sales related details, you can configure those details in the backend.
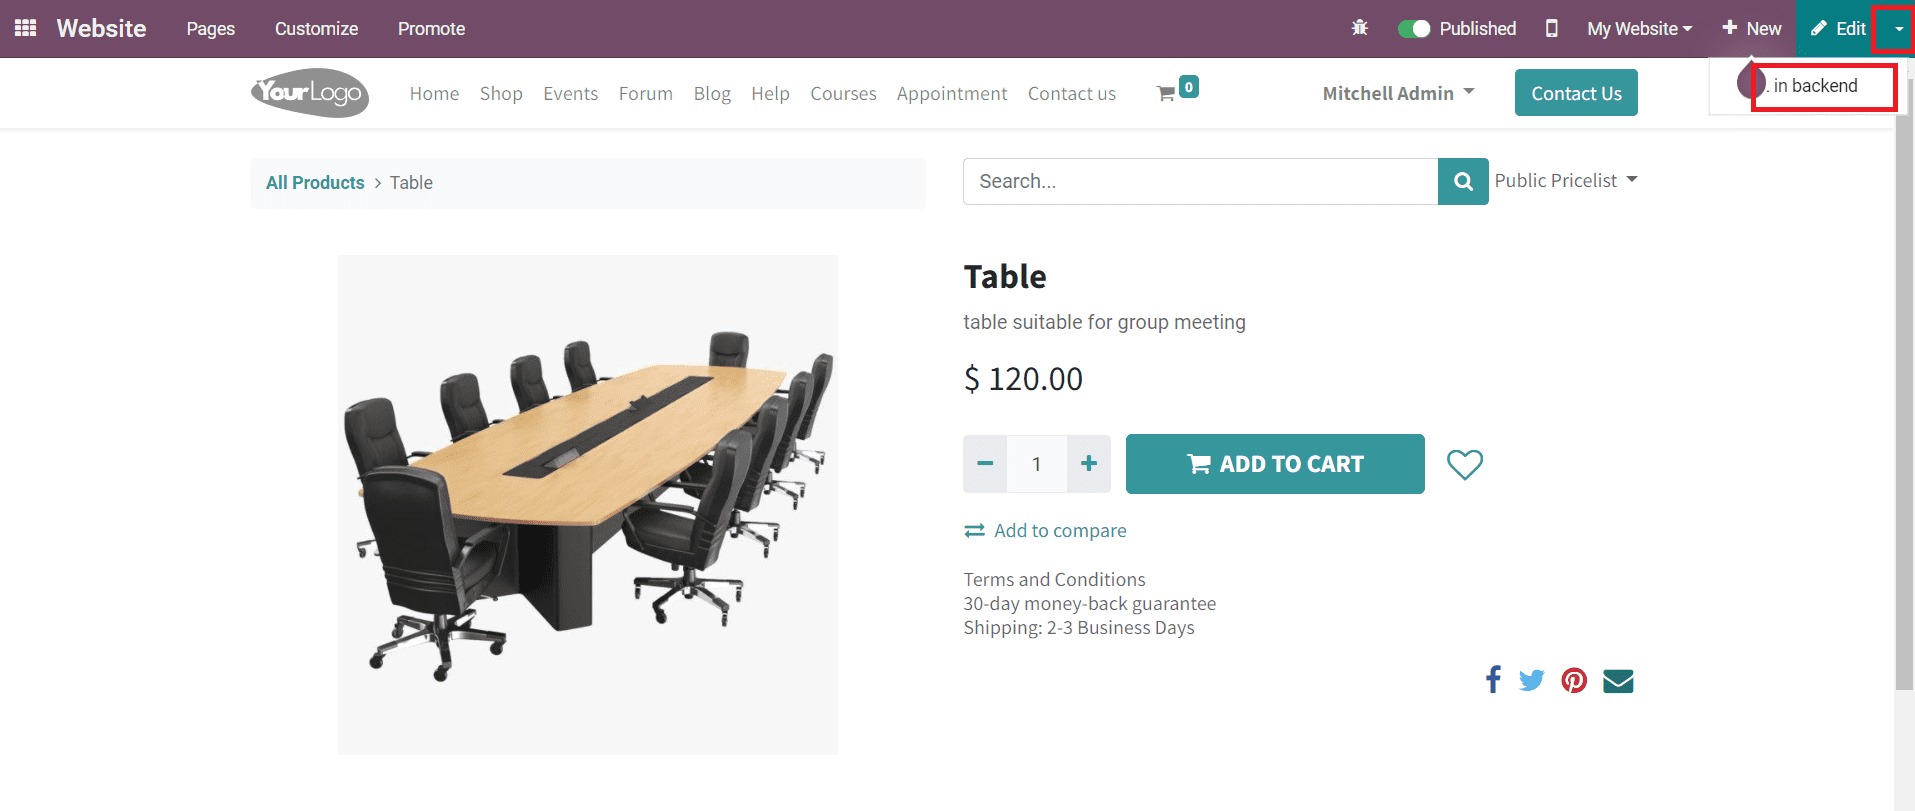
When you click on the down arrow symbol near the Edit button, you will get the option to Edit in Backend. Just like we discussed in the earlier part of this blog, you can effortlessly configure additional details in the backend.
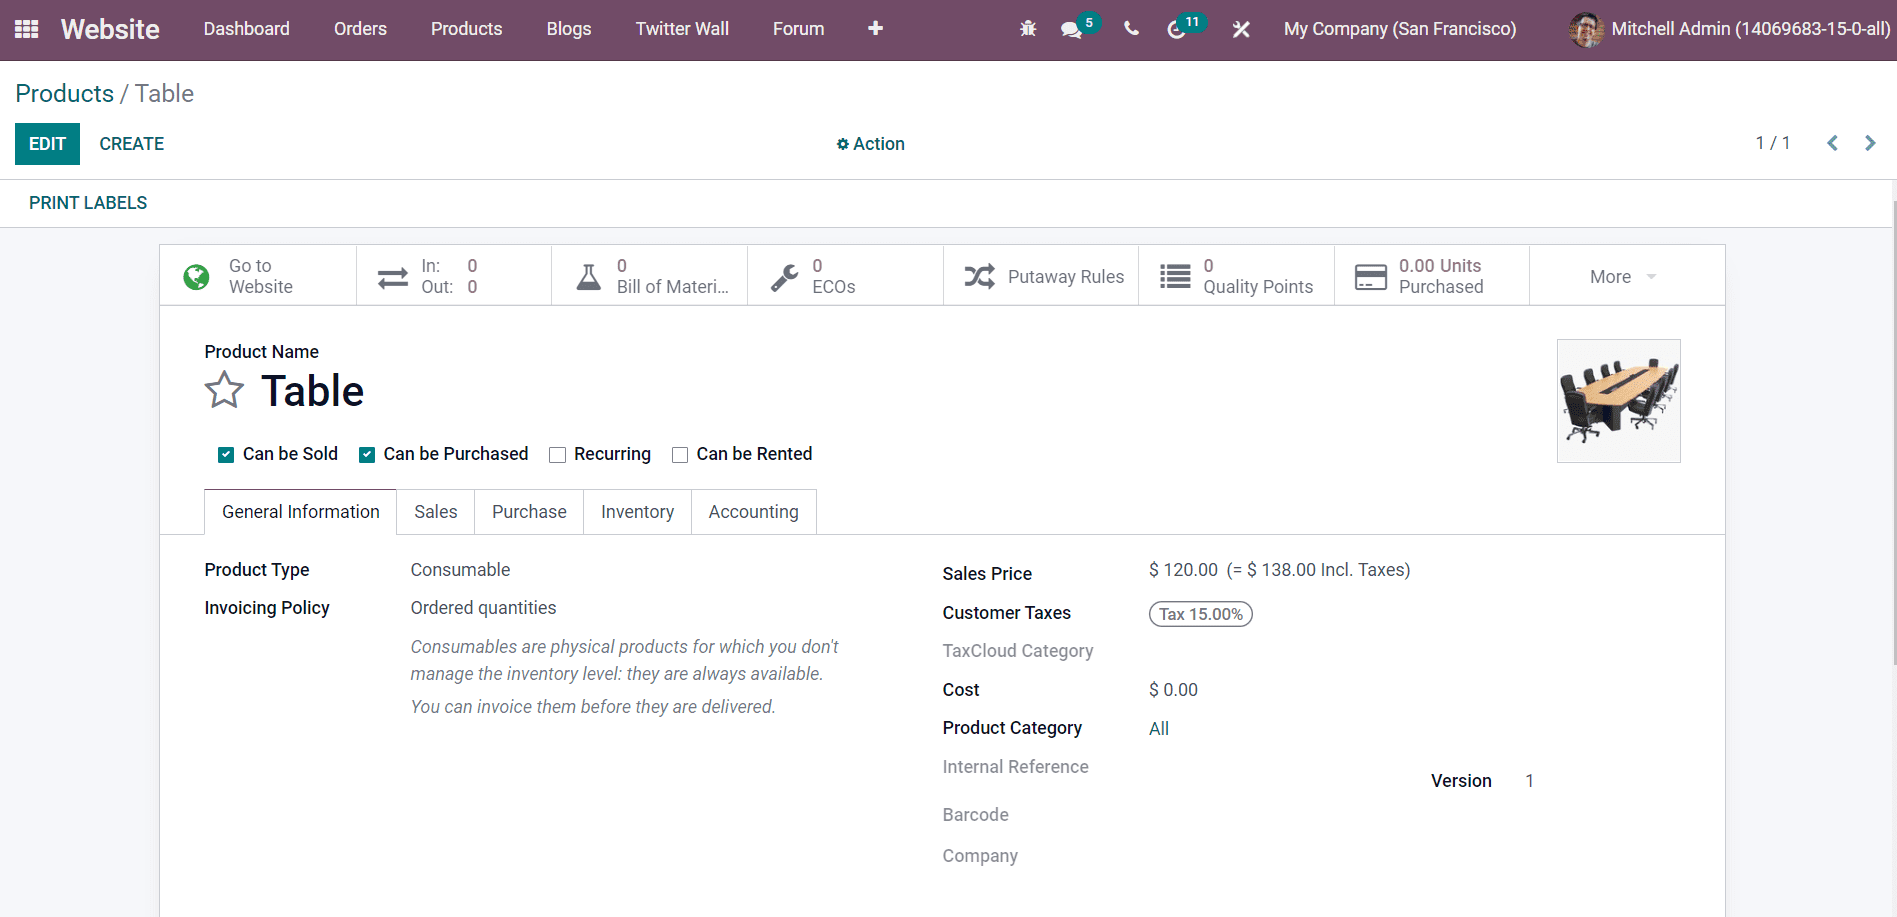
This product is already published on the website so you don’t need to publish it again. All you have to do is click on the Edit button and configure the details of the product in the specified spaces. Don’t forget to click the Save button after completing the editing.
The methods of configuring a new product in Odoo are quite simple as compared to other ERP systems. From the backend and frontend, a user can add new products to an eCommerce page seamlessly with the guidance of the product configuring system available in the Odoo Website module.