In every organization, the work of different employees is managed by the manager and the reporting authority. Thus the workflow is targeted and underwent in organized and systematic control. This is maintained, and the software is called the Approval system. By implementing these systems, every enterprise move in a standardized way without default. This Approval system enhances a significant role in authorization by the business managers to monitor the business operations.
With the Odoo platform in the Odoo 15 Studio with the customization feature of the toggle Studio, you can improvise your Approval module. With its dedicated tool, the Studio module in Odoo 15 plays an inevitable role in customizing the Approval module appropriately with the business management you operate. The Odoo 15 Studio maintains all your business management in the Approval module that tapers all your business elements conducted by the employees and consolidates internal decision-making of the activities done by the senior managers based on their actions. To deliver and implement this activity in the Approval module, the Odoo Studio makes each employee access each with a requested window authority with the required tools.
Furthermore, all the managers will have access to the given windows to the employees where the approval requests have got. To know more about Odoo 15 Approval module you can access it An Overview of Odoo 15 Approval Module
Also by studying the given link of the blog you can study the function of creating a new approval request
With the request access, the employees can grant permission or admit the request access to them based on the status of the request access, or else they can reject it.
This blog gives you an acumen on how we can configure the extra features of the Approval module with Odoo 15 Studio through various steps in the Studio module.
Now let us see how we can configure the additional features in the Approval module with the help of toggle studio in Odoo 15.
Approval Module Configuration with Odoo 15 Studio
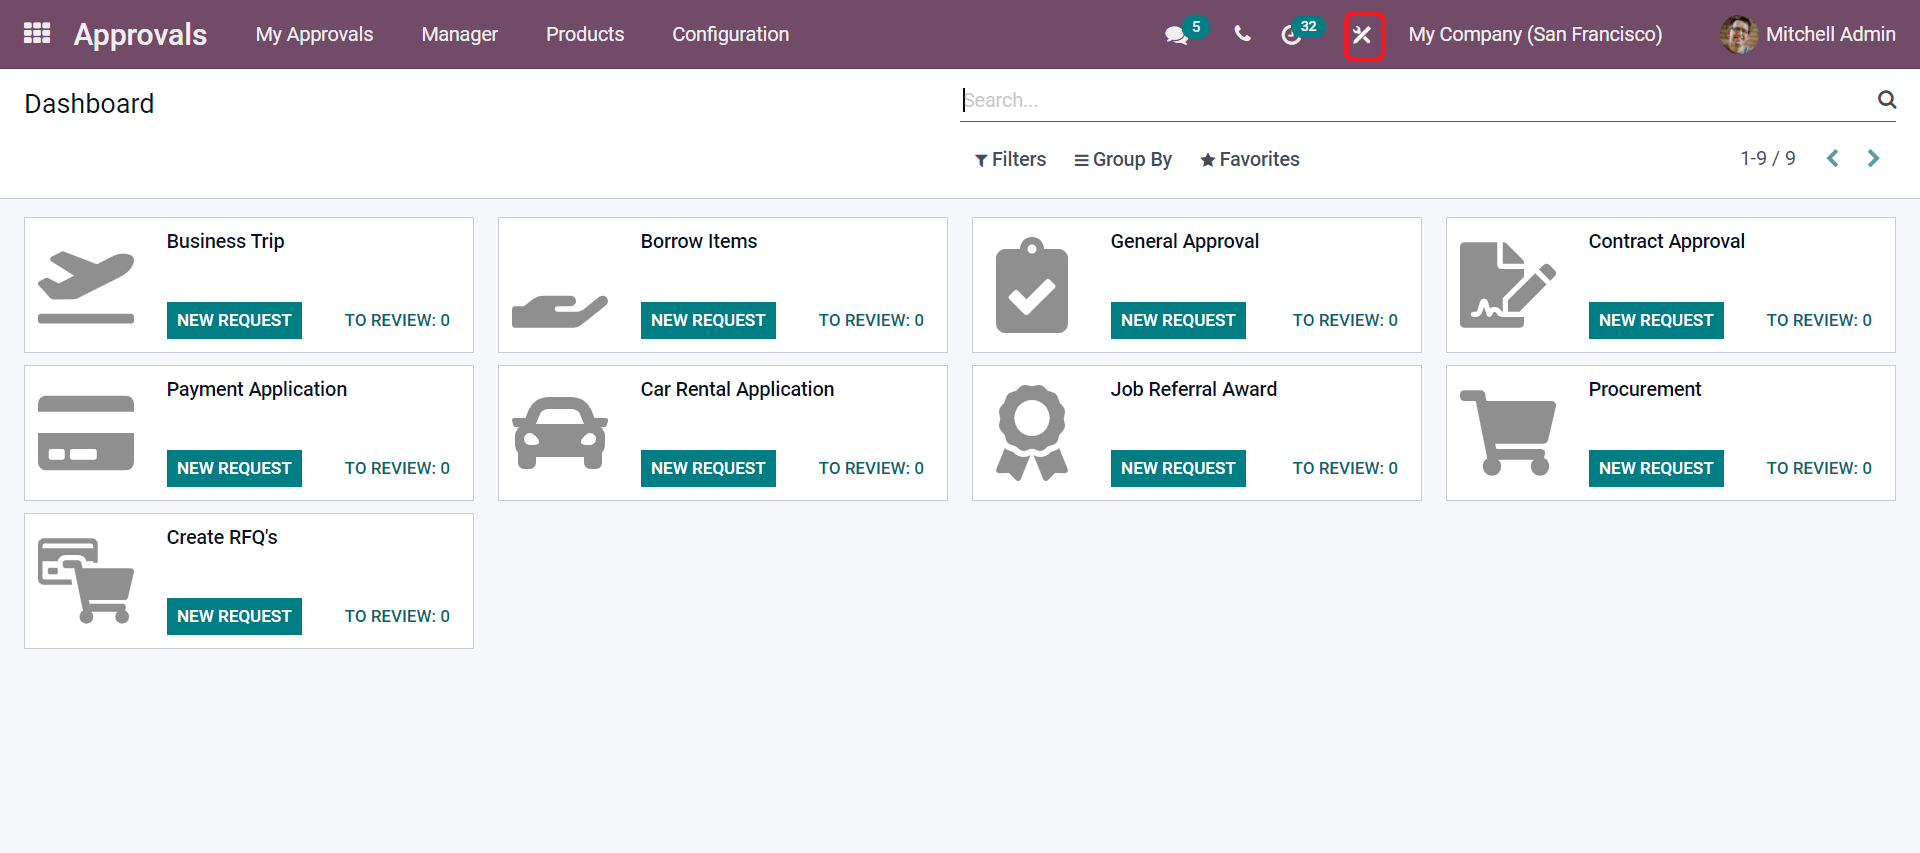
From the given screenshot, while clicking on the highlighted icon, the Toggle Studio, let us see how to configure the extra features in the Approval module with Odoo 15 Studio. In the screenshot above, you can see the different Approval requests in the Approval Dashboard—this platform where the manager logs in can view the approval requests from the other employees through their window. As seen in the above image, once the Studio module is clicked, it will be redirected to a configuration menu to maintain and add new features to the existing request menu, as seen in the screenshot below.
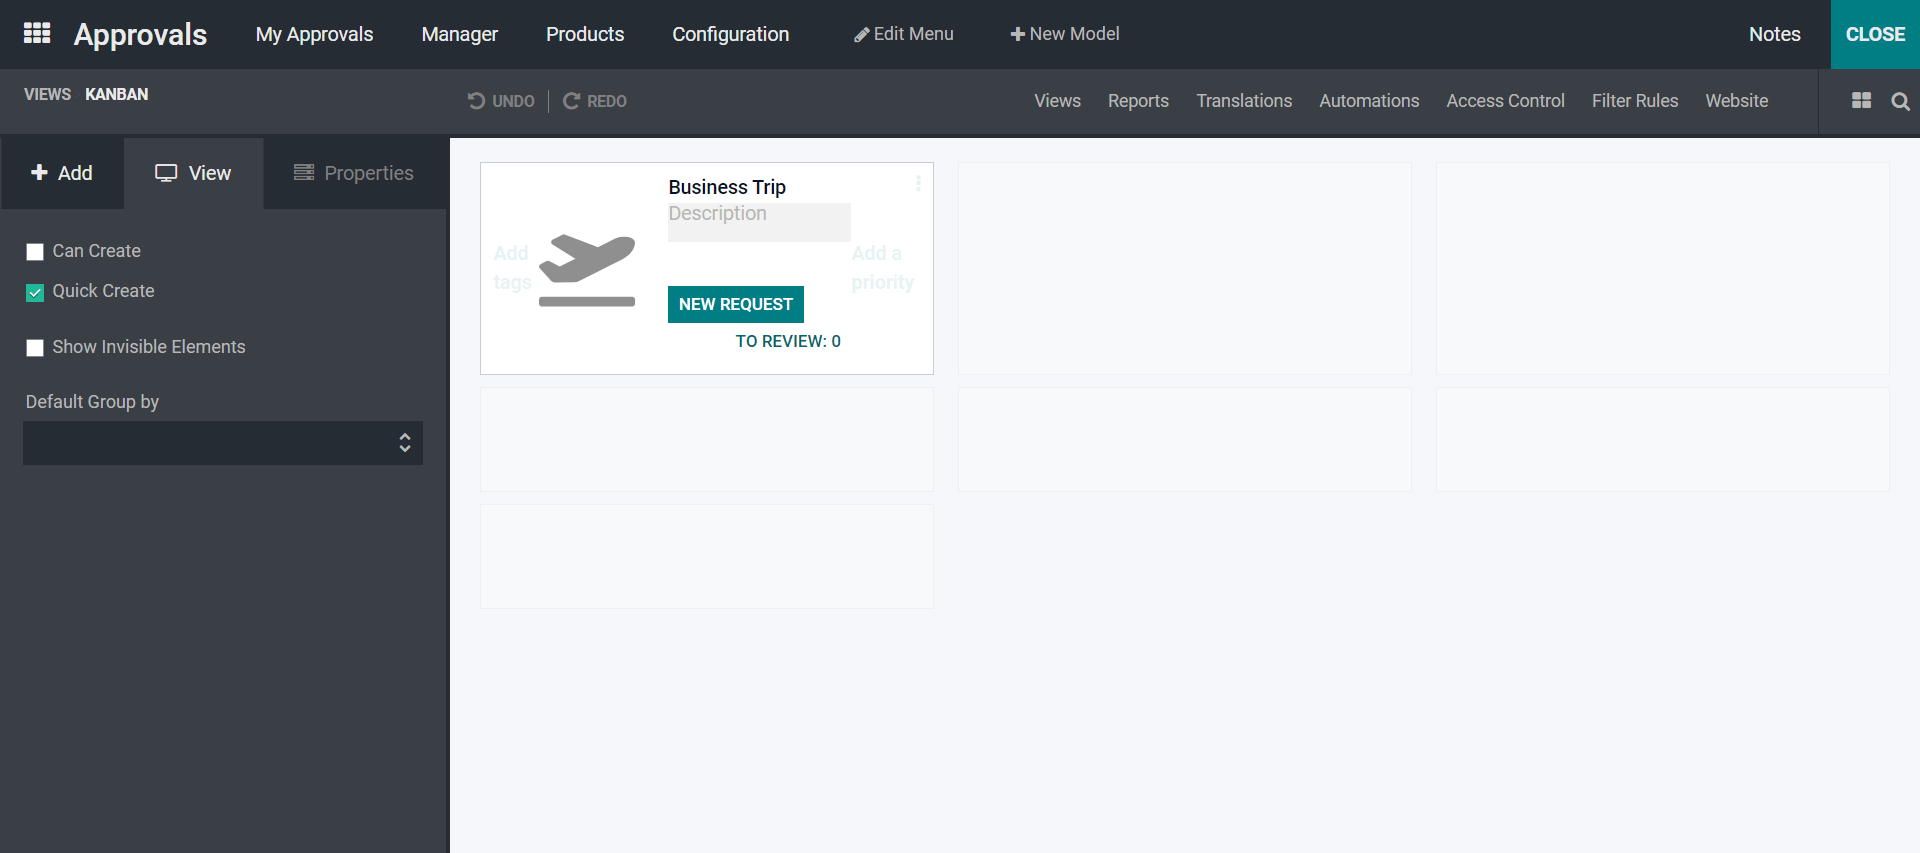
By moving to the Views tab in Odoo Studio under Odoo 15 in the Form view, you will be navigated to the Approval Type window to add the pipeline status if required or remove it as per your business requirement. To know the other configurations of the other tabs in Odoo 15 Studio, you can refer to the links given below Steps in configuring reports and translators in Odoo 15 Studio and Automated Actions, Access Lists, and Filter rules in Odoo 15 Studio.
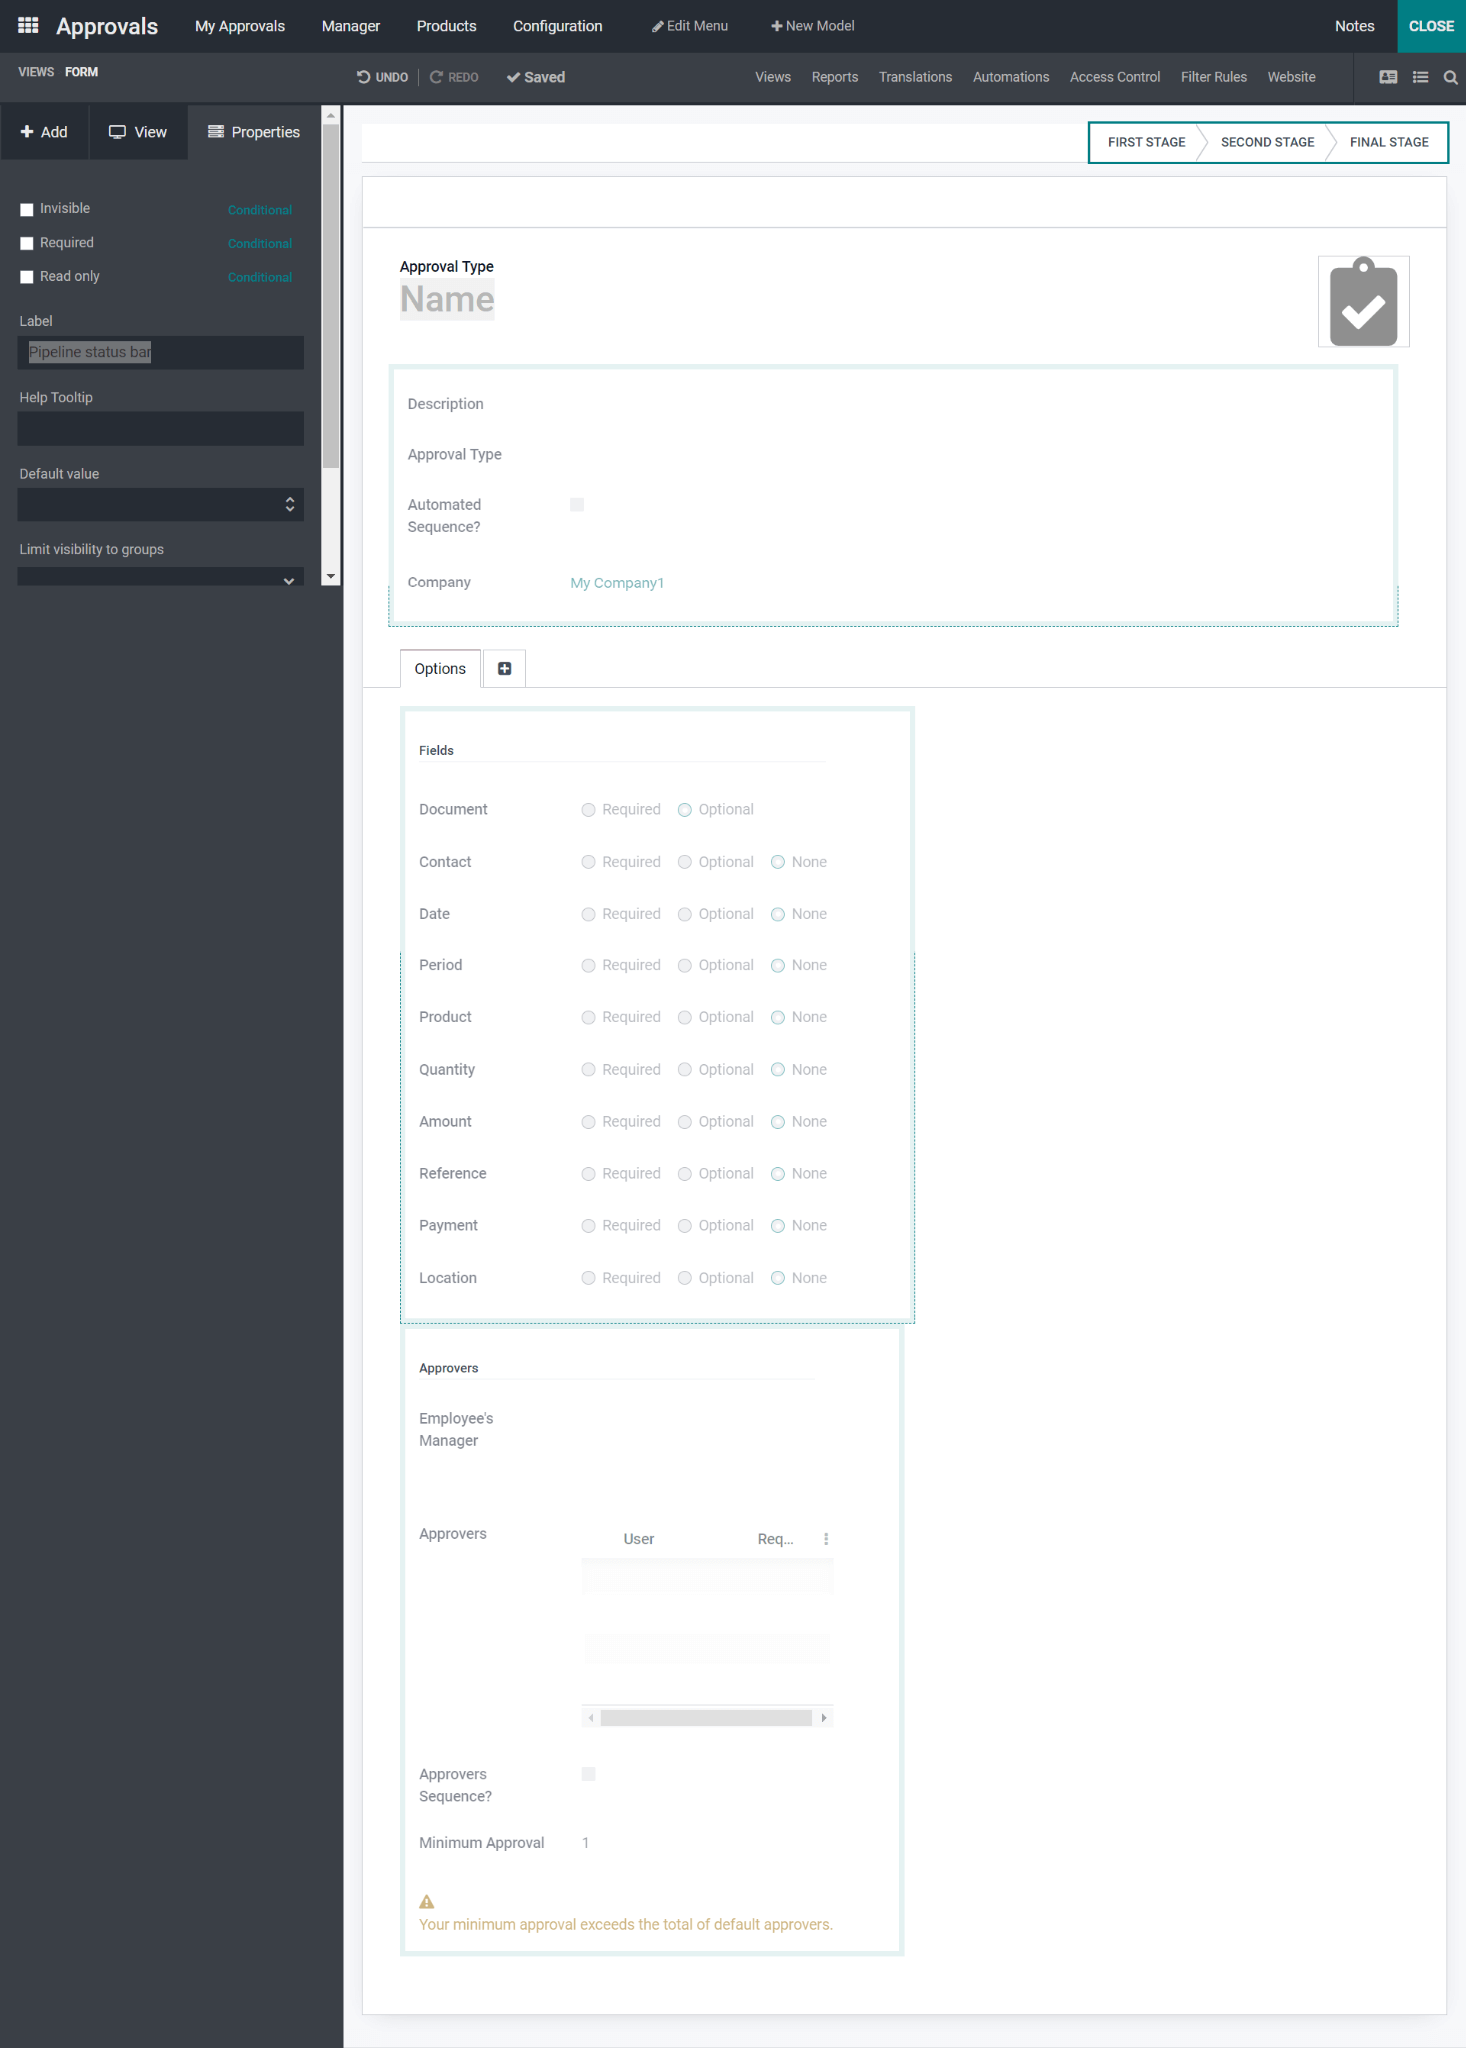
By your business requirement, if you do not require the pipeline status at the Approval type, you need to move the left-hand side Edit Values option from the Properties.
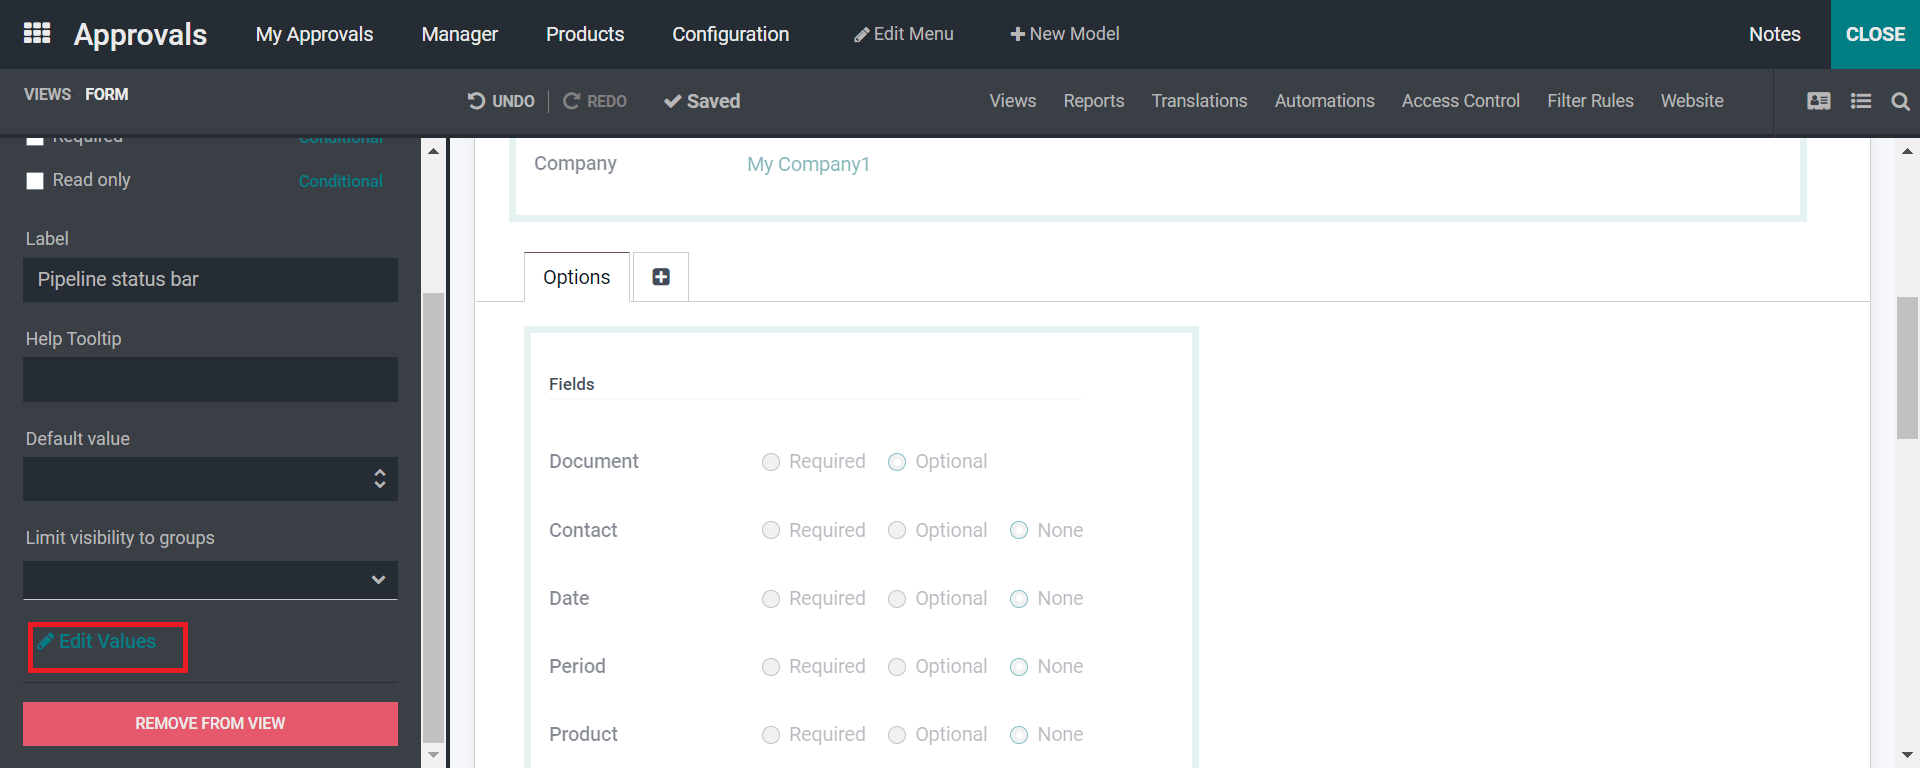
As seen in the above screenshot, the Edit Values option is redirected to a window that mentions the Field Properties seen below.
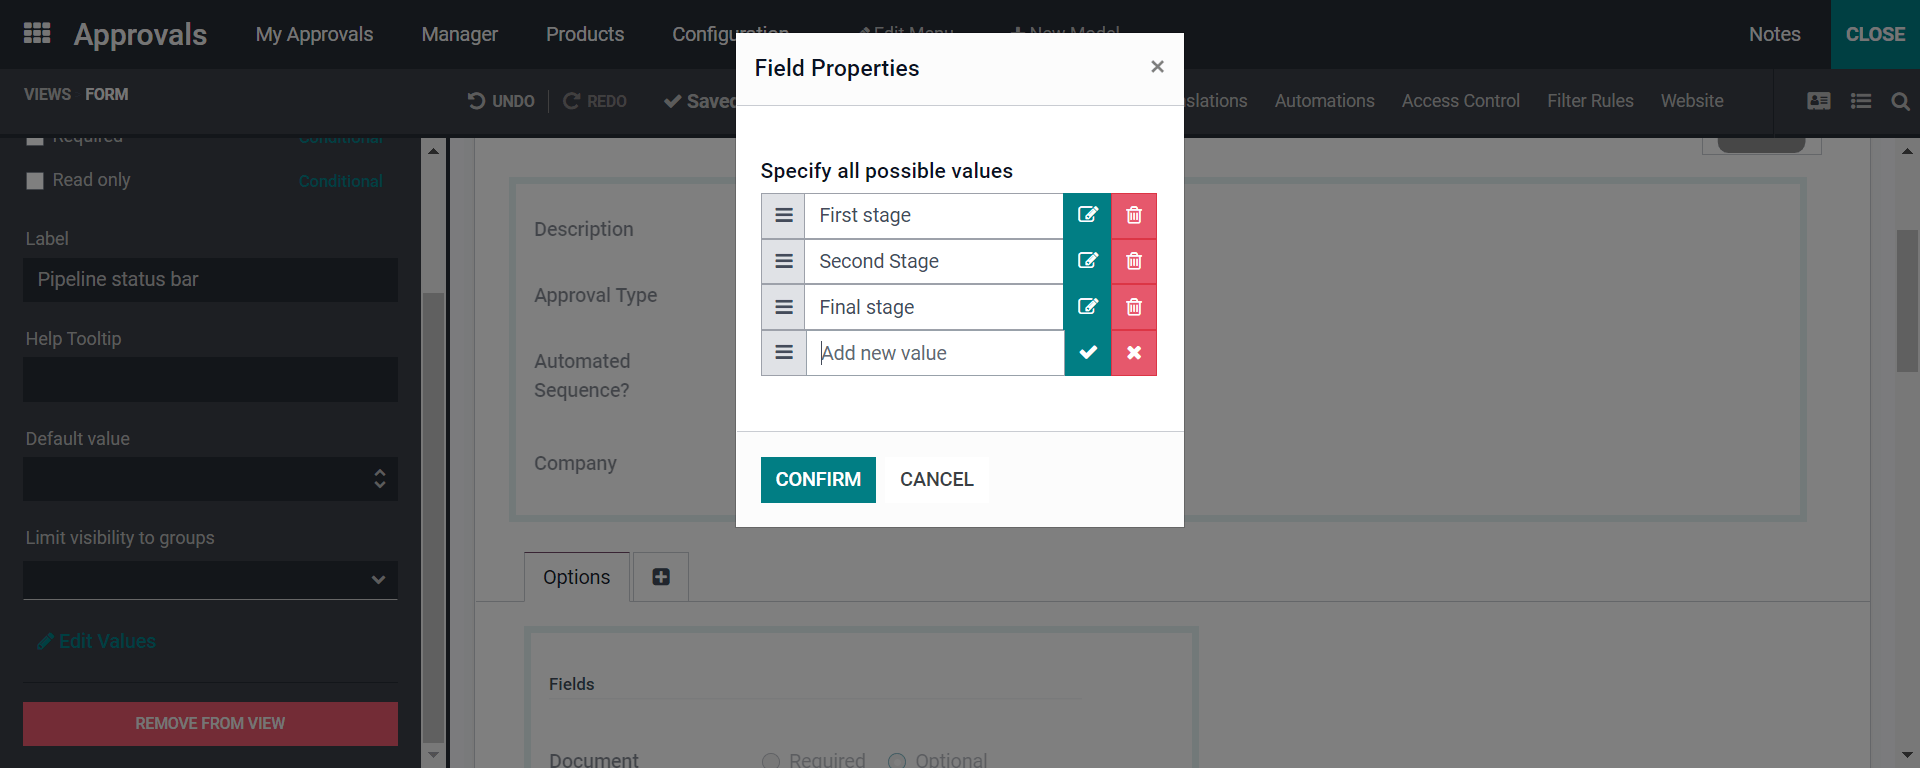
Here in the screenshot, by seeing the Delete icon, you can click on it and delete each stage, and then by clicking on the Confirm button, the entire pipeline status bar is deleted.
Moving the My Requests under the My Approvals tab lets us see how we can add extra features with the Odoo 15 Studio module.
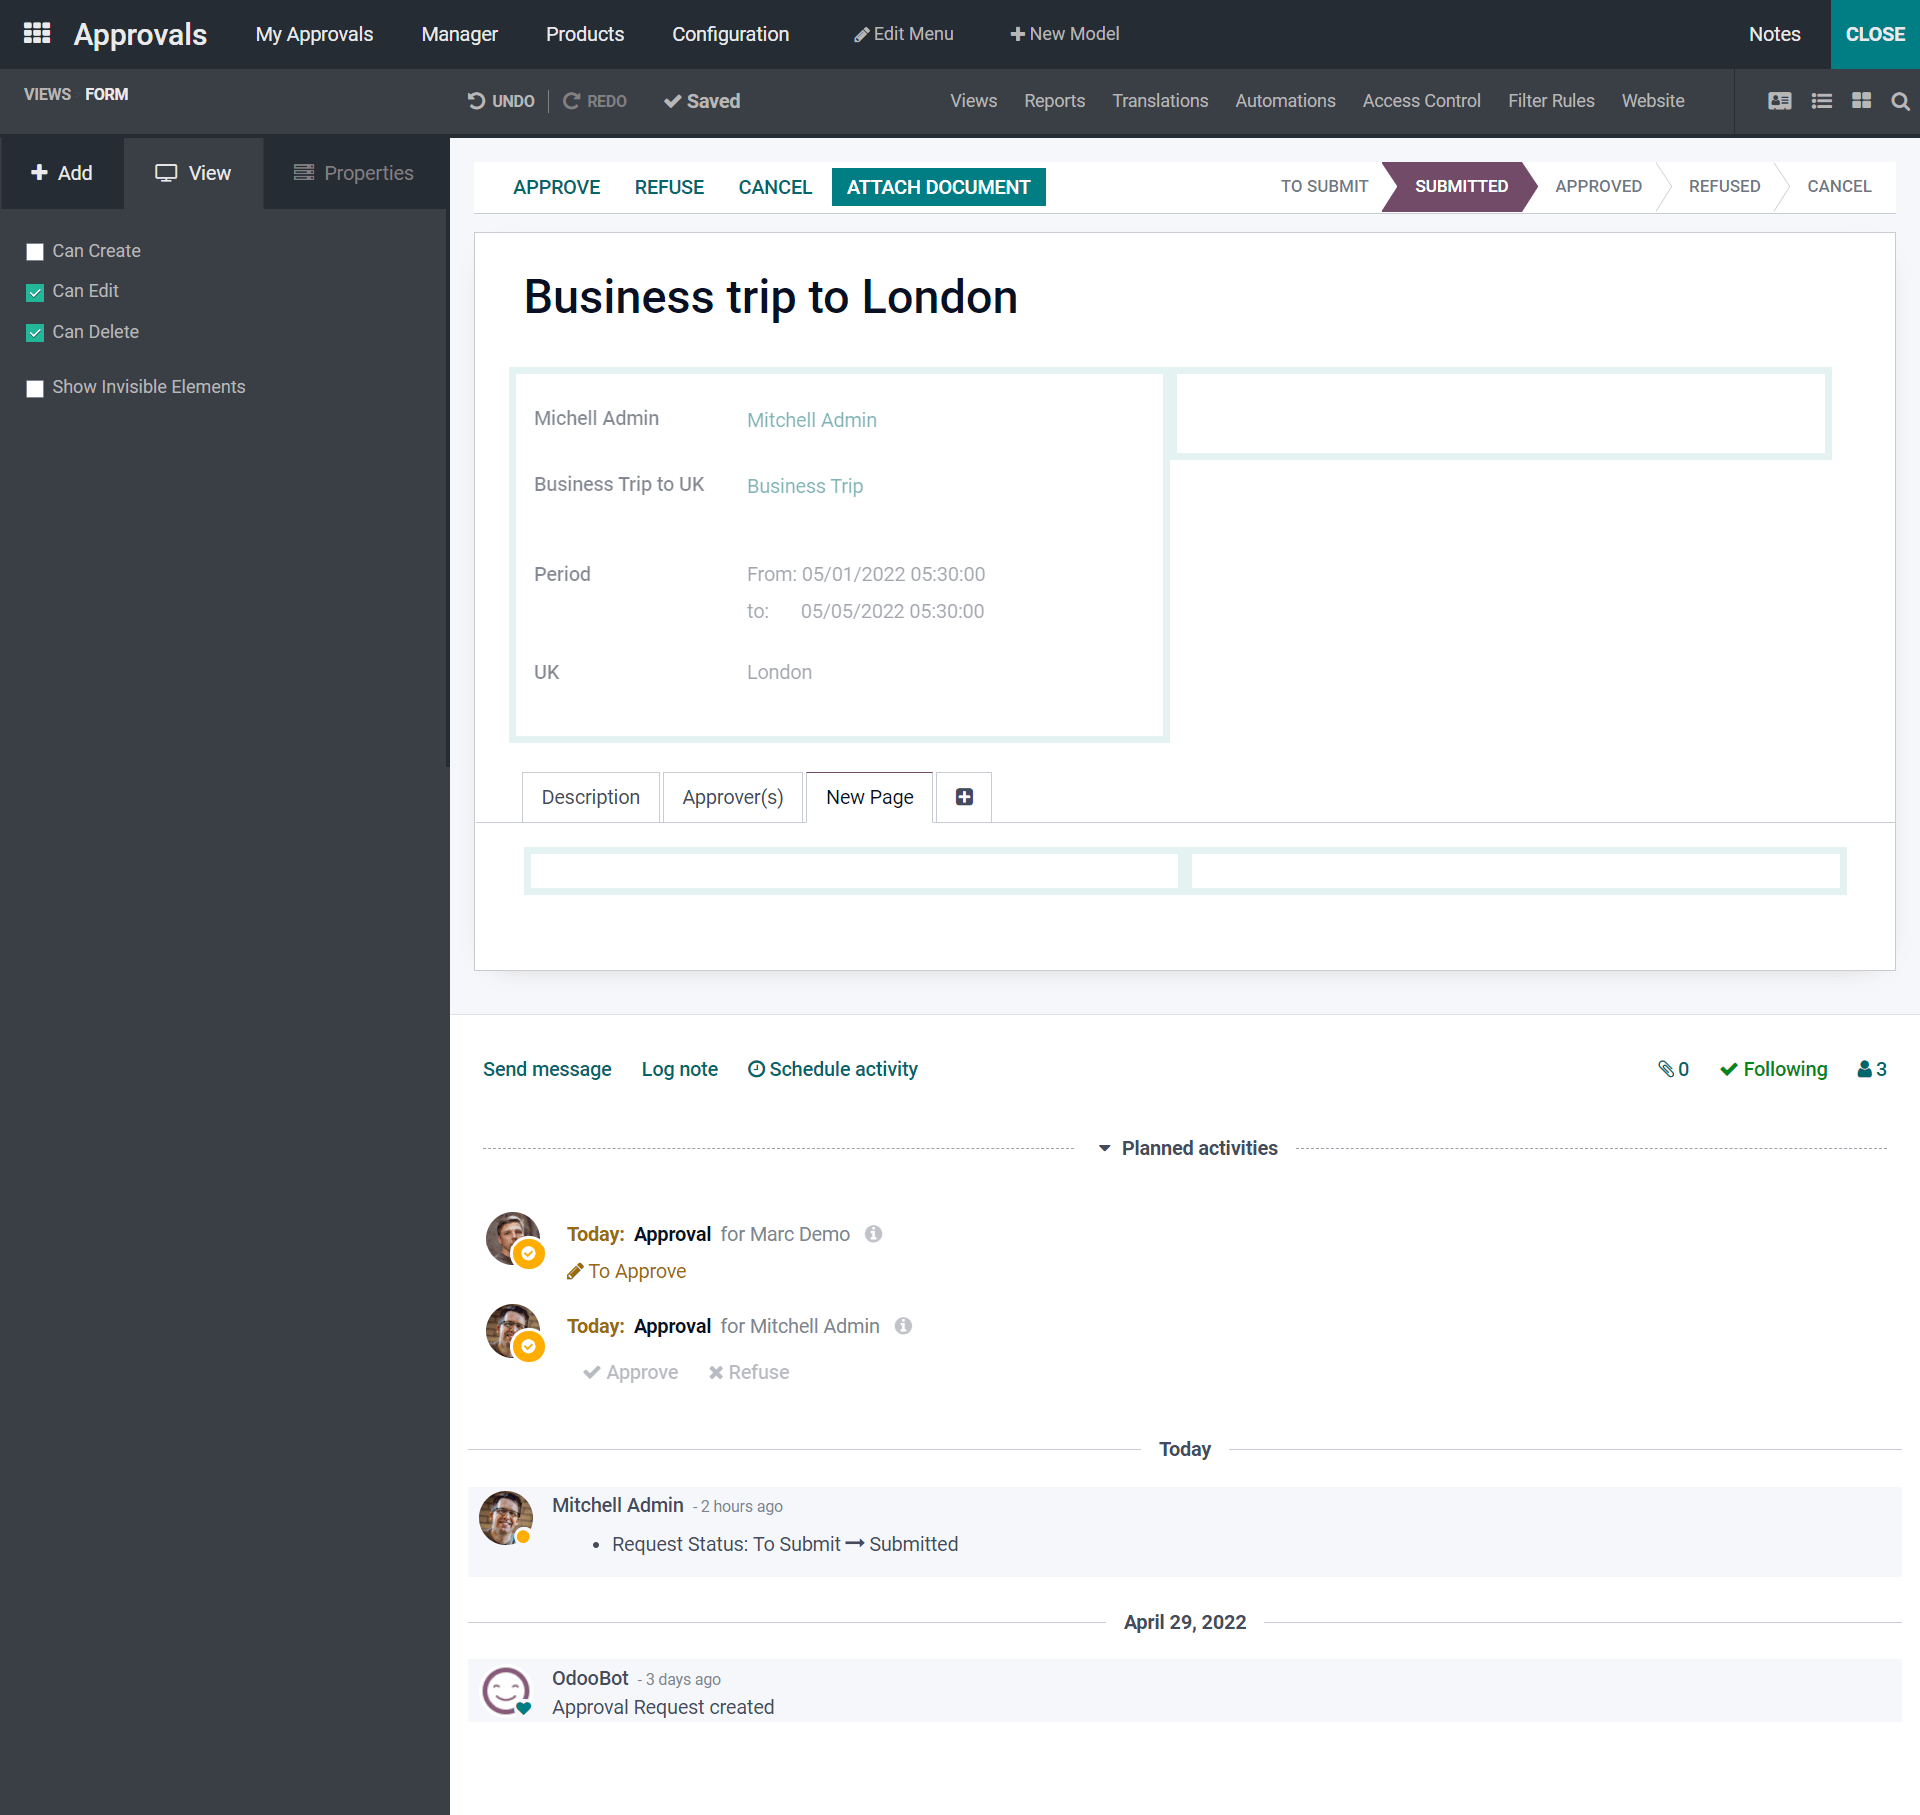
Here the above screenshot will depict you with the multiple configurations. By selecting the Add option, you will get various fields to add by simply dragging and dropping to a specific area from the left-hand side box. As seen in the above screenshot, you will be able to edit or create the distinctive fields created by marking or enabling the box formed by clicking the View option.
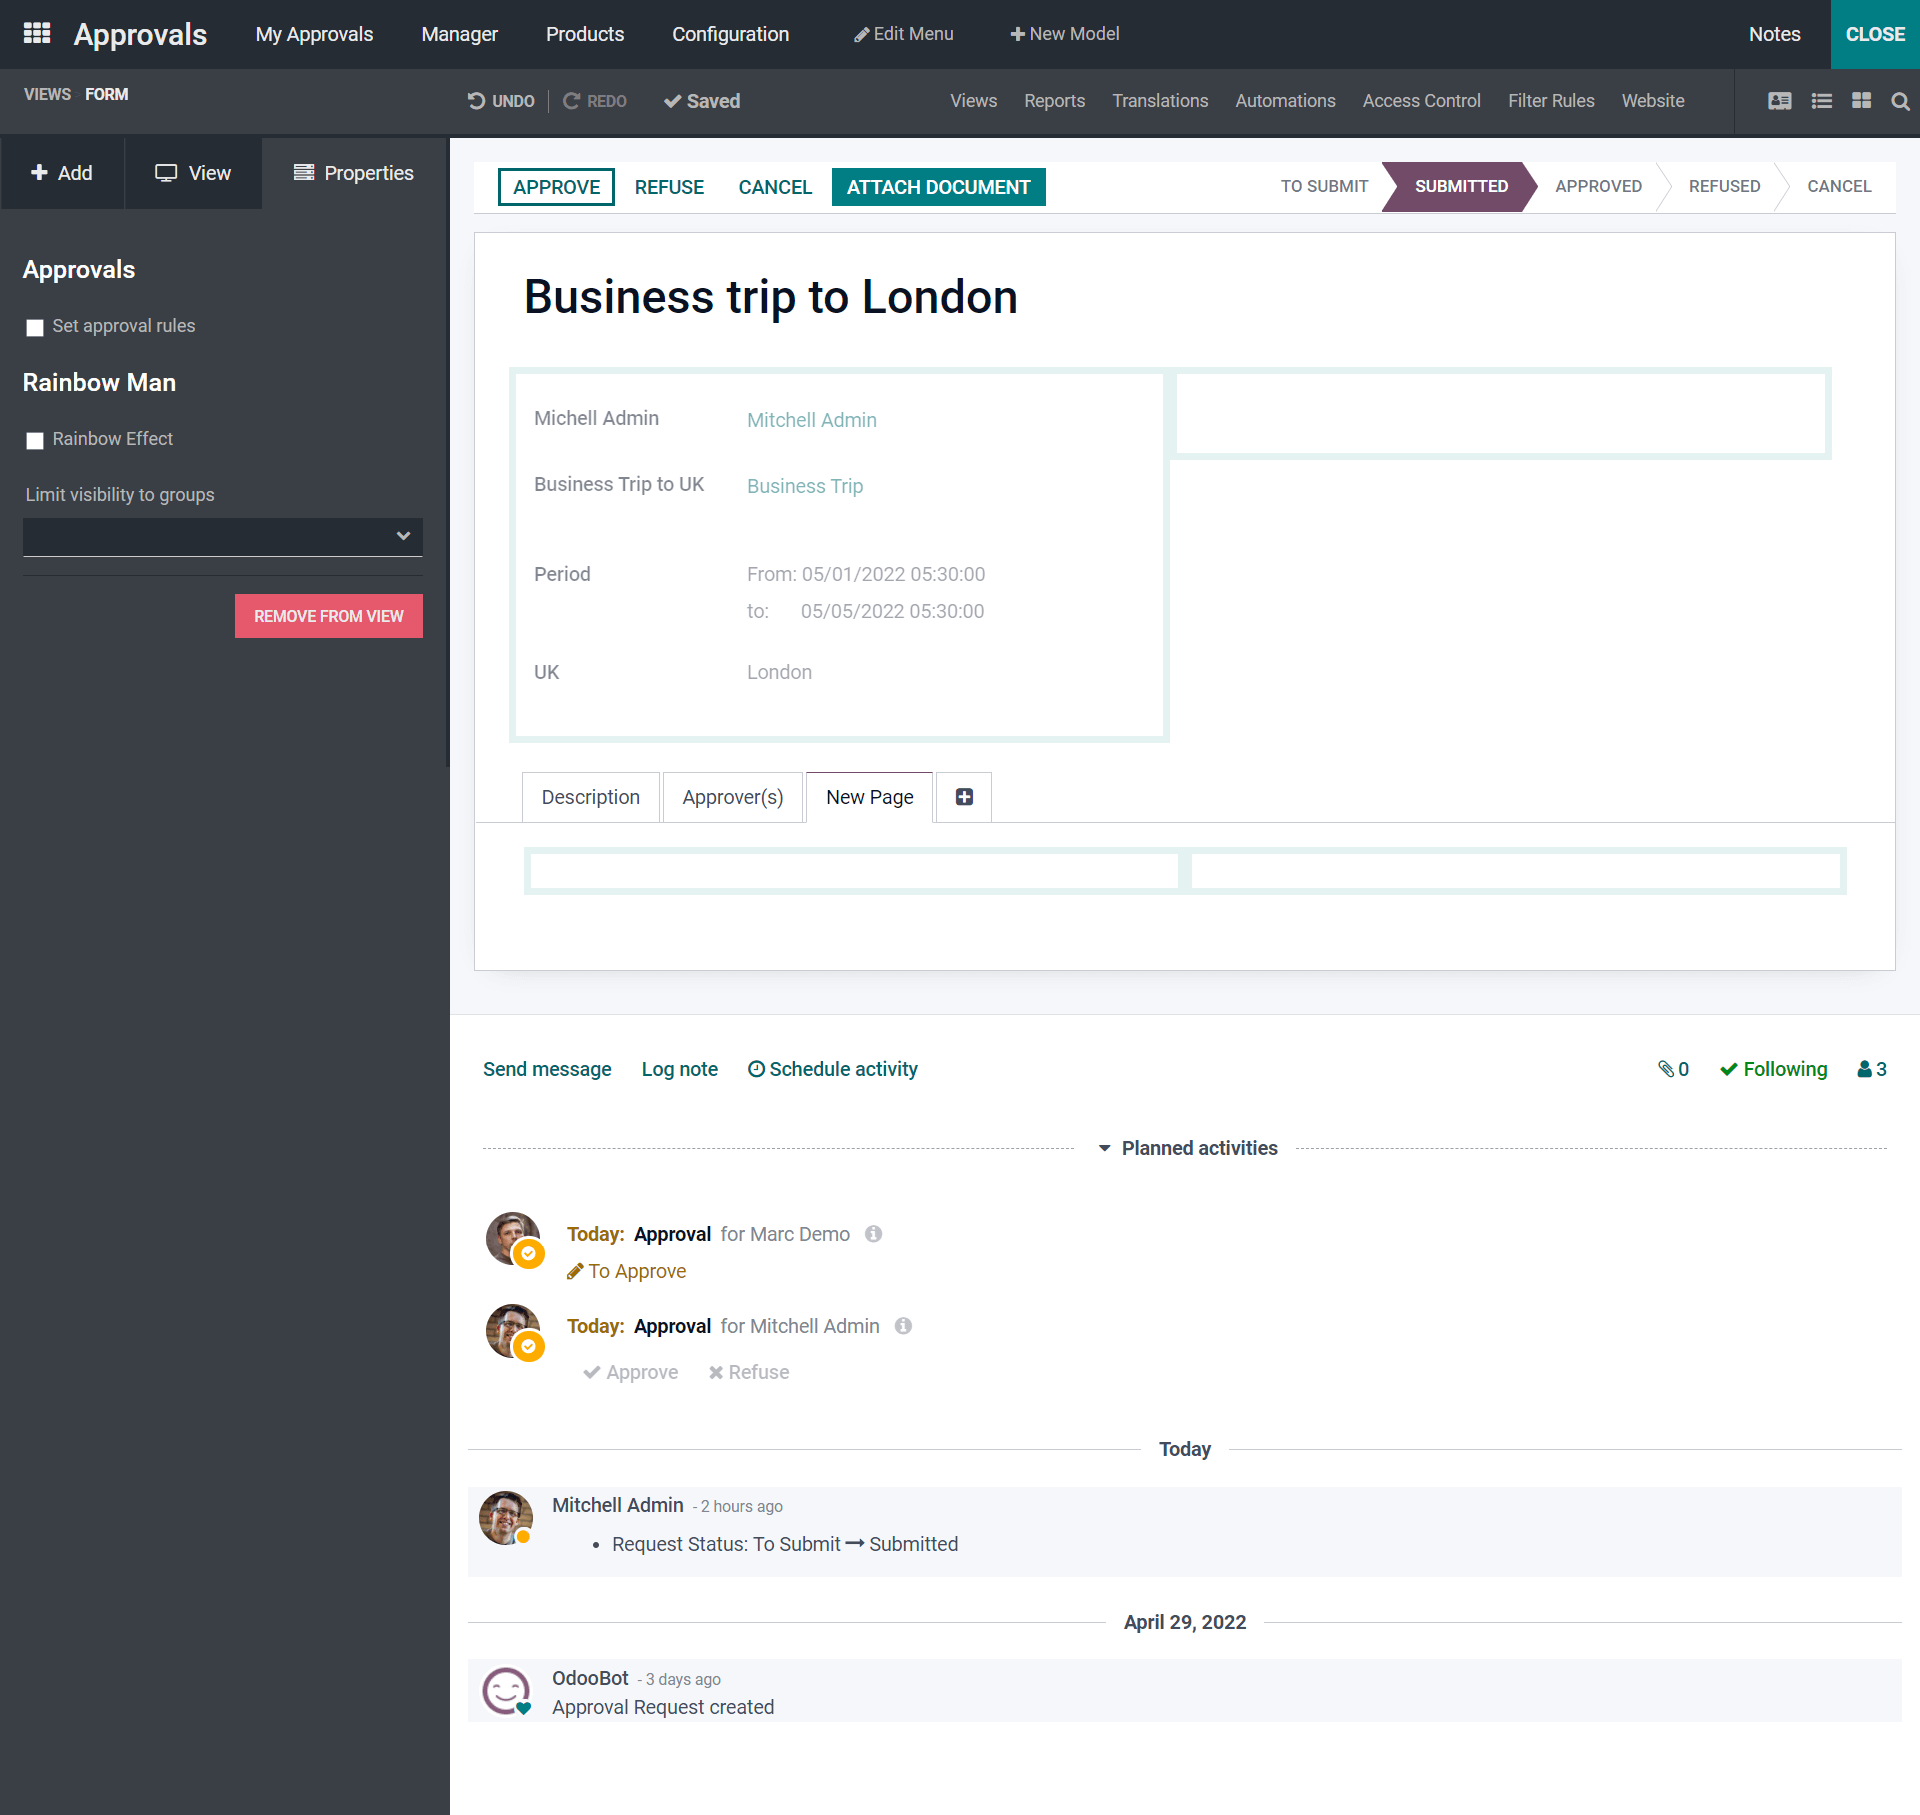
As seen in the above screenshot, by selecting a respective field, you can configure it with the Properties seen on the left-hand side.
Now by enabling the Set Approval Rules at the selected respective field, you can configure the distinctive field.
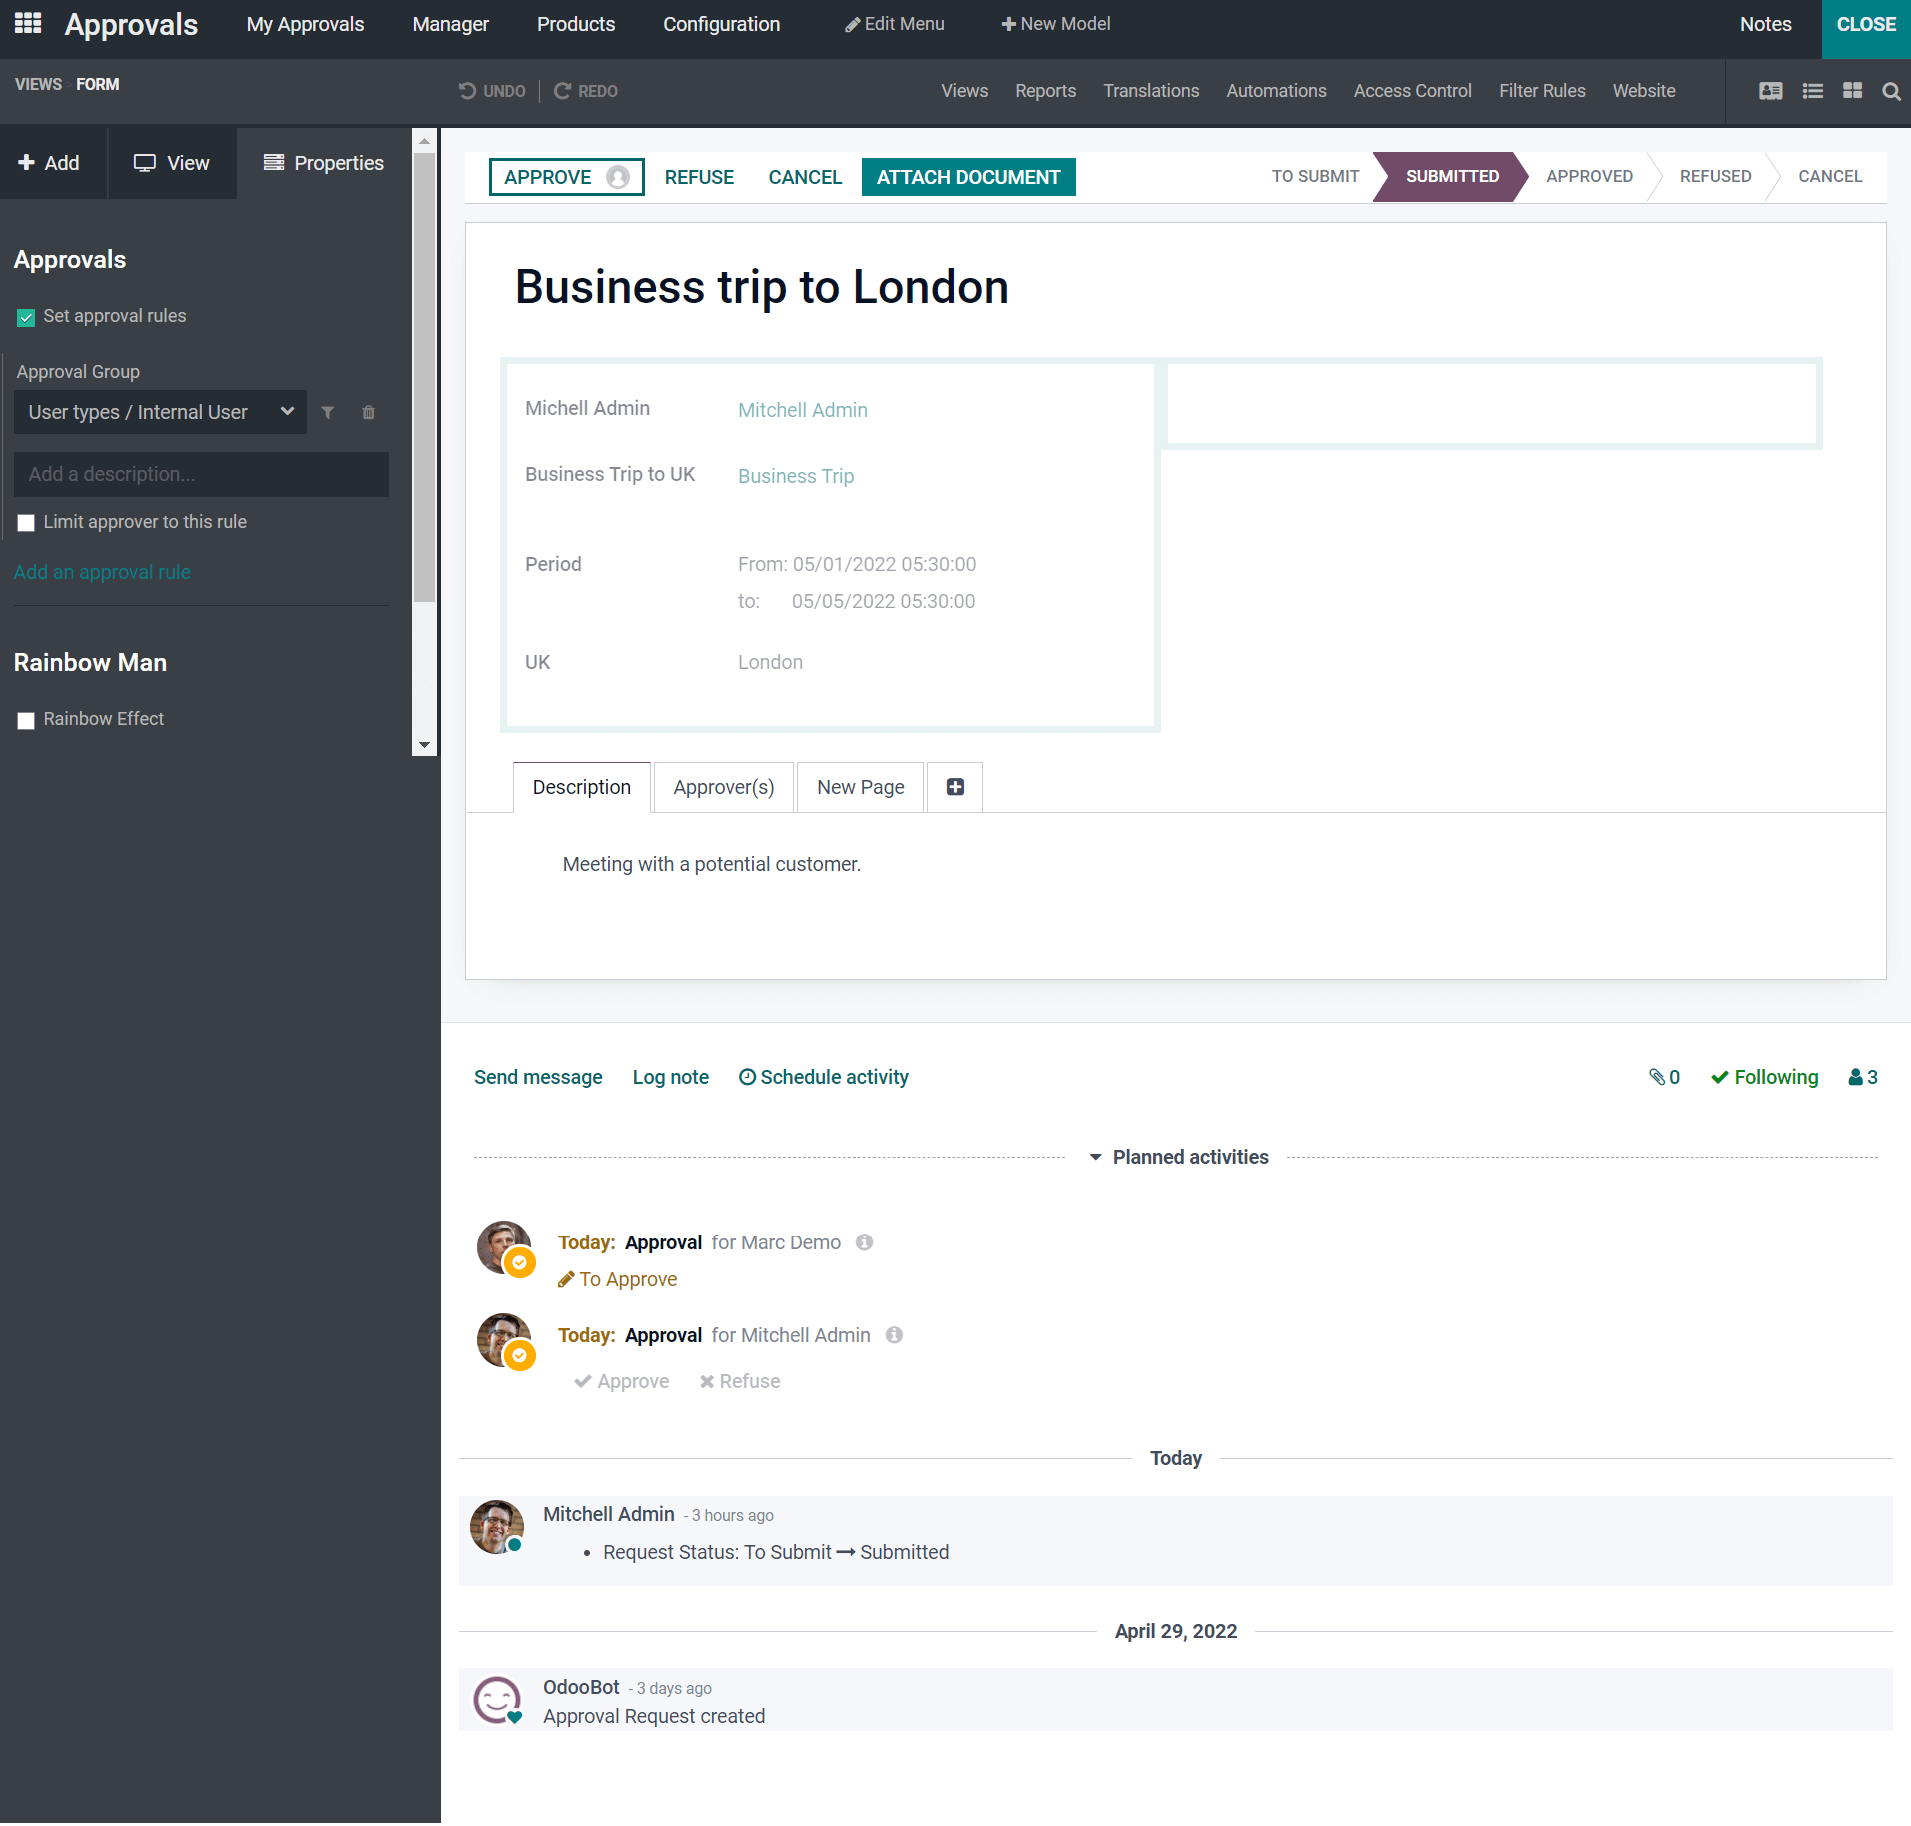
By seeing the above screenshot you can enable or disable the limit approver to the rule by adding the description. Also, you can add the Approval rule. Also additionally, you can add the Rainbow Man function on the basis of limiting the visibility of groups by enabling the Rainbow effect. And if you do not require the distinctive edited field you can choose the Remove from View button and it will enhance you to remove the section.
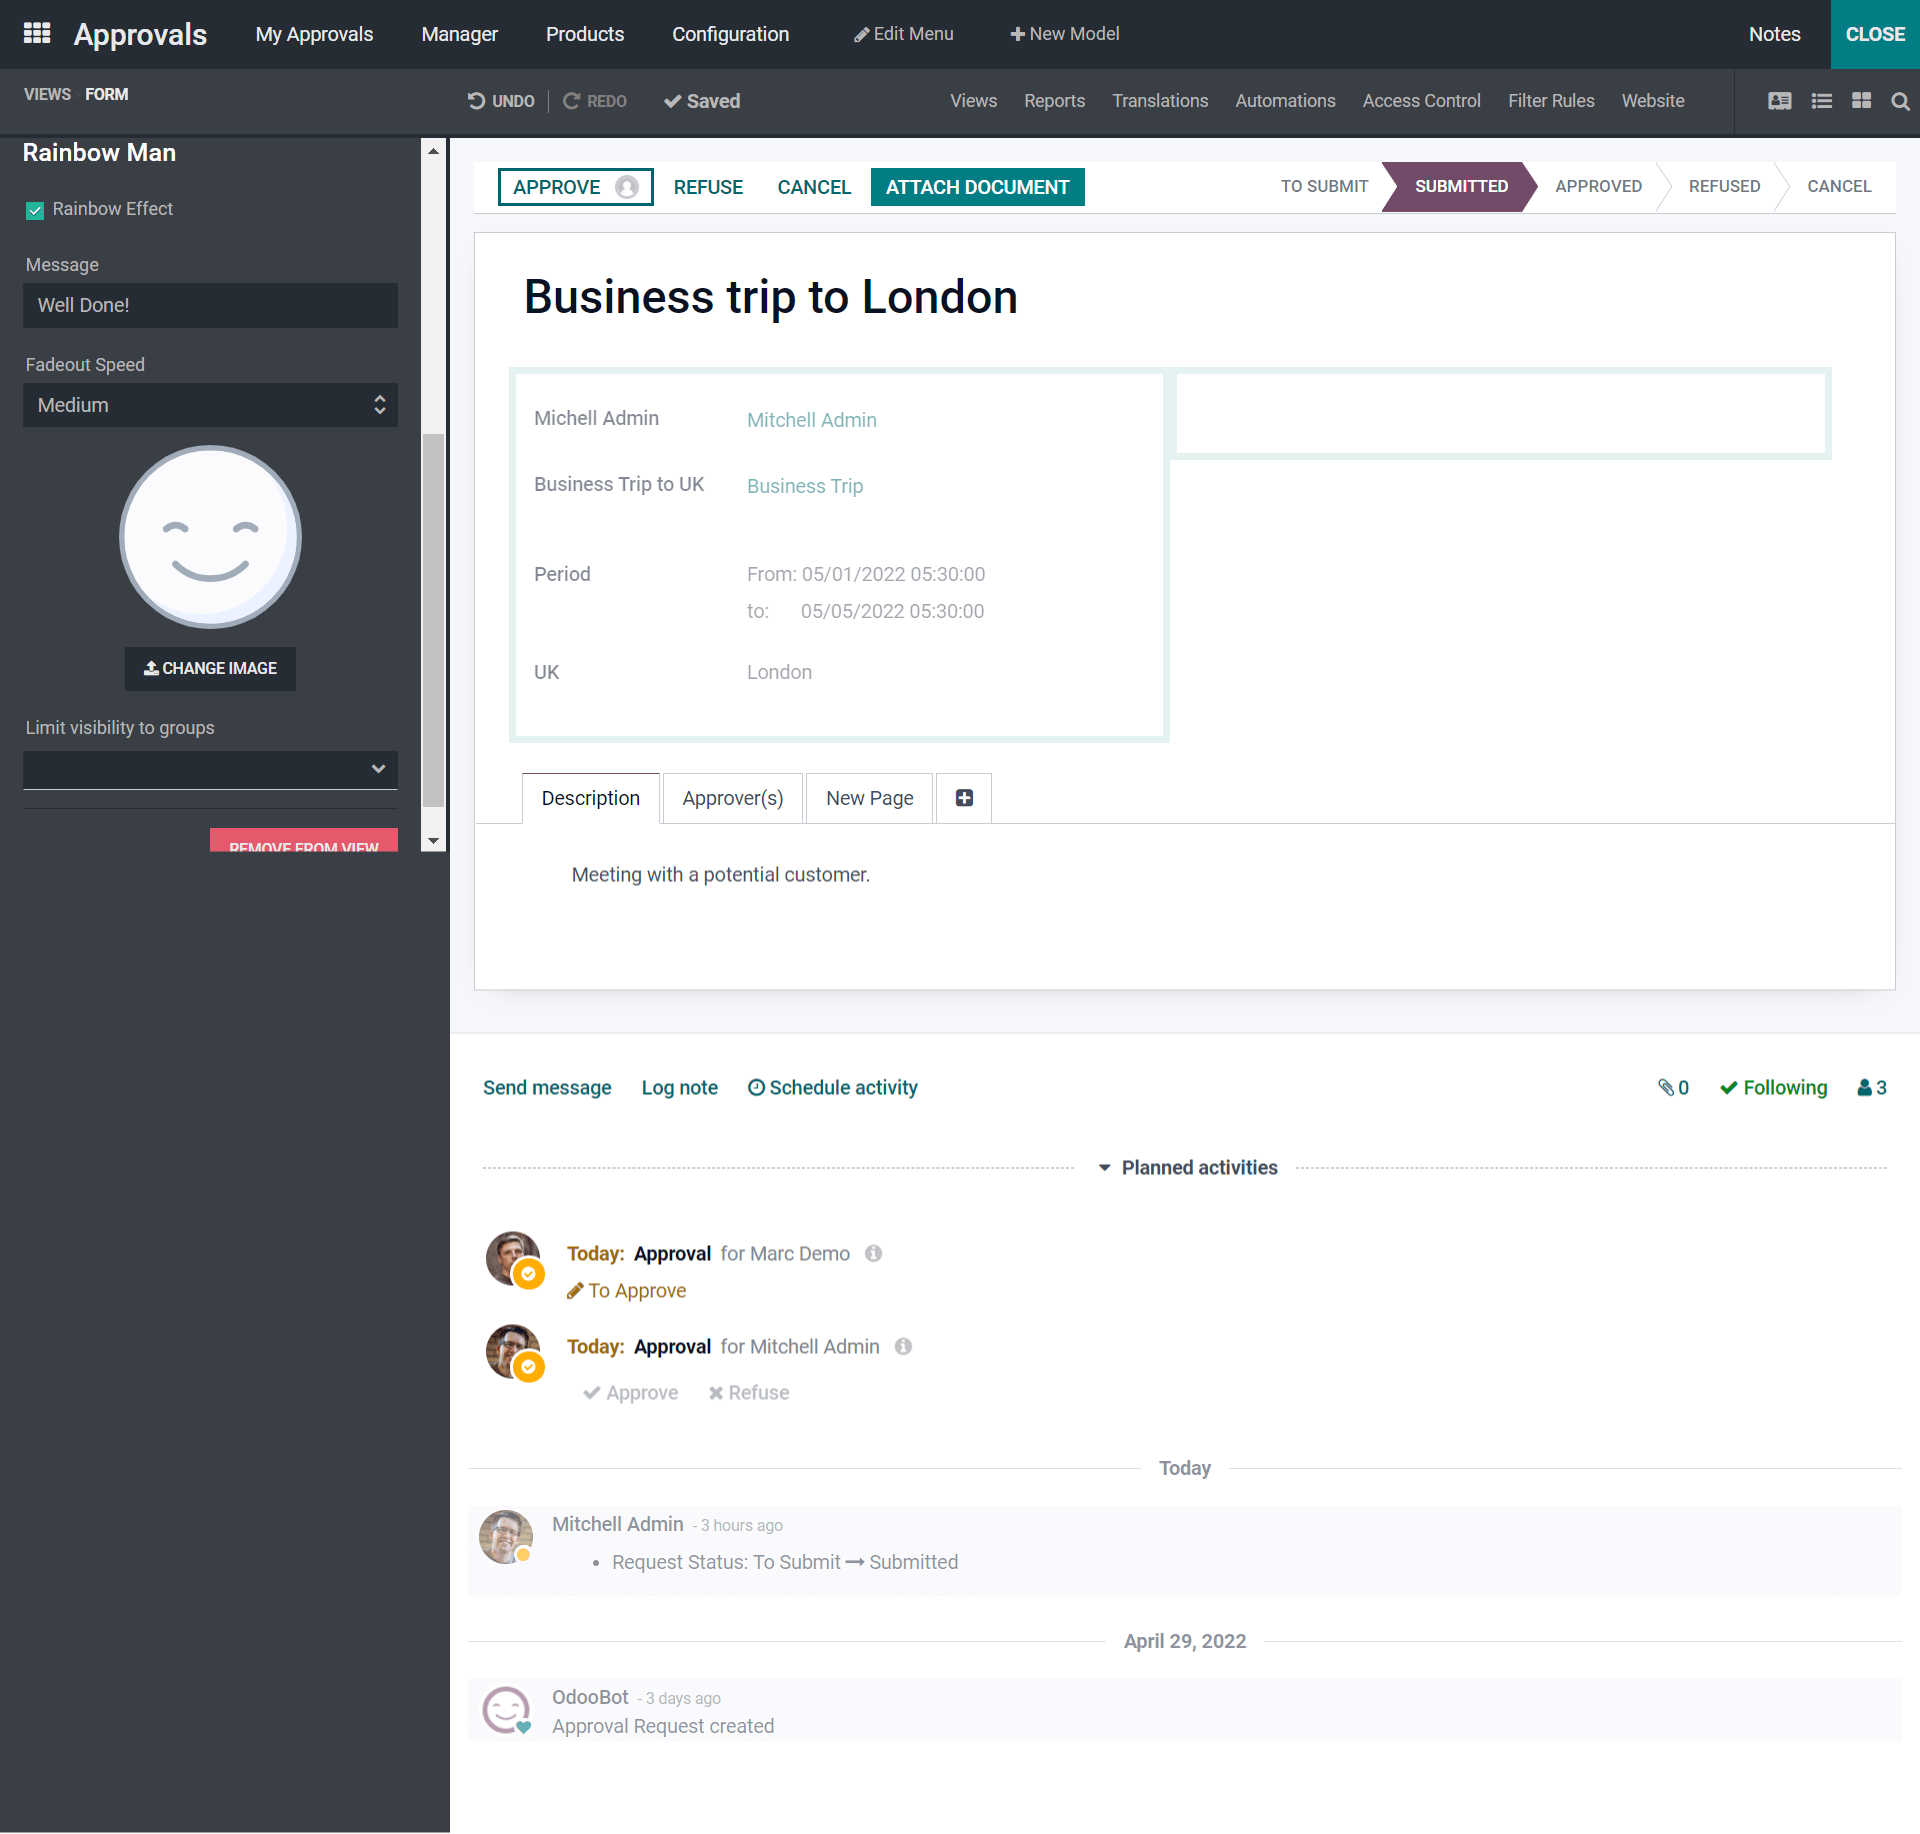
As seen in the above screenshot, with this Rainbow Effect enabling, you can allow the message visibility, and also you can configure and display the image based on the message form.
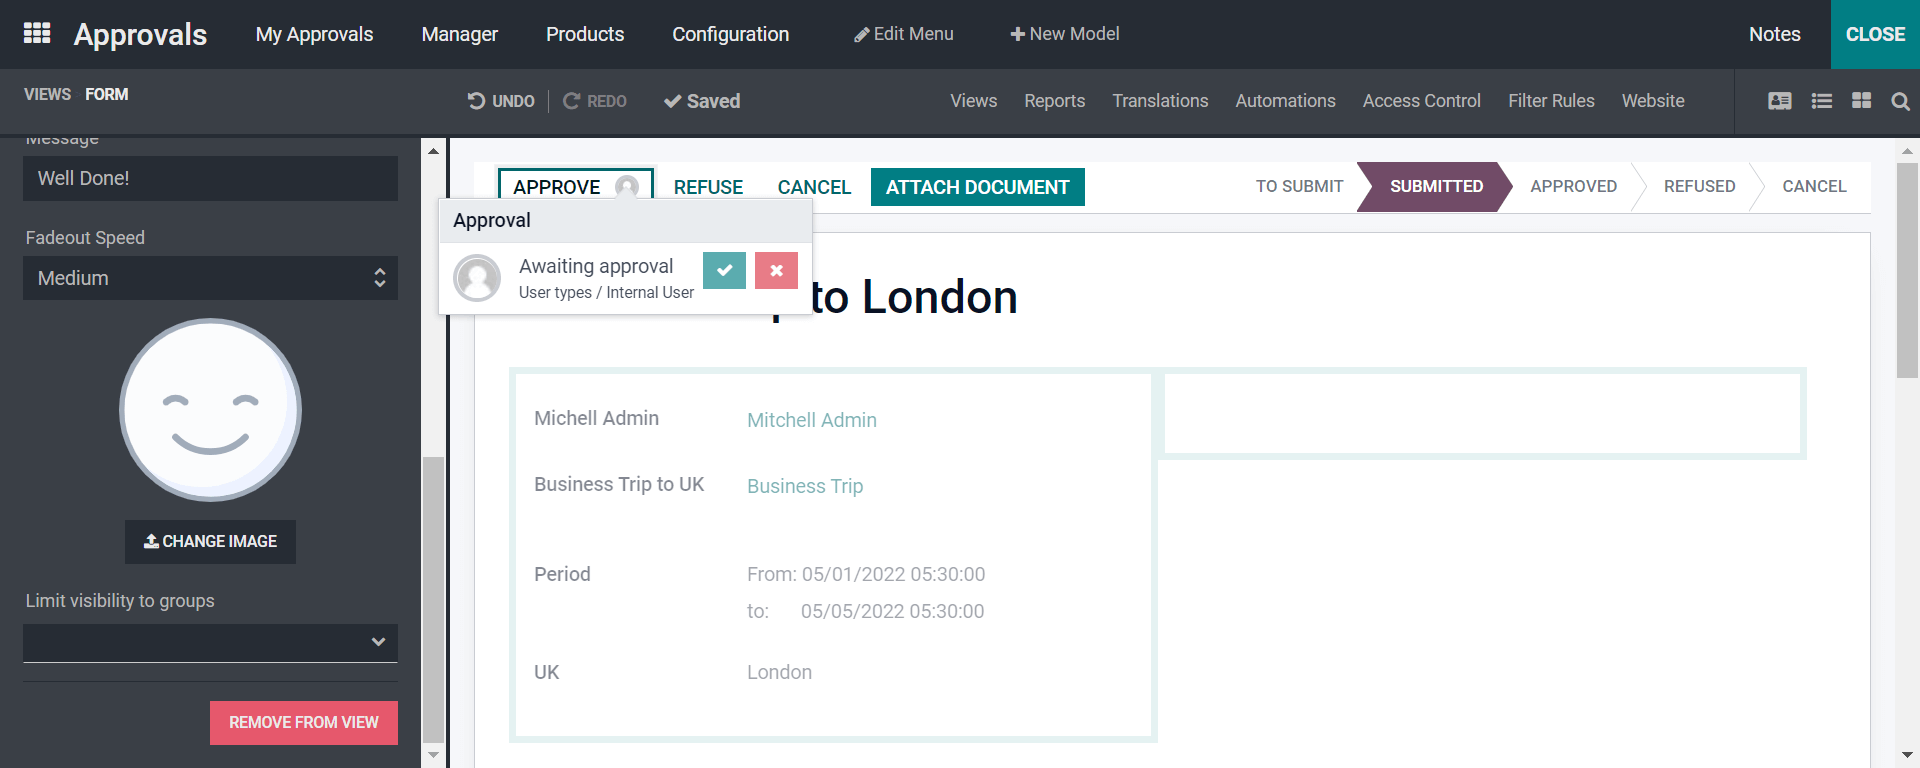
By observing the above screenshot, the Approve button enhances you with the access rights mentioning the Awaiting approval showing the tick mark and wrong mark that belongs to the Approve and Reject button. Upon the user describing the Awaiting Approval can be configured. And it is the autonomy in the configuration aspects of Approval.
With the blog, we conclude that Odoo 15 Studio module makes you customize your business application to your requirement. This blog defines the additional modifications that can be customized through the Approval module in Odoo 15 Studio. These modifications make the business operations with ease and dextrous features that encompass more beneficial to your business.