The Odoo 16 Expense module can be used to configure expense products and track employee expenses and reimbursement. Employee costs are the sums an employee spends to execute a task. The employee incurs these costs while performing their duties. However, some of them are actually business expenses. Therefore, the employer can refund the employee for the expense when the employee submits the receipt. Therefore, both employees and the organization need to handle these costs properly. Because if the process is inaccurate, it could result in a loss for the business or employee displeasure.
Odoo users can handle different expenses paid by employees, record them, and track them with the "Expenses" module. The technology allows employees to directly enter all of their expenses, including hotel stays, airfare, and other fees.
So for that purpose, the company must also contain some of the Expense Categories. The Odoo16 expense module simplifies the process of creating and managing expense products and categories. The user can use expense products, which are produced inside the product section of other modules like sales, purchase etc. because all the modules in Odoo16 are integrated.
Let's examine the configuration and management of an expense product using the Odoo 16 expense module.
Expense Categories
Expense categories are configurations of expense products that include many categories. Travel, accommodation, communication, etc are some examples of expense categories. This means the users can use these categories to add their expenses. An expense category contains many details like cost, sales price tax, expense accounts, etc. So if a user uses a certain category related to their expense, they can use these details too, which reduces the difficulty of adding expenses.
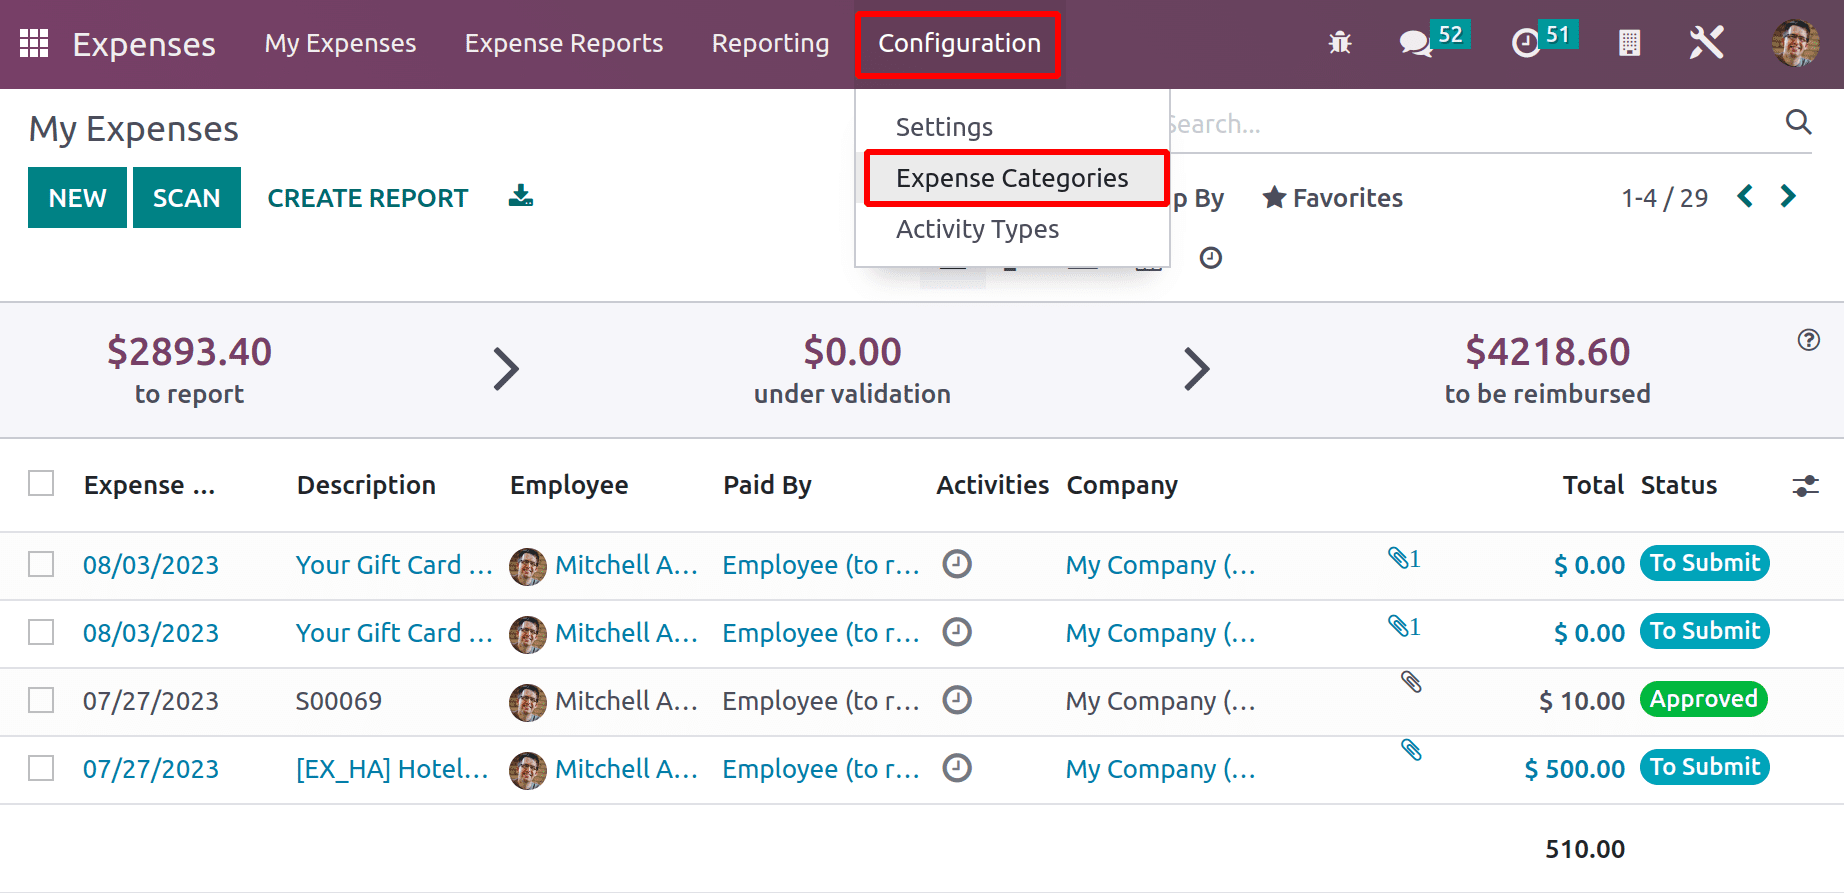
Expense categories can be easily accessed from the expense module, which is available in the Configuration tab. Click on the configuration and choose Expense Categories from the list.
: Configuration > Expense Categories
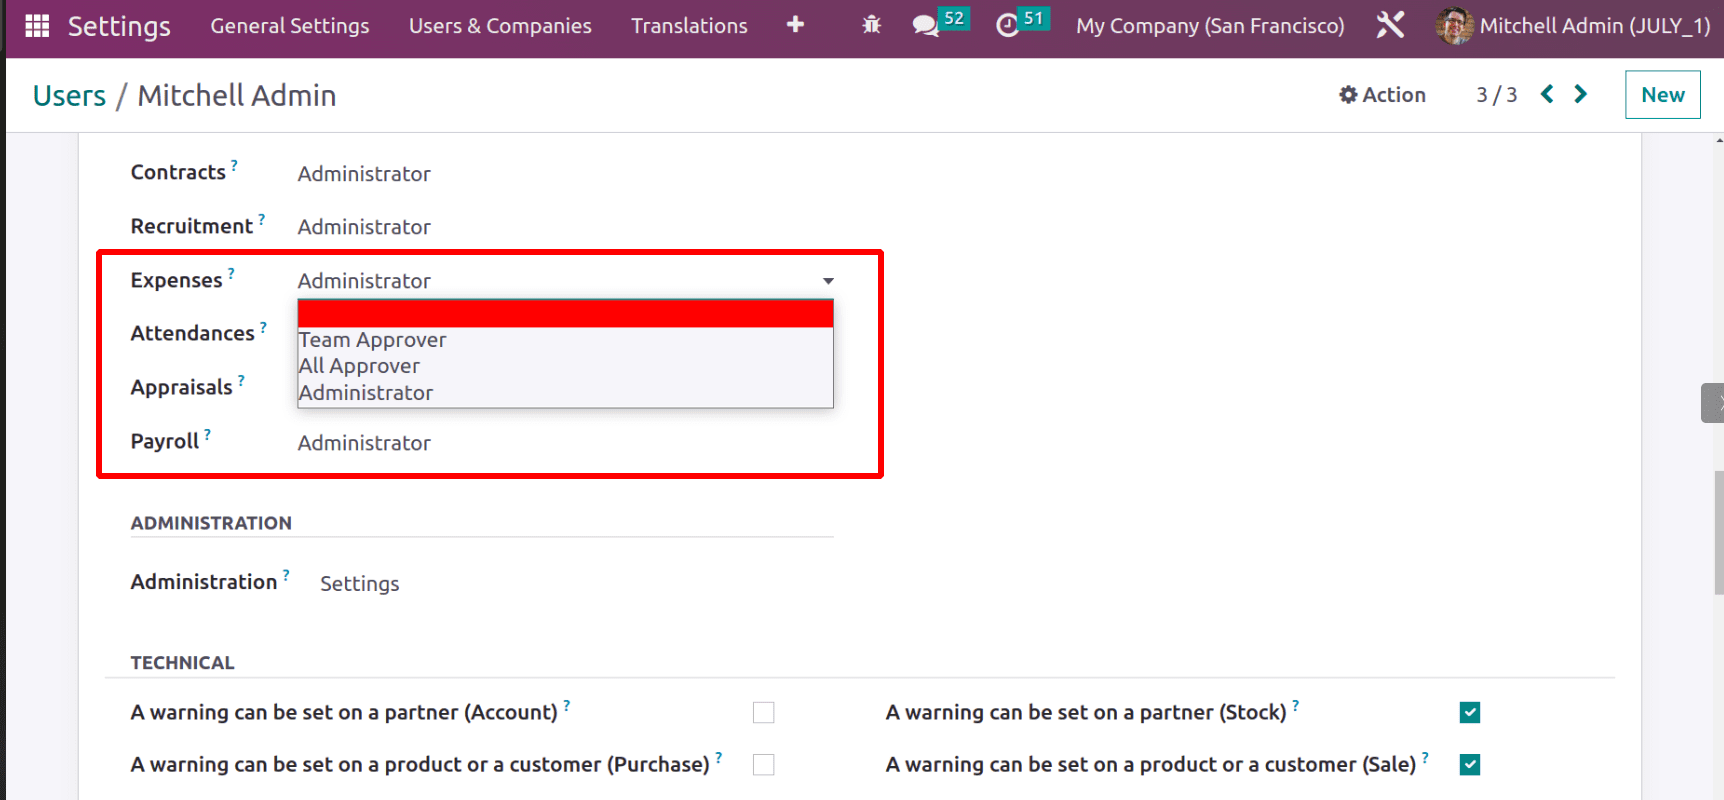
Expense handling is organized with different hierarchies. An employee can report his expenses, and the manager can approve the expense. Thus, the Access rights for the expense module include Administrator, Team Approver, and All Approver. The user with Access rights as Administrator can only have the right to view and create new Expense Categories.
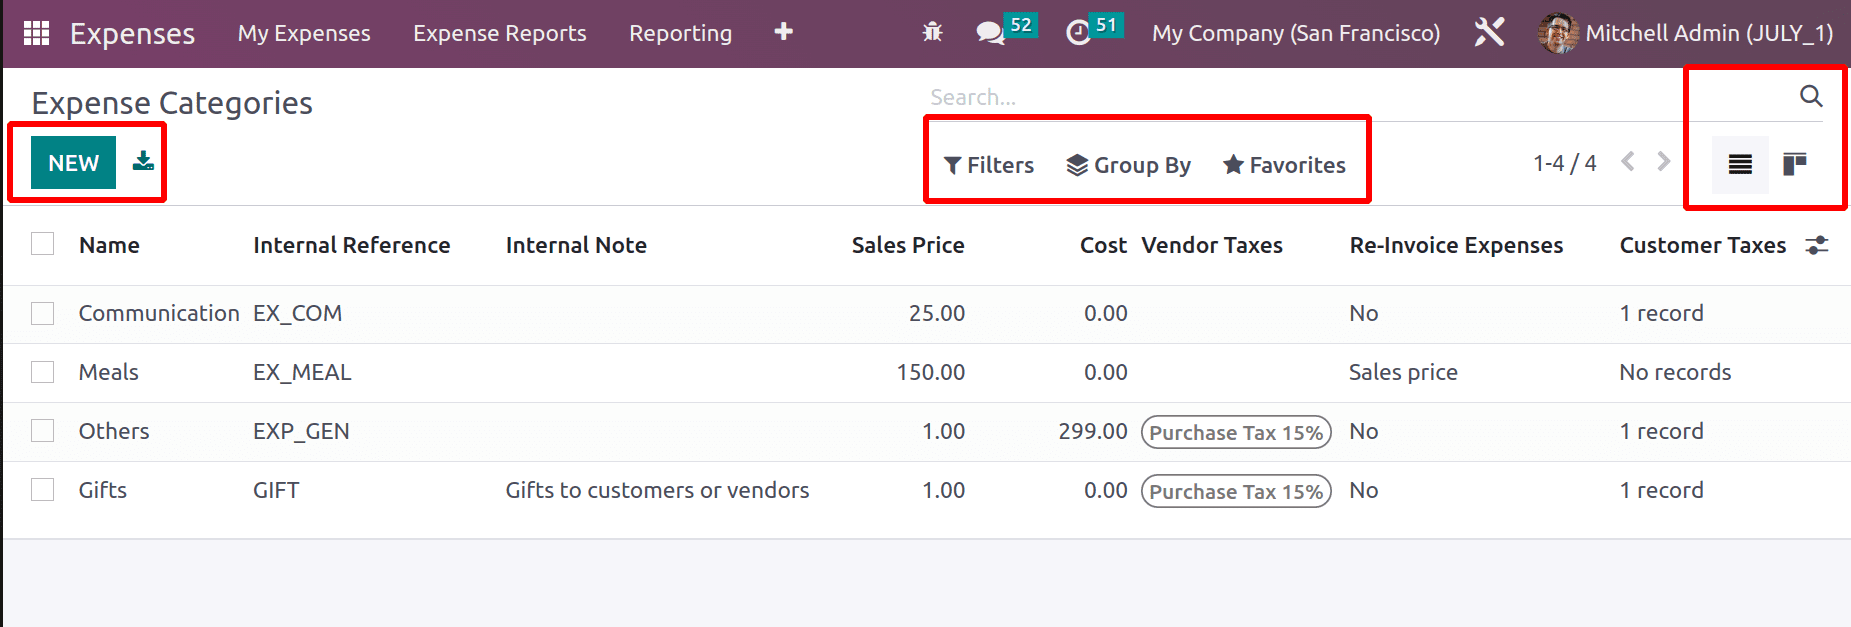
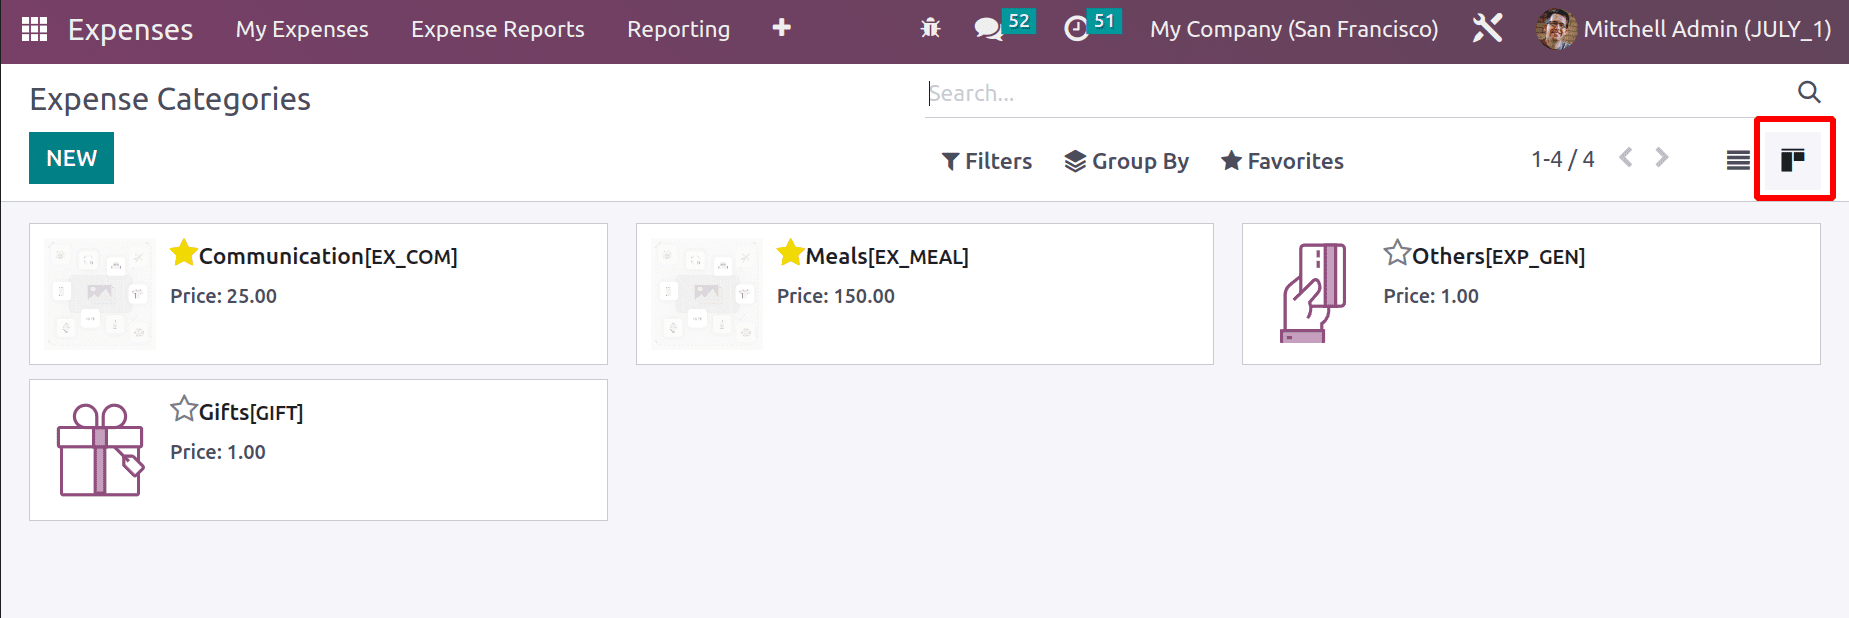
Let's have a look at the Expense Categories. When opening the option, it shows a list of previously created categories. The view also contains some details like Internal Reference, internal notes, sales price, cost, vendor tax, customer tax, and reinvoicing expense policies.
The search, filter, group by, and favorite options are available here. The List view and Kanban view of the category are available.
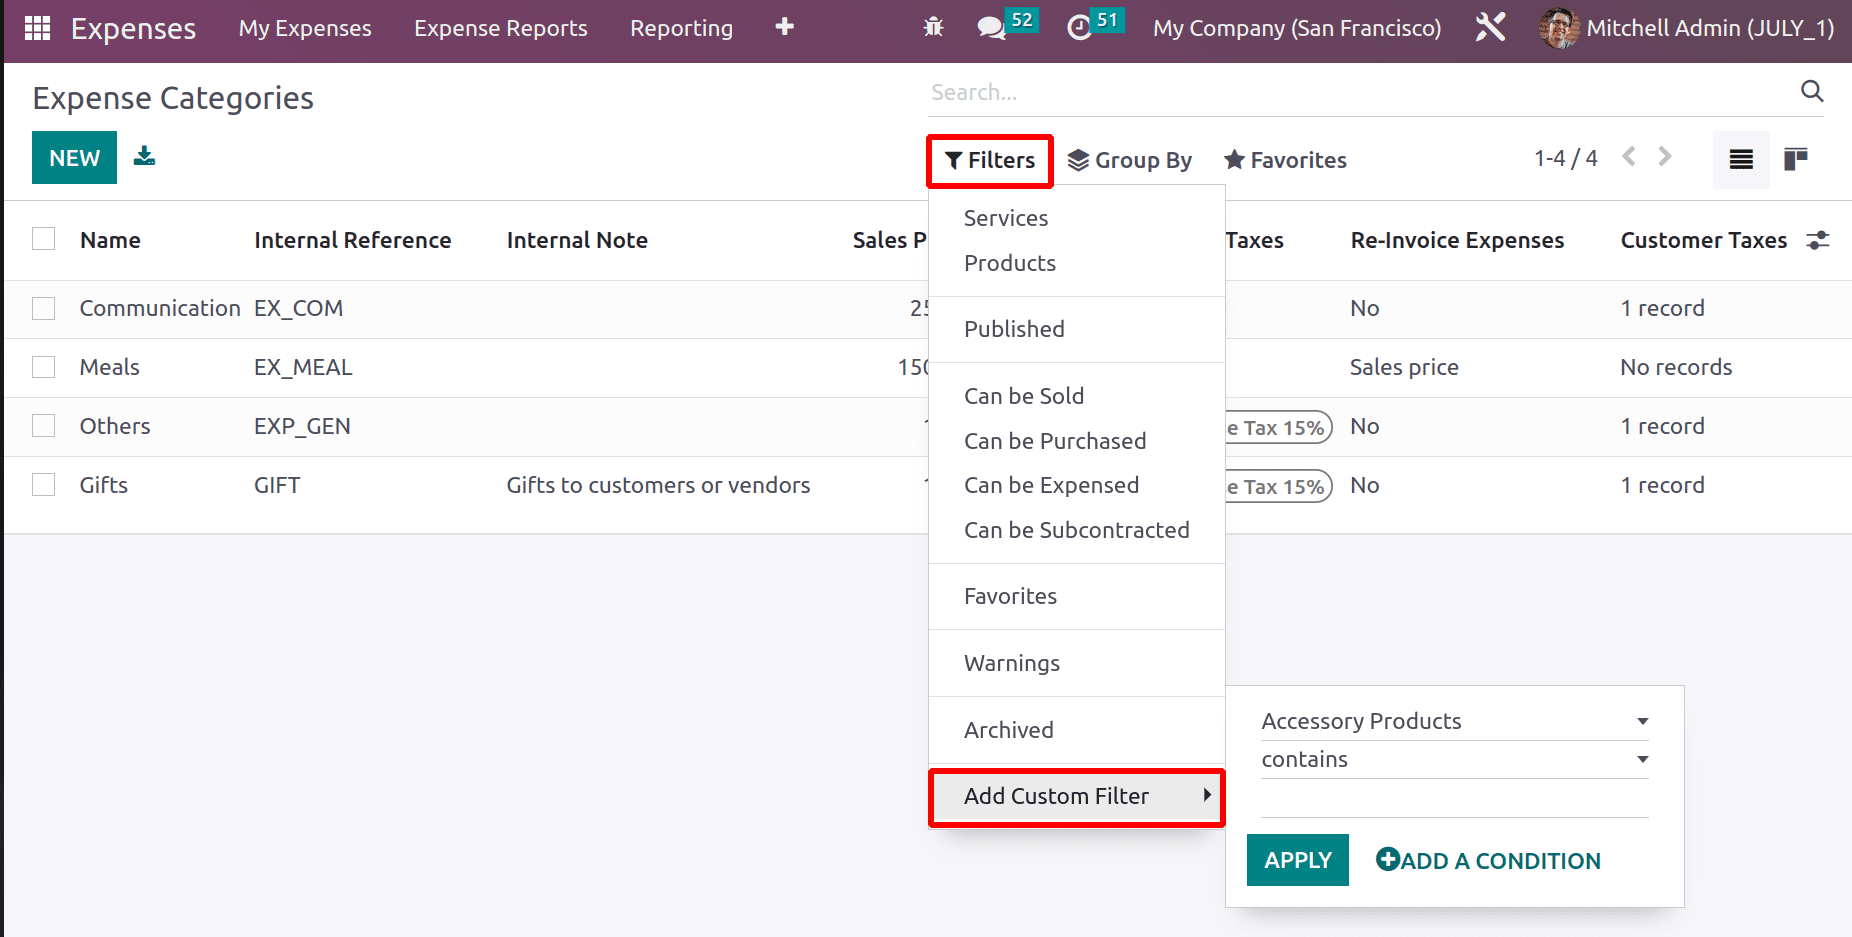
Filtering is available in expense categories. Users can filter the data based on many options like service products or published products, etc. Custom filtering is also possible here.
Grouping of data is also possible. Group by option can be used for grouping purposes. The data can be grouped on the basis of either Product Type or Product Categories. Custom grouping can be done by using the Add Custom Group button.

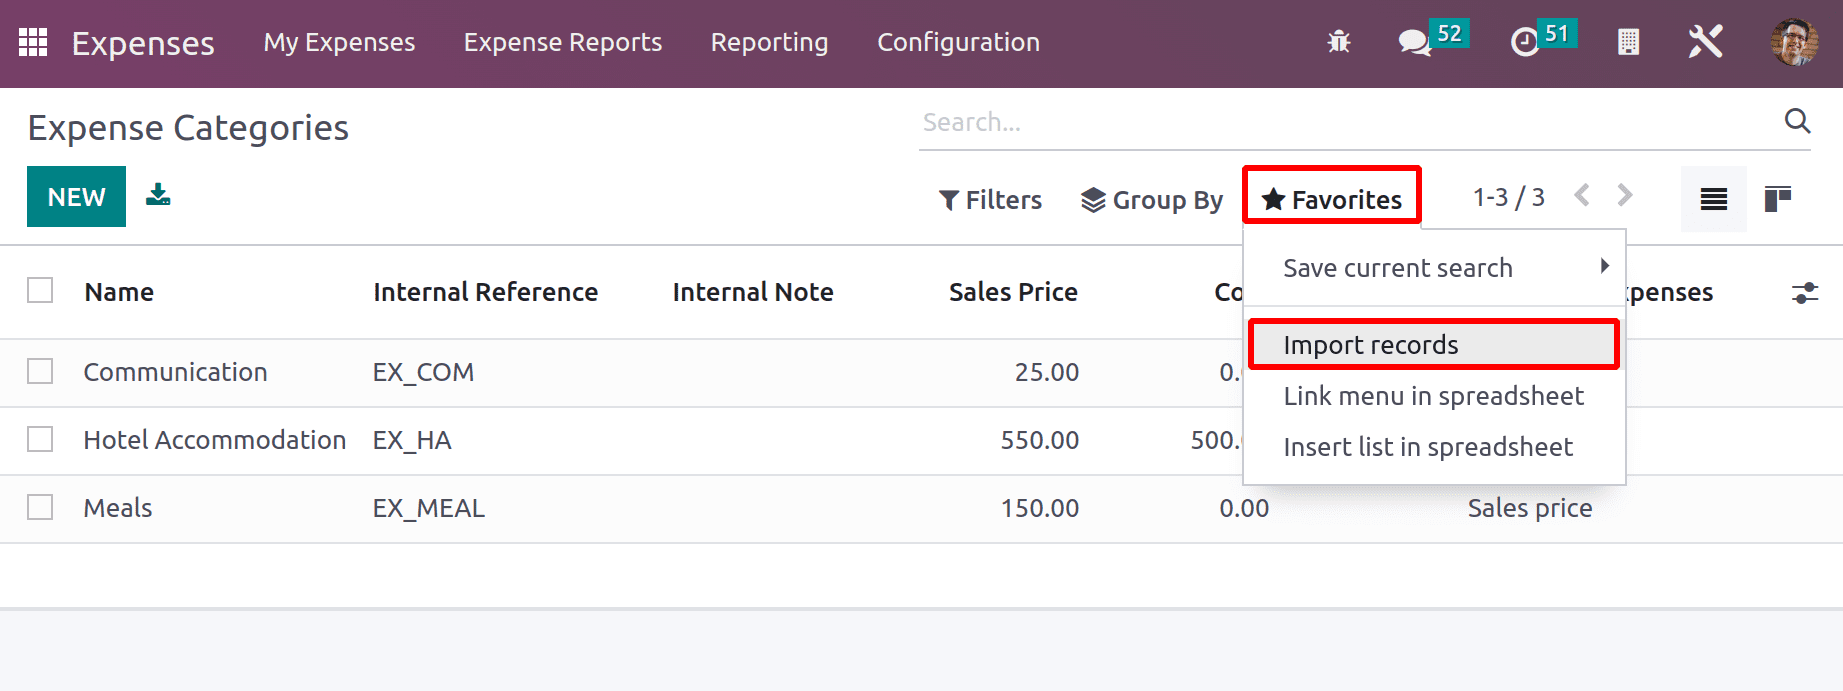
The third one is the Favorite option. The current search can be saved as a default search by using the Save Current Search option. New Expense Categories can be imported into the system by using the Import button. Attaching the data to the Document module is also possible from here.

Apart from the list view, a Kanban view of Expense categories is also available in the Odoo16 Expense module. Users can easily choose either the list view or the Kanban view in a single click.
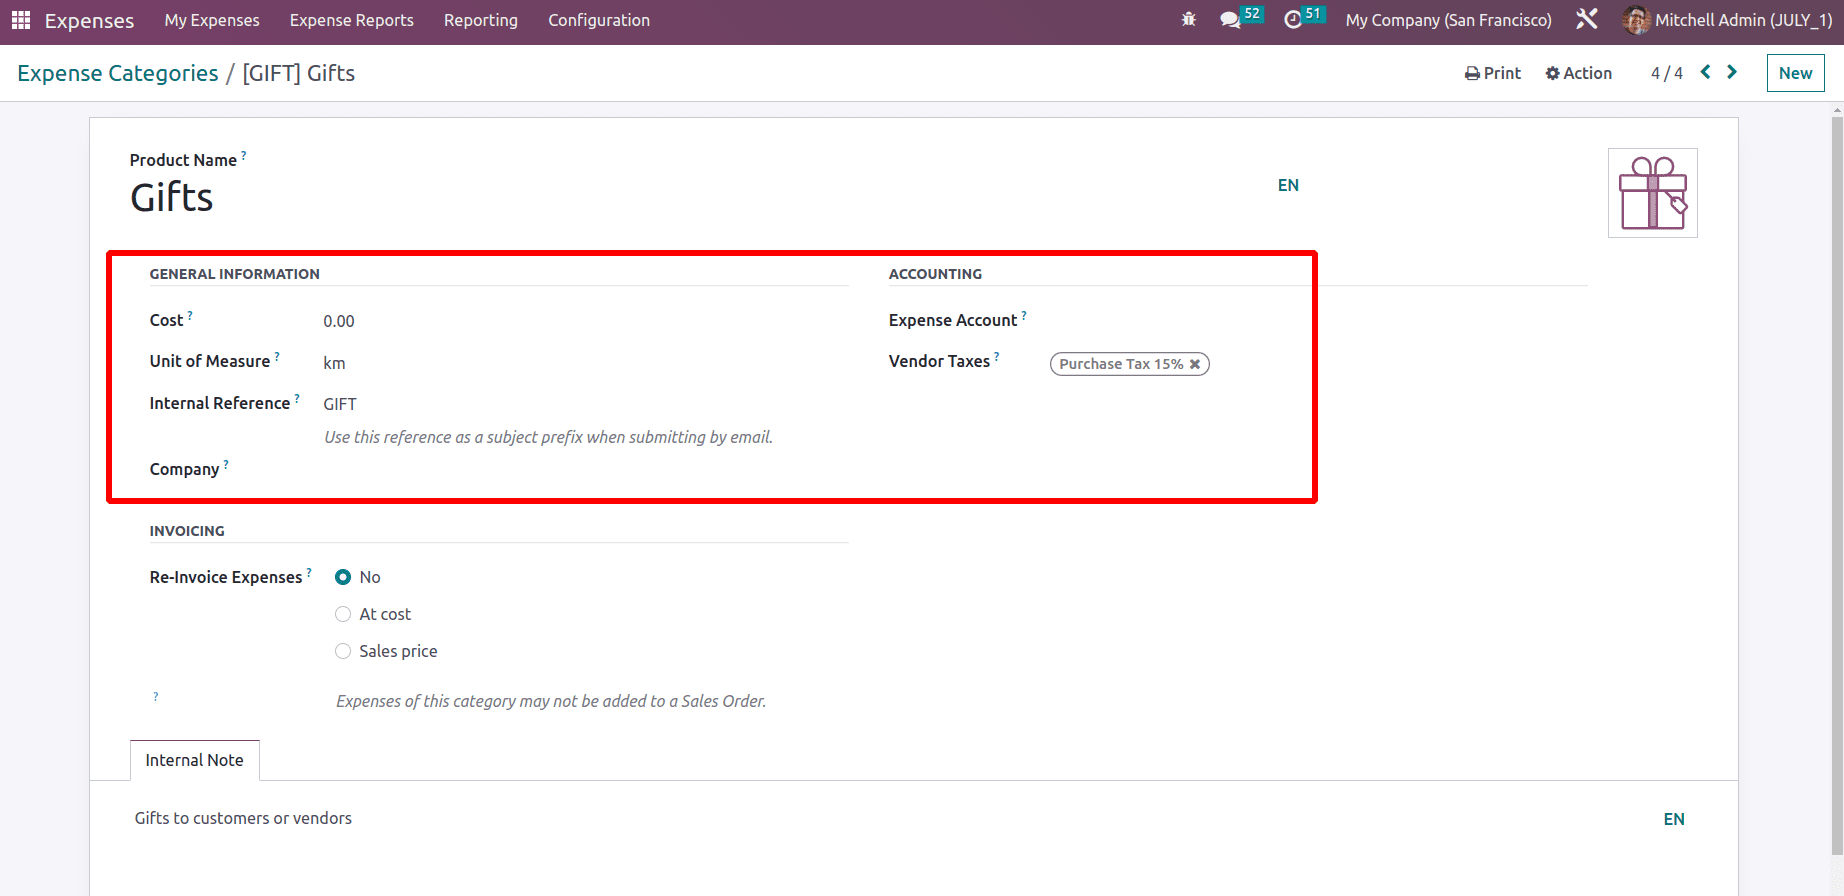
Let's open an already-created Expense Category from the window. The product is named ‘Gift’. General information and accounting information about the product is given inside the product.
Under the General information, the details like cost, Unit Of measure, internal reference, and company name such details are given.

Here, the Internal reference is important when an employee expense is created from an Incoming email from the employee. To know more about how an expense report can be generated from the incoming email, refer to the blog:
Expense Creation form Incoming E-mail in Odoo 16
Then the Accounting Information contains an Expense Account. If the user needs any particular expense account to record the entries created by expensing this product. Otherwise, the account from the product category will be taken.
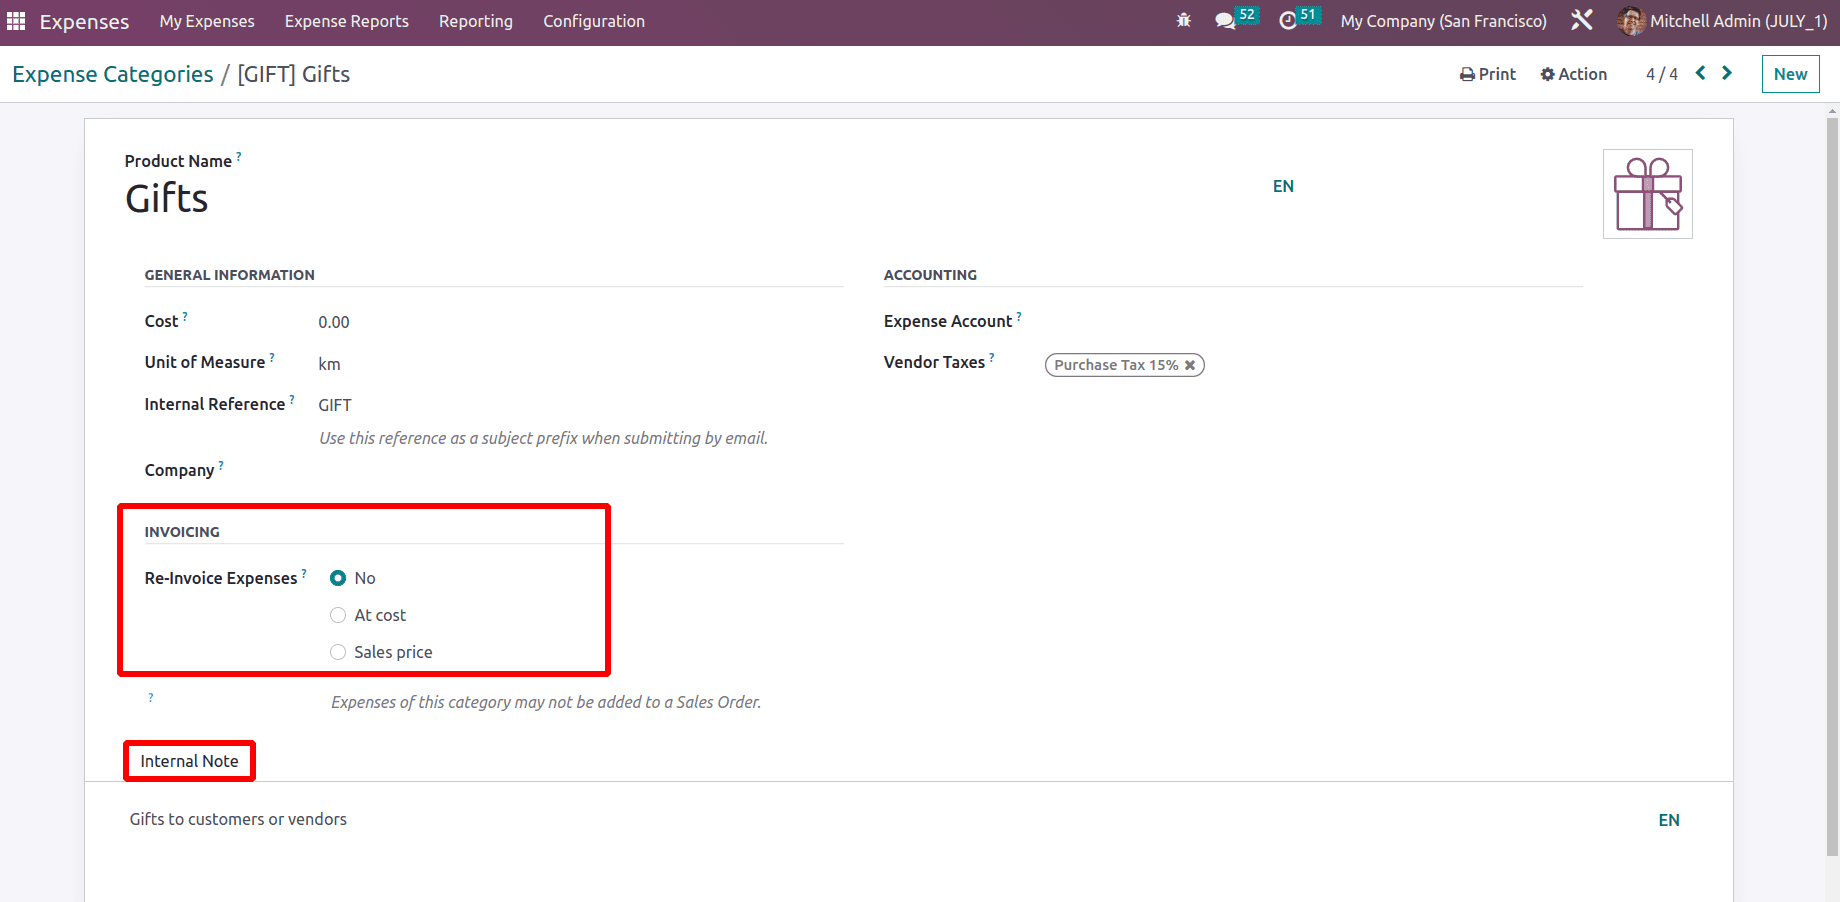
Next is the Invoicing section. An expense product can be invoiced in 3 different methods.
* No Re Invoice
* Based on Cost
* Based on Sales Price
If the user does not need to add the expense of this category into a customer sale order choose the first method No ReInvoice.
At Cost means that the expense of that category will add to the sales order in their actual cost when the expense is re-invoiced.
At Sales Price means that the expense of that category will add to the sales order in their sales price when the expense is re-invoiced.
To know more details about this Reinvoicing method, check the blog:
Expense Re-invoicing in Odoo 16
Any description about the particular product can be added inside the Internal Notes tab.
Configuring new Expense product
For an employee to add their expense, they need an expense product. It is easy to create the expense products like any other product. Let's create a new expense product.
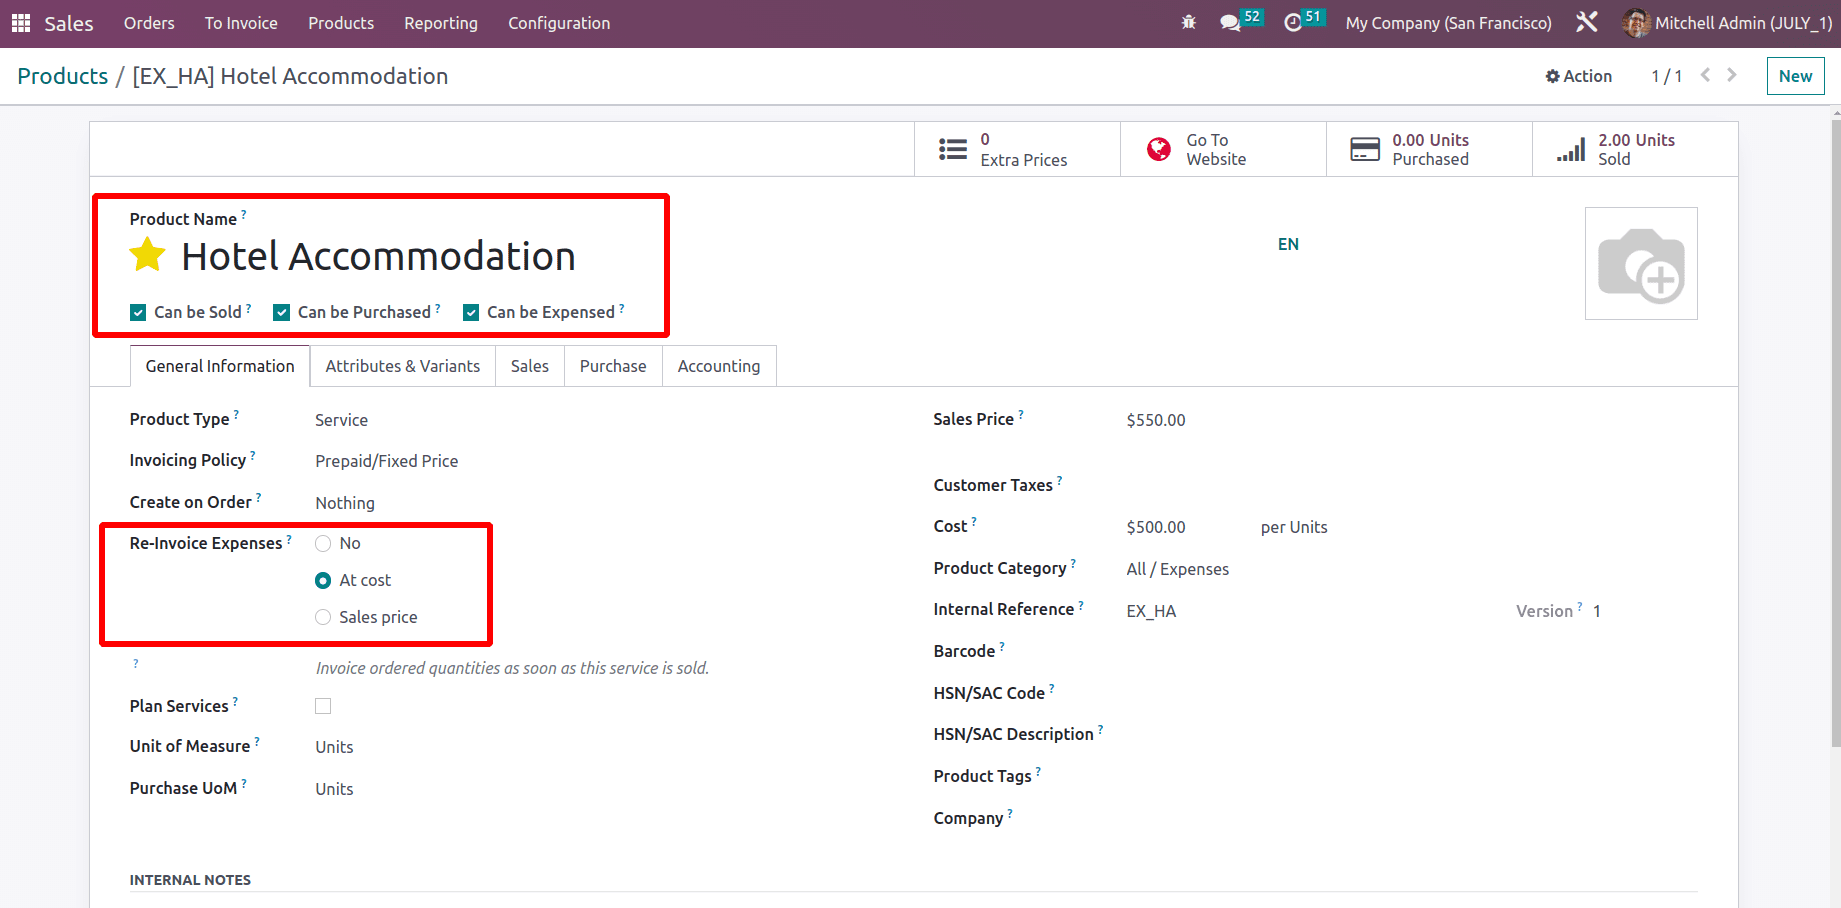
Here, Hotel Accommodation is an expense product. So the check box named Can be Expensed is enabled. The product type is Service.
An expense can be reinvoiced to the employee in three types. As said before, the product category chosen is ‘All/Expenses’. The sales price and other details about the product can be mentioned inside the product.
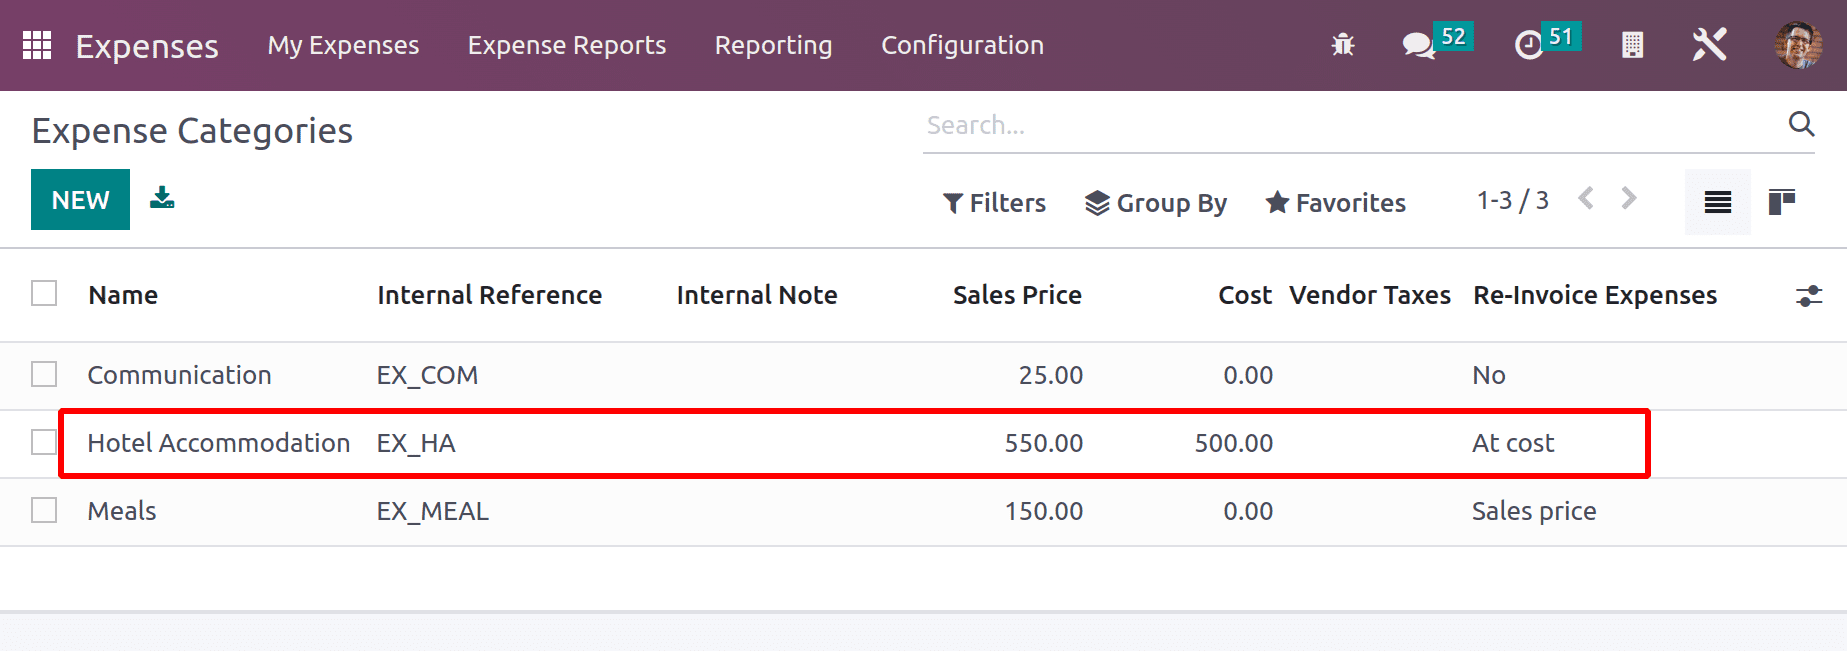
The created product can be viewed inside the Expense Categories from the Expense module also. For that go to the Expense module and choose the Expense category from the Configuration tab. So the category contains all the expense categories used inside the company. The created expense product is also available here.
Importing new Expense Categories
Instead of creating them, it's also possible to import the existing categories to the Odoo16 expense module. So any company that uses other software can easily import their expense products into Odoo without any difficulty. Which makes the user easily convert the existing expense products to Odoo16. Let's check how importing is possible.
The Favorite option contains an Import records option to import the expense categories.
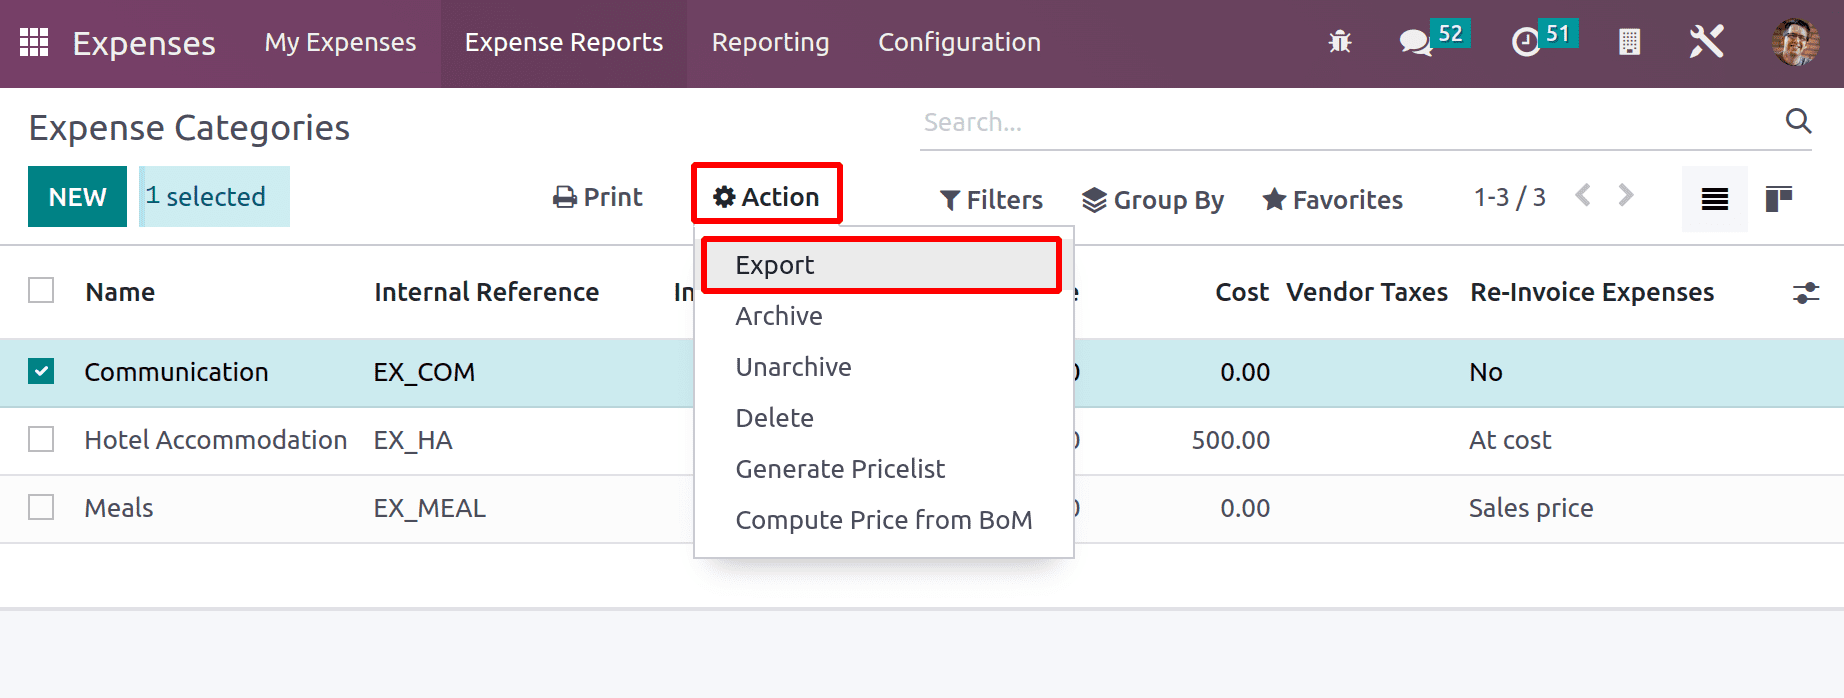
Before that, the user needs an Excel or CSV template with proper manners to import. So lets export the product to create an Excel sheet to import. For that select the category and go to the Action button.
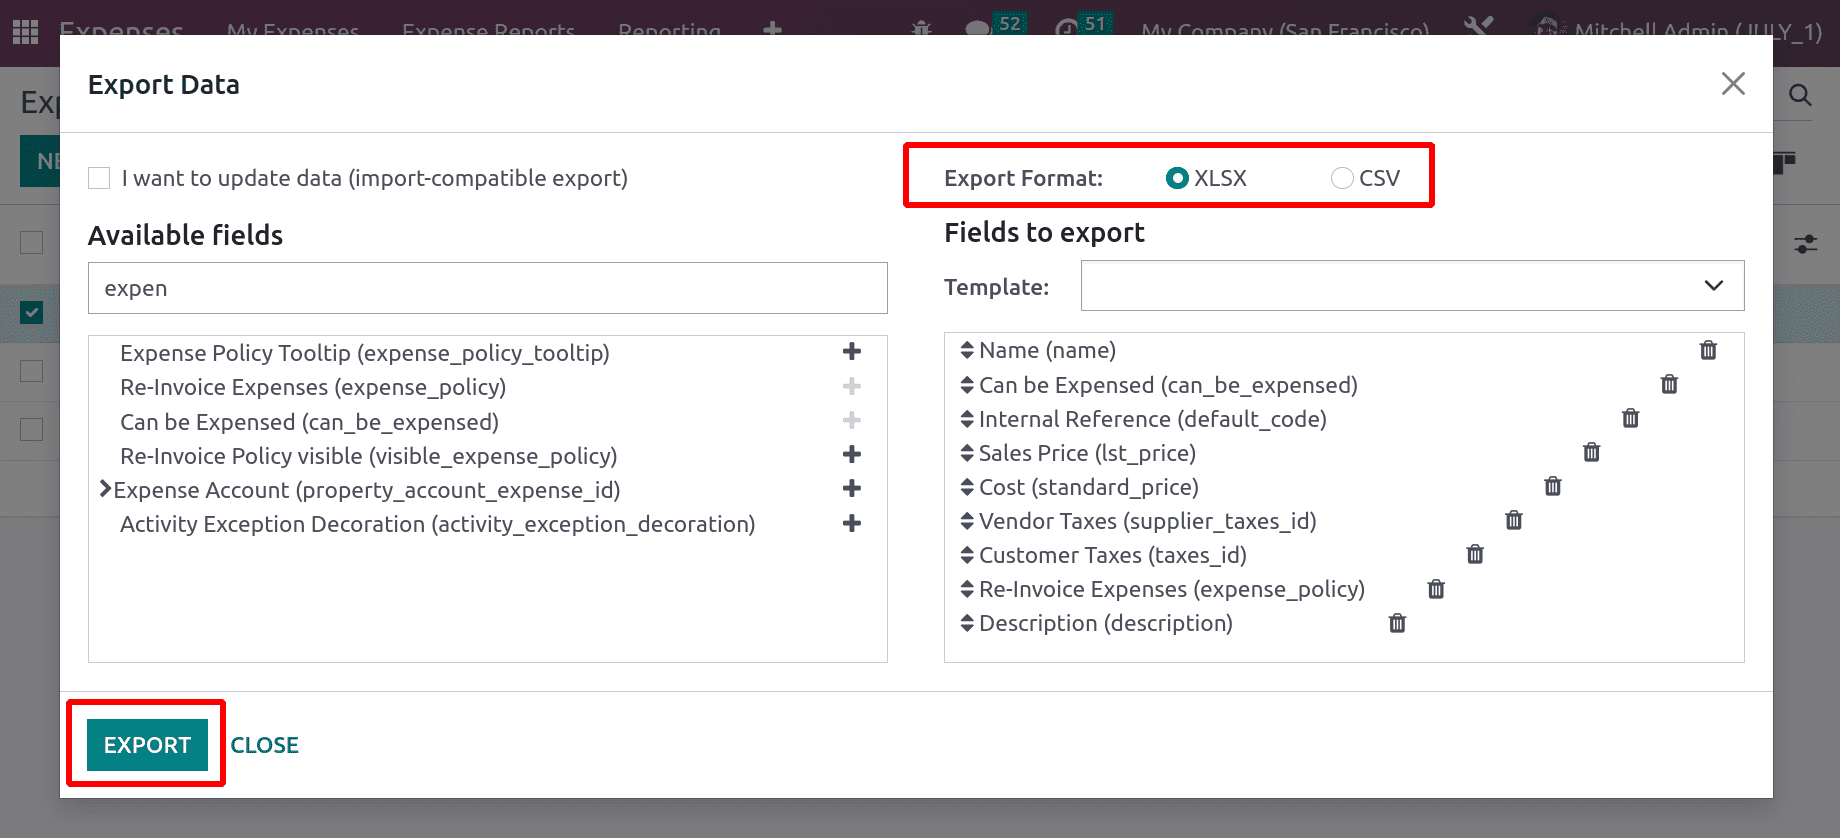
There is an Export option. Users can export the data to their system by using this button. After clicking the Export button, another window appears. From there the user can choose which of the different fields are included in the exported file. The left side shows all the available fields, by clicking the + button the users can select them. The right side contains all the selected fields. The details can be exported either in XLSX or in CSV formats.
After selecting fields, click on the EXPORT button. Then the corresponding document will be downloaded to the system.
Inside the document add the details of new products. Here, 3 new products are added.
One is Travel, an internal reference added as EX_TRA. The description is Bus, taxi and others. The reinvoicing policy is No invoice. Other details like cost and sales price tax are also added.
The second product is named Lunch with Customer, with an internal reference EX_Lunch. The description is that Food with customers. The reinvoicing policy is based on Sales Price.
The third one is Airfare with reference EX_AIR and Description Airline charges. The reinvoicing policy is based on Cost.
Save the document after adding details. Then, go back to the Expense Categories in the Expense module. Currently, there are only 3 expense products. To import more, click on the favorite option and choose Import Records.

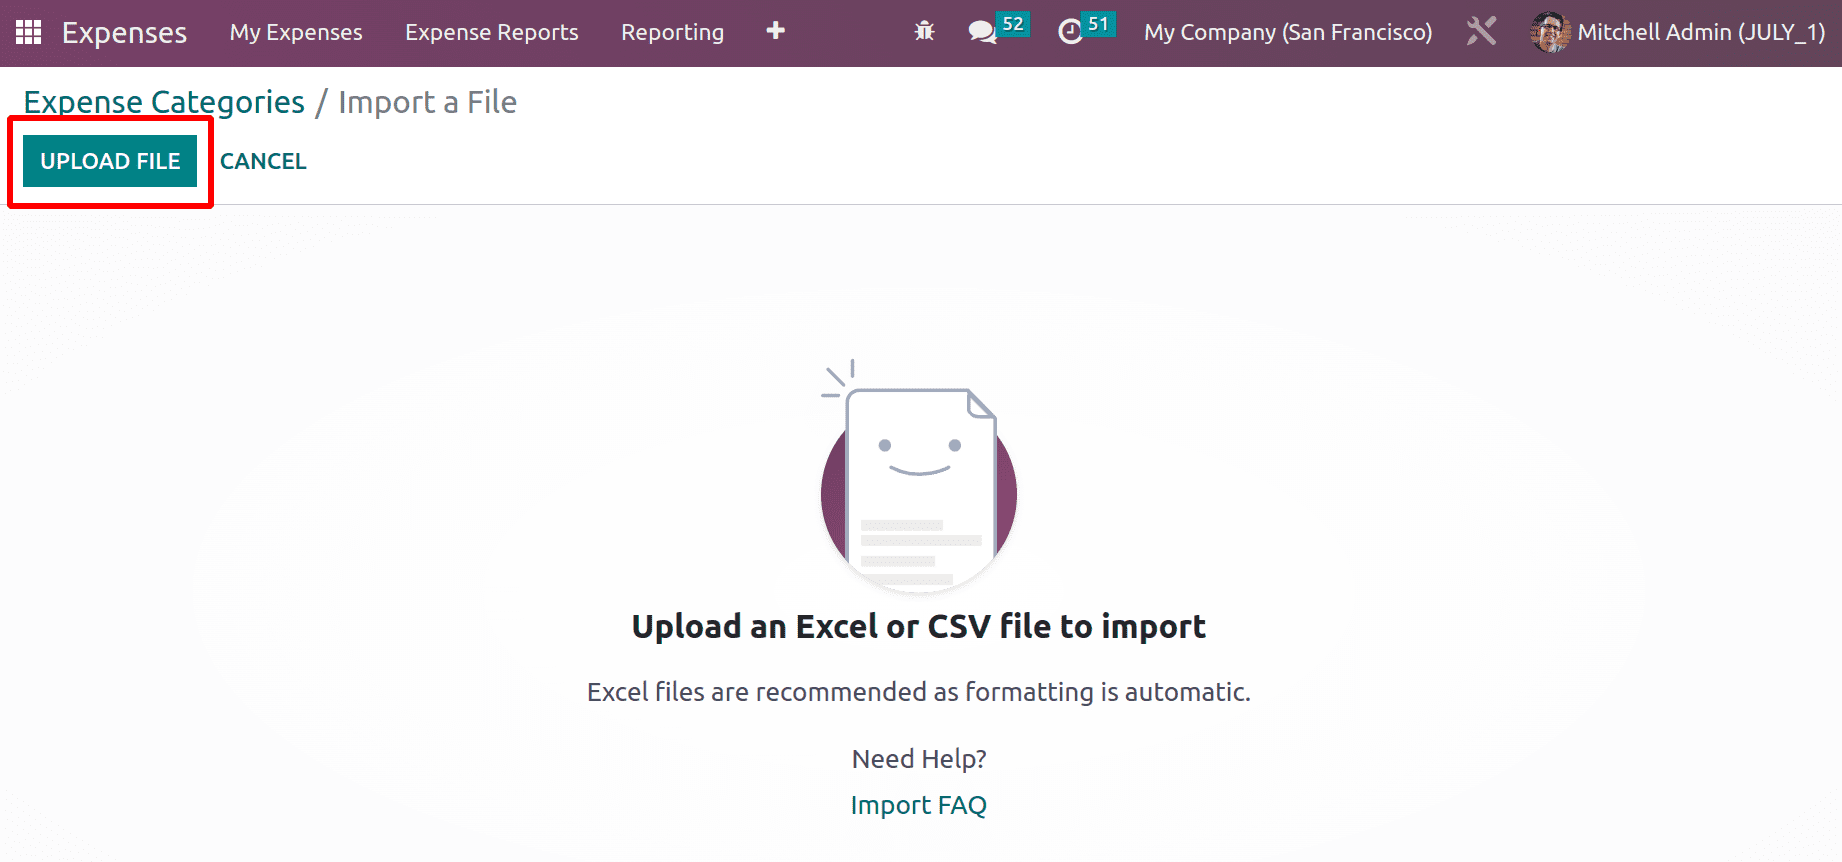
There is a button for the UPLOAD FILE. Using that button the user can add the created file to the Odoo16 expense module. The document must be either an Excel or CSV file.

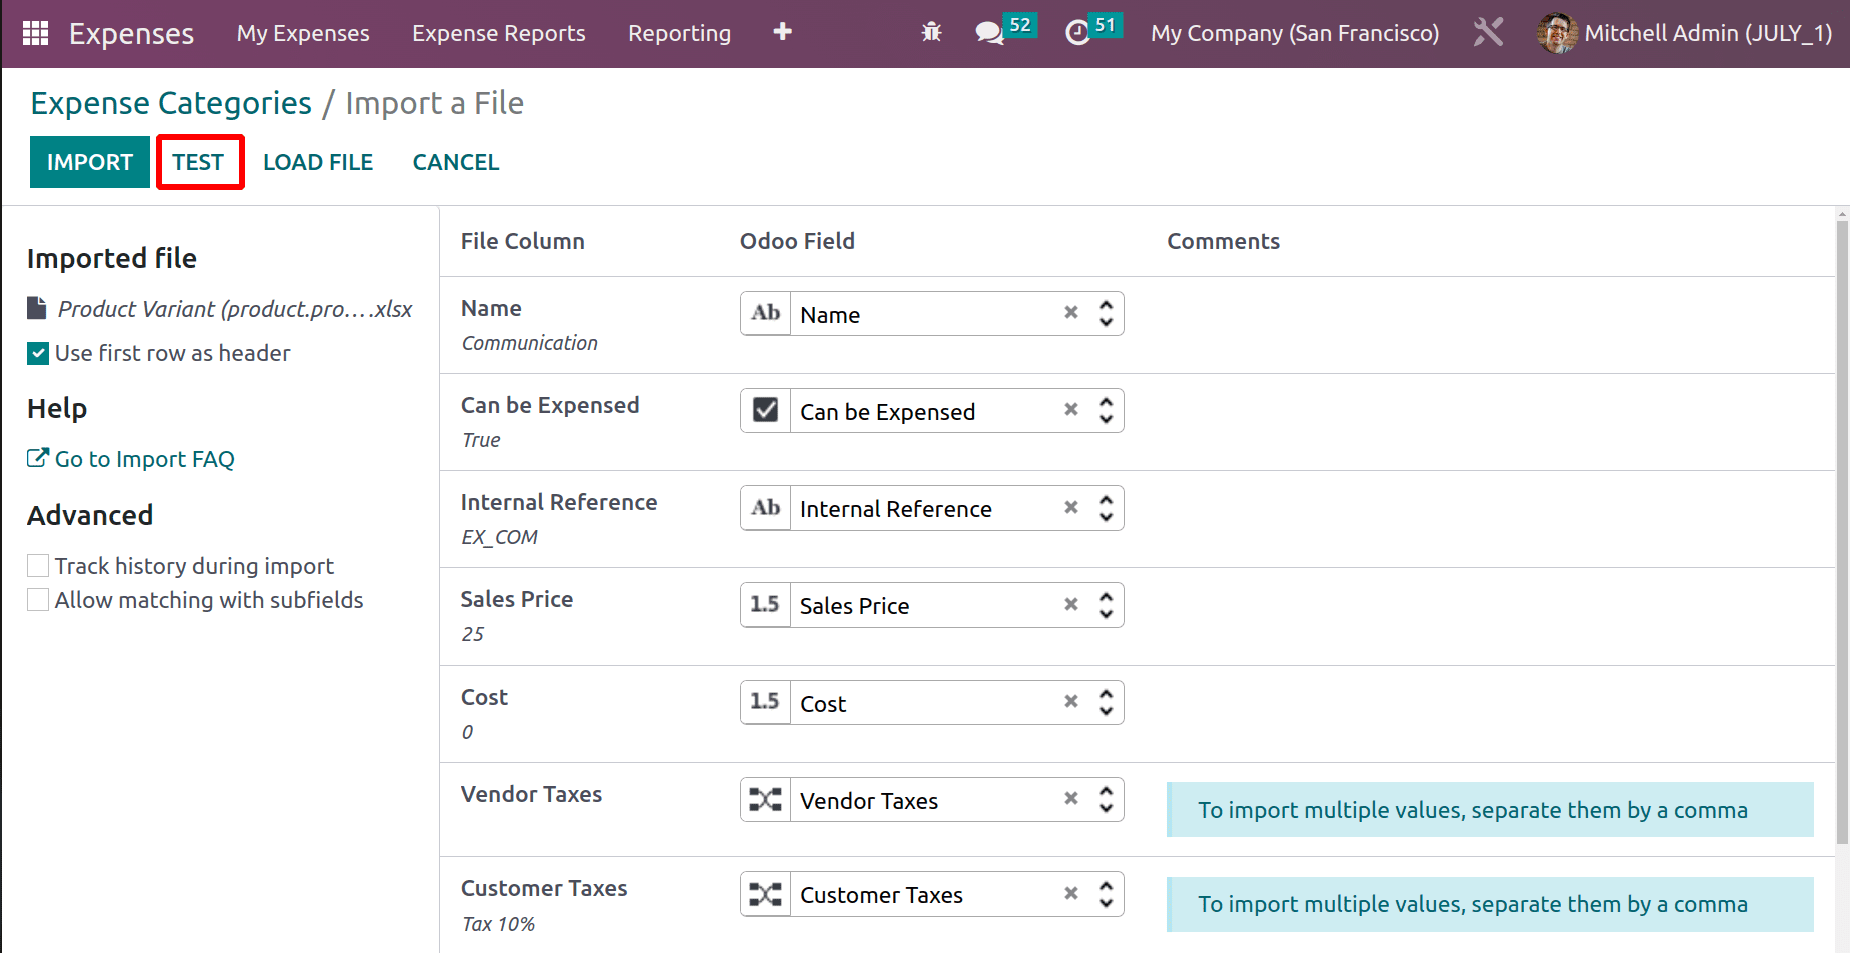
Add the file then the details added in the file with fields are shown there. Before importing them the user needs to Test the details. So click the TEST button before importing.
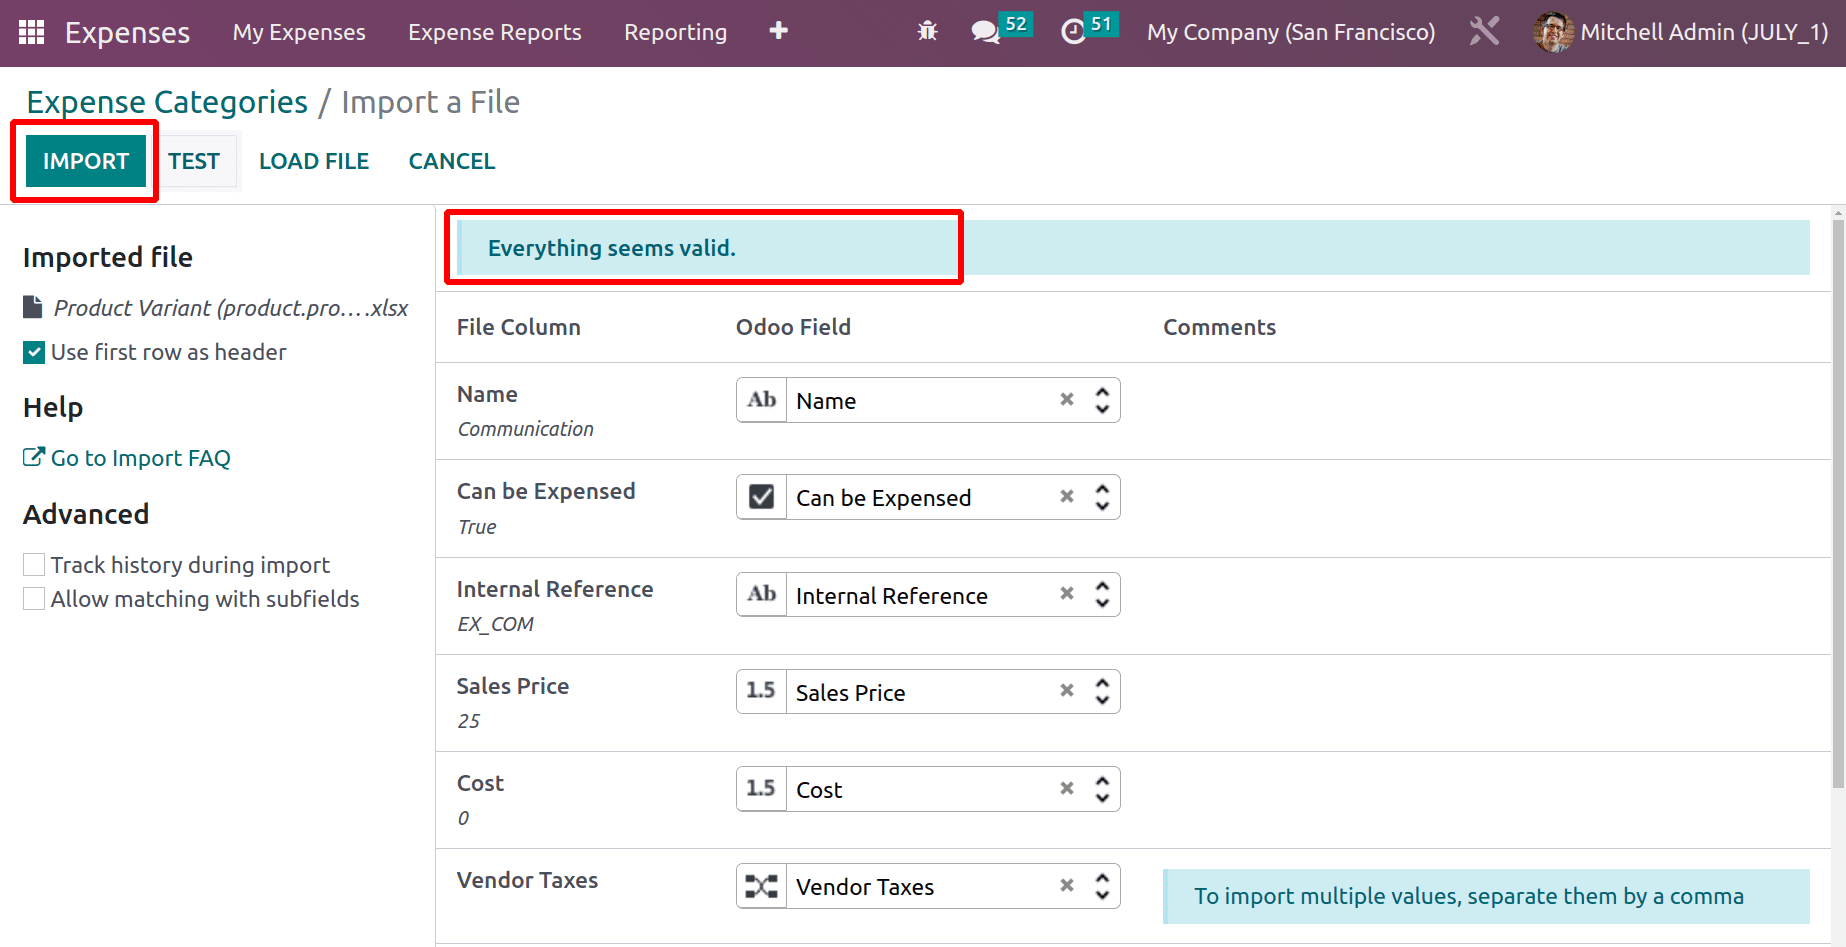
After testing if the details are in the proper way then Odoo16 shows a message like ‘Everything seems valid’. Then the user can import the file into the system. For that click on the IMPORT button.
Then again check the Expense Categories. The imported new expense products appear there with added details like Internal reference, Sales price, description, etc.
So the process of importing data to the system is quite simple in Odoo 16.
Odoo 16 Expense product management is quite simple using the expense module. So the process of adding employee expense to reimbursement is quite simpler, which enhances employee satisfaction and also helps the company to properly manage expenses.