Several companies deal with sales. Customer payment is a vital part of the selling process. Customers can pay their bills through a variety of means these days. Credit cards, bank transfers, liquid cash, and other payment options are just a few examples. When we sell a product to a customer, they can use any of them. As a result, multiple payment methods must be available in a shop or similar establishment. Odoo makes it simple for us to manage these payment types. In Odoo 15, we used a few different payment methods. Payment options utilized in point of sale sessions include Cash, Bank, Customer Account, and Payment Terminals. Let's take a look at each one separately.
In the POS module, we may establish payment methods. To do so, go to the configuration tab and select payment methods.  We can view the payment methods generated, and we can also add new payment methods from there. Let's discuss them one by one.
  - Cash
Cash is a straightforward and familiar method of payment for everyone. We can utilize the technique of cash for payment when selling a product, and the customer makes payment in the form of liquid cash. The payment type cash is formed here, as can be seen.  When this is opened, we can see that the method name is cash because this name appears at the point of sale when selecting a payment option. Set the journal to cash. An Intermediary Account and Company can be mentioned here.
- Customer Account
The customer account is the second payment method. It functions similarly to a credit card. We can sell things to our clients, and if they select the customer account option, all transactions will be recorded in the Receivable account, and the customer has the option of paying them all at once.  We named the method Customer Account and added the company here. We enable the Identify Customer field because doing so forces us to set a client, and developing a customer is required for this approach.
Because we wish to enter the transaction data into the Receivable account, we must leave the journal field empty. Save it after you've finished setting everything up.
- Payment Terminal
During payment, we can use payment terminals. We must first configure it before we can use it. To do so, navigate to the setup tab and select settings. Some payment terminals are available here, such as Adyen, Vantiv, Six, and others, which enable payment terminals.
Save the added changes. 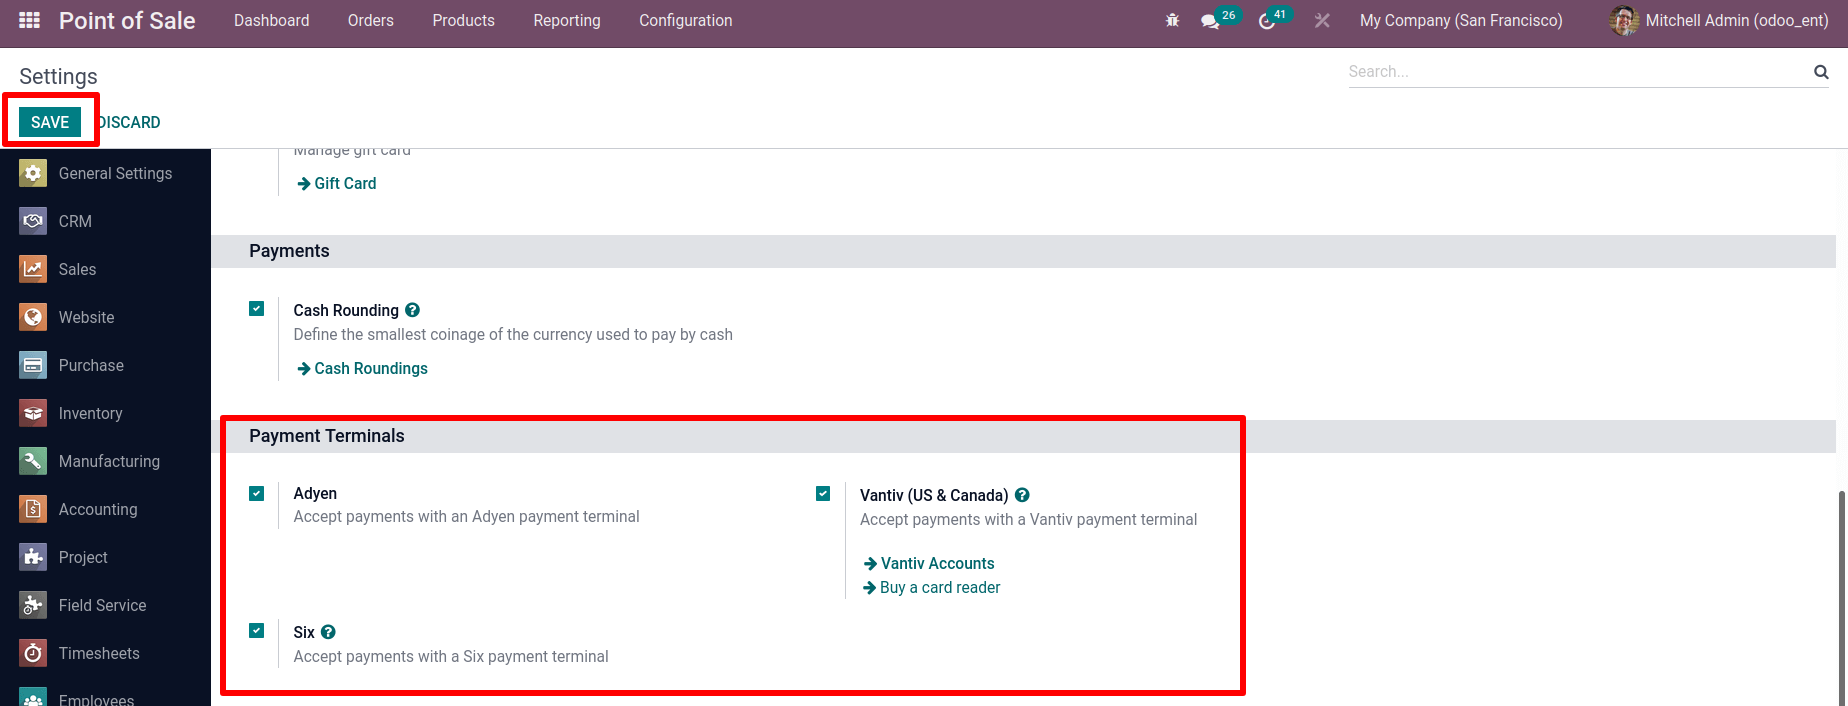 Create a new payment method check that uses this payment terminal after that.
Assign a name to the procedure and a bank to the journal. We can then add details such as Outstanding Account, Intermediary Account, Compan, etc. Here you can add a payment terminal and select a credential. 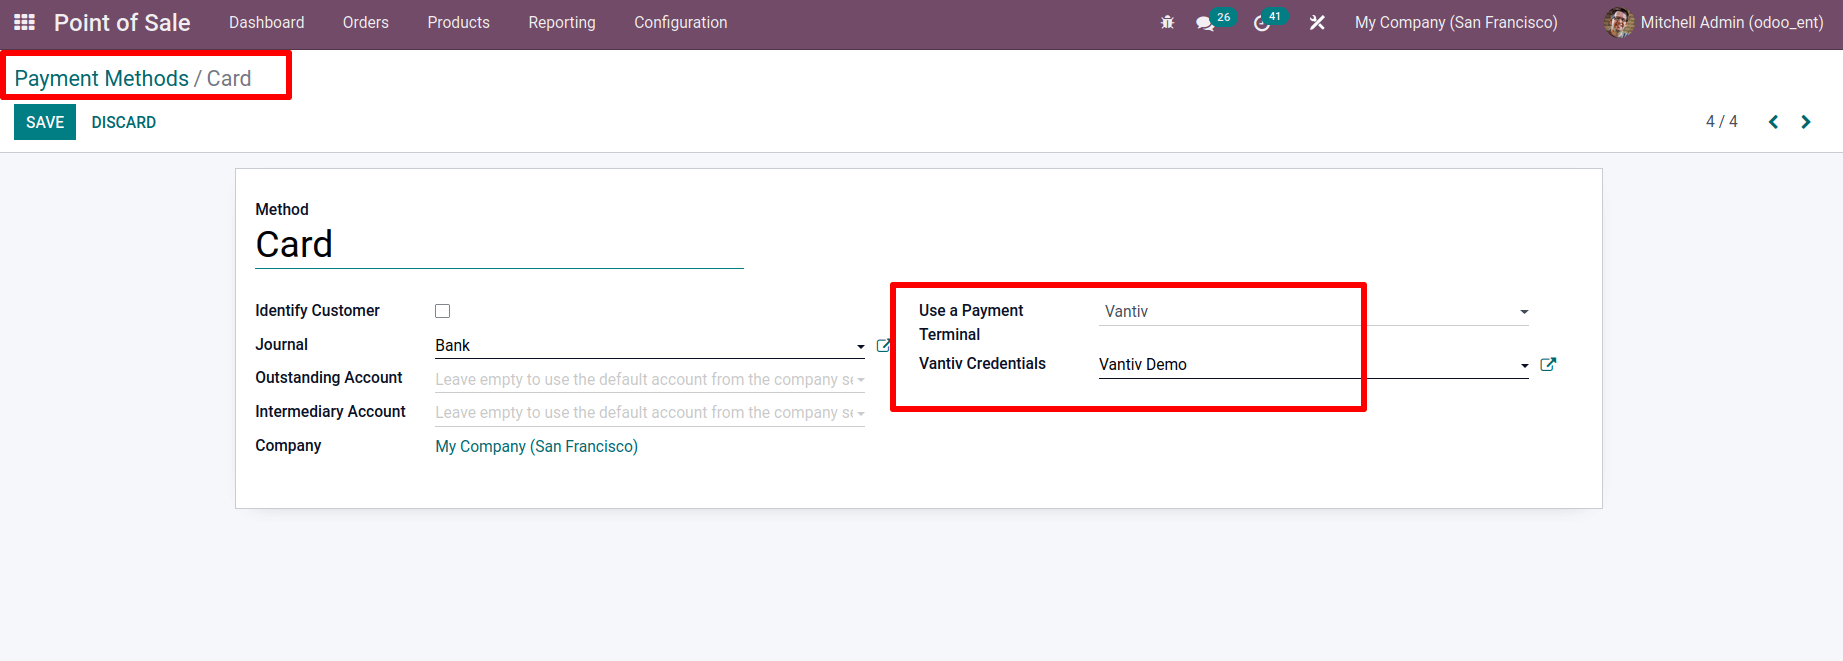 Simply save the page after you've made your modifications.
- Bank
We are also familiar with bank payments, just as we are with cash. It is possible to make a bank transfer payment for their invoiced amount. The amount can be transferred from the customer's account to the company's account. The previously created bank payment method is displayed here. Let's have a look.  The name Bank and the journal Bank are mentioned here. Outstanding Account and Intermediary Account can both be established up here. Mention the business's name. It is feasible to put payment terminals here in the case of a bank.
- Using Different Payment methods in Point of Sale Session
So we created all payment terminals. To begin, we must first add payment methods to the point-of-sale session. To do so, go to the configuration tab and choose the point of sale option from the drop-down list. We can see the existing point of sale sessions there. Click the create button to create a new one.
: Configuration > Point-of-Sale > Create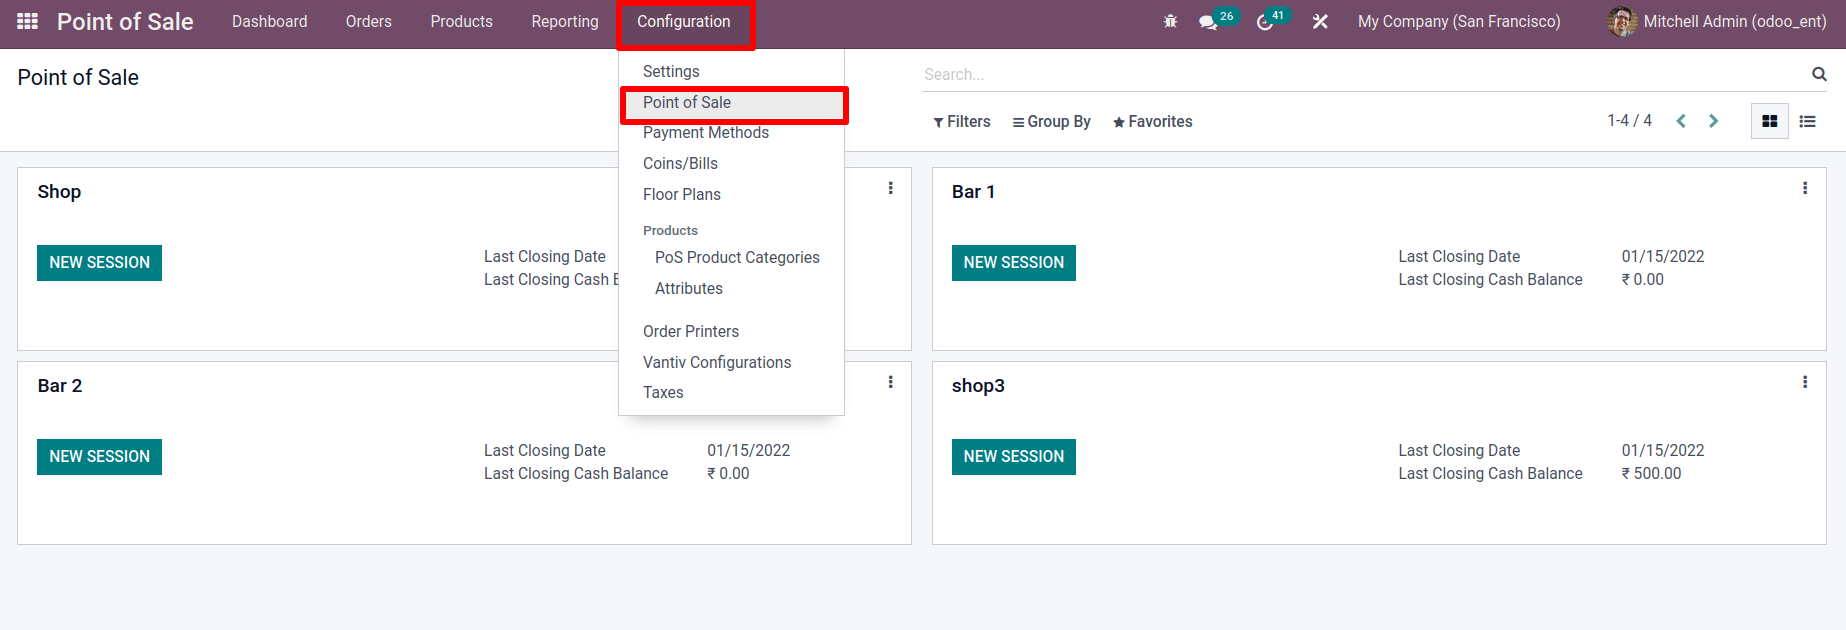 Here, I'm going to make a new session called DEMO SHOP, and it'll be a shop. On the payment page of those settings, we can see a spot where payment methods can be added in the current session.
 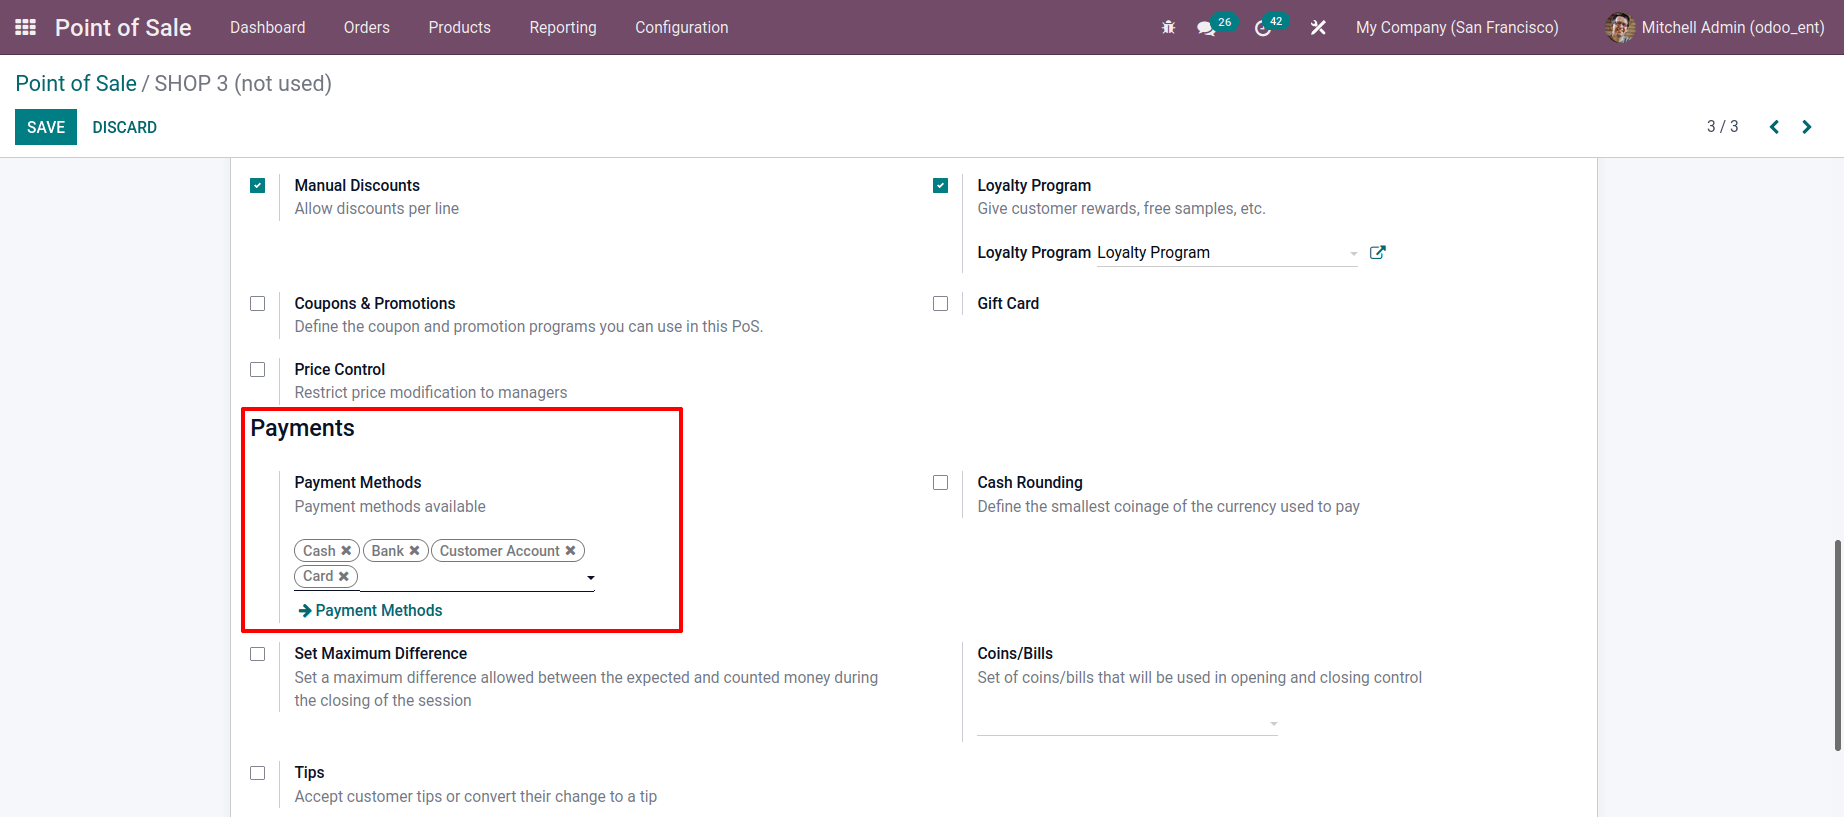 Then save it when you've added a payment method.
Let's get started with a session. We've already set up four payment options. While paying sale orders, we can use each one. From the dashboard, open the newly created session. I've now joined the session.  When starting a new session, a small window displays to put some money in as an opening balance. A session's opening balance is the amount we keep in the session, which could be a balance from the previous session.
 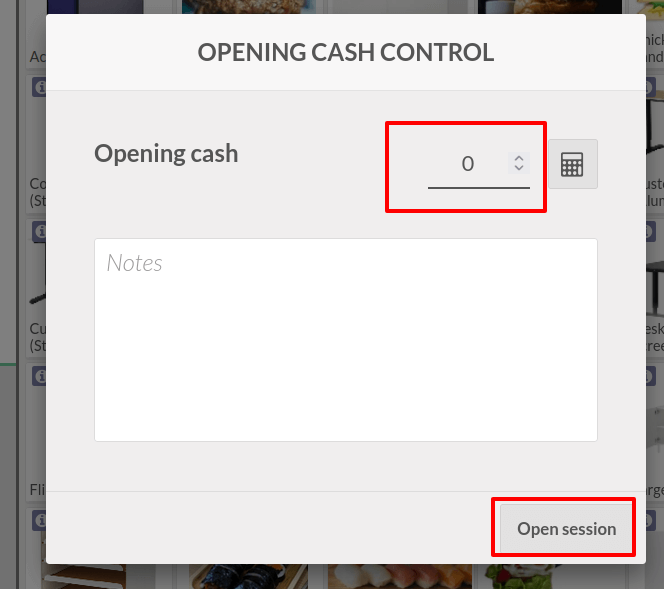 We can begin our session after adding the opening balance.
I'm placing a selling order for an Acoustic Bloc Screen for the customer Azure Interior, with two quantities totaling 1000. Let's get to the payment counter by clicking on the payment button. We can then select our payment options. 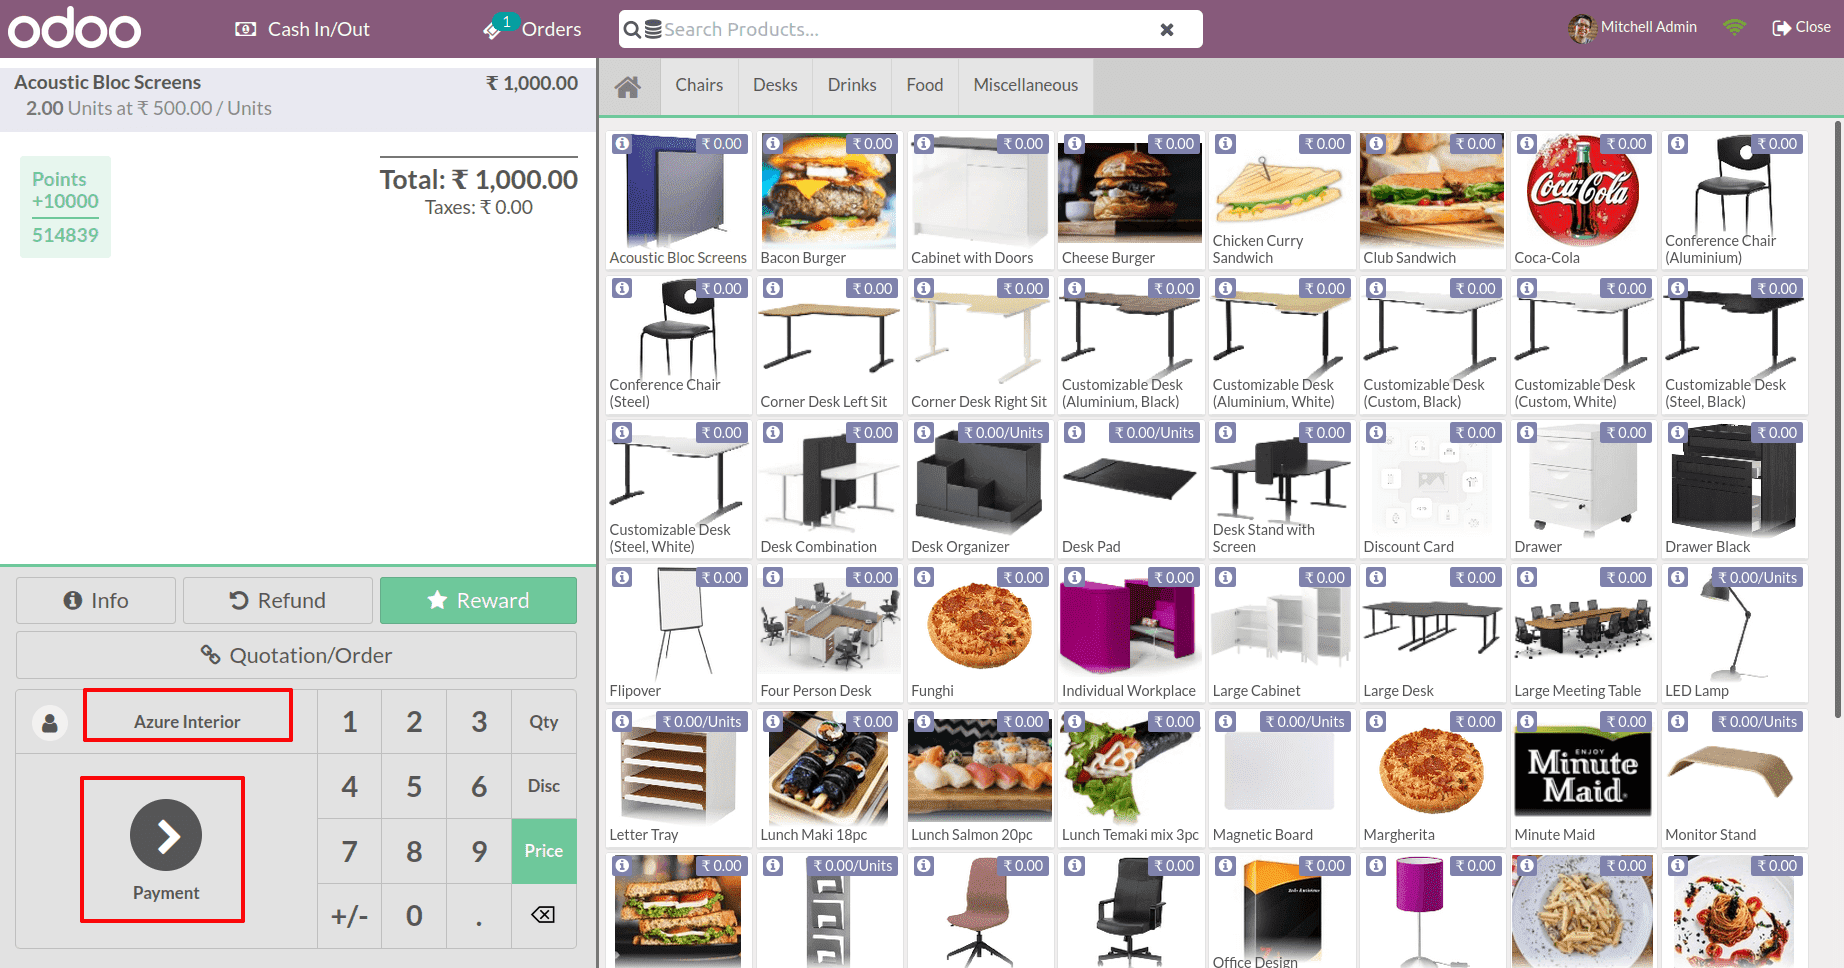 There are four methods that we created before displaying. Our customer selected the Cash option since he paid the sum in cash.
 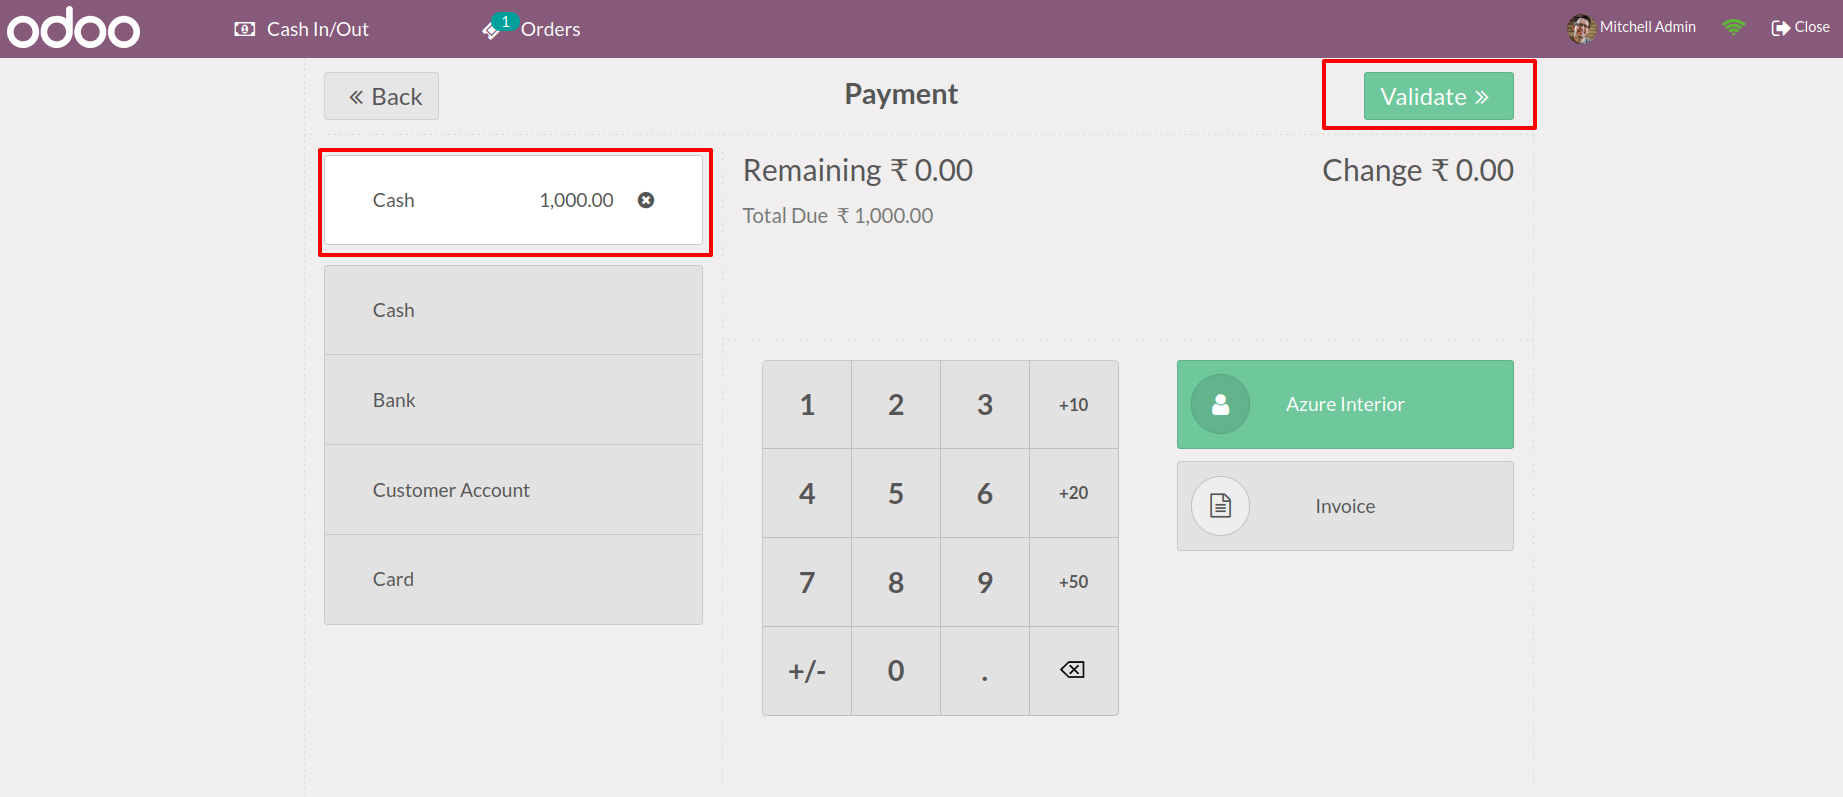 We can see the total amount paid in cash in the screenshot above, confirming the order. It is also possible to create an invoice from there. We're not producing an invoice right now, so let's validate the payment. After that, a receipt will appear. There are two alternatives available. One is used to print the ticket, while the other is used to send mail.
 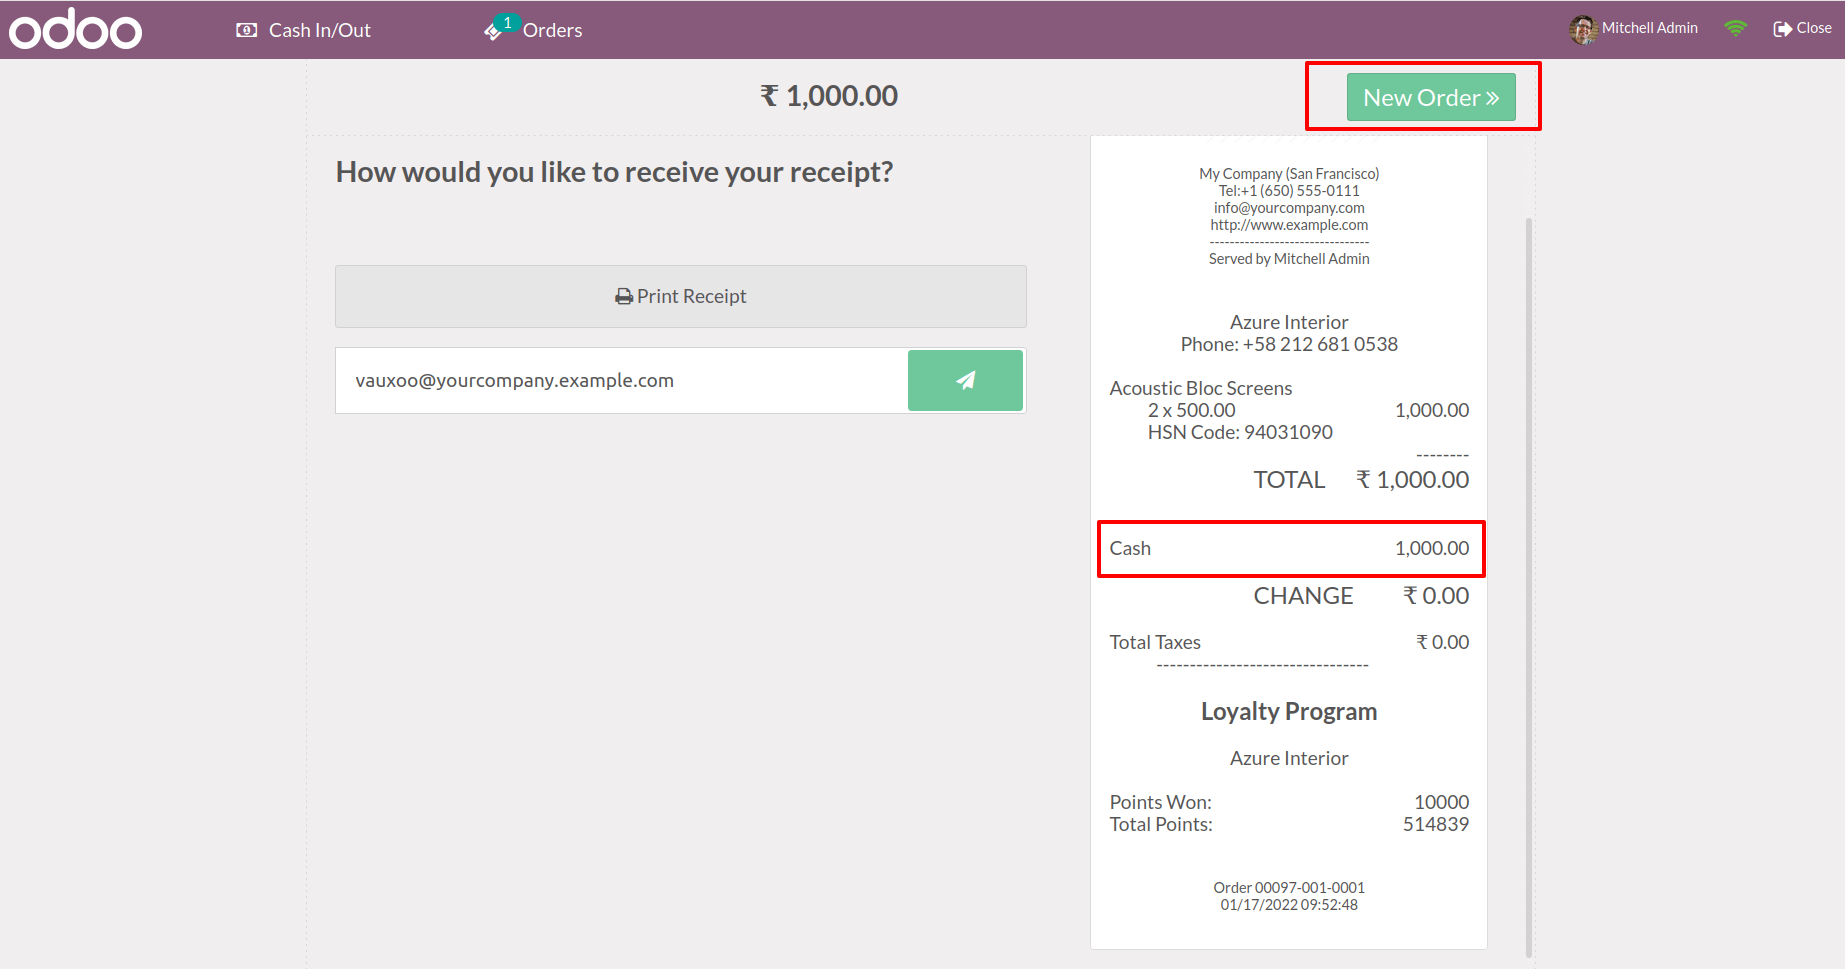 Now that the current order has been completed, we can move on to the next one by clicking the New Order button.
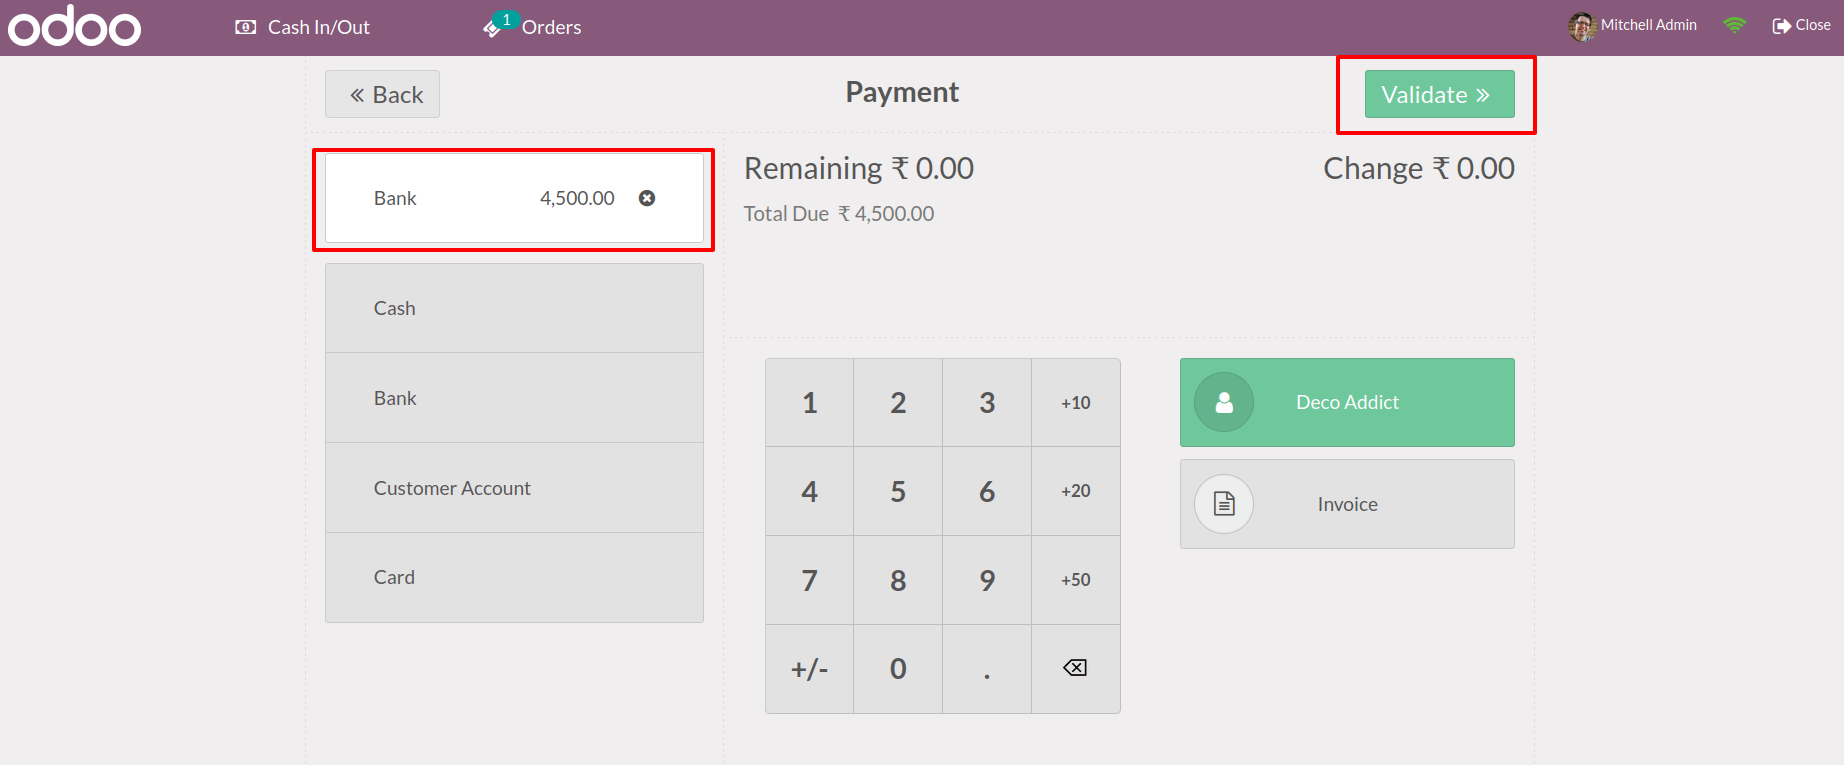
Let's look at how we can use the method of the Bank now. Then we'll be able to make a new order for a different customer. Deco Addict is our second customer, and we supplied three units of Cabinet with Doors to them. Click on the button Payment. 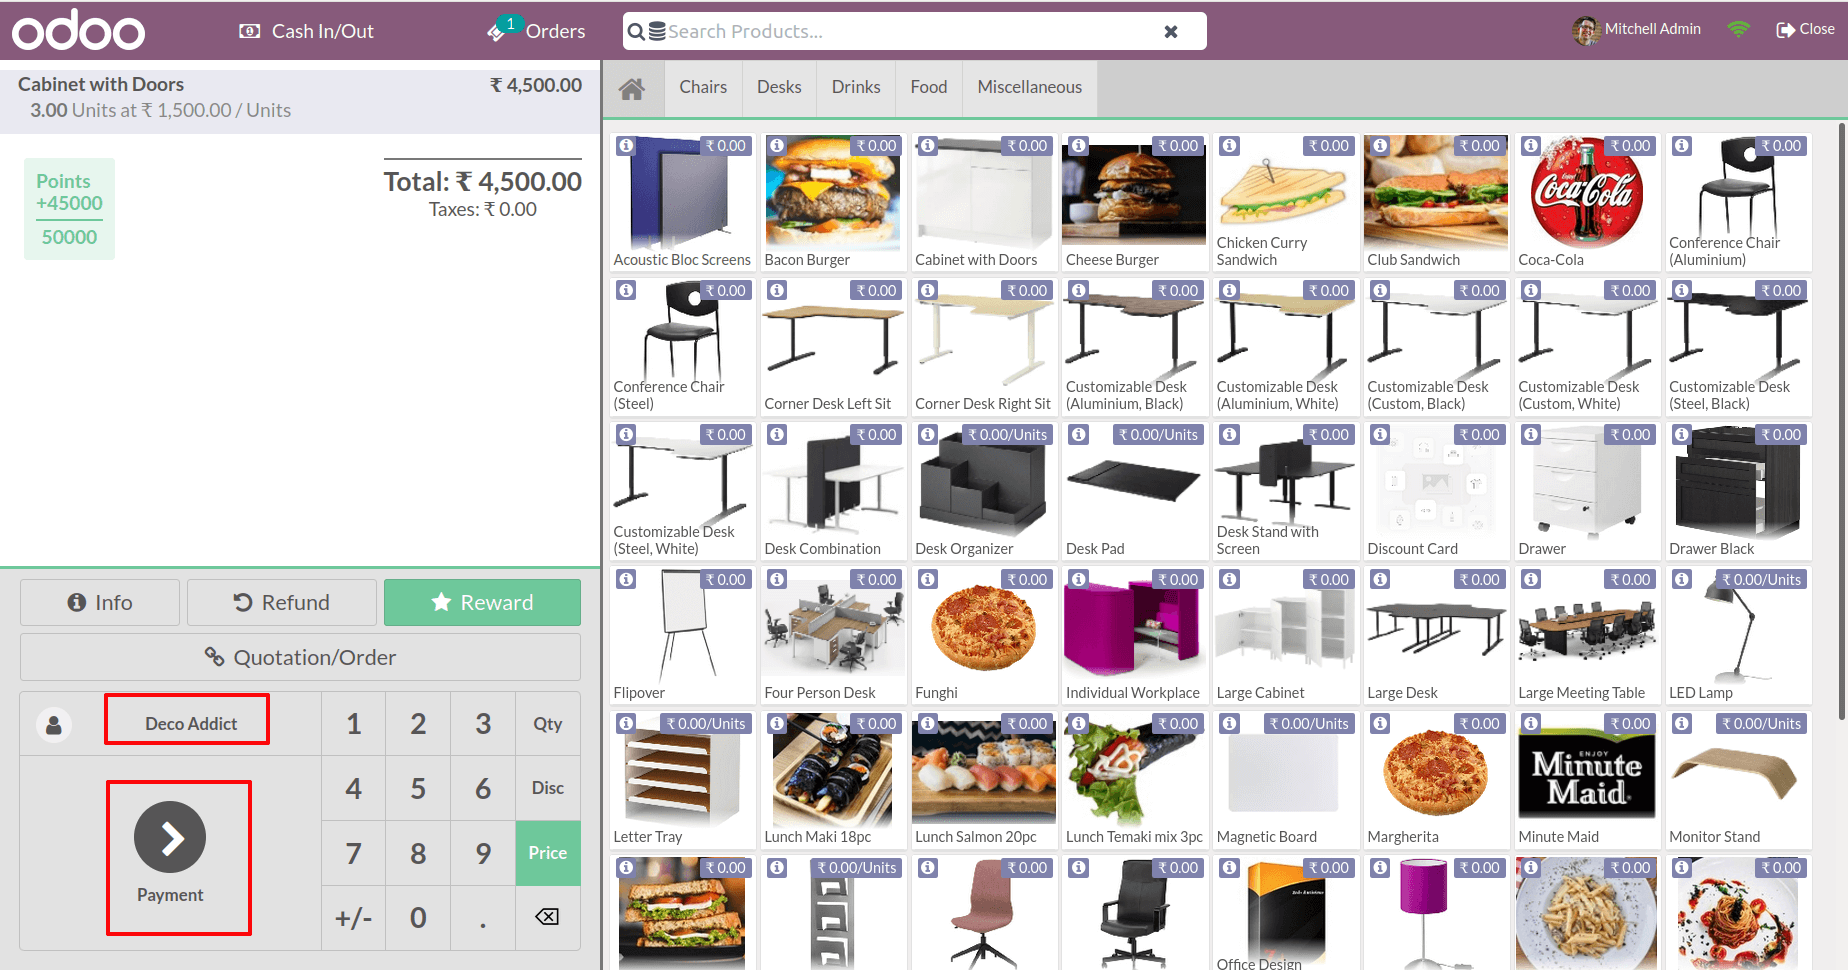 Choose the bank selection from the payment methods menu. The entire sum is now being paid through bank transfer. The payment will then be validated.
  The receipt is now shown. Details include payment method, total paid amount, products with quantity, etc.
 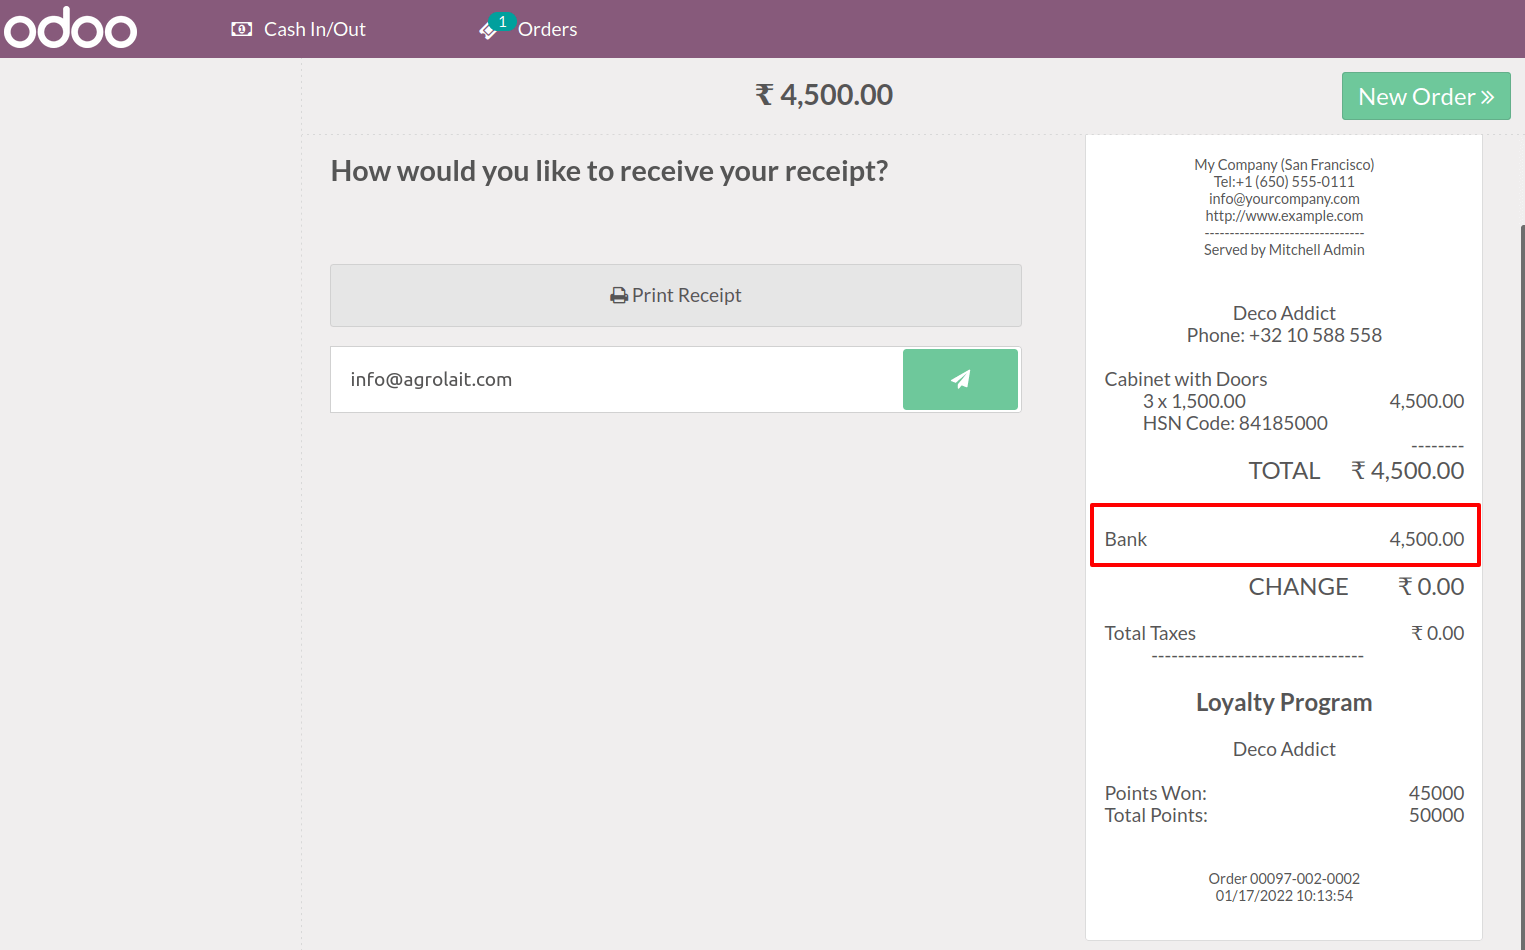 Then we'll go on to the next order by clicking on the new order button.
To check the payment method Customer Account, select the third customer. Demo Customer has been chosen as our third customer, and one quantity of Storage Boxes at the price of 999 has been sold. 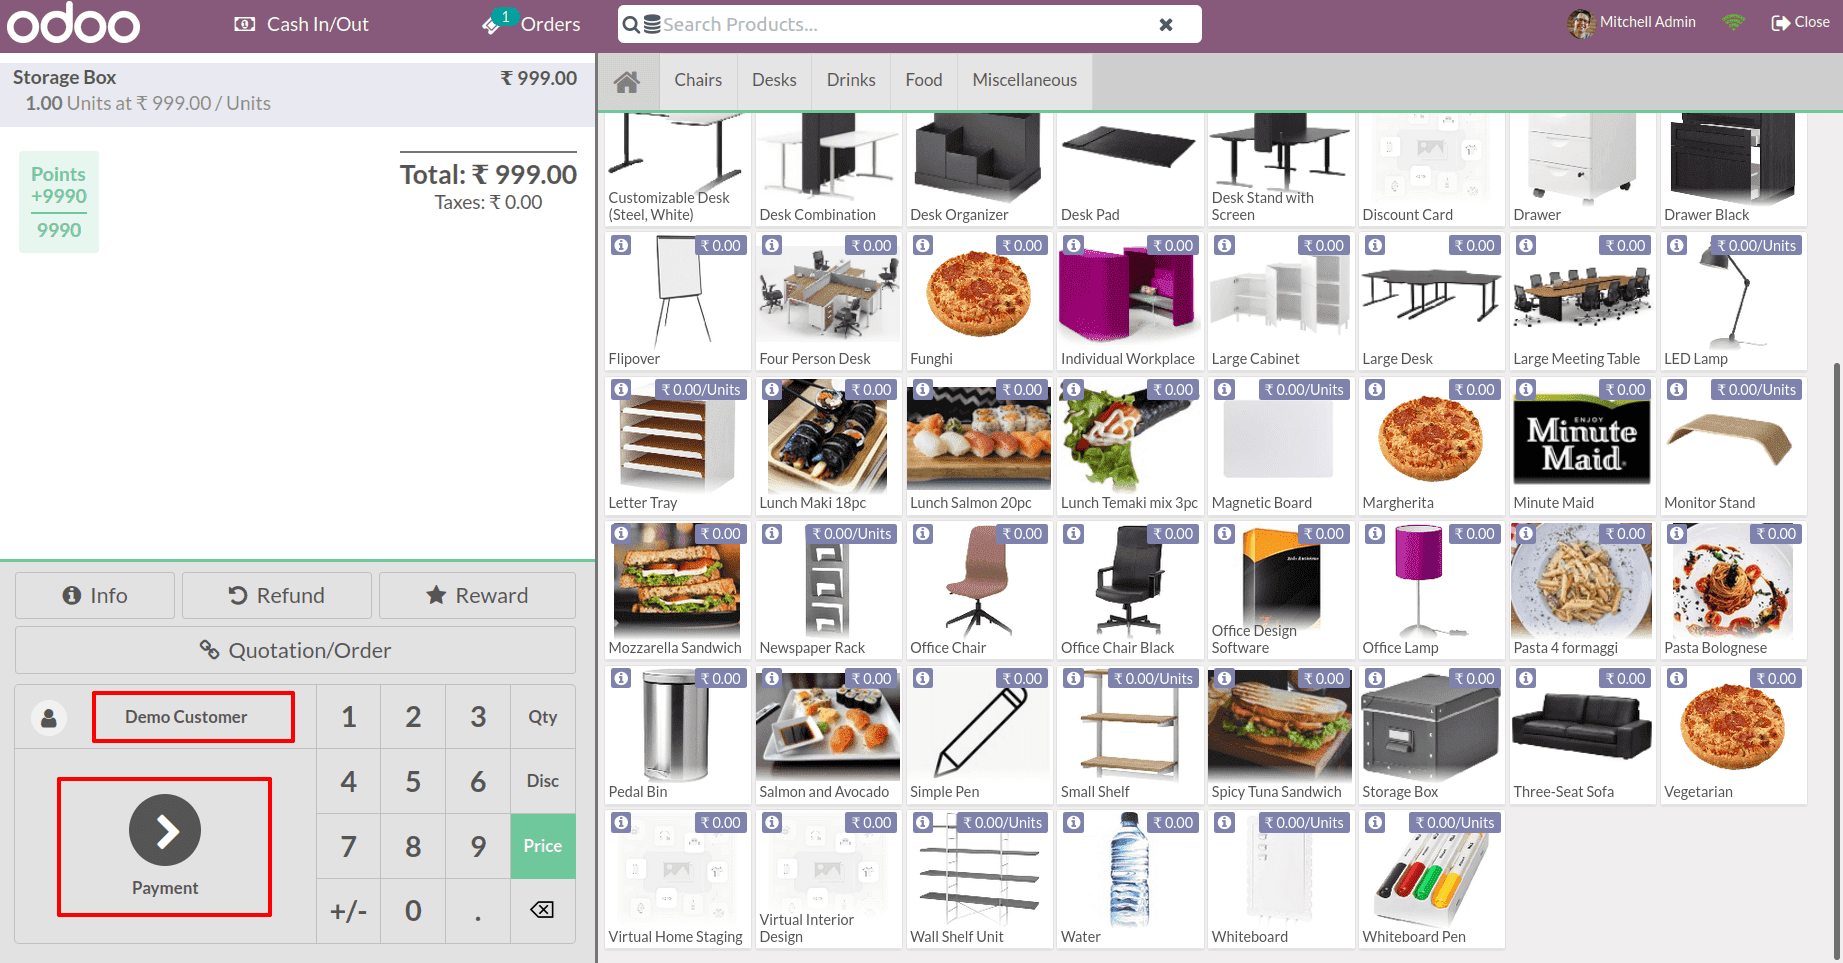 Let's make a payment and use the customer account as the mode of payment. As previously said, the customer did not pay money and instead used this alternative, which is similar to a credit card.
 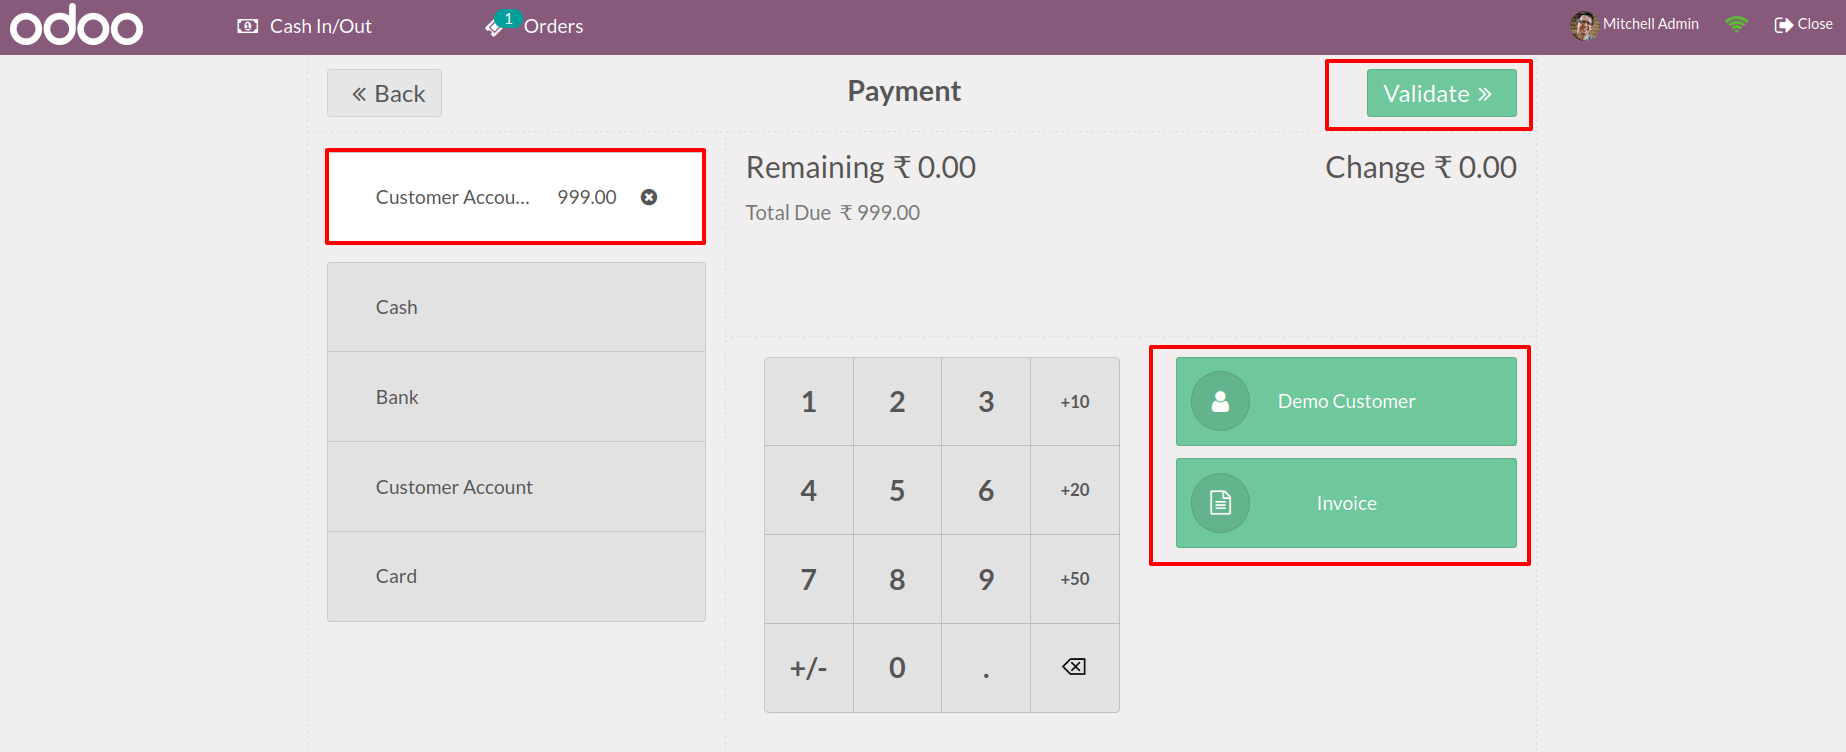 Let's make an invoice right now, Select Invoice from there and click on Validate. As a result, a receipt is generated, and an invoice is created in the back end. The amount paid as a Customer Account was reflected on the receipt.
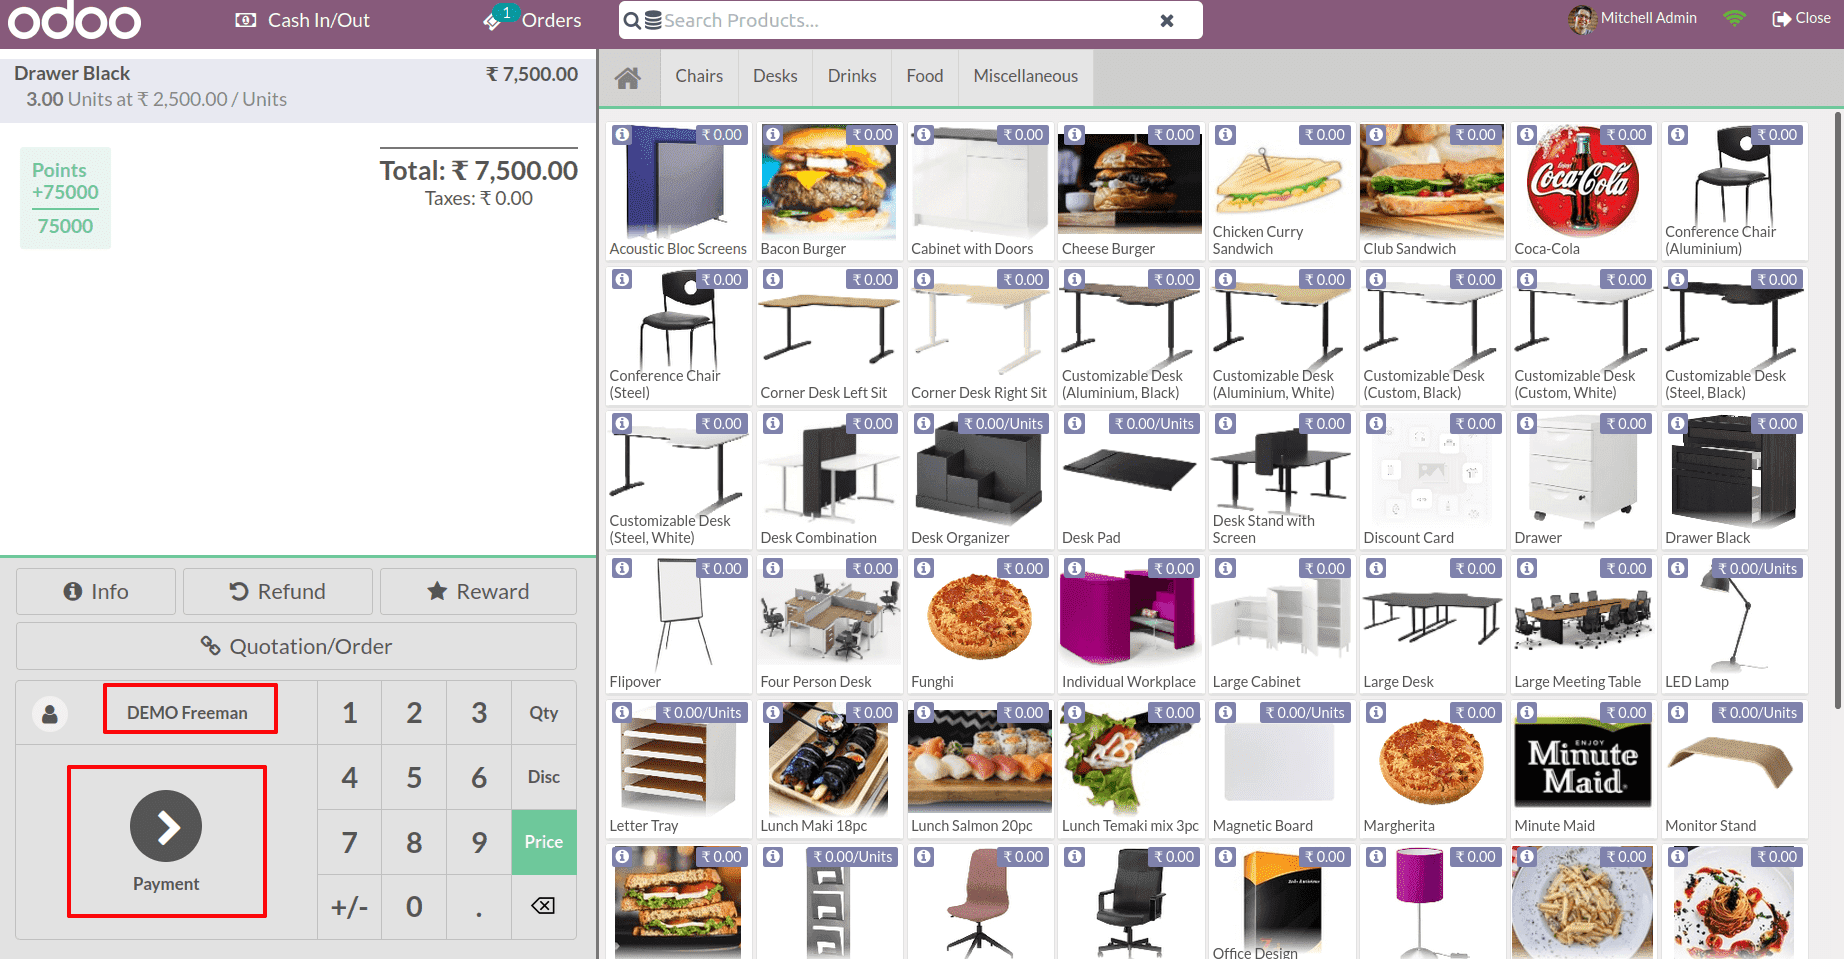
 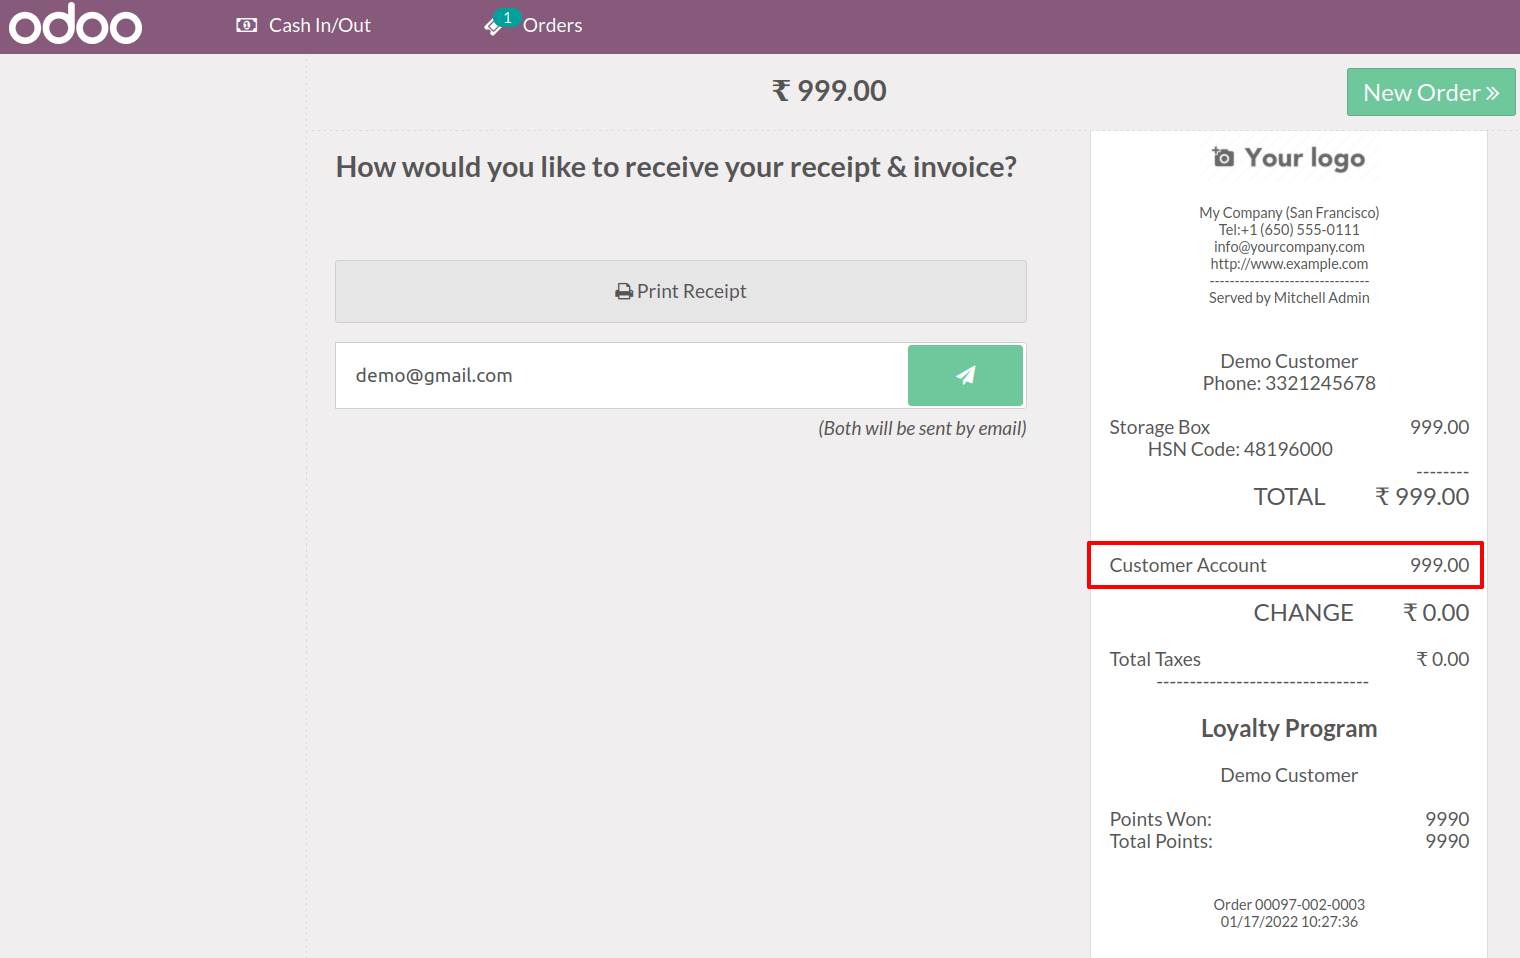 Click on the New Order button to switch to a different order. Let's pick another customer to apply to the fourth payment method using Payment Terminal. DEMO Freeman is being chosen as a new customer. He selected the products, calculated the total amount, and then clicked the Payment button to complete the transaction.
  Select the Card as a payment method. Then, as we can see, it is currently waiting for a payment terminal.
Because we used the method Card, we had to swipe the card like we usually did. We can also generate an invoice for this order. 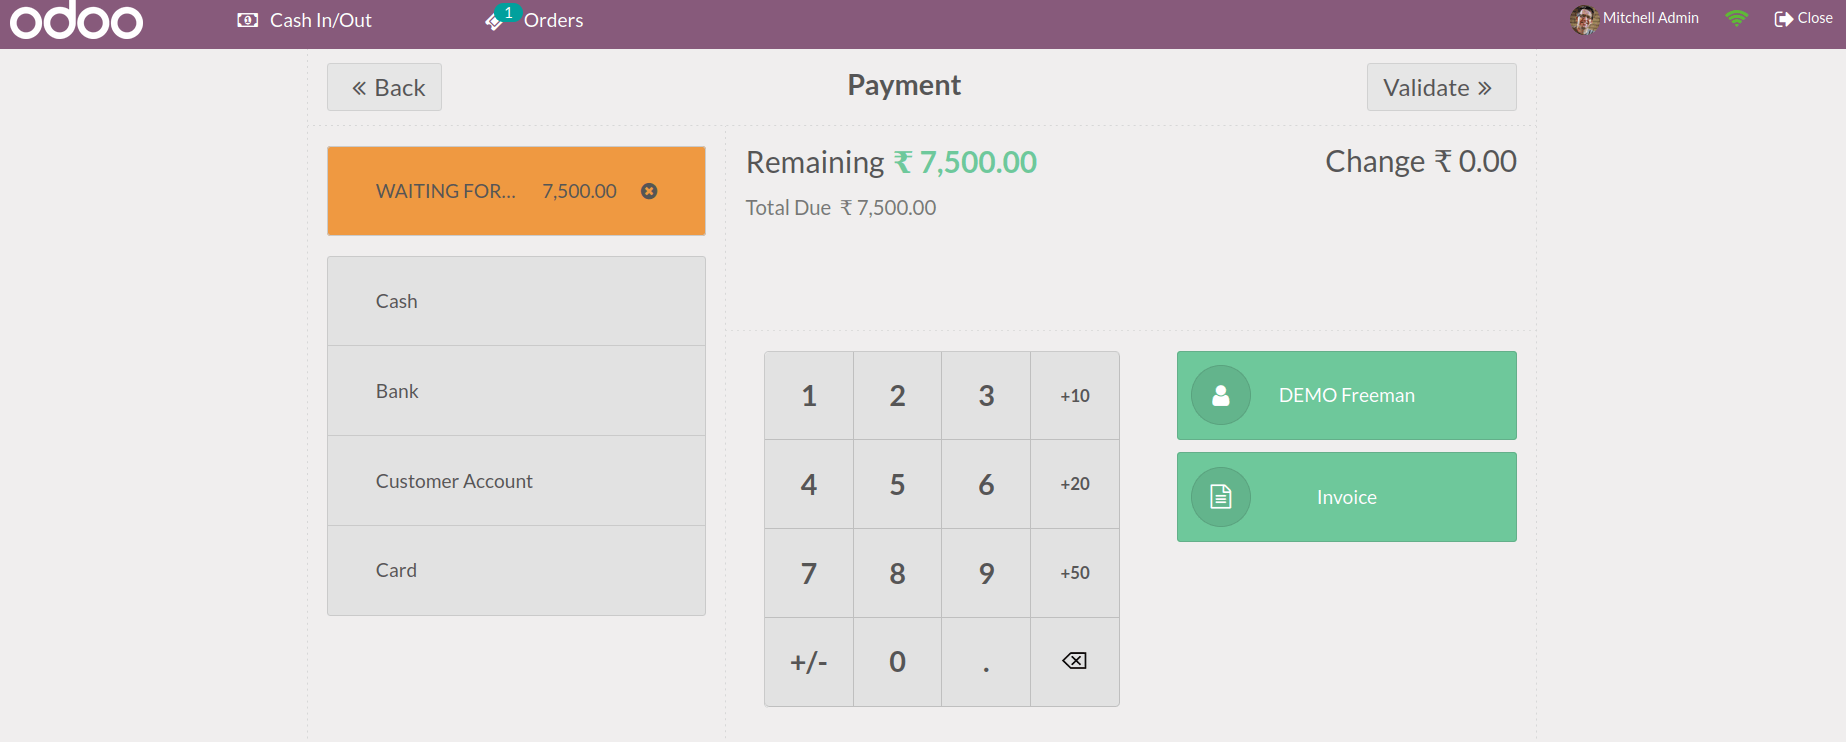 This mode of payment requires the use of a terminal. Let's look at the Cash In/Out option and see how it's used. Choose that option.
 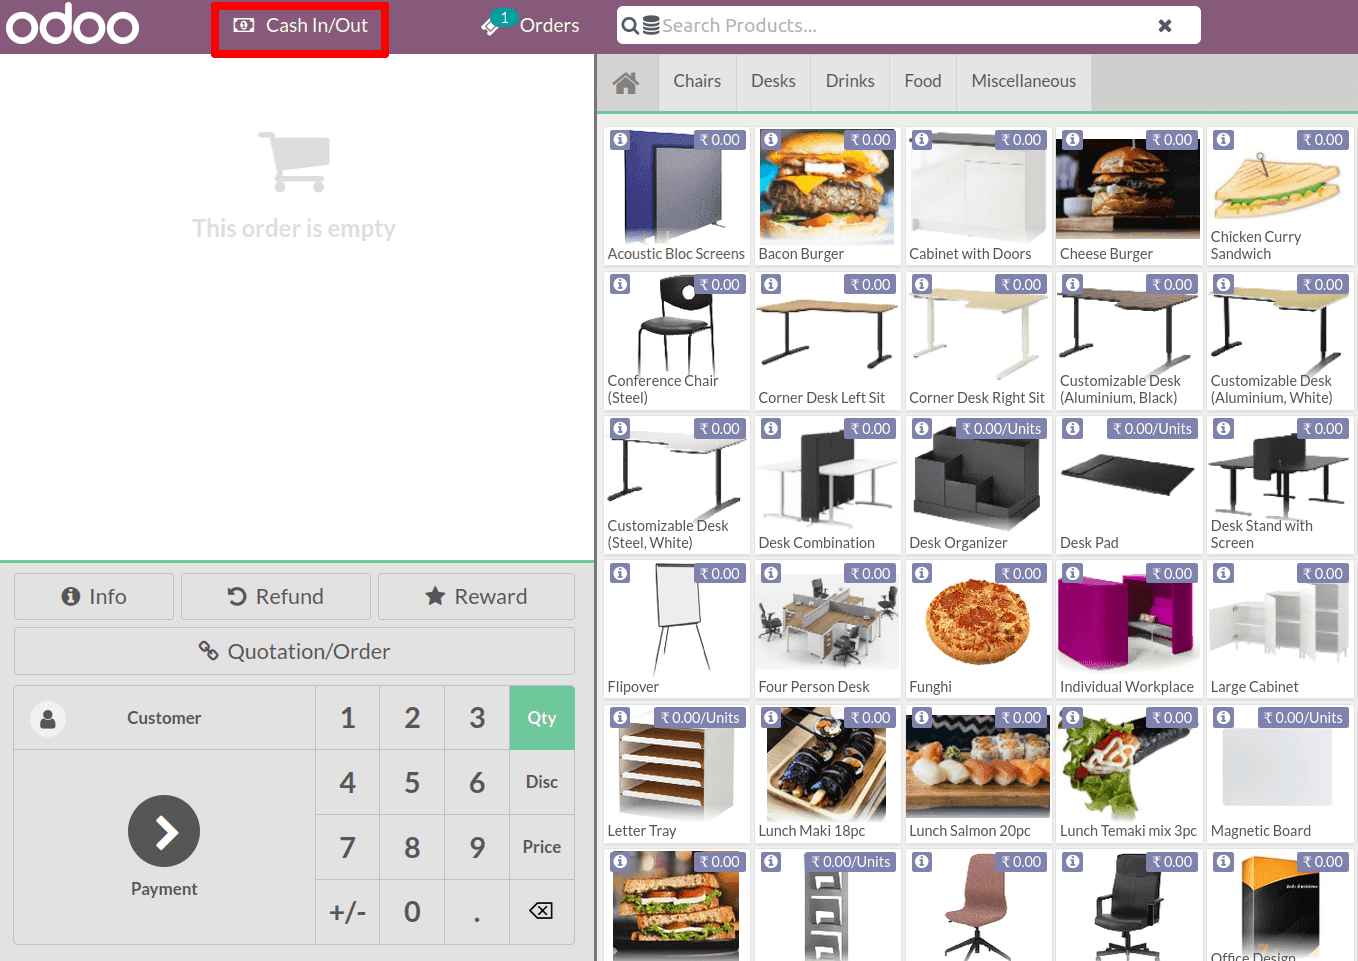 Many employees work in a shop. They may have ongoing expenses such as lunch transportation, and thus there may be opportunities to temporarily take money from the cash counter and return it before nightfall.
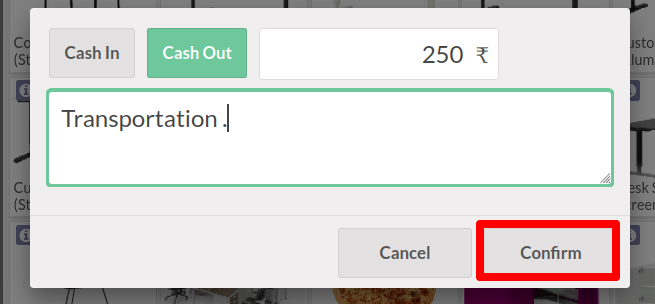
We can use the Cash In / Out option for such situations. 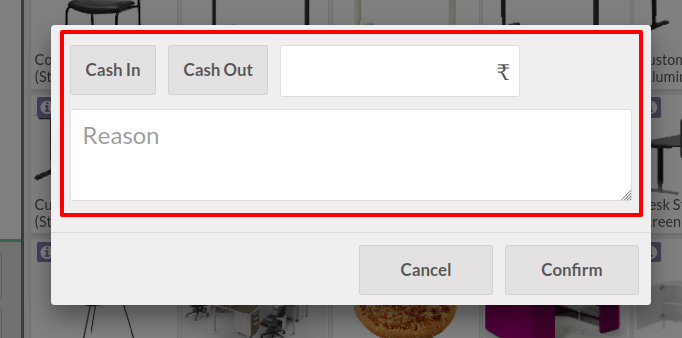 Assume that an employee withdraws $250 from the cash register to cover his transportation expenses. As, a result, select the Cash Out option, as the cash will be taken from the counter. Include the amount as well as the reason.
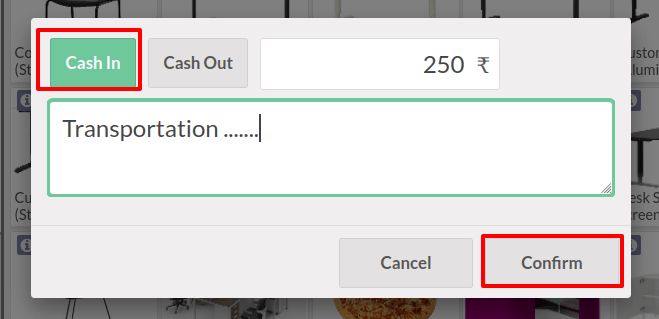
  After a while, he returns the money. To do so, select Cash In / Out once more. The small window appears once more. From there, select the Cash In option. Include the amount as well as the cause. It is confirmed.
  We can end the session once all orders have been processed. To do so, go to the right side of the screen and select the Close option.
  After that, a new window displays. From there, we get all of the order data, including the start and end times.
We collect total orders, payments, and cash in and cash out details from the closing control panel. We created orders in 13999 and only paid the amount of 13000.
We paid the remaining 999 as a customer account payment, shown in the Receivable account. The entire amount for each payment method is displayed separately here. The opening balance will be updated if any opening balance is added at the session's start time.
In the cash column, enter the amount that was counted.
It is also possible to include any notes. Check the box below to get the payment difference and record the profit and loss entry. 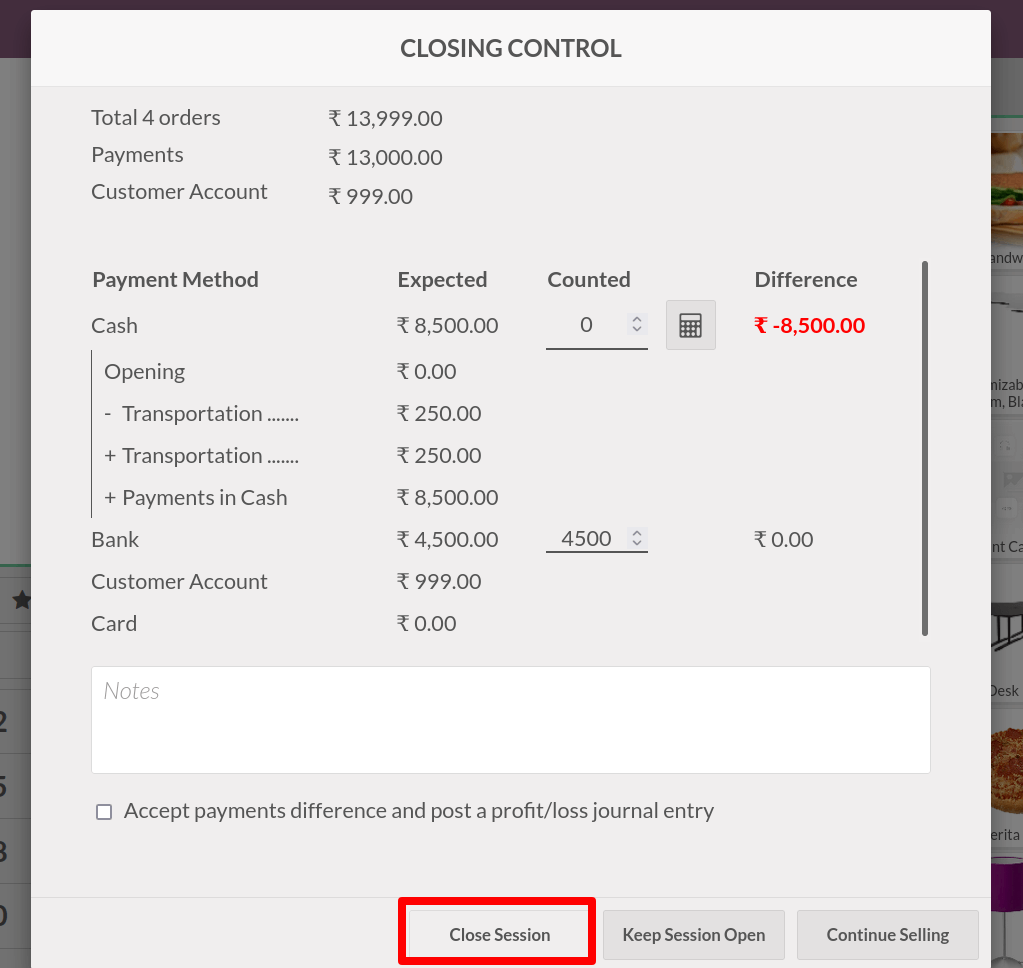 We can then choose whether to close the session or keep it open. If we receive any new orders, we will continue selling. Go to the bottom of the page to select one of these options. There are three alternatives available. Close the session, keep it open, and keep selling. We can close the session once all orders have been cleared.
We return to the back end following the closing session. There, we may view the DEMO SHOP session. The Last Closing Date and the Last Closing Cash Balance can also be found there.  From the Orders page, we can see all the orders created, orders made, payments that have been made, and customers.
  We can see the orders we created before and the total amount from the orders tab. Includes order number, POS session, date, receipt number, customer, employee, status, etc.

When I checked the status of the orders I created, two of them were in the Invoiced stage, and two were in the Posted stage because we only made invoices for two orders. Here's a Demo customer-made payment with the Customer Account payment mechanism.
We explained that the situation is similar to that of a credit card because the user has not paid the balance so that the transaction can be seen in the Partner Ledger. As a result, go to the Accounting module, select the Reporting tab, and select Partner Ledger from the drop-down list.
: Accounting > Reporting > Partner Ledger An amount of 999 is debited here. We can see that a balance of 999 has not been paid. The customer can settle this amount, set up, reopen the session, and select the specific customer from the list. We can see that there is a balance due there. The sum payable for the Demo customer is 999.
 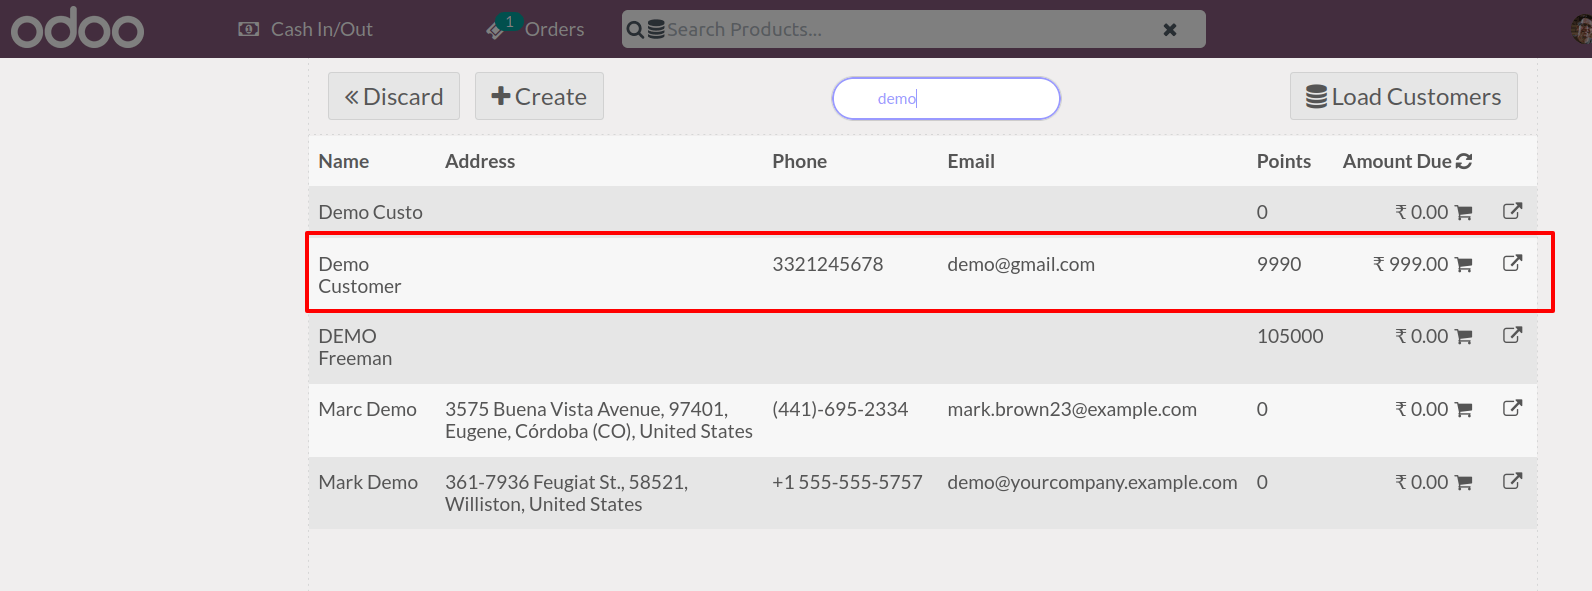 We'll be able to pay the balance from there. Near the amount, click the “Add to cart sign.” There is a small window that appears. The payment method can then be selected.
 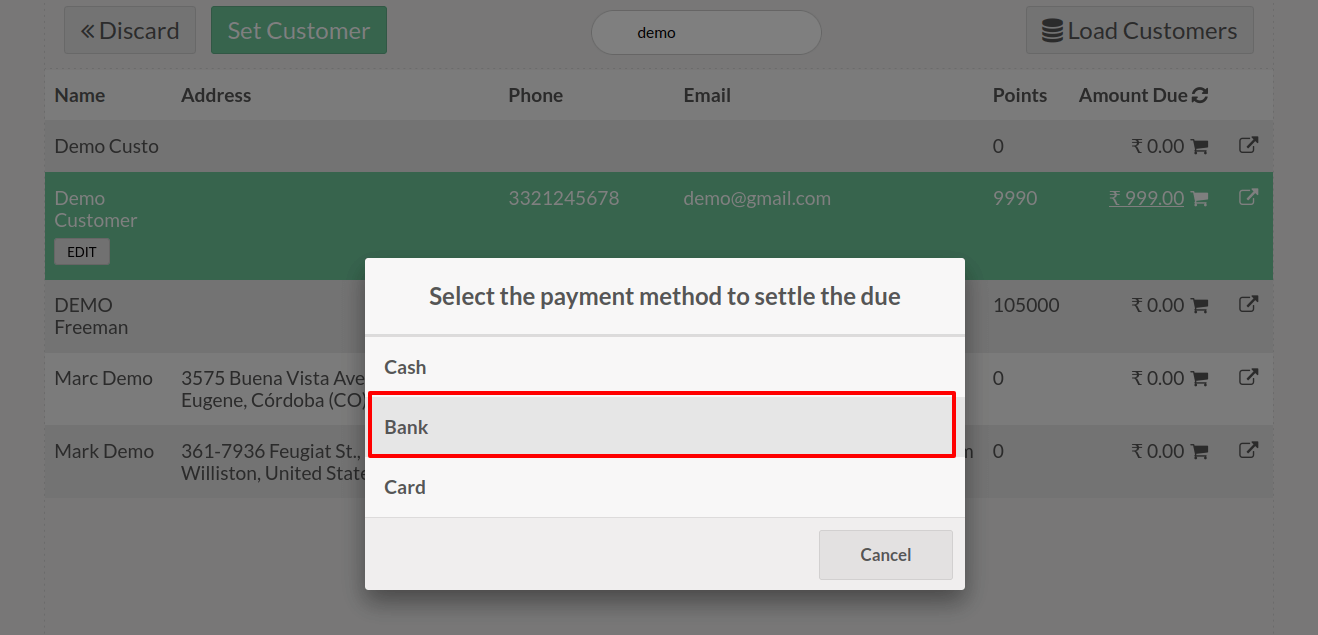 Then there's another window, which we stated previously. The payment will then be validated.
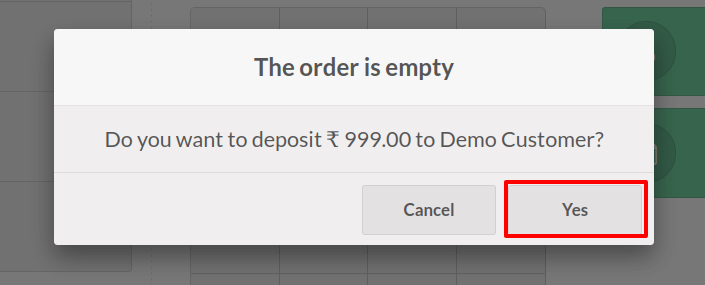
 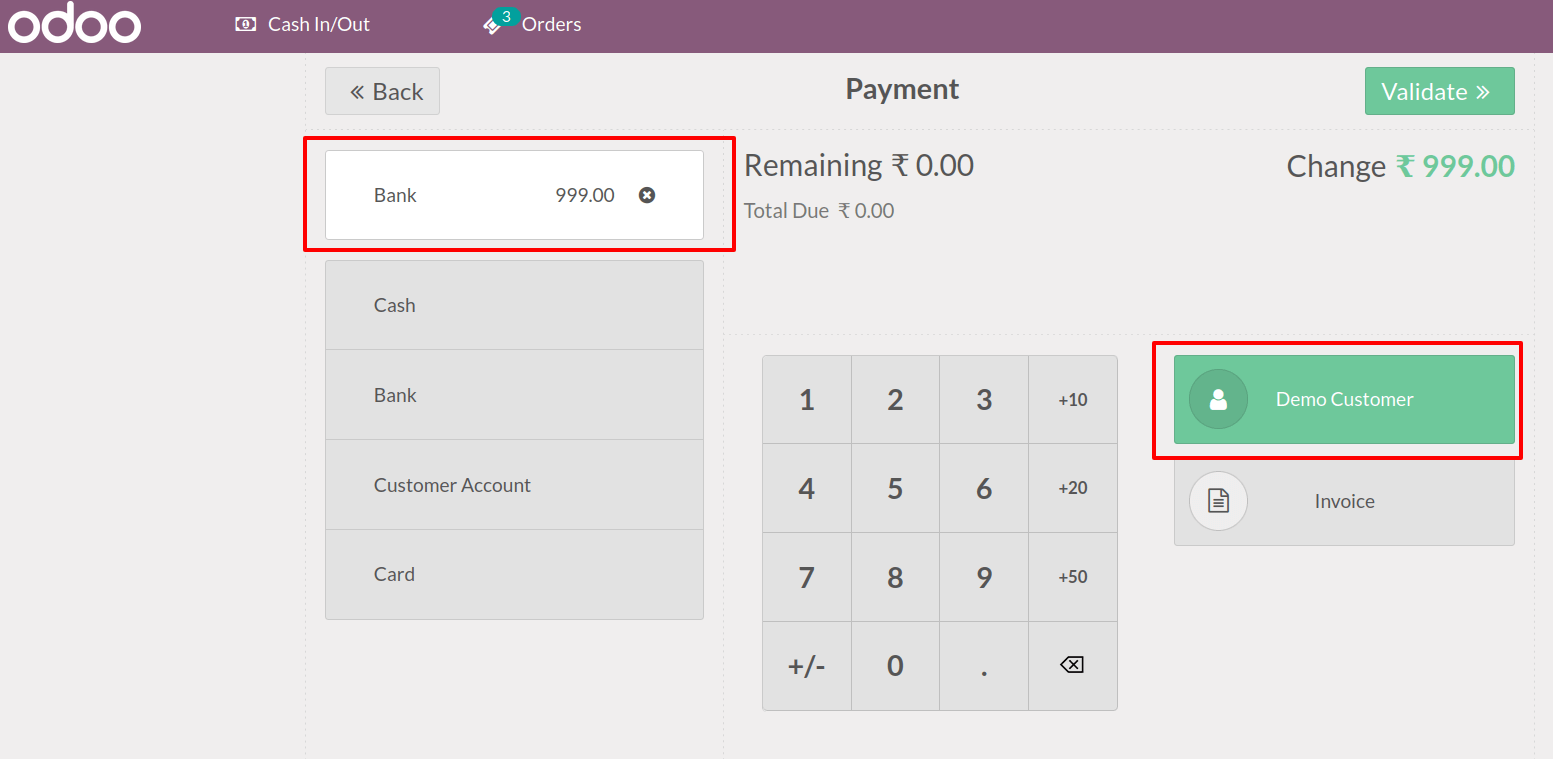 A pop-up notice will occur during validation. We don't add any products. After all, the order is empty, ensuring that payment is made. Yes is the best option.
  Let's have a look at the partner ledger now. To do so, go to the accounting module's reporting tab and select the partner ledger. Choose our customer from there.
 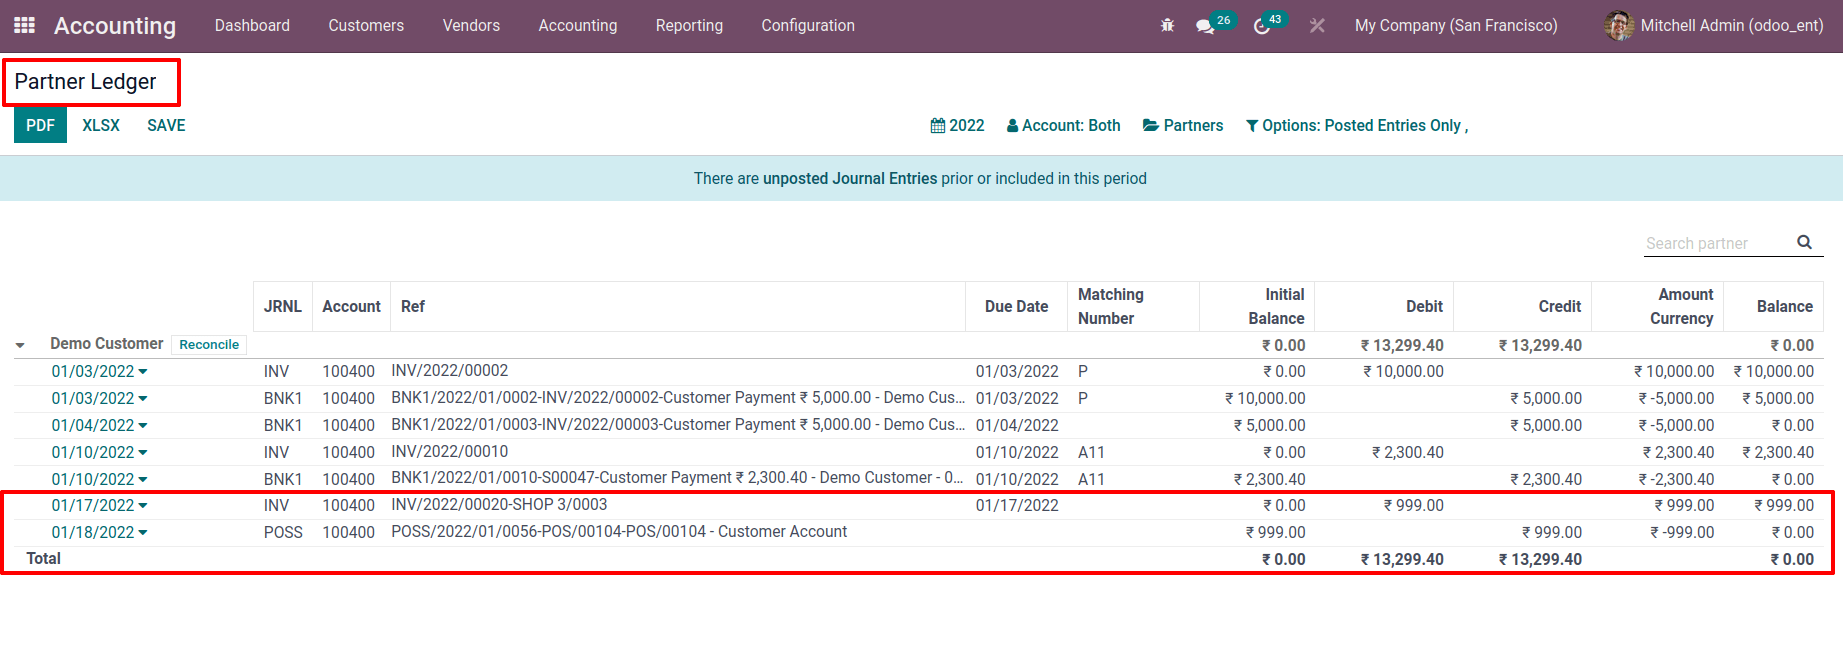 We can see that 999 has been credited to the account, and the balance is now zero. That's all there is to it when it comes to payment methods. This blog examined several payment mechanisms and how they function in Point of Sale sessions.