Customer service is an essential part of all types of businesses and services. Odoo has combined its various elements into a comprehensive platform called Field Services, which assists in managing the end-to-end process of a task or service. Users can easily create and manage the services that have been assigned to them. This package is primarily intended to handle onsite services such as repairs, installations, construction, and a variety of other services, for both homes and businesses.
The user is able to manage every aspect of the assigned task, from planning to implementation, and they can also assess the effectiveness of their services. This can, among other things, help them enhance their services, promote business performance, and boost customer dependability.
The field service platform facilitates the management and processing of various tasks and services, such as
1. Creating New services/tasks
2. Scheduling an appointment with the service provider
3. Assigning tasks to employees, teams etc
4. Planning the tasks
5. Tracking time
6. Tracking locations
7. Sell products
8. Worksheet management
9. Invoicing for the particular services
10. Providing quotations
11. Digital Signatures
Odoo Apps integration
The field service software system is already integrated with other Odoo applications such as,
* Project: With the aid of customized worksheet templates, tasks can be arranged as multiple projects.
* Sales: Manage sales and Create quotations, products can be added to the task. Create customized quotations according to the tasks and services
* Invoicing: Create customized invoices and keep track of every customer interactions
* Timesheet: Create and analyze the time-based work reports with the use of timesheets.
Let's check the process of assigning a task by taking a Field Service application from the Odoo 16 platform.
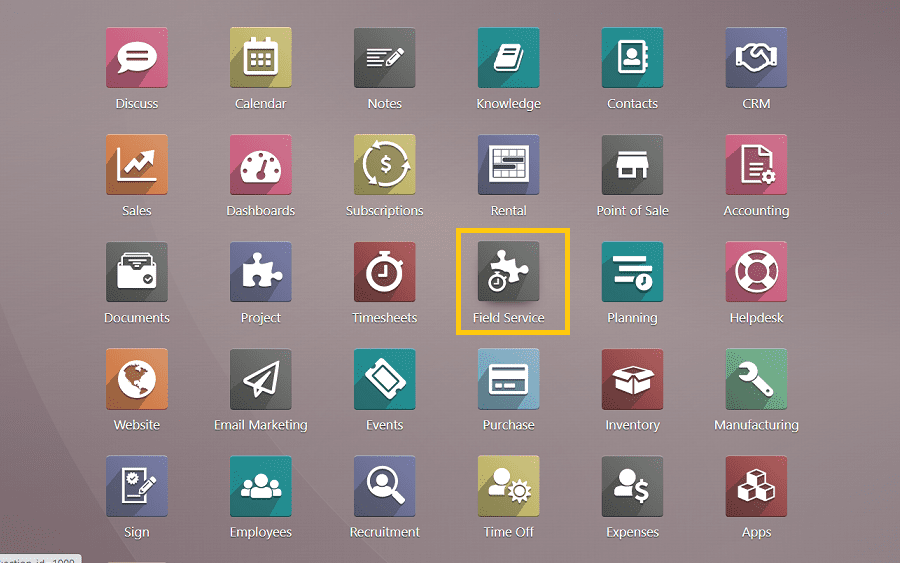
You will enter a page where various tasks are arranged as multiple projects on the basis of date, as shown in the below snapshot.
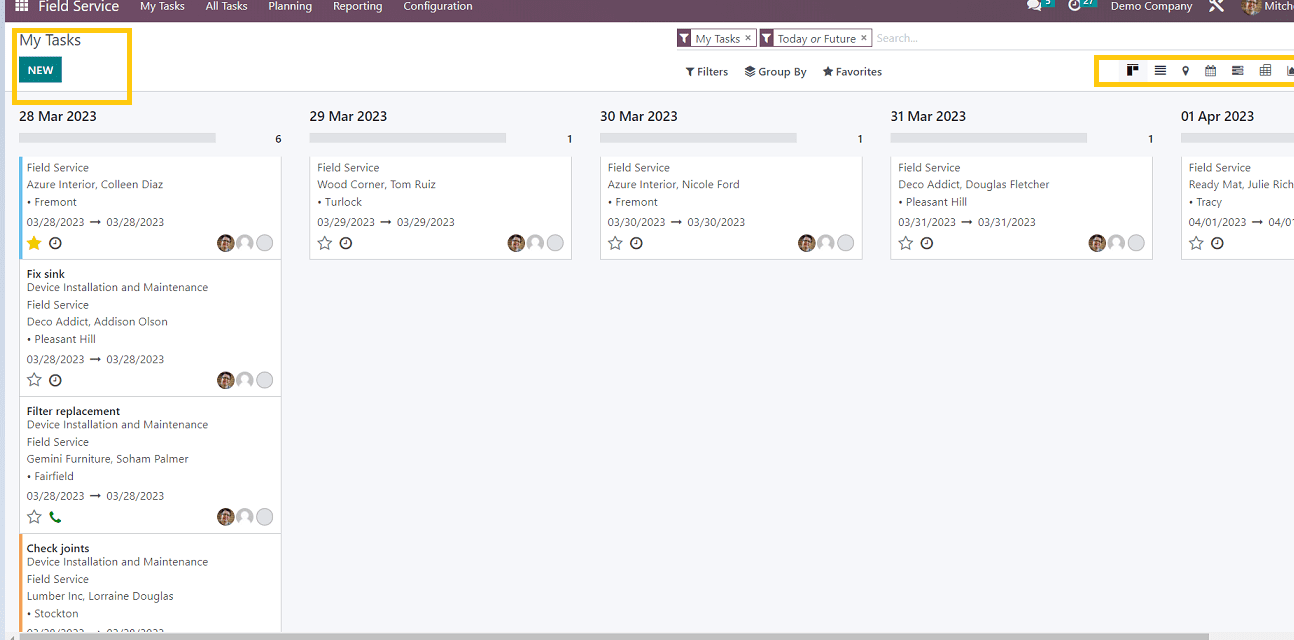
Users can switch from this Kanban view to other views by clicking on the visualization buttons in the top right corner of the page, which include list view, calendar view, gantt chart view, pivot view, and so on. We can also create new tasks by clicking on the "New" button in the upper left corner, as shown in the screenshot above.
Now, let's check the process of assigning a newly created task to an employee or team.
We can start by selecting the “All Tasks” menu from the field service application, as shown in the below picture.
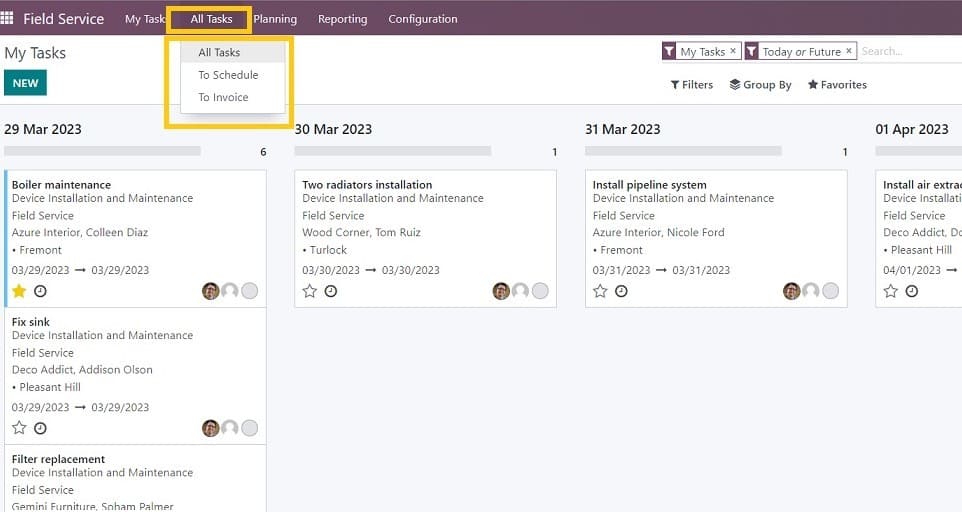
This menu contains 3 options as
1. All Tasks
2. To Schedule
3. To Invoice
All Tasks Menu
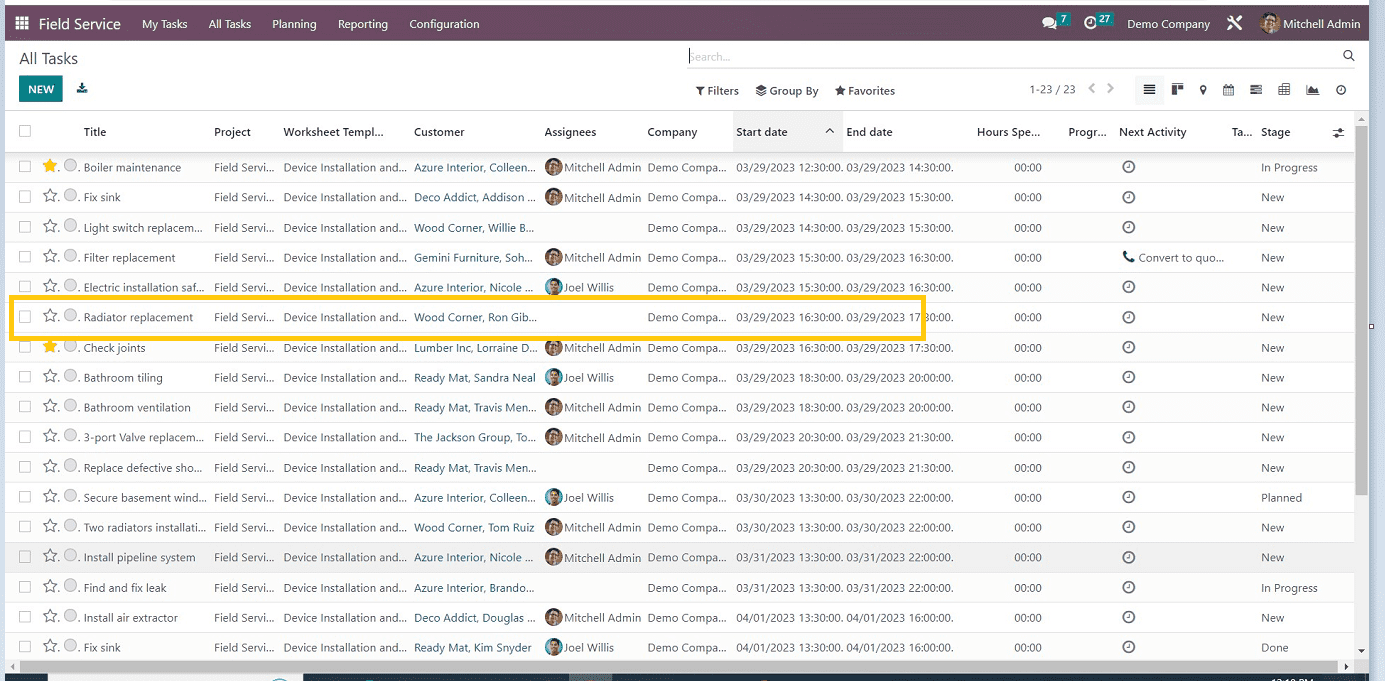
After entering this menu, we can see the list of all assigned and created tasks, as shown in the below screenshot.
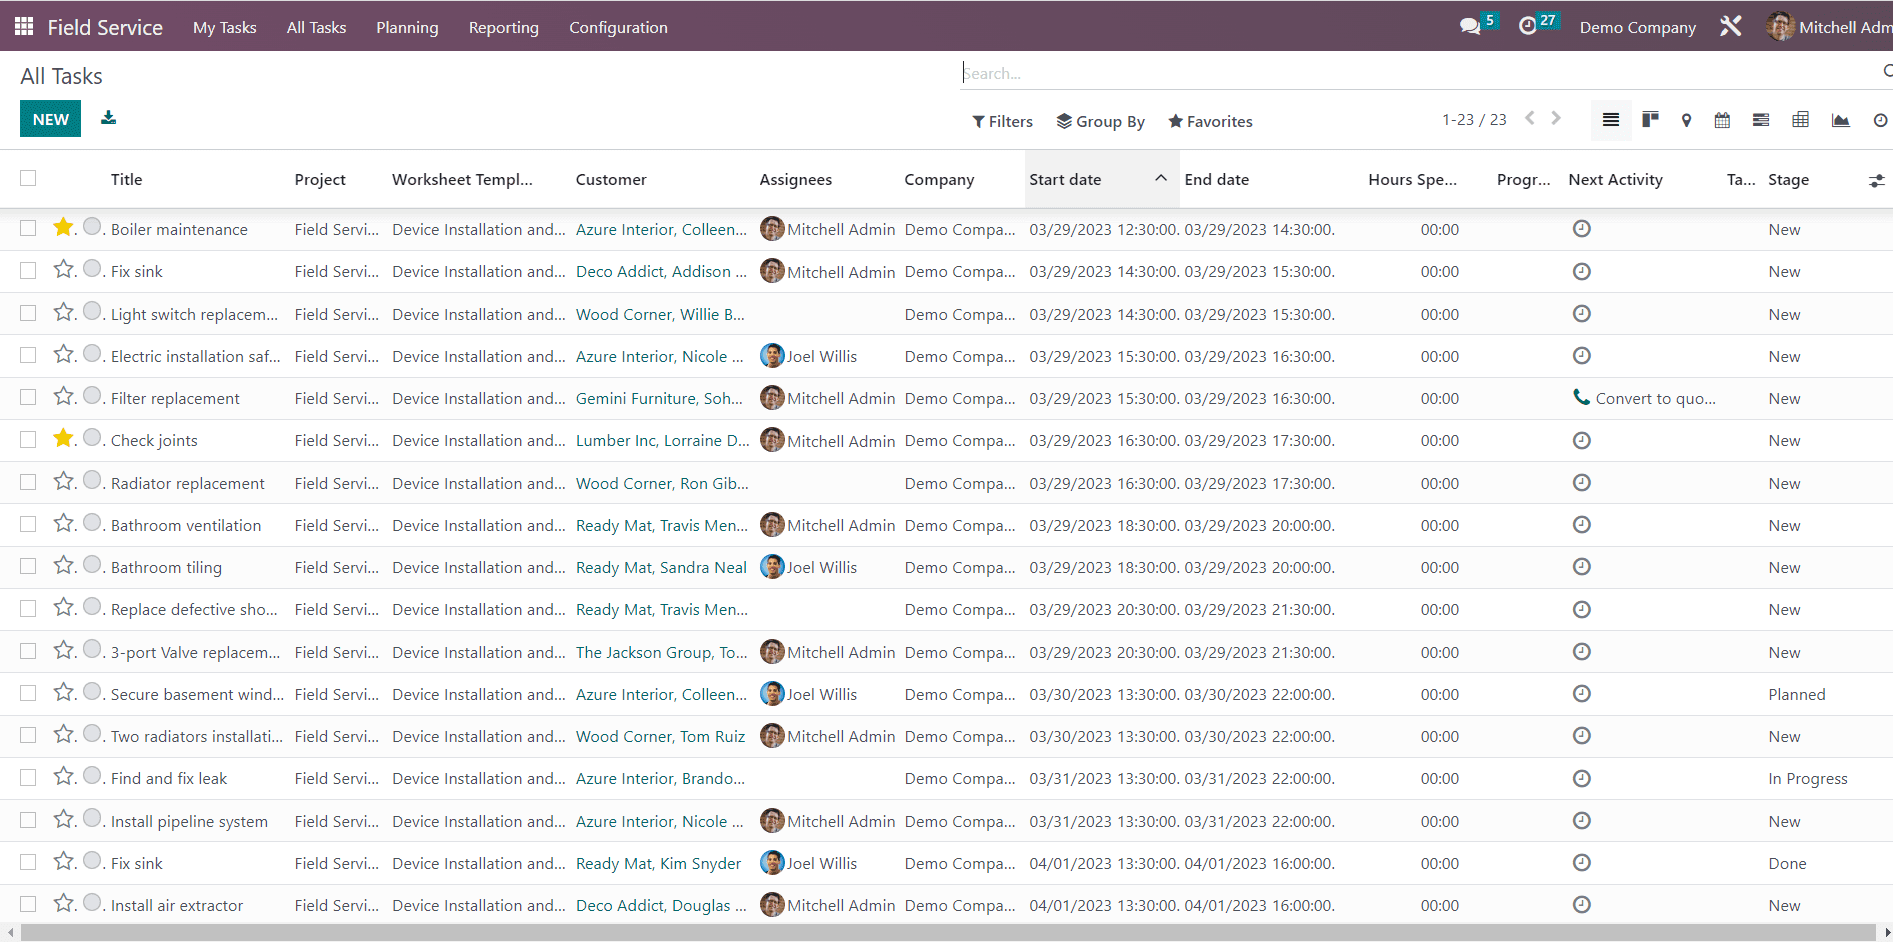
From the above screenshot, we can see the list, status,status and other details regarding each task. It will be very useful for users to understand and manage their tasks. We can check the details of newly created tasks by clicking on them. It will open a new form view, as shown below.
From here, users can change the status of their task and also manage various other functions.
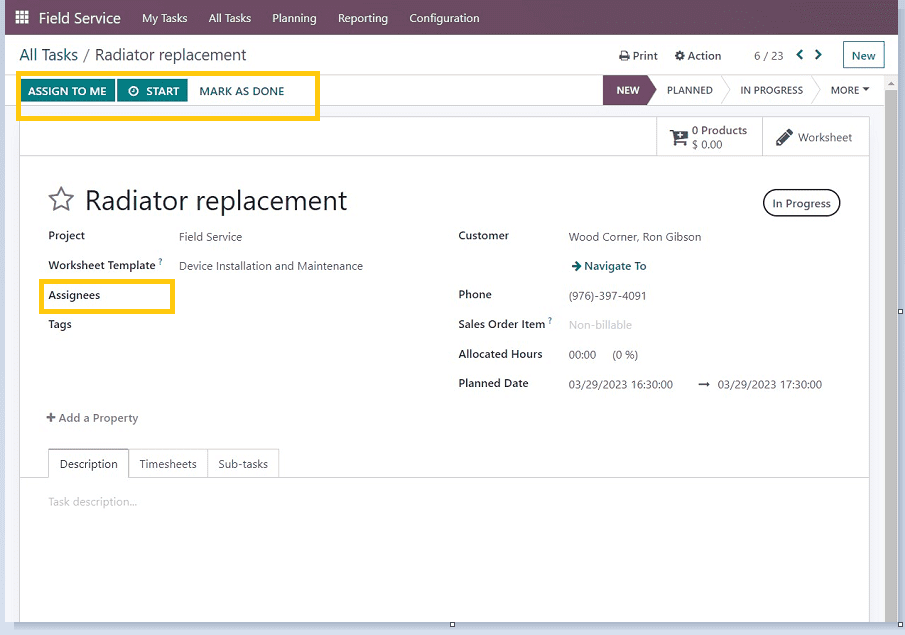
We can assign the task to employees or teams using the above view, but it is also possible to assign the task to the user itself. To assign the task to other employees, click on the "Assignees" option so we can add the employee names from the previous employee names that are already created from the drop-down list.
To assign the task for the user itself, click on the “Assign to Me” button so the particular task will be assigned to yourself, and it will show your total number of assigned tasks as shown in the below screenshot.
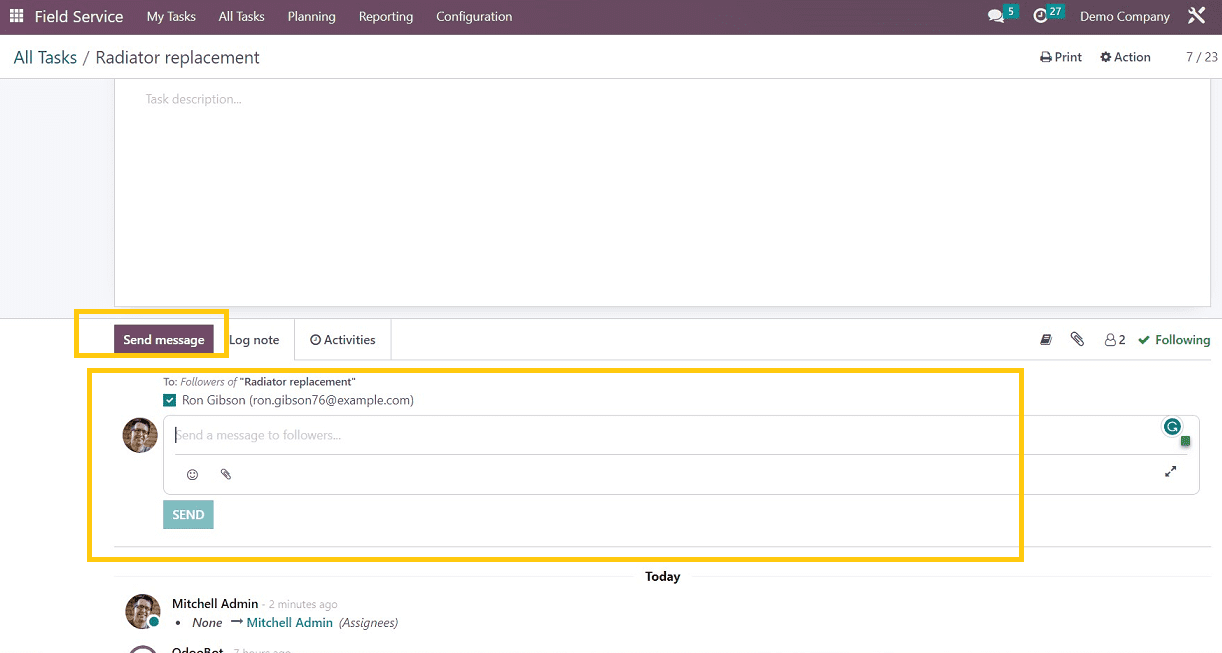
After assigning, users can send messages to assignees about the task by clicking on the “Send” button, which will open a mailbox option where the user can type the message to the employees regarding the task assigned to them. After confirming the message, click the “Send” button as depicted in the below screenshot.
Once the assignment process is complete, we can set up the timer option as per the urgency of the task and customer requirements. This can be done by pressing the “Start” timer button from the upper left corner of the form view, as shown in the below screenshot.
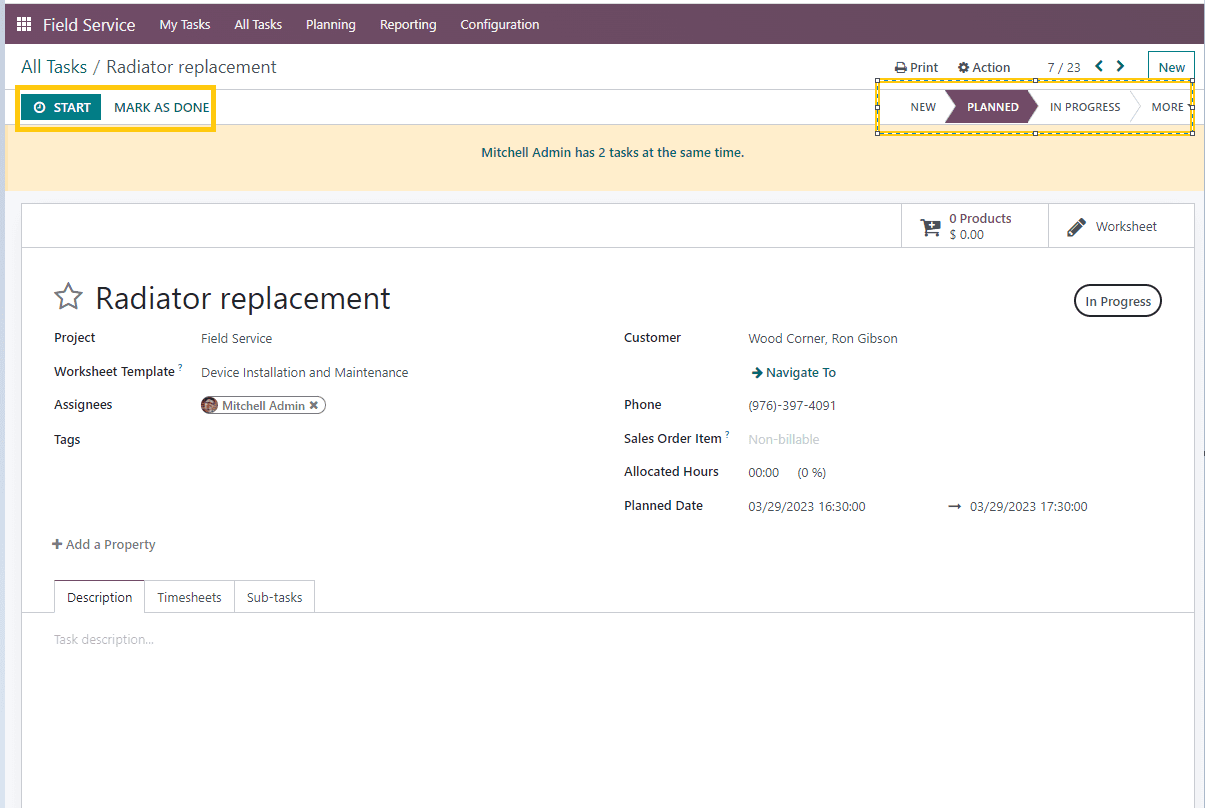
The timer will be started until the particular task is completed, and it is also possible to pause the timer according to the conditions.
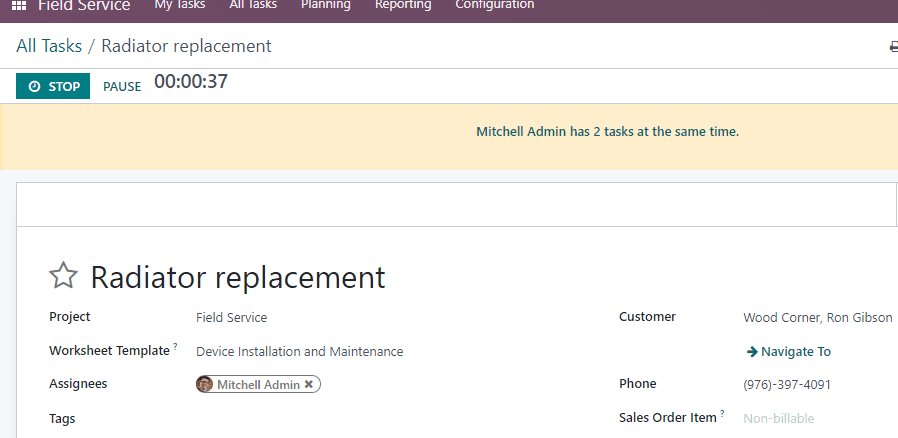
Once the employee has finished the assigned task, we can stop the timer by selecting the "Stop" timer option. This will open a pop-up window, as shown below.
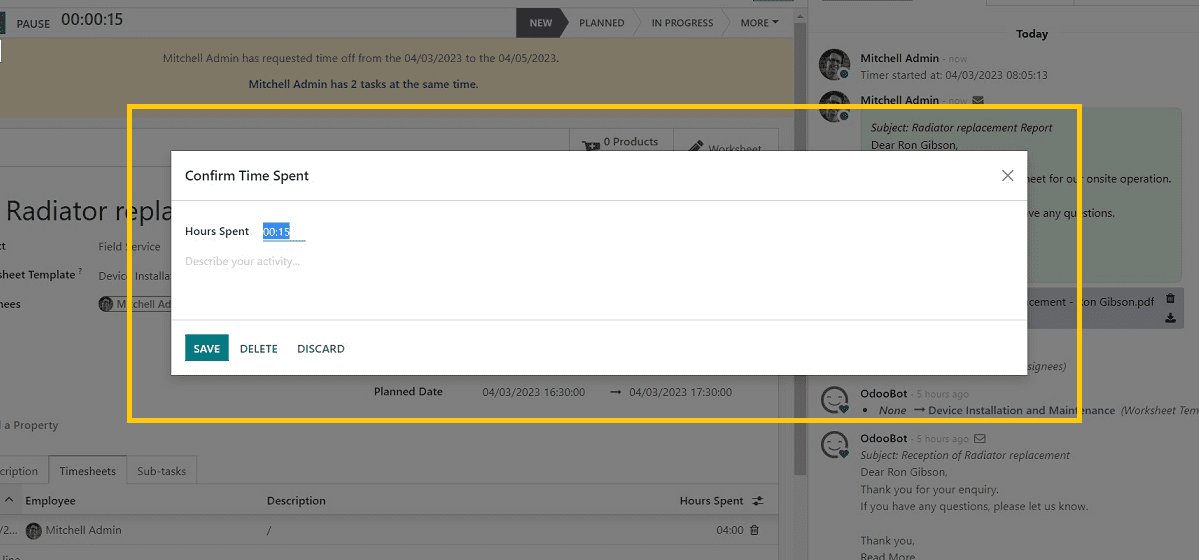
Here, we can edit the time like delete, discard the changes, save the time and provide any description regarding the task, time spended on the particular task etc.
After saving the time details, users can sign the work report and mark it as done using the upcoming form view, as shown below.
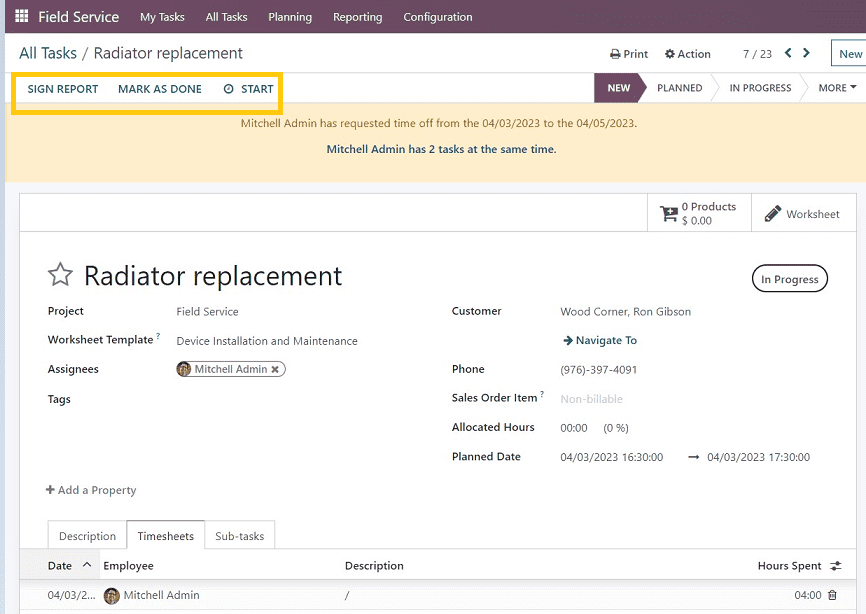
Once we have clicked on the “marked as done” button, we can create an invoice for the particular task by clicking on the “Create Invoice” button from the next page.
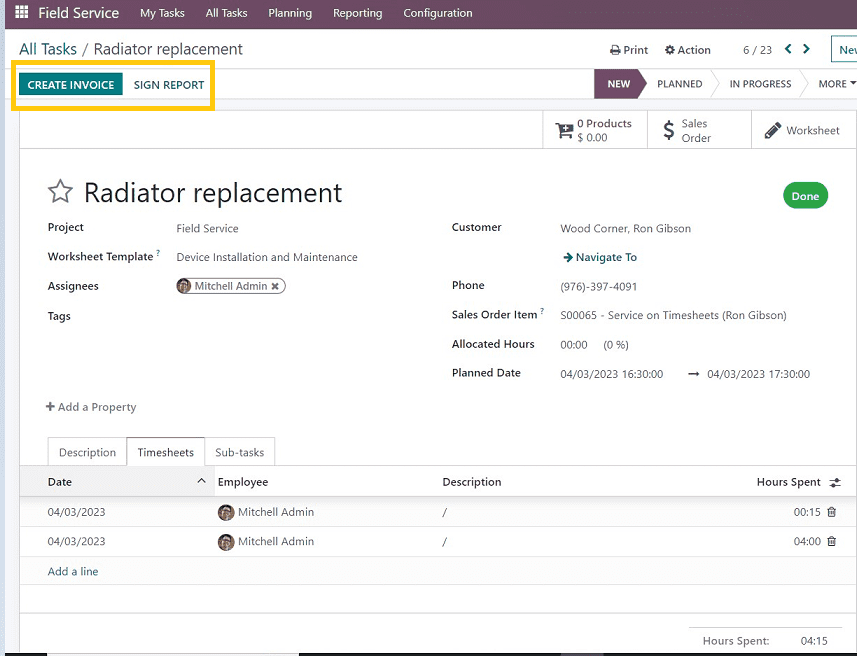
The upcoming steps are an inevitable part of task management, such as creating invoices, generating payments, etc. After clicking on the Create Invoice” button, we can create the invoice by editing customized invoices using the form view shown below.
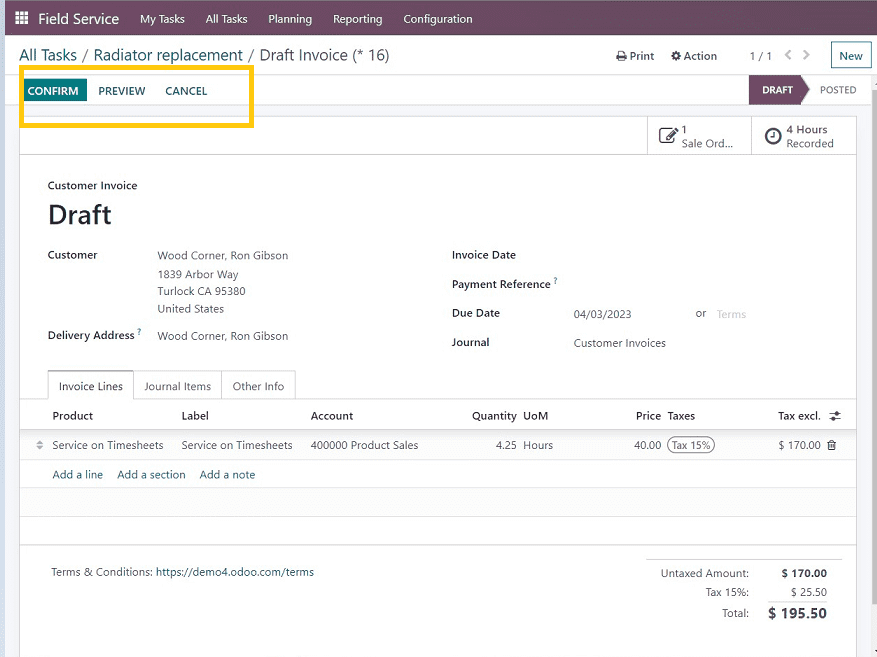
This draft allows users to add lines for additional services or goods. The customers can easily ensure that their payments for the services and products are accurate because the taxes associated with those specific services or products will also be added automatically in accordance with business standards.
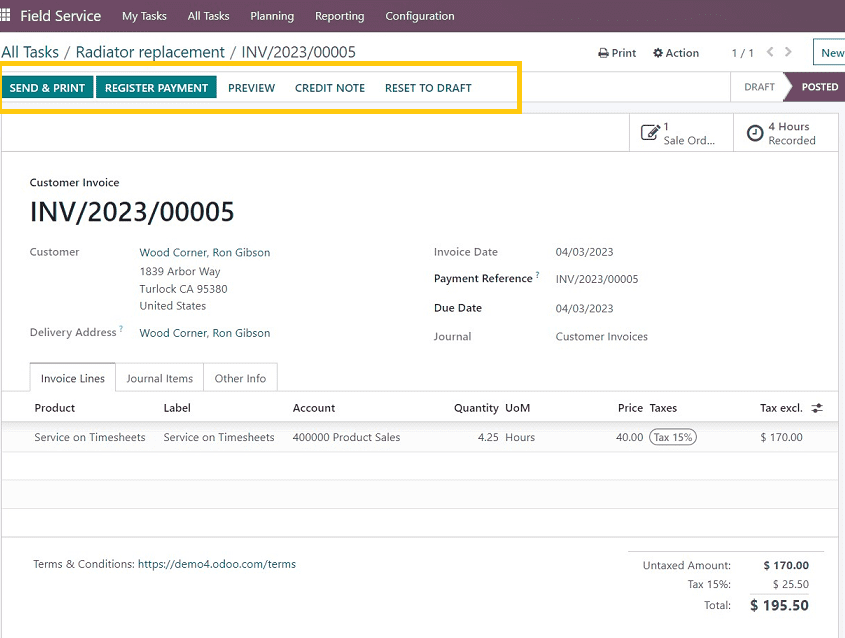
Once the invoicing process is complete, the “Register Payment” option can be used to process the payment through the page, as shown in the screenshot above. A green ribbon will appear on the task page to denote the task is complete and payment has been processed, as depicted below.
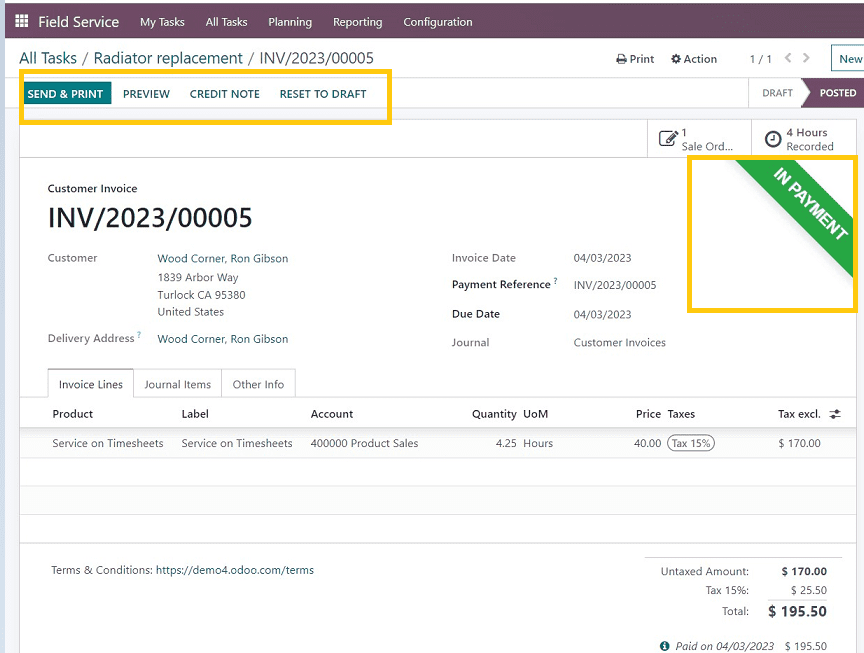
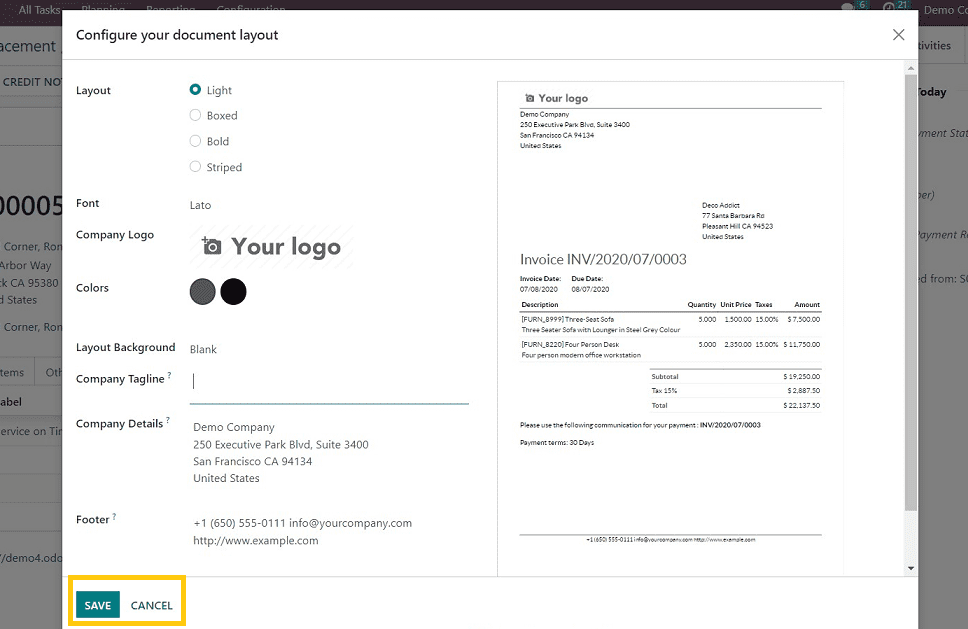
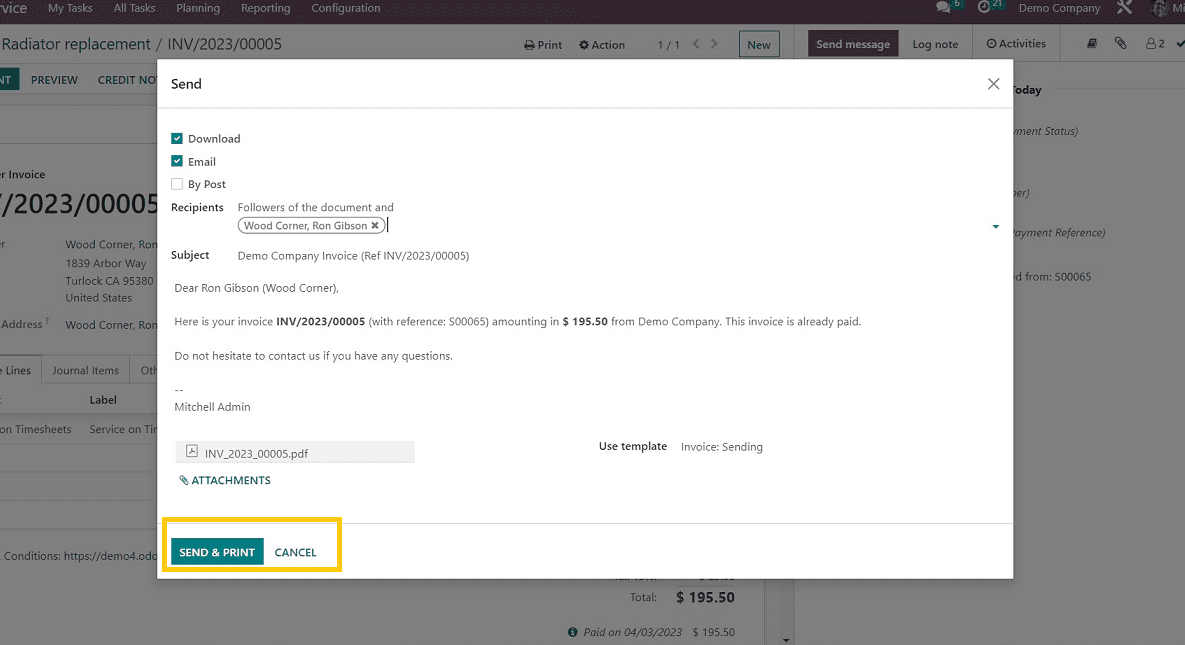
Once the payment has been processed, we can send the invoice details by mail and also print the invoice by using the “Send & Print” button from the form menu, which will lead into an invoice print template page from there. Users can edit the invoice format, such as the layout and font format, add a company logo, a company tagline, company details, etc., and save the details.
A popup window appears on the screen to compose the email body, as shown below.
Once the procedure is finished, the tasks section list, as shown above, will show a green tick indicating that our task has been finished, letting us know that its status is complete.
The process of assigning different tasks to employees, managing timesheets, tracking time, etc., is covered in this blog. Every type of business organization can easily complete these tasks, and the platform provides minute details about the task that might be overlooked if done manually.