Odoo, a powerful open-source ERP and business management software, provides the flexibility to customize and extend its functionality through custom modules. One essential aspect of custom module development is the ability to add a settings menu, allowing users to configure various options according to their specific requirements. In this blog post, we will explore the step-by-step process of adding a settings menu for custom modules in Odoo 16, enabling users to personalize their module settings with ease.
First of all, we need to create a custom module, we need to define a configuration model that will hold the settings for our custom module. This model will inherit from the res.config.settings class provided by Odoo. Open your module's main Python file and add the following code:
class ResConfigSettings(models.TransientModel):
   _inherit = 'res.config.settings'
   contract_type = fields.Selection(
       [('monthly', 'Monthly'), ('half_yearly', '6 Months'),
        ('yearly', 'Yearly')],
       string="Contract Type",
       config_parameter='employee_contract.contract_type',
       help="Select contract types from the selection field")
The code mentioned above will pick the employee contract type by adding a new field to the res.config.settings. The config_parameter is a global model that can be accessed from anywhere in the Odoo system, and the feature allows you to store and retrieve configuration parameters in the database. We are unable to save the field with the chosen data without utilizing the config_parameter property in fields. After saving the record, it will be clear if you've selected or added data to the field. Since employee_contract is the module name and contract_type is the field name in the above field declaration, the config_parameter becomes "employee_contract.contract_type"
After inheriting the res.config.settings, we have to create a view for our new module. For that add the below code for xml.
<record id="res_config_settings_view_form" model="ir.ui.view">
   <field name="name">
       res.config.settings.view.form.inherit.employee_contract
   </field>
   <field name="model">res.config.settings</field>
   <field name="priority" eval="15"/>
   <field name="inherit_id" ref="base.res_config_settings_view_form"/>
   <field name="arch" type="xml">
       <xpath expr="//div[hasclass('settings')]" position="inside">
           <div class="app_settings_block"
                data-string="Employee Management"
                string="Employee Management"
                data-key="employee_contract">
               <h2>Employee Management</h2>
               <div class="row mt16 o_settings_container">
                   <div class="col-12 col-lg-6 o_setting_box">
                       <div class="o_setting_left_pane"/>
                       <div class="o_setting_right_pane">
                           <span class="o_form_label">Contract Type</span>
                           <div class="text-muted content-group mt16">
                               <field name="contract_type"/>
                           </div>
                       </div>
                   </div>
               </div>
           </div>
       </xpath>
   </field>
</record>
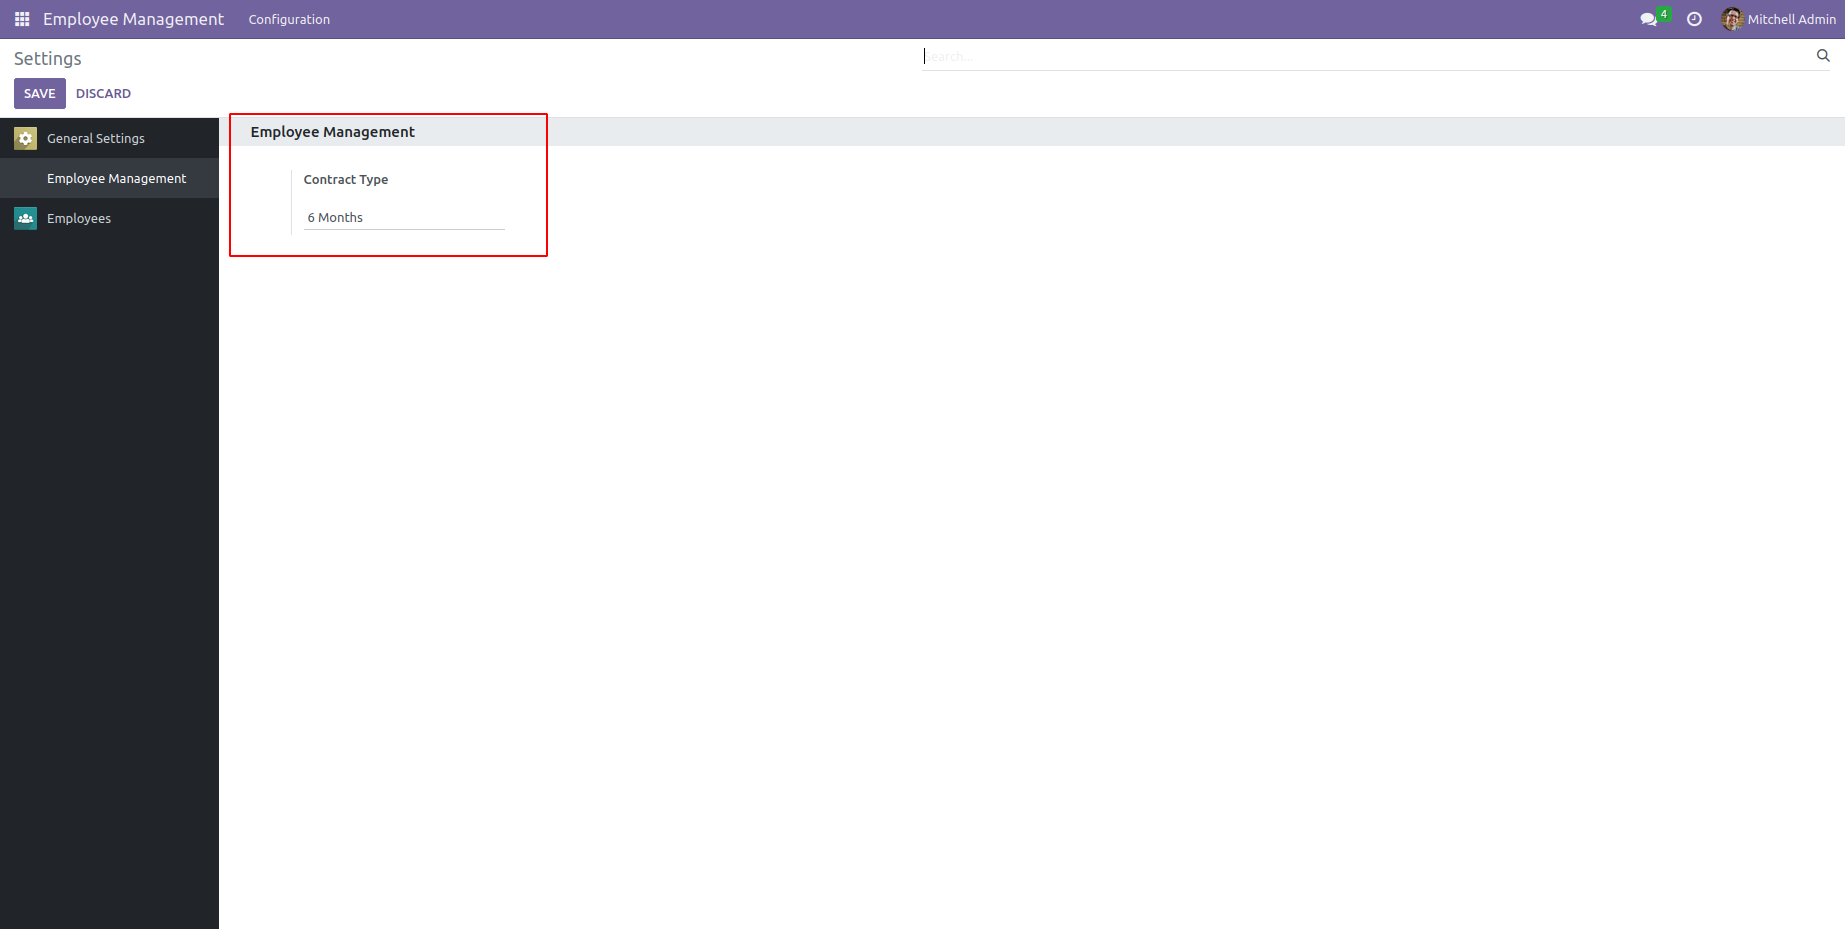
The above XML code will create a new session in the settings and add the new field to the configuration settings. And the new <div> element is added to the base view. It contains a section for "Employee Management" settings with a header, and it has the attribute "data-key" set to "employee_contract”. The <span> element with the class "o_form_label" displays the label "Contract Type."
This <div> element contains a form field displaying the value of the "contract_type" field. The field tag is used to display a field value or allow users to input data in the form.
Next, add ir.actions.act.window model, it represents a window action and defines the behavior of the menu item.
<record id="res_config_settings_action"
       model="ir.actions.act_window">
   <field name="name">Configuration</field>
   <field name="type">ir.actions.act_window</field>
   <field name="res_model">res.config.settings</field>
   <field name="view_mode">form</field>
   <field name="target">inline</field>
   <field name="context">{'module' : 'employee_contract'}</field>
</record>
The context field is used to pass additional context data to the action window with the ID "res_config_settings_action". The context data is specified as a dictionary with a single key-value pair. The ‘module’ is the context variable (key) being set and ‘employee_contract’ is the value assigned to the context variable. It indicates that the context variable ‘module’ is assigned the value ‘employee_contract’.
The menu items provide a way to navigate and access different views and actions within a custom module.
<menuitem id="employee_management_menu_root"
         name="Employee Management"
         sequence="1"/>
<menuitem id="employee_management_menu_action"
         name="Configuration"
         parent="employee_contract.employee_management_menu_root"
         sequence="6"/>
<menuitem id="employee_contract_settings_menu_action"
         name="Settings"
         parent="employee_contract.employee_management_menu_action"
         action="res_config_settings_action"
         sequence="7"/>
The above code will add a configuration menu and a submenu of settings to the module. The window action is now added to the submenu. After these, we can execute the code and view the field values as a selection field with values on the user interface screen.

Configuring the above code will add a new settings menu to an Odoo module which is a straightforward process that involves defining appropriate XML code and Python code within your module. By following the step, you can effectively enhance the functionality and user experience of your Odoo module by providing users with a dedicated settings menu for configuring module-specific options.
To read more about adding custom fields to existing configuration settings in Odoo 16, refer to our blog How to Add Custom Fields to Existing Configuration Settings in Odoo 16