Using their mobile banking apps, consumers may rapidly begin payments by scanning the barcodes on invoices provided by Odoo 17. This improves payment procedures and reduces the risk of typing errors, which can cause random payment issues. QR codes provide quick and accurate information about an invoice in an e-invoicing system, eliminating the need for external sources. Odoo simplifies business operations by introducing advanced features that can be easily accessed in modules. One such feature is the addition of payment QR codes on invoices. This helps prevent errors in invoices with wrong account information or payment descriptions, saving customers time and allowing them to pay their bills quickly. When enabled and set up in the Accounting module, Odoo enables users to append payment QR codes to invoices produced for clients in European nations where this functionality is available.
This blog post explains how to activate and configure the QR Code features in the Odoo Accounting module.
Configuring QR-Code to Invoices
Choose the Settings option from the Configuration menu in order to set up QR Codes in the Odoo 17 Accounting module. Activate QR Codes under the Customer Payments tab and click the Save button.

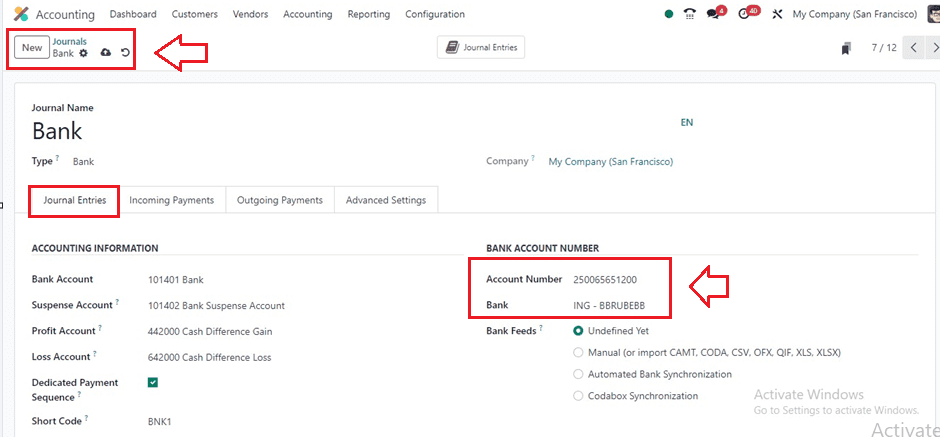
To add payment QR Codes to invoices for clients in various countries, ensure your bank account information is properly configured by going to the Accounting module, selecting the ‘Configuration’ menu, and then selecting the ‘Journal’ option and clicking on your bank journal.
You will get the dashboard of all the journals created inside the Accounting database with their respective Journal names, Type, Journal Groups, Short Code, and Default Accounts.
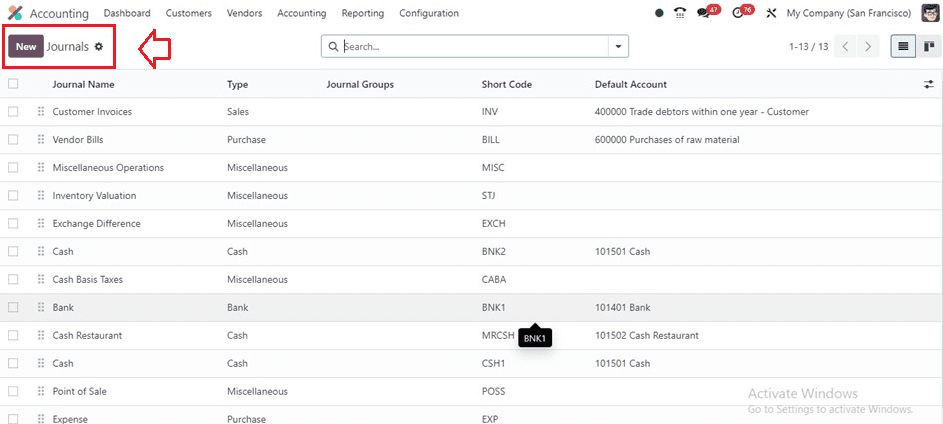
Then, you can choose an existing journal from the provided list view or create a new journal using the ‘New’ button. Here, I am choosing an existing journal named “Bank” and opening its configuration form. In your bank journal form, ensure that you include the ‘Bank’ and ‘Account Numbers’ in the specified fields as shown below.
Prepare a new invoice by choosing the Invoice option from the Customers menu in the Accounting module.
Creating an Invoice with a QR Code
To invoice a customer, navigate to the ‘Invoice’ option from the ‘Customers’ menu in the Accounting module. Your invoice dashboard will show you the following details: invoice number, customer, invoice date, due date, activities, tax excluded, total, total in currency, etc.
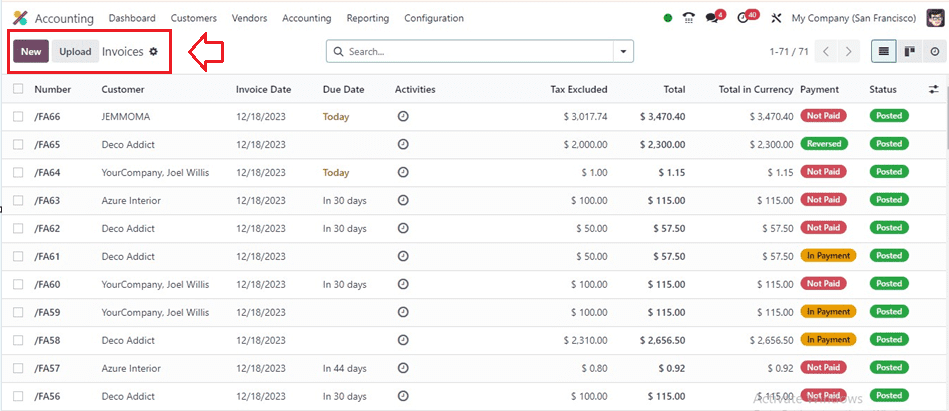
Proceed to generate a fresh invoice by selecting the 'New' option and filling out the relevant areas with the customer's name, delivery address, invoice date, payment reference, terms, and journal information.
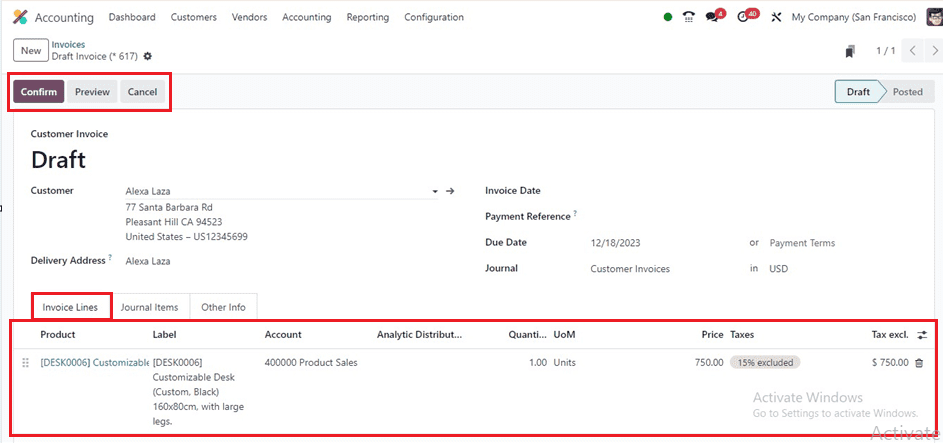
Utilize the ‘Add a Line’ button inside the ‘Invoice Lines’ tab section to add the invoice products. Choose the "Payment QR-Code" field in the "Other Info" page to choose the kind of QR Code that will be used to pay the invoice. Leave this field blank for the first available method.
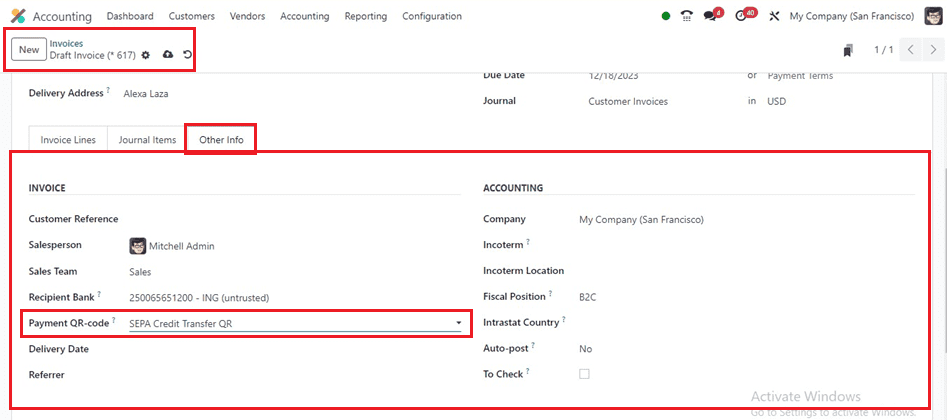
Then, provide the other form fields required for the invoicing purposes. Then, use the ‘Confirm’ button to validate the updated invoice after entering details. You will now see a ‘Preview’ button that takes you to the customer's perspective, which they will see via the customer portal.
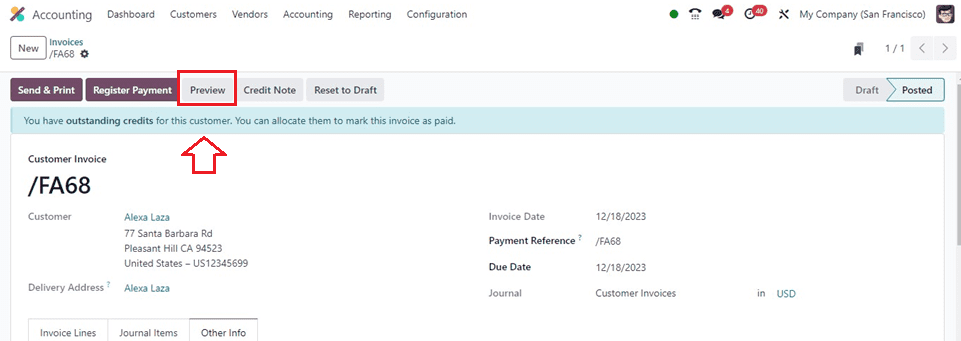
Hitting the ‘Preview’ button will open the preview with the QR codes.
The Odoo 17 Accounting module features an automatic QR Code on invoices, which customers can scan and complete payments using any banking application. The QR Code is also available for printing the invoice. This easy-to-use solution just takes a few minutes to configure and helps the client as well as the business. This feature is particularly beneficial for customers using the Print option.