Point-of-sale (POS) systems are essential for streamlining retail operations and enhancing customer experiences. Odoo, a comprehensive business application suite, provides a powerful POS solution for managing sales efficiently. As businesses grow, their needs evolve, and customization becomes necessary. One such customization involves adding custom buttons to the Odoo 18 POS screen, allowing businesses to tailor the interface to meet their specific workflows and requirements.
In Odoo, custom functionality is typically implemented through the creation of modules. A module is a self-contained package that encapsulates the necessary code, data, and resources required for a specific feature or functionality.
Once you've created the custom module, the next step is to define the structure and appearance of the custom button using XML. Odoo's POS system utilizes XML templates to render the user interface components, including buttons, menus, and other interactive elements.
In your module's static/src/xml directory, create a new XML file and define the structure of your custom button. This typically involves specifying the button's class, icon, and label, as well as any additional attributes or event handlers required for its functionality.
Here's an example of how you might define a custom button in an XML template:
<?xml version="1.0" encoding="UTF-8"?>
<templates id="template" xml:space="preserve">
<t t-name="your_module.ControlButtons" t-inherit="point_of_sale.ControlButtons" t-inherit-mode="extension">
<xpath expr="//t[@t-if='props.showRemainingButtons']/div/OrderlineNoteButton" position="after">
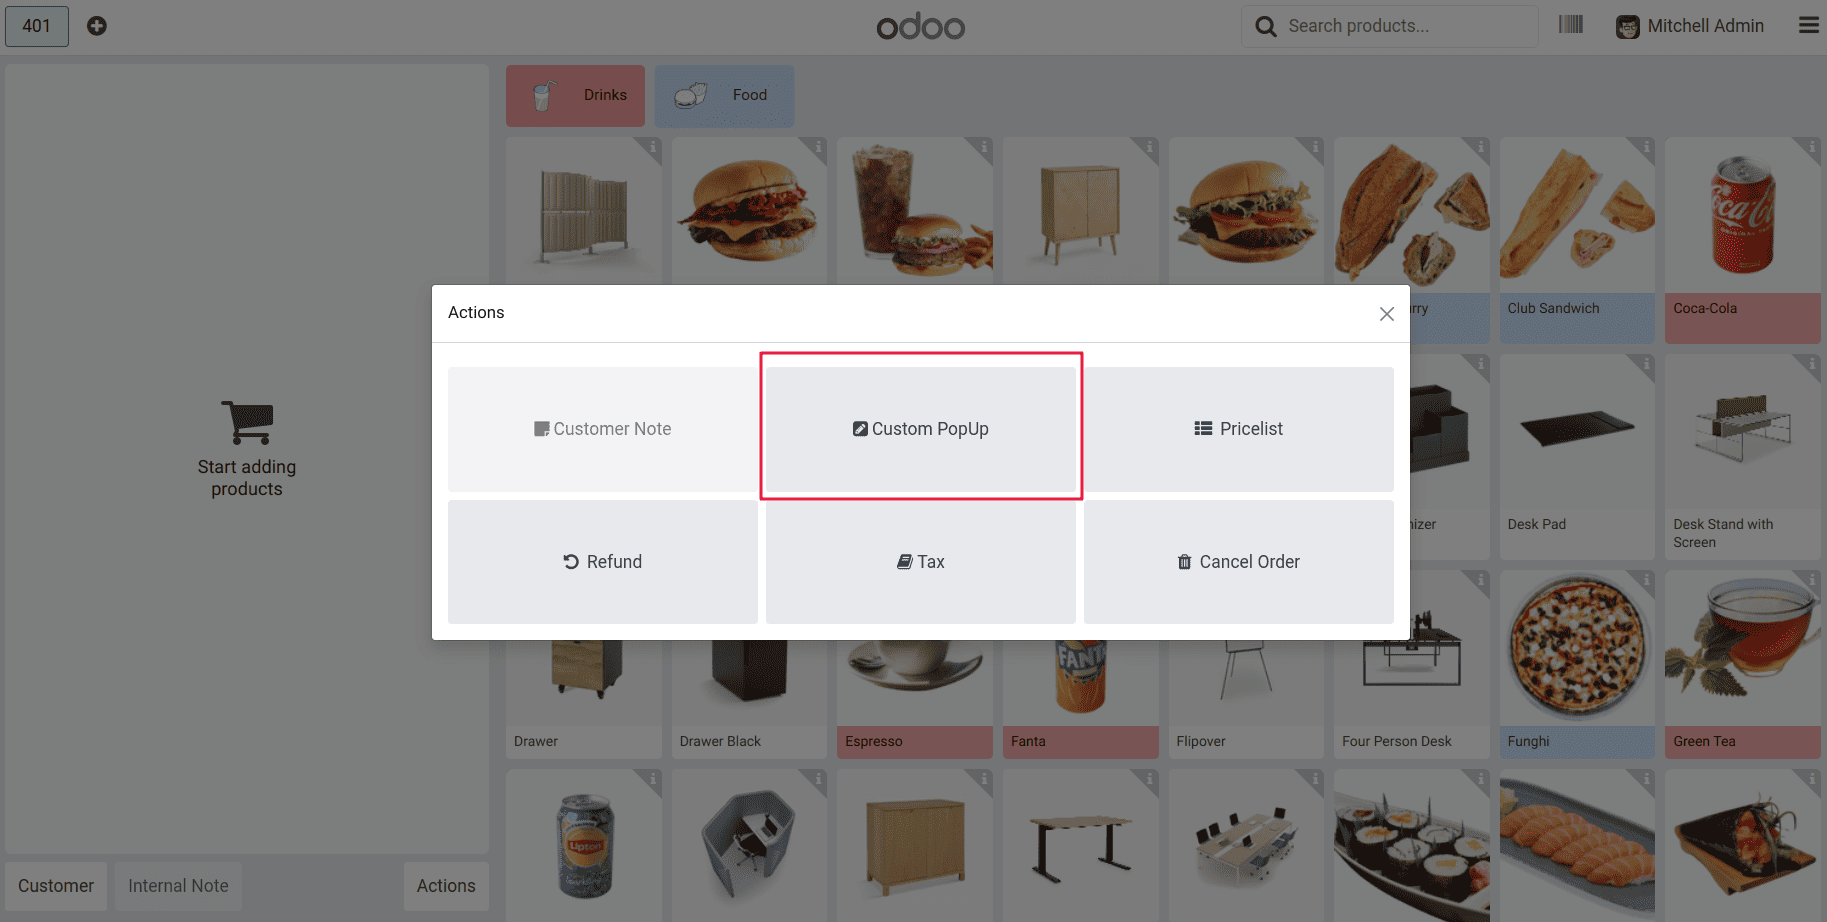
<button class="btn btn-secondary btn-lg py-5" t-on-click="() => this.onClickPopup()">
<i class="fa fa-pencil-square me-1" role="img" aria-label="Custom Alert" title="Custom Alert"/>Custom PopUp
</button>
</xpath>
</t>
</templates>
In this example, we define a custom button with a star icon, a label "Custom PopUp," and a click event handler onClickPopup(). The button's appearance is styled using Bootstrap classes, ensuring a consistent look and feel with the rest of the Odoo POS interface.
While the XML template defines the structure and appearance of the custom button, the actual functionality is implemented using JavaScript. Odoo18 POS system is built on top of the Odoo Web Library (OWL), a modern JavaScript framework that facilitates the development of responsive and interactive web applications.
In your module's static/src/js directory, create a new JavaScript file and define the behavior of your custom button. This typically involves creating a new component or extending an existing one, and implementing the desired functionality within the component's methods.
Here's an example of how you might implement the onClickPopup() method for the custom button:
/**@odoo-module **/
import { AlertDialog } from "@web/core/confirmation_dialog/confirmation_dialog";
import { _t } from "@web/core/l10n/translation";
import { ControlButtons } from "@point_of_sale/app/screens/product_screen/control_buttons/control_buttons";
import { patch } from "@web/core/utils/patch";
patch(ControlButtons.prototype, {
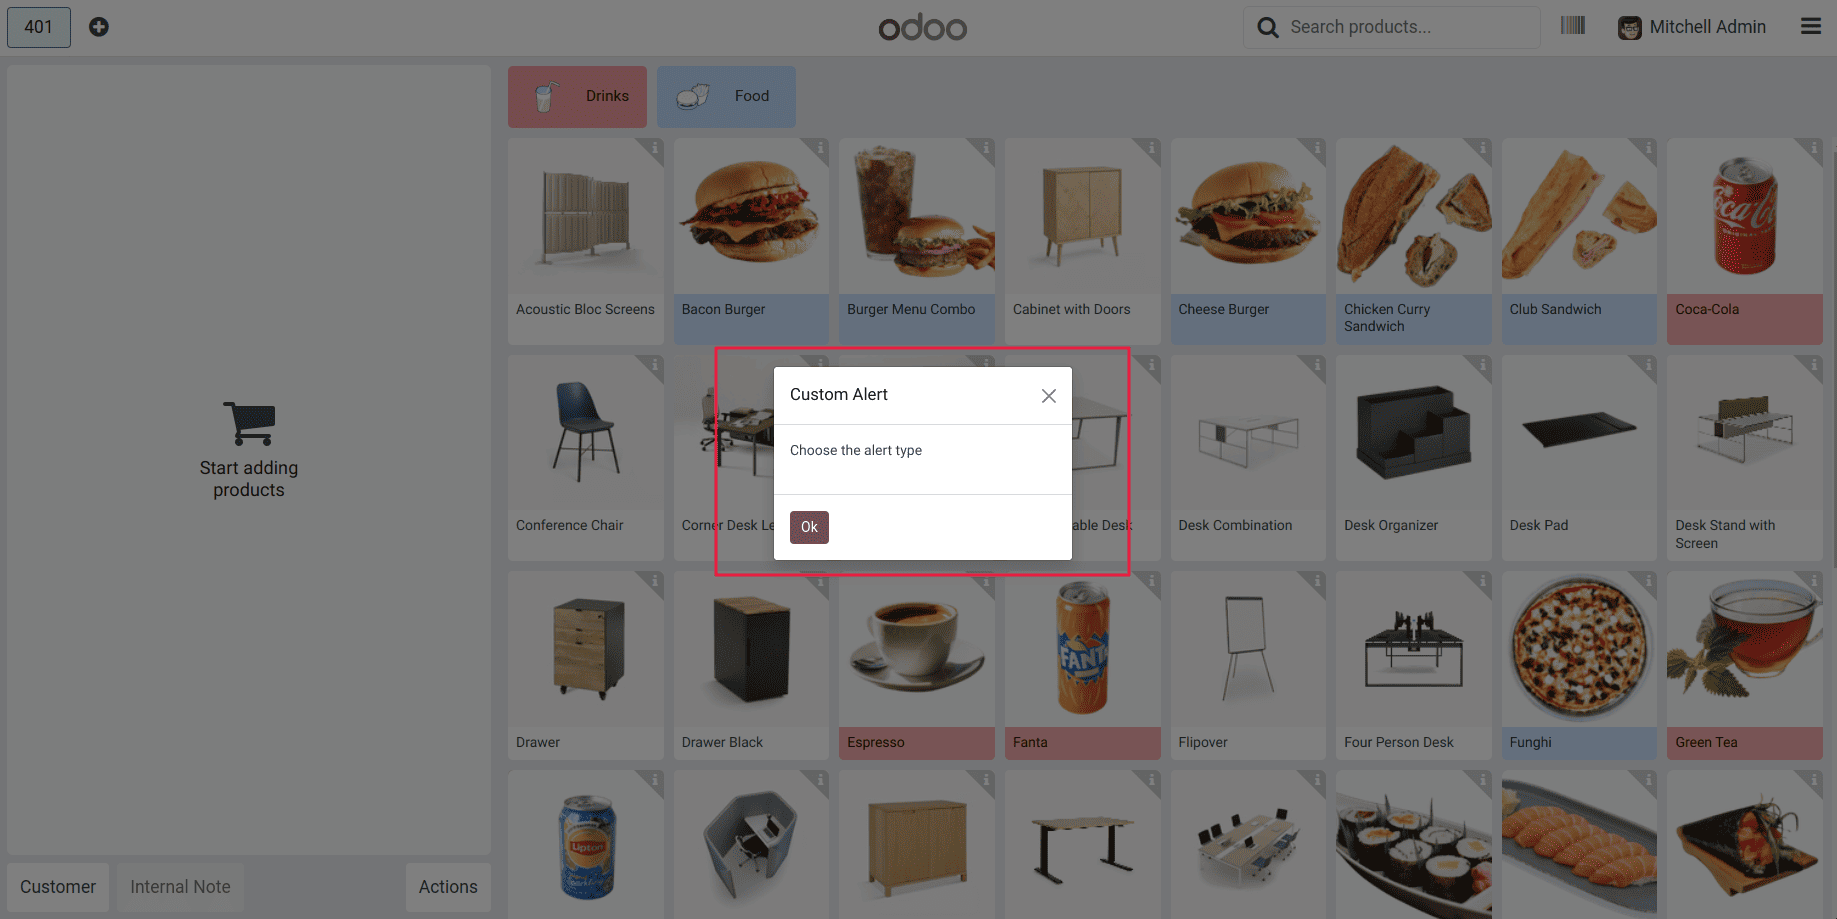
async onClickPopup() {
this.dialog.add(AlertDialog, {
title: _t("Custom Alert"),
body: _t("Choose the alert type"),
});
},
});
While the examples provided illustrate the basic process of adding a custom button to the Odoo POS screen, you can further customize the button's appearance and behavior to suit your specific requirements. This can include modifying the button's styling, adding additional functionality, or integrating with other Odoo modules or third-party services.
To read more about How to Add a Custom Button in Odoo 17 POS Screen, refer to our blog How to Add a Custom Button in Odoo 17 POS Screen.