For every state or country, the tax is different as their rules are different. So while doing a purchase or sale there will be a change in the currency values and tax rates. Odoo features a multi-company and multi-currency feature to make things easier.
The fiscal position helps tax mapping if the business process takes place across the countries and states. This feature helps the business world where they got clients from different parts of the world.
Let’s look at how to configure and use a fiscal position in the sales module and accounting module.
1. Tax Mapping
Firstly install the sales module and accounting module. One can create and update fiscal positions.
To achieve this, Go To Accounting -> Configuration -> Fiscal Positions -> Create.
Once it is created, click on save.
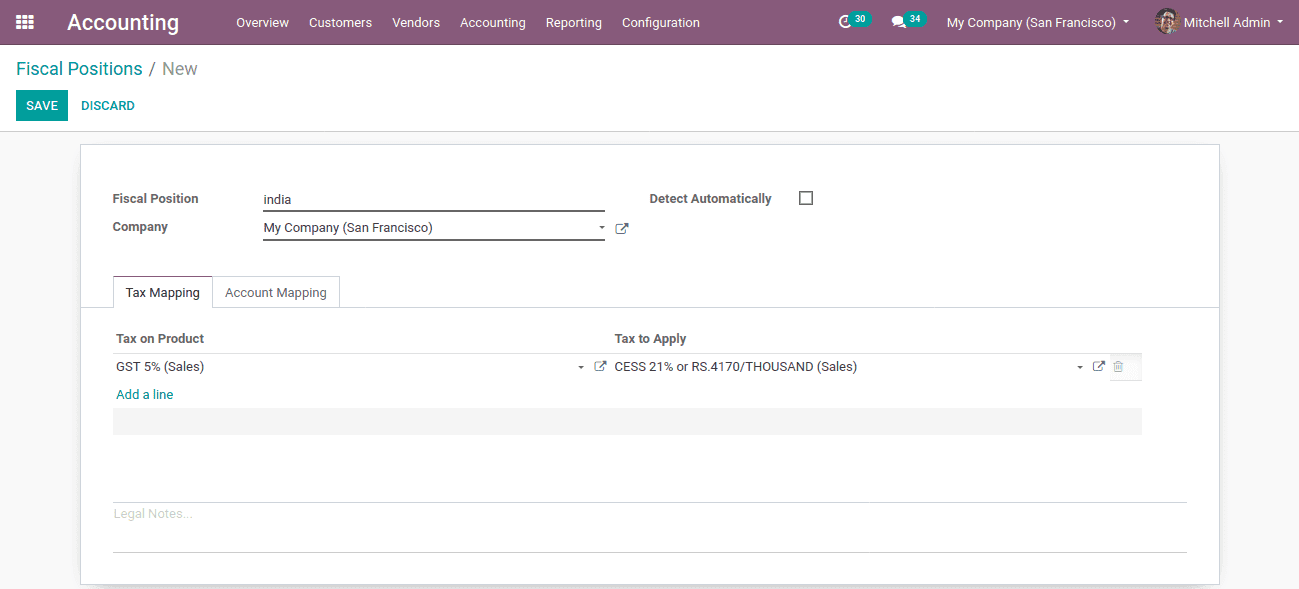
Fiscal position: Defines a name that we are given for the creating fiscal position.
Company: Company that comes under the fiscal position
Detect automatically: Can be enabled if the country needs to be detected automatically.
Tax Mapping: The method of turning a tax into a different one.
Tax on product: The default tax applied to a particular product.
Tax to apply: The tax that we want to apply on that product
Here we are supposing the tax of GST 5% on a product specified by the vendor/customer converting tax of CESS 21%. So the Tax on the product set as GST 5% (sales) and Tax to apply set as CESS 21%.
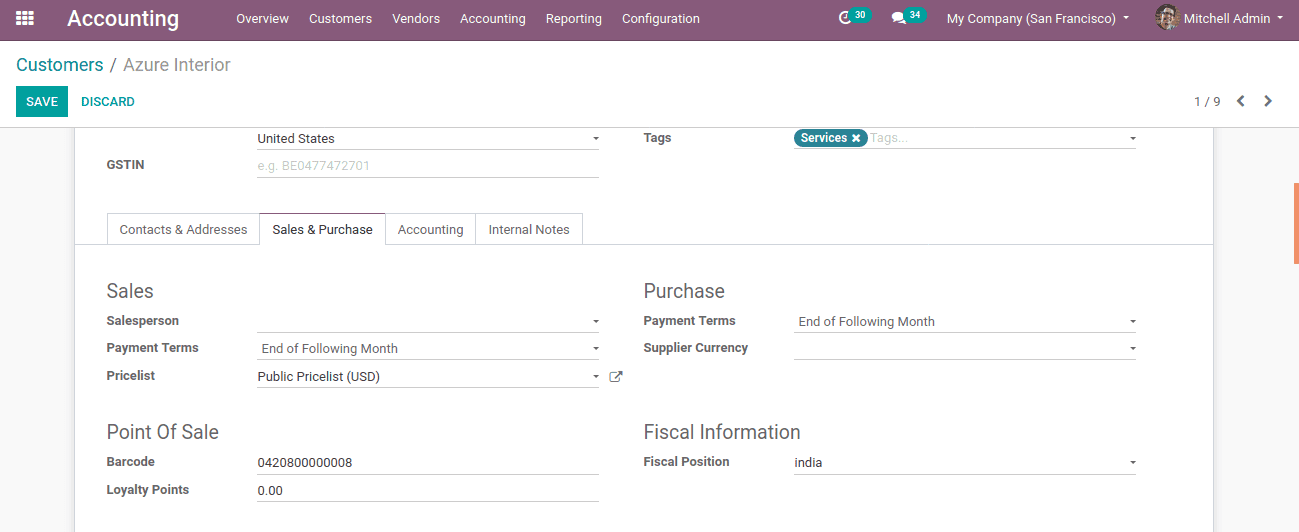
One can either use already existing customers or a new customer to add a fiscal position in the ‘Sales & Purchase’ tab.
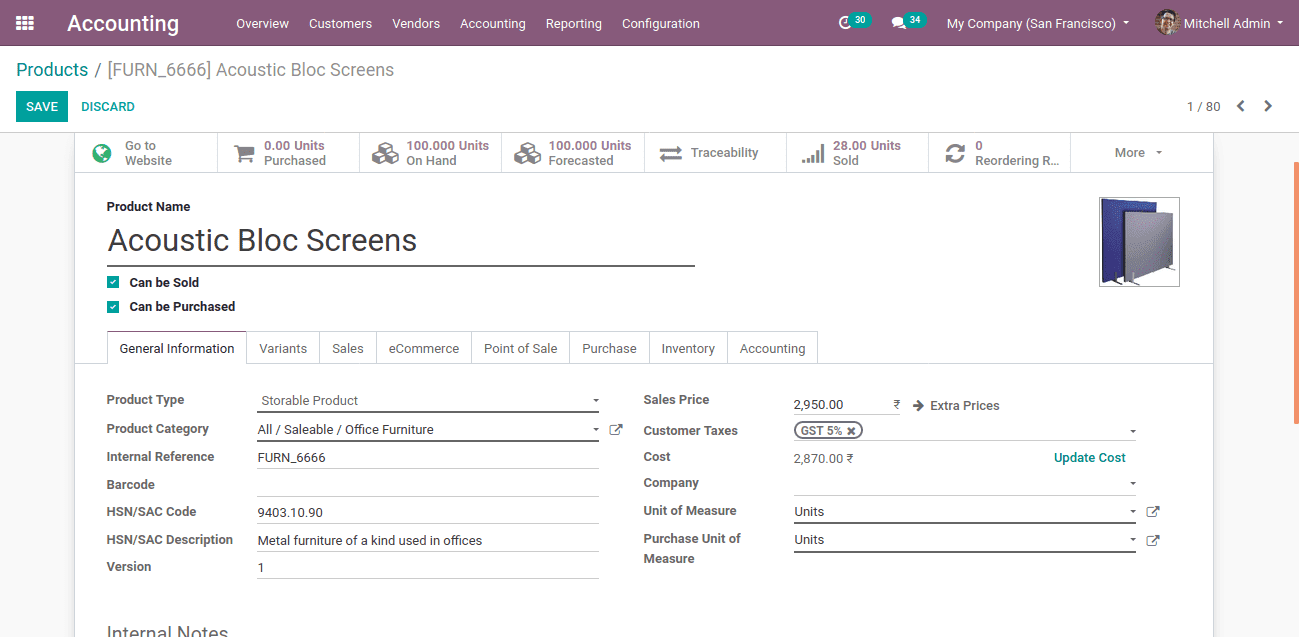
The next step is to configure the fiscal position to a product.
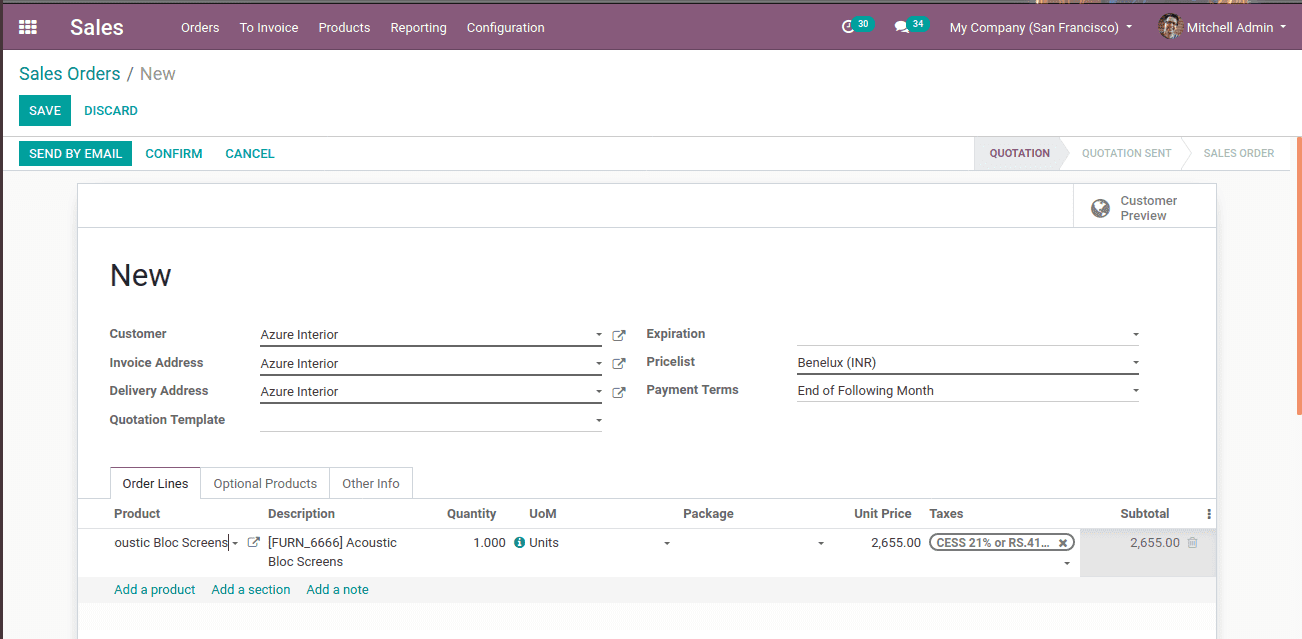
Now Go to the sales module create an order, while we creating a sale order, the tax for the selected product changes as shown below
At the Other Info tab, one can see the fiscal position, the created one ‘India’.

This is how tax mapping works.
2. Account mapping
Account mapping is another feature under the fiscal position. Using this concept one can change accounts based on countries or customers. Customers of India can be identified automatically by the option detect automatically. The country is specified while creating fiscal positions.
Under the account mapping tab, one can add the accounts to be mapped. Here the account of local sales is mapped to the account of revenue. Here the income account is the ‘account on product’ while the ‘account to use instead’ is the account to which mapping is going to do. Users can use already existing accounts or can create new accounts.
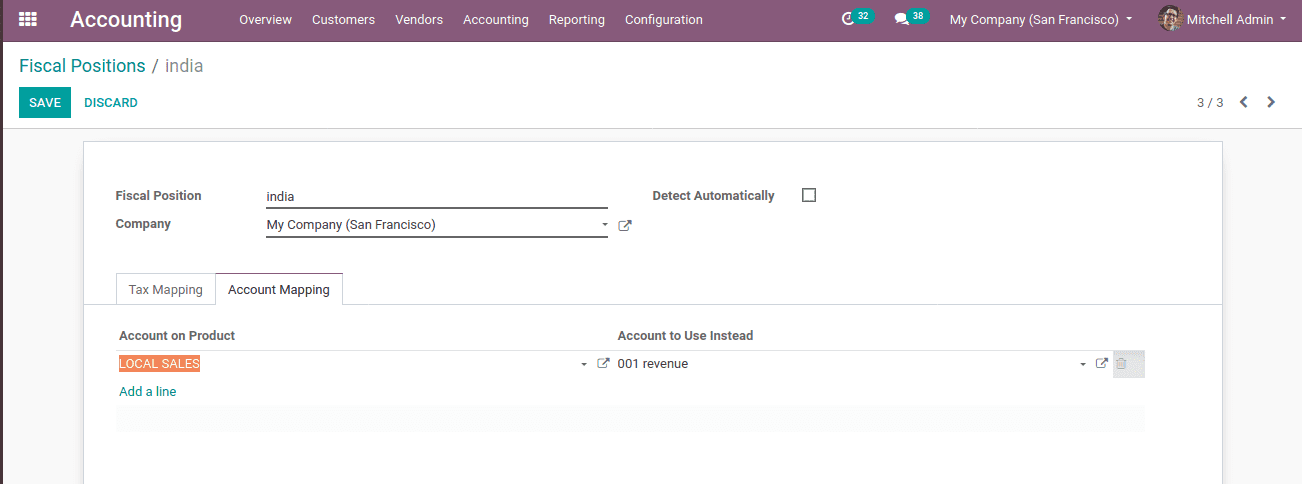
Now when the Indian customer gets an order, the product’s income account is mapped to another account. Thus sale order income from India can be stored under a single account.
Create a new product or an already existing one, whose income account set as the account on the product.
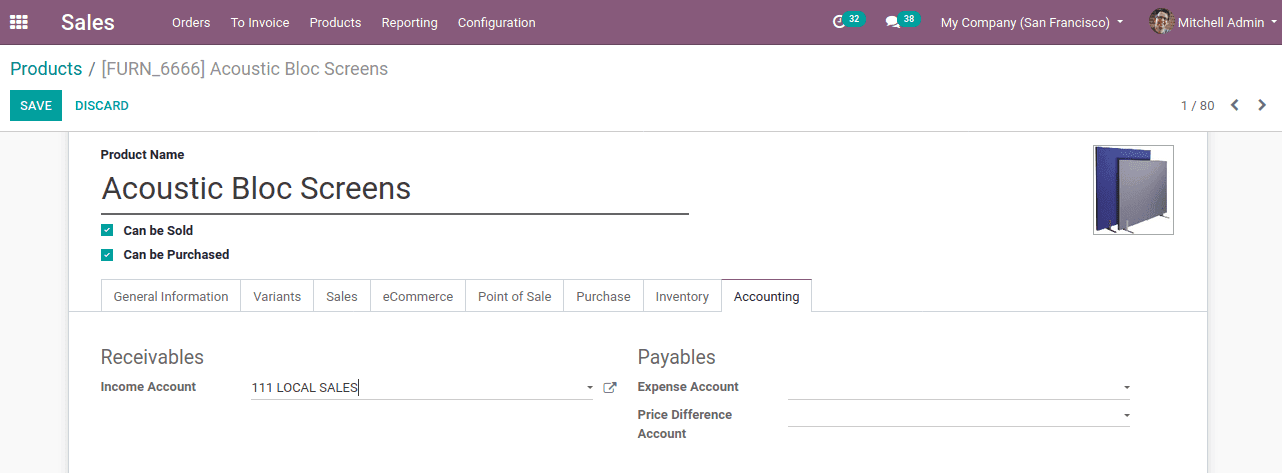
Income account is the account that used to hold income from products. Income accounts can be visible under the ‘receivables’. Create a customer or call an existing customer who belongs to India.
Create a quotation entering product and customer.
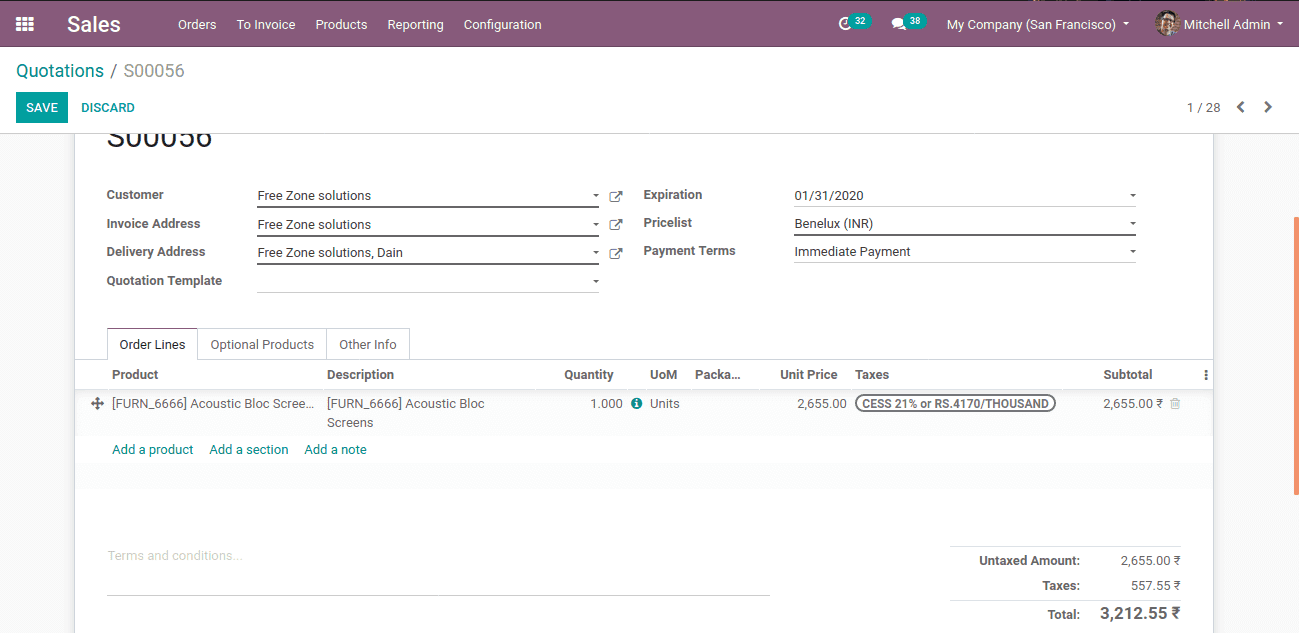
Confirm the quotation and create an invoice.
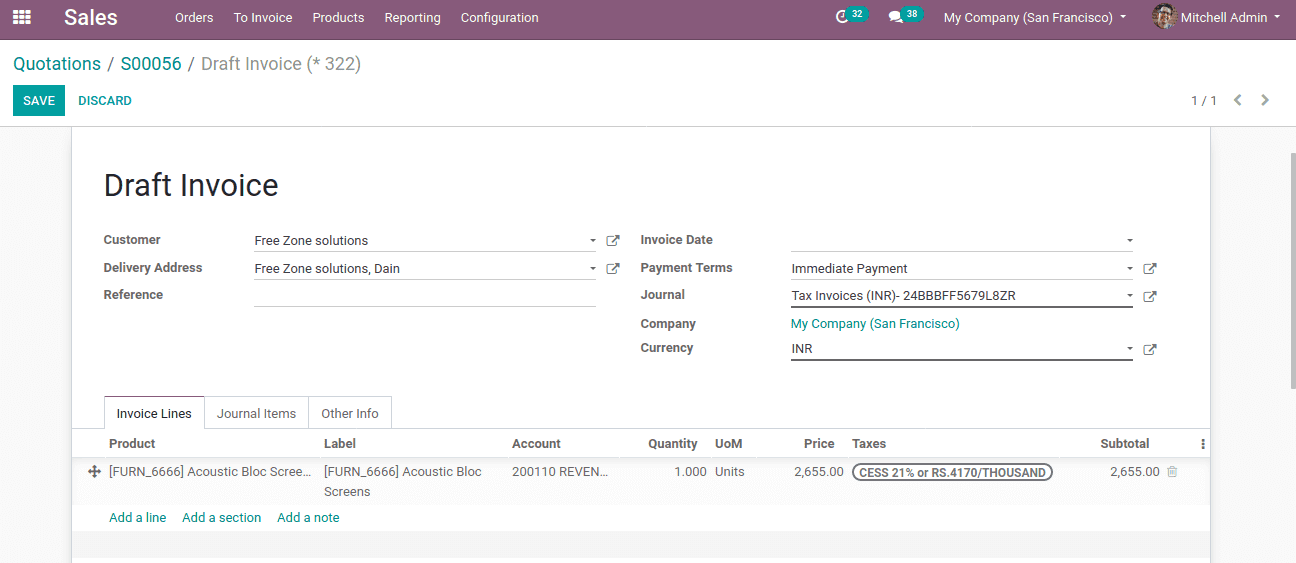
In the invoice, the income account ‘local sales’ for the product is now mapped to the ‘revenue’ account. If the chosen customer is not from India, this mapping is not possible for them. Thus account mapping is done successfully.