Ensuring proper Employee management is integral for the growth of a business or an institution. Employee management is not an easy job, and it requires more attention and care. The Odoo 15 Employee module is dedicated to employee management. The employee module is filled with advanced tools for efficient Employee management.
This blog will give you a detailed overview of Employee and Department management with the Odoo 15 Employee module
Employees
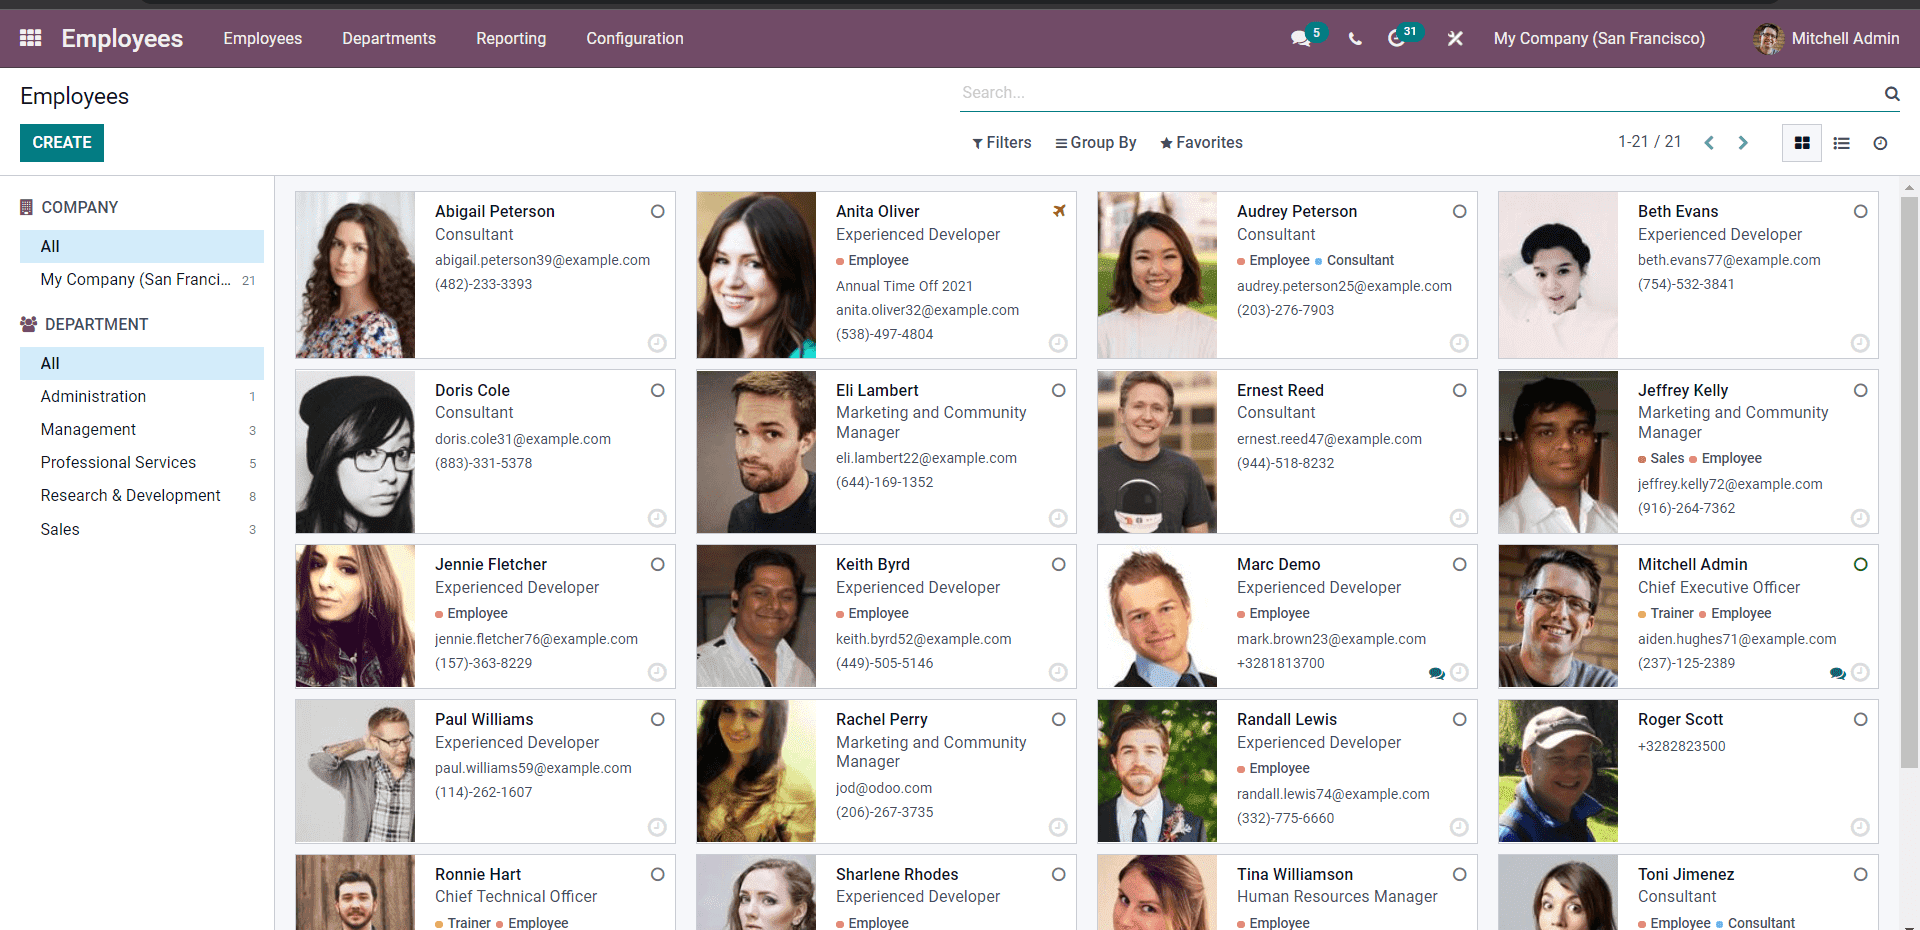
The above-given image Represents the Dashboard of the Employee module with all of the Employees listed down. The filtering options on this page will allow you to access the employed much more easily. The employees can be based on their departments and sub-departments.
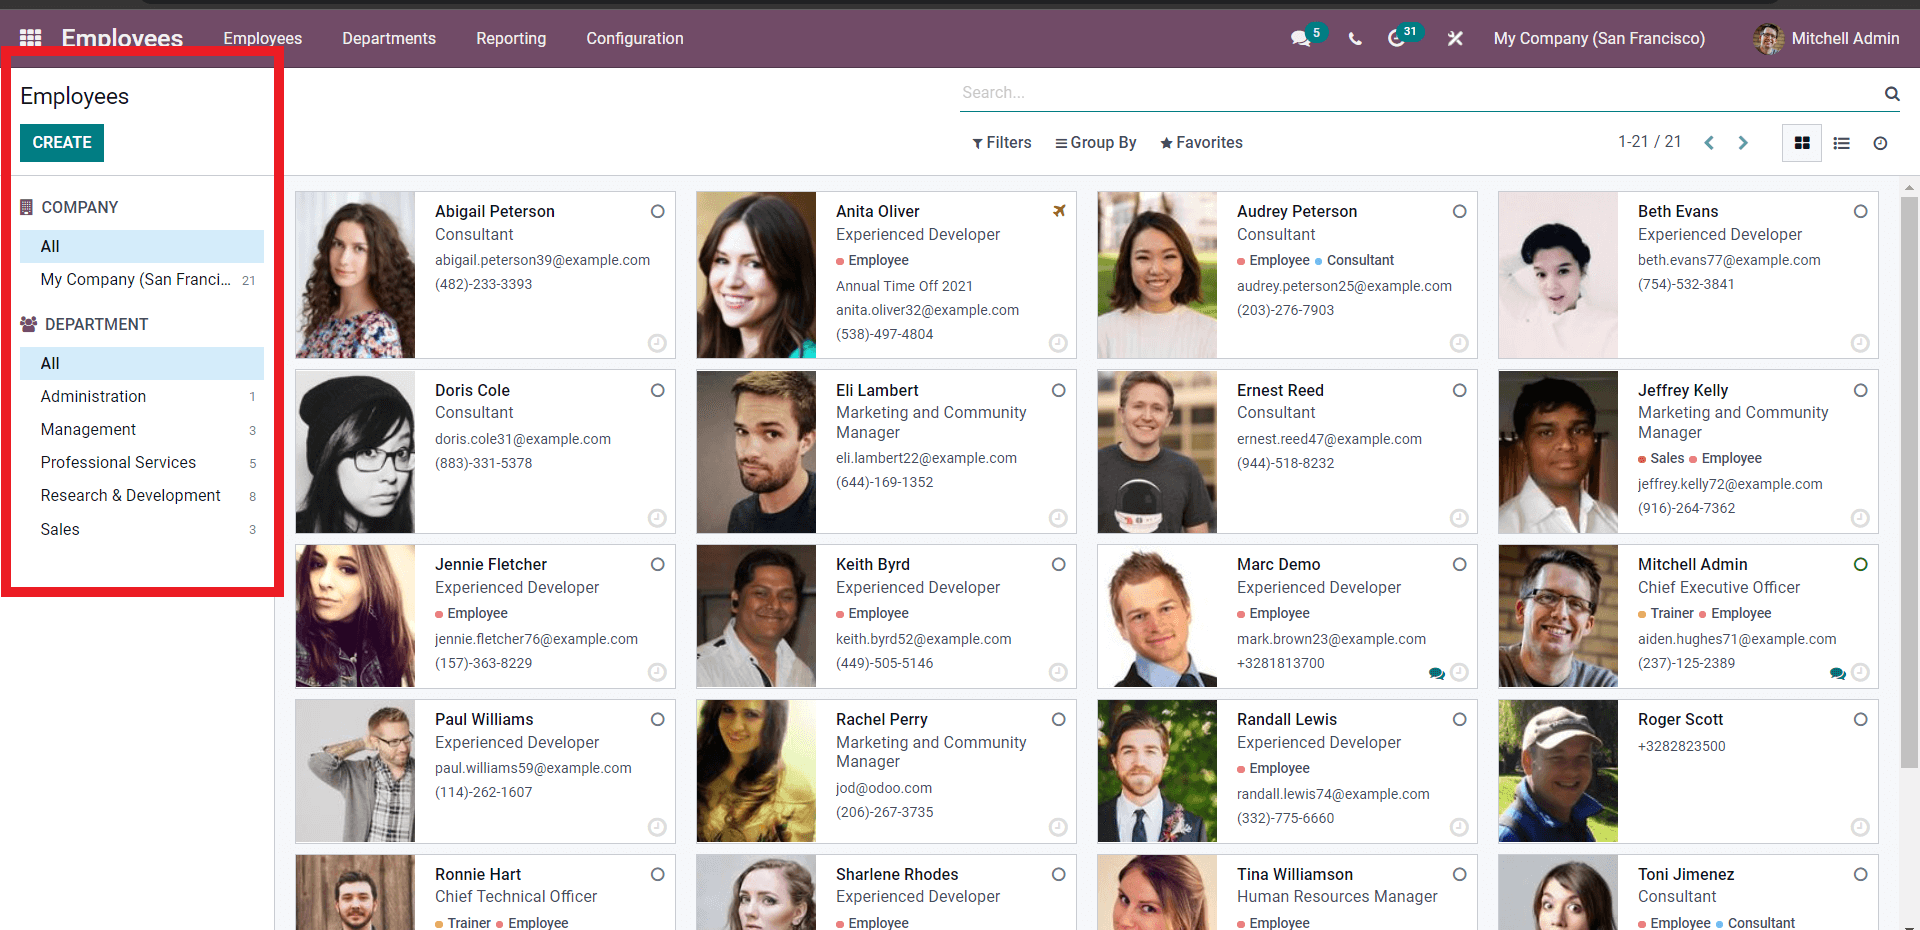
As marked above, click on the department, and the employees under it will be shown on the page. The feature can help you to manage massive employee strength; it is easy to access them quickly. You can create new Departments from the Configuration tab of the module. Click on the Departments from the drop menu of the Configurations tab, and a page Departments will open up as shown below.

All of your departments will be displayed on this page. For configuration on any departments, just click on them, and on the configuration page, the department will open up. Use the CREATE button to create a new department.
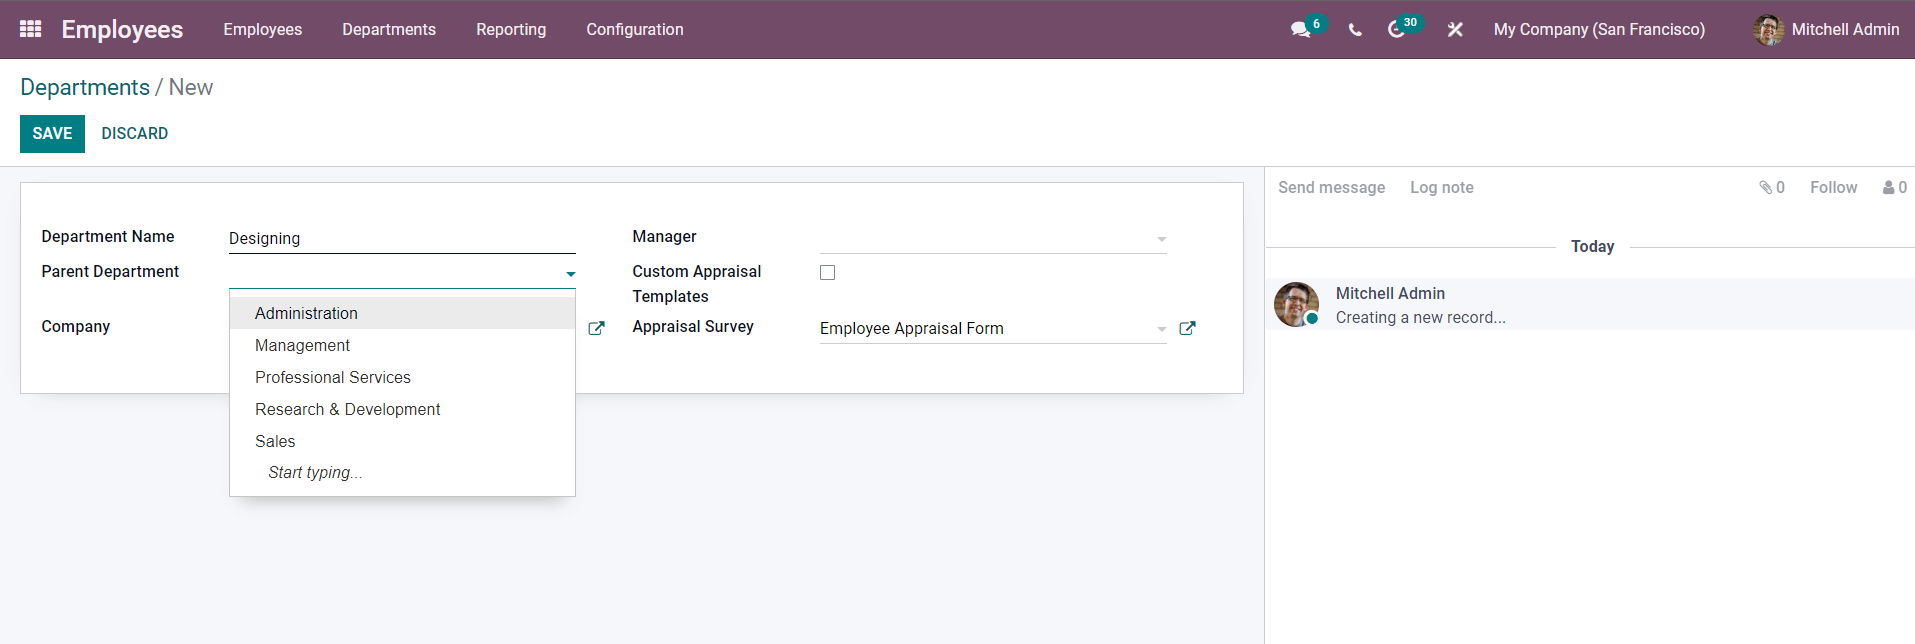
Enter the Name of the Department and if you want to add a parent department. Add the department from the Parent Department field from the drop menu as shown above. You can add the manager of the department from the Manager field. These are not mandatory for the functioning of the Department in Odoo and are optional. After the configurations on the Department, save it using the SAVE button. The newly created Department will be displayed under the Departments tab of the Employee module as shown below.
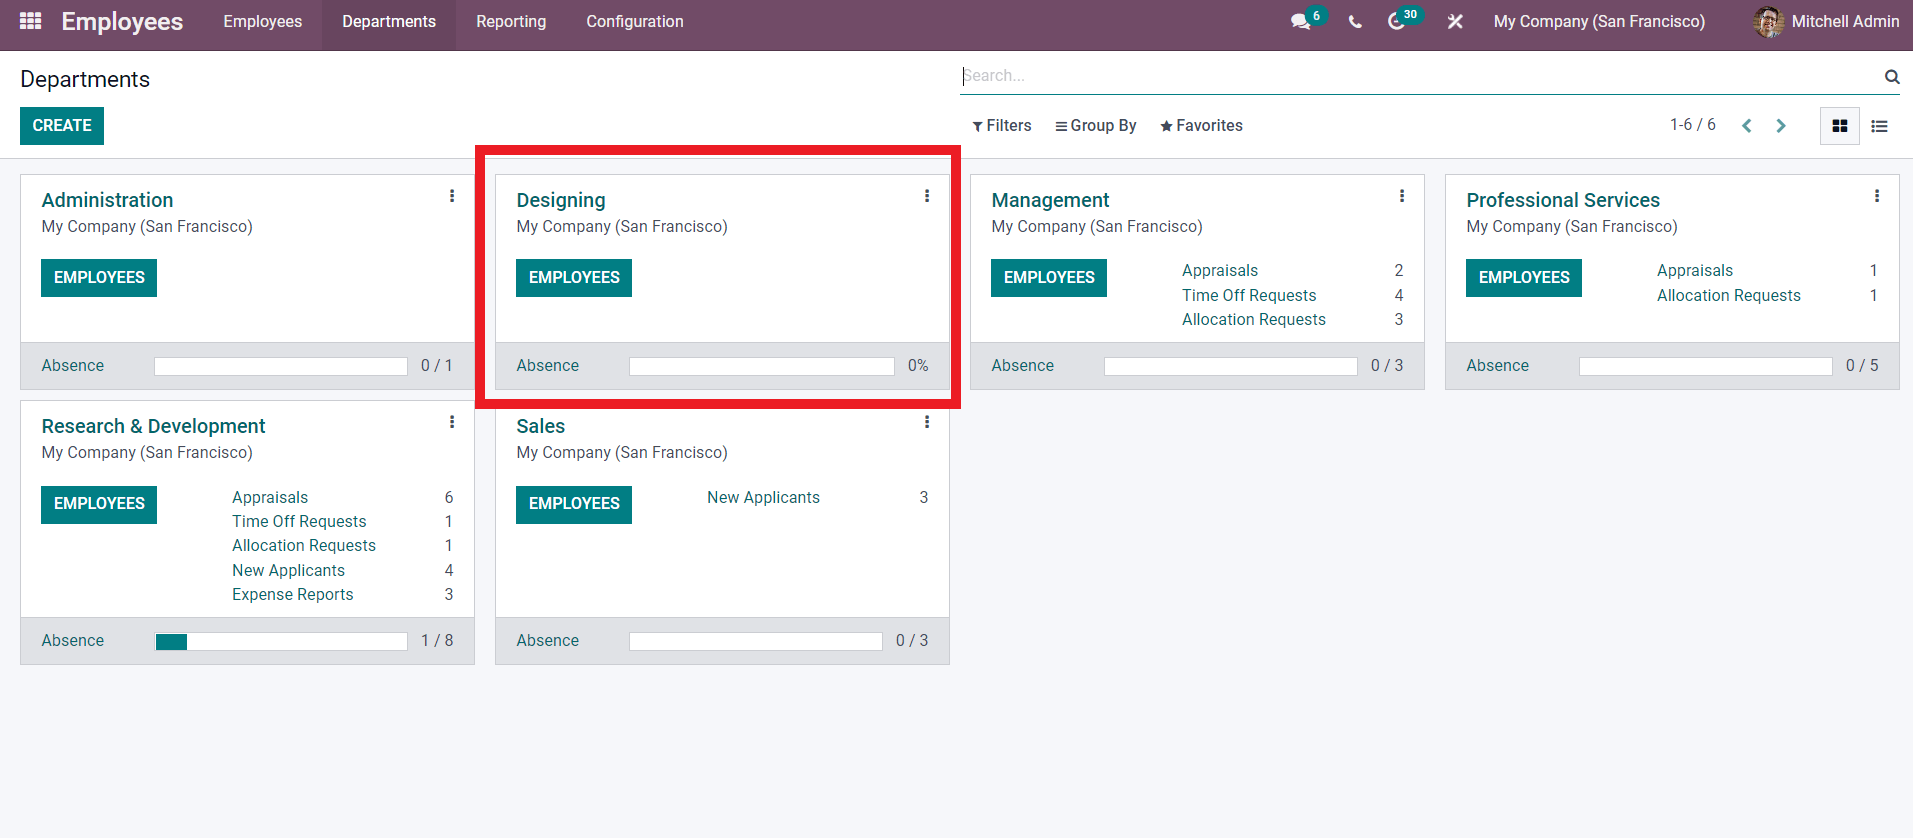
You can manage the Departments from here. All of your departments can be managed from here. Click on the EMPLOYEES button to manage the employees under the Departments. The three dots next to the Departments holds more advanced options. The real-time data and activities on the department will be displayed alongside each Departments as shown below.
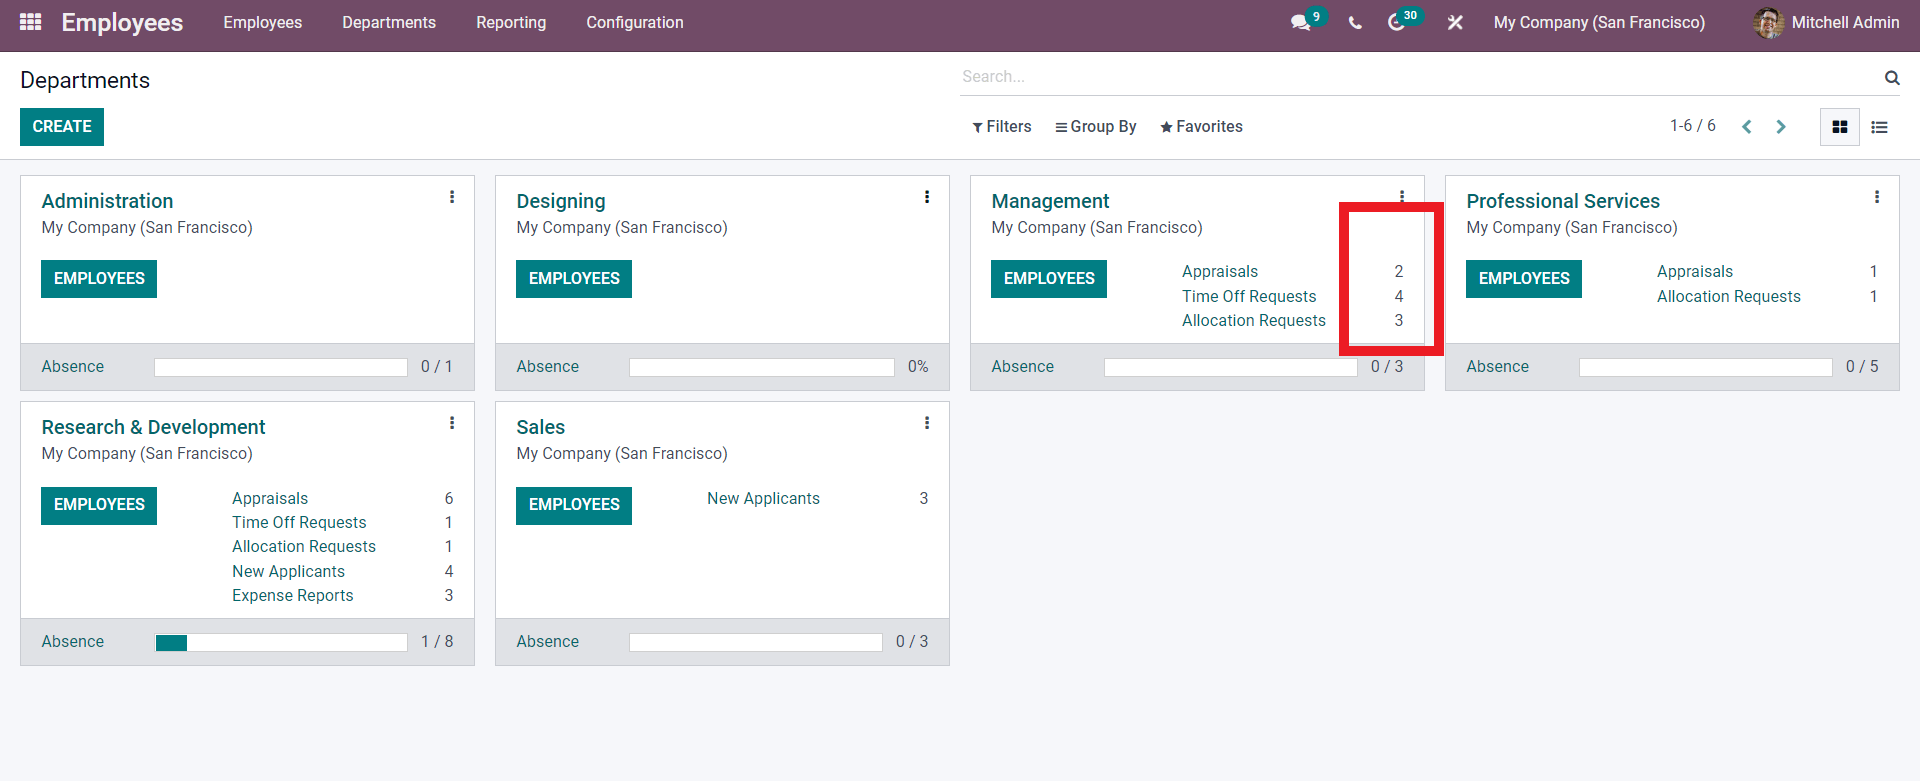
In the image shown above, you can see the real-time data on Appraisals, Time off Requests, and Allocation Requests. Similarly, you can get real-time reports on the Departments including the Absence percentage. Click on the three dots next to the Departments for more options as shown below.
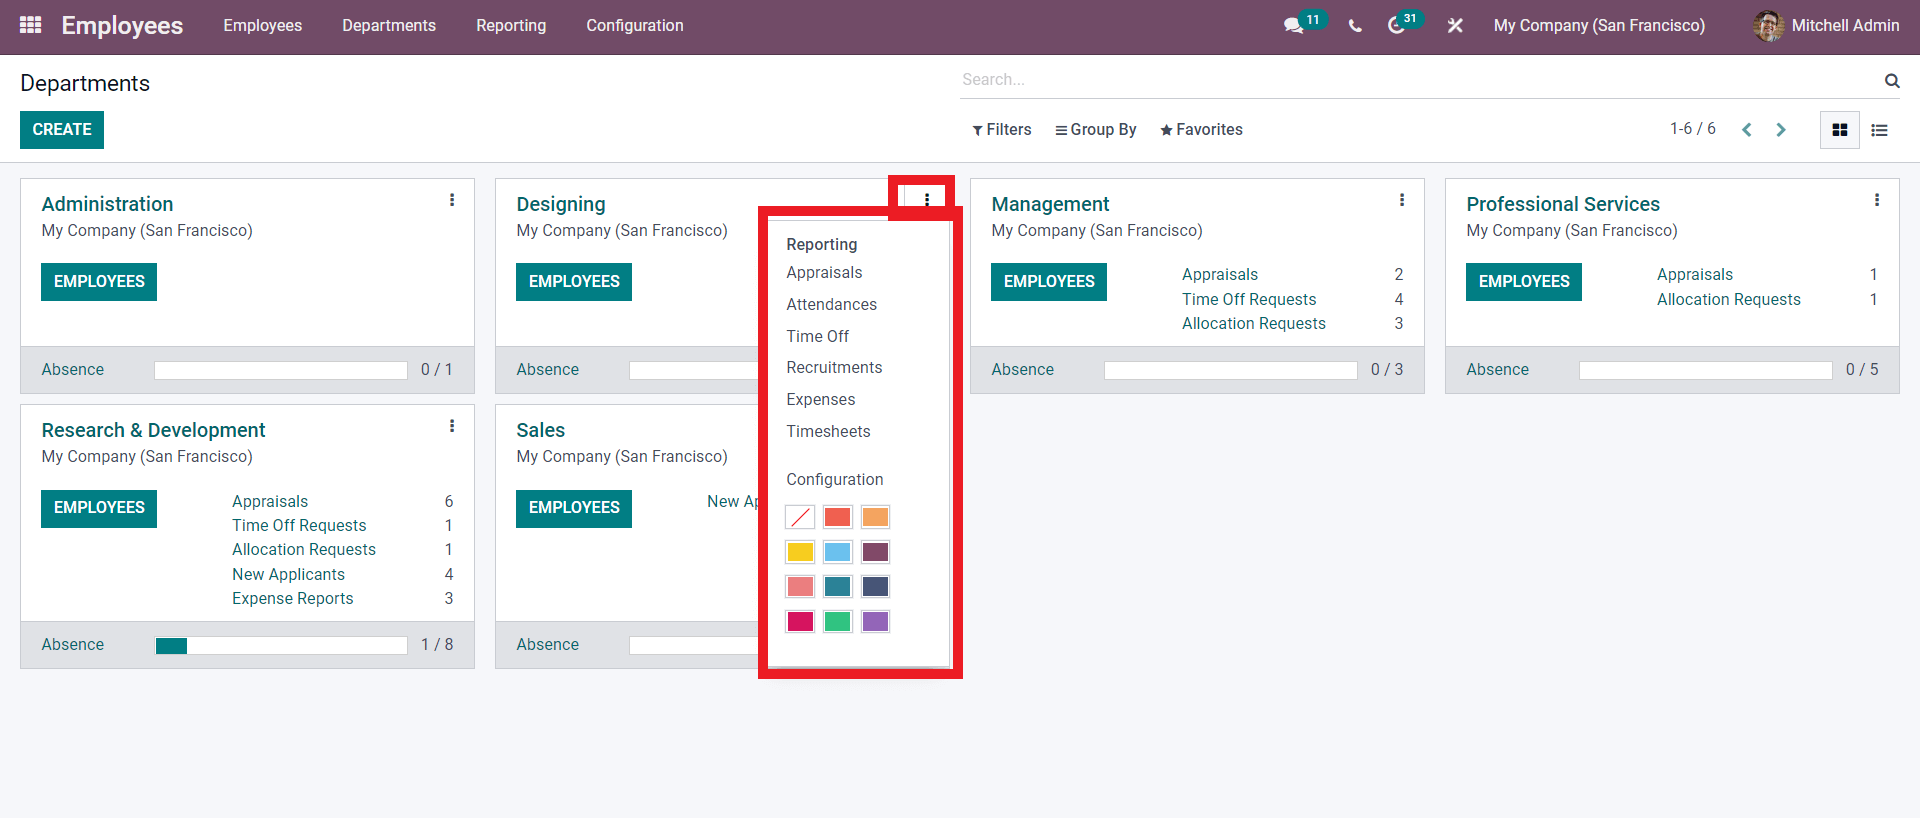
You can view the Reports on Appraisals, Attendances, Time Off, Recruitments, Expenses, and Timesheets. Click on them to view it as shown below.

The above-given image represents the APPRAISAL ANALYSIS. You can get the Appraisal analysis on TODAY, DAY, WEEK, MONTH, and YEAR. You can view the Analysis in GANTT view(default view as shown above), CALENDAR, GRAPH, and PIVOT. by going to the right corner of the page as shown below.

The page will be automatically updated with the activities of the Departments.
Job Positions
Job positions play a huge role in any Institution. Odoo uses Job positions to analyze the Employees and differentiate them between the various categories based on their Positions in the company. With the Odoo 15 Employee module, it is easy to create new Job positions instantly. To generate and Manage the job positions go to the Configuration tab from the module’s dashboard and click on Job positions from the drop-down menu. As given below, a page on the job positions will open up.

The job positions in the company will be listed down on this page. For configuration on the already created Job positions, click on the job positions you want to configure, and a configuration page will open up to Edit job position.
If you want to create a new Job Position, use the CREATE button, and a page to create the new job will open as shown below.
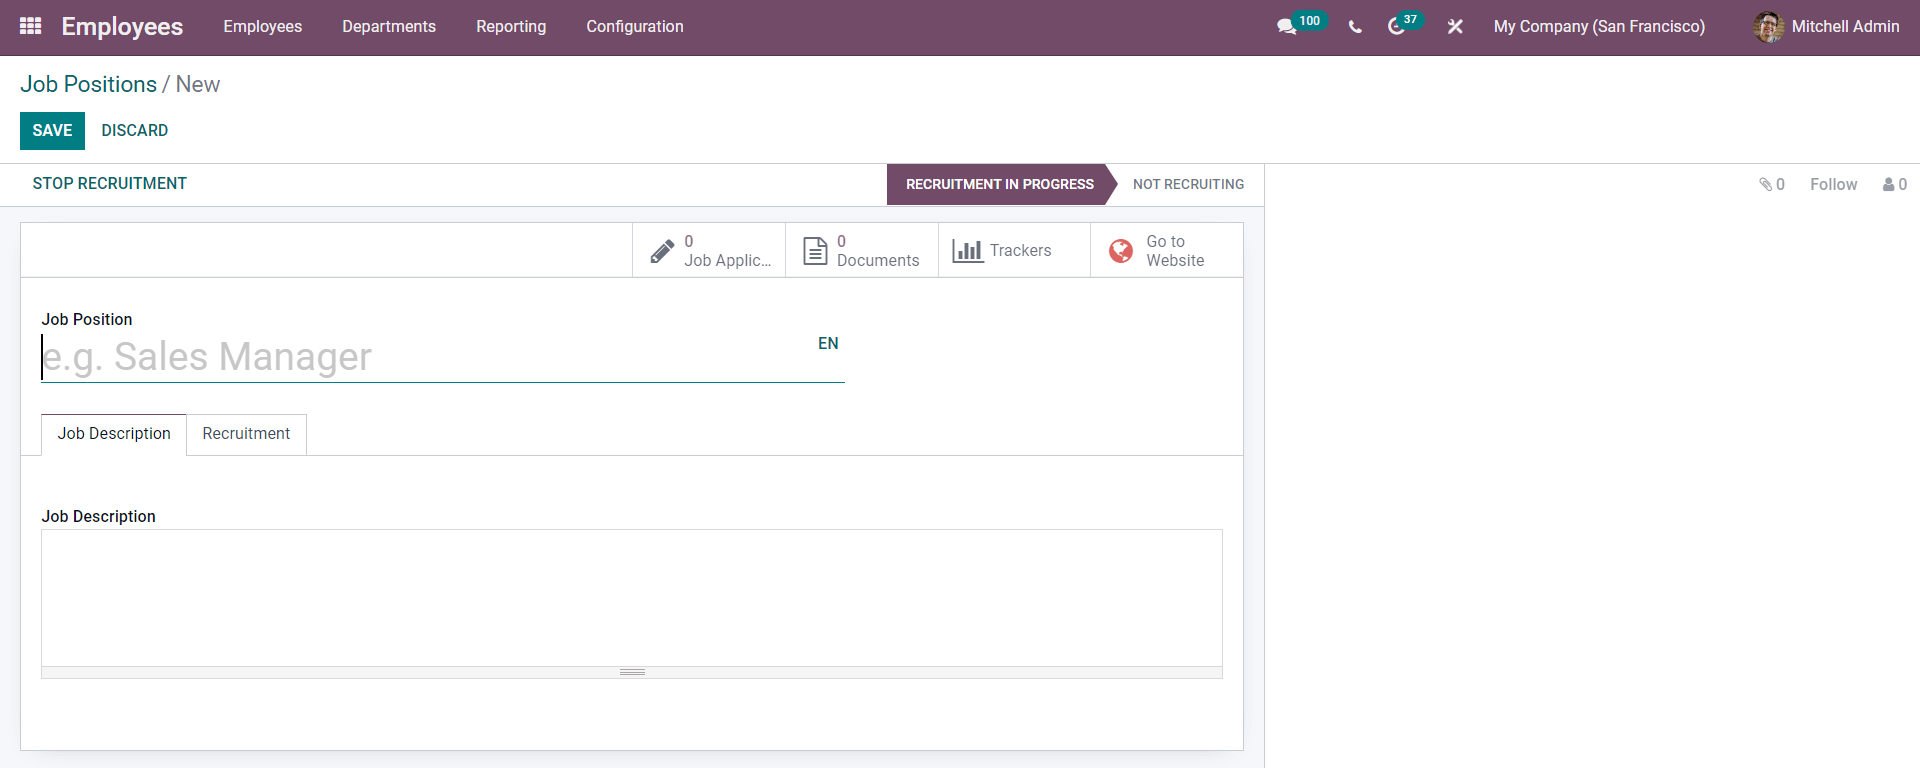
Enter the Name of the Job position and the Job description. Click on the Recruitment tab for configuration on the Job recruitment as shown below.
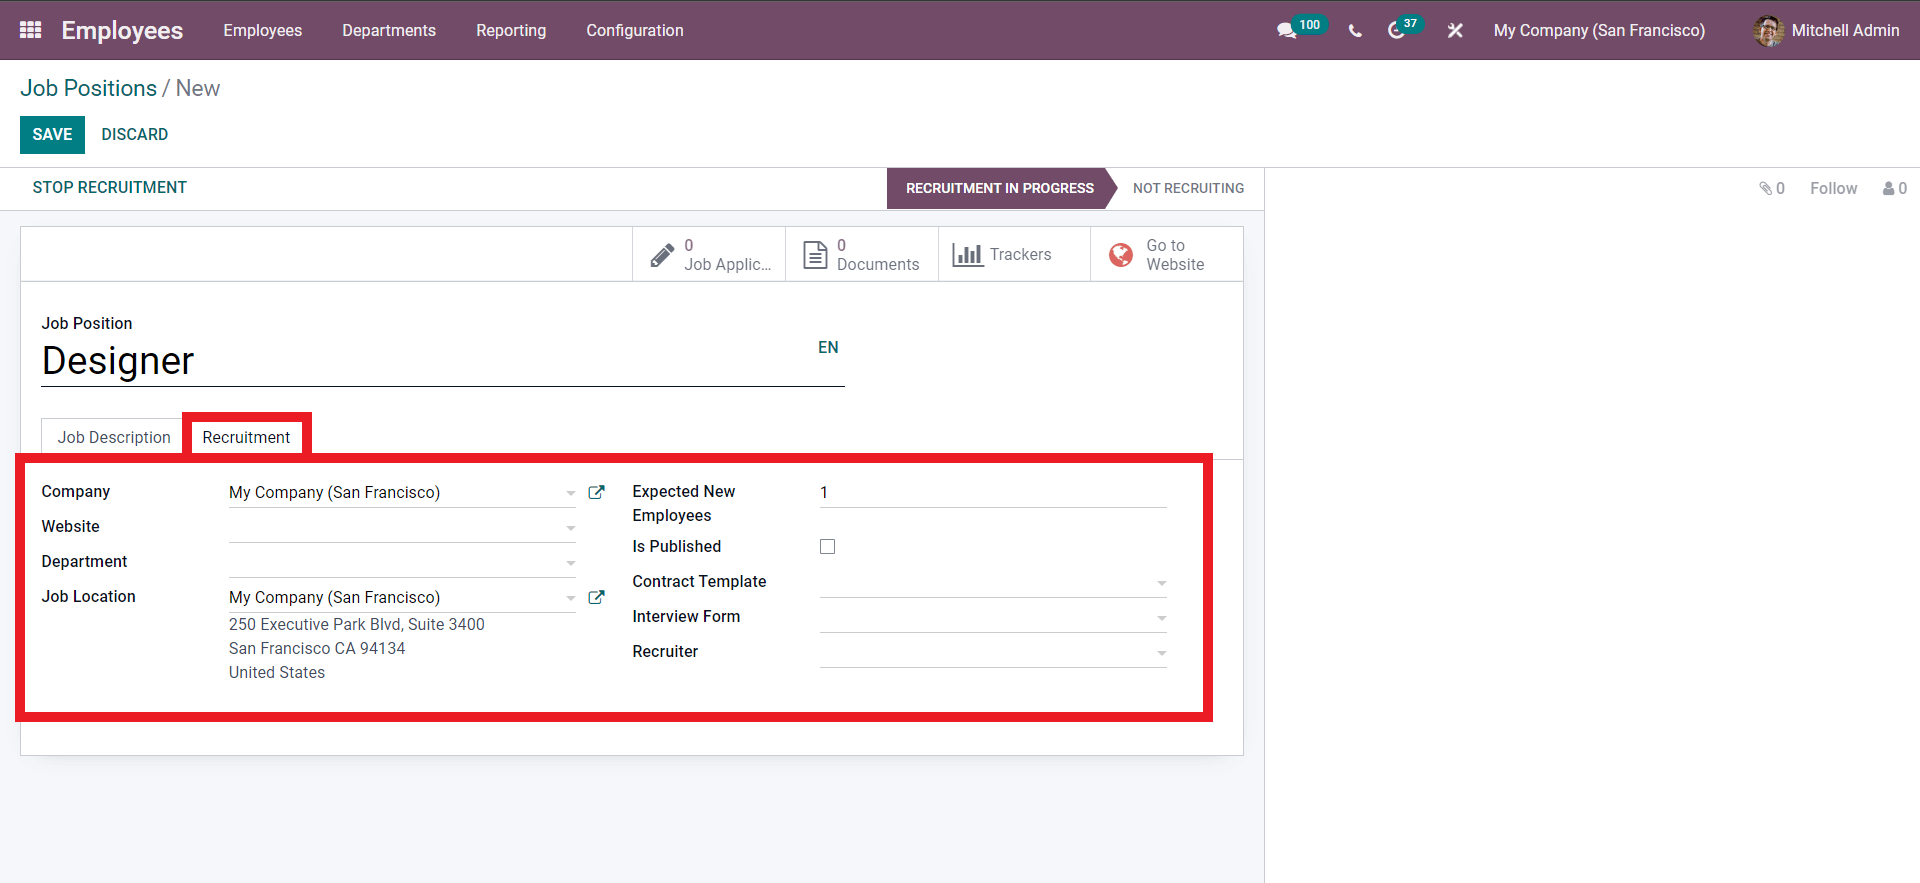
In the section, you can add the Company, Official website, Department, and Job location. You can change the number of new expected employees from the section of the same name. You can also choose the contract template, Interview form, and recruiter from this section. Configuring the recruitment section will allow you and Odoo to manage employees more efficiently.
Defining the Job positions is essential in Odoo. This will allow Odoo to categorize the employees into different sections and allow access to some of the functionalities of Odoo that are necessary for their job role in the company. After the job position configuration, click on the SAVE button, and the job will be saved to Odoo. You can publish the Job recruitment to the newly created positions directly for the Job configuration page. Go to the Website tab on the page as shown below.
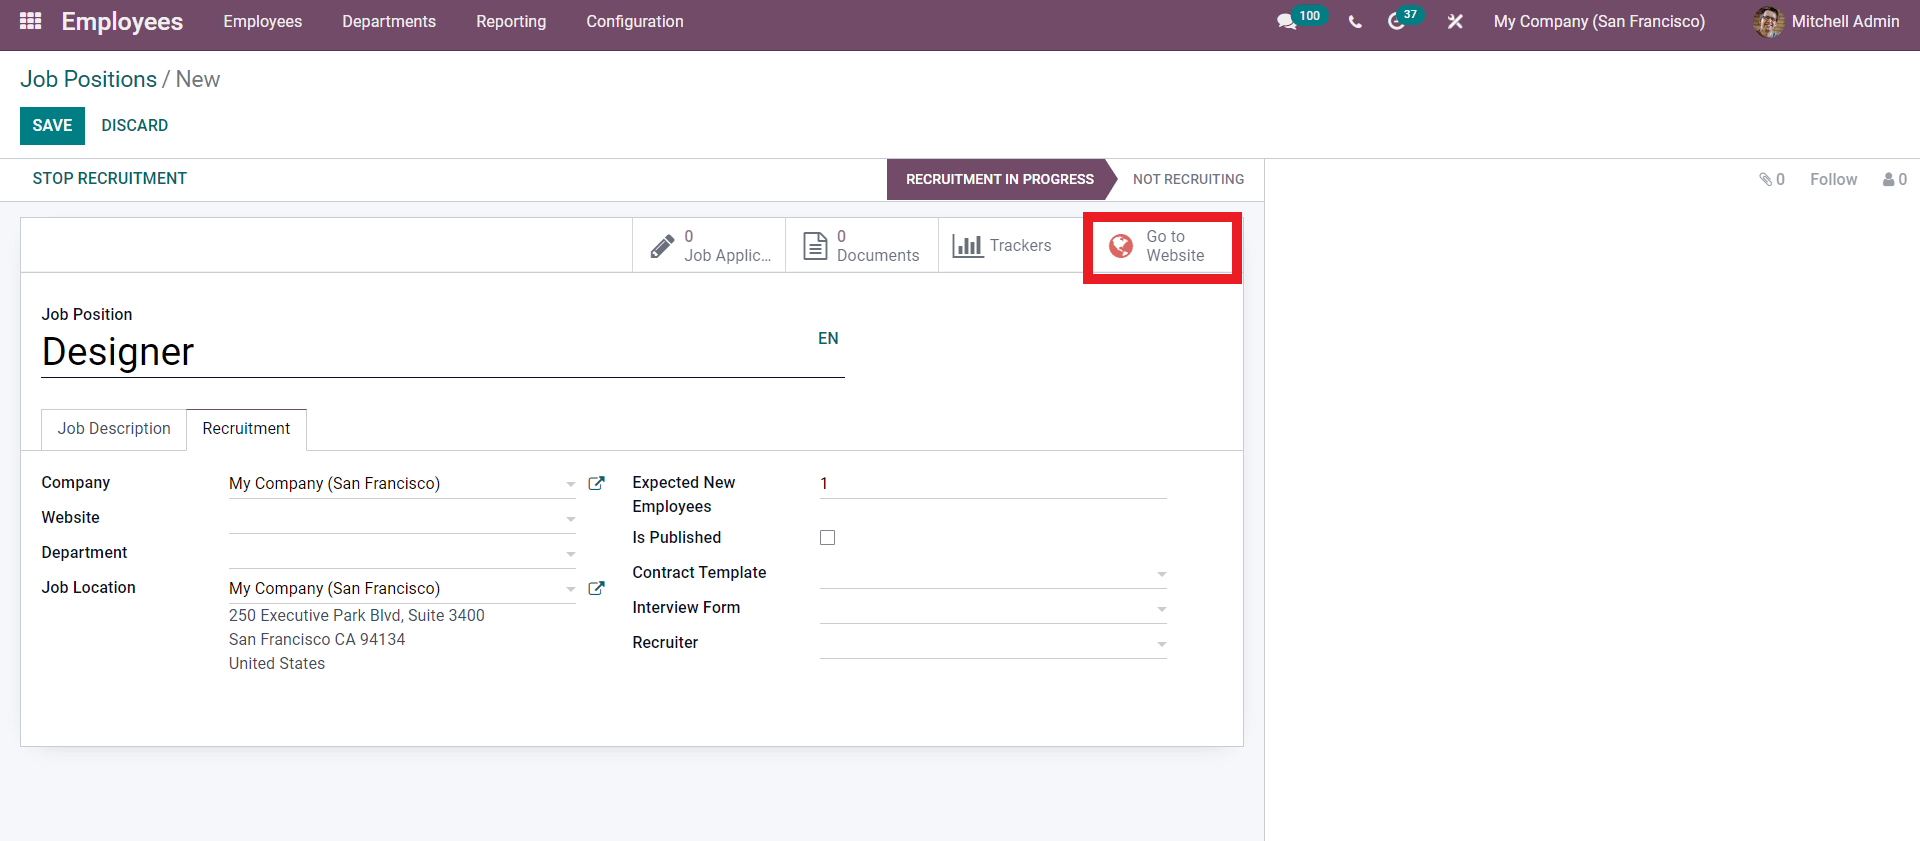
A Page on Publishing the Job position is shown below.
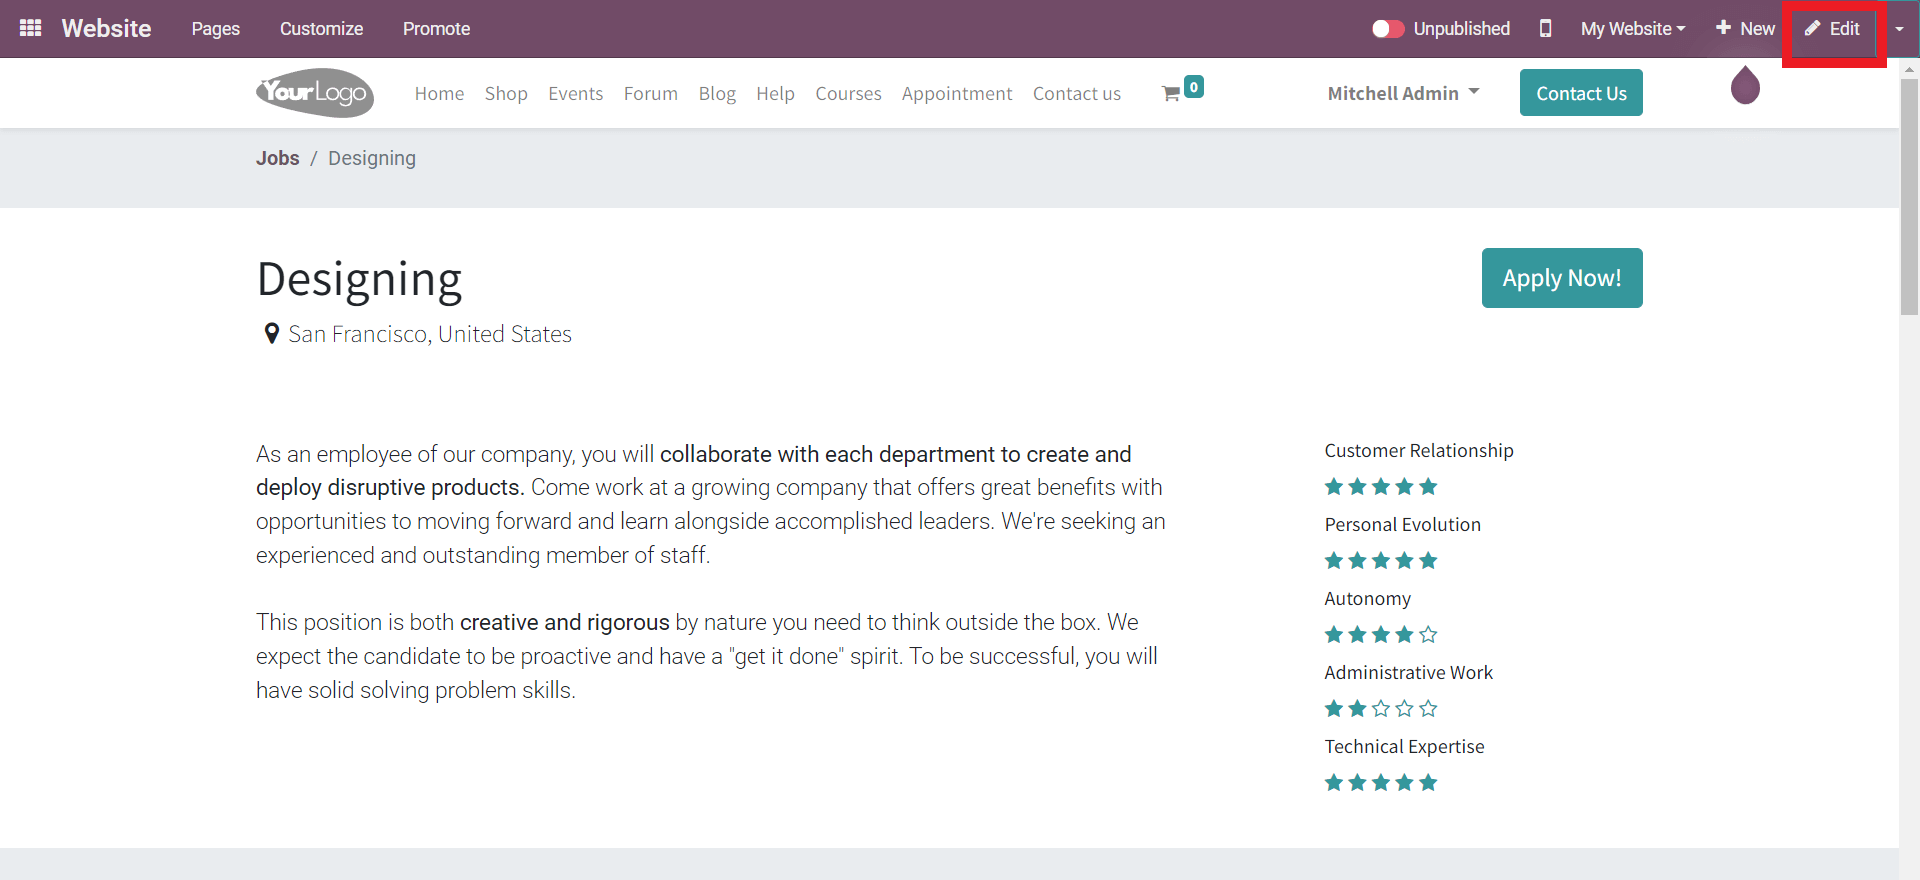
Click on the Edit Button shown above to edit and post the Job position on your website. A configuration section will pop up, as shown below.
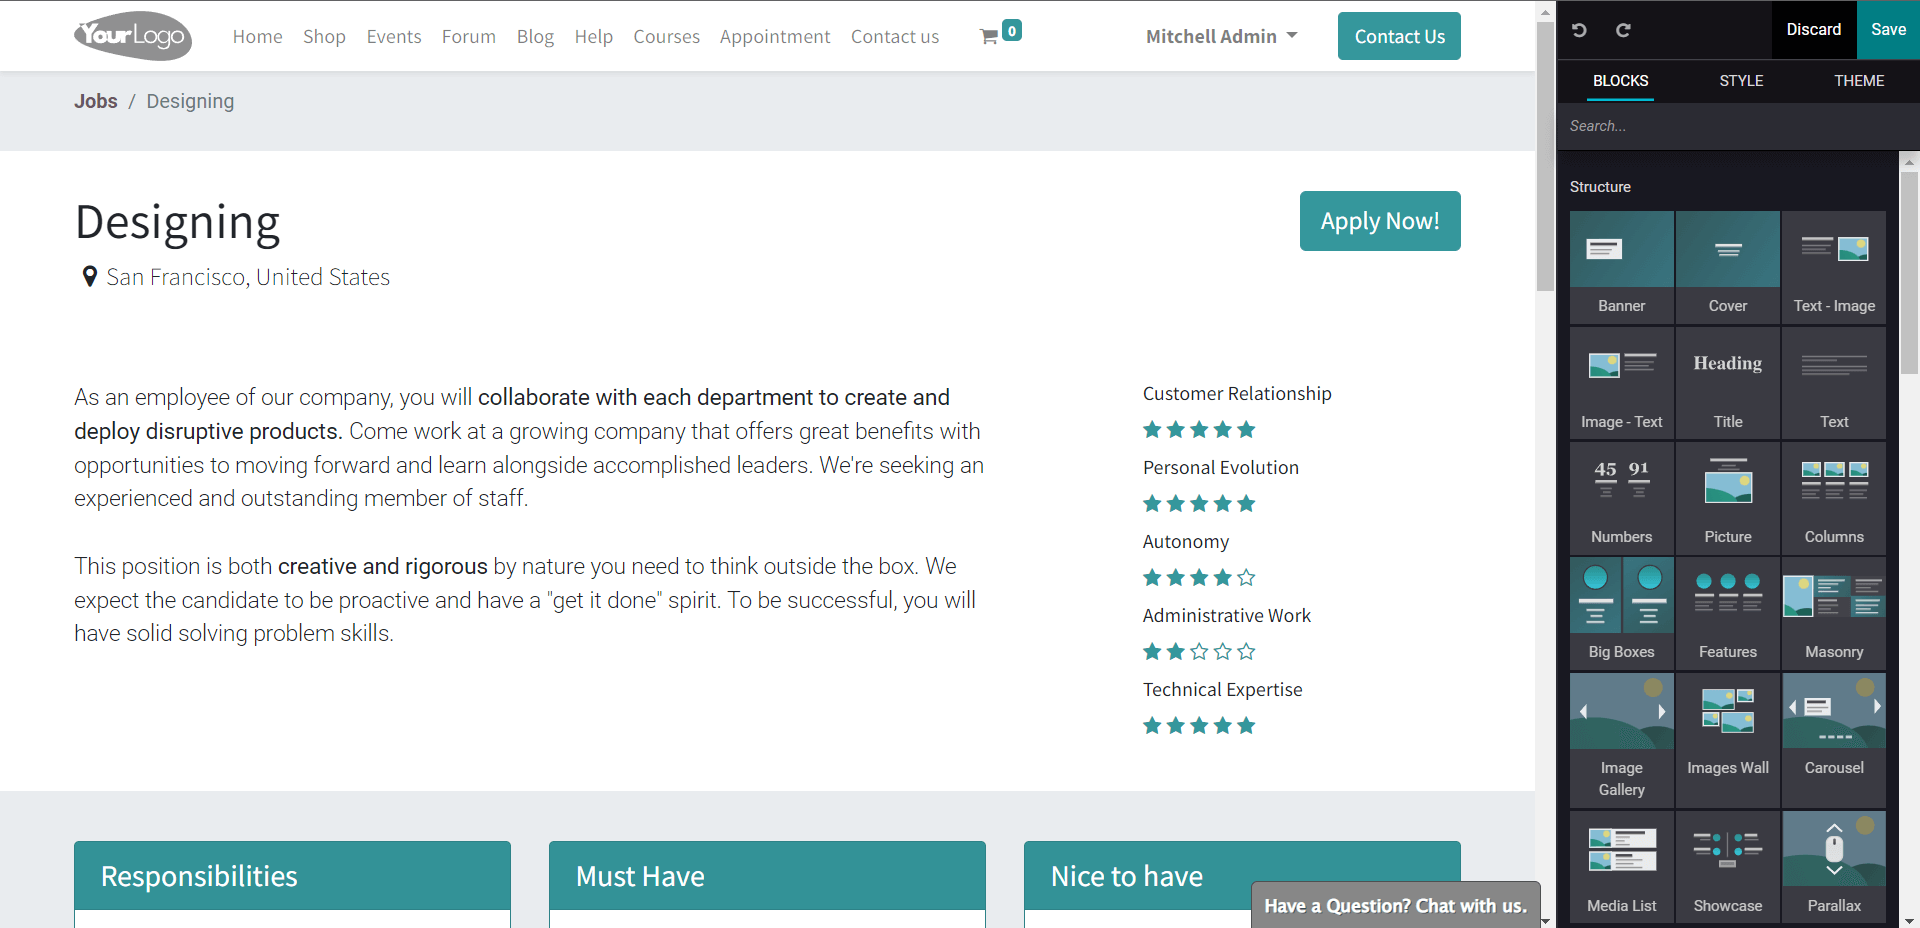
Click on the Job description body to edit or rewrite it. Use the Block structures towards the right side of the screen for advanced configurations.
To publish the Job opening move the Unpublish button to Published, as shown below.
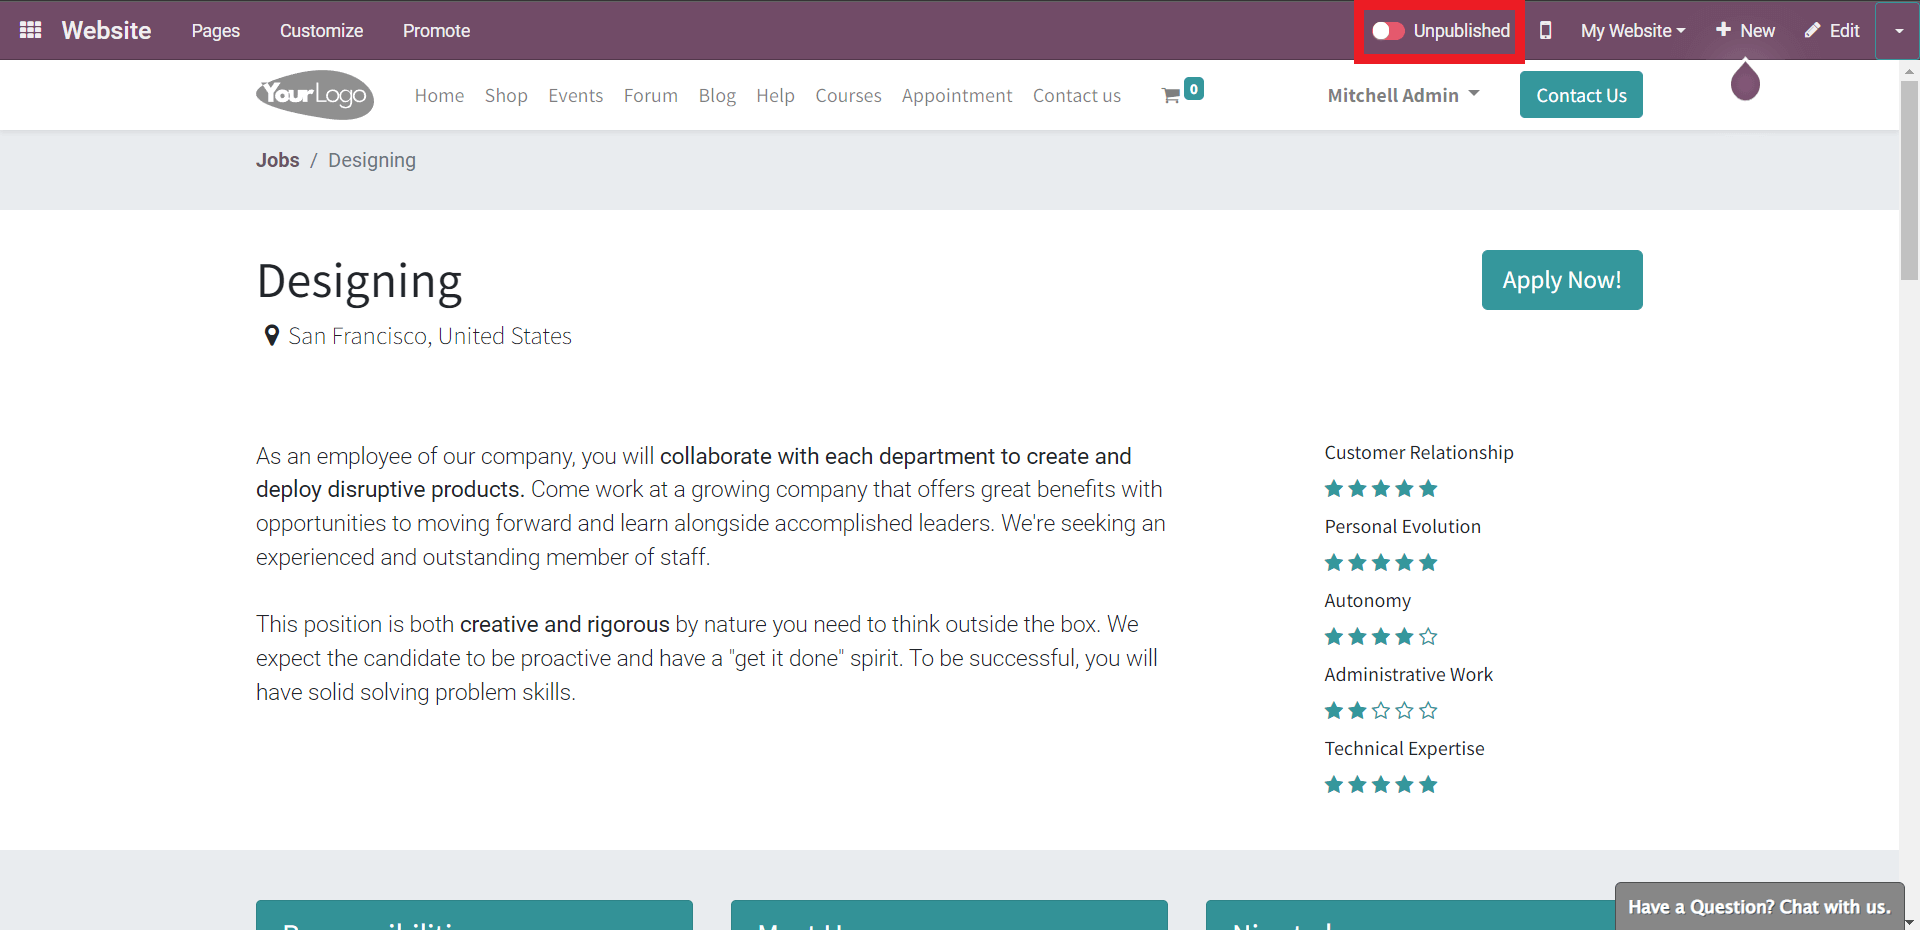
As soon as you click, it will change to Published and be automatically published on your website.
Employee creation and management
After your HR teams lock on a skilled new employee, they can quickly include the Employee in your Odoo database. It is effortless to add the newly recruited Employees to your Odoo database. Go to the Employees section from the module’s dashboard and click on the CREATE button below.
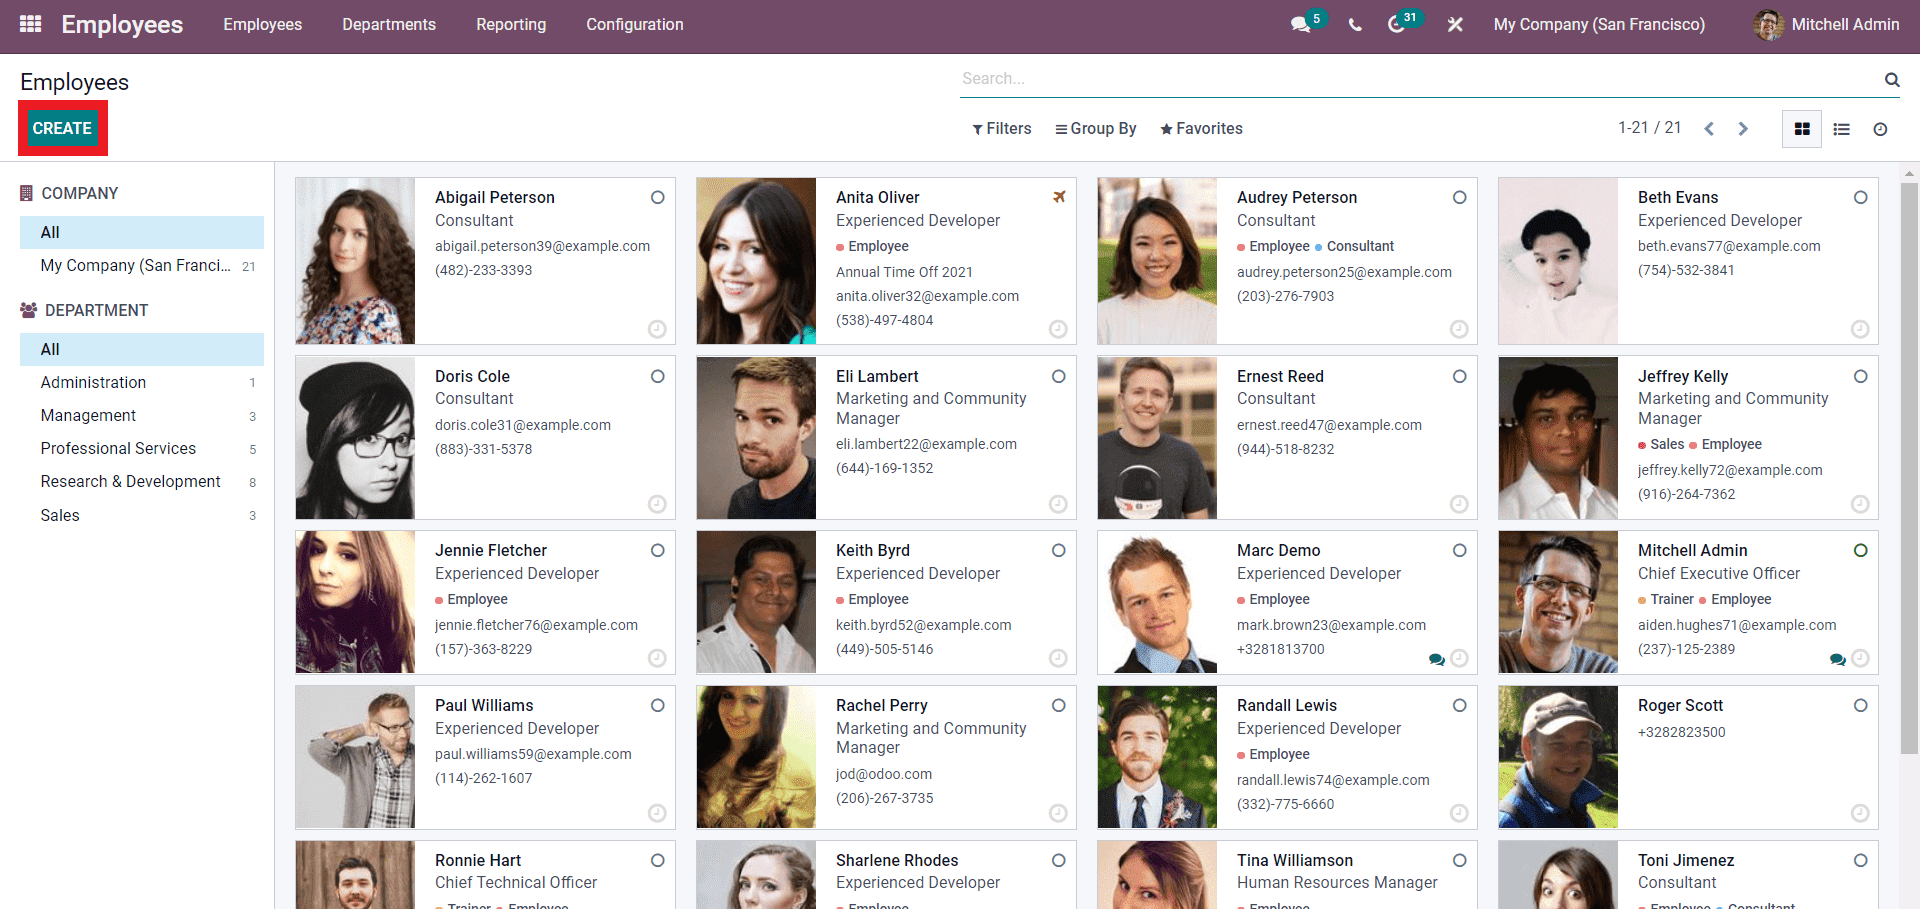
To add a new employee, press the CREATE button on the Dashboard of the Employee module, and a configuration page will open up
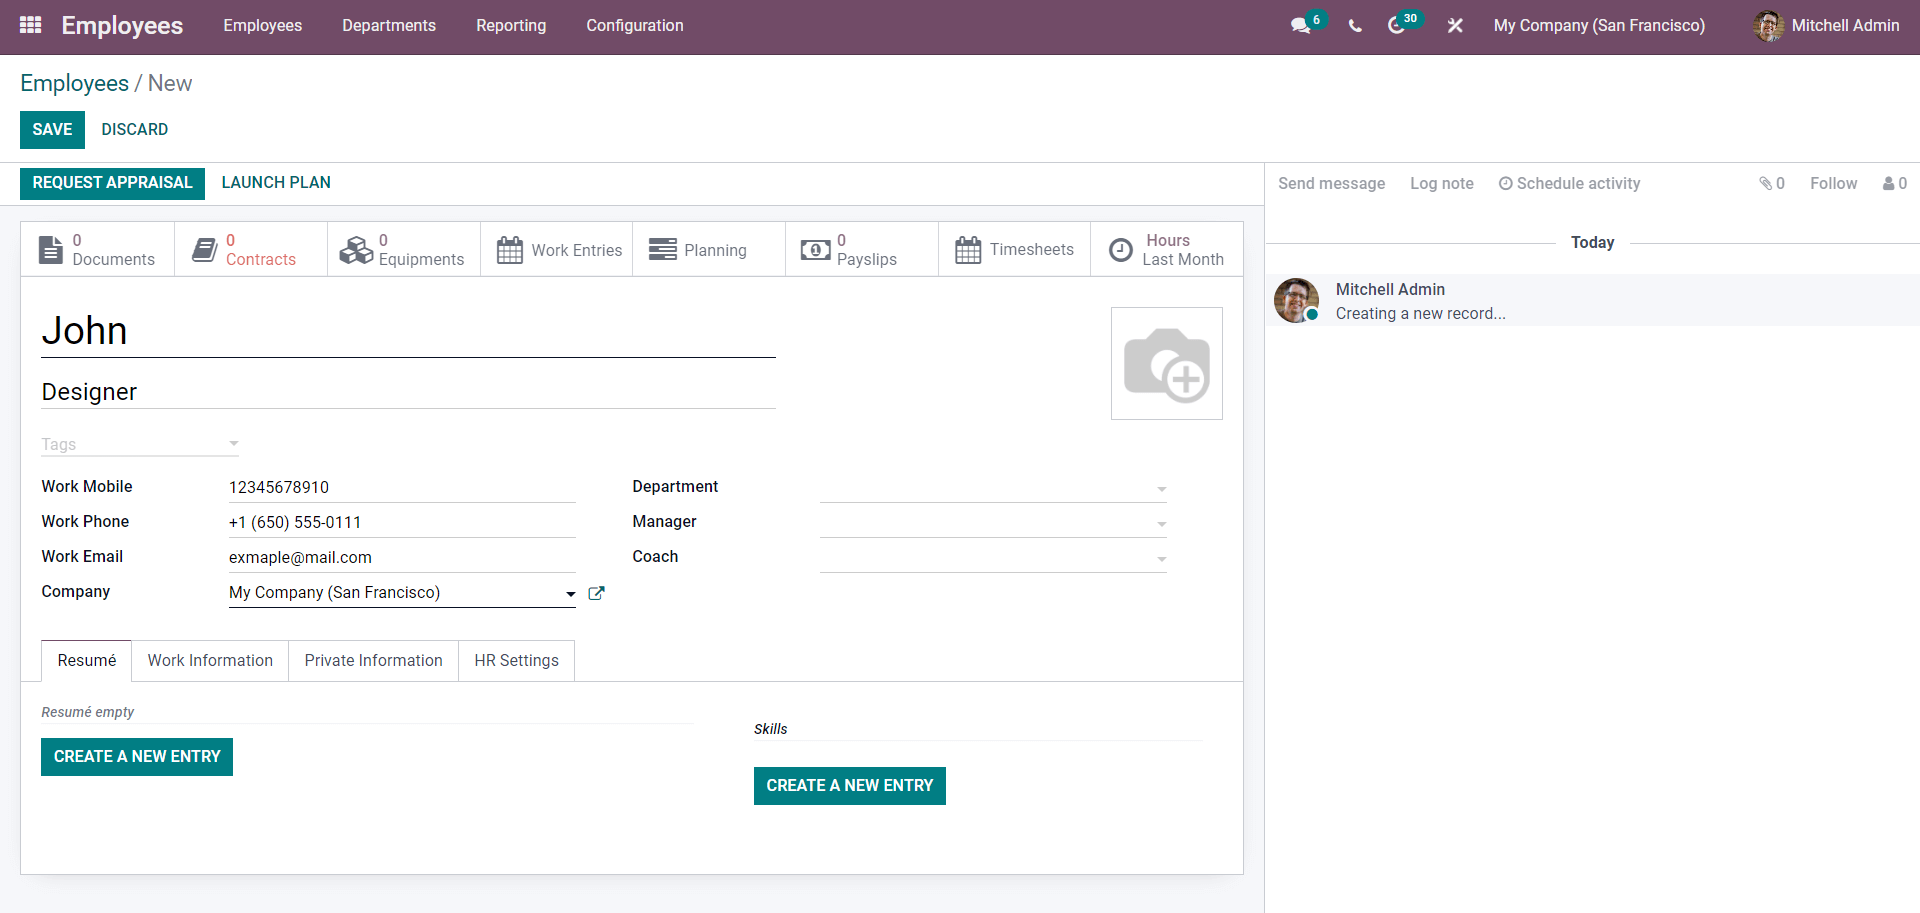
Type in the employee’s name, Job position, and contact details. After the configuration on the Contact information defines the Department of the Employee from the Department field as shown below.
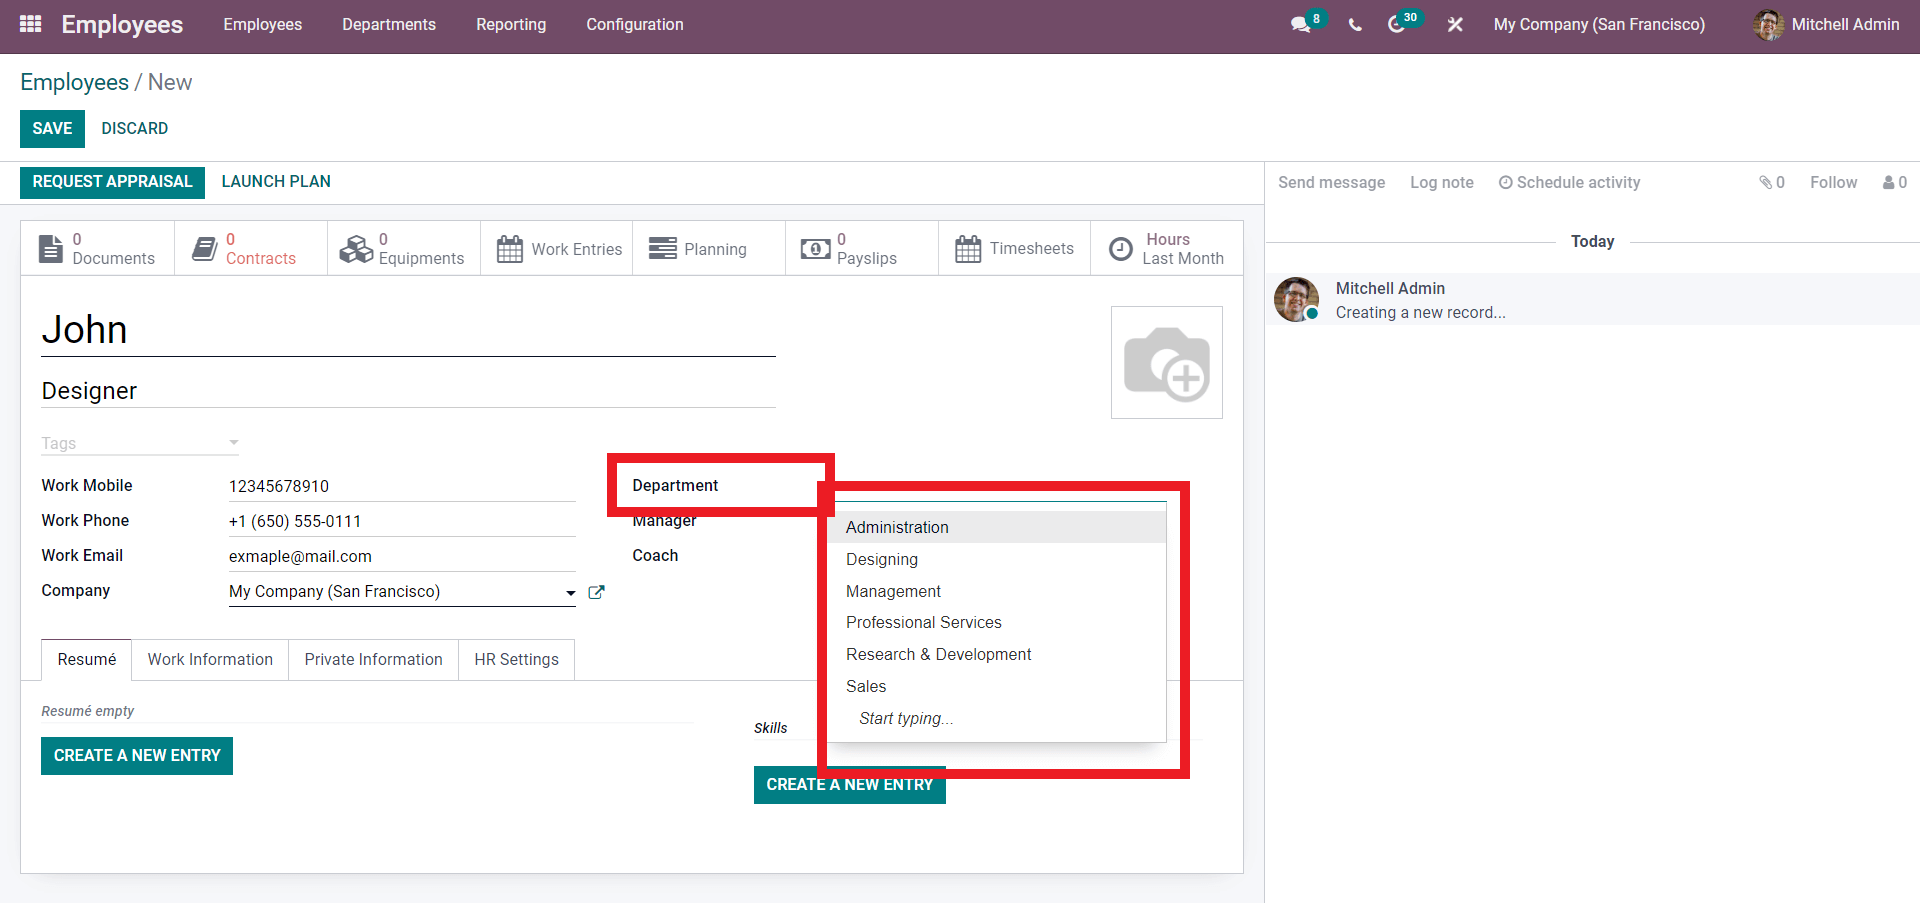
You can pick or select the Department from the drop-down menu. Click on the Start typing to search for more departments. As we have already created a Design department earlier, we can assign the employee under Designing. Along with the Department, you can also add the manager and the Coach if it is necessary. After the configuration on the Upper deck of the Configuration tab.
Under the Resume tab, press the CREATE A NEW ENTRY button to create a new resume entry. A configuration will open up as in the image below to create the new entry.
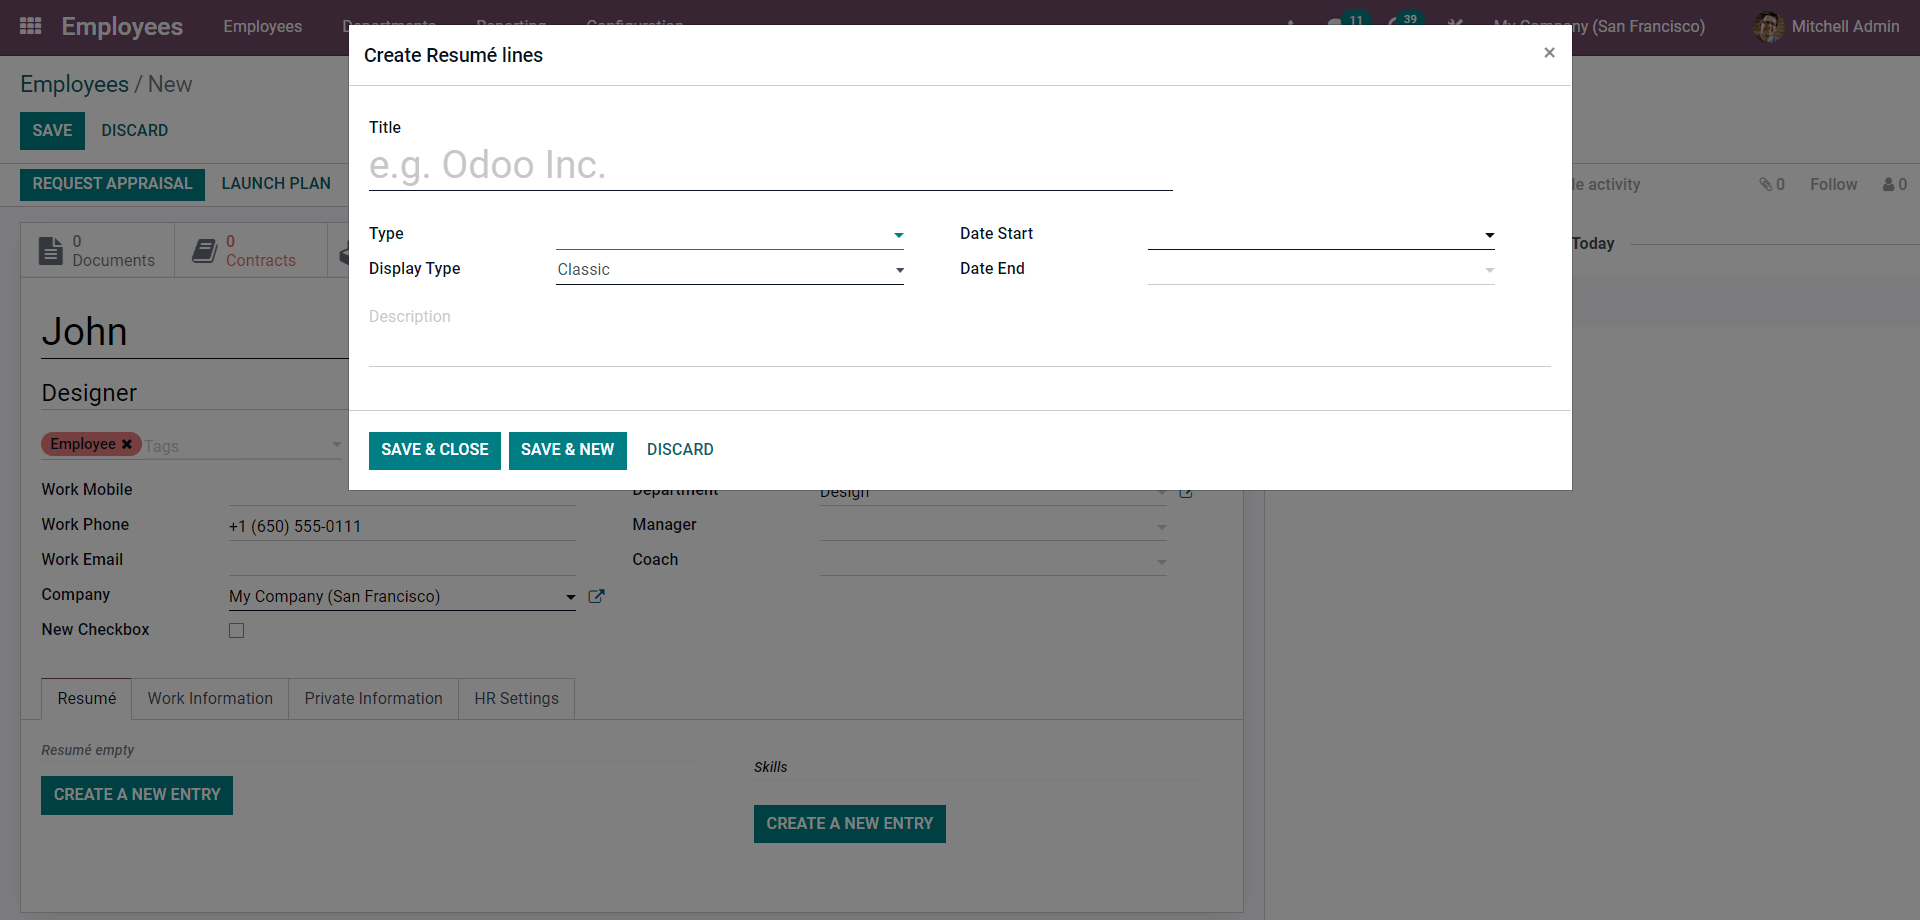
Enter the title of the resume and choose the type from the ‘Type’ Section as shown below.
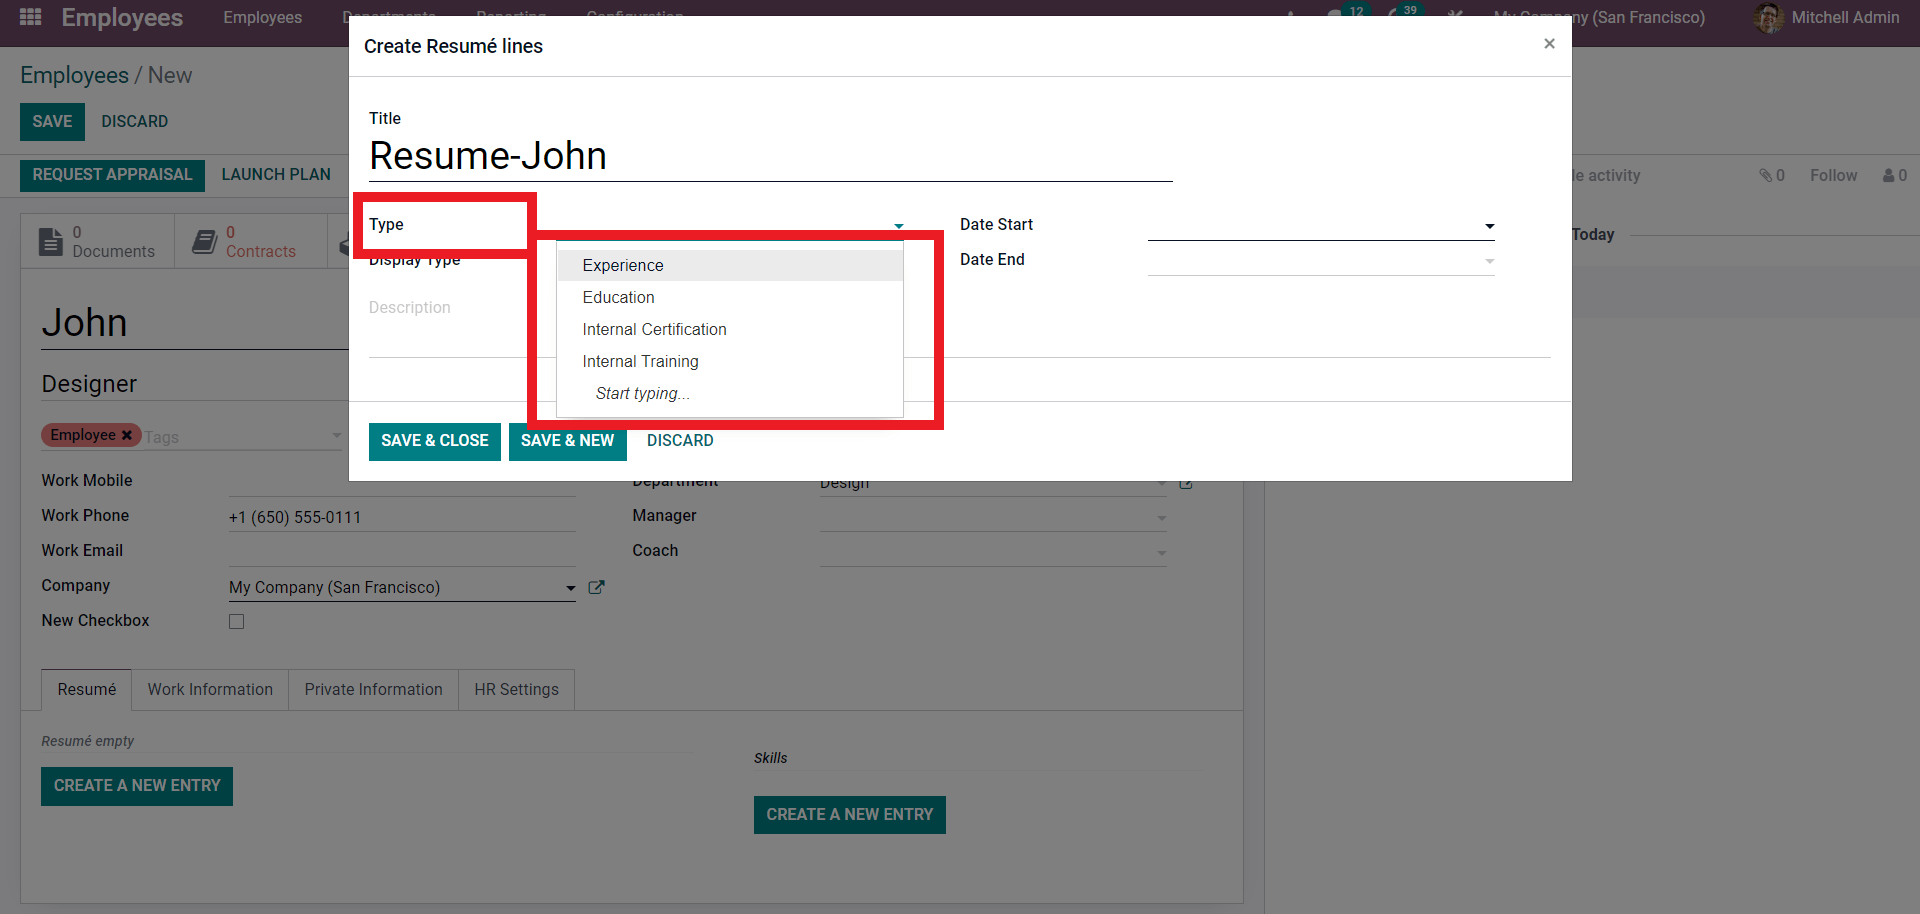
Choose from the dropdown menu of options as shown above. After choosing the desired type click on the Display type to choose the theme with which the resume should be presented.
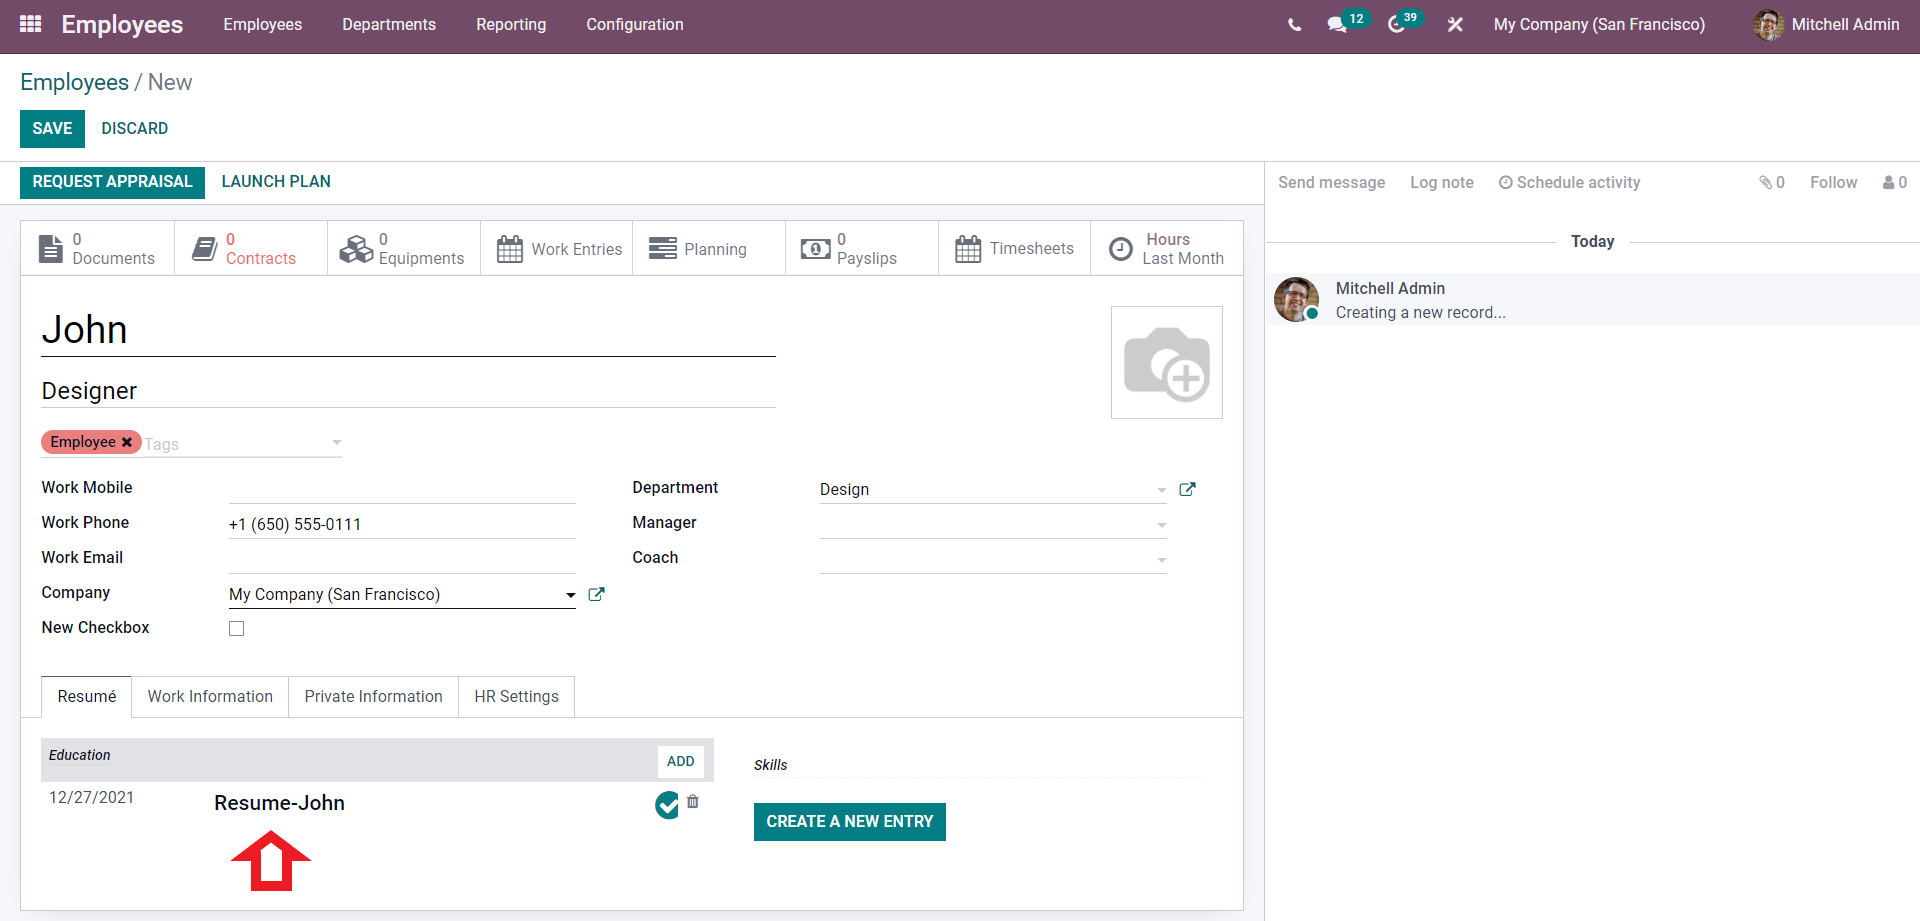
The start and the End date can be also provided from their respective fields. After the configurations click on the SAVE & CLOSE button and the resume will be included in the Employee profile as shown below.
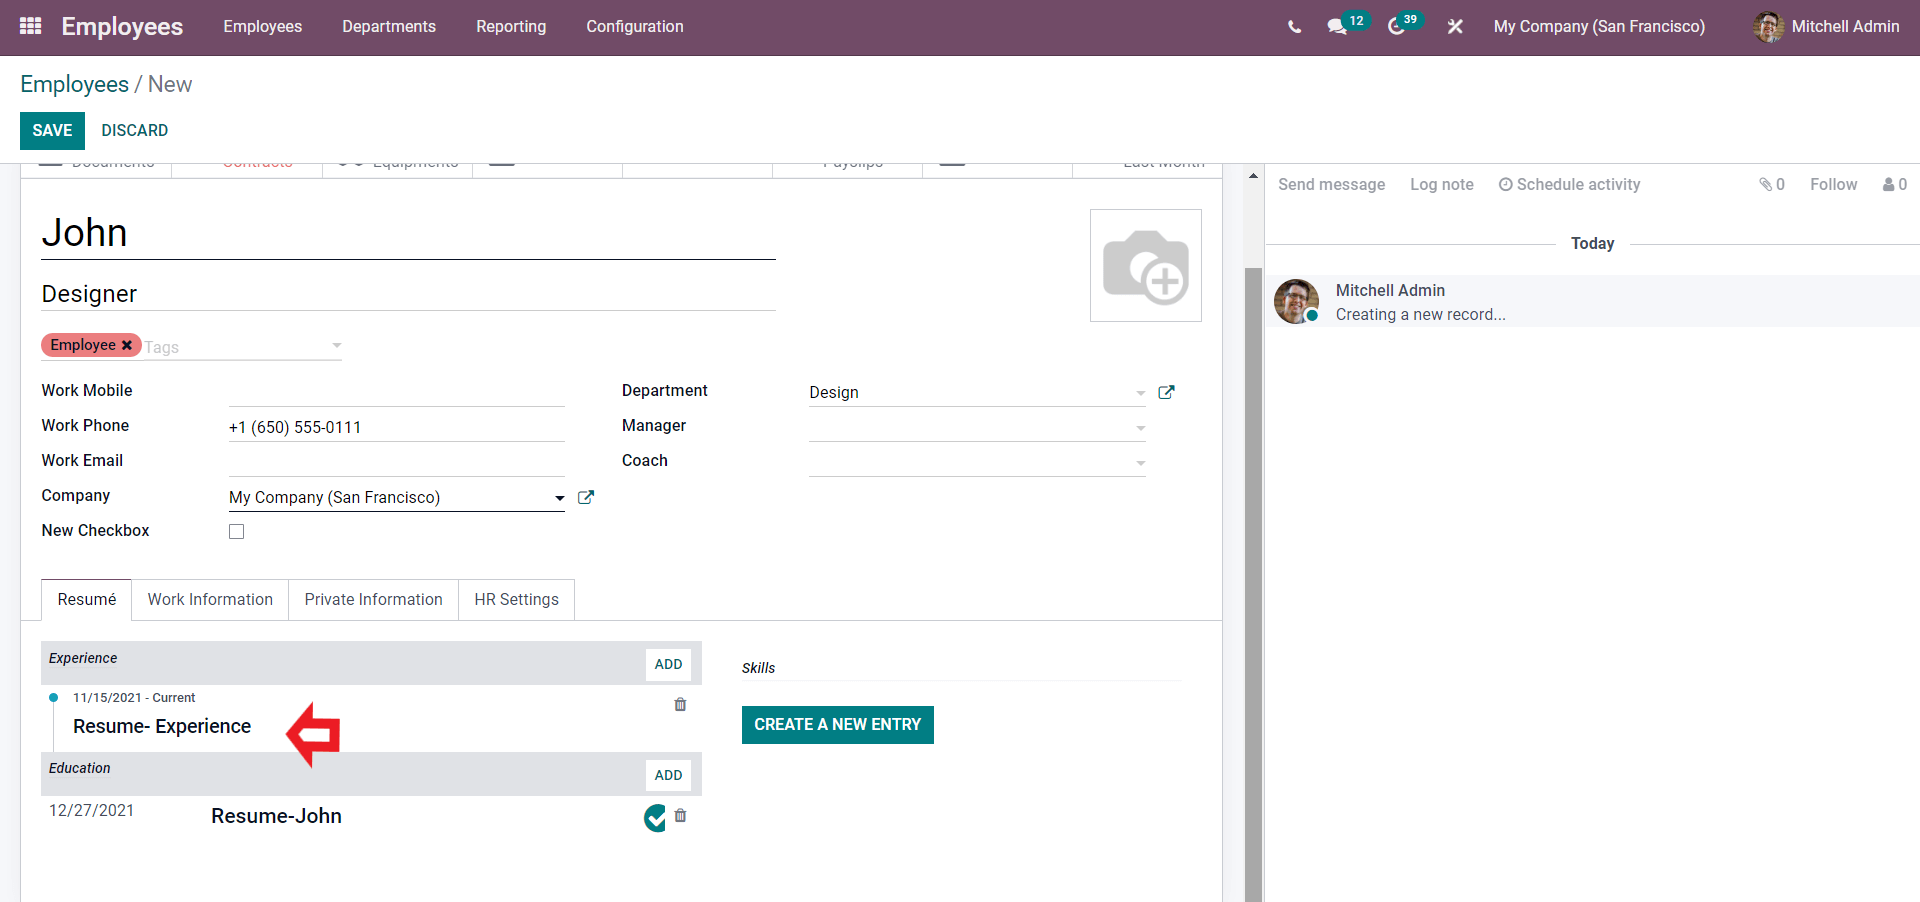
Similarly, you can create multiple resumes under the same employee as shown below.
Click on the CREATE A NEW ENTRY under the Skills section enter the Skill of the Employee. A tab will appear as shown below.
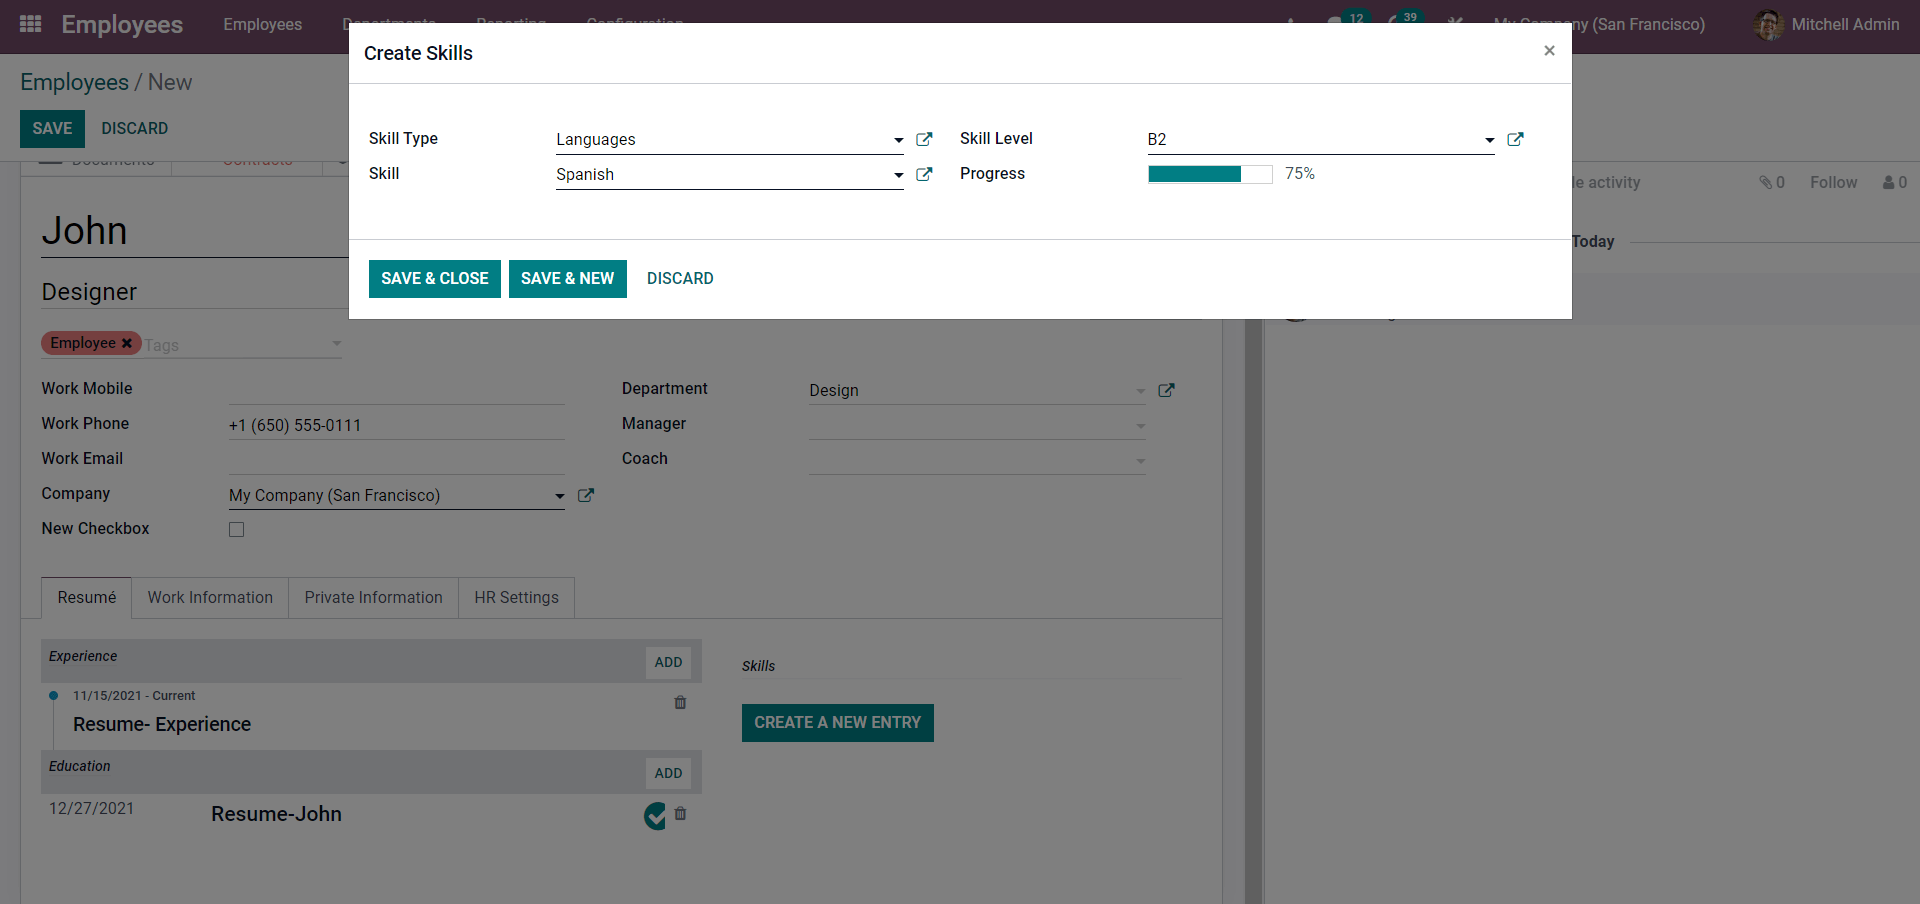
Choose the Skill Type and enter the Skill. Here the Skill type is language, and add the Skill is Spanish. You can rate the Skill level from the skill level field. After entering the skills, click on the SAVE & CLOSE button.
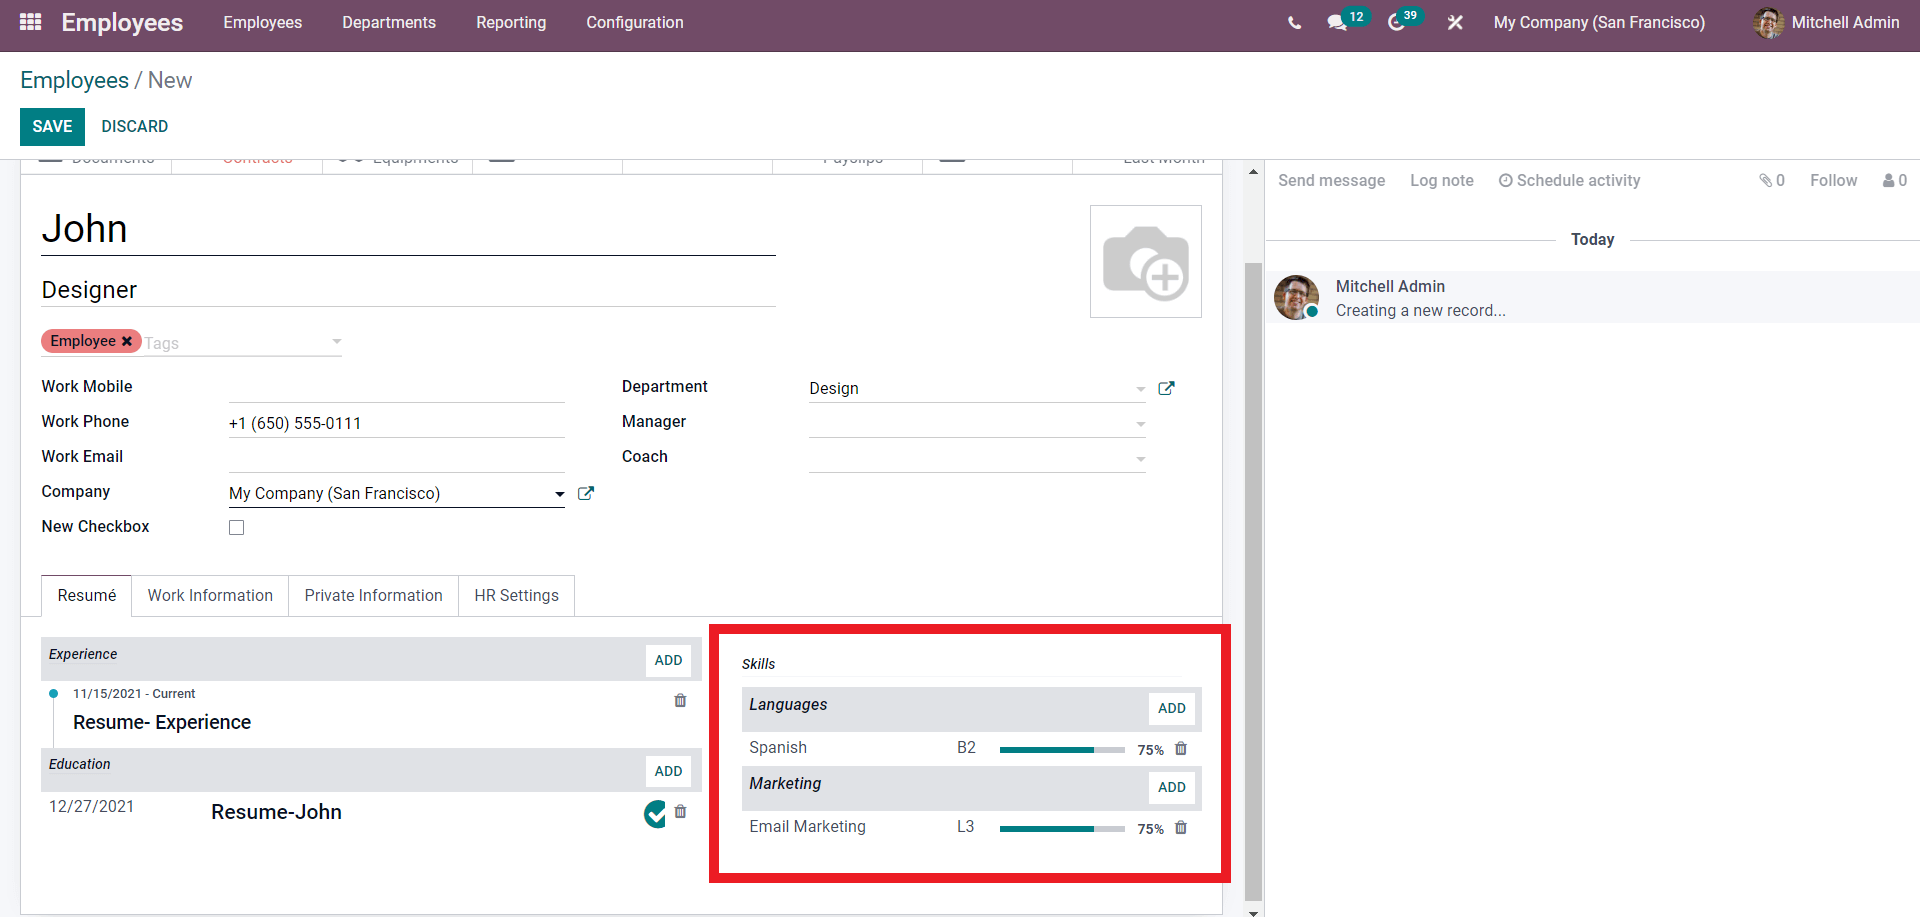
As shown above, the Skills will be included in the Employee profile. You can add multiple skills to the same employee. Press the ADD button next to the Skills shown above to add the new skills.
After the configuration on the Resume tab, you can move on to the Work information tab, as shown below.
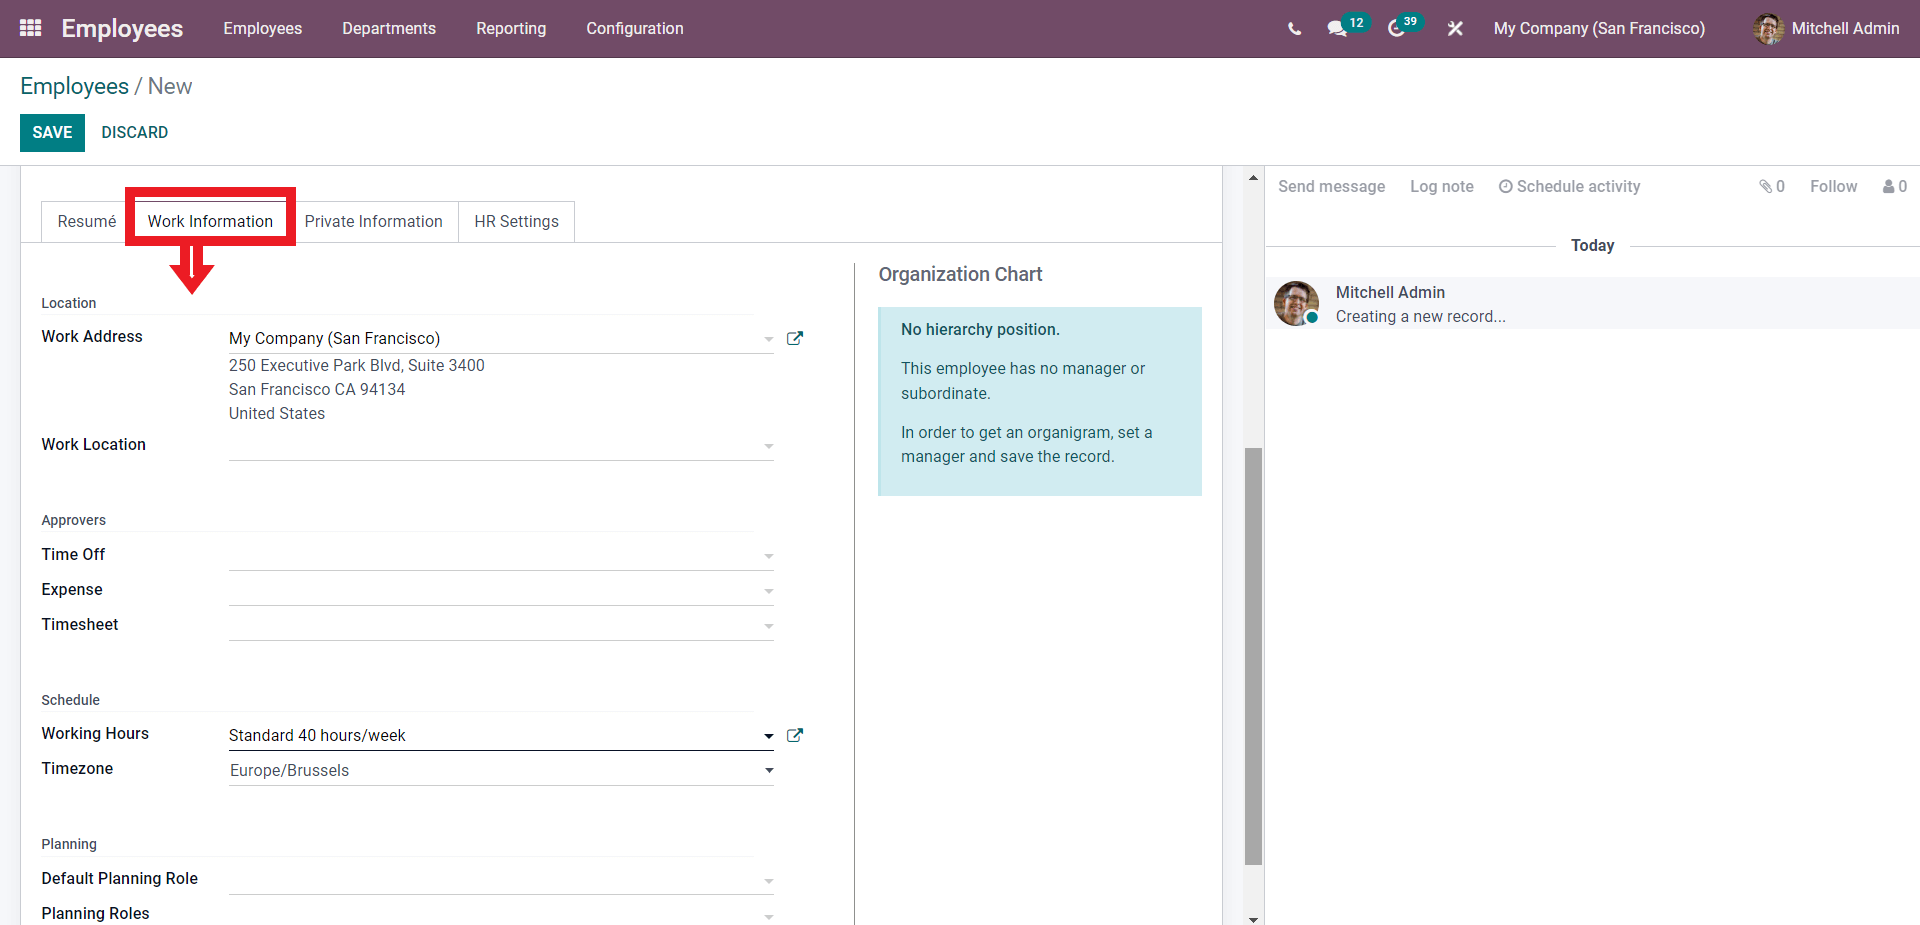
Here you can add the Work Information on the Employee. From this page, you can set the Work address, Work location, Approvers, Schedules, and Plannings on the employee from here. Configure this section with respect to the nature of your Company and the Employees job position.
The Employee’s personal information can be entered under the Private information tab as shown below.
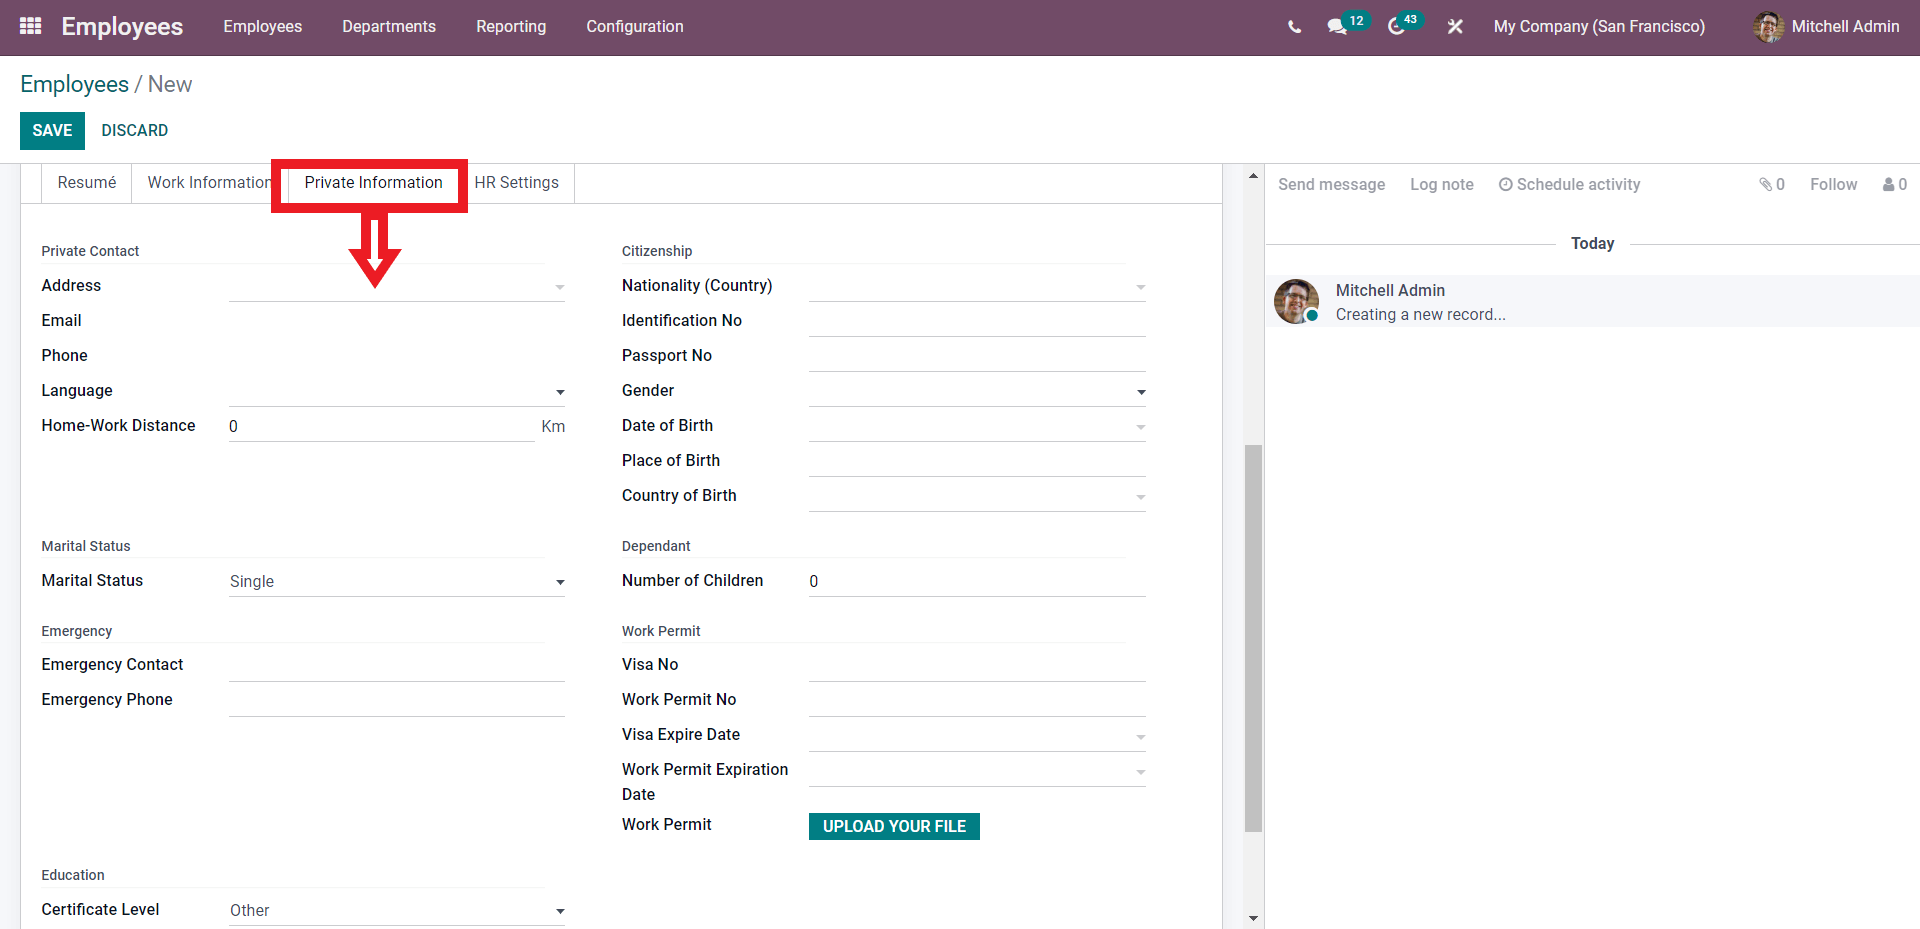
You can use this space to add all of the personal information on the employee. The work permit of the employee can be uploaded on this page. Click on the UPLOAD YOUR FILE next to the Work Permit section on the page to add the permit.
The HR setting tab will let you add the Human resources settings on the employee as shown below.
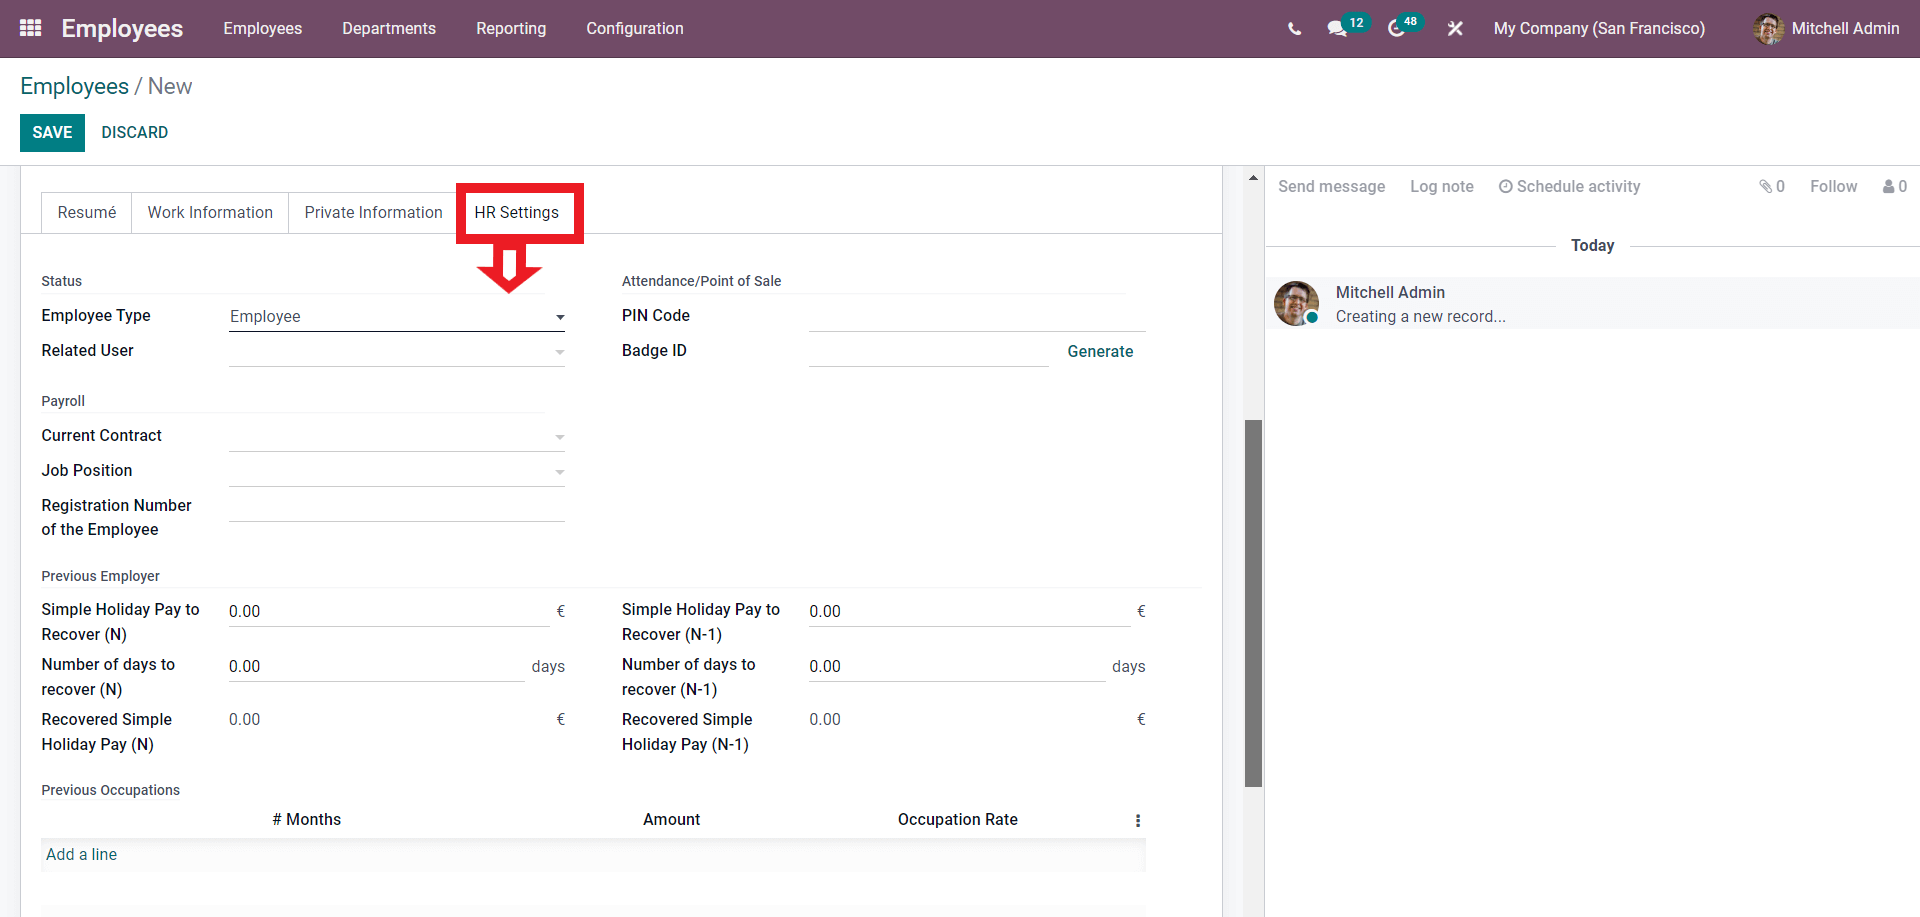
All of the HR settings on the Employee can be done from here. Here you can enter the Employee status along with Payroll, Previous employer, and other details which you can go through to manage the employee easily.
Employee Profile management
To edit the info on an already created Employee click on it from the Dashboard of the Employee module and a page on the Selected employee will open up as shown below.
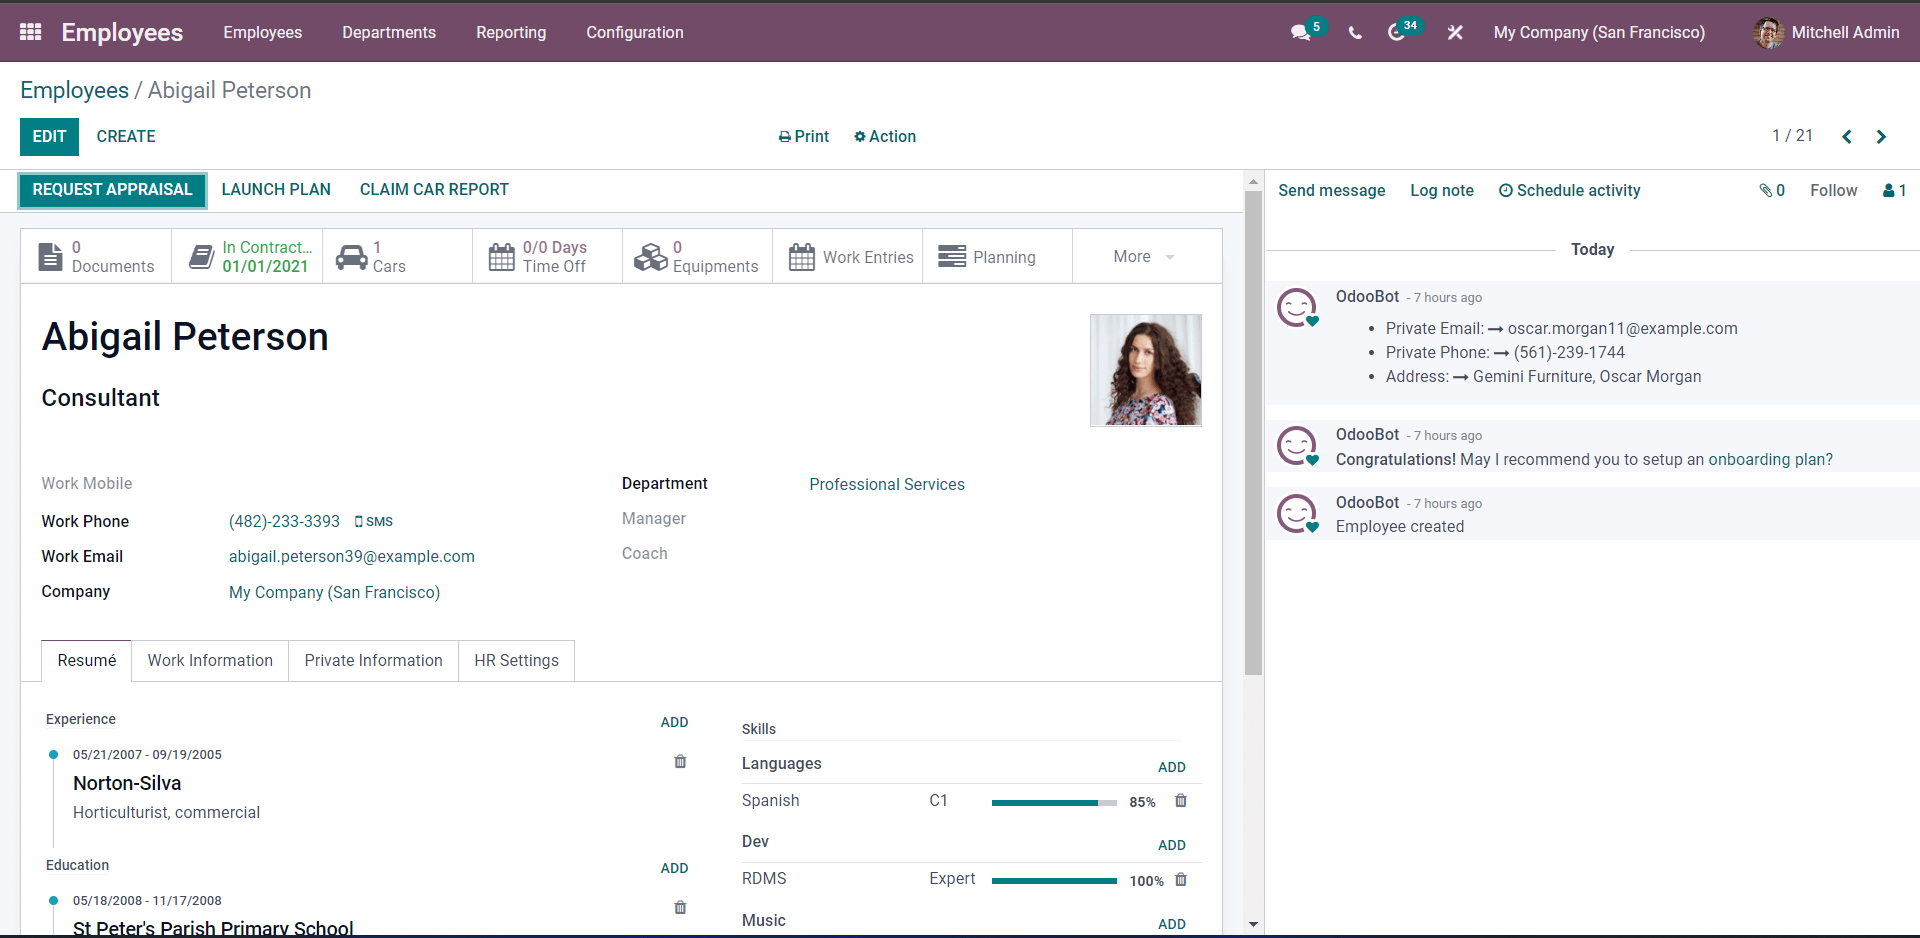
All of the Information on the employee will be given on this page. Everything from the Contact details to the Employees’ Private information can be recorded here. You can also check whether the employee is on contract and has a company-provided car or vehicle. Additional documents, Equipment, Work Entries, Planning, and other work details can be described here.
The resume of the Employee is shown below the Resume tab. Work information will be displayed under the Work information tab, private information under the personal information tab, and employee-specific HR settings under the HR settings tab. Click on the EDIT button for additional configurations on the Employee details.
With the Odoo 15 Employee module, you can effortlessly manage and have a complete overview of your Employees at a single glance from the dashboard of the Employee module. You can easily configure, create and manage multiple departments easily.